Saturday, January 29, 2011

A is for...

Back again!  Today I have a super fun tutorial for you guys.  It's a design for turning an alligator clip into a beauteous, embellished badge holder.


Isn't it neato?  This little project came to me like a bolt from the blue, and I love it lots!   


I started with this alligator clip, which has a hole in the middle of the cylinder-shaped body:


I gathered a headpin, some beads, a pretty filigree piece, and a teeny rubber washer or cushioning thingy.


For the cushioning thingy, you could use an O-ring, a piece of craft foam or anything squishy, cut to size.   It's somewhat optional, but it help get the beads secured nice and tight.

Here are the steps:  1.  Put all the beads and the cushioning thingy on the headpin.  2. Thread the headpin up through the hole in the alligator.  3.  Add a final bead, one that will fit tight into the top of the alligator.


4. Make a wrapped loop.  (Wrapped loop step-by-step here.)


There is a bit of a trick here.  You need to be sure everything stays tight, tight, tight while you wrap.  Otherwise the embellishments on the front will end up wobbly.


That's it!  String a cord or chain, clip on your badge, and you're good to go.


Design options are endless.


In the shot above, notice the blue/green one does not have a filigree piece.  Just a pretty bead.  I think it looks nice that way, too!

But wait, there's more!  Check this OUT, people.  Clip on a pop top, a simple key ring or anything circular, like so:


What do you get???  I'll tell you what you get!


A glasses holder.

And the crowd goes wild.

Later, crocogators.

Thursday, January 27, 2011

My Chemical Love: Weirdest Photography Tip Ever!

Hiya!  Here's an oddball picture to start you off.  Now, what the heck can this post be about?


You guys, this one is dopey, but since I'm too sleepy and grumpy to do a whole tutorial today, thought I would share this happy little tip.

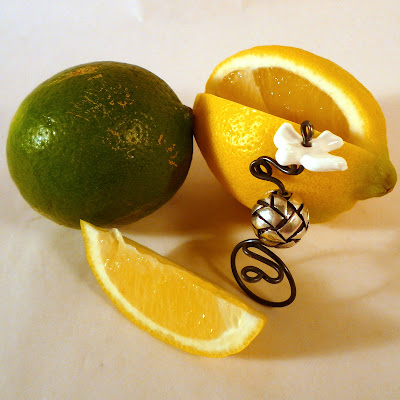
I do lots of construction work.  Grouting, tiling, sheetrocking, plastering, demolition. And sometimes my hands get so rough it makes me nuts.  I can slather on moisturizers all day long, and they do nothing.  How can that be?  Why don't they work?  And when I try to take blog photos, my hands look like this:


Yeesh.  Wrinkly.  Worn.  A little too lived-in.  I picture a lizard.  A spinster one, named Eugenia, with no love life whatsoever.


Recently, after a big tiling project, I was moaning away on this subject, and my husband for some odd reason was actually listening.  After a moment's thought he said, quite casually, "Well, the grout we were working with today is very alkaline.  Your skin probably needs acid to balance it.  Try some lemon juice."


Say what?  Is this is a thing people know?  Or did he just invent it?

So I sliced a citrus...


Rubbed in the juice.  And suddenly my hand looked like this:


Okay, it's still wrinkly and lived-in.  But now I picture a youthful, dewy lizard, named of Gidget, with several handsome Komodo Dragons asking her out.

And people, you would not believe how smooth my skin felt.  It was truly weird.  I'm not sure if the photos really convey the difference, but let's see that again, shall we?  Completely un-retouched.

Before:


After:


Isn't that bee-zarre?  Chemistry to the rescue!  So if you find yourself scaly after certain alkaline craft projects, consider this theory, brought to you by my chemical love.

Hope you like the ring, too!  I thought 'Bird On a Wire' would be a great name for it.

Wednesday, January 26, 2011

The Mystery Thing Revealed, and I Am So Mad!

I can't believe it.  This is just getting freaky.  I was absolutely certain I had you people this time.  Oh, well.  Go ahead:


Point and laugh.

Yes, it's crazy but true.  Some of you brilliant readers actually guessed this Mystery Thing:


And I have no idea how you did it!  When the rest of you see the answer, you will be as puzzled as I.

Ready?  Set?

Here is the Pink and Swirly Mystery Thing, revealed:


The rubber handle grip from a dollar store hairbrush.  Now, how on earth did those gals guess right?

The winner for first correct guess: Annabel52!  There were so many awesome and hilarious guesses vying for most creative, too many to list here.  If you want some good laughs, go read all the comments.  In the end, I made my mom pick from my 15 favorites.  Winner for most creative: Kerry, who guessed plasticized Pepto Bismol.  Hee hee!  I am totally trying that!  Congrats, Annabel and Kerry, expect an email shortly.

Here's a mini tutorial; it was super simple.  I discovered you can peel away the rubber grip with a little effort - just use a fingernail to get it started, then puuuuuull hard and patiently until it gives way, bit by bit.


It ended up as a hollow tube-like piece shaped like a swirly pink slug.  (Hmmm...slugs...a future Mystery Thing?)


Then I just snipped out a couple of shapes, trying to take advantage of the swoopy ends.  I poked a few holes with a sharp poky thing, and used jump rings to add the extra goodies.  Here's a close up:


I still can't believe you got this.  Grrrrr!  I'll get you next time, my pretties!

Sunday, January 23, 2011

Guess the Mystery Thing: Pink and Swirly and Strange.

Hi, girls and guys!  It's time once again for that very popular challenge game, Guess the Mystery Thing and Win Because It's Unique and Pink and You Want It But Also Because Mich is Way Too Confident This Time and is Convinced She Will Stump You and You Need to Show Her That Hubris Will Be Her Downfall if She Persists in Gloating in Advance Not to Mention Being Extremely Unladylike.

Guess the Mystery Thing for short.

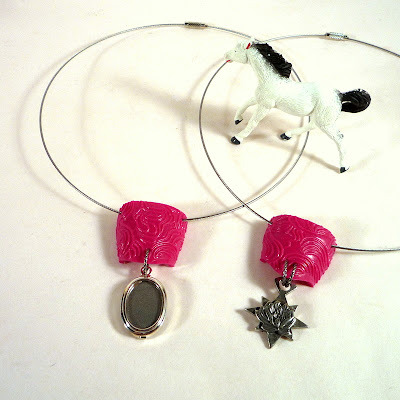
Here are two pink, swirly, interesting necklaces:


The oval one is a photo locket, and the flowery charm is a thistle.

I do wonder what you guys think of these?  They're definitely a bit strange, but there's a sort of kind of Valentine-y air about them?  Maybe?  Hmm.  Hopefully at least some of you will like them enough to play.

So the question is, what the heck is that pink stuff?

There will be two winners: first correct guess and most creative guess, to be chosen by moi.


If nobody gets it right, there will be a random winner chosen by my Patented High-Tech Cutting-Edge Randomizer Program (my mom picks a number).  So even if you're stumped, you could still win!

The rules:

1. Open to anyone, anywhere.  (You don't even have to be a follower of the blog, although I would lurve it if you were!)
2. If your email isn't available to me in one click from an online profile, be sure to include your email address with your guess.

Hint: the little horsie in the photo has nothing whatsoever to do with the Mystery Thing.  I just thought he was cute.


Okay, y'all - here we go.  Guess the Mystery Thing!!!

THIS CHALLENGE IS NOW CLOSED!  THANKS, EVERYONE!

Friday, January 21, 2011

I promised not to tell anyone that my friend Vivian wears curlers.

Hi, again, everybody!  Wouldja look at these earrings?


My dear sweet friend - let's call her X - wears old fashioned curlers to bed.  I know this because we were roommates during a recent Vegas weekend getaway.  And these adorable thingies fell out of her make-up bag:


Ooh!  I fell instantly in love!   I asked if I could have some!  I asked with several exclamation points!  She thought I was weird!  However, being a dear, sweet friend, she did say okay - but only if I promised never to reveal her curler-wearing shame.  I would have said anything to get my hands on those curler pins, so I promised.

The tutorial goes like this...

1. Poke a hole in each curler pin.  2. Bend the pin around a pencil to give it as much or as little curve as you like.  3.  Put a bead on a headpin and string them onto the pin.


4.  Bend the headpin down against the back and trim.  5.  Make a teeny loop to secure the bead.


Now just add an earring finding.  On this pair, I simply strung them onto the curler pins, cinching tight until they got stuck:


You can also add a coil end finding, pinching it down with pliers.


And there ya go!  Genuwine Olde Fashioned Curler Pin earrings.


So much fun to make, and I am happy with their curly, oddball charm.  The beads are turquoise and denim lapis.  I like how they go with the creamy, vintage-looking plastic.  What do you guys think?

Thank you for the pins, my dear, sweet X!  Aren't you proud of me?  I totally didn't say a word.

Friday, January 14, 2011

I dare you not to think this is cute!

Today, a teensy little project.  I call it Bunny Howling at the Moon.


So simple to make, and I used two fun items from - all together now - the dollar store.  The black circle is a checker from the same set as the Chessmen Pendants.  The little white bunny is a paperclip!  Look!


Here are the steps.  1. Twist a bunny clip like you're taking apart an Oreo cookie.  (I'm sorry there's no picture, I only have two hands.  But don't try to tell me you don't know how to unscrew an Oreo - I won't believe you.)  A little metal connector will pop out, and you will end up with two flat bunnies:


2. Heat a metal poker in a flame.  3. Melt holes in the checker and the bunny.  4.  Put both on a long headpin.


5. Bend the headpin up in back, and make a generous-sized wrapped loop.


That's it!  String a chain, cord or neckwire, and you have Bunny Howling at the Moon.


There are lots of other versions of this paper clip out there.  I've found cats, dogs, several species of zoo animals and Vespas.  I hope you come across some!  They are just too ridiculously cute.

I'm already planning to make Vespa Howling at the Moon.