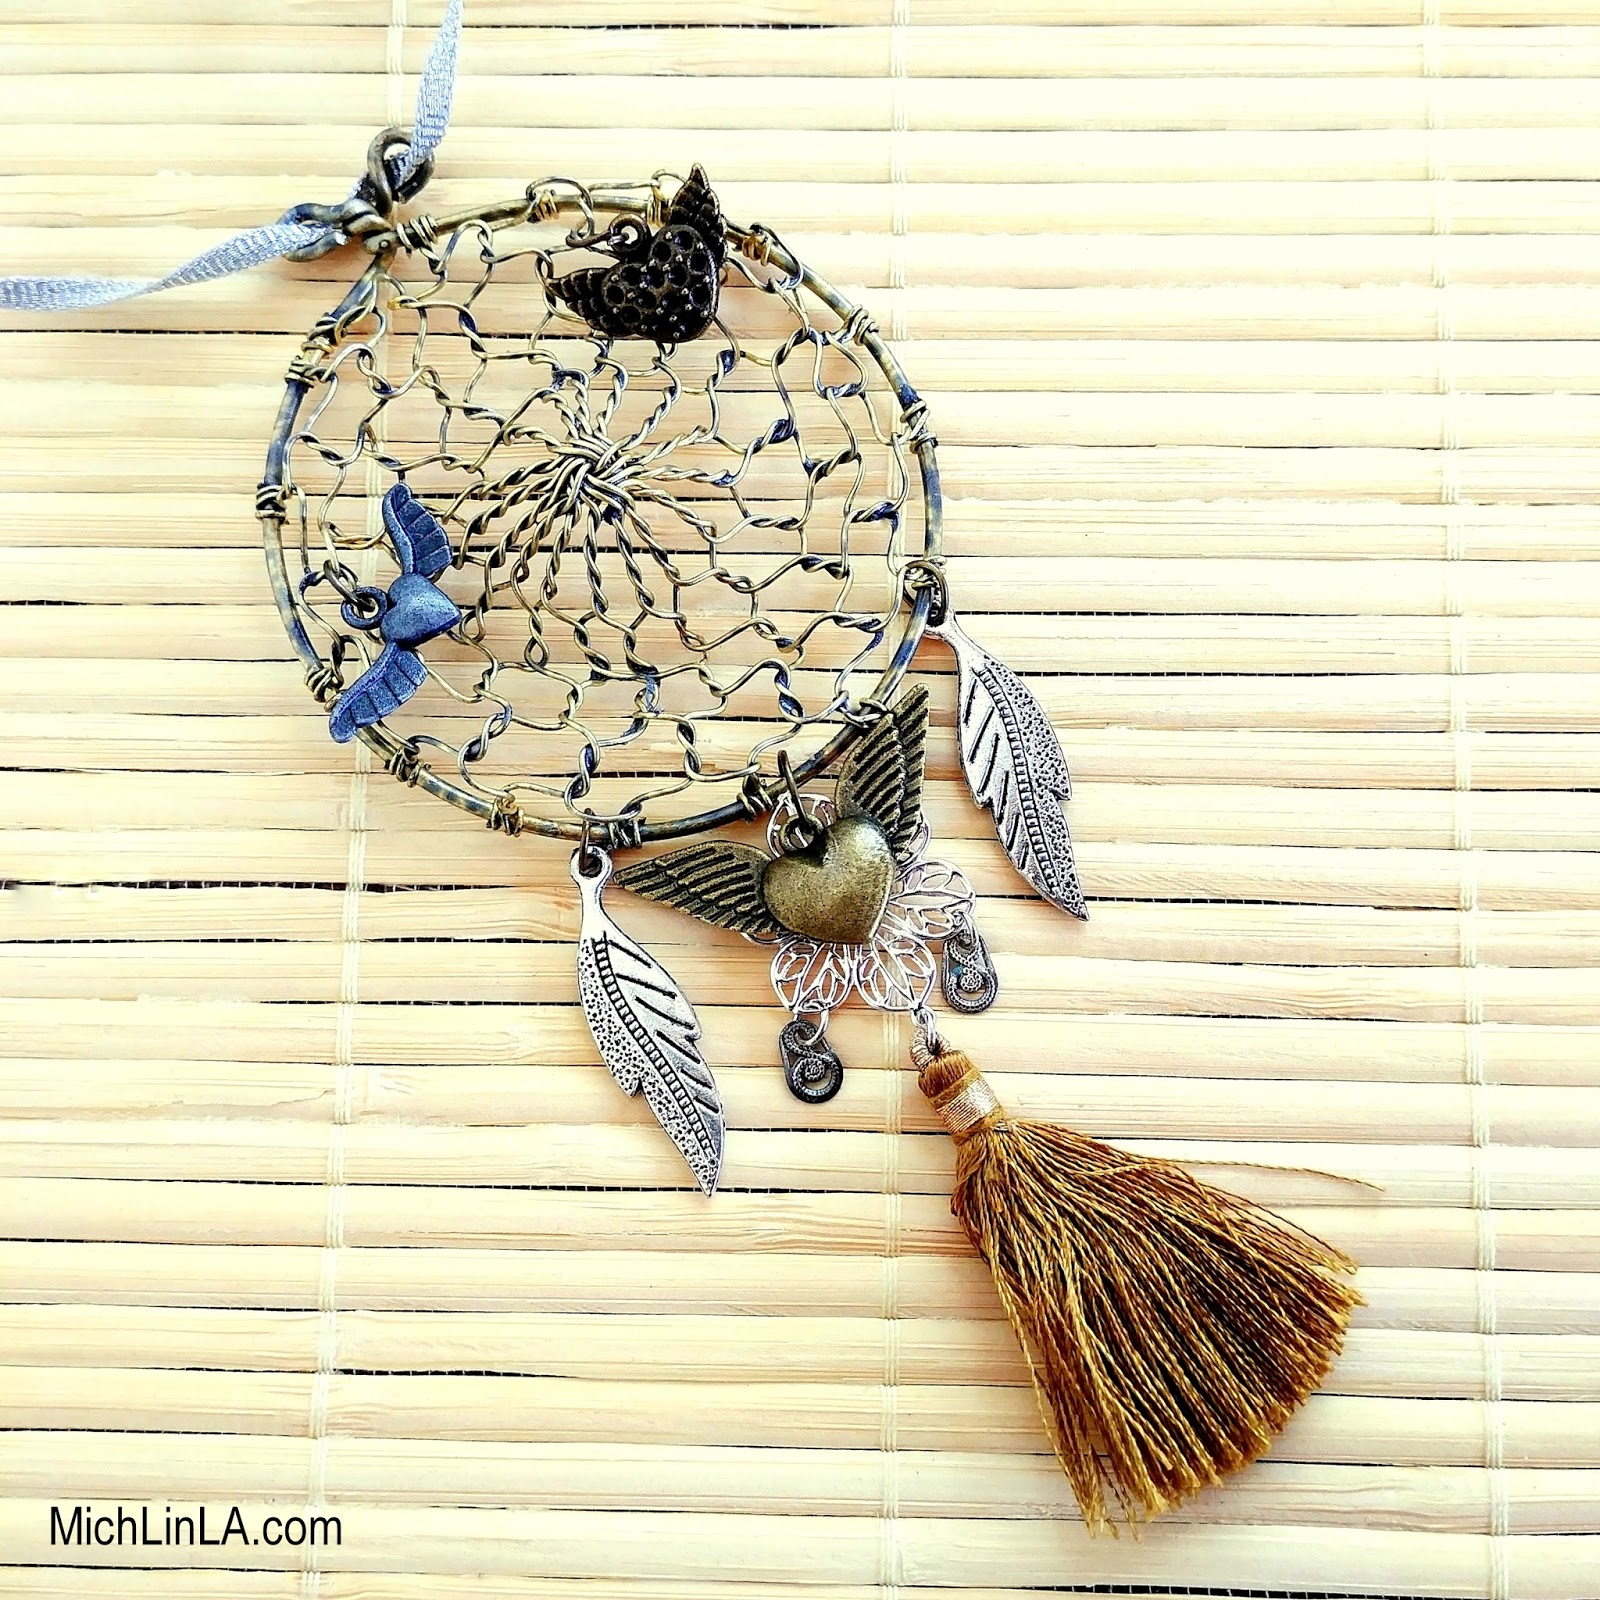
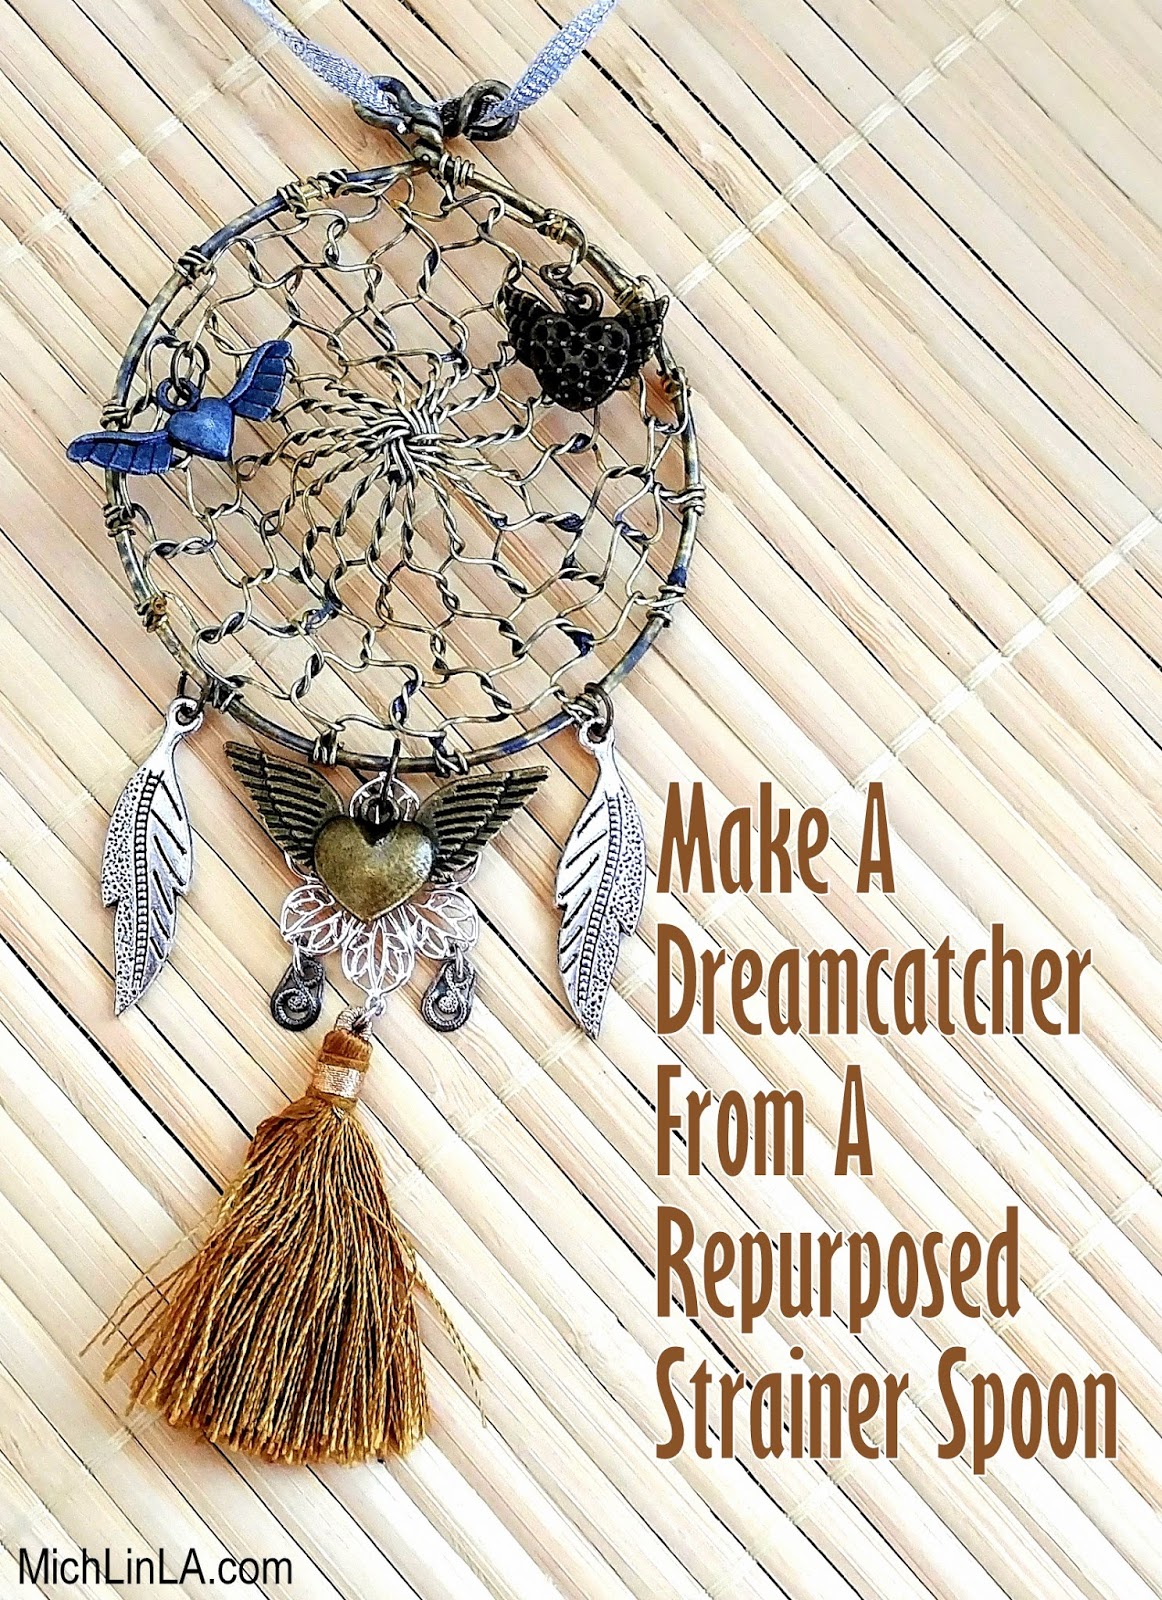
Check out my latest little brainwave! A cool metallic dreamcatcher that looks it's woven with wire.
I've always loved dreamcatchers, but never tried one before. Probably because I didn't want to figure out the knotwork involved. (Q: is there an award for laziest crafter?)
So I came up with a simple five minute hack for the 'web' part of the dreamcatcher. After that, it was all embellishment - the part of crafting I really enjoy.
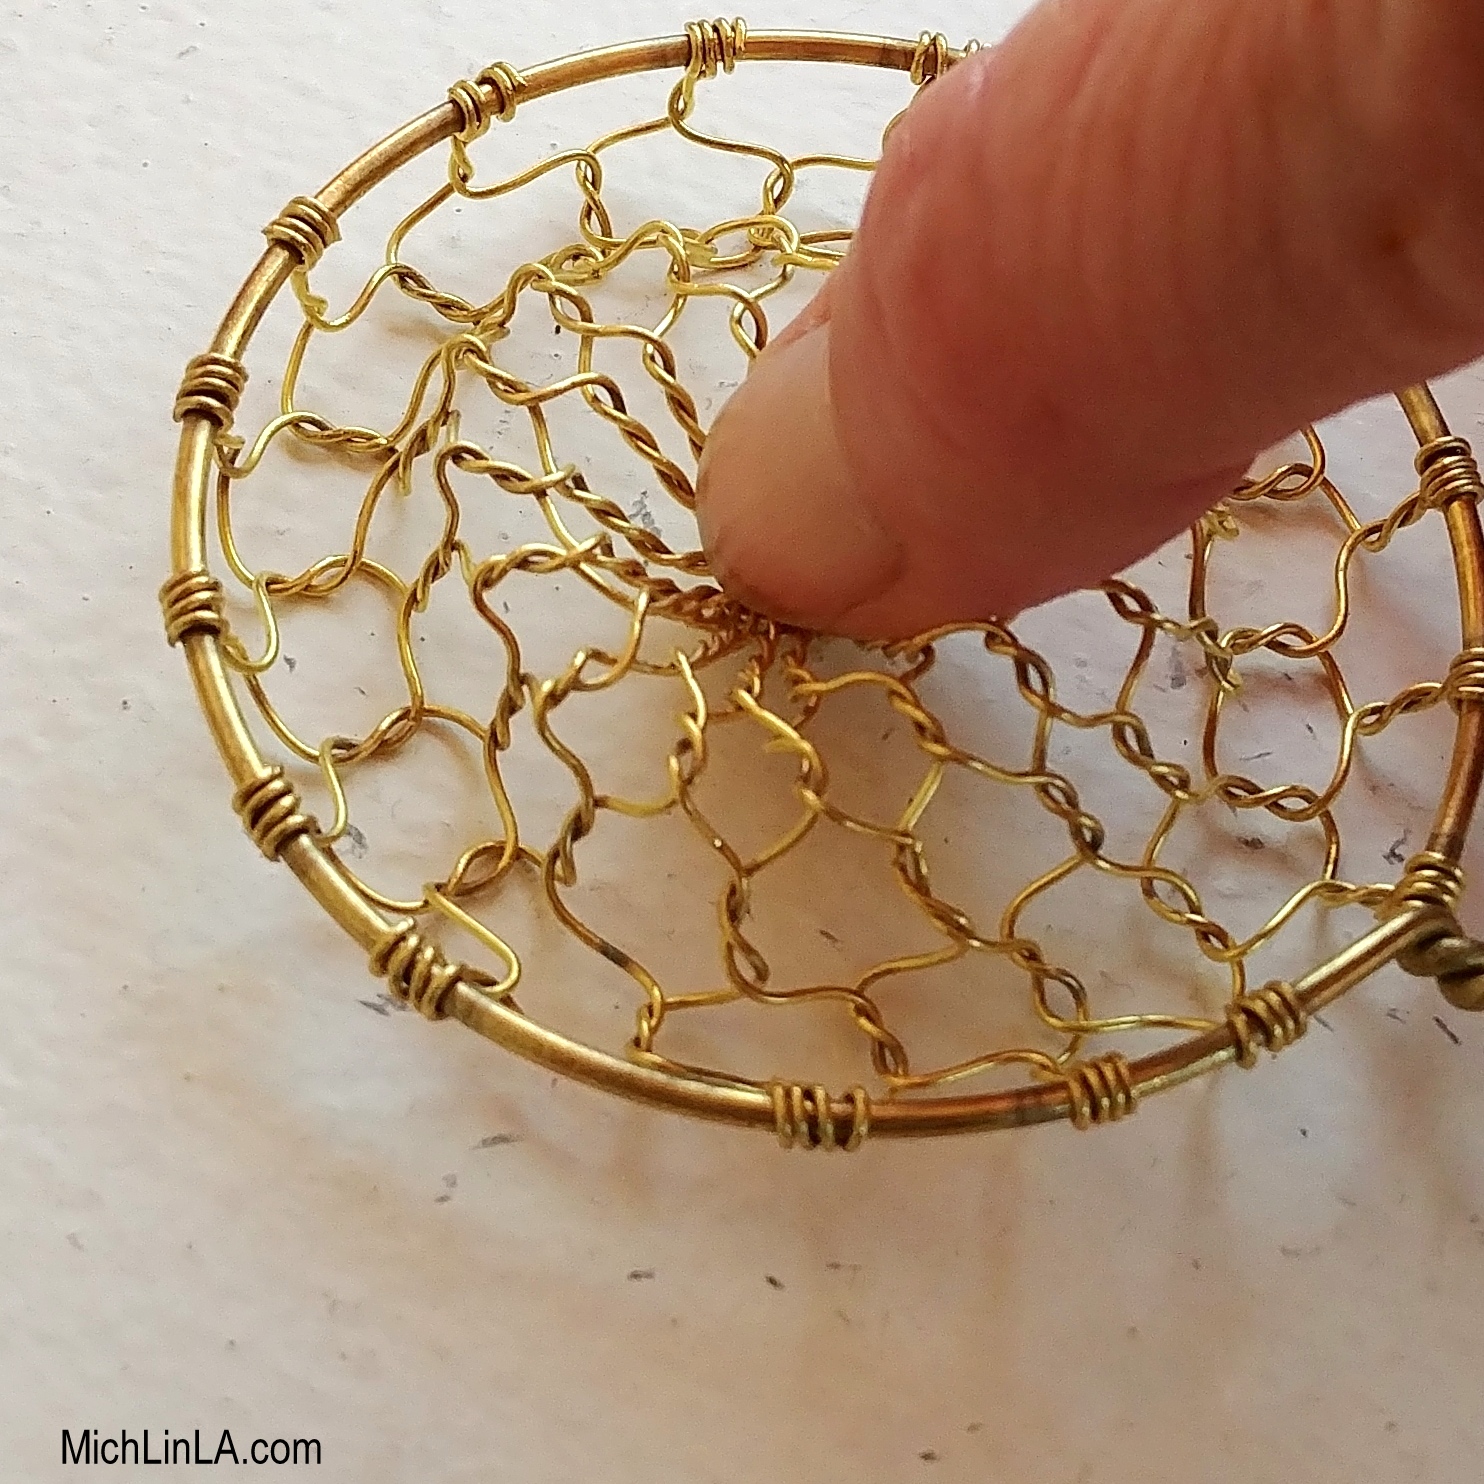
Here's the DIY. I began with a loose-weave metal strainer spoon. I found mine at an Asian market for less than two bucks. Try your favorite kitchen shop or dollar store for something similar.
First I squished the center of the spoon inward.
Then I flipped the spoon over and squished again, flattening the small inner bump. It created a pattern of concentric circles in the mesh.
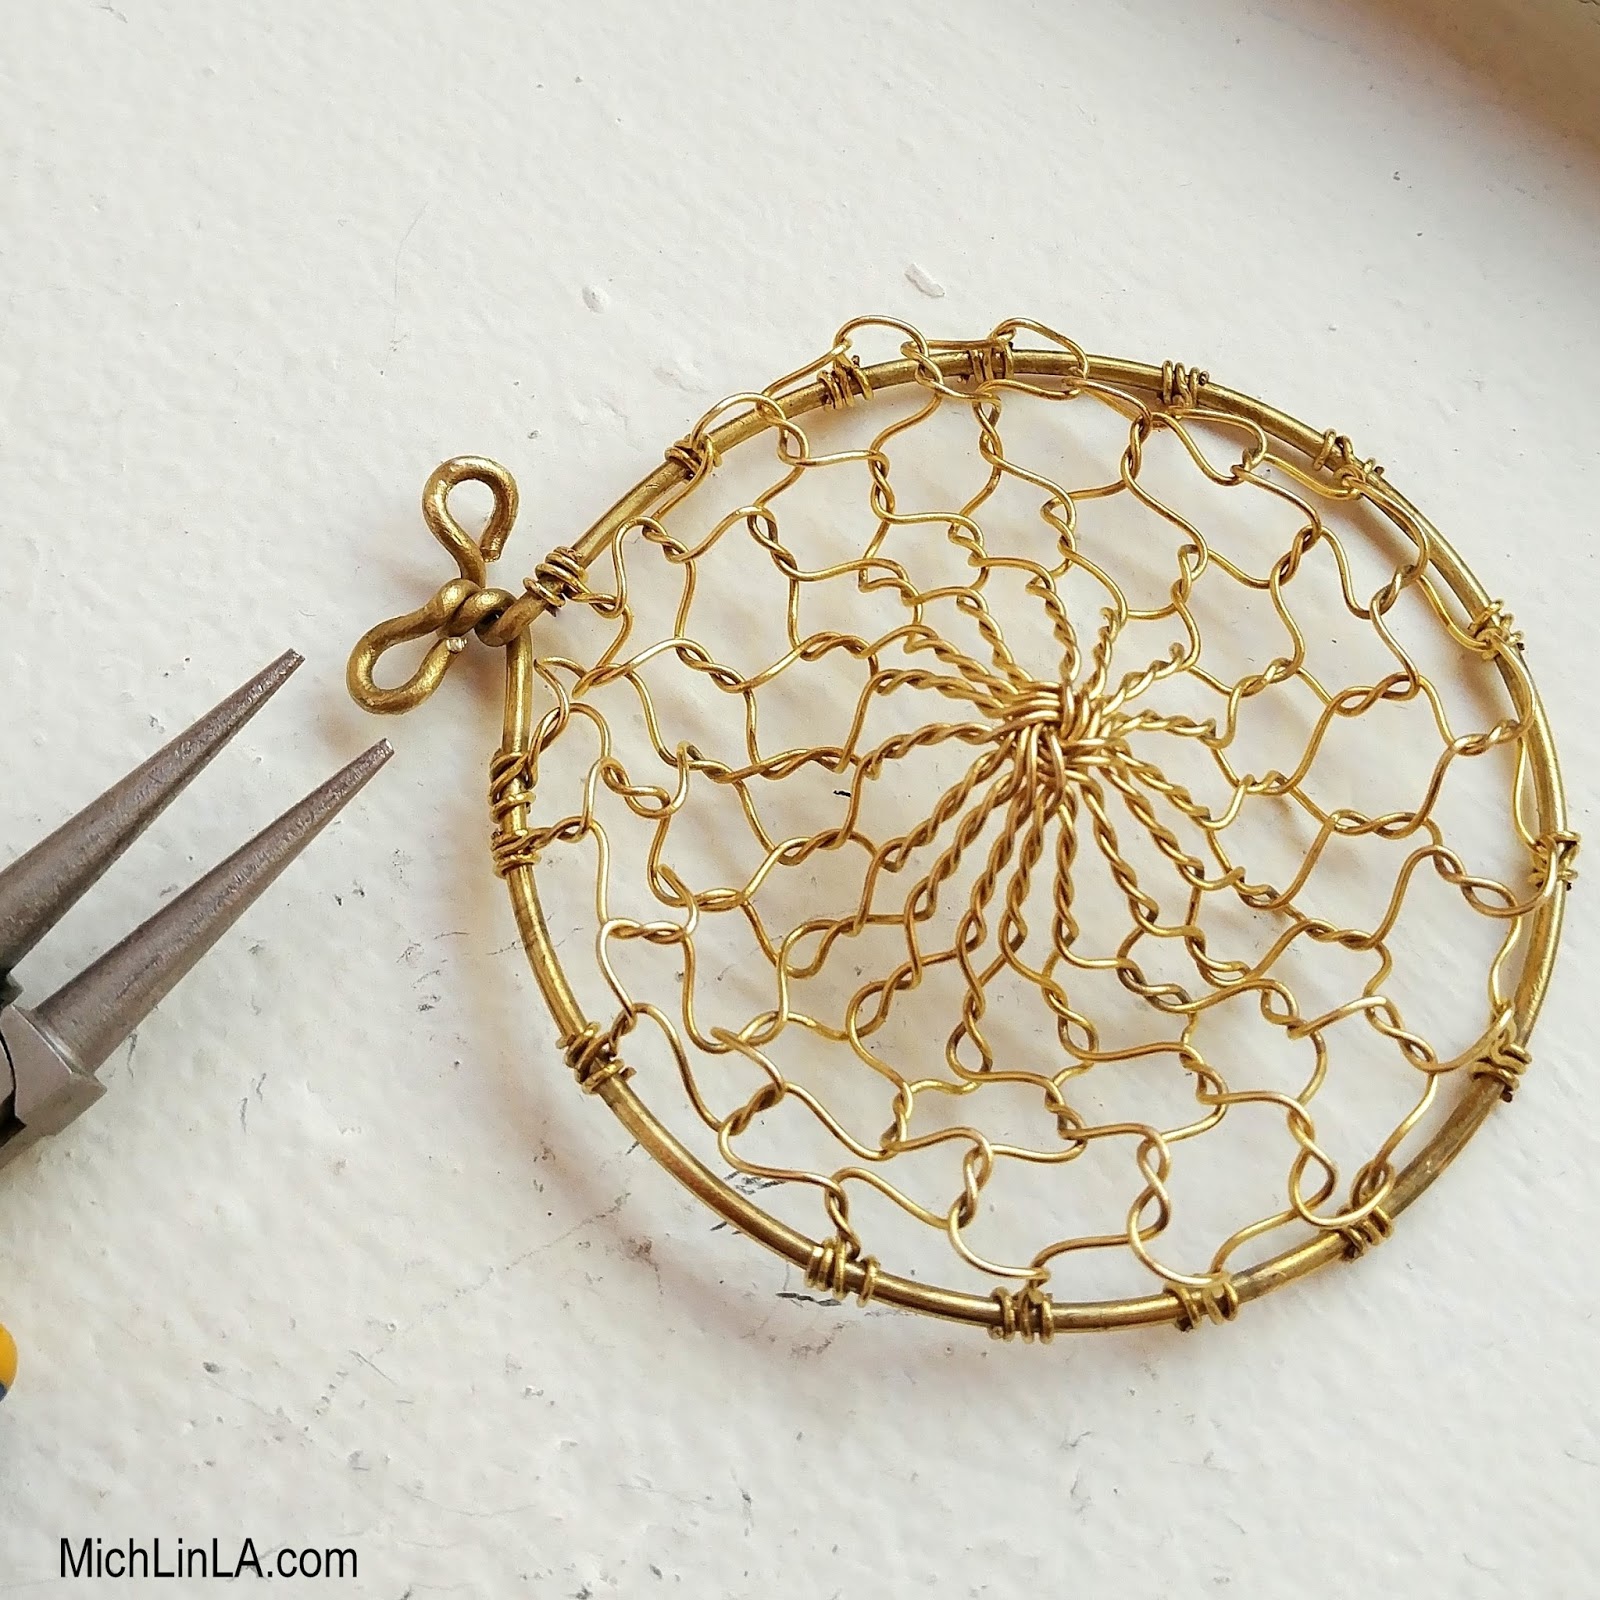
I untwisted and trimmed the handle wires. Then I made small loops with the trimmed ends, like so:
Tip: that two-loop bail was the one tricky bit. Because the handle wire was so curly, I had to straighten it with pliers before turning the loops. You could simplify by just cutting the handle short, and turning a plain loop.
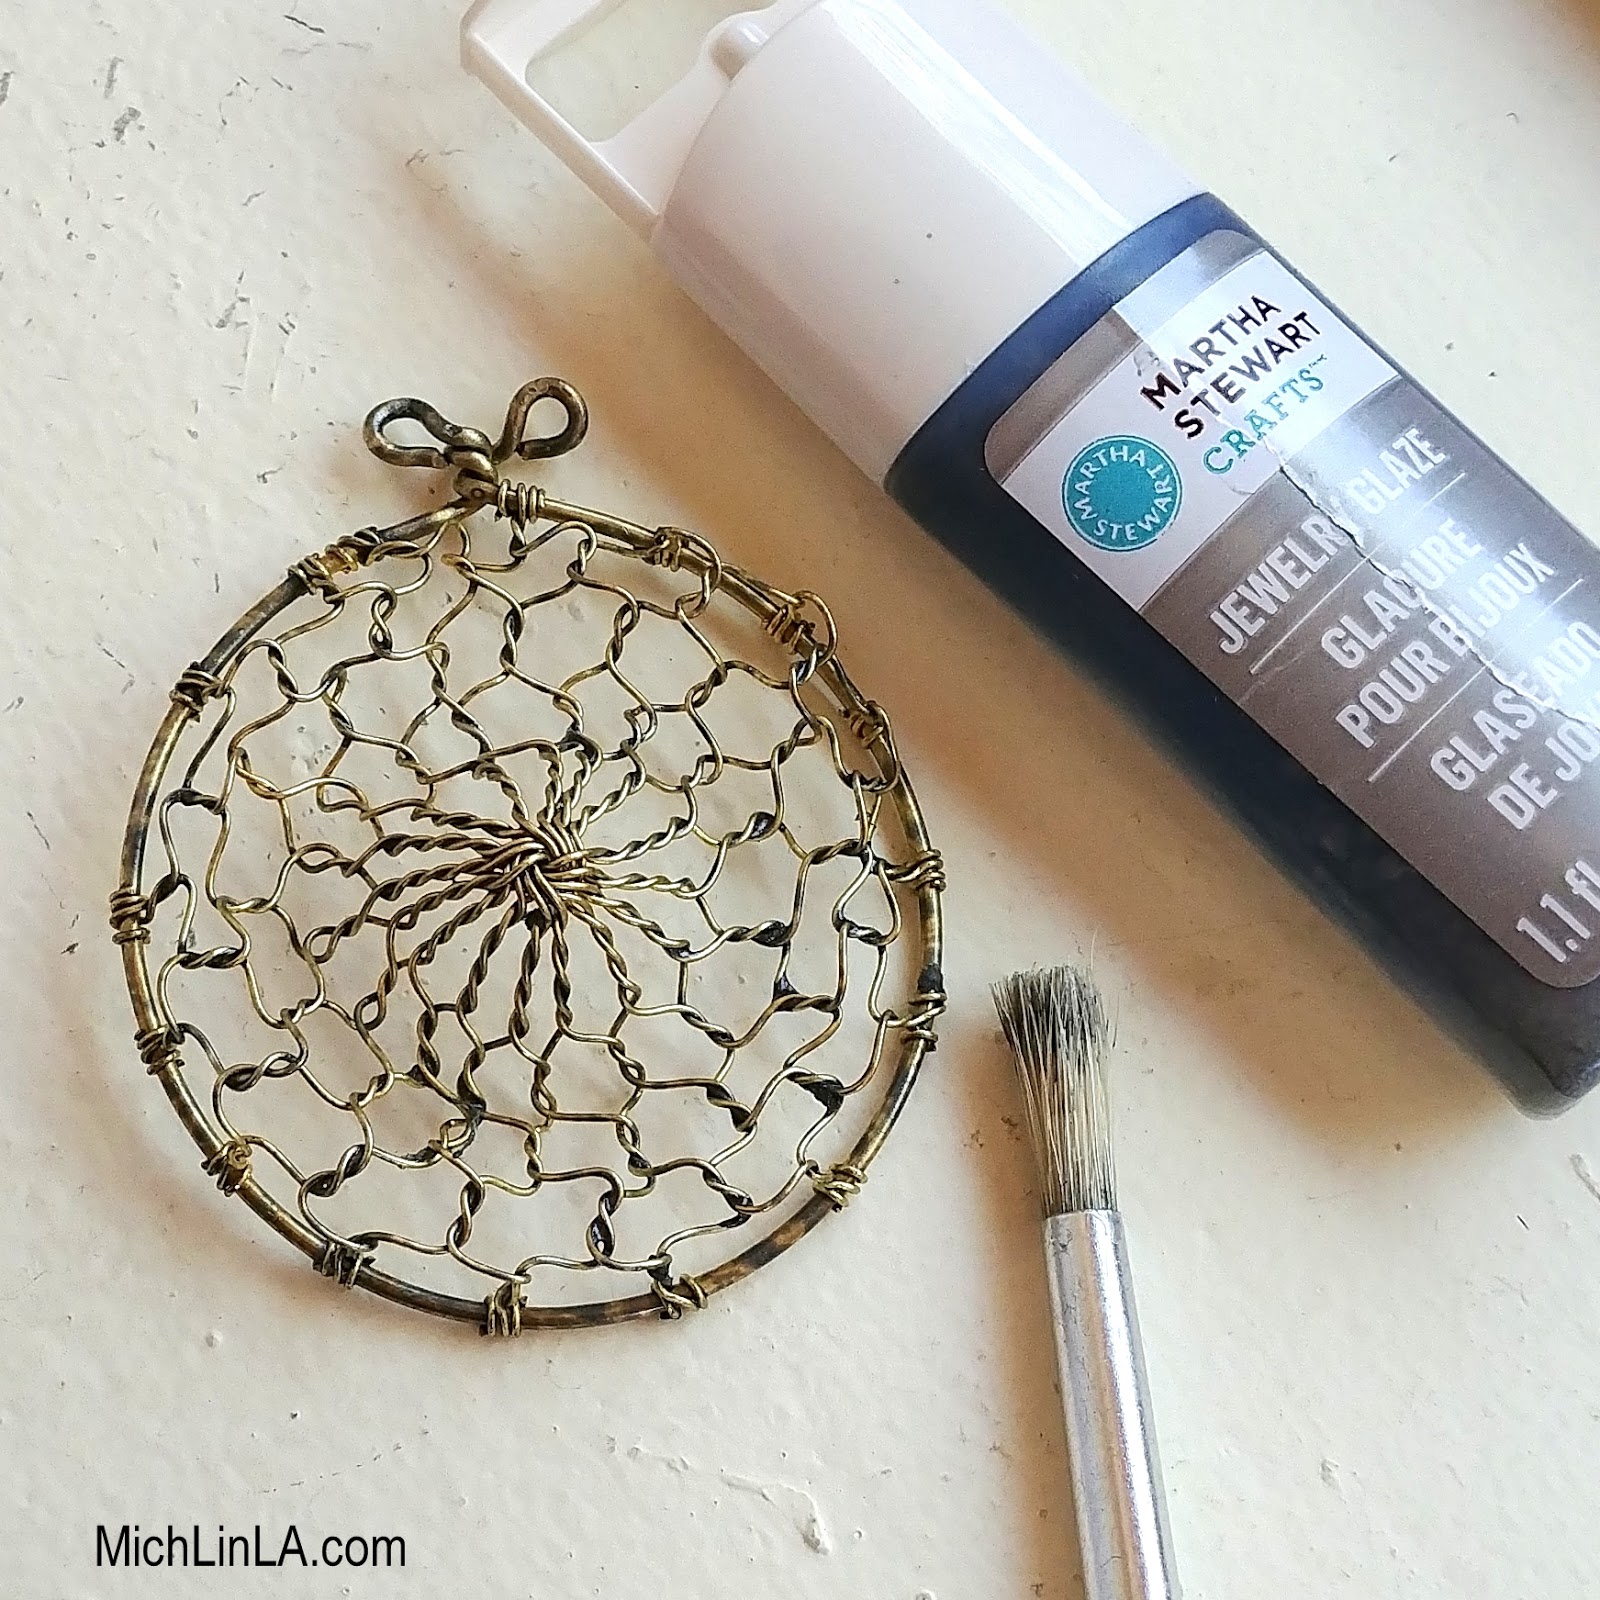
If you like the bright brass color, your dreamcatcher web is all done and ready to decorate. I took one extra step: a dark jewelry glaze to add an antiqued look.
Tip: If you don't have glaze or patina, a simple wash with brown or black craft paint will work, too!
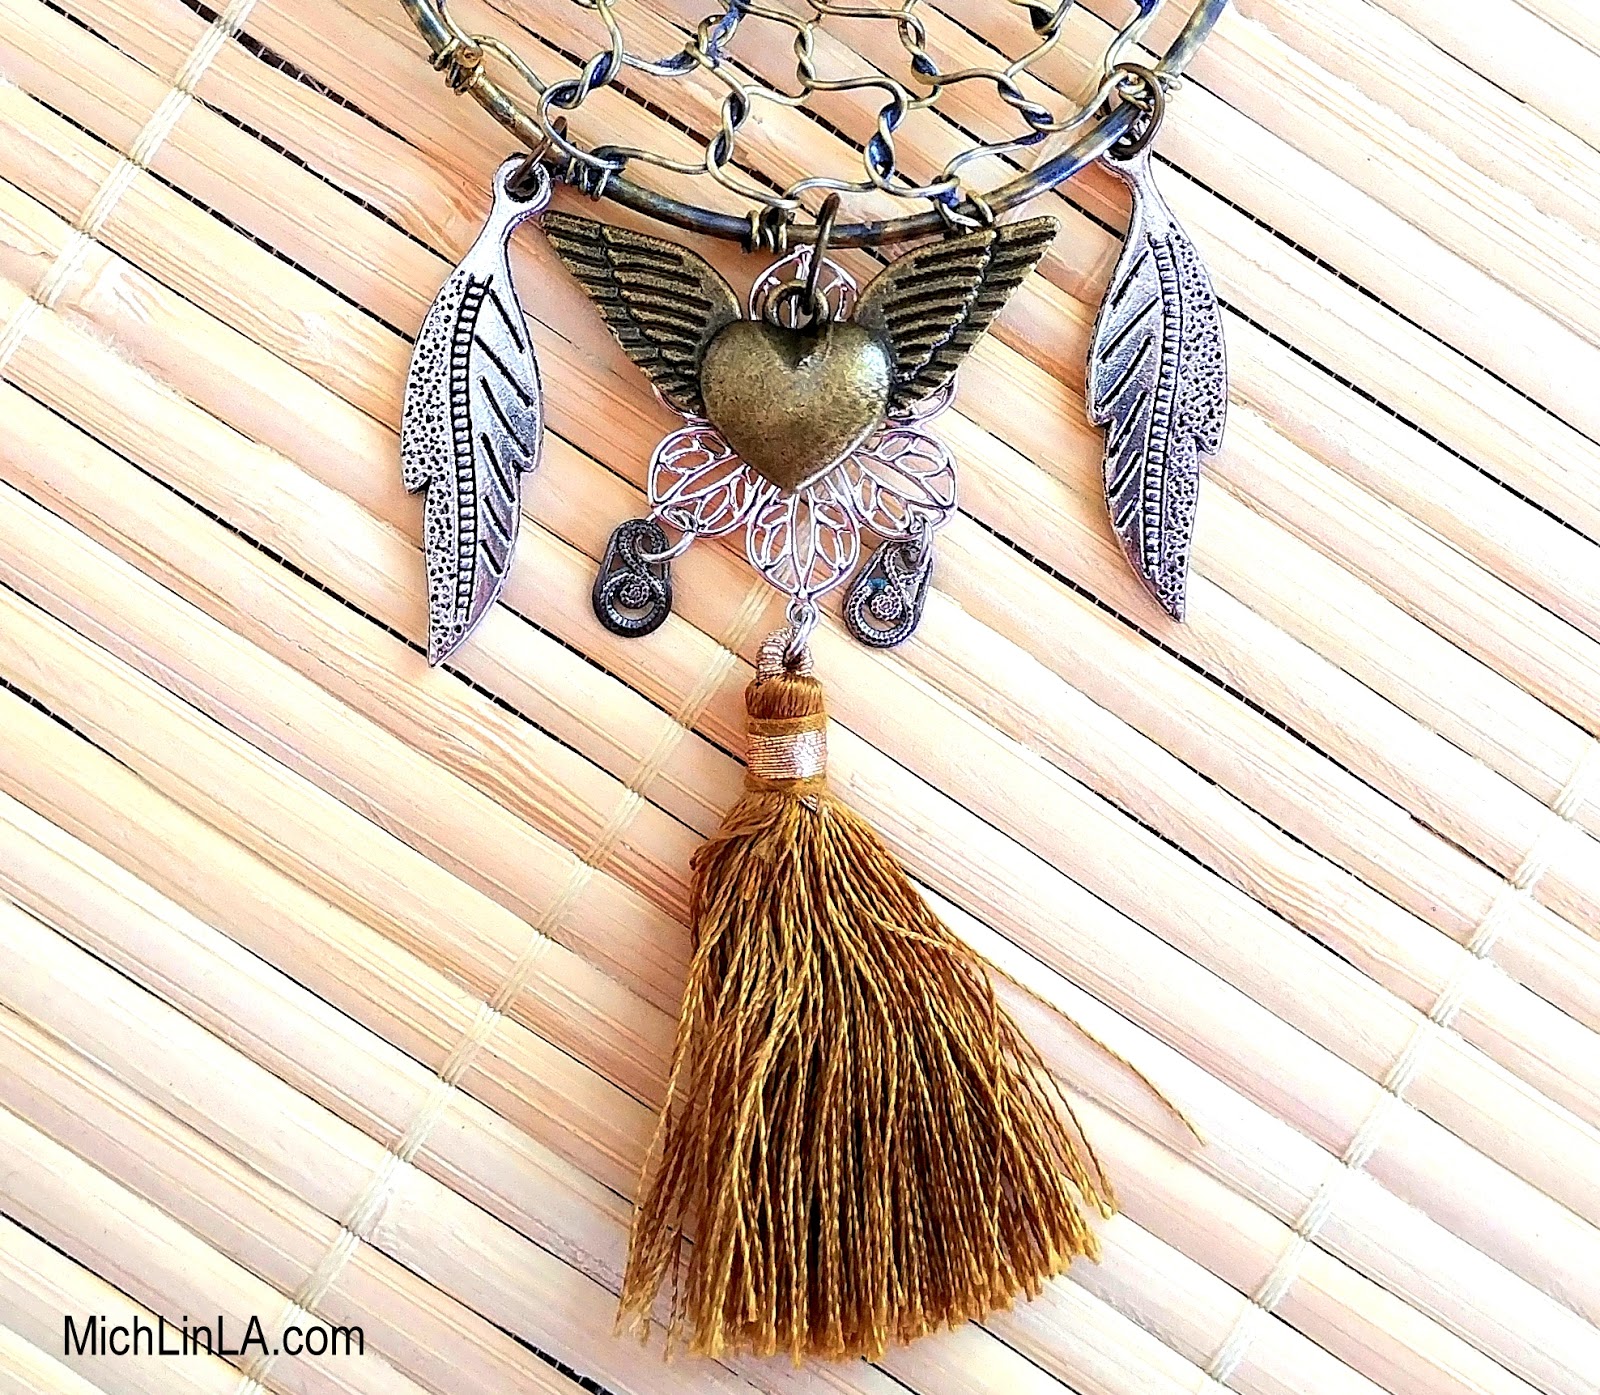
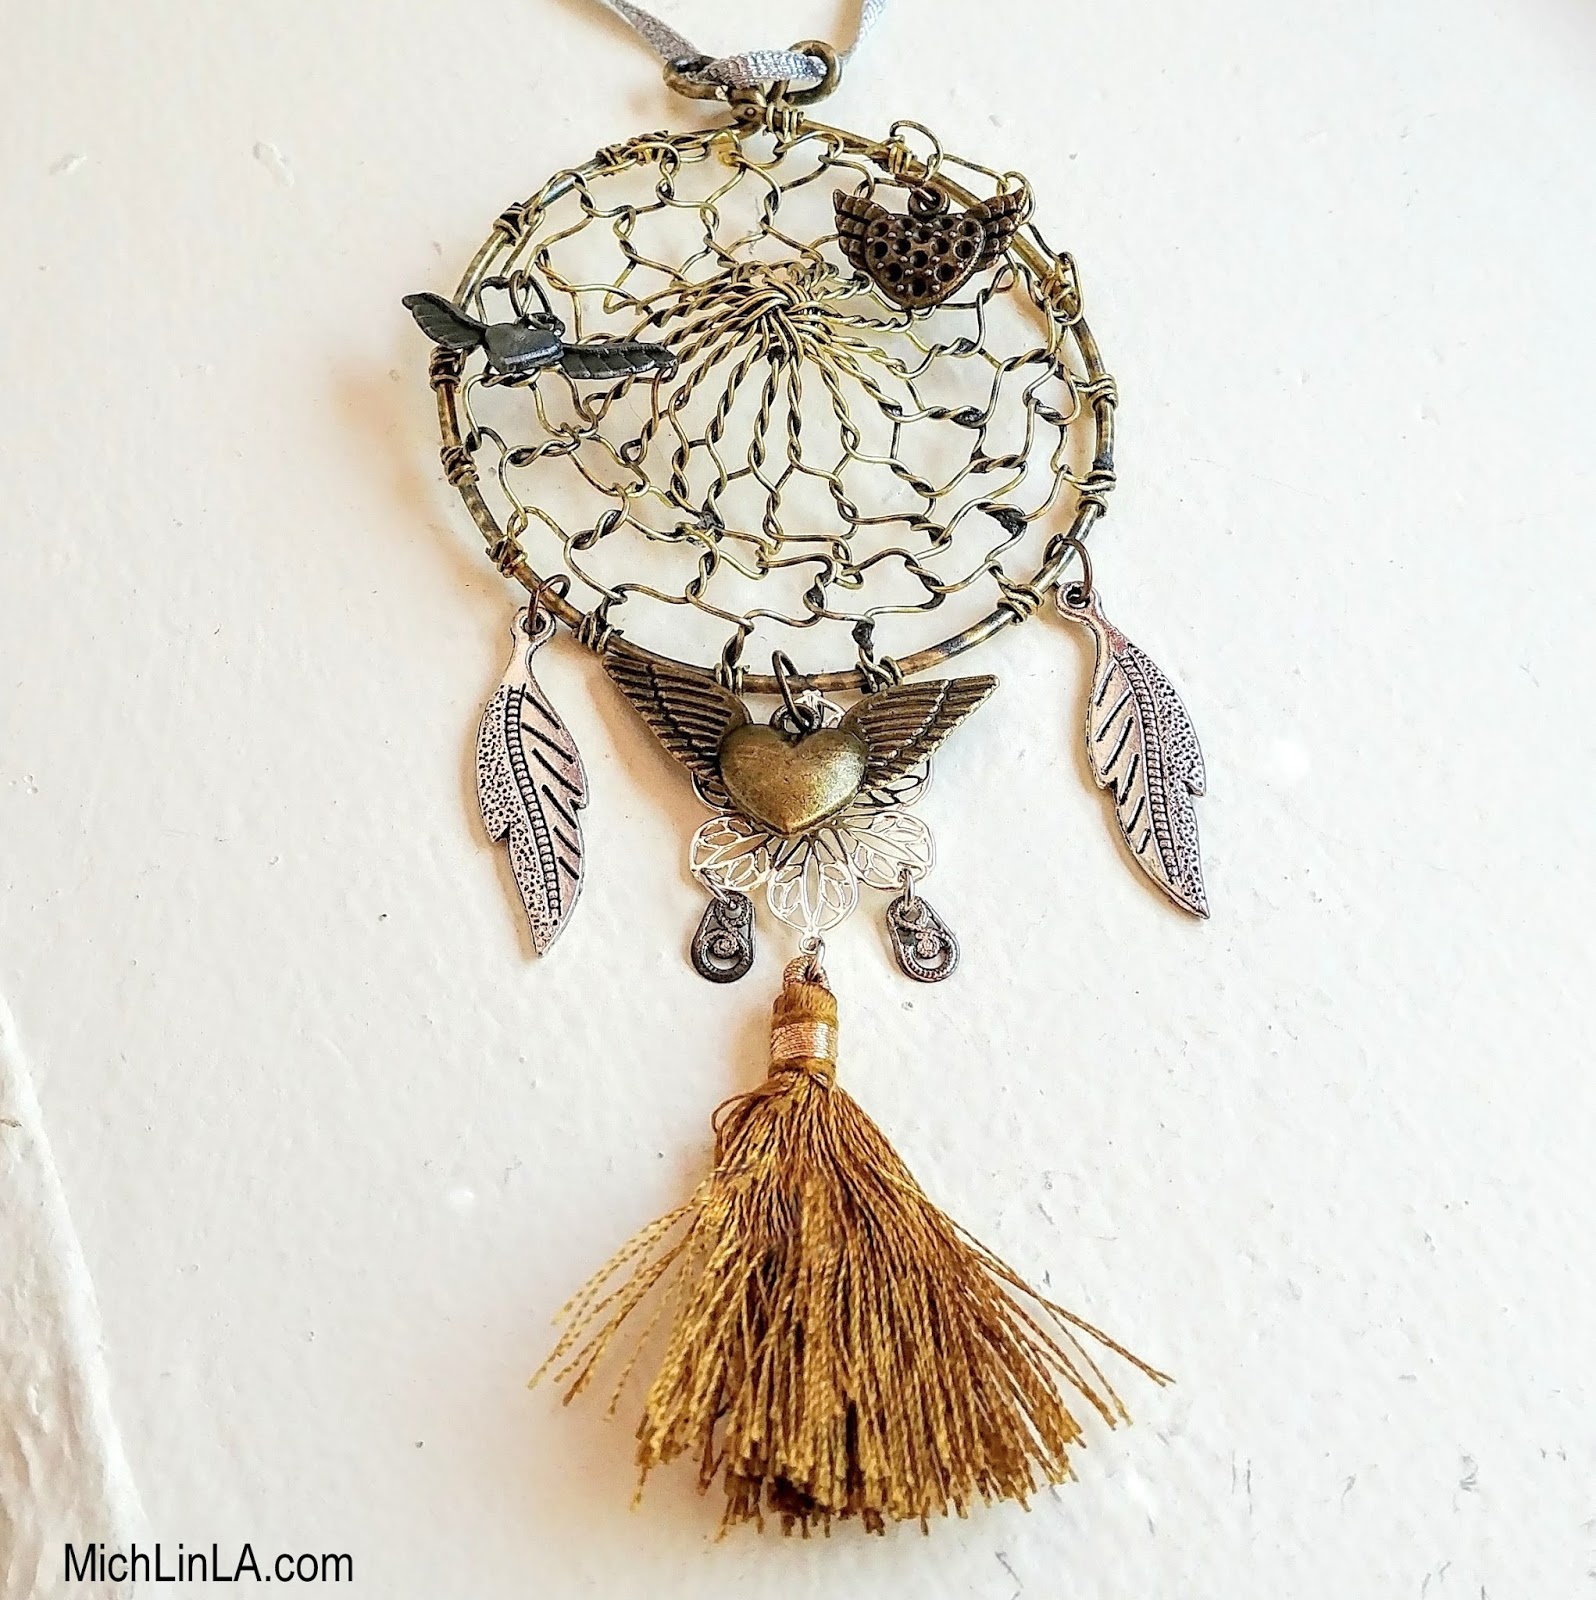
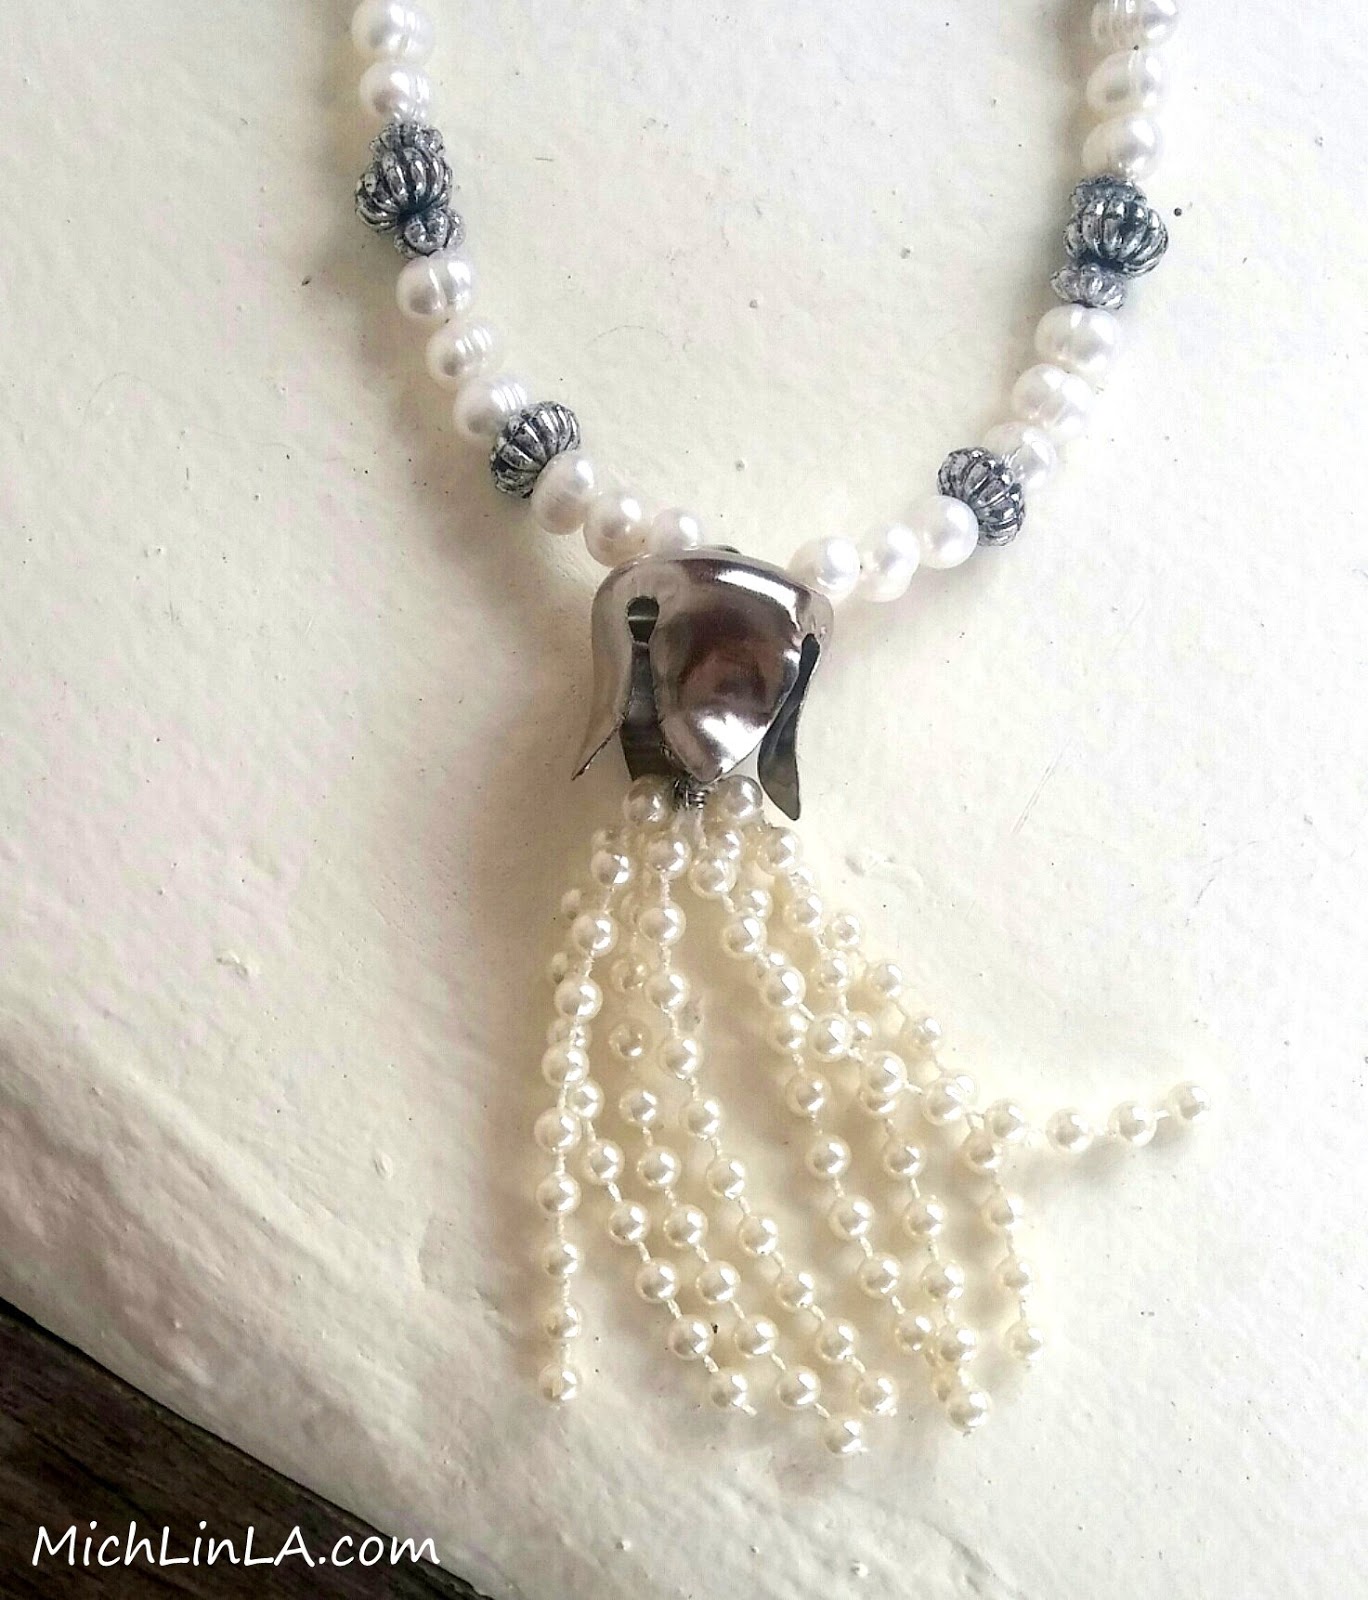
Then I had a great time with the adornments. Metal feather charms, flying hearts, filigree and a tassel went into the final result.
And my dreamy catcher was ready to hang above the bed.
Of course, this is just an example. You might prefer to include more traditional elements. Bone beads, feathers, shells or other natural objects - there are lots of different styles when creating a dreamcatcher, with personal meaning for each maker.
Consult your own taste, aura, and sense of magic.
Now wouldn't this make a great gift, especially for a guy or someone who isn't really into jewelry? Or hey - I would even count this as a handmade Christmas ornament.
OK, people, thanks a bunch for visiting! See you again...maybe in dreams.
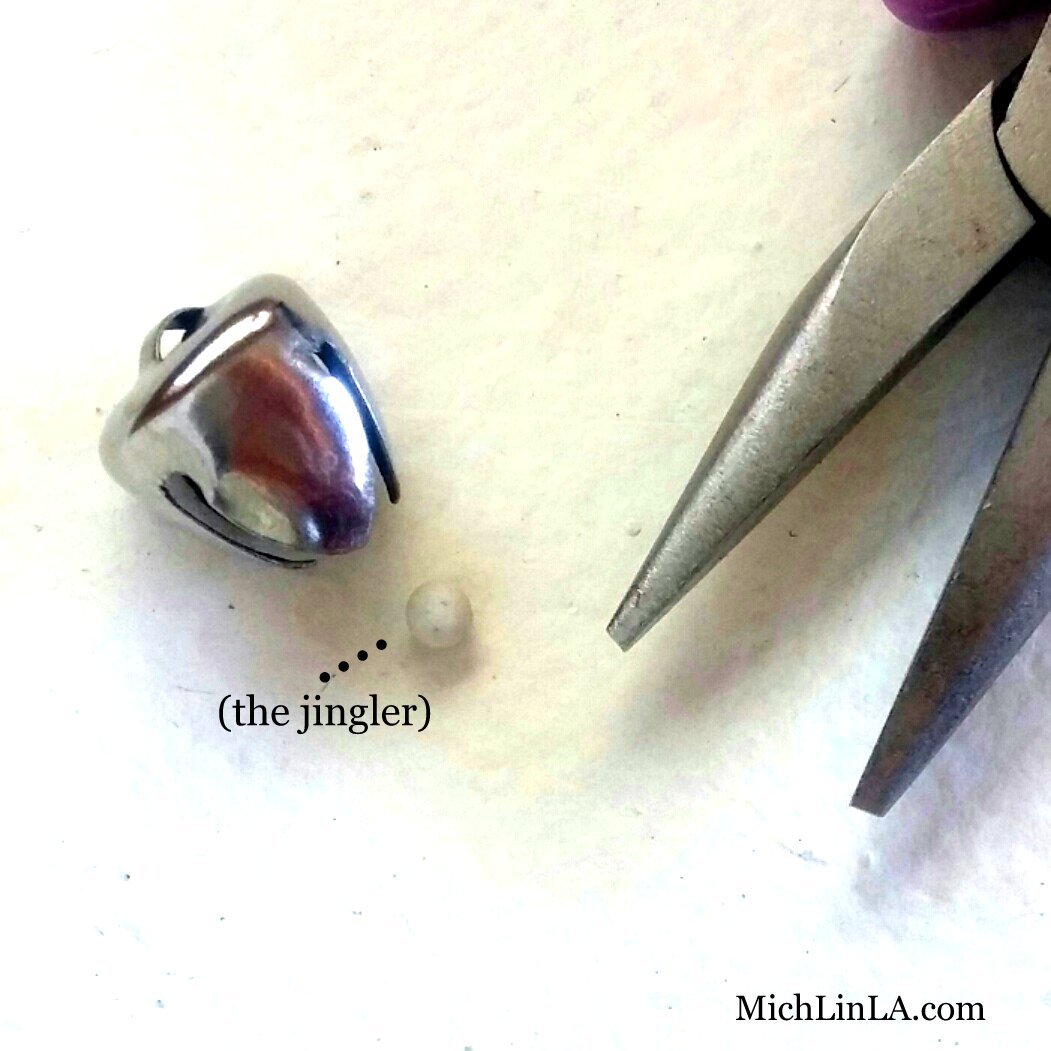
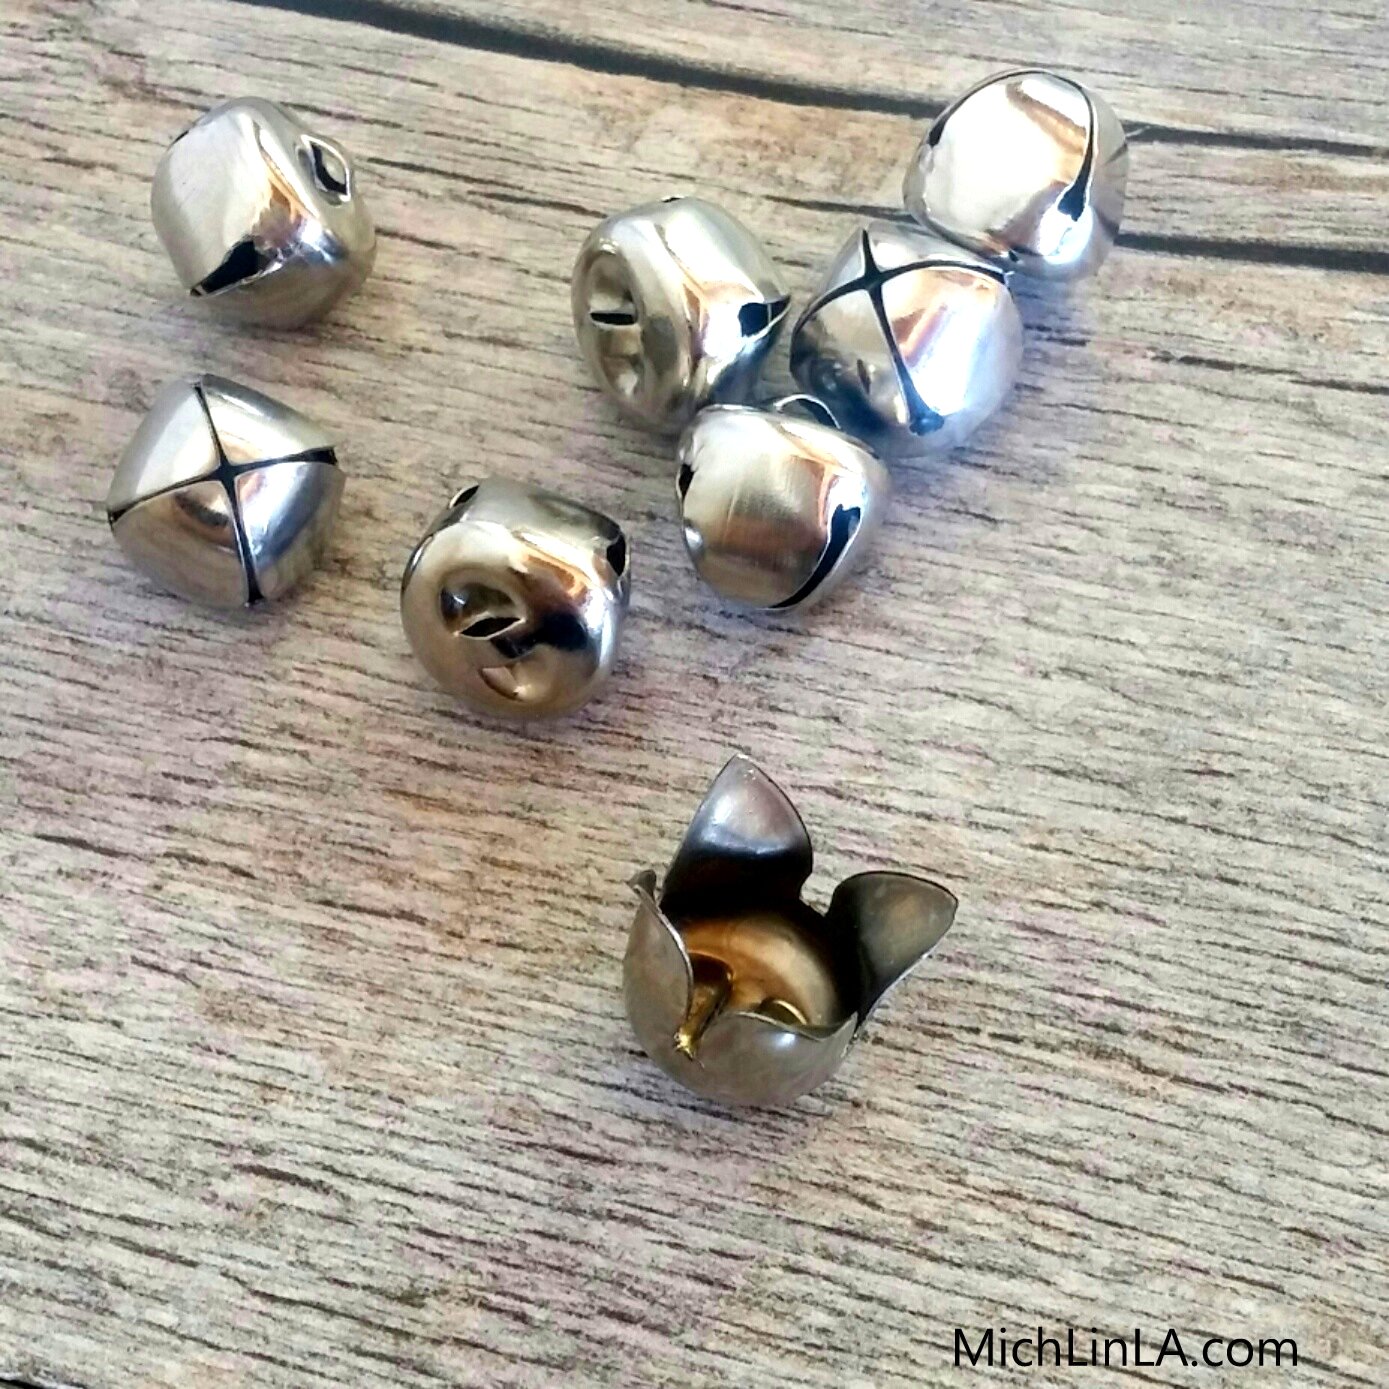
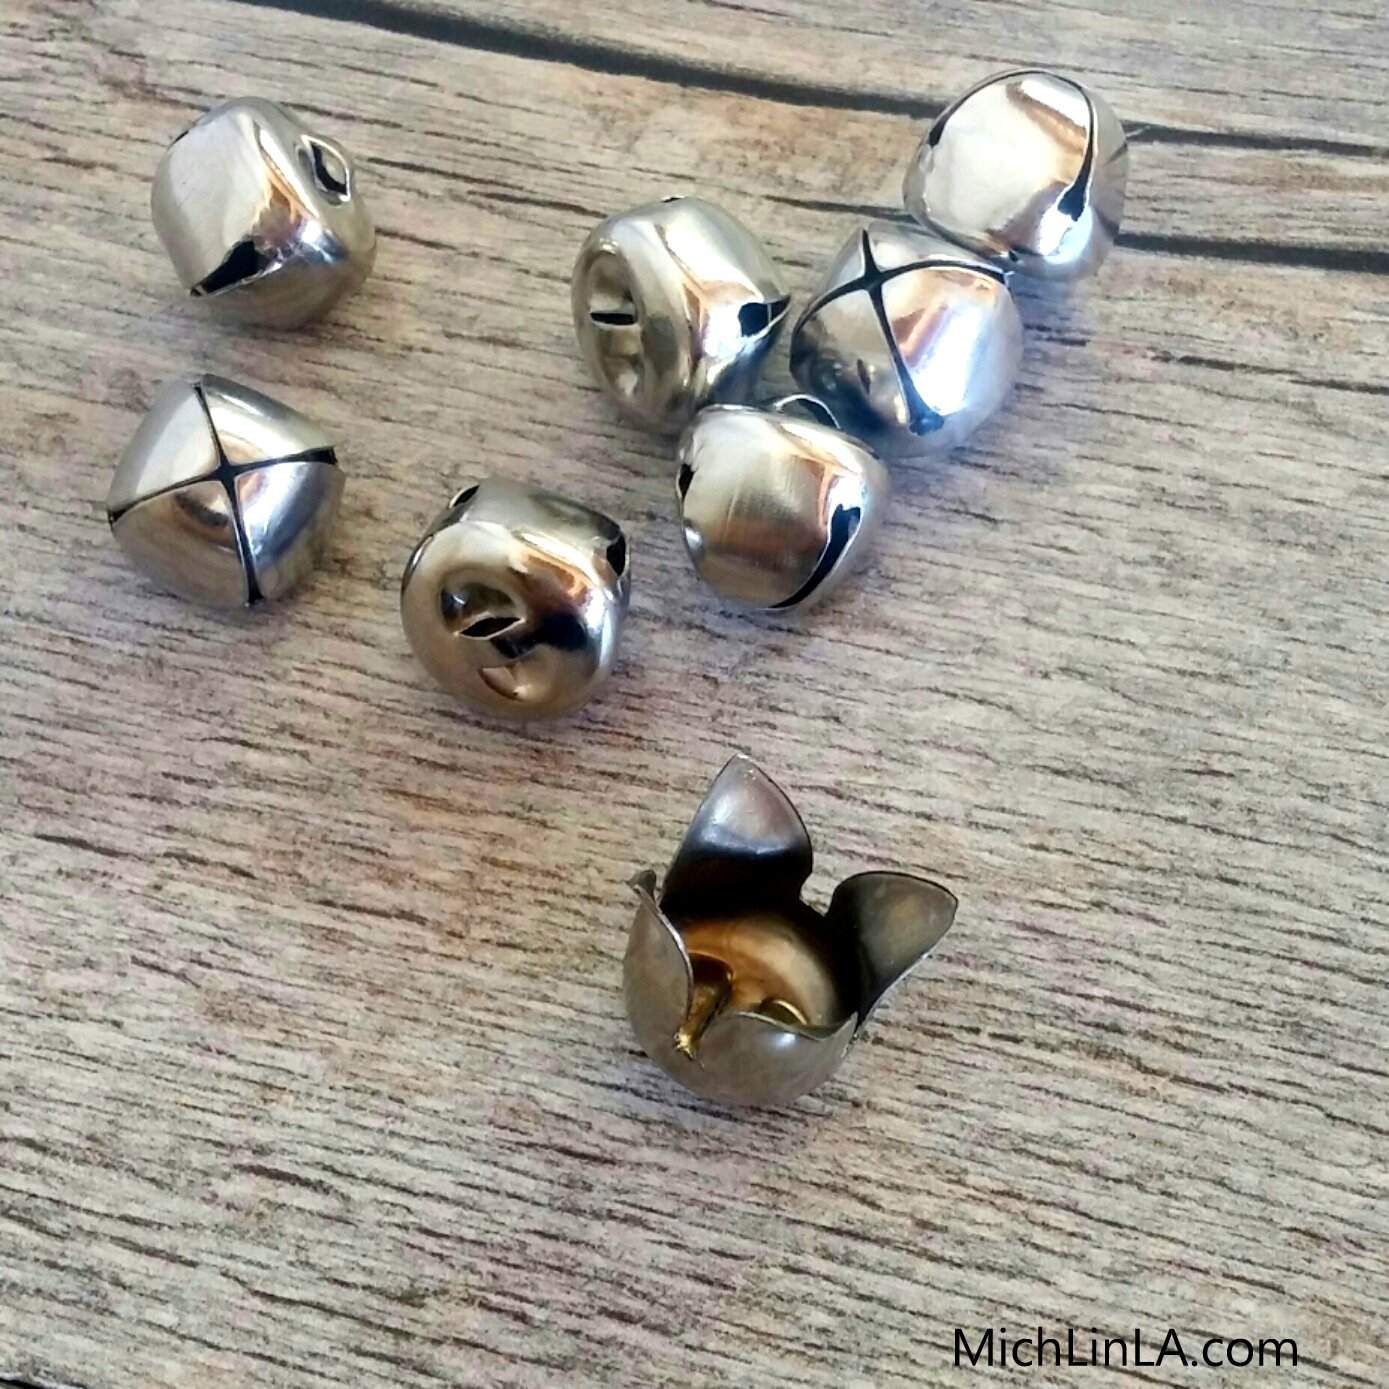
It's the most wonderful time of the year: that month when you can buy jingle bells at the dollar store! (Okay, you can buy them other places too. So I'm told.)
Why is this wonderful? Well, duh, they make everything more jingly. But even more significantly -
You can turn them into flower buds.
They are awfully fun to use in crafting. Delightful for jewelry...
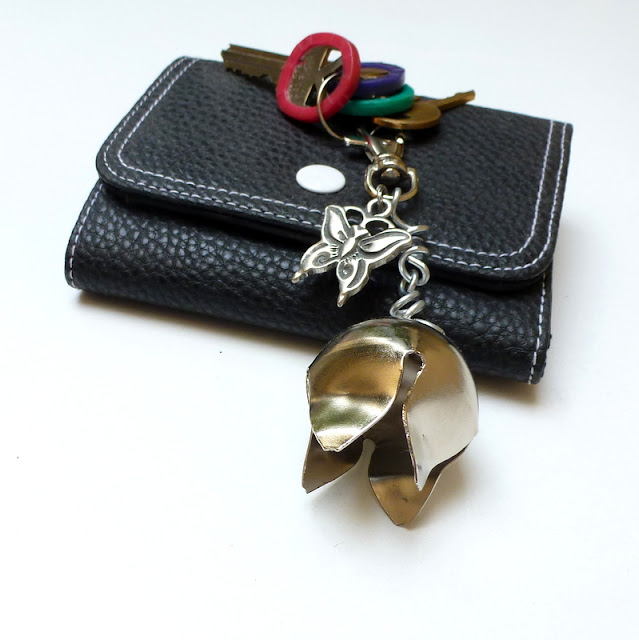
I love to use them in home decor projects (more about that in another post), and for cute flower gifts like these key rings.
If you try, bet you'll come up with all kinds of cool things to use them for.
The DIY is easy - you can probably figure it out without a tutorial. But I have a neat little trick to show you, so bear with me all the way to the end - you might decide to do it my way. Ready? Here we go.
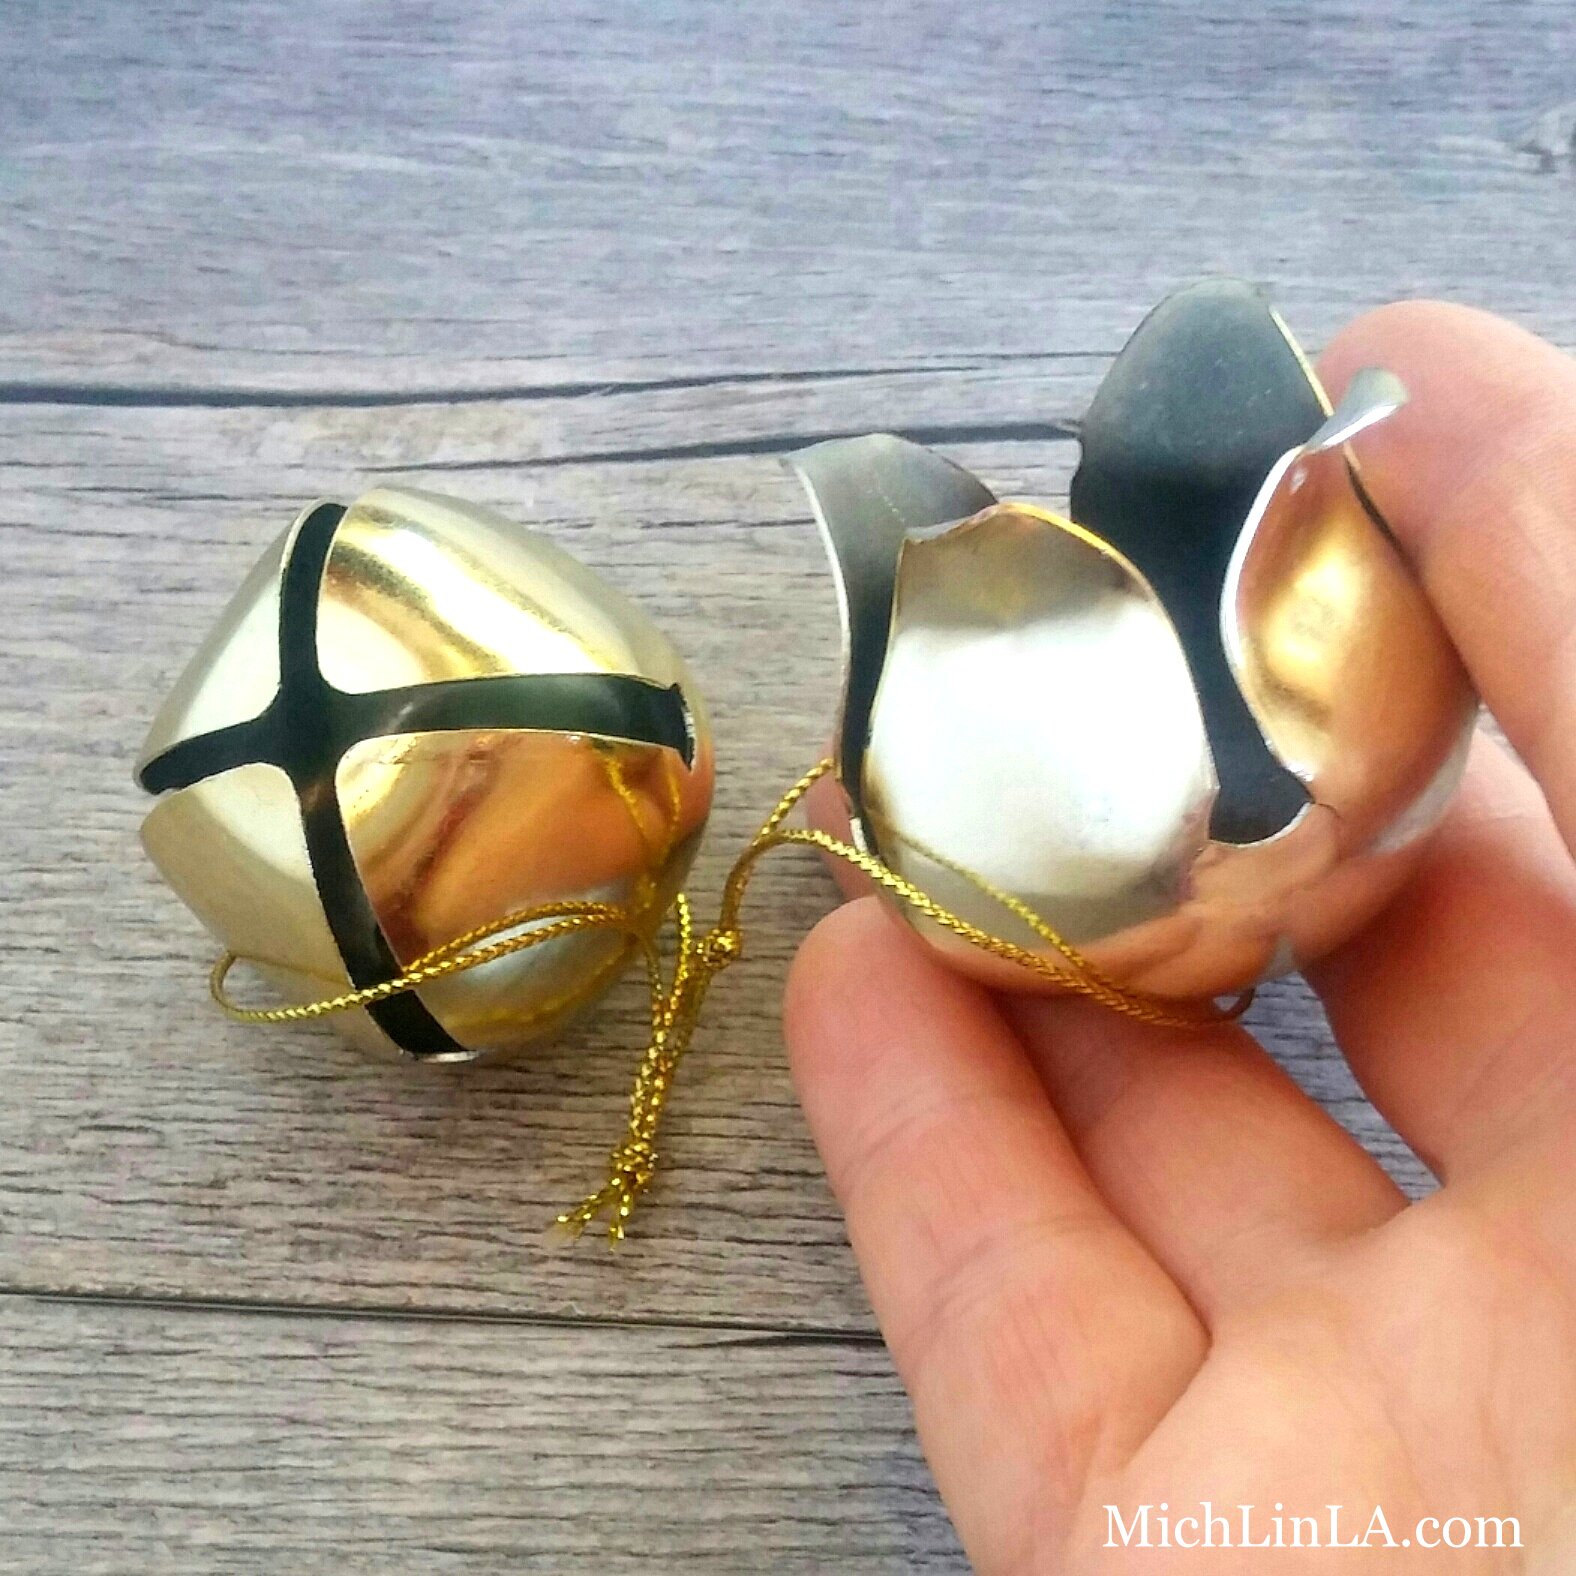
First the basic technique - this is how I used to make them before figuring out my super secret maneuver. And it's a perfectly fine way to do it.
1. Use a fingernail or pliers to open out the petals just far enough to jettison the jingler.
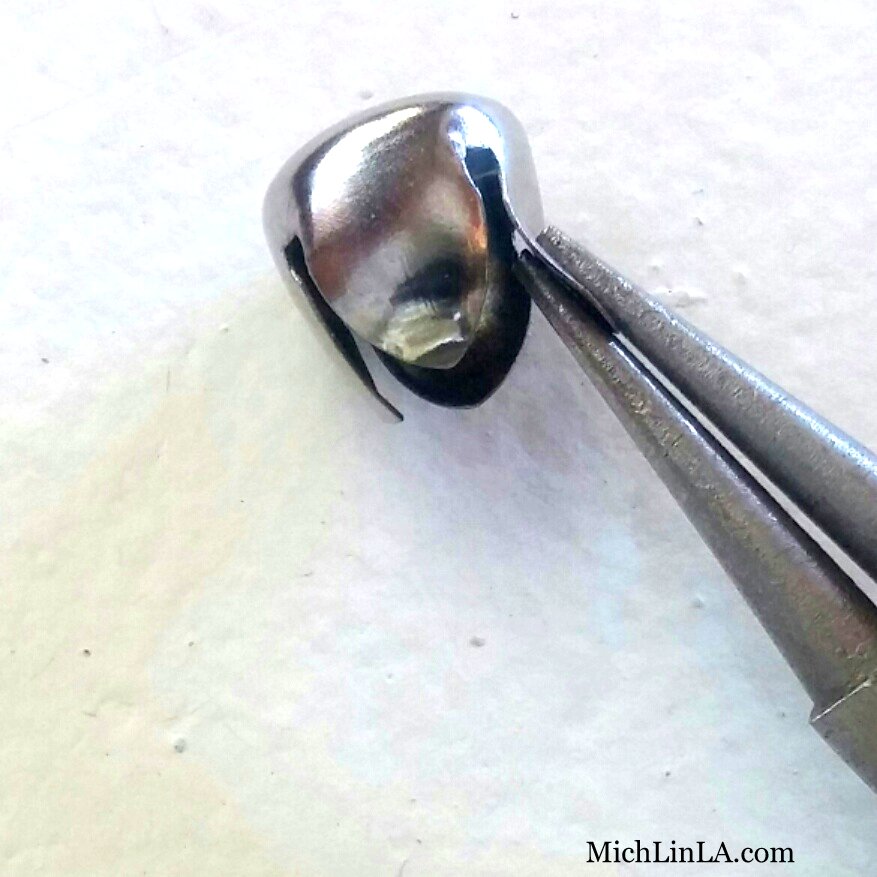
2. Grab a petal between pliers and bend it over - as little or as much as you like.
Do it with all four petals and - yep, that's it! Flower done!
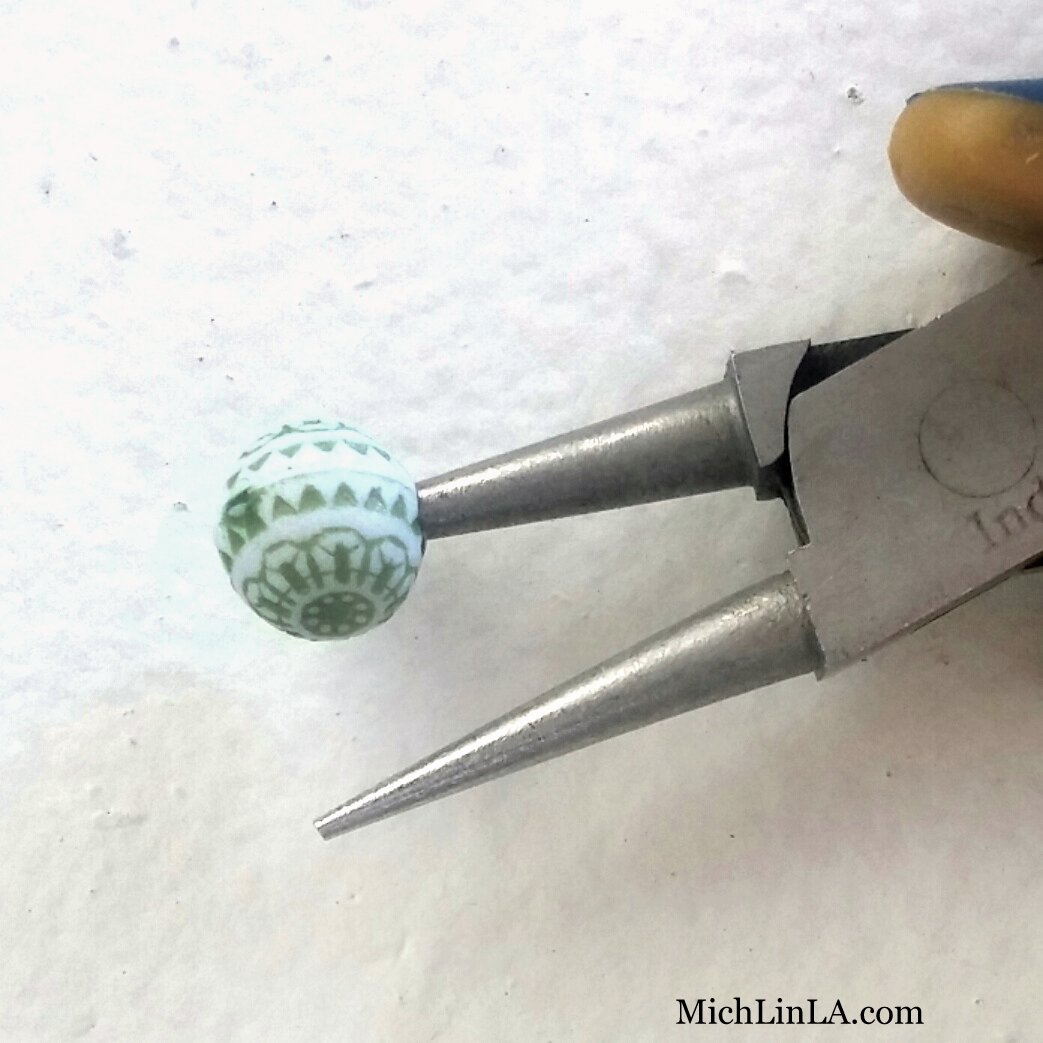
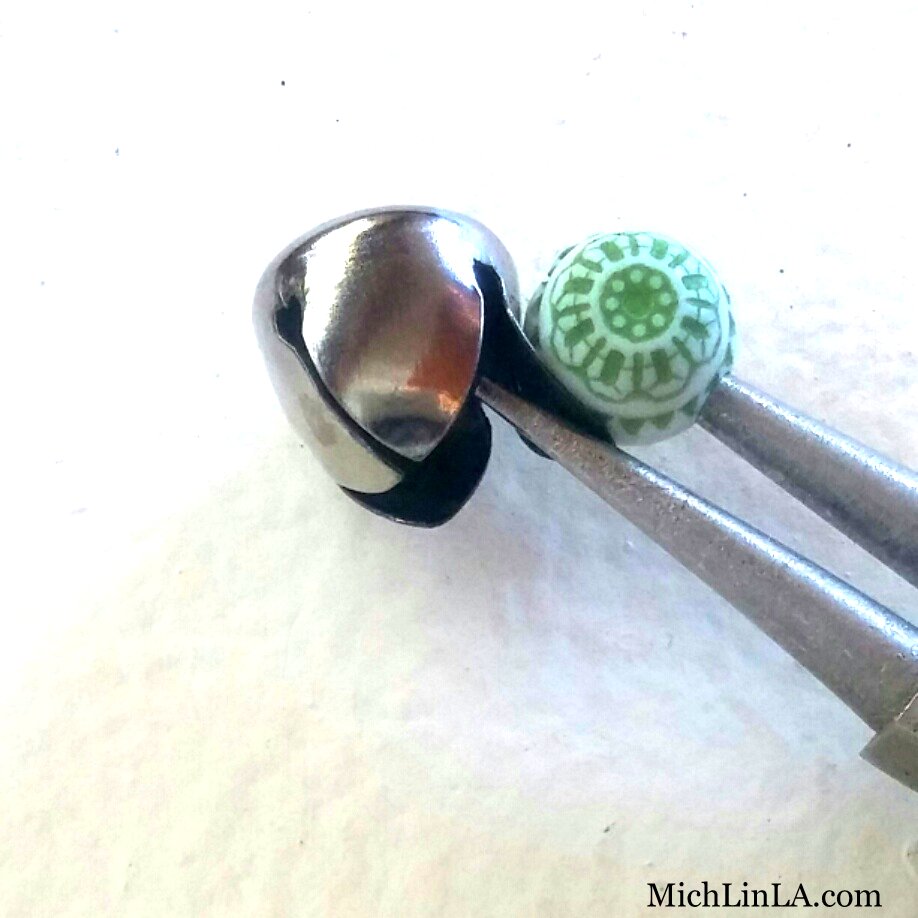
But here comes my awesome trick. Watch carefully now.
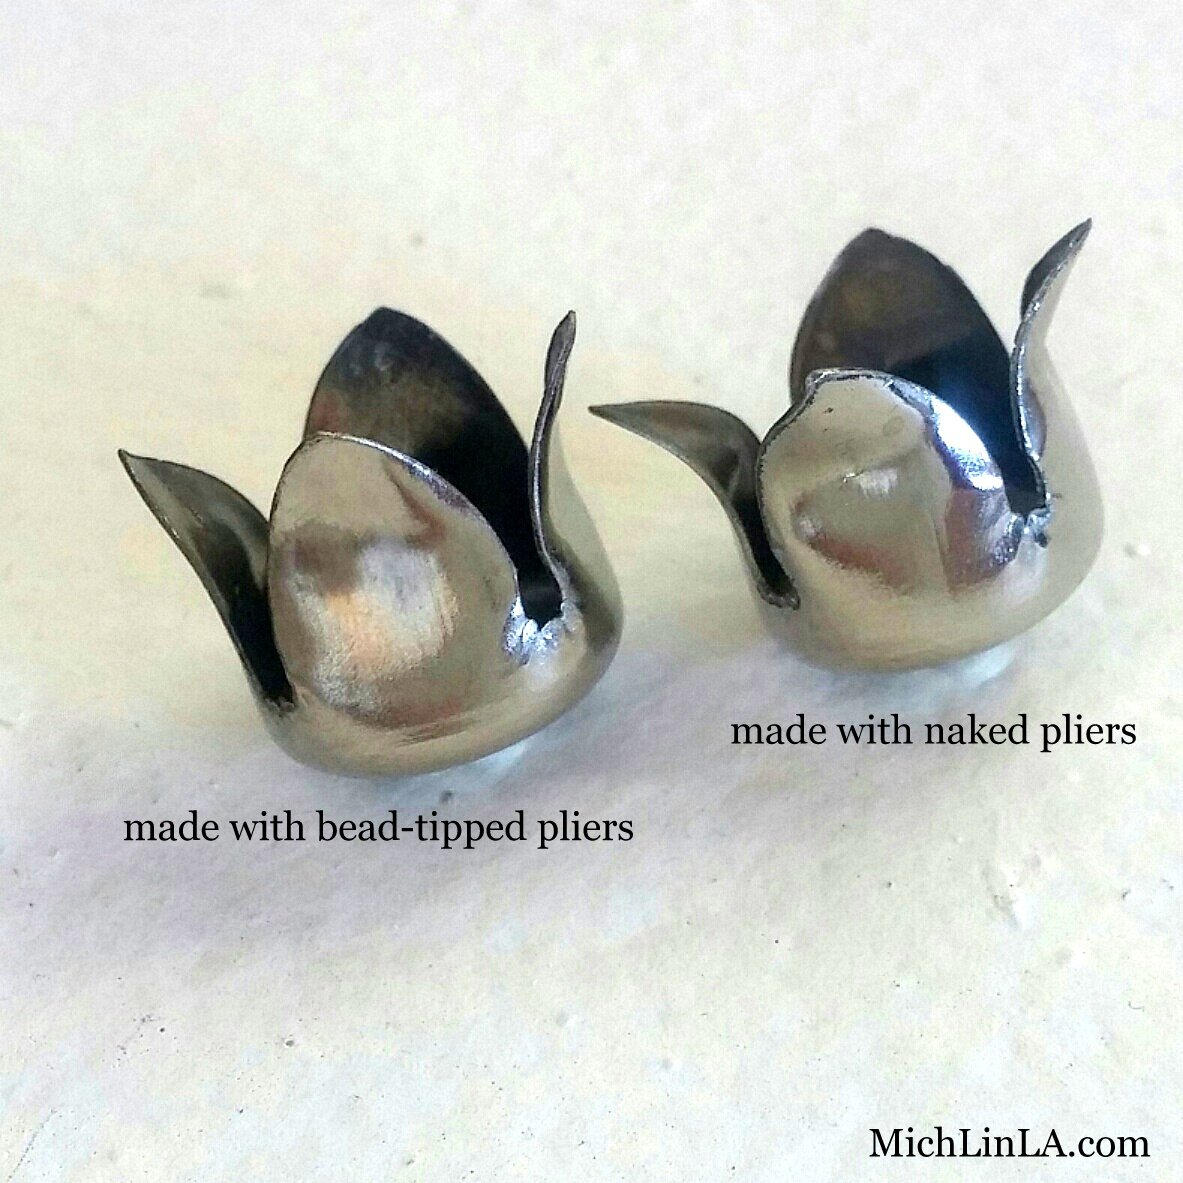
Pop a round plastic bead onto one tip of the pliers.
Now grab your petals (with the plastic bead on the outside) and bend.
The round bead will protect the metal and make a prettier, unmarked petal! This photo shows what I mean:
A tiny - but interesting - difference, is it not?
I hope you enjoyed this idea! Perhaps there's a trip to the jingle bell store in your future?
P.S. check my next post for another awesomely adorable idea for the jingle buds!
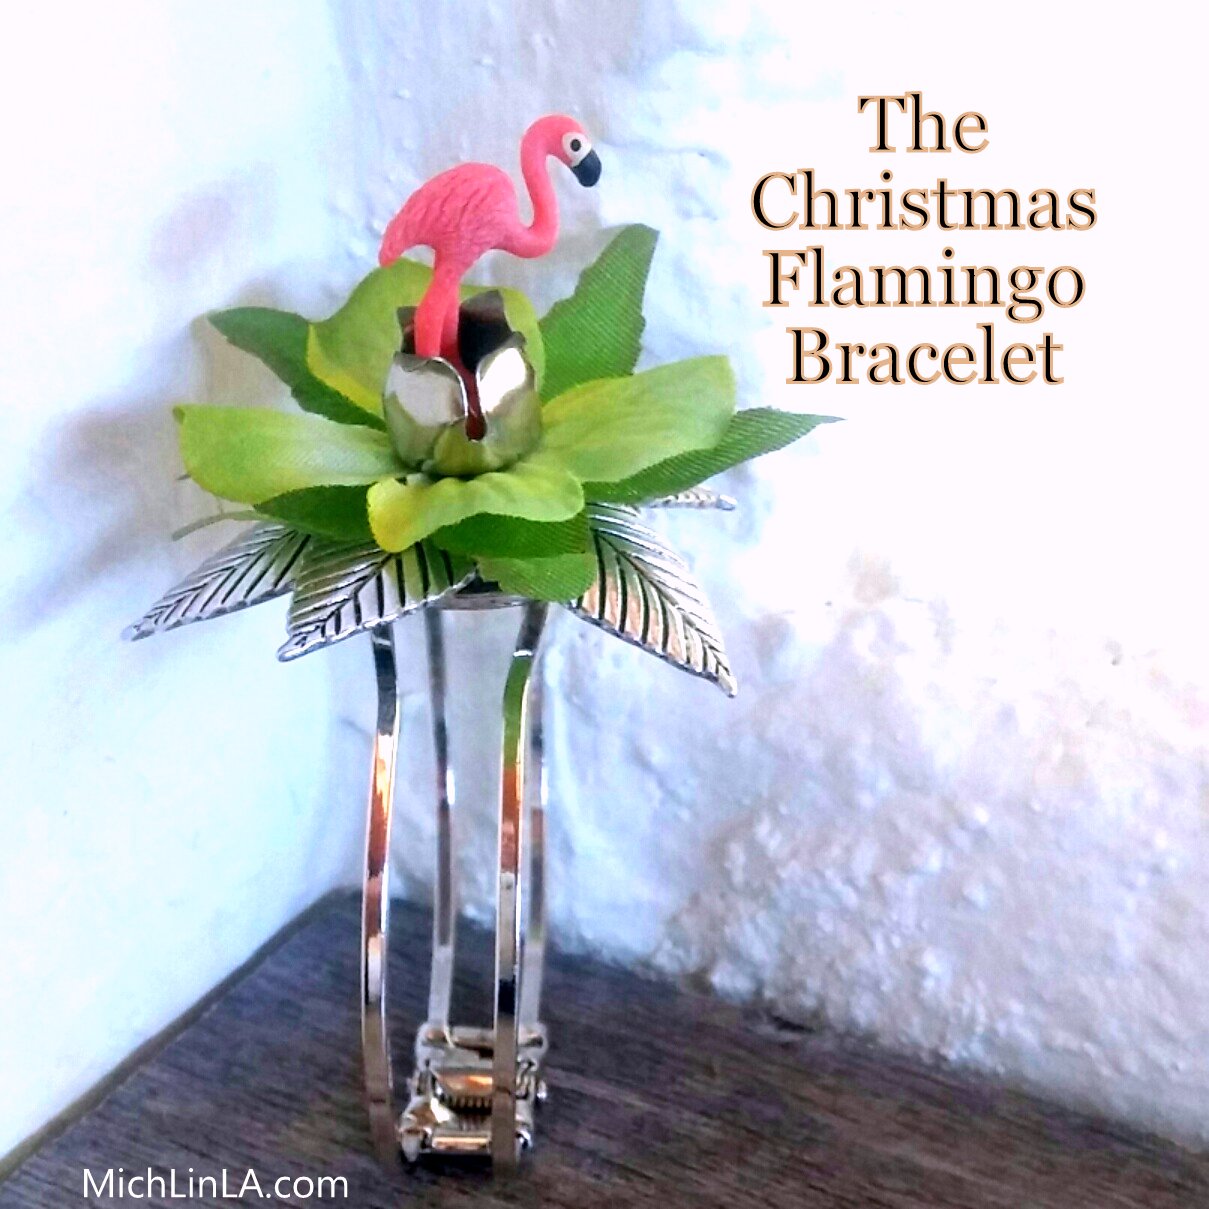
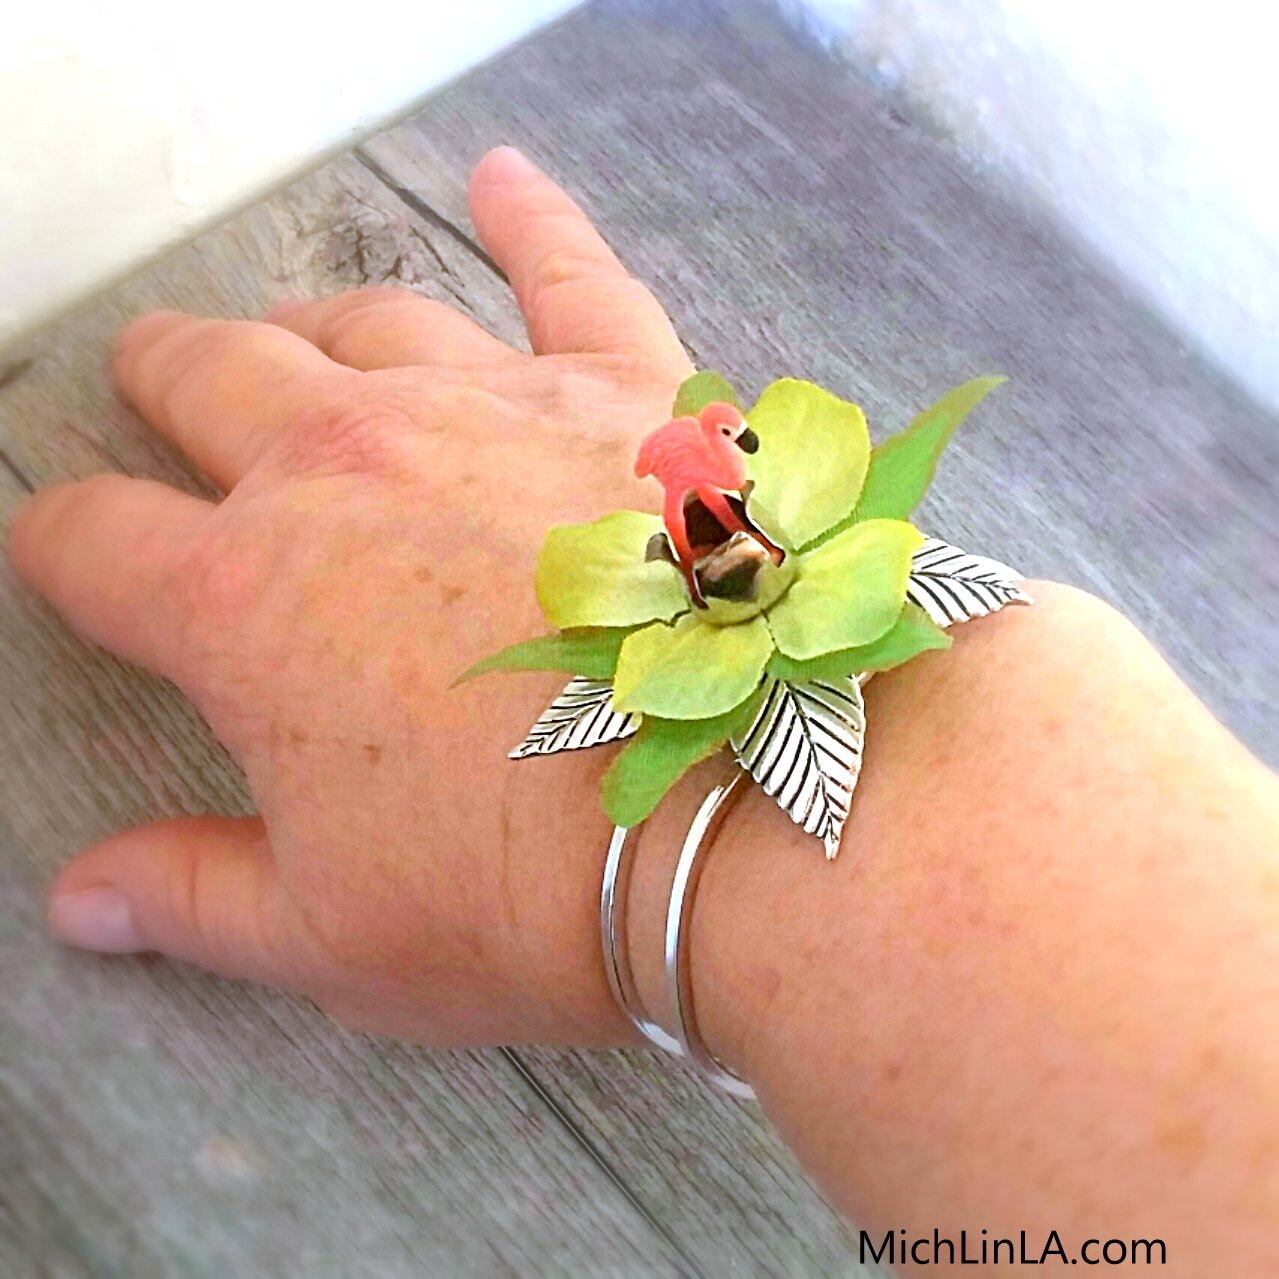
What do you get when you combine an off-the-shelf bracelet kit, a miniature silicone flamingo and a not-very-mysterious Mystery Thing?
Can anyone guess the Mystery Thing? It's the little silver flower bud in the center:
Gosh, I know it's a tricky one...okay, not so much. Have you figured it out? Get ready to scroll down for the answer.
*
*
*
*
Keep scrollin'...
*
*
*
*
And here's the reveal!
Yes indeed, it's a jingle bell!
I bet you guessed it. But that's okay, we all need an easy win right now, eh?
I make flower buds from jingle bells all the time. Will post a mini tutorial soon, because this is the season for buying jingle bells.
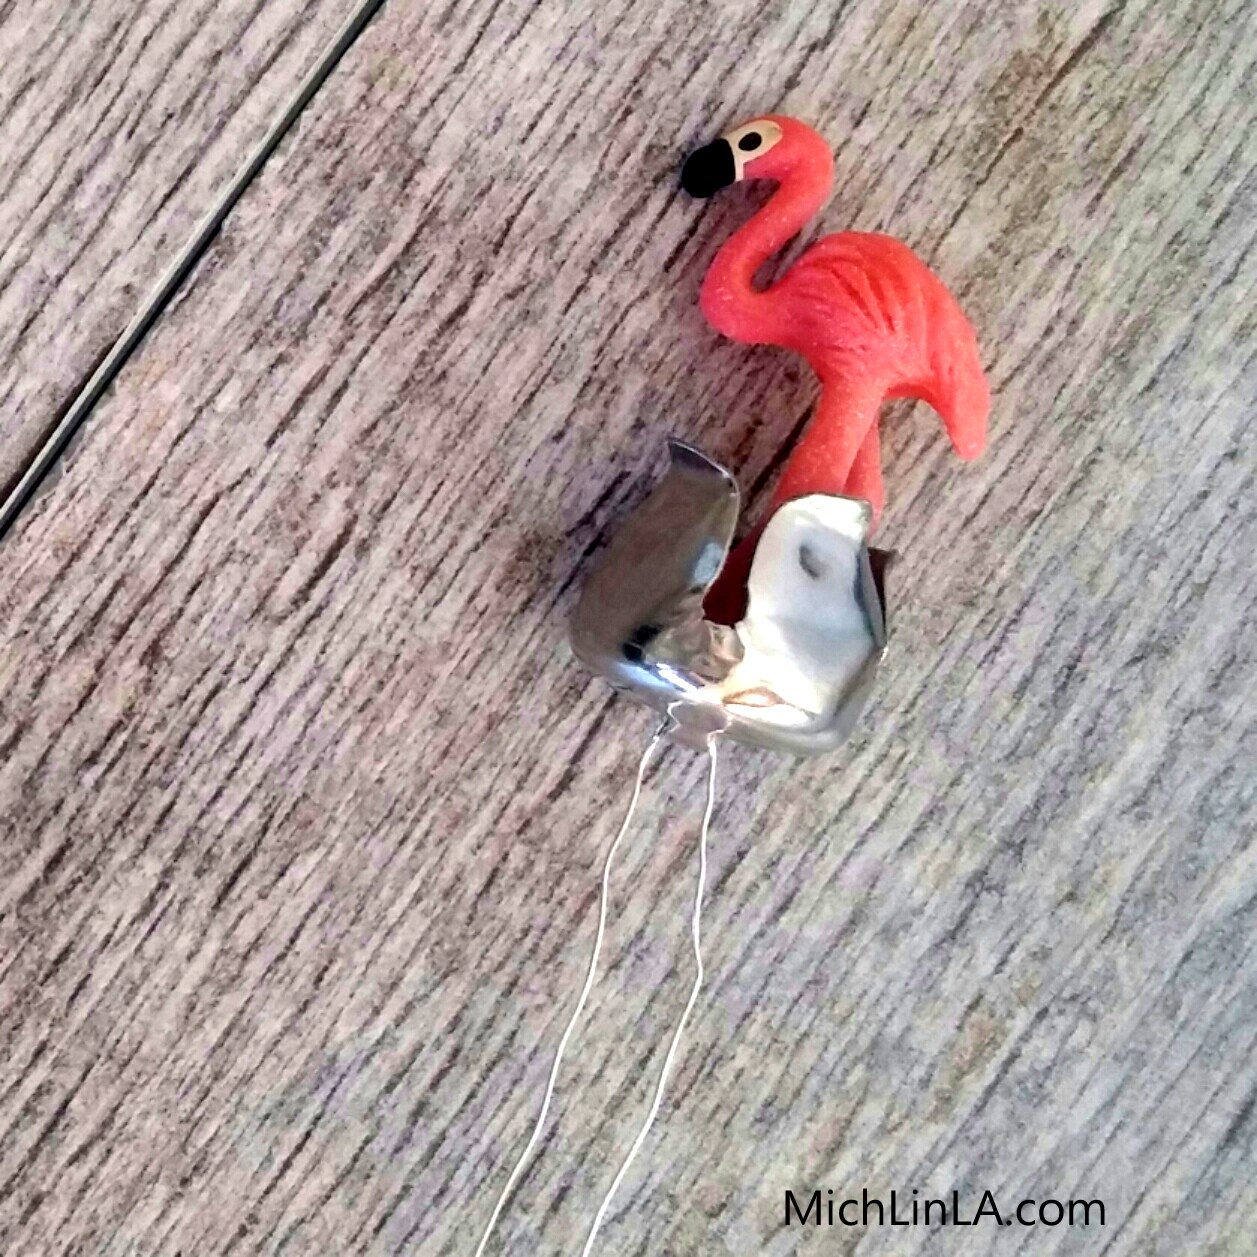
In this instance, I simply wired my flamingo to the "jingle bud," like so:
Then I wired it to the bracelet base.
Hope you smiled at this one!
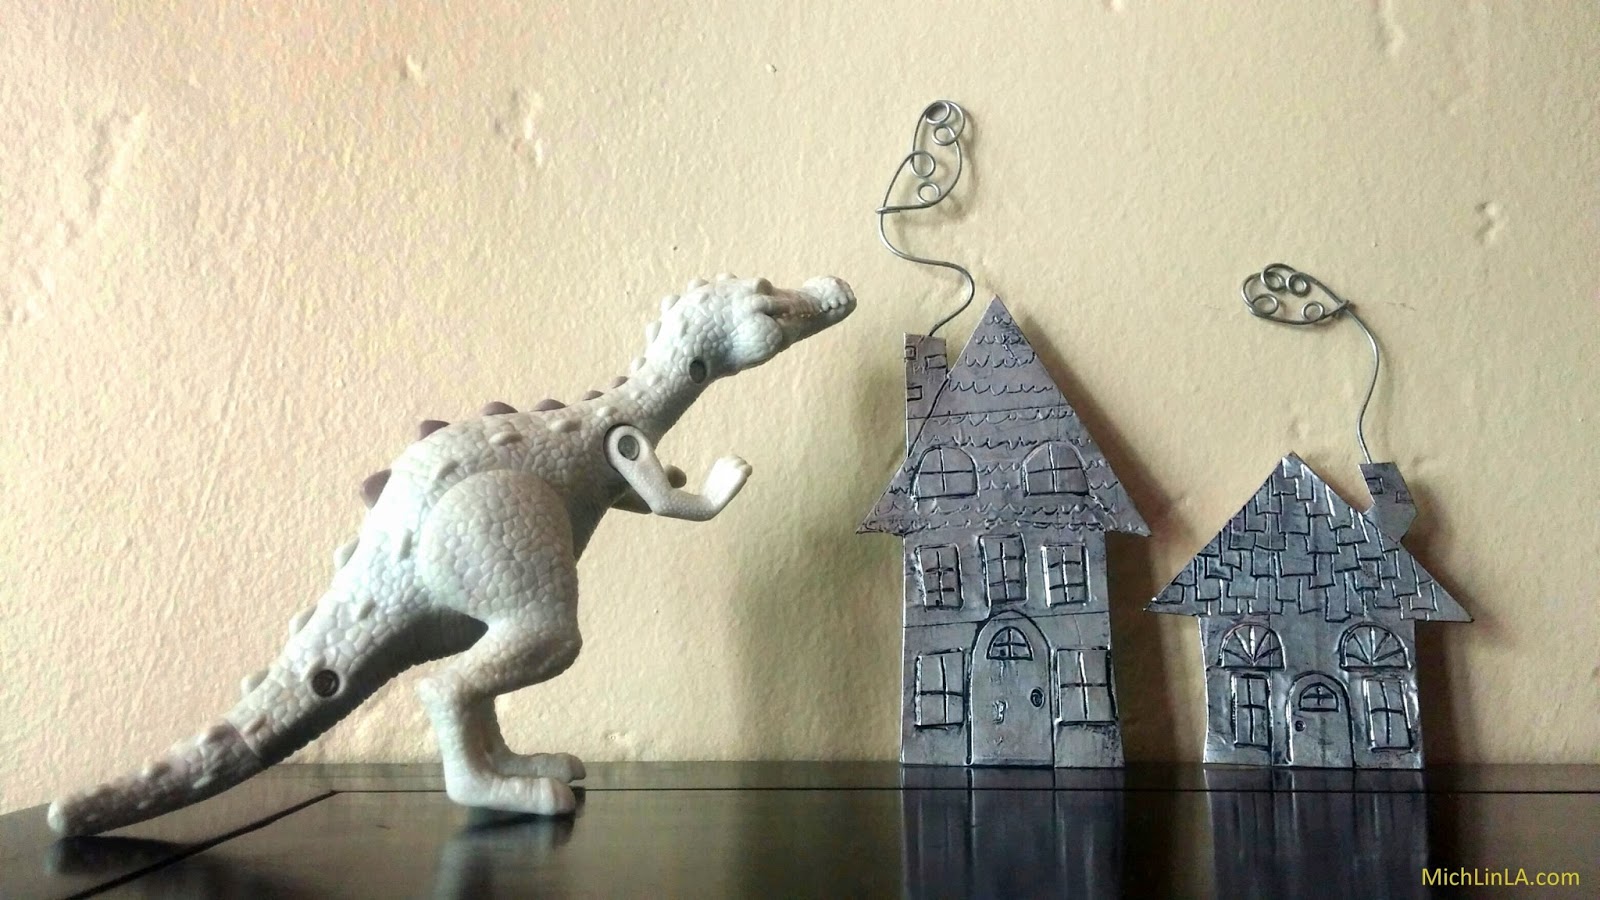
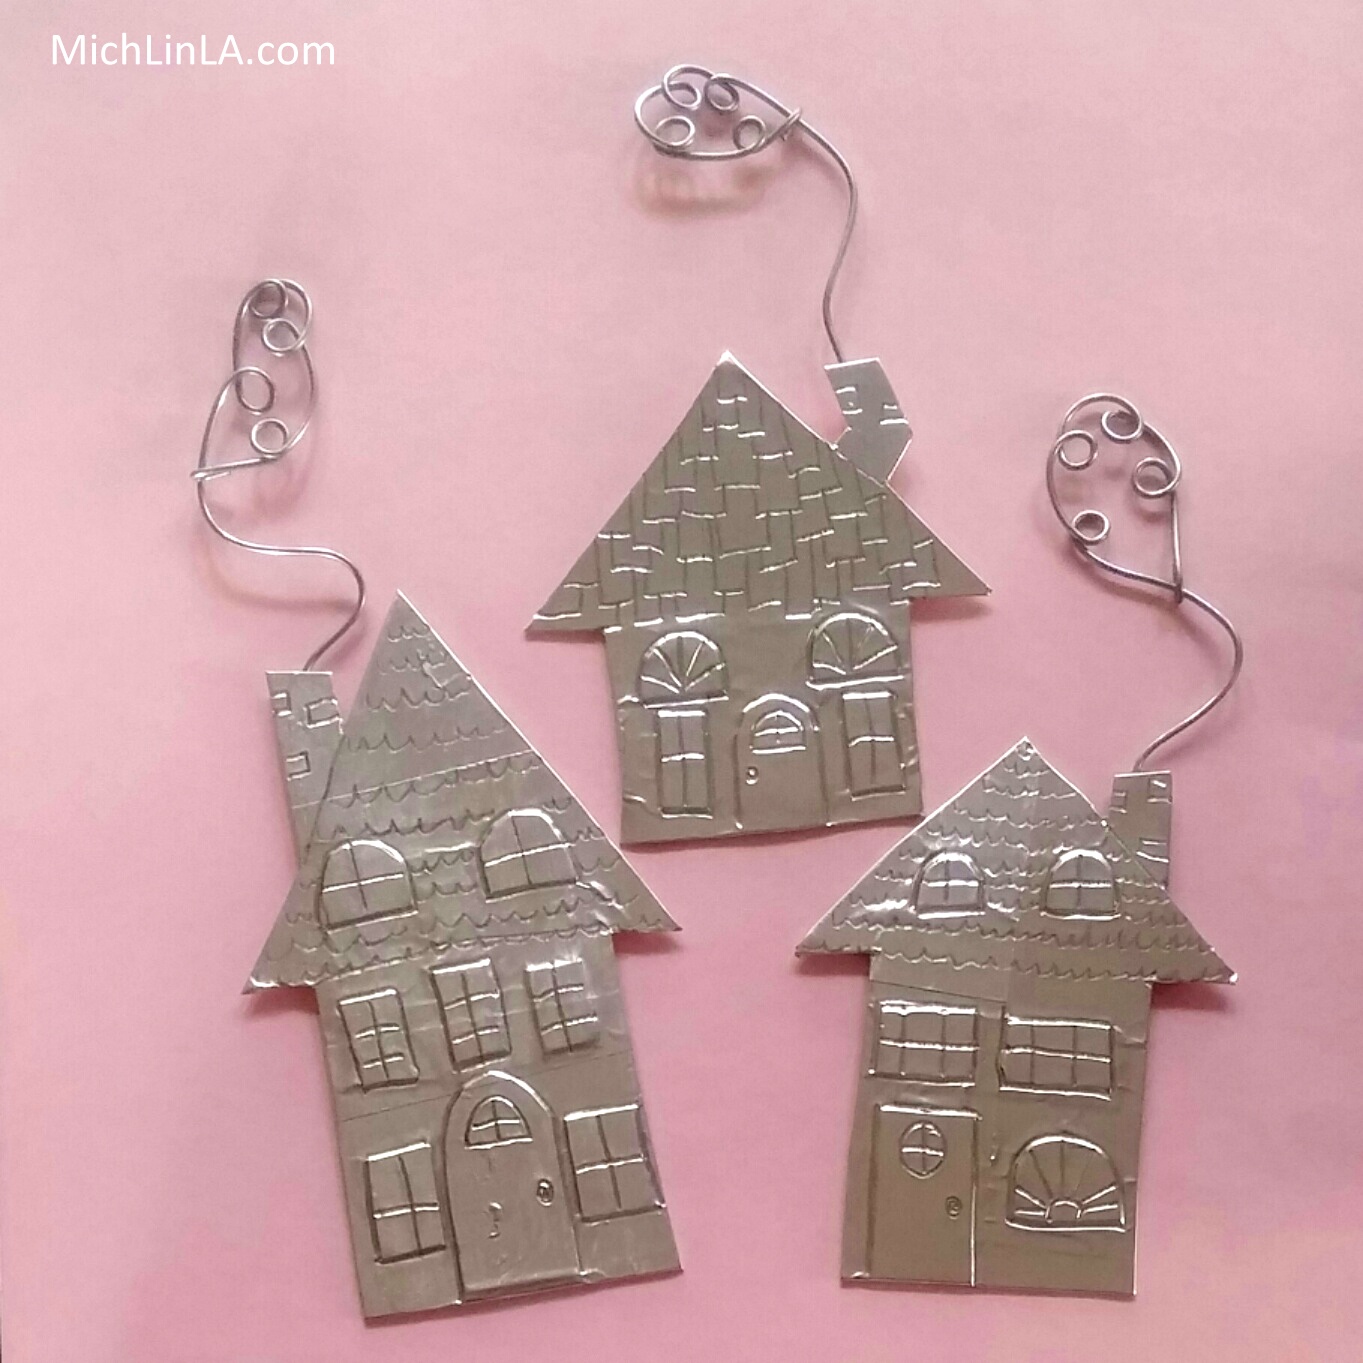
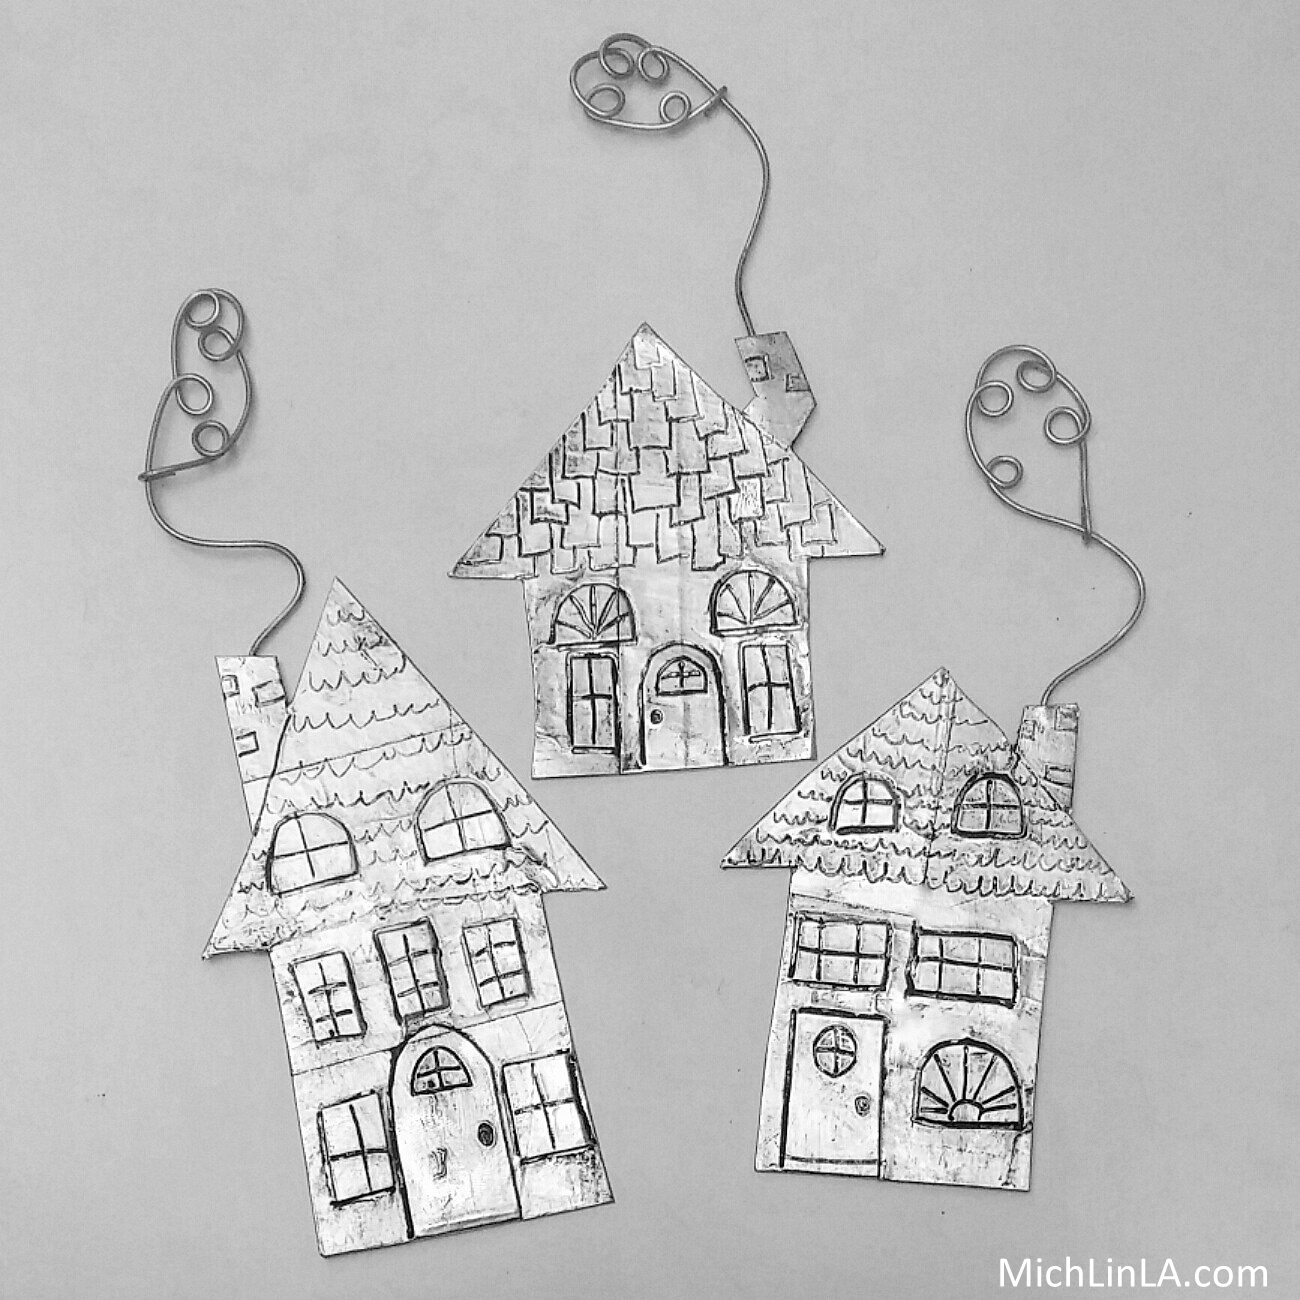
Once, long ago, I made some teeny little silver house ornaments, using recycled cardboard. These new ones are a bit bigger, with a fresh technique and several different uses. And...antiqued!
They can still be used as ornaments, but they are also fun turned into fridge magnets...
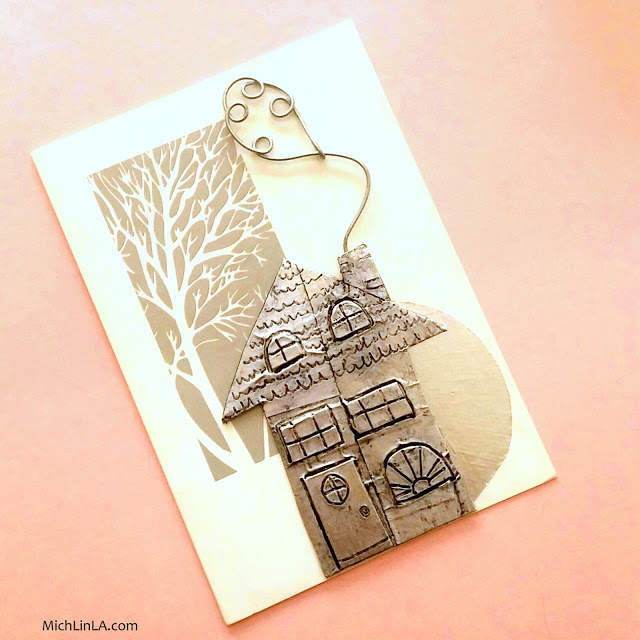
...or greeting cards...
...or standing up anywhere: your mantel, a side table, even the kids' room, hee hee.
They are eco friendly and so fun to make. For tools, all you need are scissors, a pencil and wire cutters. Materials:
-cardboard scraps
-aluminum duct tape
-double-stick tape
-shoe polish
-craft wire
Ready? Here comes the DIY!
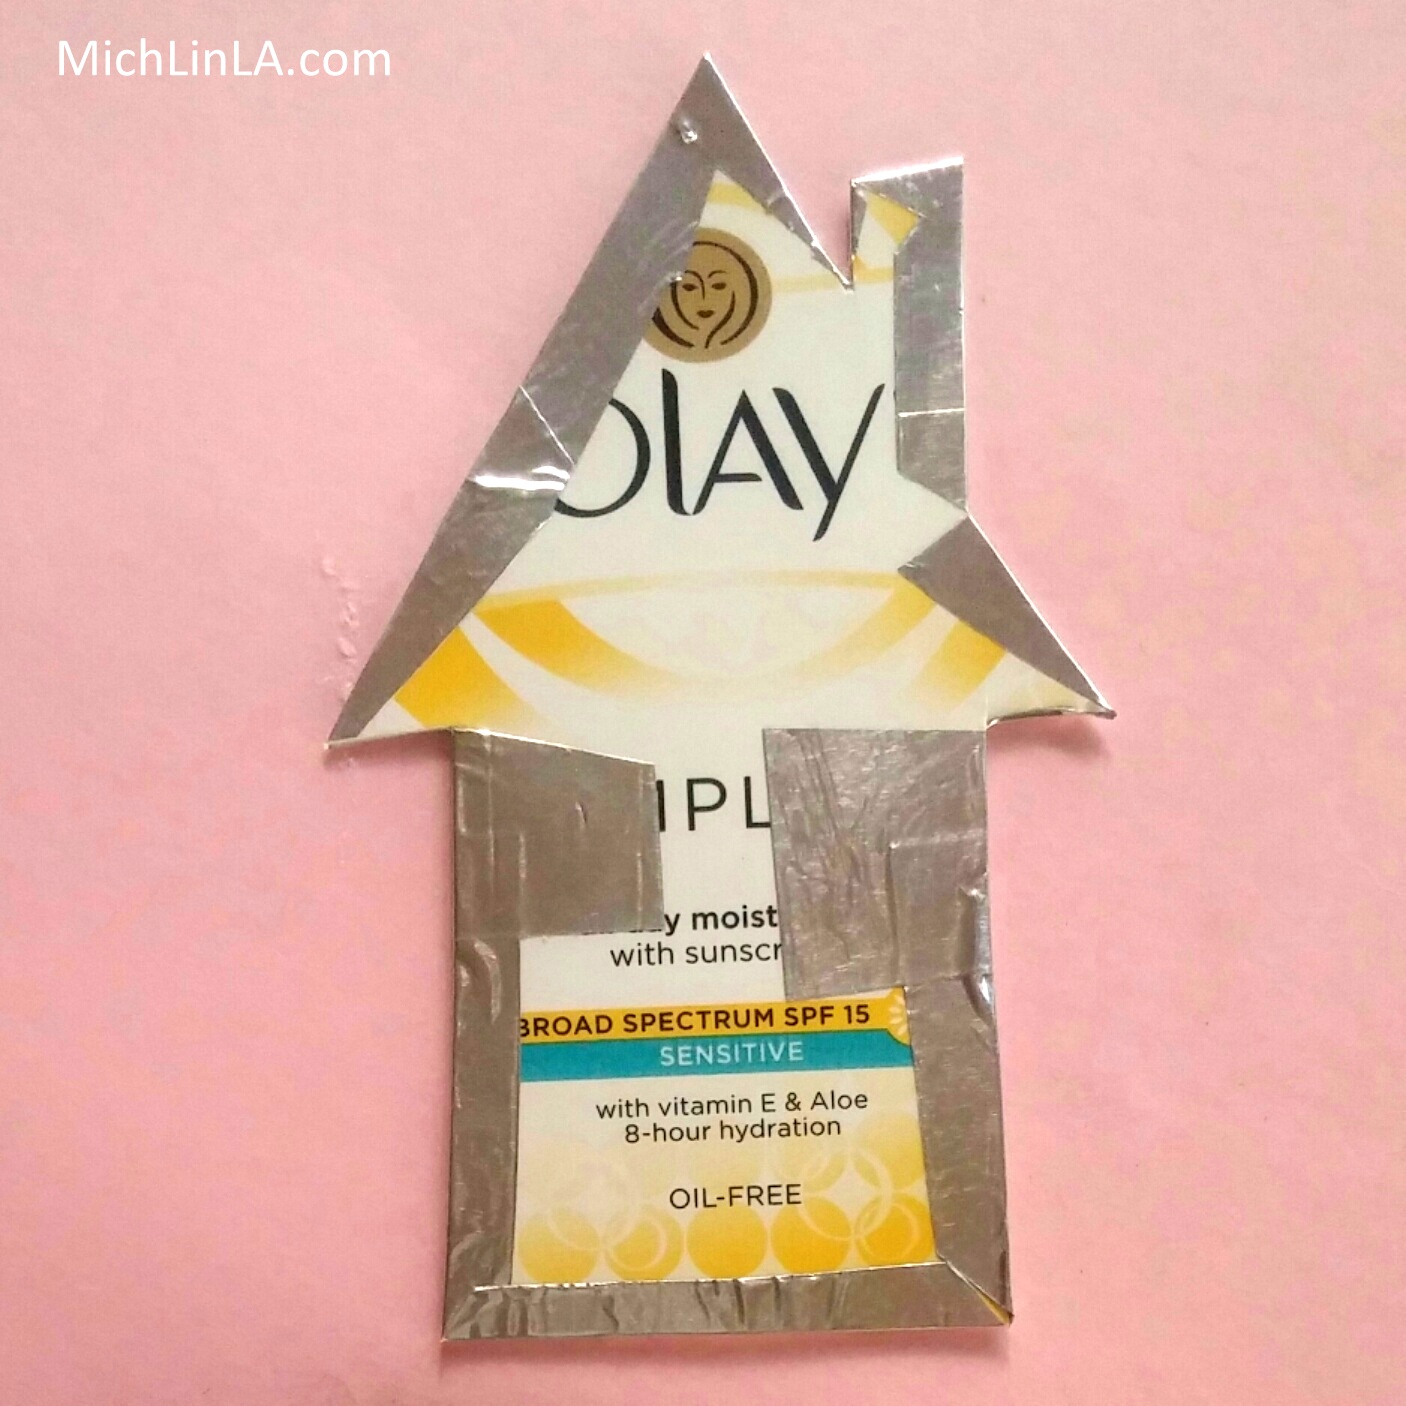
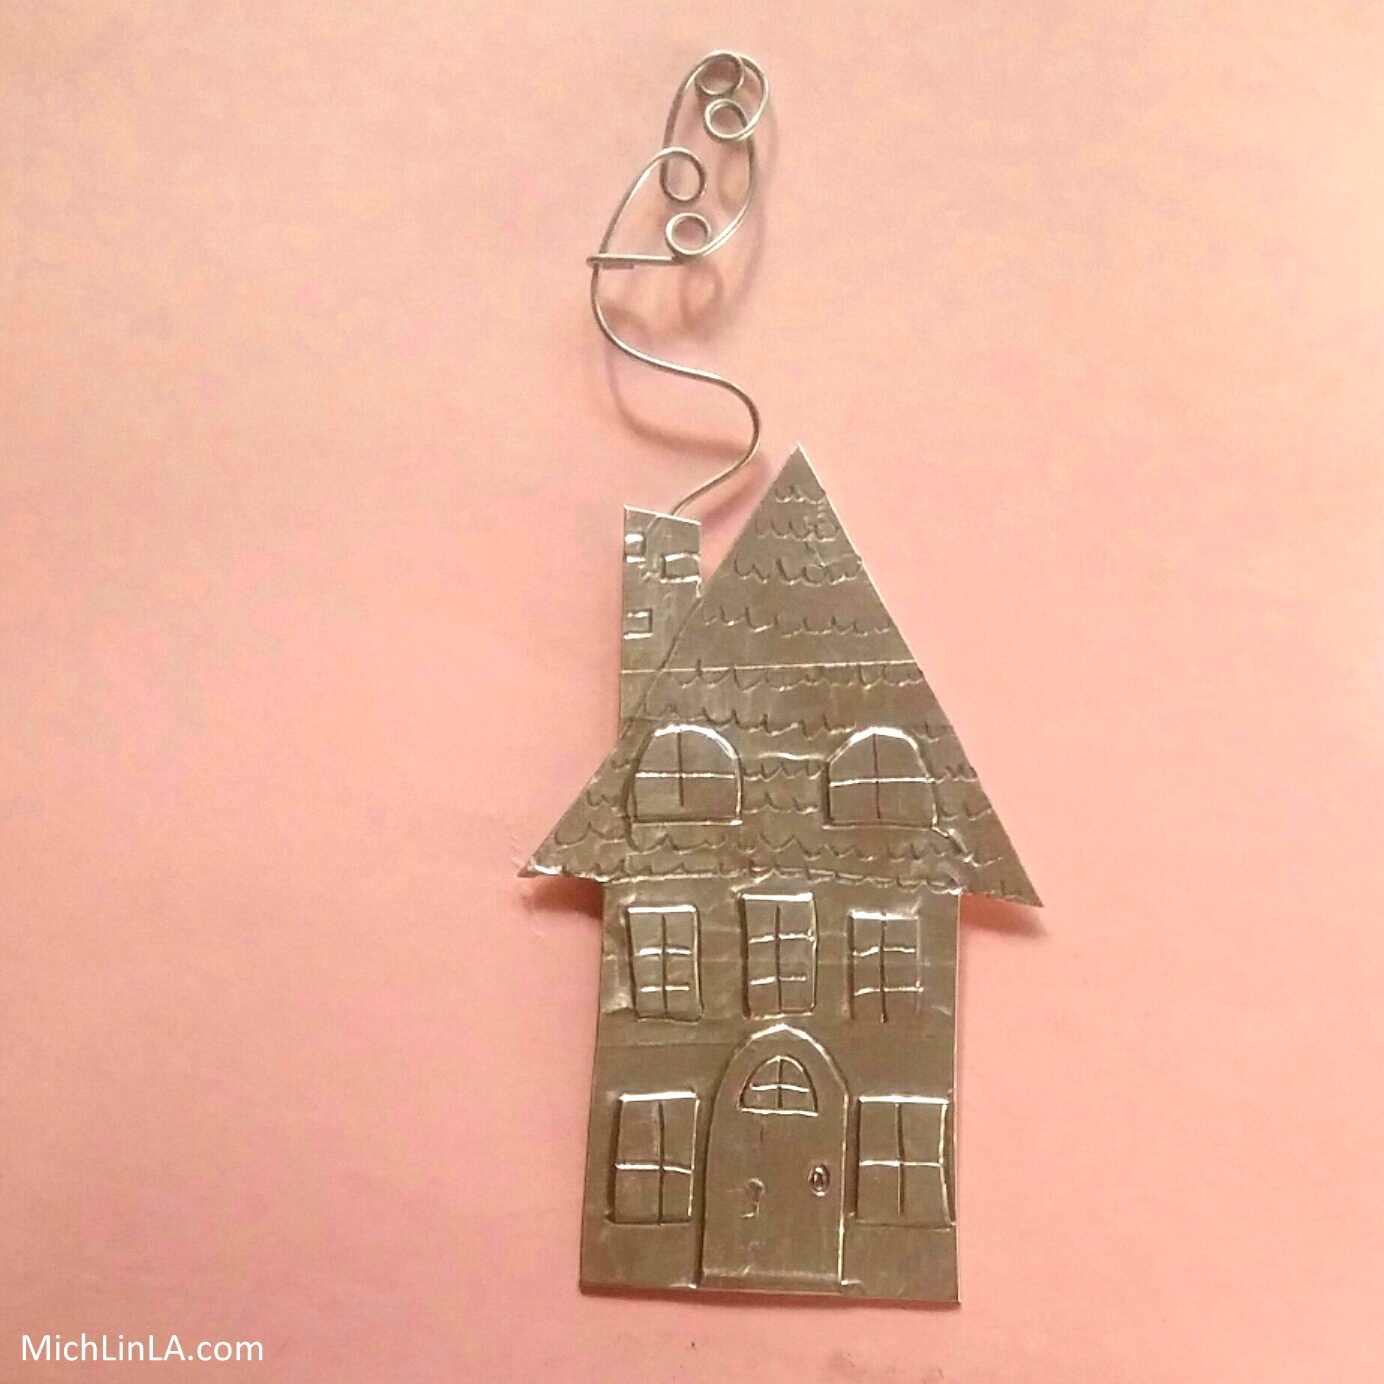
Cut a little house from scrap cardboard.
Roughly cut out a tiny a cardboard door and some windows. They don't need to be straight or the same size! Lay down short strips of double stick tape, then stick down the doors and windows.
Cover the front with duct tape.
Trim away most of the extra tape. Cut slits at the corners so you can fold down the excess in back. It will probably look something like this:
You can cover the exposed cardboard with more tape - but only if you plan on seeing the back.
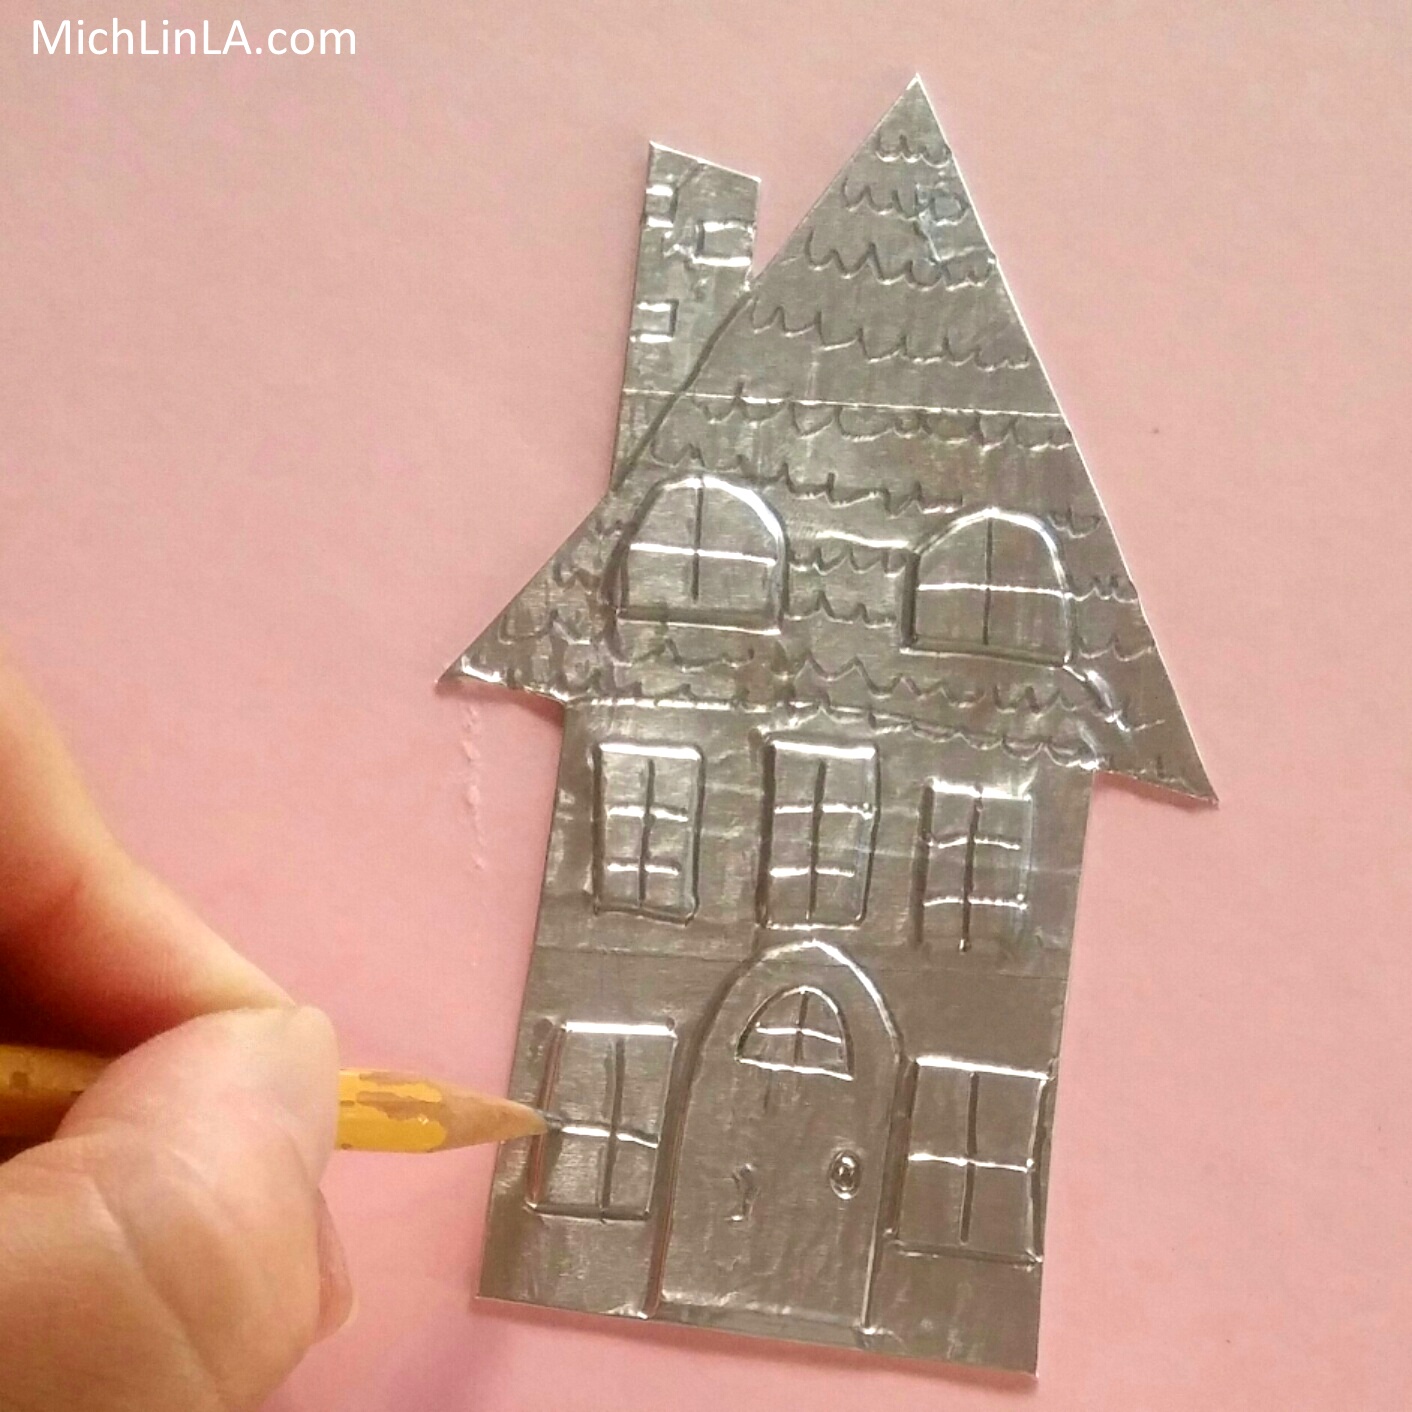
Lightly burnish down the tape around the cardboard cutouts, using something rounded like a pen cap (or just your finger.)
Now to etch in the details. Use a blunt pencil or a ball-point pen - very sophisticated tools, eh? Outline the raised door and windows first. Then add cross-hatched windowpanes, a doorknob and roof tiles. Maybe a few bricks on the chimney.
Remember, you are going for cute and rustic, not precision architectural drafting. Mistakes are okay.
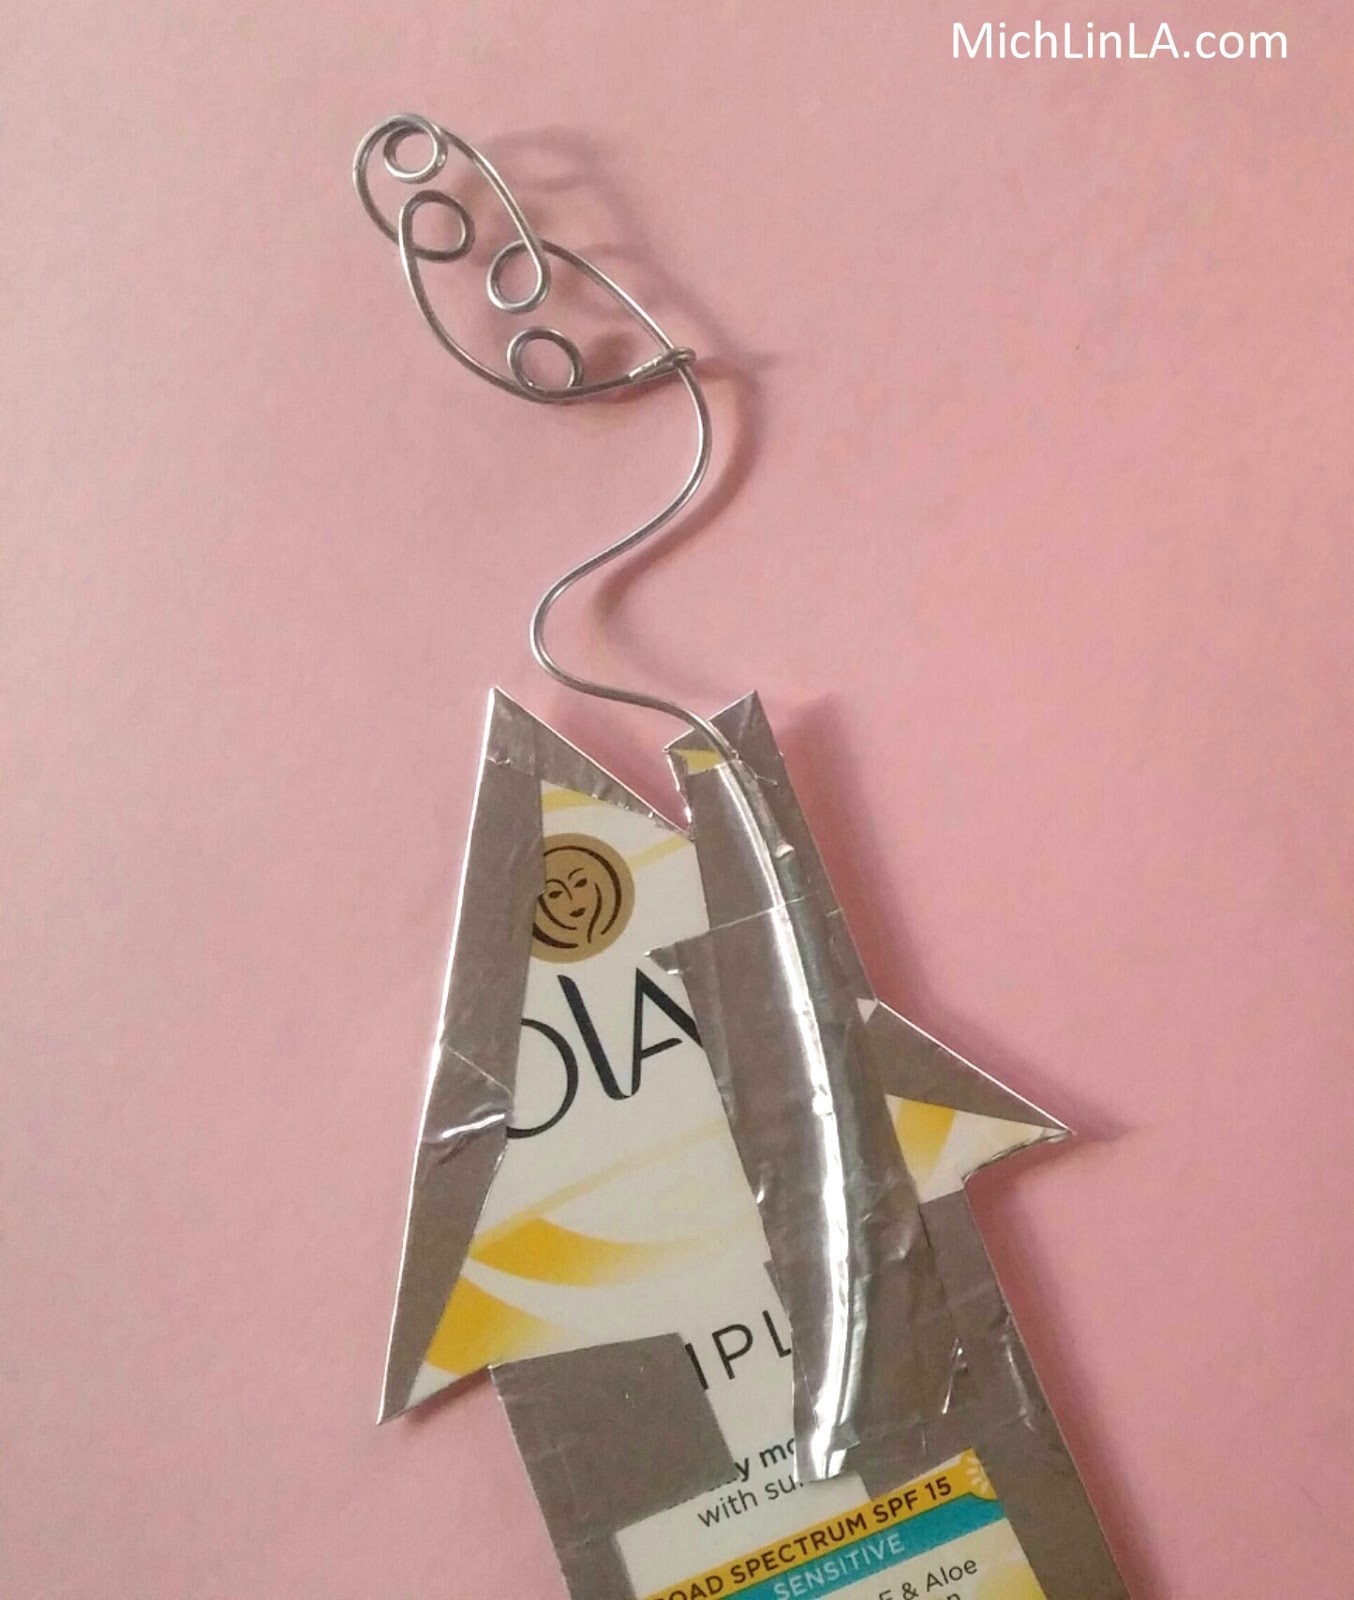
Make a wire smoke plume, to look something like this:
(For the detailed smoke plume tutorial, go here.)
Bend some curves in the wire stem, and tape it to the back of your chimney like so:
And that, my dears, is a super cool shiny silver house! Adorable.
If you like, you can stop right there. I actually love the shiny silver version as-is.
But wait, there's more. The antiquing step is next, and it's so simple. Just rub on some solid shoe polish, then buff it out until you have the amount of antique finish you like. See the difference:
To make an attached stand, cover a scrap of cardboard with silver tape, then attach it to the house with more tape forming a hinge. Here you can see the stand in the mirror:
Here's one more thought I just have to share: a wonderful gift idea. Make a replica of a real house, and present it to the owner! Wouldn't it be awesome for someone moving into a new home? Or a senior who is moving to a smaller place? Yes, it would.
To make a replica house, refer to a photo of the house front, and approximate the main features with your cardboard cut outs. Then proceed as above for a custom mini house!
Well, that's the dealio! Hope you like it.
Thanks for coming by, friends; see you another day.
P.S. If you made one, what would you do with your mini house?
Mich
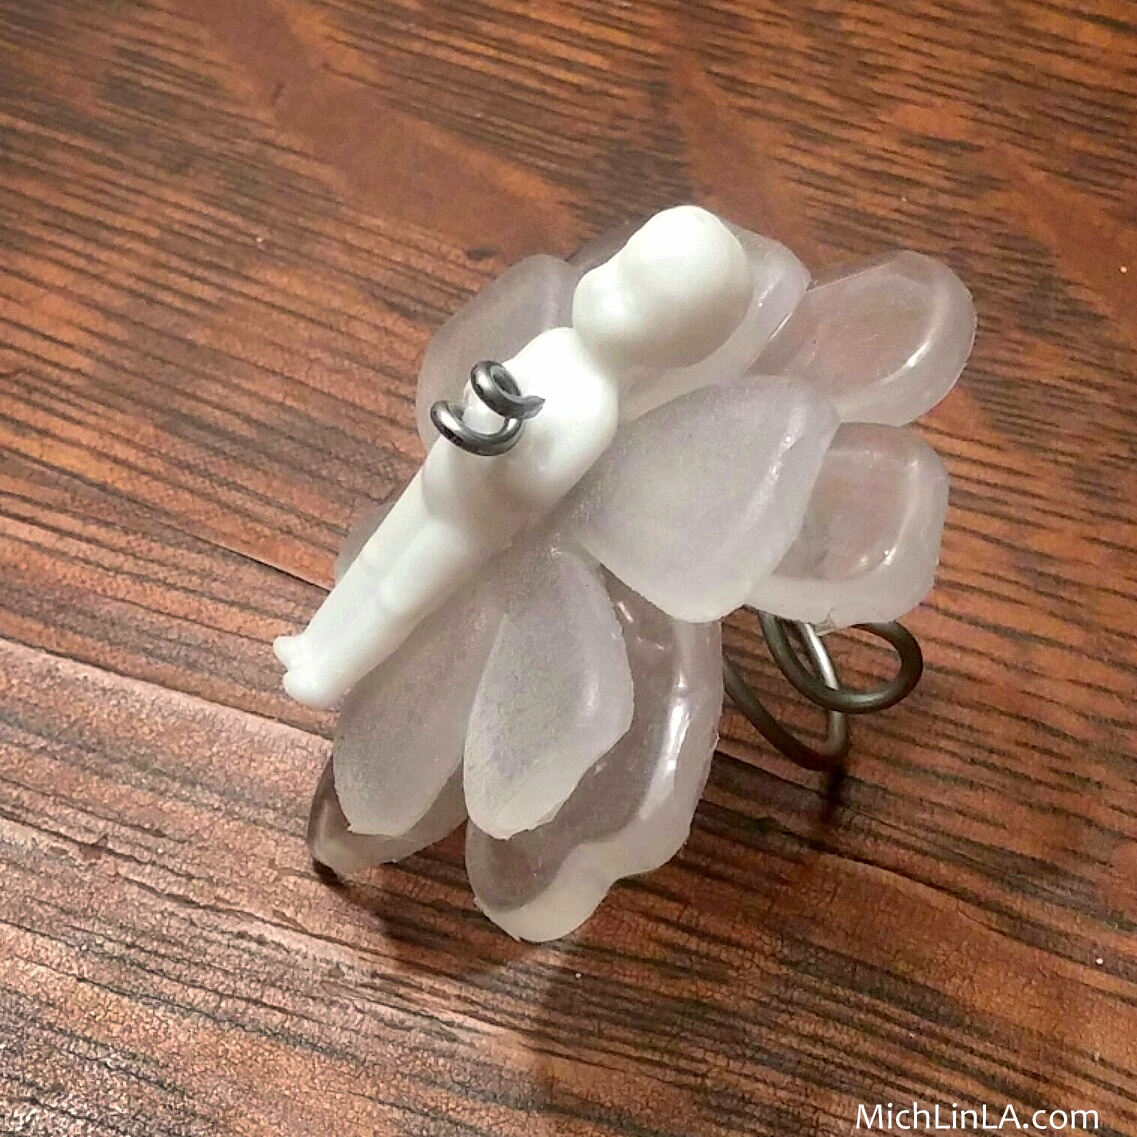
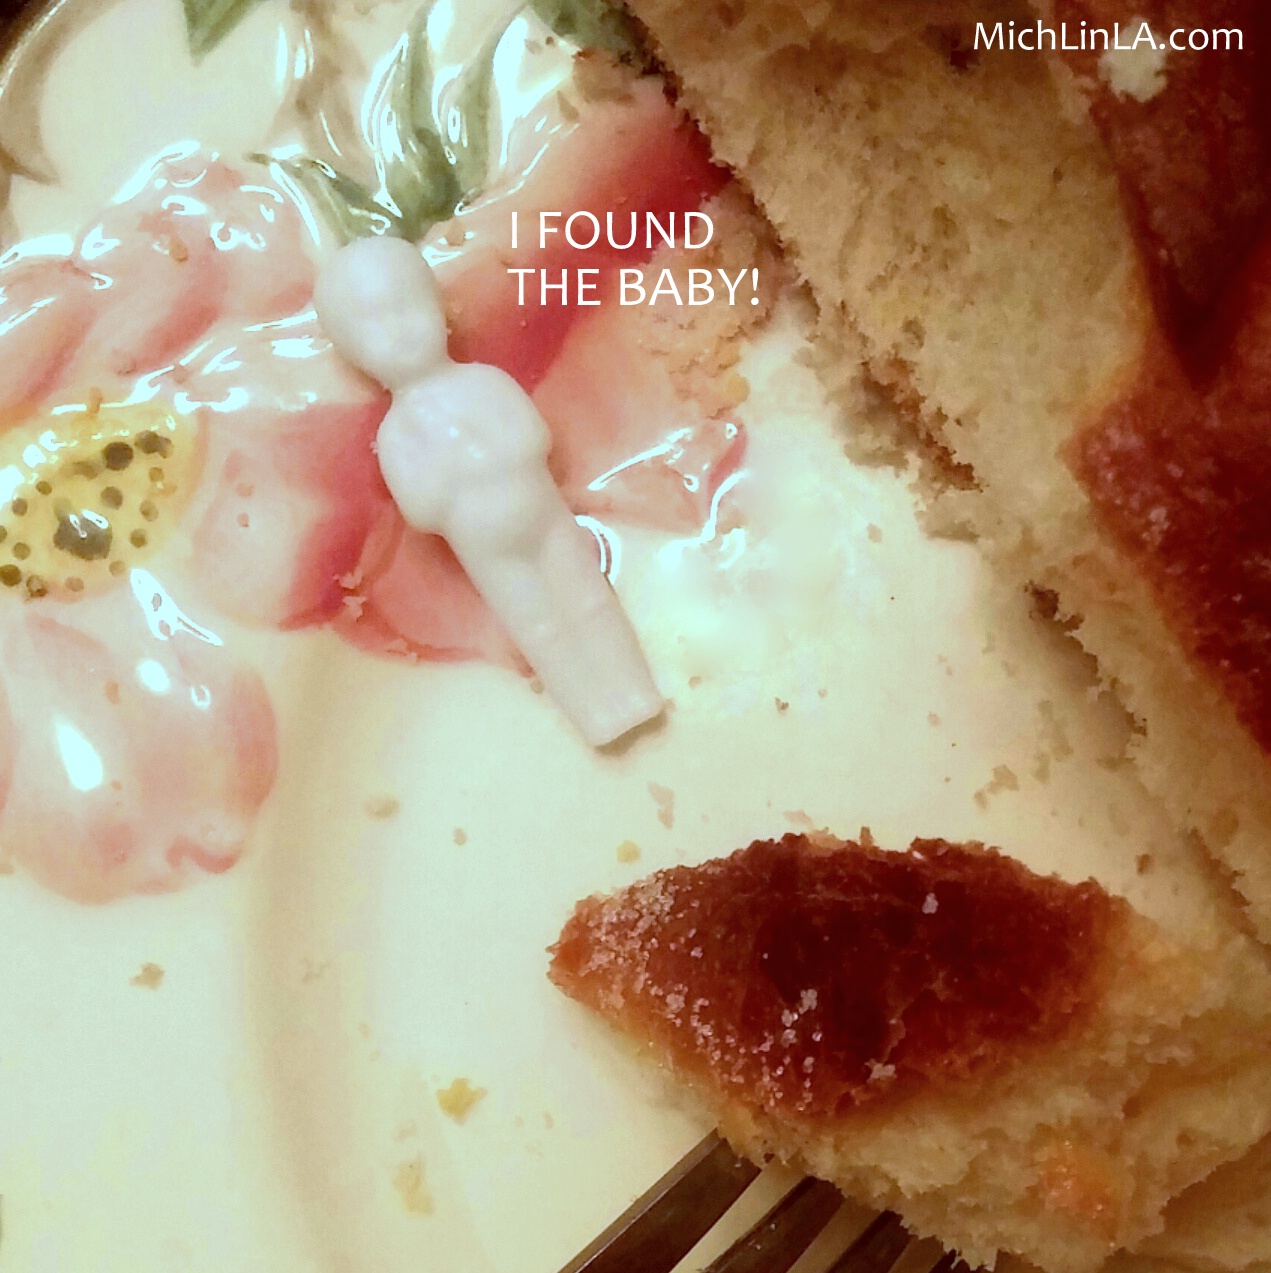
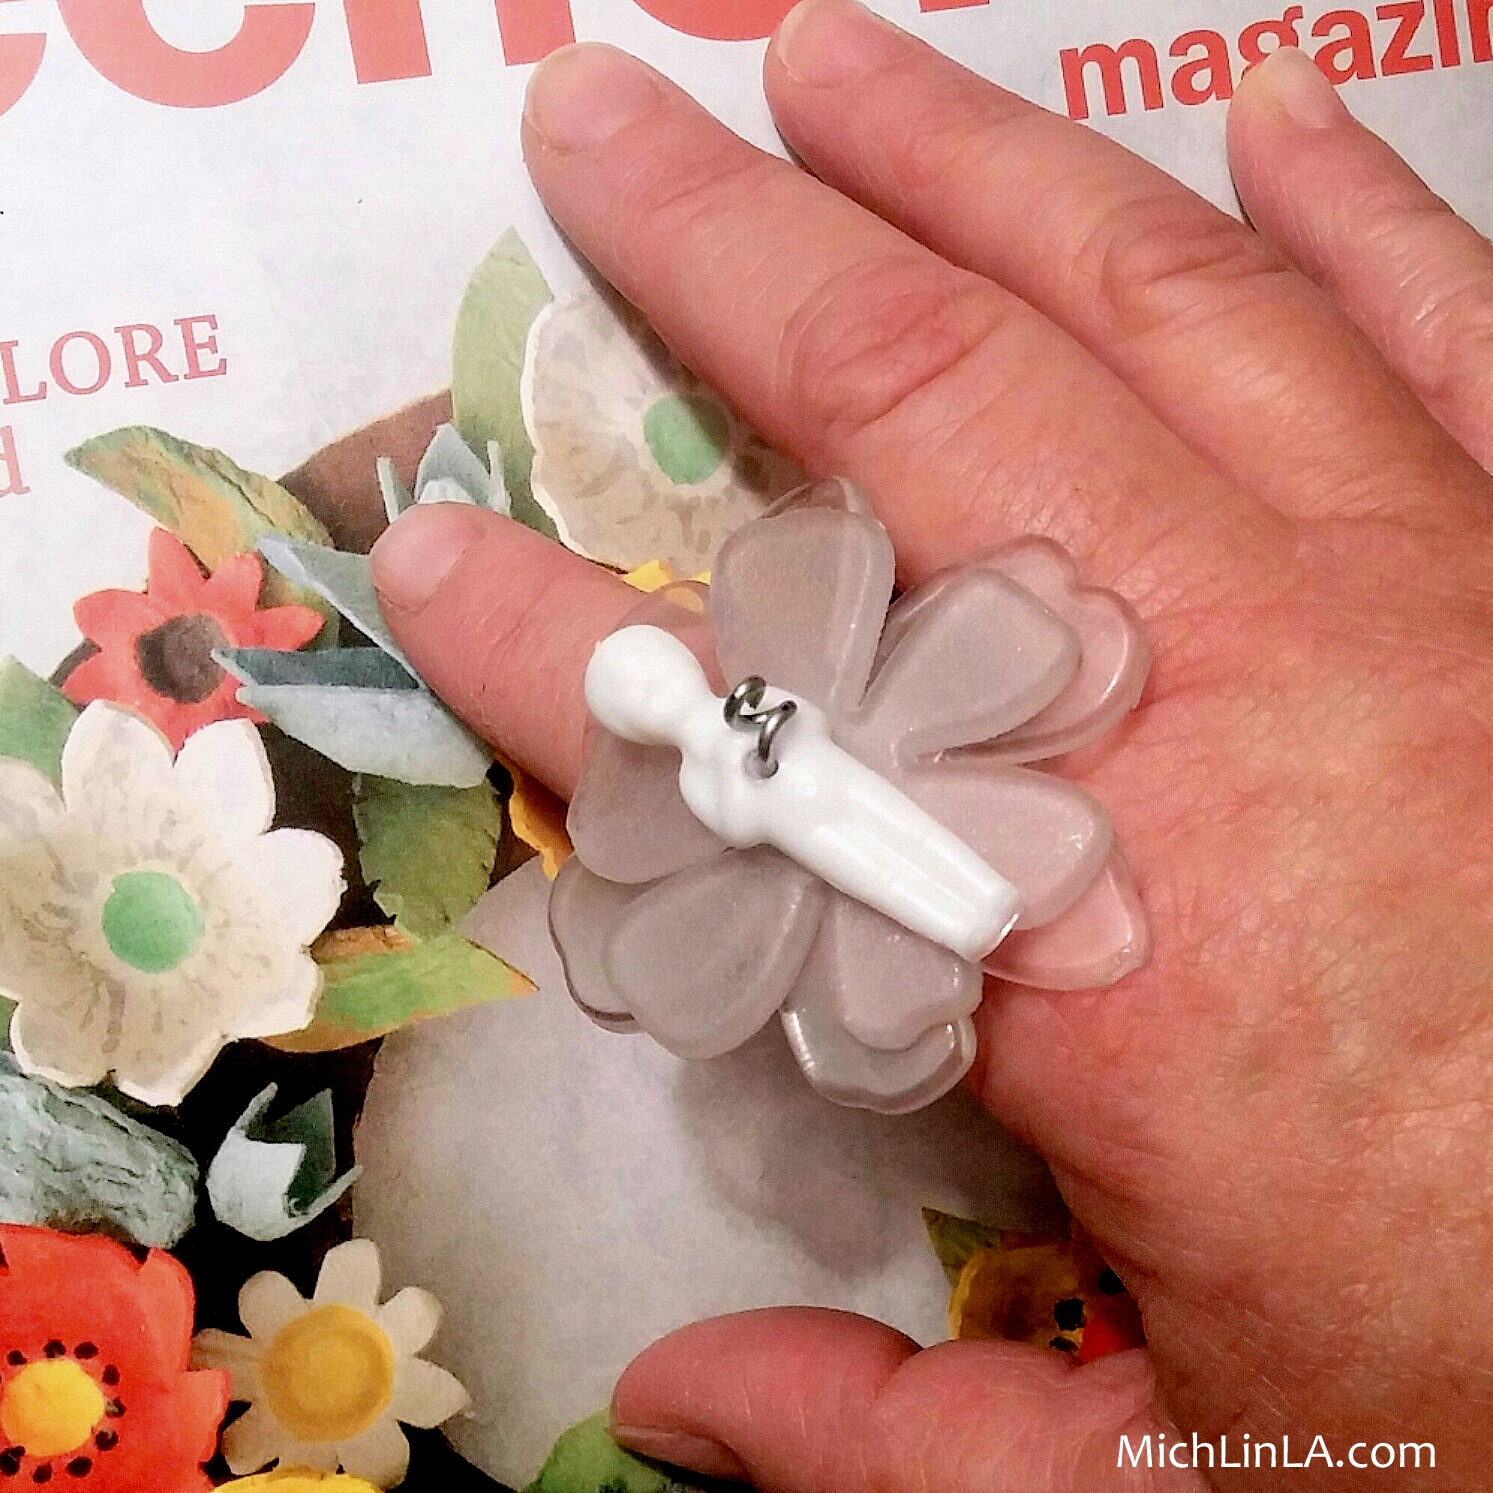
Hello! Last night I had a good time. Want to see what I made? It's a ring...can you guess the story behind it?
Yesterday was January 6th, which is celebrated as King's Day in Los Angeles and many other places. Friends came over with a giant Rosca De Reyes, a ring cake that commemorates the Three Magi.
We had Mexican hot chocolate and ate mucho cake. And lucky, lucky me!
So of course I made jewelry.
P.S. Did anyone recognize the pale flowers? They are from a rubber sink mat.
Later, creators!