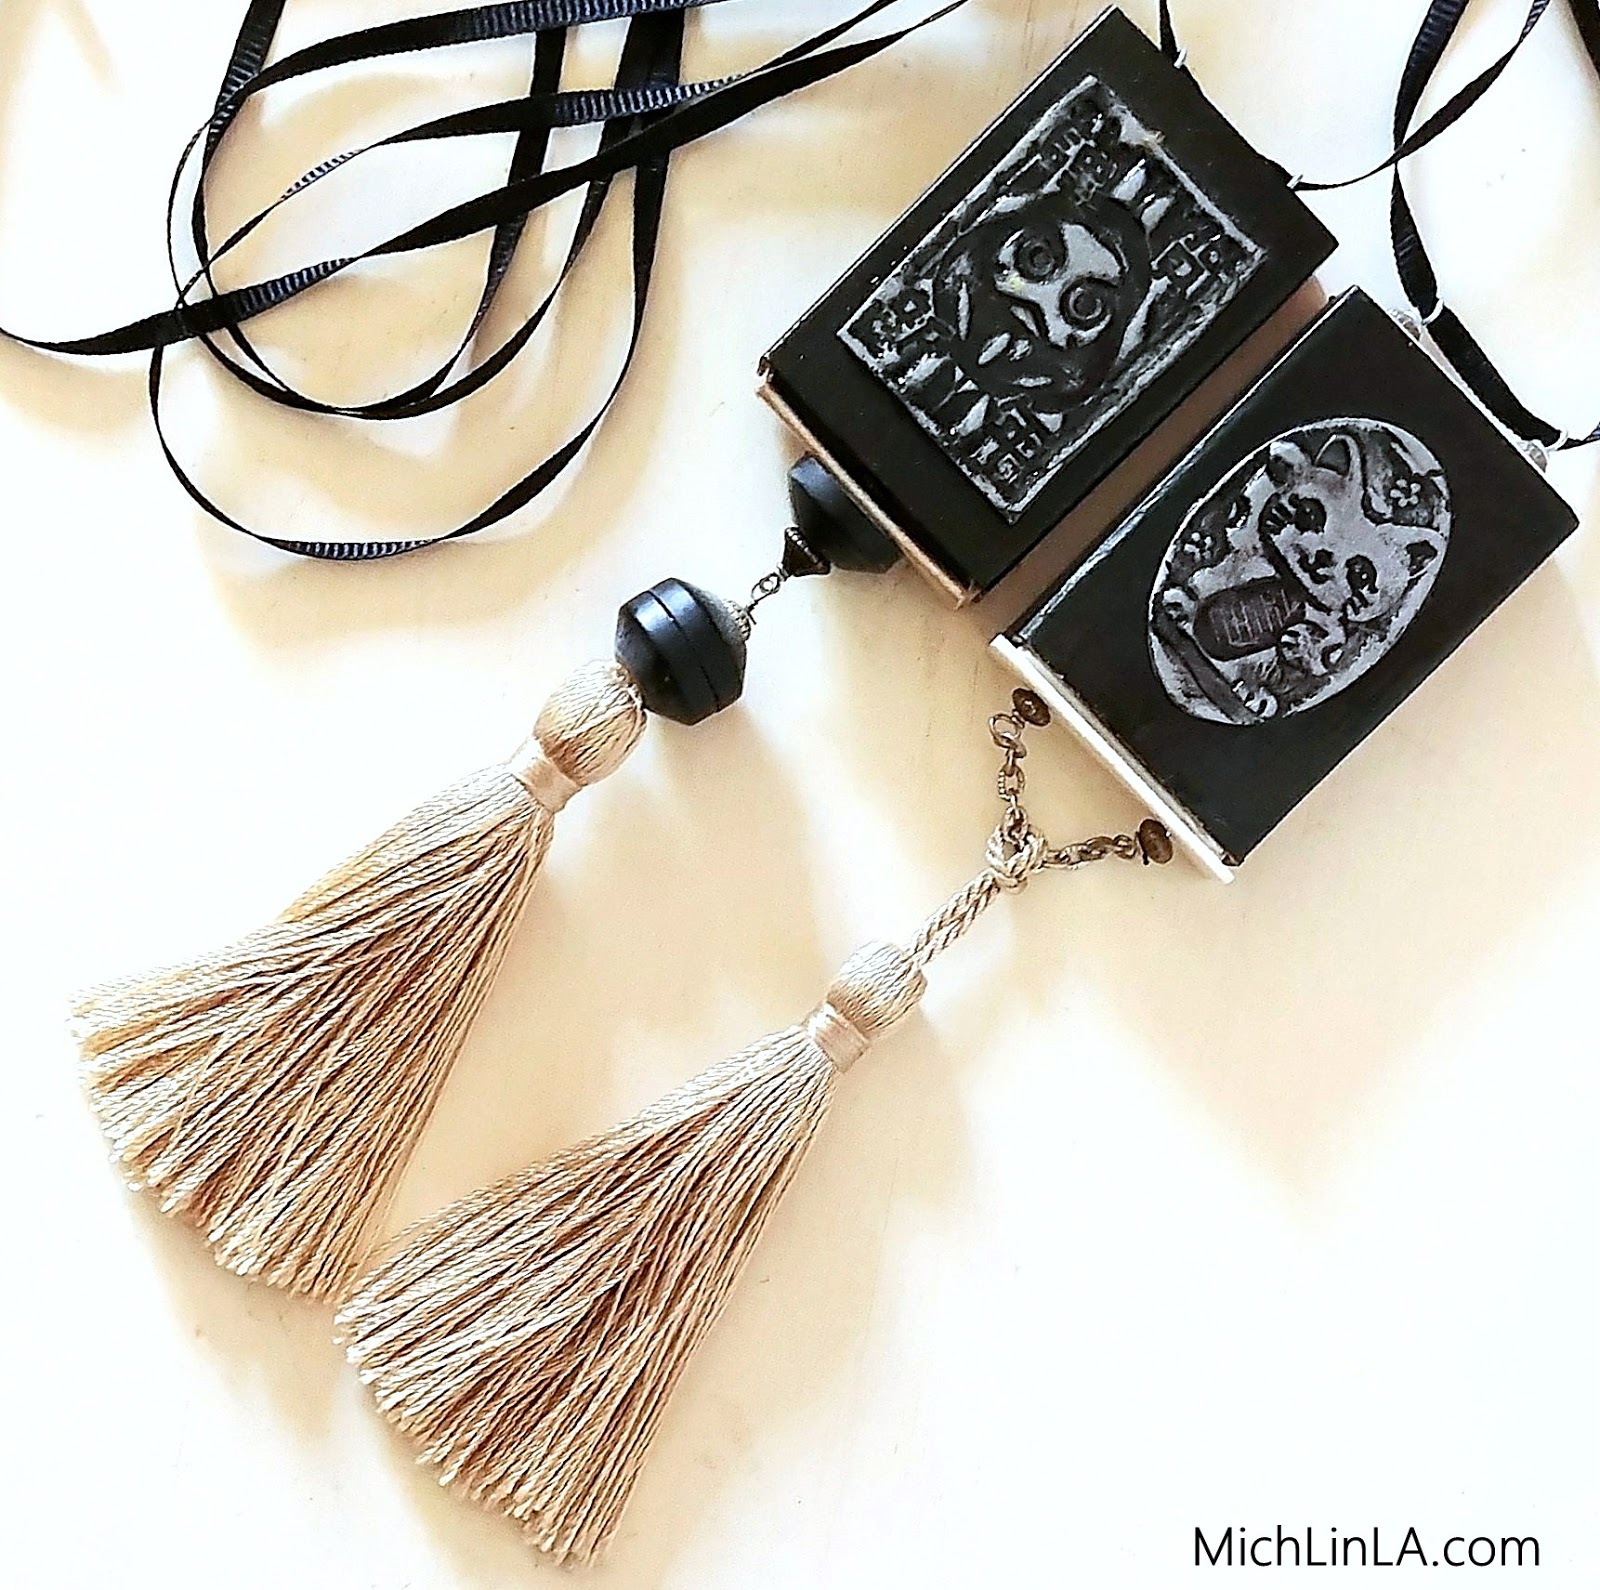
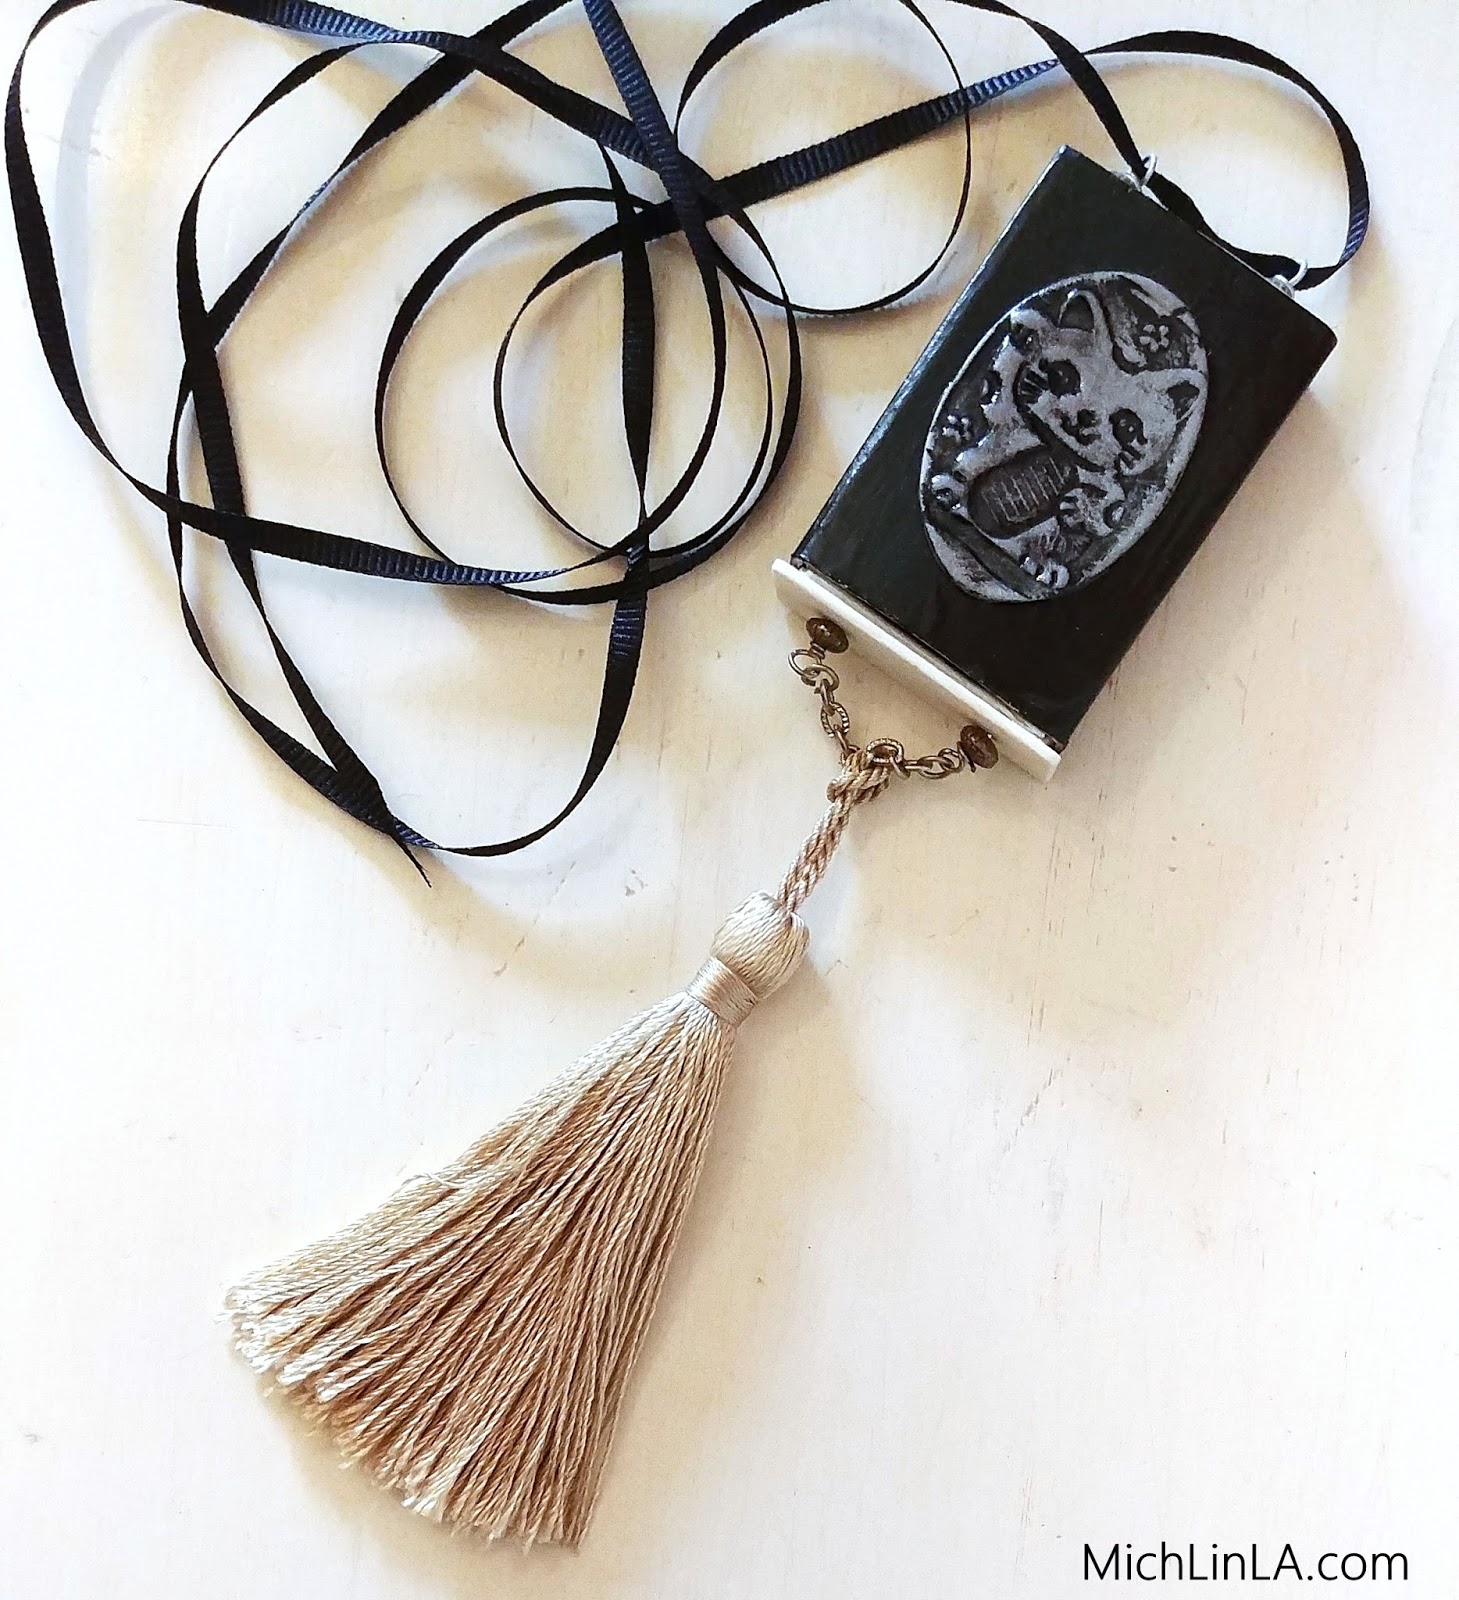
Greetings, friends! I propose that it's time to start thinking about handmade gifts. This recycled necklace gift can charm nearly anyone: a simple matchbox turned into a secret-compartment pendant.
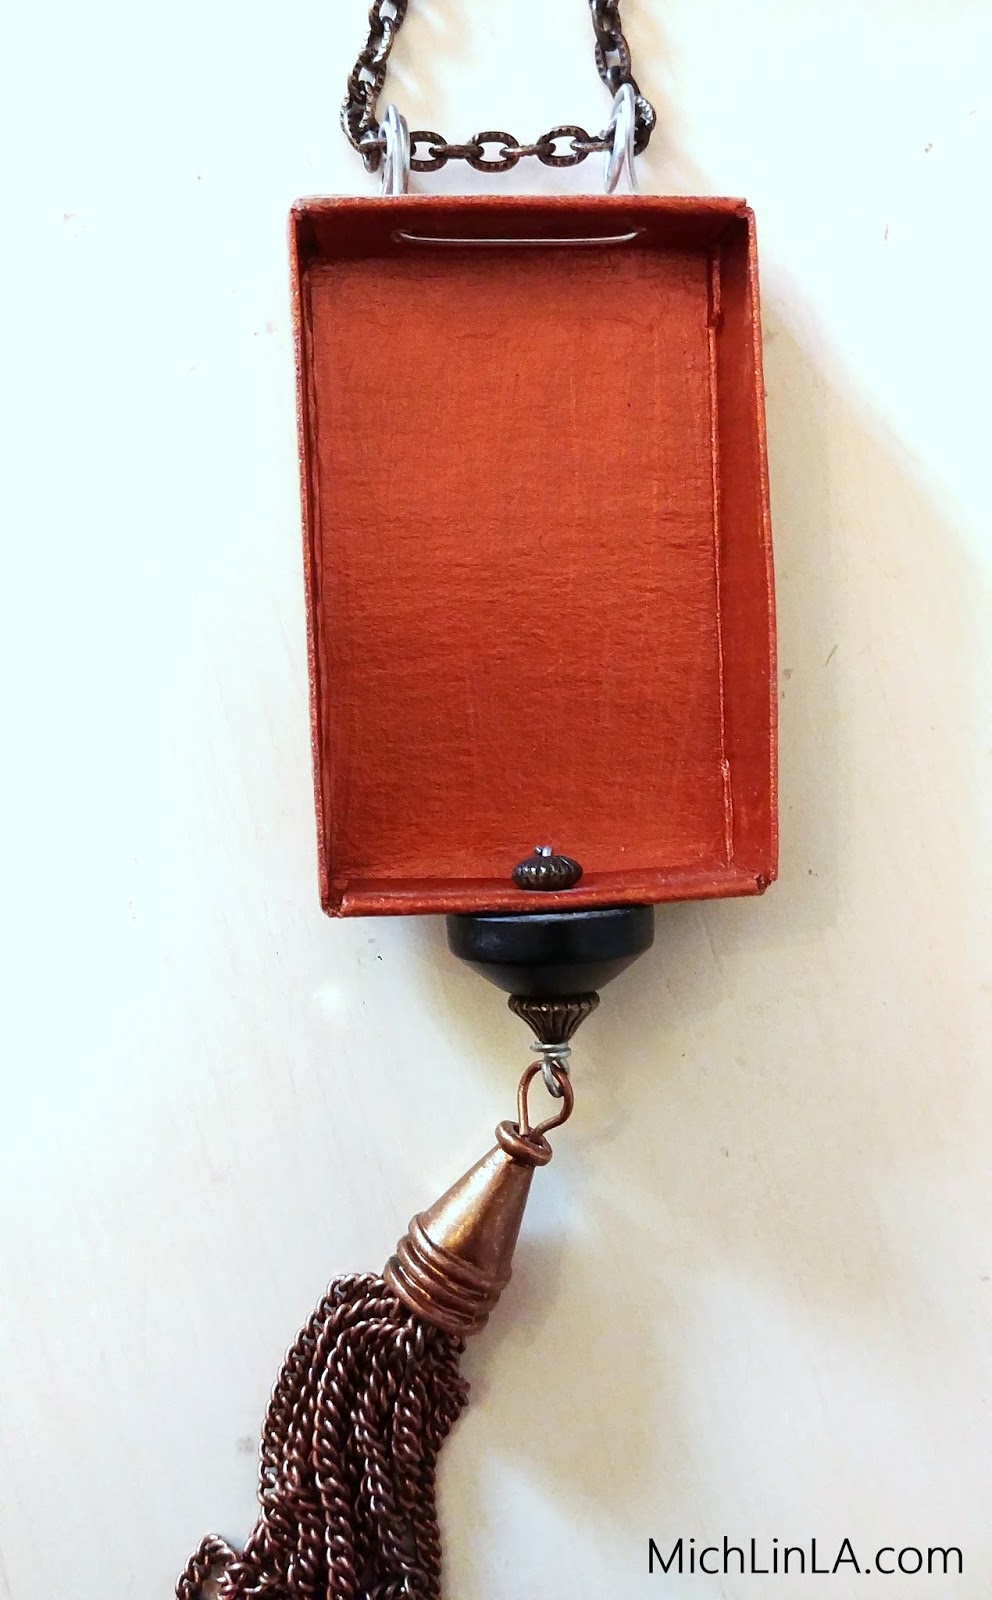
The awesomeness is threefold. 1.) It's simple and eco friendly. 2.) Customize the art to your loved one's style and interest. 3.) Because there's a tiny secret compartment, you can include an additional mini-gift inside! Here's the secret drawer:
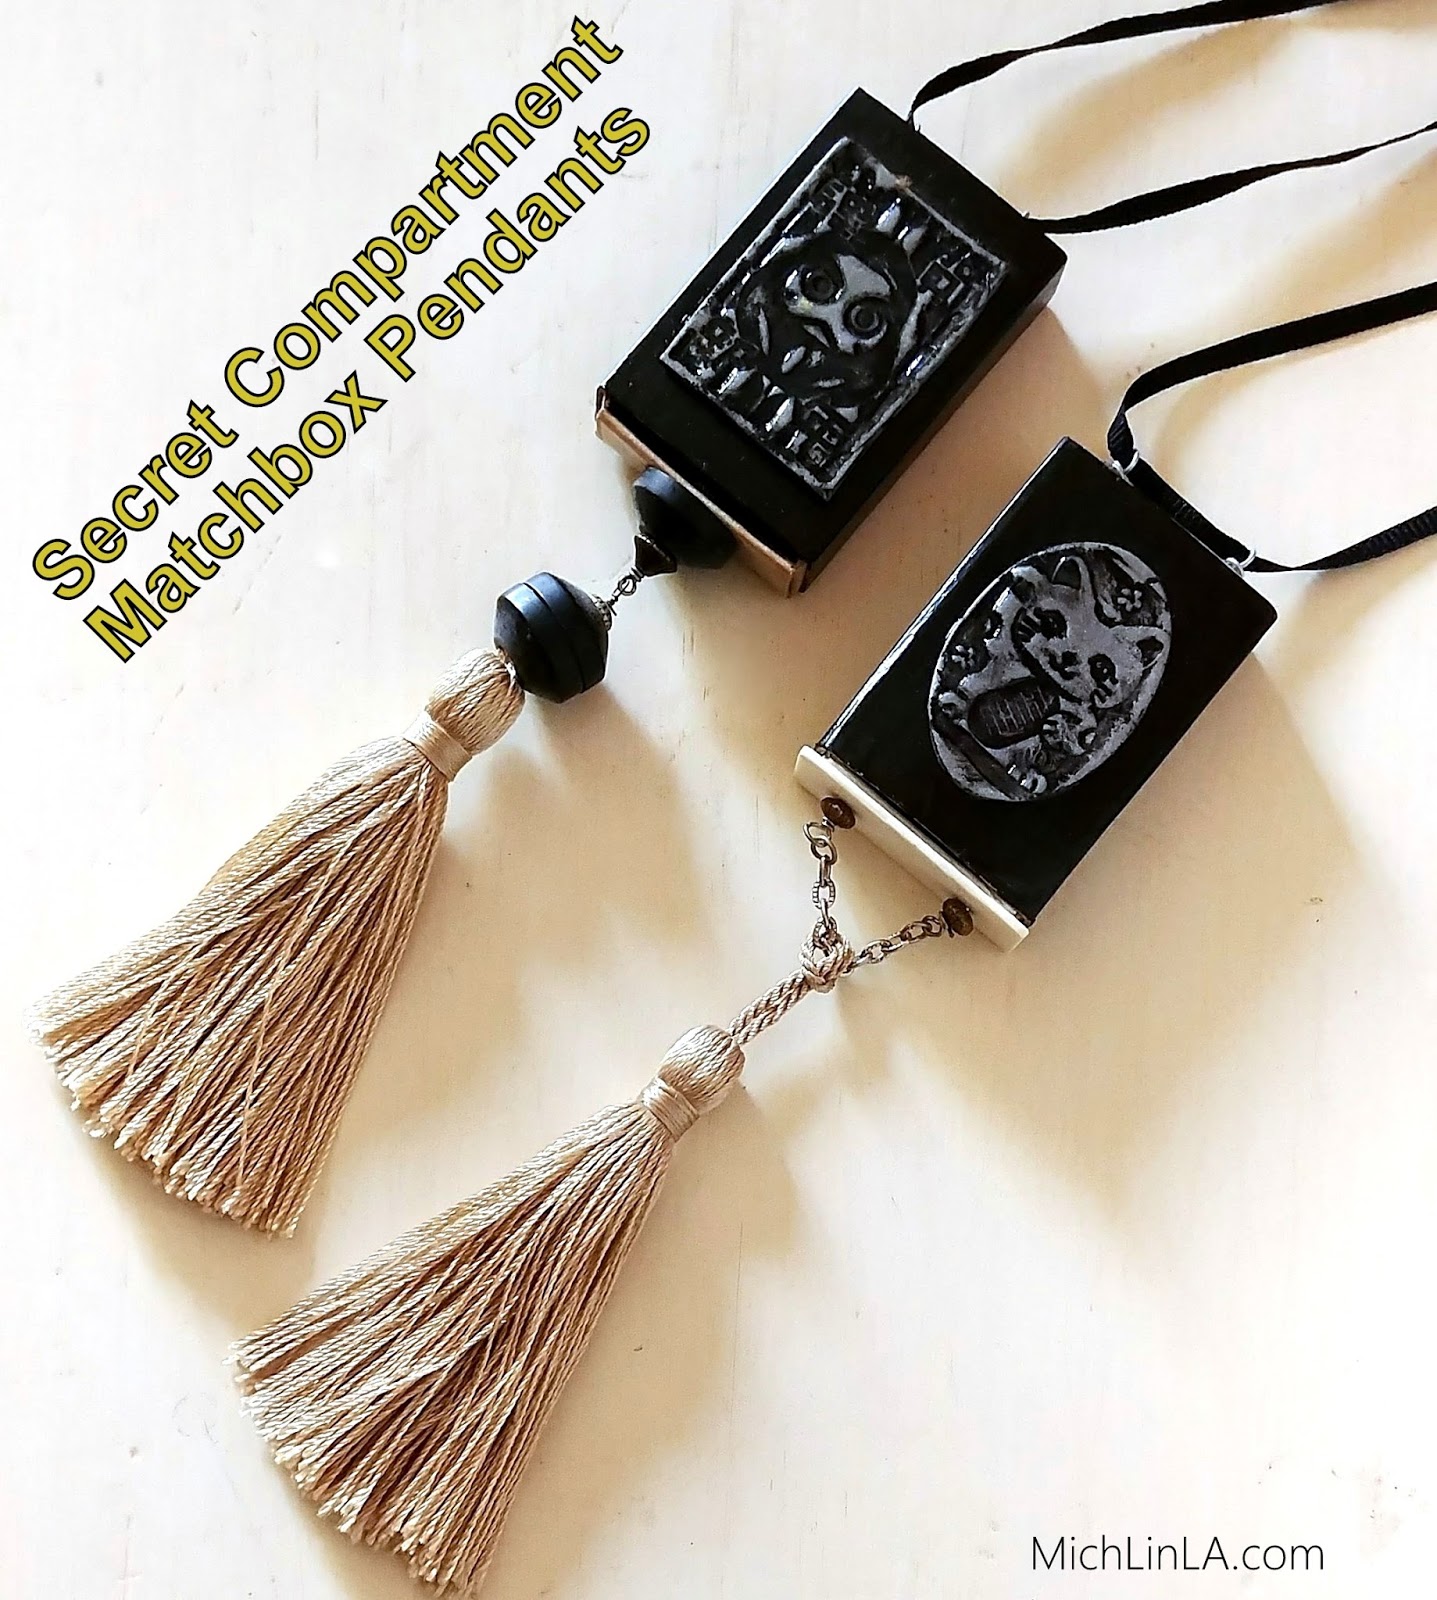
Aren't they fun? Want to make one? Here's how.
Tools:
jewelry pliers
wire cutters
something pointy for poking holes
Materials:
a matchbox
clear packing tape
acrylic craft paint
craft wire
1 or 2 headpins
a tassel
glue or mod podge
1 or 2 accent beads OR a strip of recycled plastic
spacer beads
optional: a bit of chain
The DIY
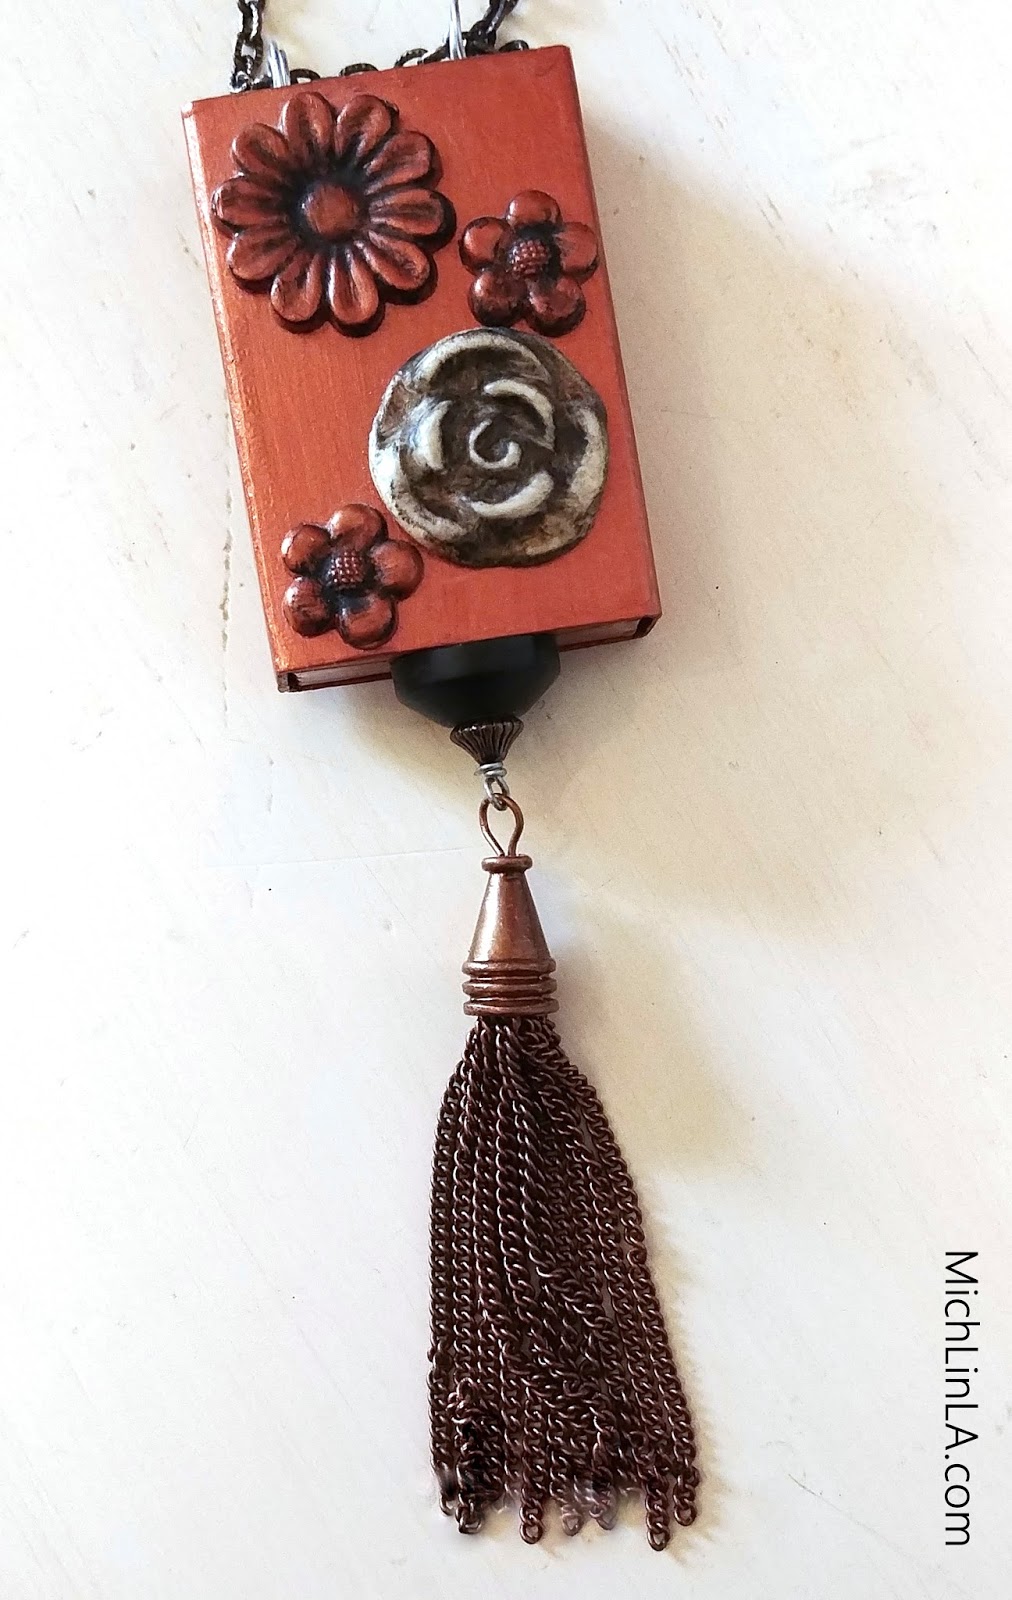
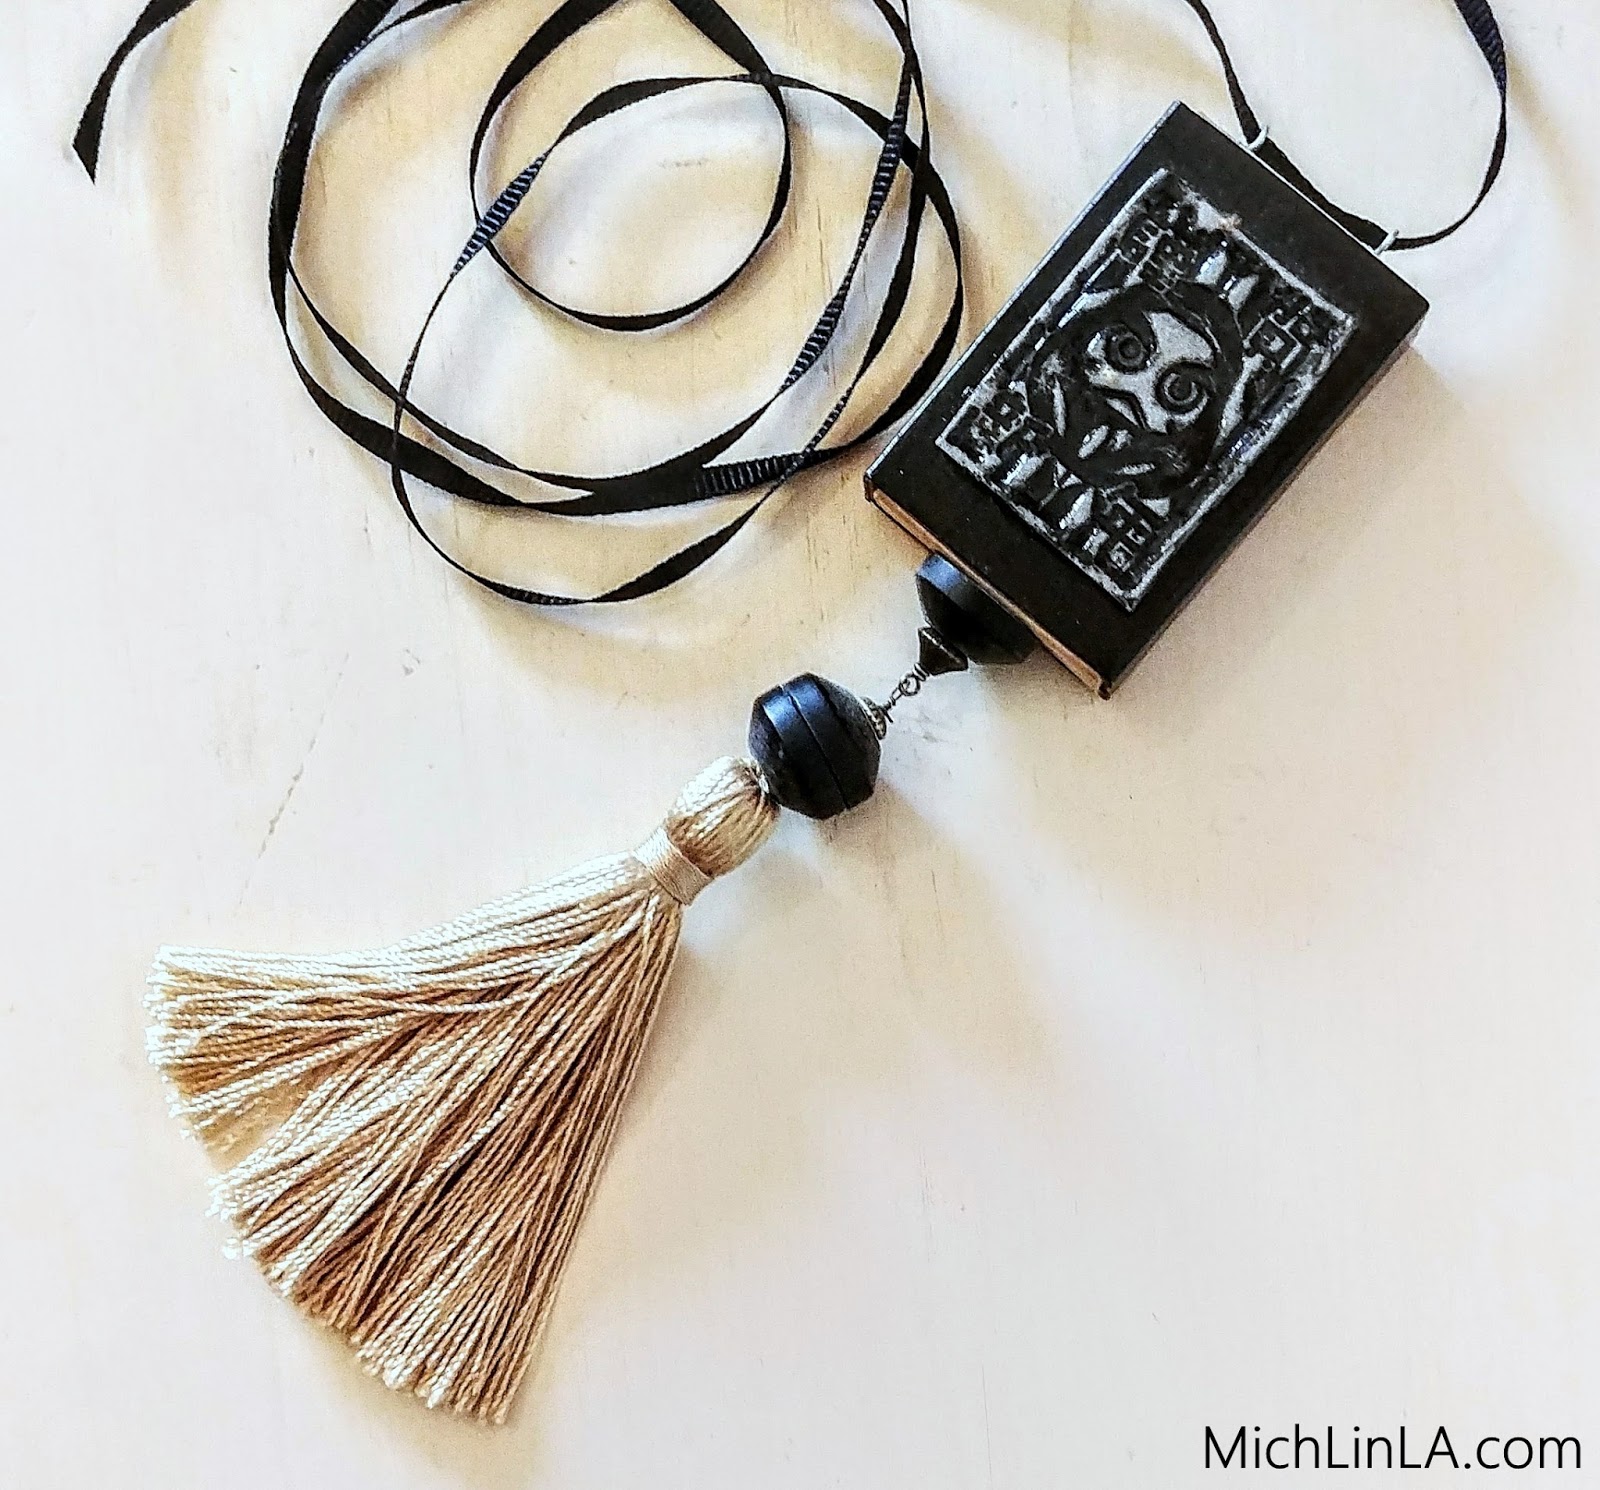
1. Embellish. Paint the matchbox's outer sleeve. If you like, paint the inner drawer as well. Then embellish! Adhere something delightful to the top of the matchbox - anything you like. (A few ideas at the end of the post.)
2. Reinforce. Reinforce the matchbox drawer with clear packing tape: cut 2 strips and crisscross them in the back, wrapping the tape over the edges and into the inside of the drawer. Reinforce the inside of the matchbox sleeve with a bit more hidden tape (that you tuck inside and smooth down).
3. Turn it into a pendant. First, poke two holes in the top of the inner drawer. Thread craft wire through the two holes and make two loops at the top. It's easy! Like this:
To finish the bottom, there are two versions.
ONE HOLE VERSION: At the bottom of the inner drawer, poke one hole in the center. Add a spacer bead to a headpin, thread it through the hole, add an accent bead and make a loop. Add a tassel. It will look like this:
TWO HOLE VERSION: At the bottom of the drawer, poke two holes. Using the same headpin method as above, add either two accents beads or, as in the Lucky Cat version seen below, a rectangle of plastic with two matching holes. Make two loops underneath. Add a bit of chain, with a tassel suspended in the center. Like this:
Functional Note: the accent beads or plastic strip should be just a bit wider than the matchbox. This prevents the sleeve from sliding off. (My accent beads in these examples were repurposed rubber washers, because I liked how they looked. But any bead is just fine.)
Ideas for how to embellish the pendant:
Modpodge some original or found art.
Paint it, glitter it, doodle it.
Glue stuff on, like charms or buttons.
Add a polymer clay panel. (I made my Japanese-themed panels from polymer clay, impressed with rubber stamps I bought at a 100 yen store in Tokyo.)
Ideas for mini gifts inside the matchbox:
Photos
Love notes
Funny coupons to be redeemed
Candy
3 carat diamond earrings
Ca$h
Who can suggest some more tiny gifts for inside?
Alrighty, you guys - thanks for visiting, hope you enjoyed this one!
Hi, all! This week I made two jewels from hardware store ball chain. I did it using a fun trick with a finding meant for a different purpose.
First the jewels, then the trick!
I started with this beautiful multicolored ball chain, isn't it the prettiest stuff?
I found it at a local Ace Hardware. (If anybody knows an online source, leave it for us in the comments, eh?)
The finding in question is a type of bead tip (typically used for adding clasps to ball chain or strung beads). This is the kind that closes sideways instead of folding in half.
Now for the big trick. I clamped a bead tip onto the end of a short length of ball chain, like so:
And...welp, that's it! Simple, yes? And there are tons of ways to create jewelry from this interesting component.
To assemble an earring, I used these ingredients:
Using jump rings, I added the ball chain segments to a filigree.
Then I connected the fishhook ear wire to the top.
If you have two ears, make a second earring. Done!
Note: if you have been coming here long enough, you know that I don't have pierced ears, so instead I wear ear cuffs. Here's my ear cuff version:
Either way, these earrings are awesomely swingy and surprisingly light to wear!
The necklace went together pretty quickly, too. They key difference: put bead tips on both ends of each ball chain segment. This close-up shows the construction a bit better.
I made three double-ended chain segments in graduated sizes. I threaded them onto craft wire, separated by silver beads. I finished with a small loop on each end - and added more ball chain for the necklace.
If you can't find the colorful chain, use regular silver or gold tone. Just think how many ways you can use these little ball chain segments! How about fringe at the bottom of a large multi-loop pendant? How about individual skinny ball chain earrings? How about a great big tassel?
Let's hear your suggestions!
Alrighty, then, that's today's project - thanks for visiting, hope you enjoyed!
p.s. Interested in making your own simple ear cuffs? Check out this tutorial.
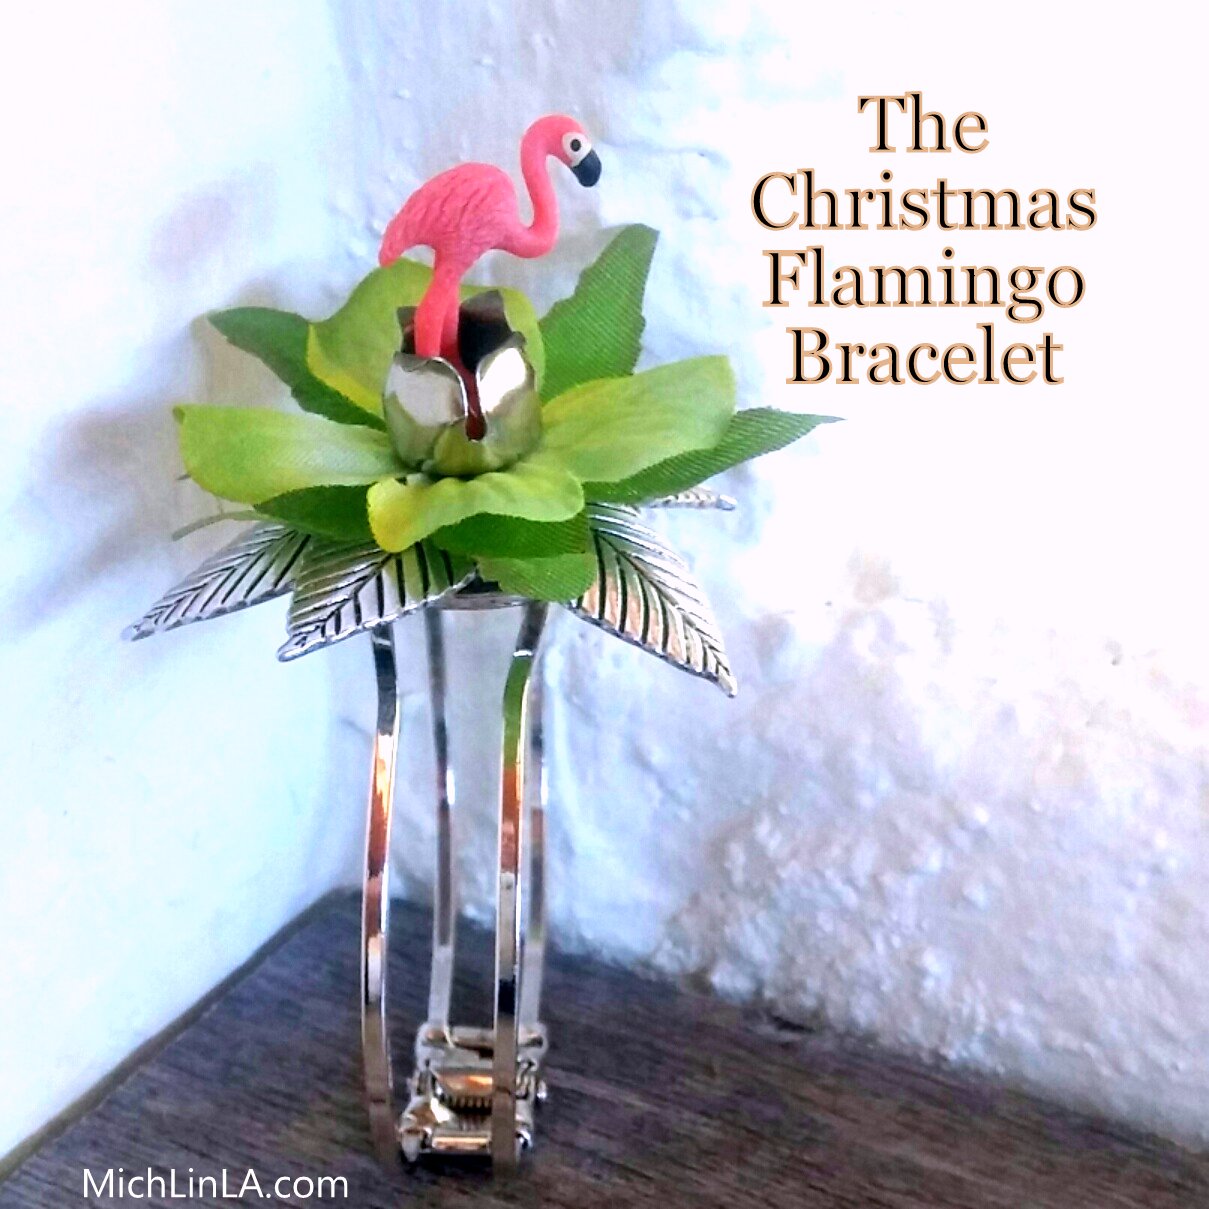
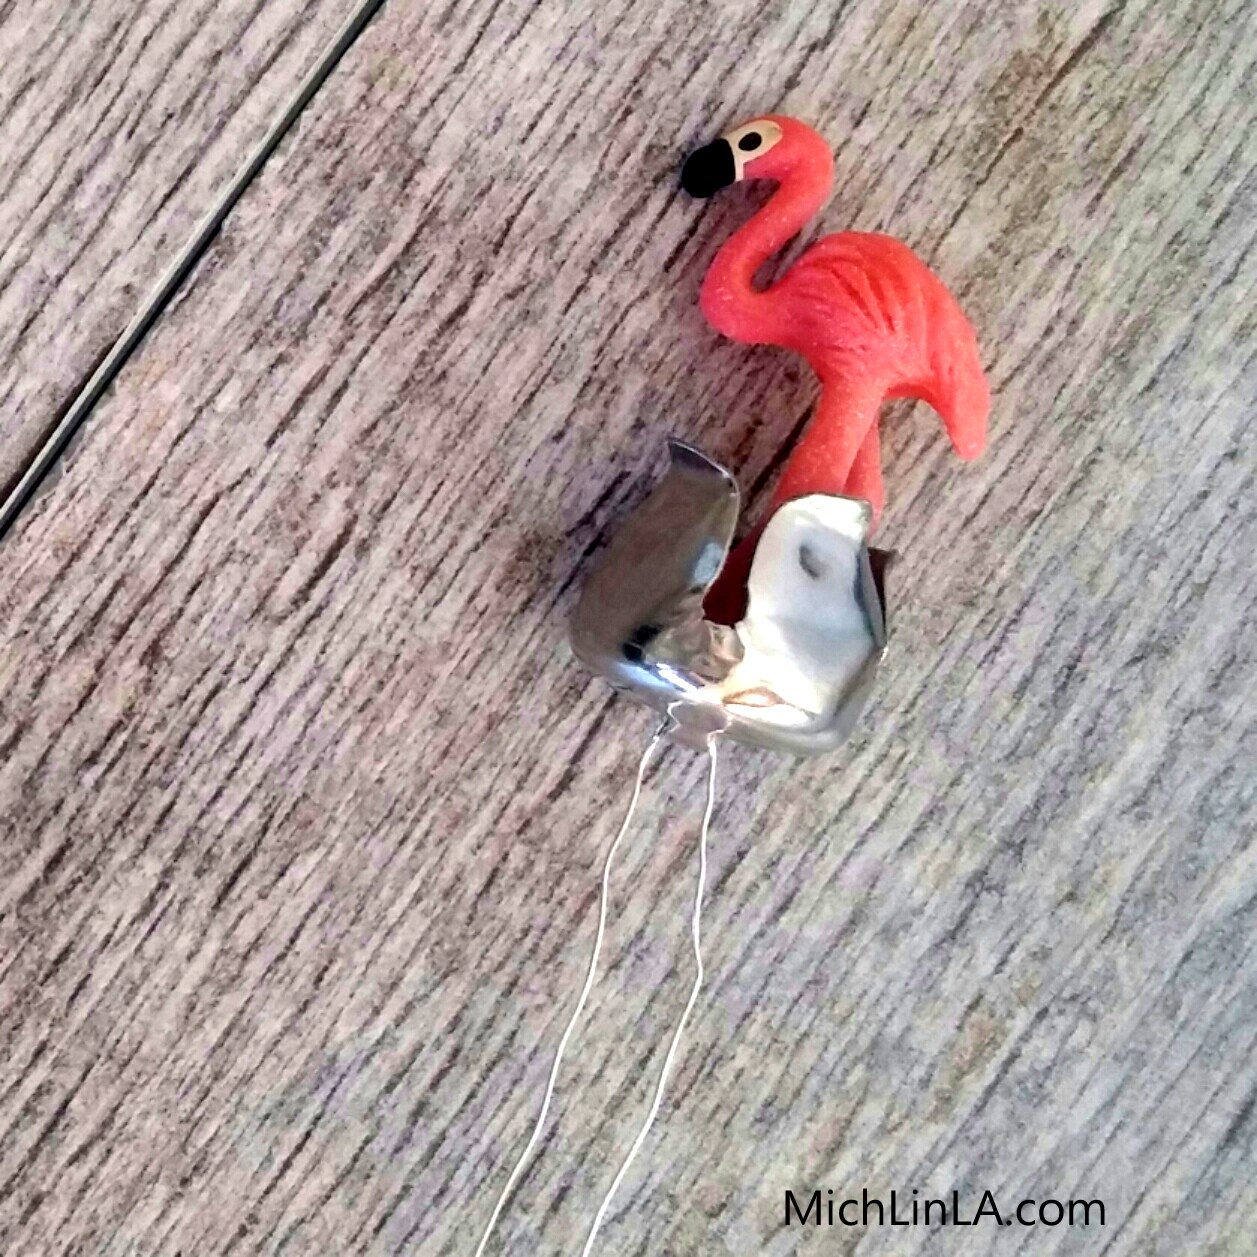
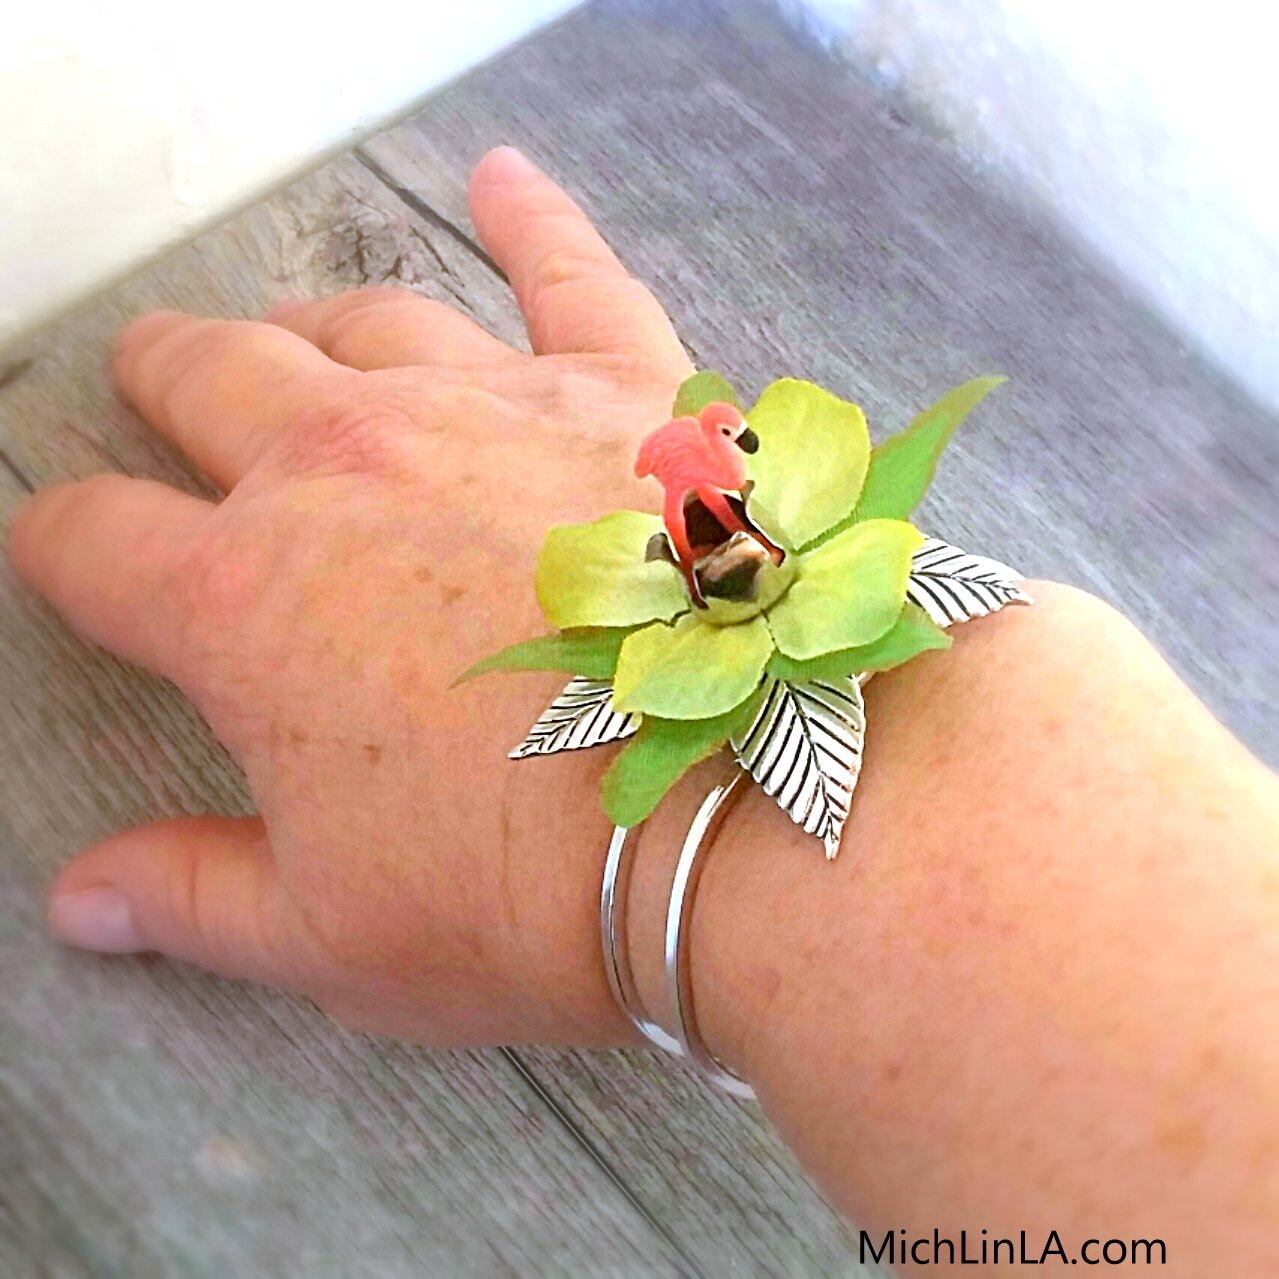
What do you get when you combine an off-the-shelf bracelet kit, a miniature silicone flamingo and a not-very-mysterious Mystery Thing?
Can anyone guess the Mystery Thing? It's the little silver flower bud in the center:
Gosh, I know it's a tricky one...okay, not so much. Have you figured it out? Get ready to scroll down for the answer.
*
*
*
*
Keep scrollin'...
*
*
*
*
And here's the reveal!
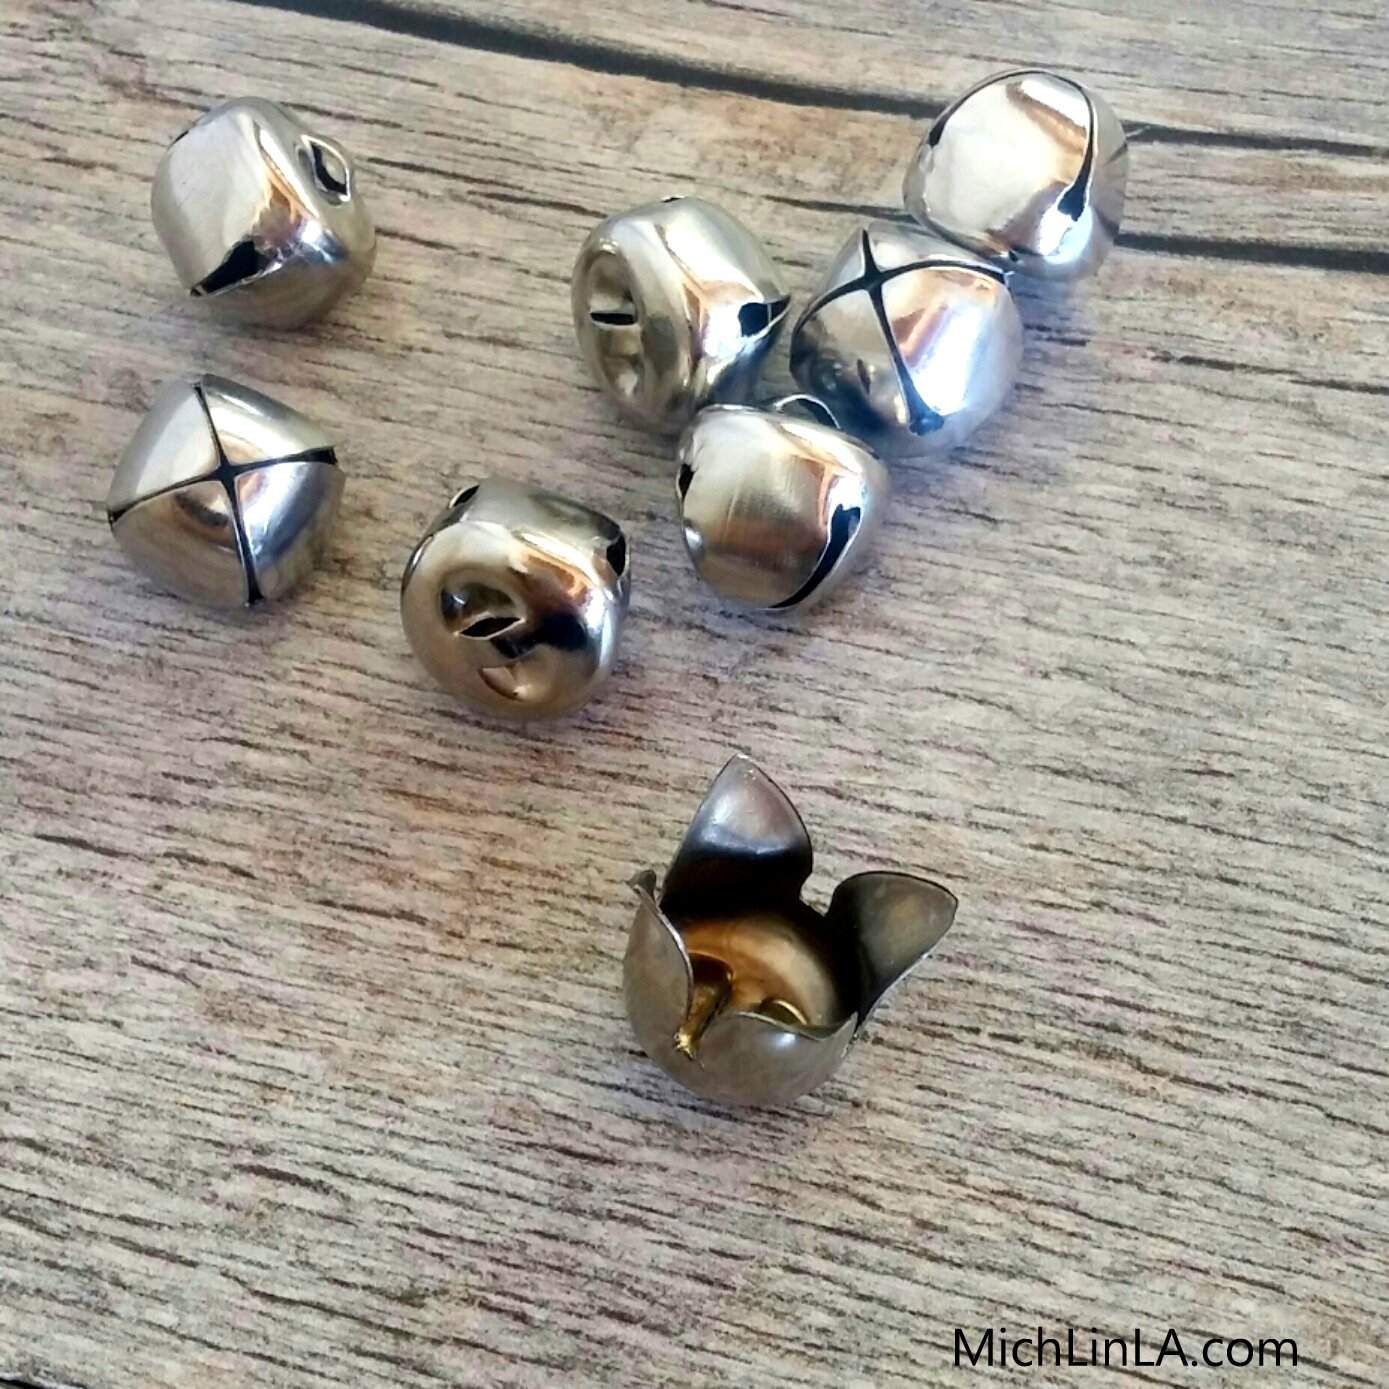
Yes indeed, it's a jingle bell!
I bet you guessed it. But that's okay, we all need an easy win right now, eh?
I make flower buds from jingle bells all the time. Will post a mini tutorial soon, because this is the season for buying jingle bells.
In this instance, I simply wired my flamingo to the "jingle bud," like so:
Then I wired it to the bracelet base.
Hope you smiled at this one!
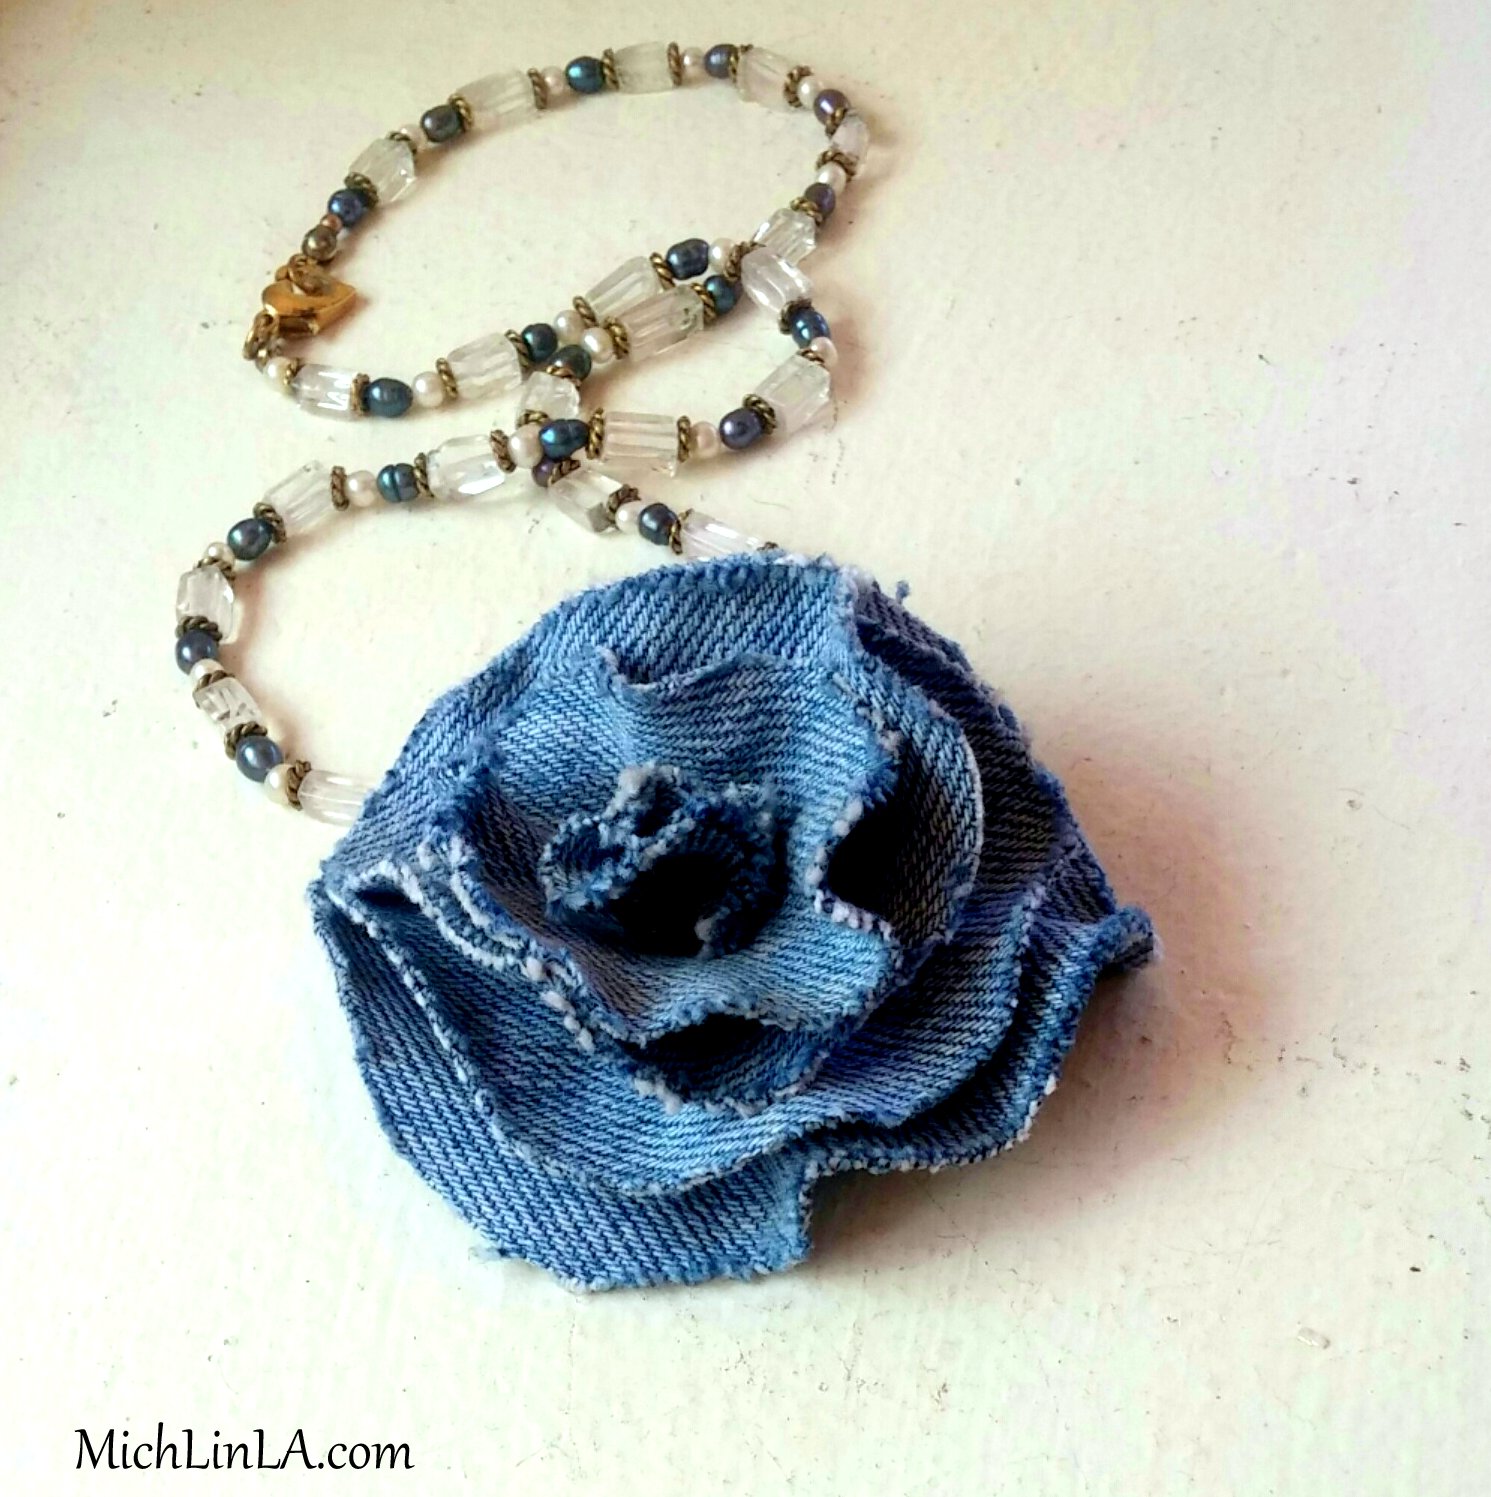
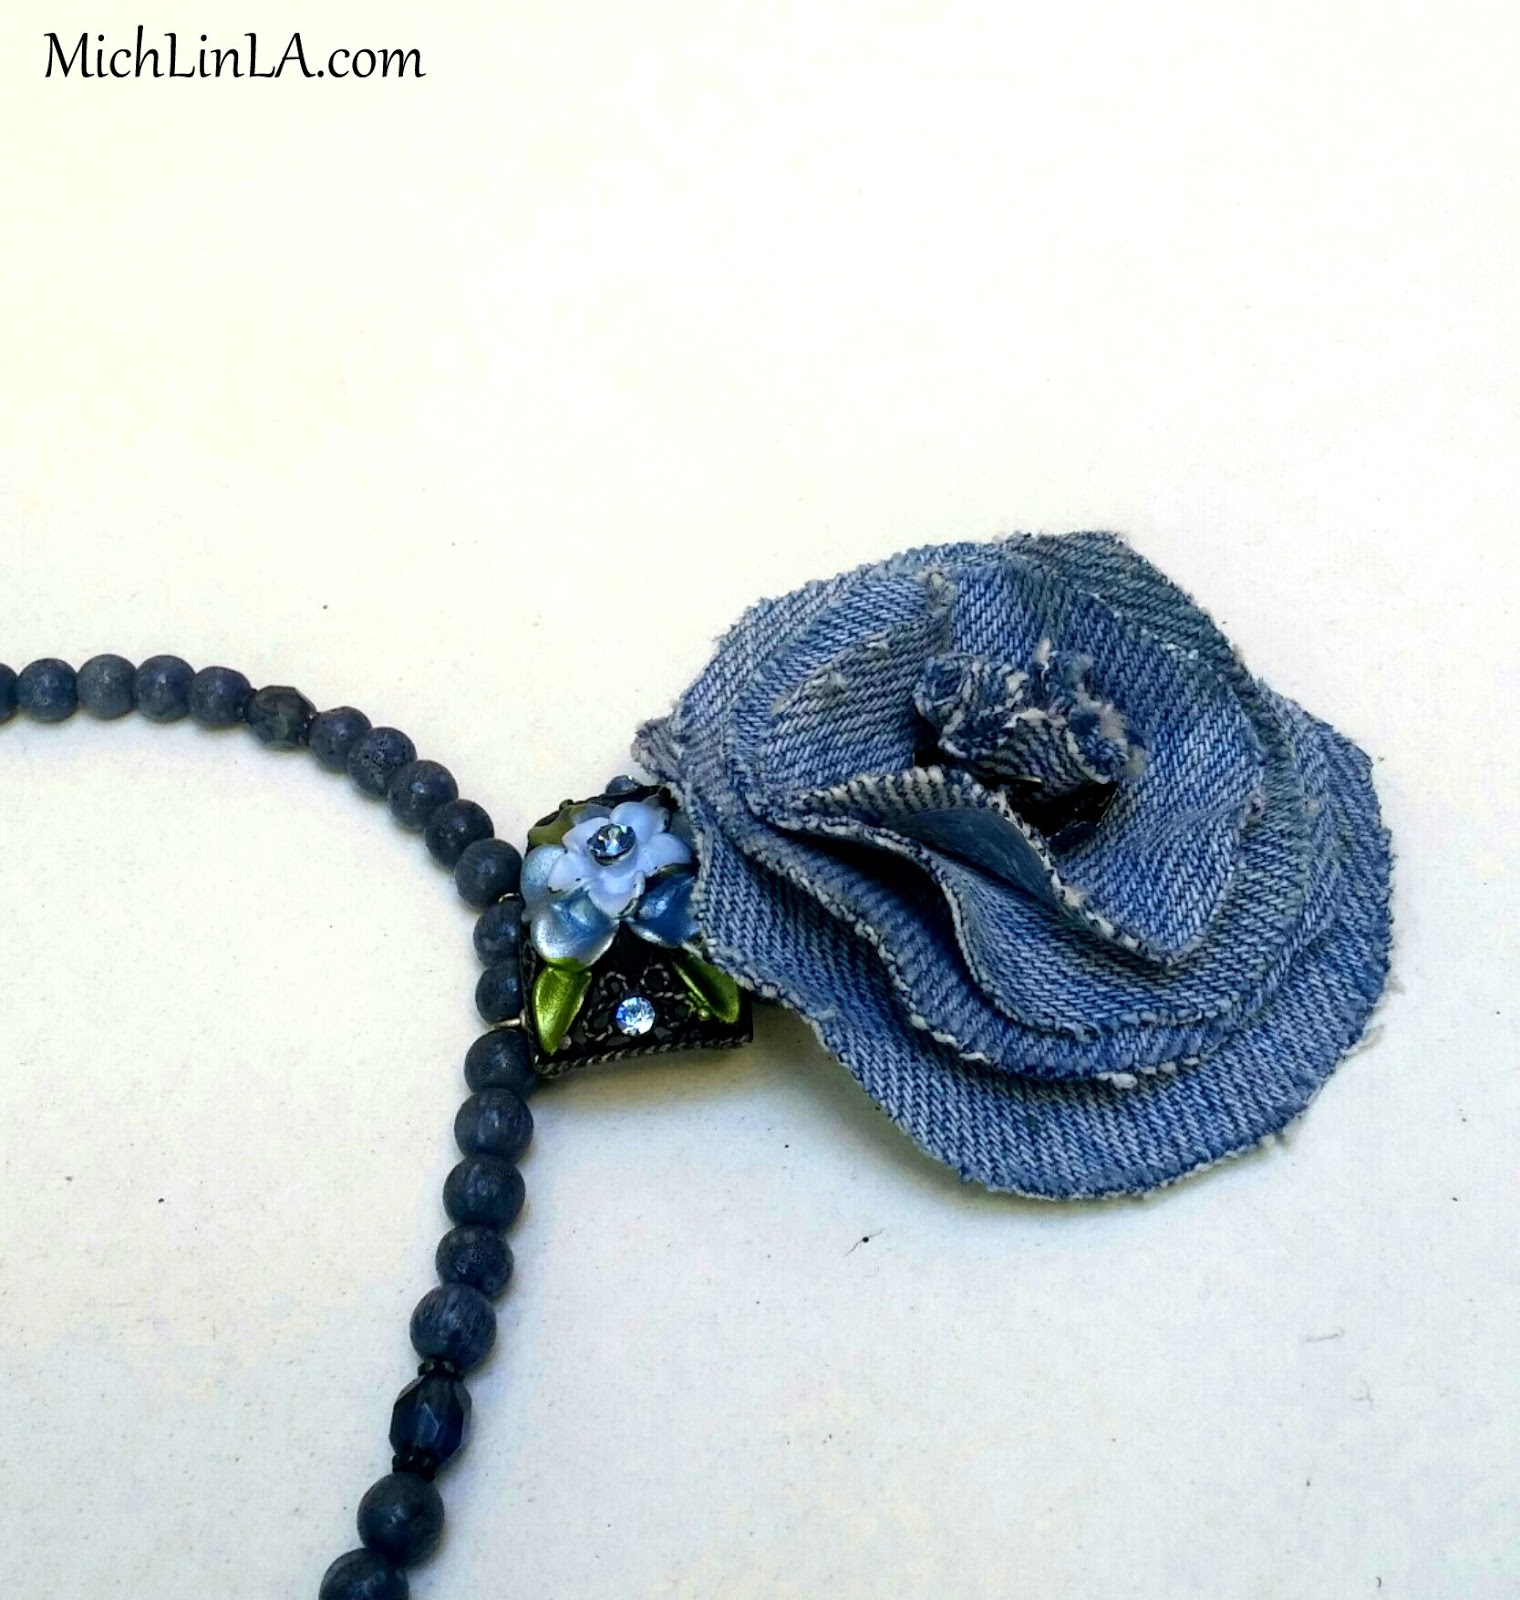
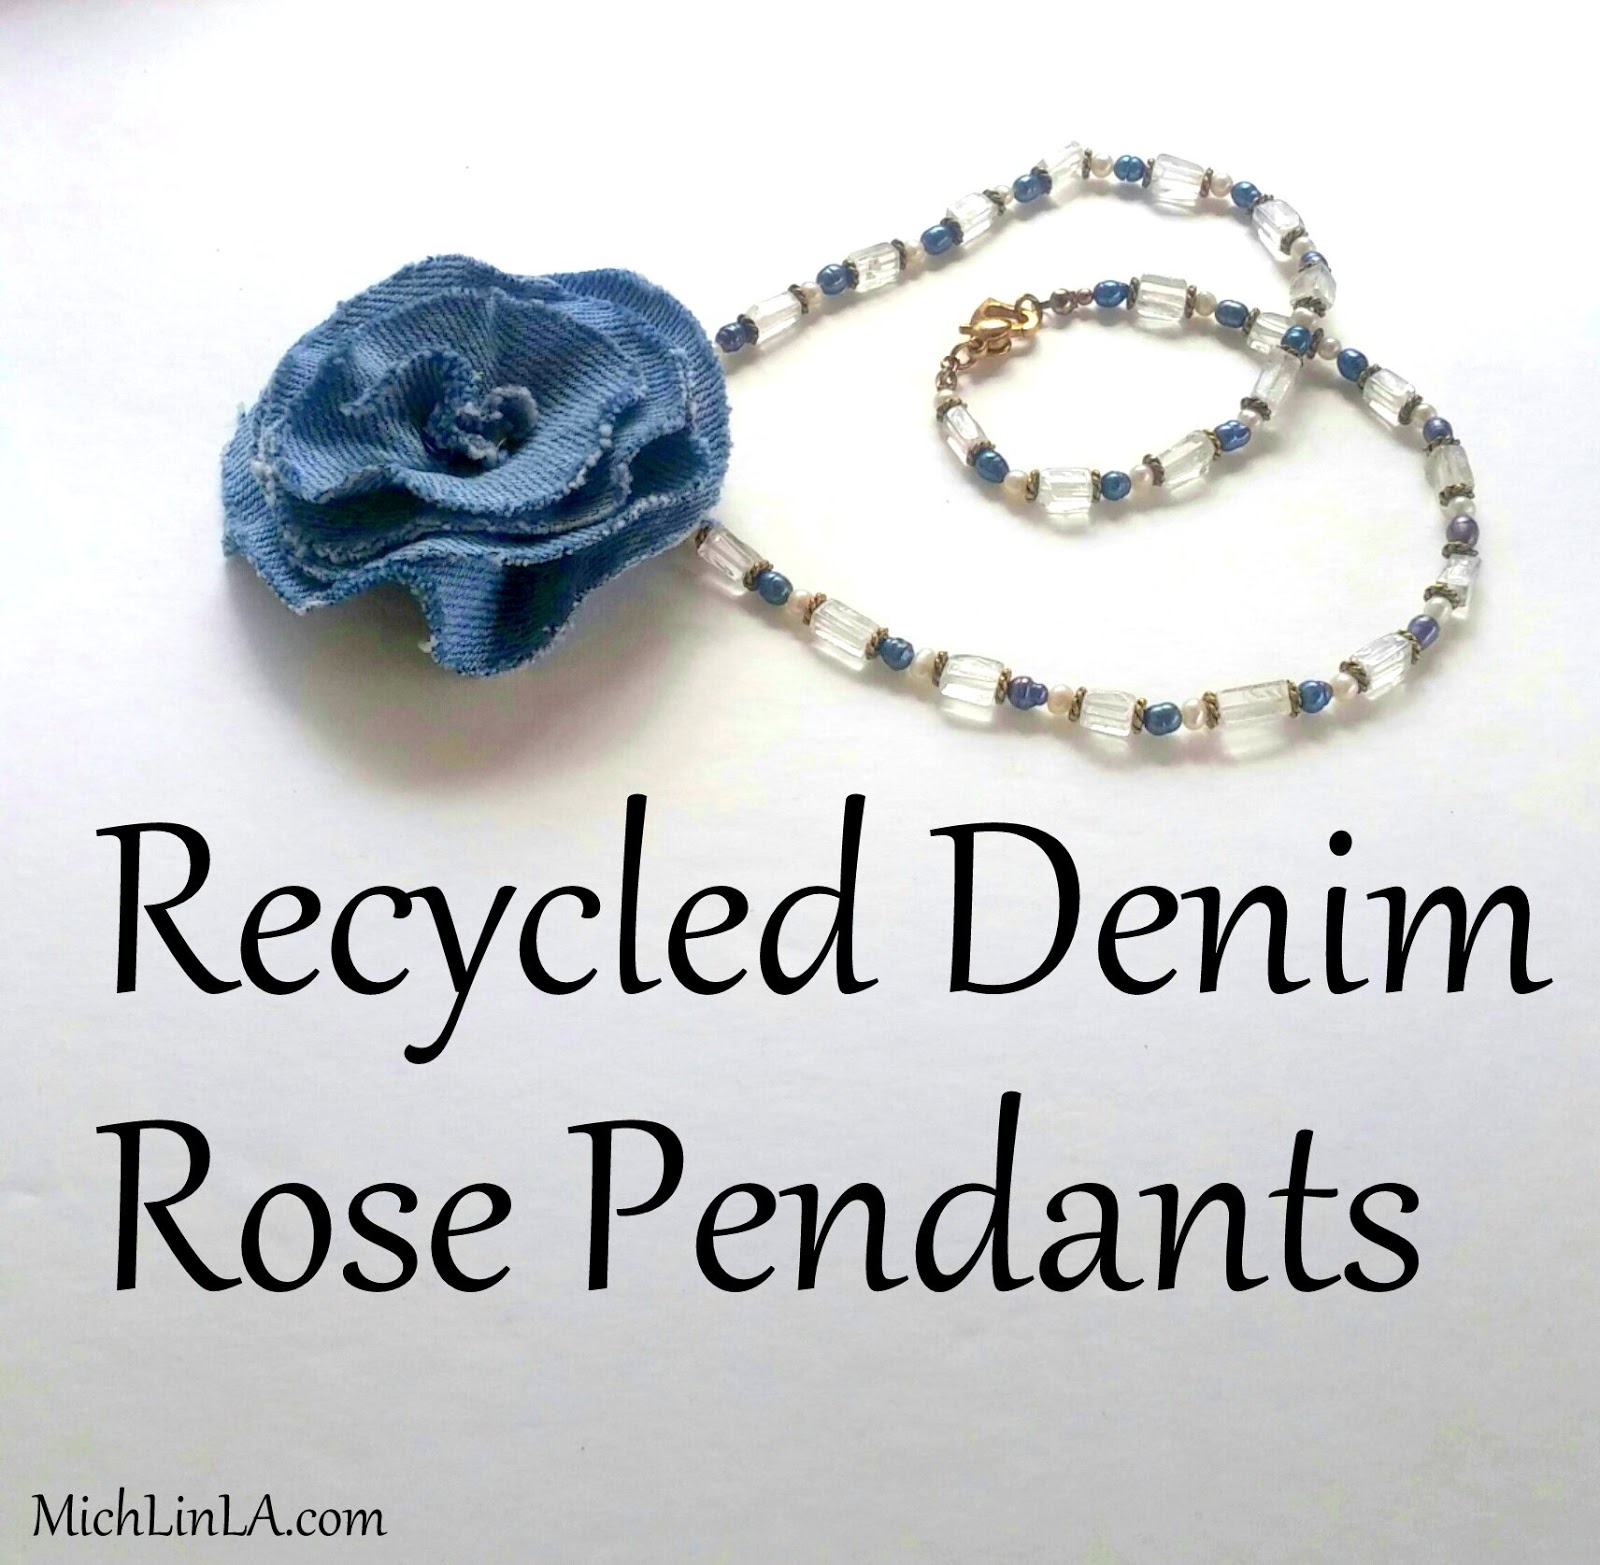
Hello, my friends! Today I have a fun and flowery upcycled jewelry idea to show you. Denim rose pendants!
The unique thing about these roses: a secret metal structure underneath, that keeps the petals from drooping. Just like an underwire bra!
Not that any of us know anything about underwire bras...no, no. No droopy petals here. We are all naturally perky. But I digress.
The DIY
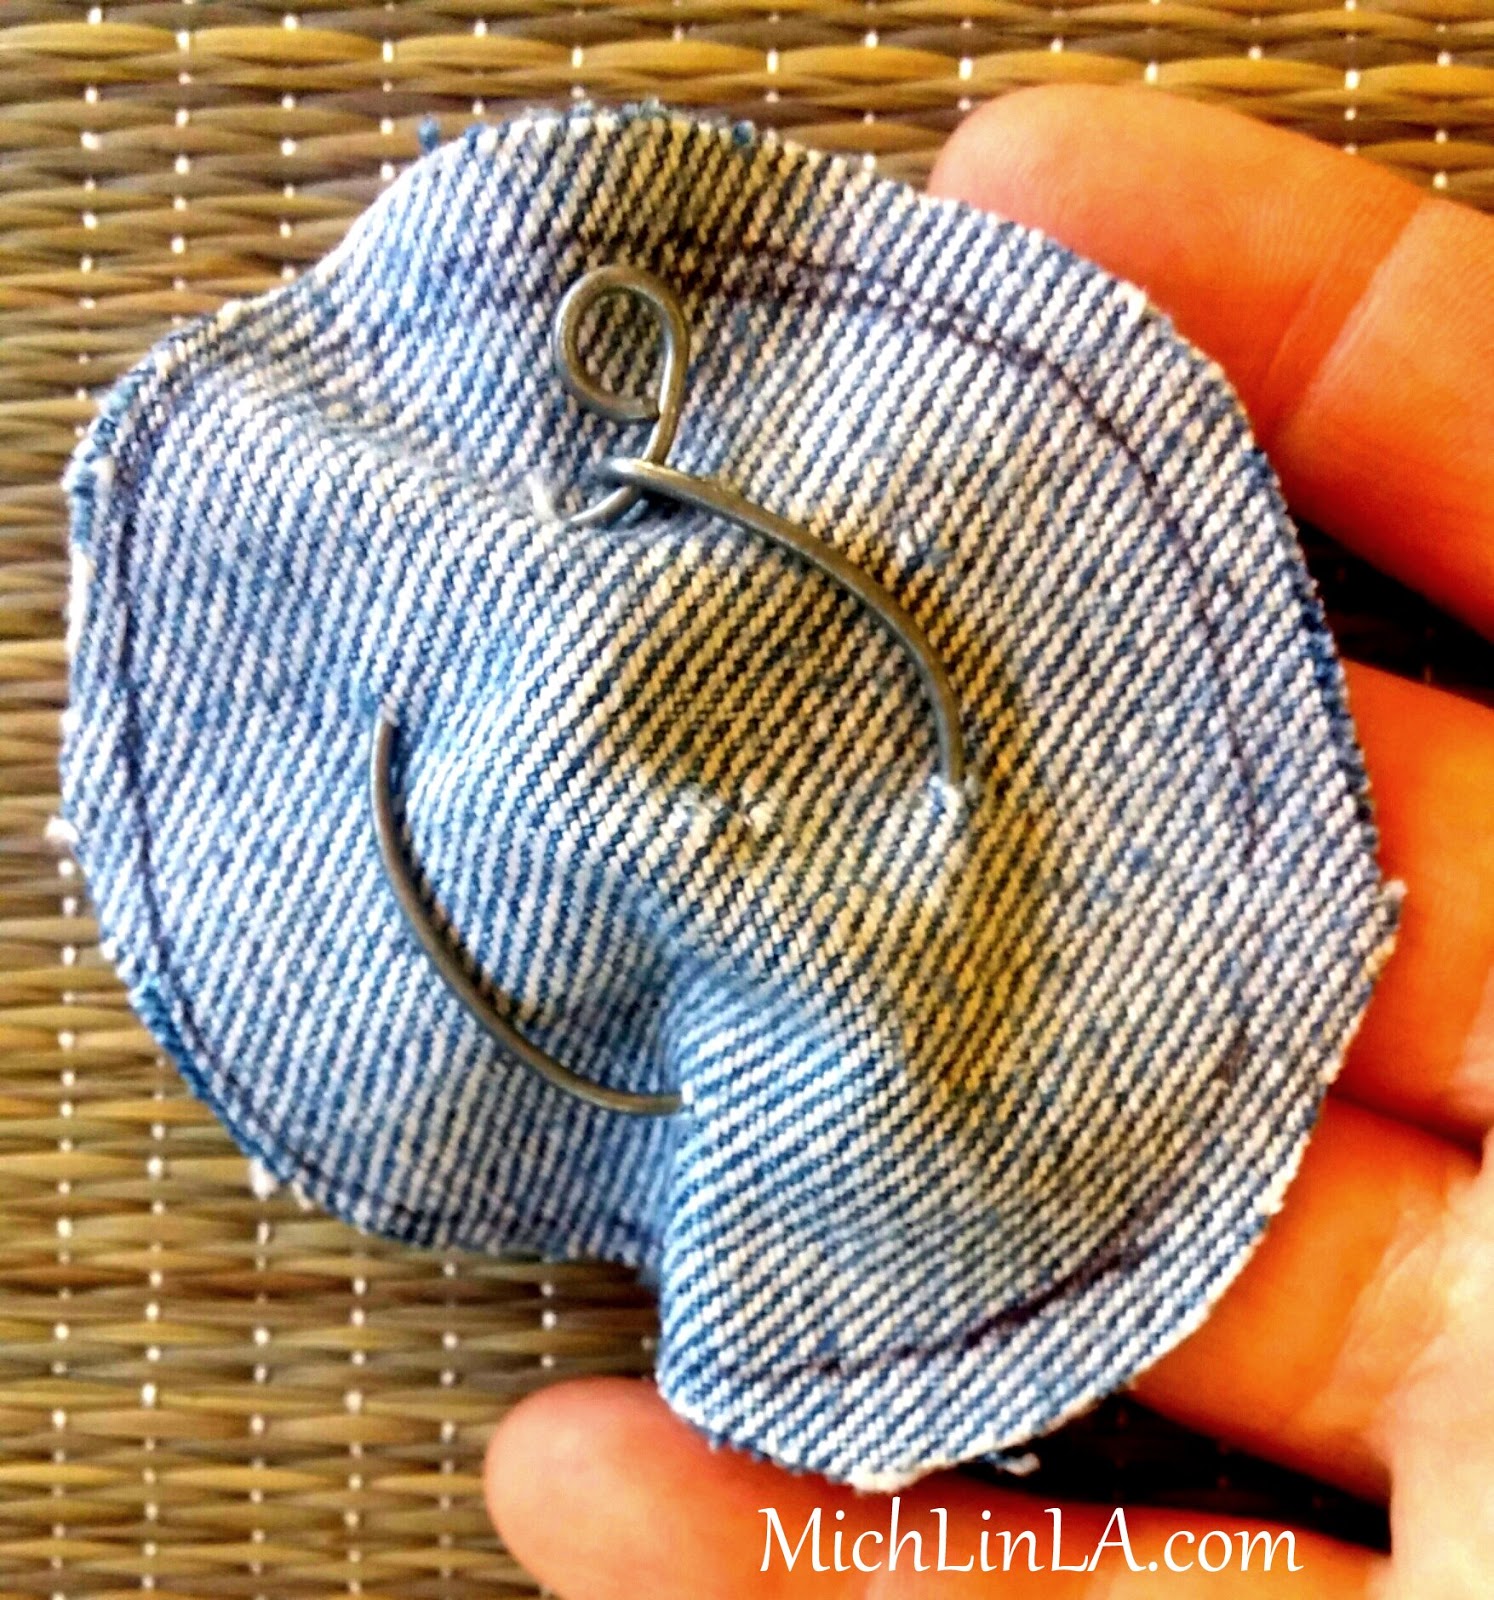
My rose has four graduated circles as the main petals. There are two hidden metal components to the structure. Ready to learn the secret? OK!
Support secret number one: the largest petal has an actual underwire.
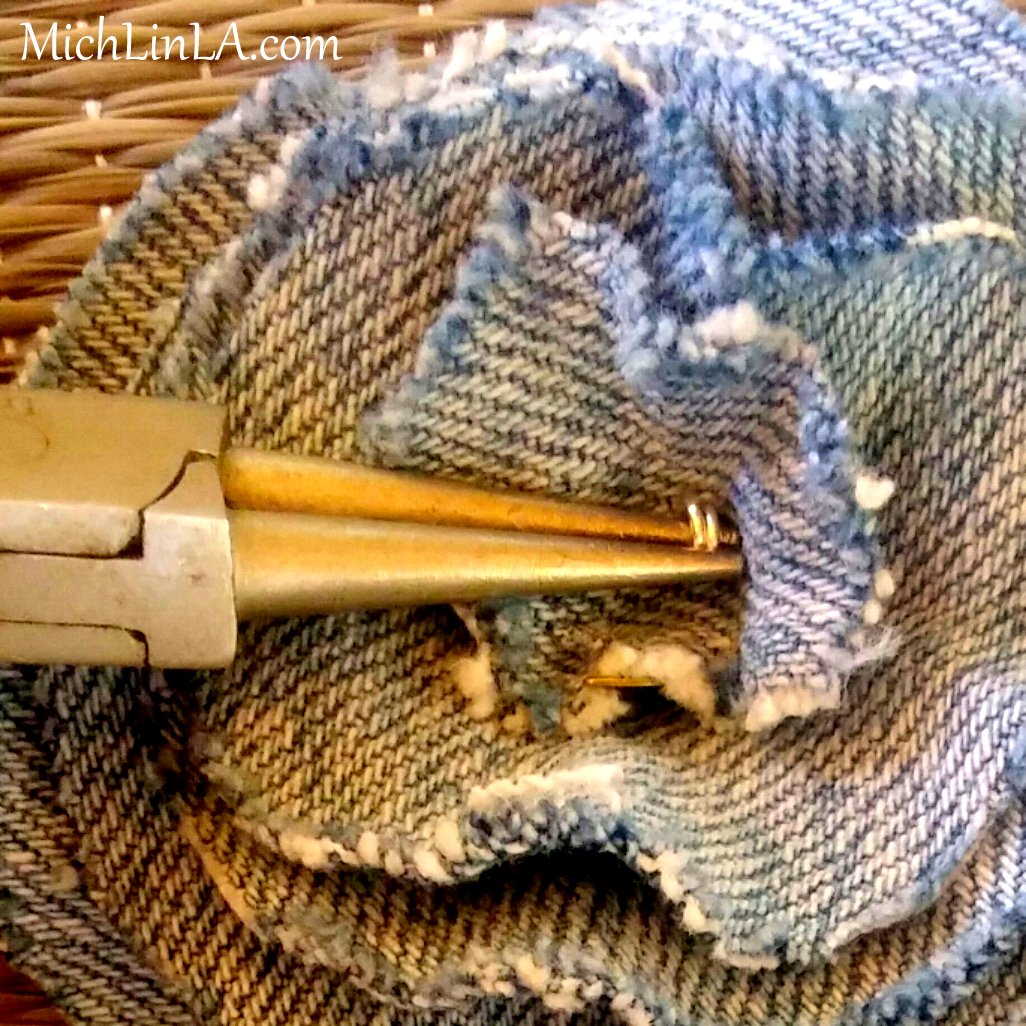
To make it: referring to the photo above, poke four holes in your largest circle. Thread craft wire through the holes. Form a loop so the denim is slightly gathered. Pinch one end of the wire tight to secure. On the other wire end, make a small loop.
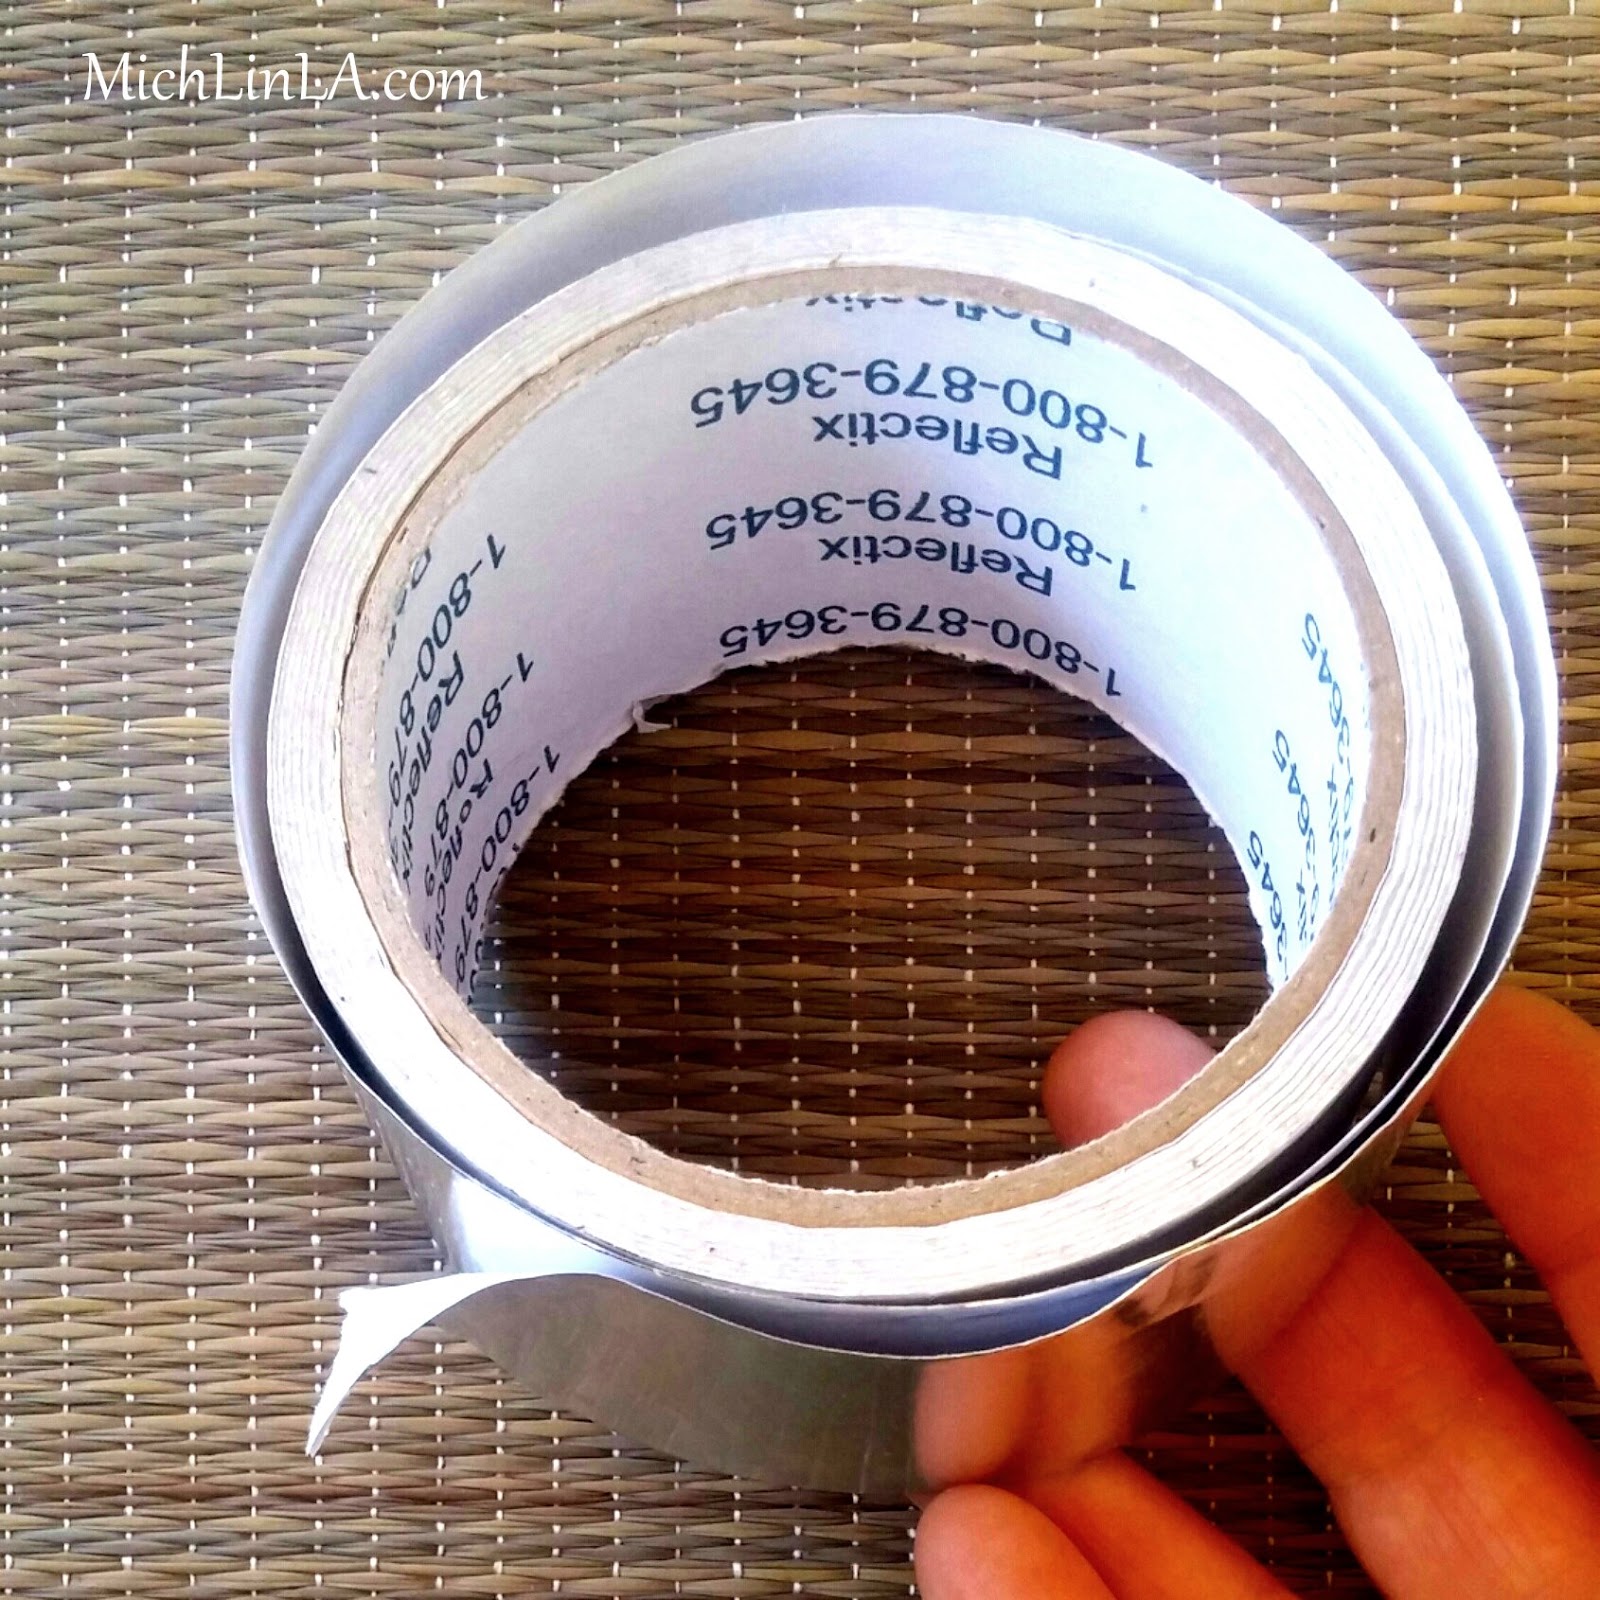
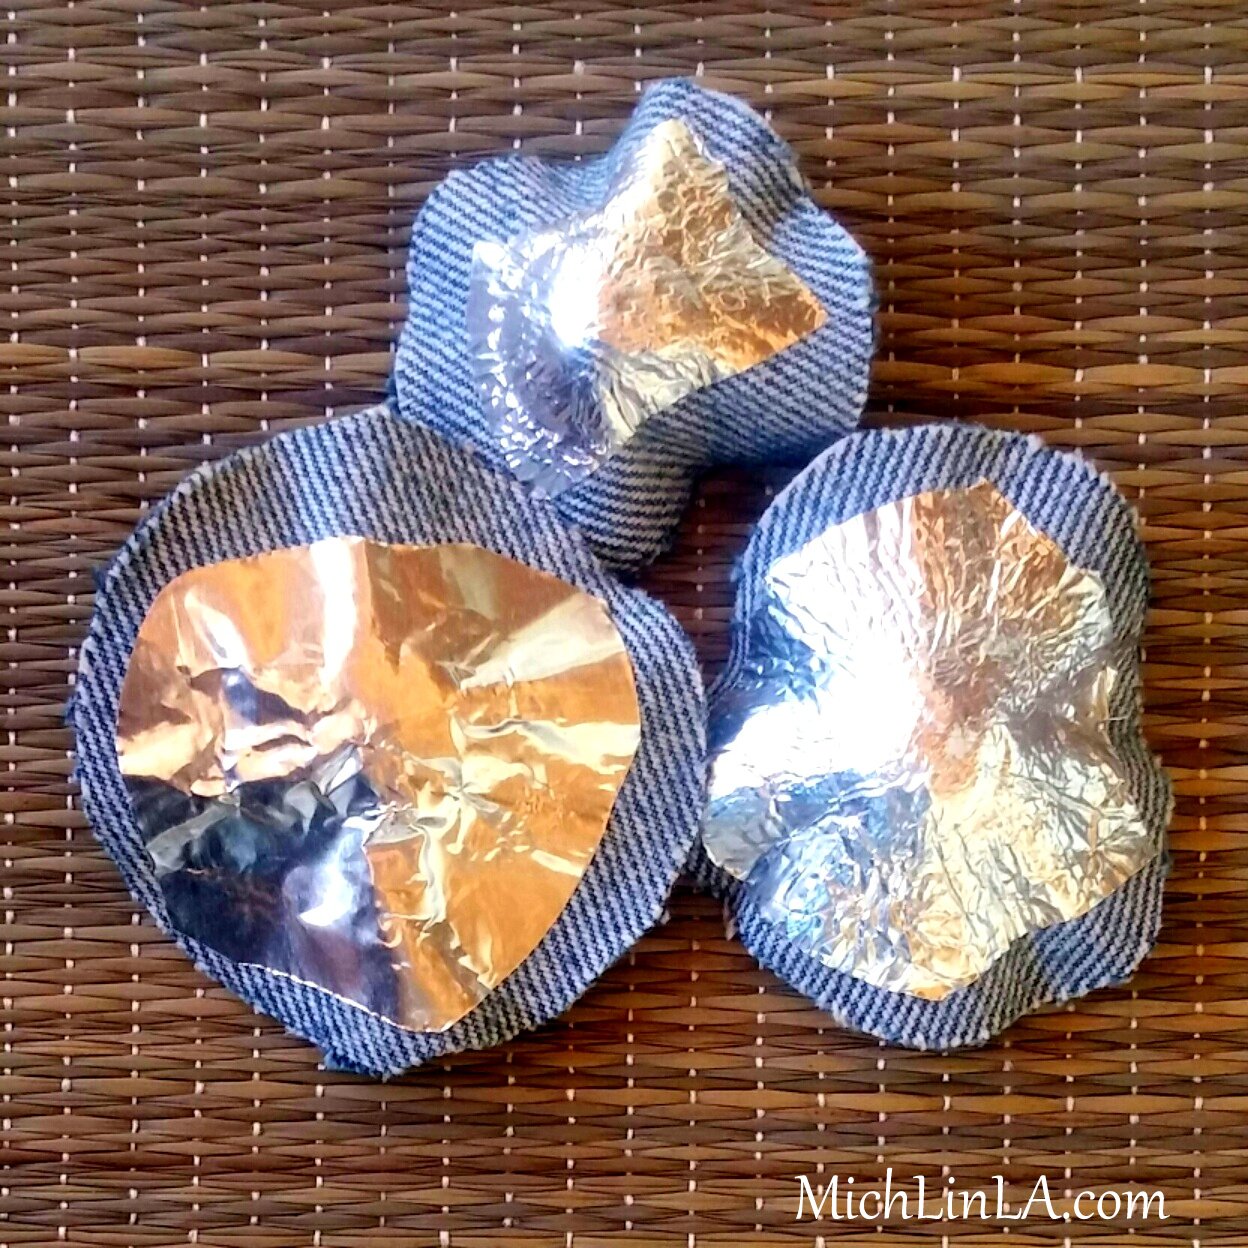
Support secret number two: stiffen the three smallest circles with my favorite stuff - aluminum duct tape.
Add a piece of tape to the back of each denim petal, then pinch them up in the center.
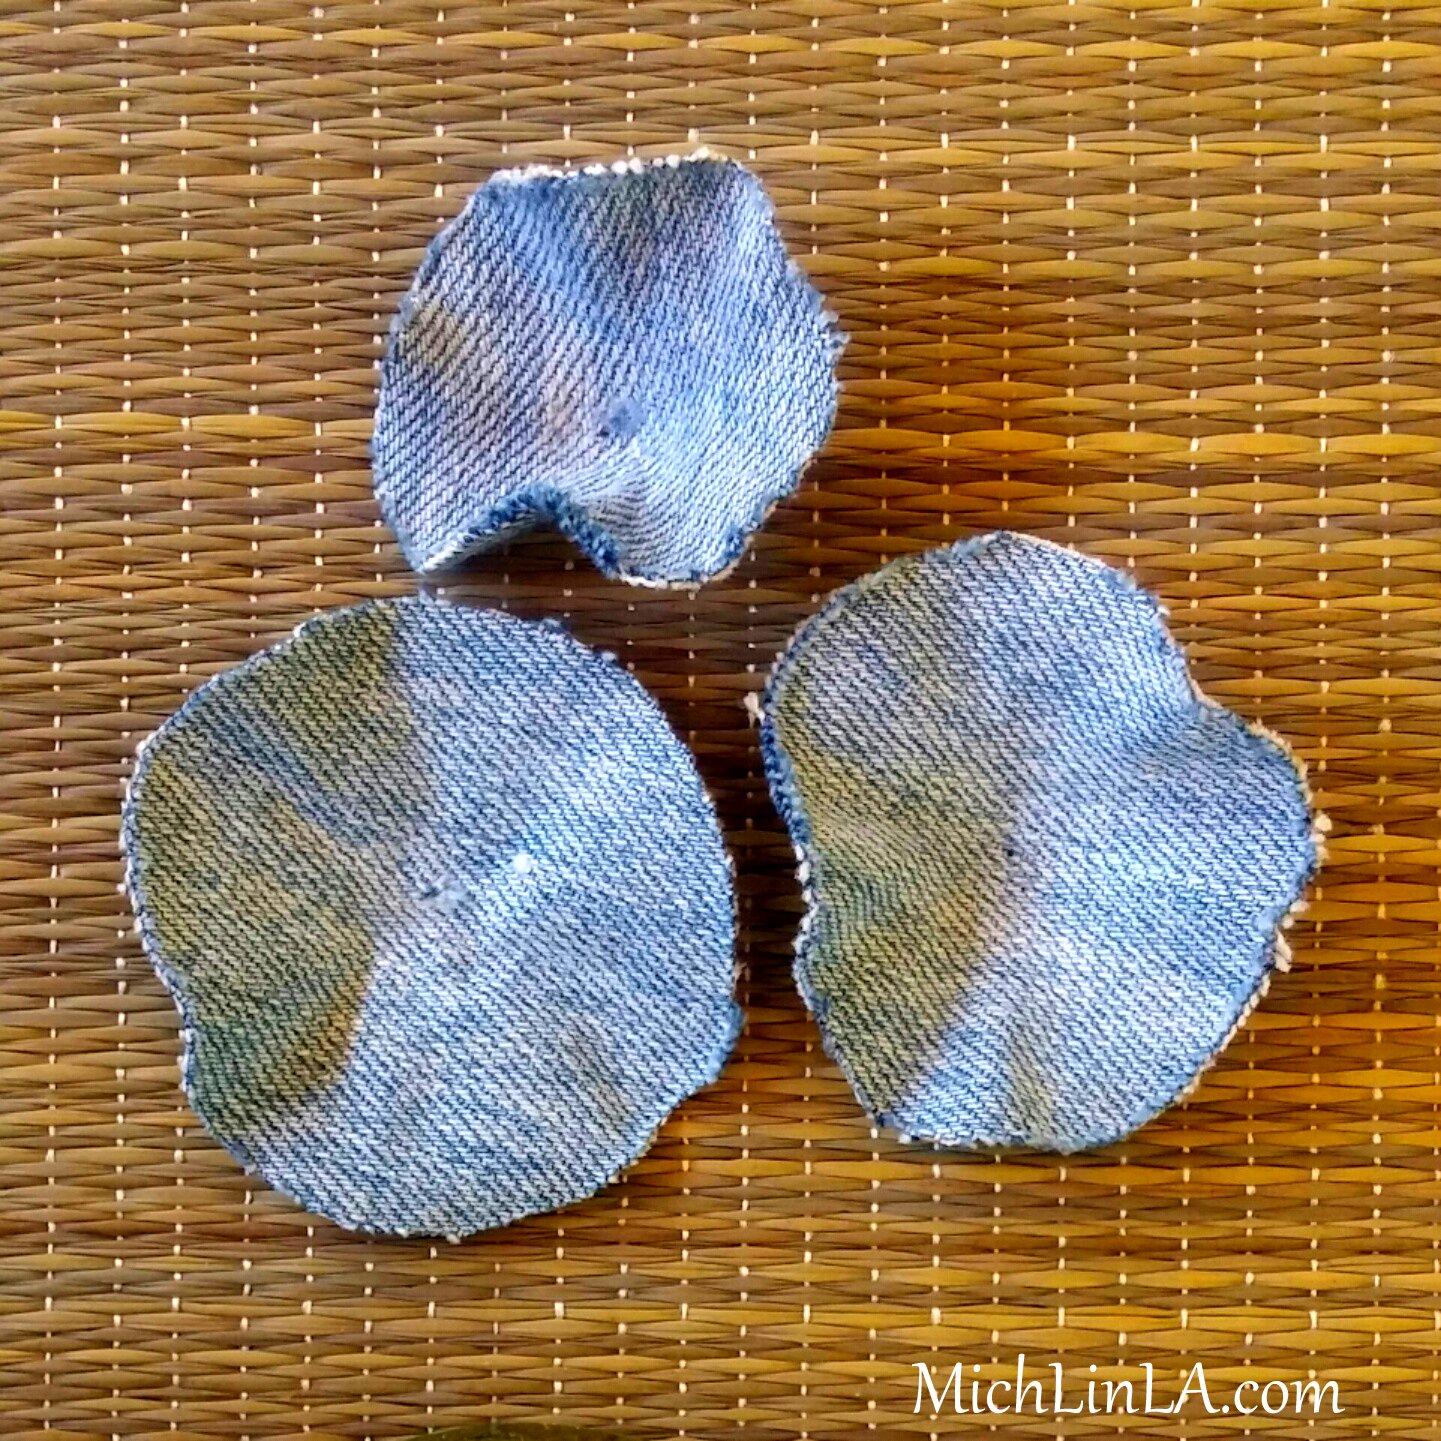
Flip them over and they now have subtle ruffles! See?
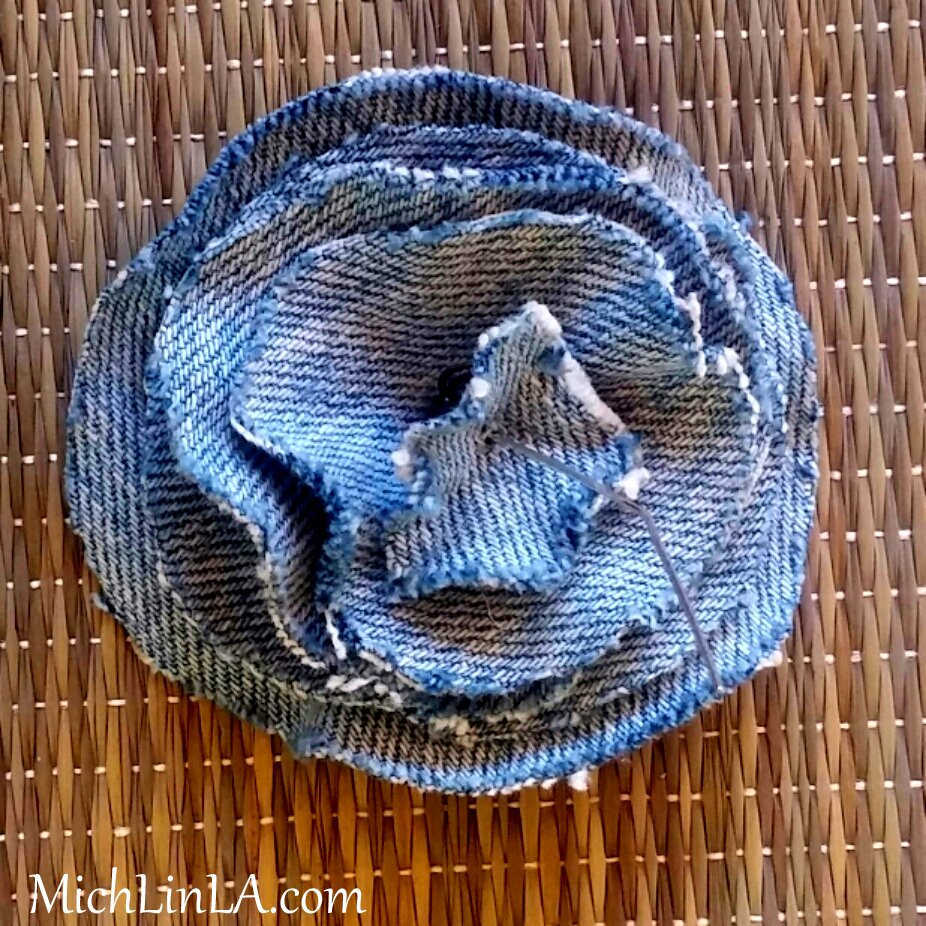
To assemble the rose, first put a small flat spacer on a headpin.
Poke a hole in each petal and stack them onto the headpin. Add a bead cap.
Add a scrap of denim, which will be the tiniest center petal.
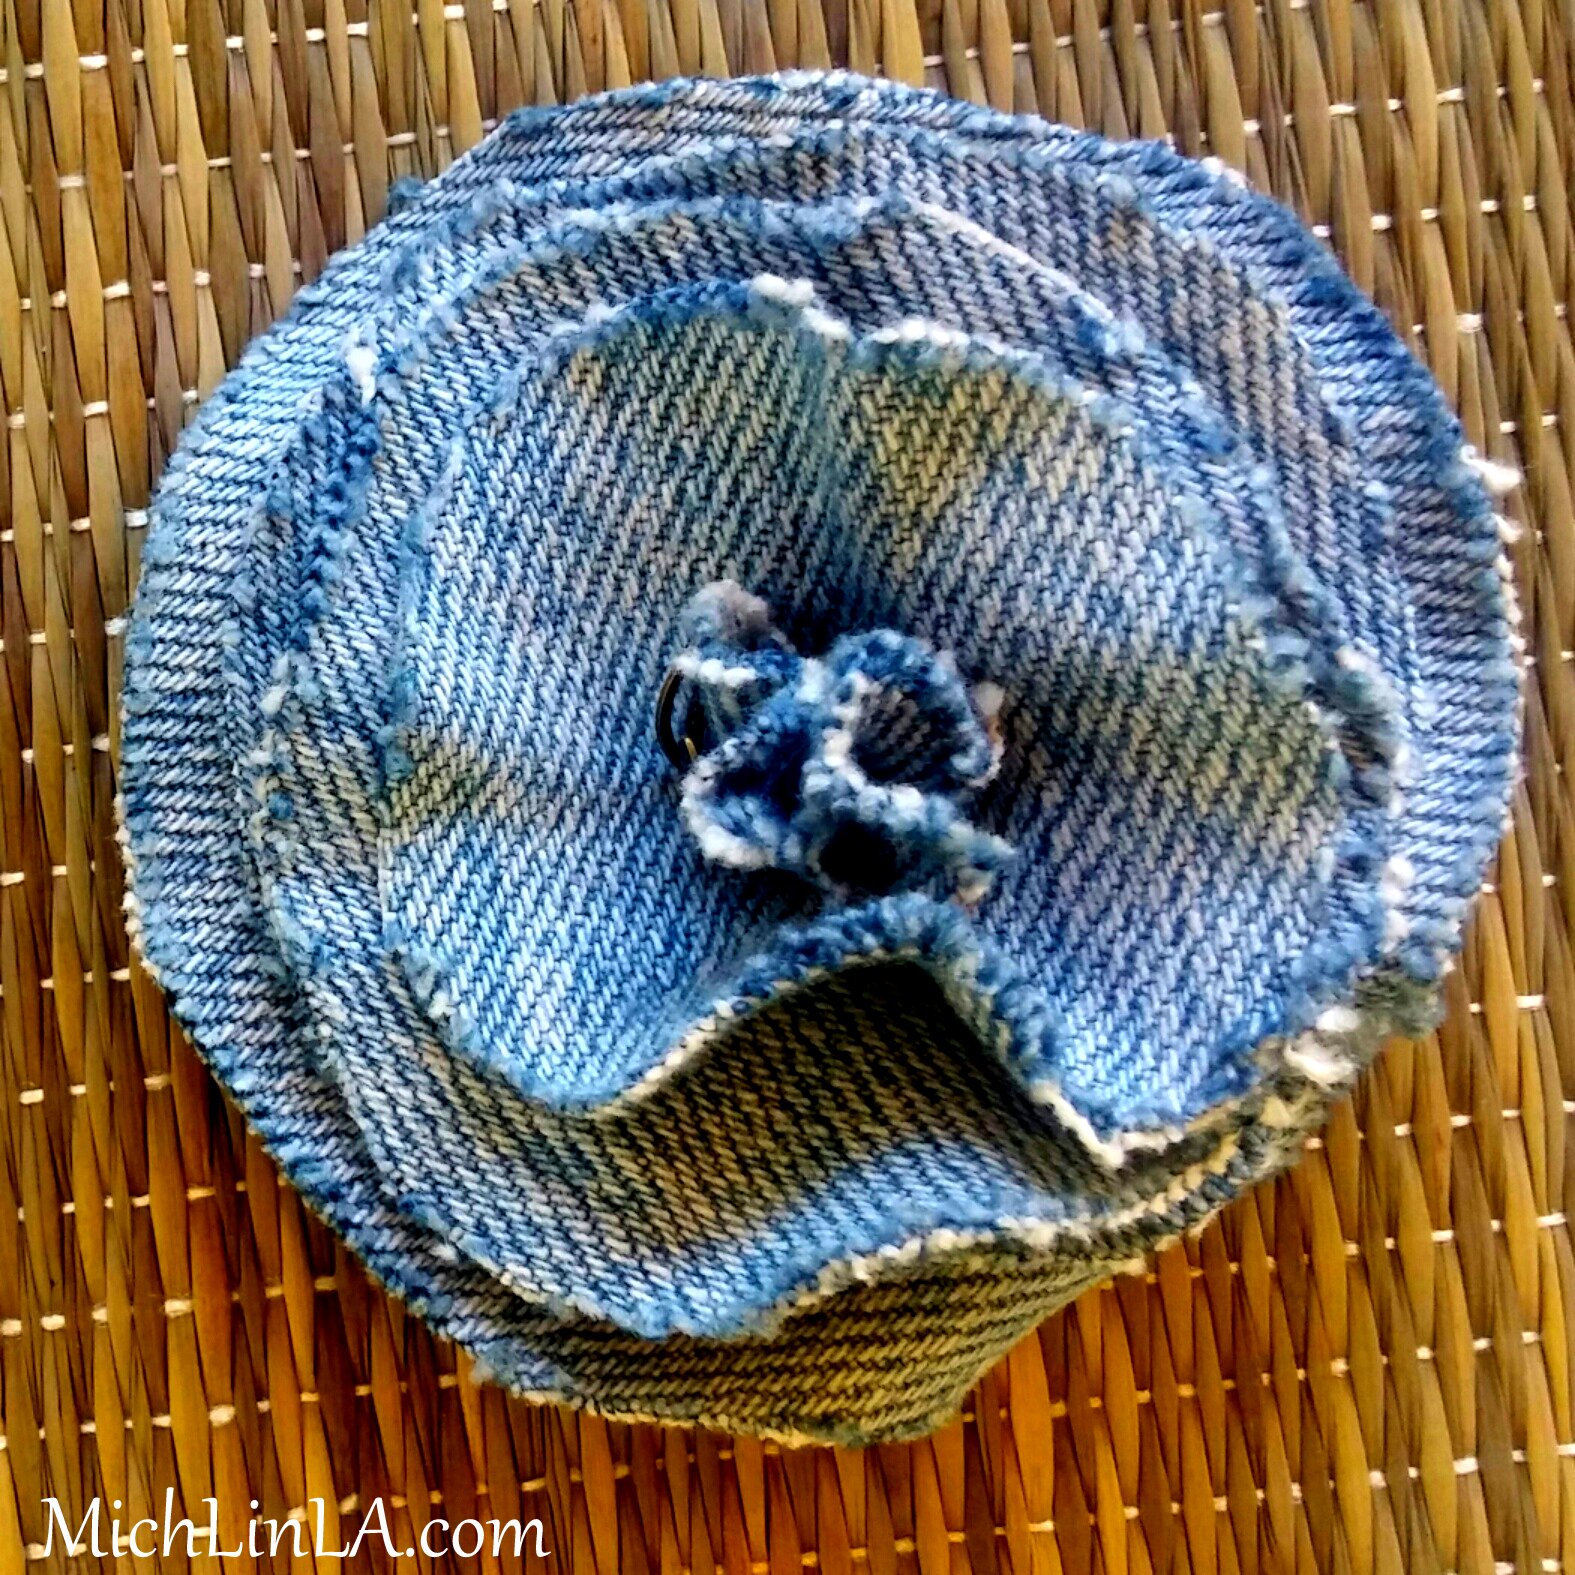
Trim the headpin short. Use round-nose pliers to twirl the wire down into the center. Twist it as tight as it will go!
And huzzah, that is your finished underwired rose.
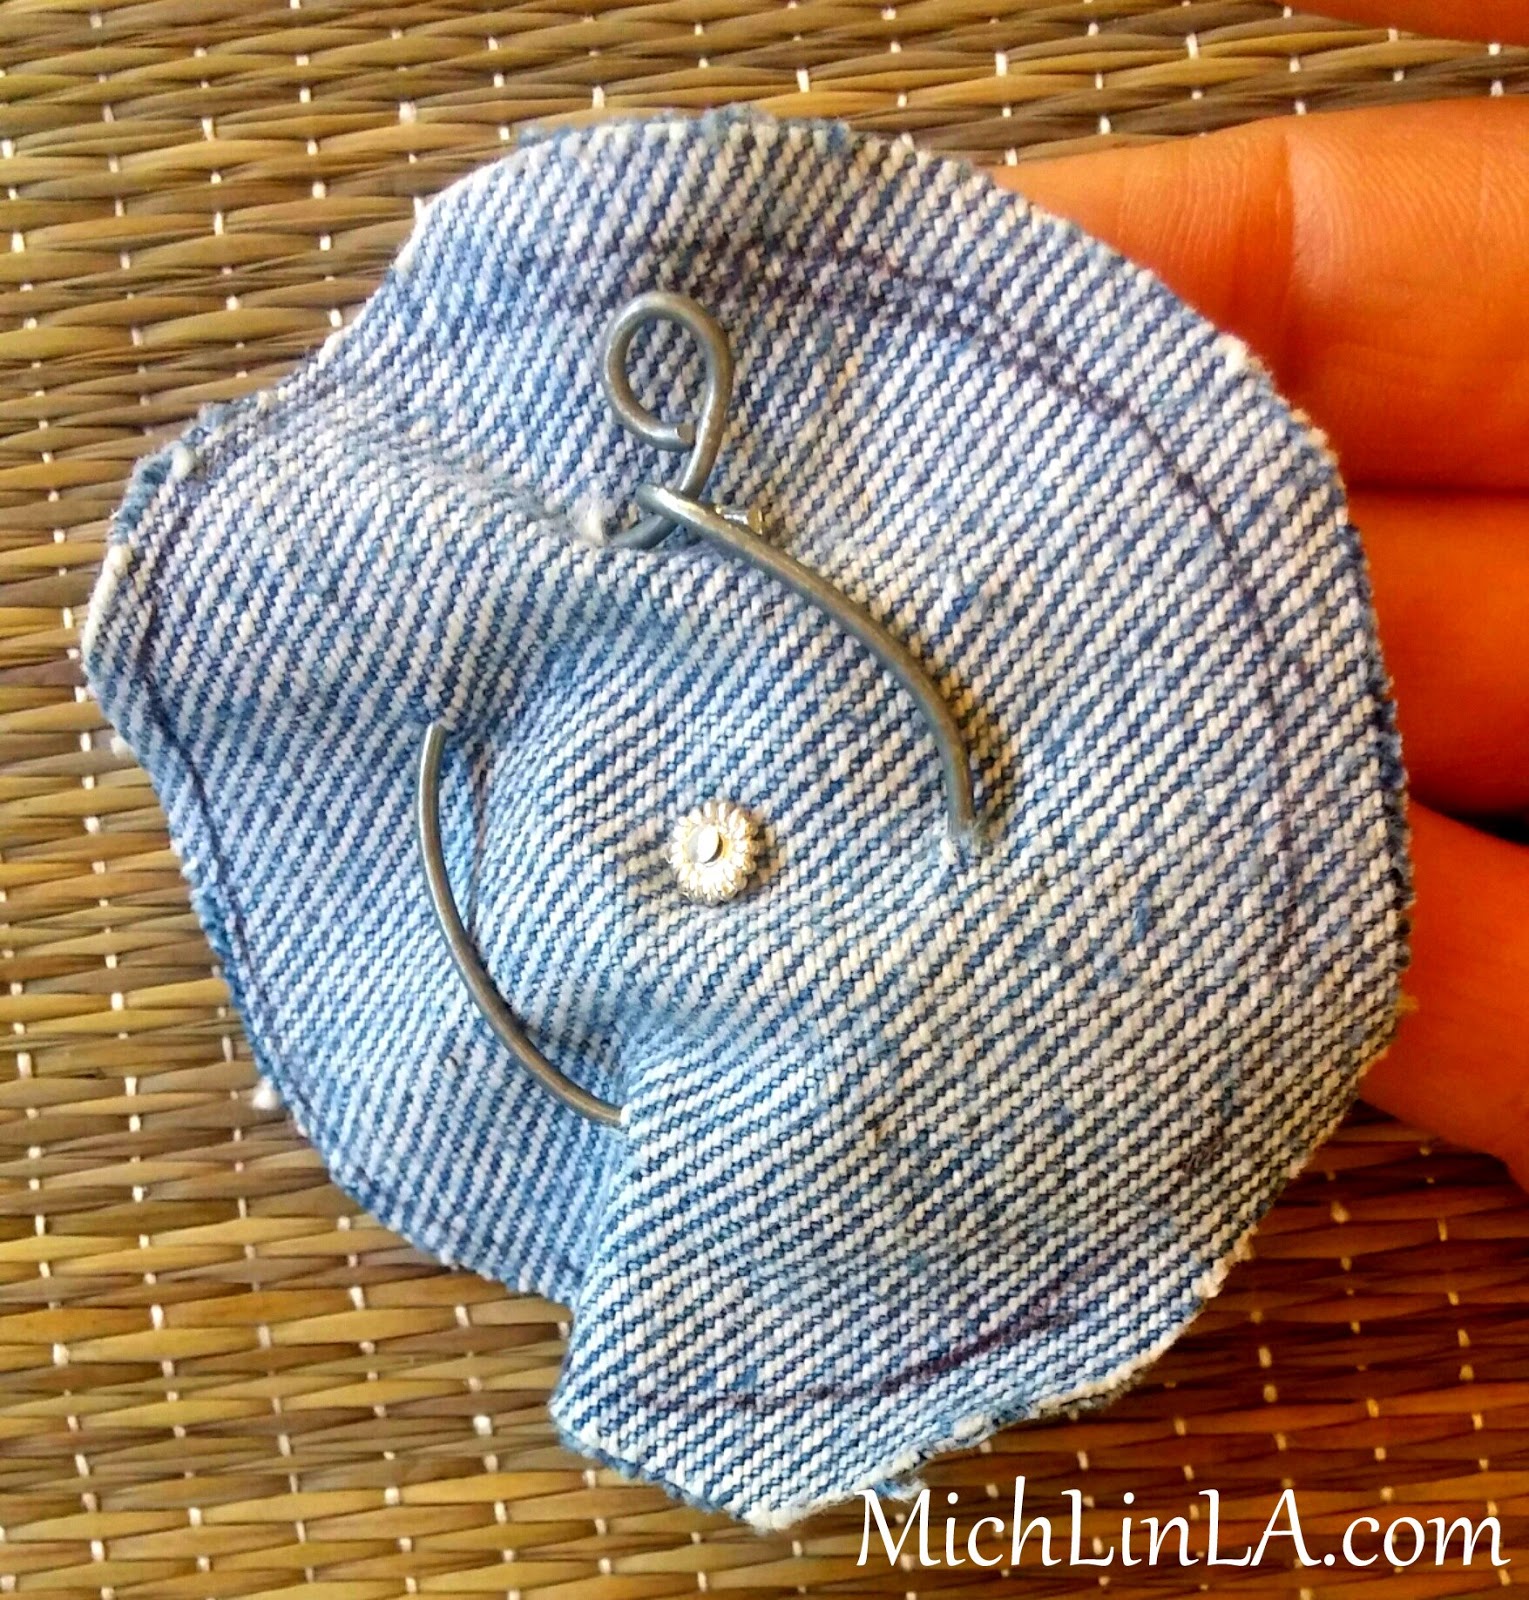
Here is the back.
Use that small wire loop as a built-in bail, to hang your pendant from a strung necklace.
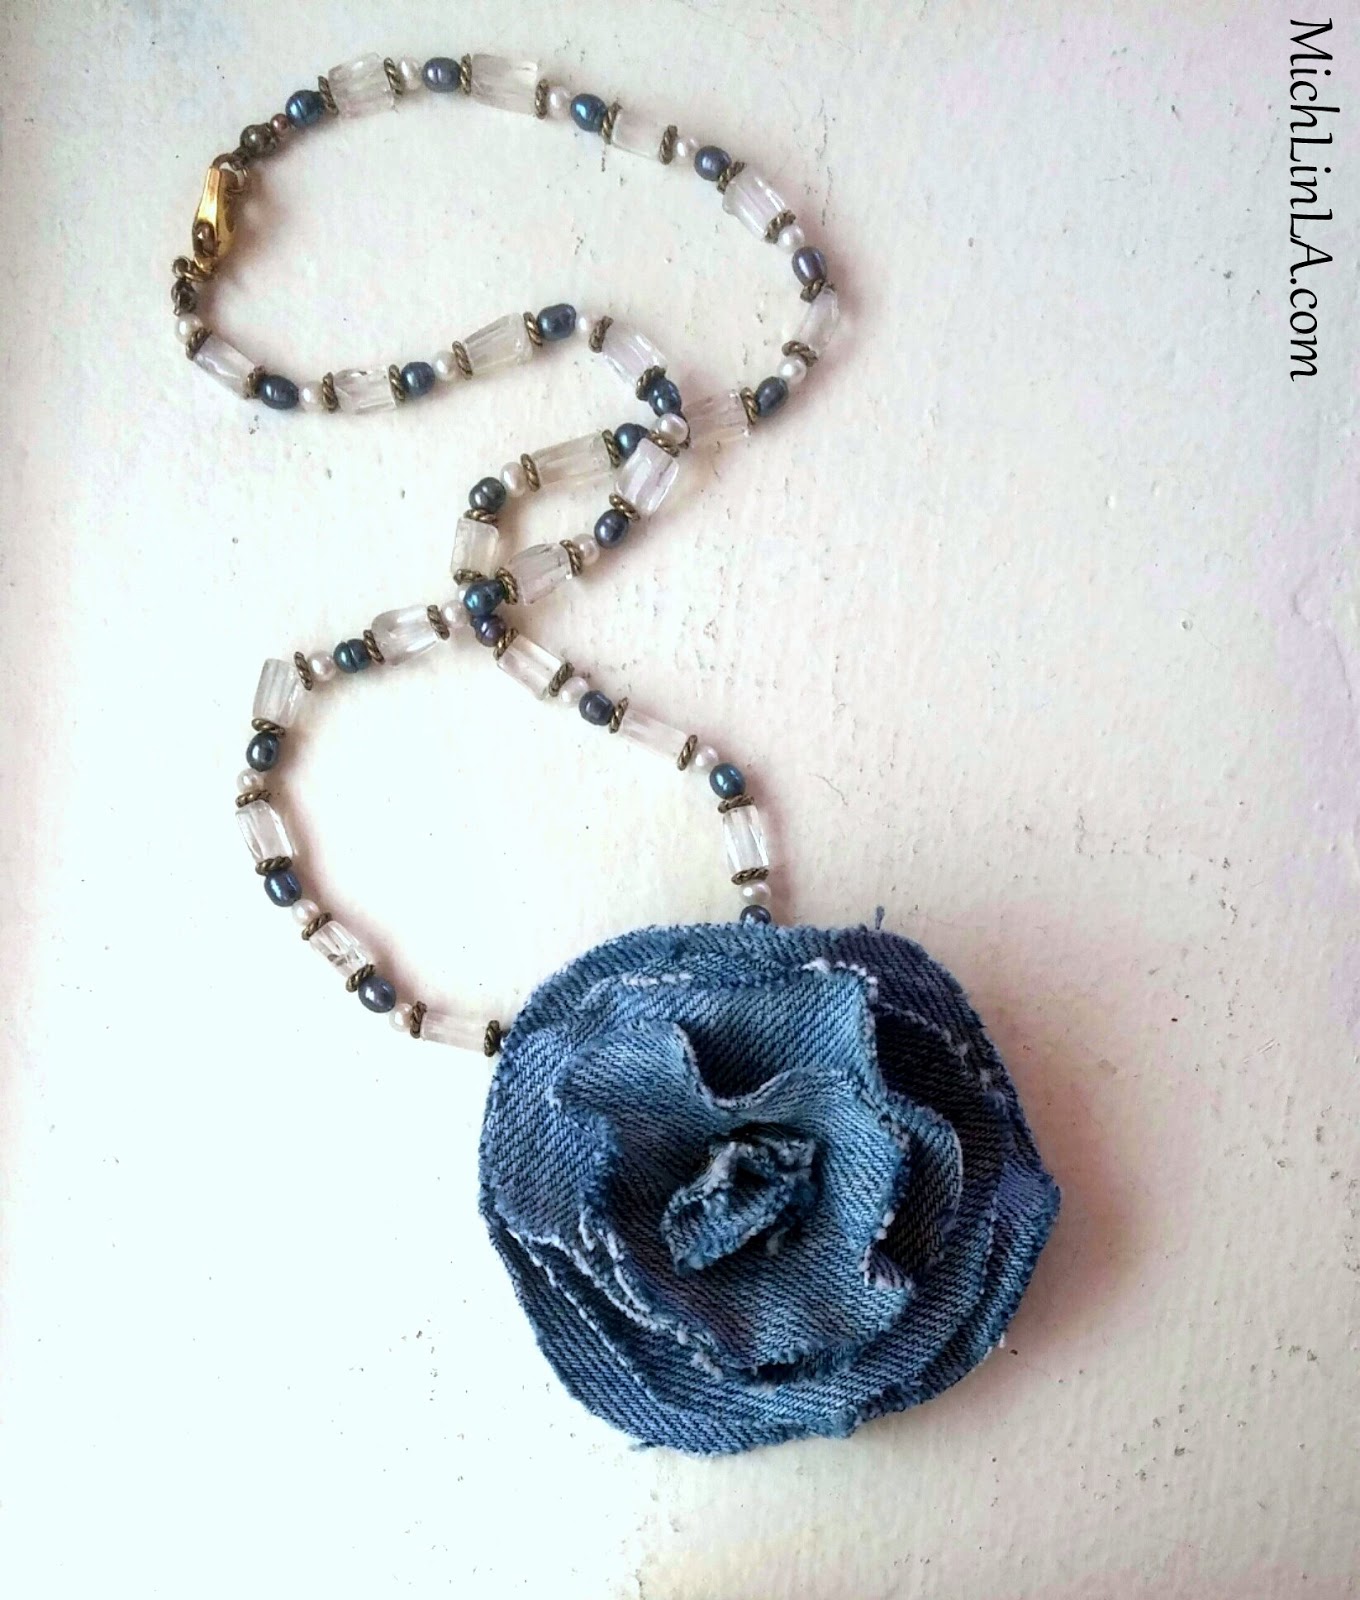
My concept was to contrast the rustic denim pendants with elegant semiprecious stones. These are strung with natural quartz crystals, Czech crystals, lapis beads and freshwater pearls.
They look amazing dressed up or dressed down. Aw, go on, you know you want to make one...and wear it like the natural-born Blue Jean Queen that you are.
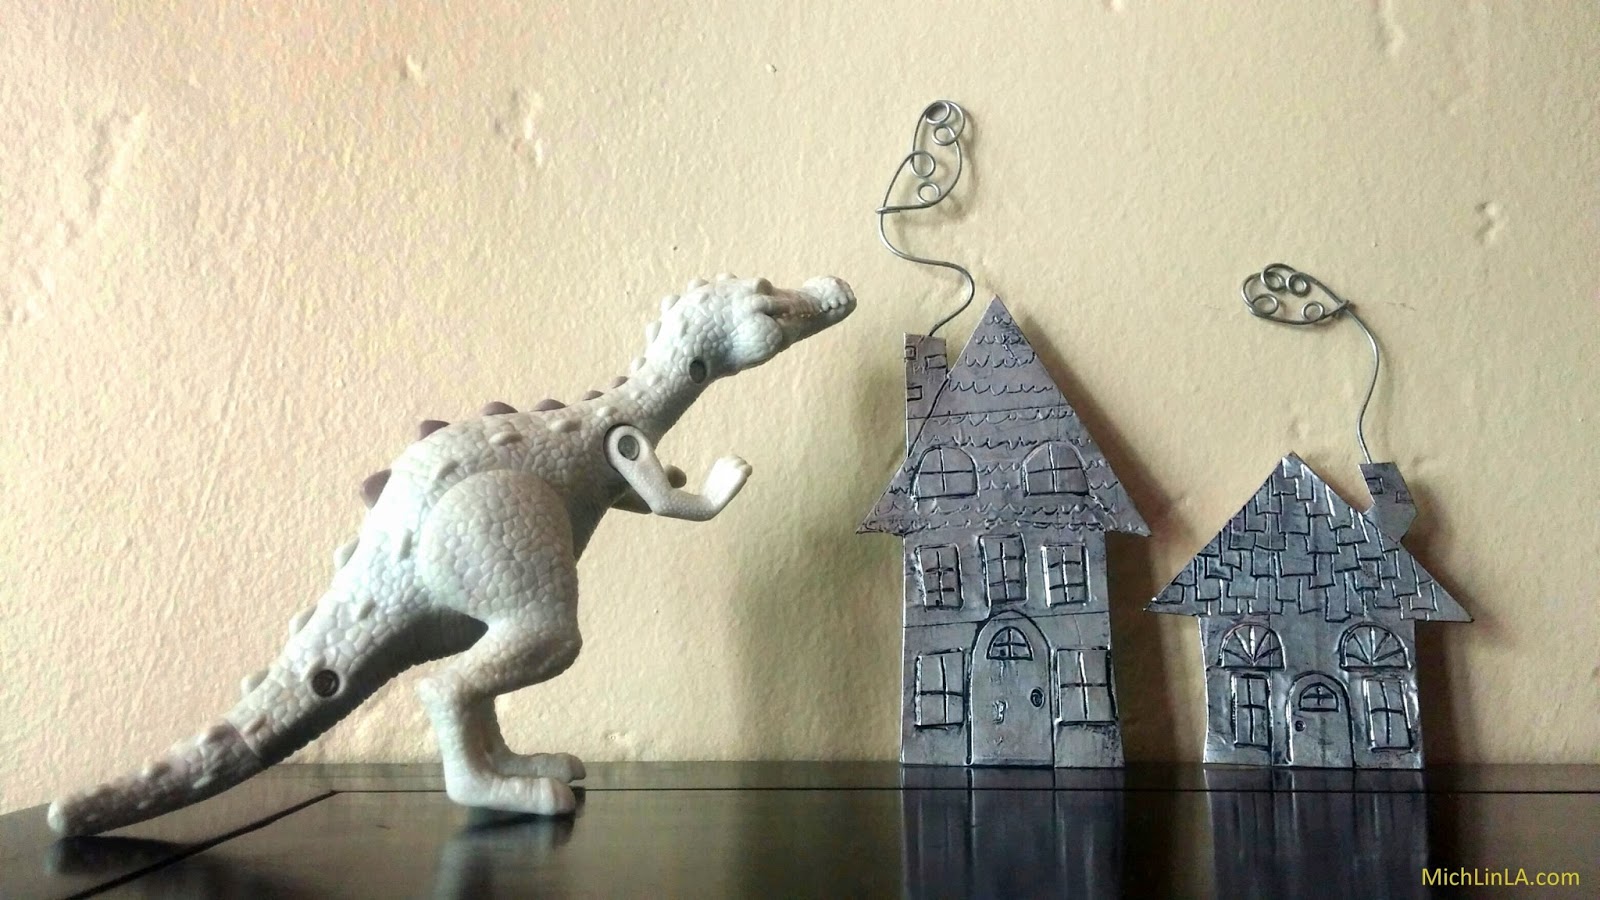
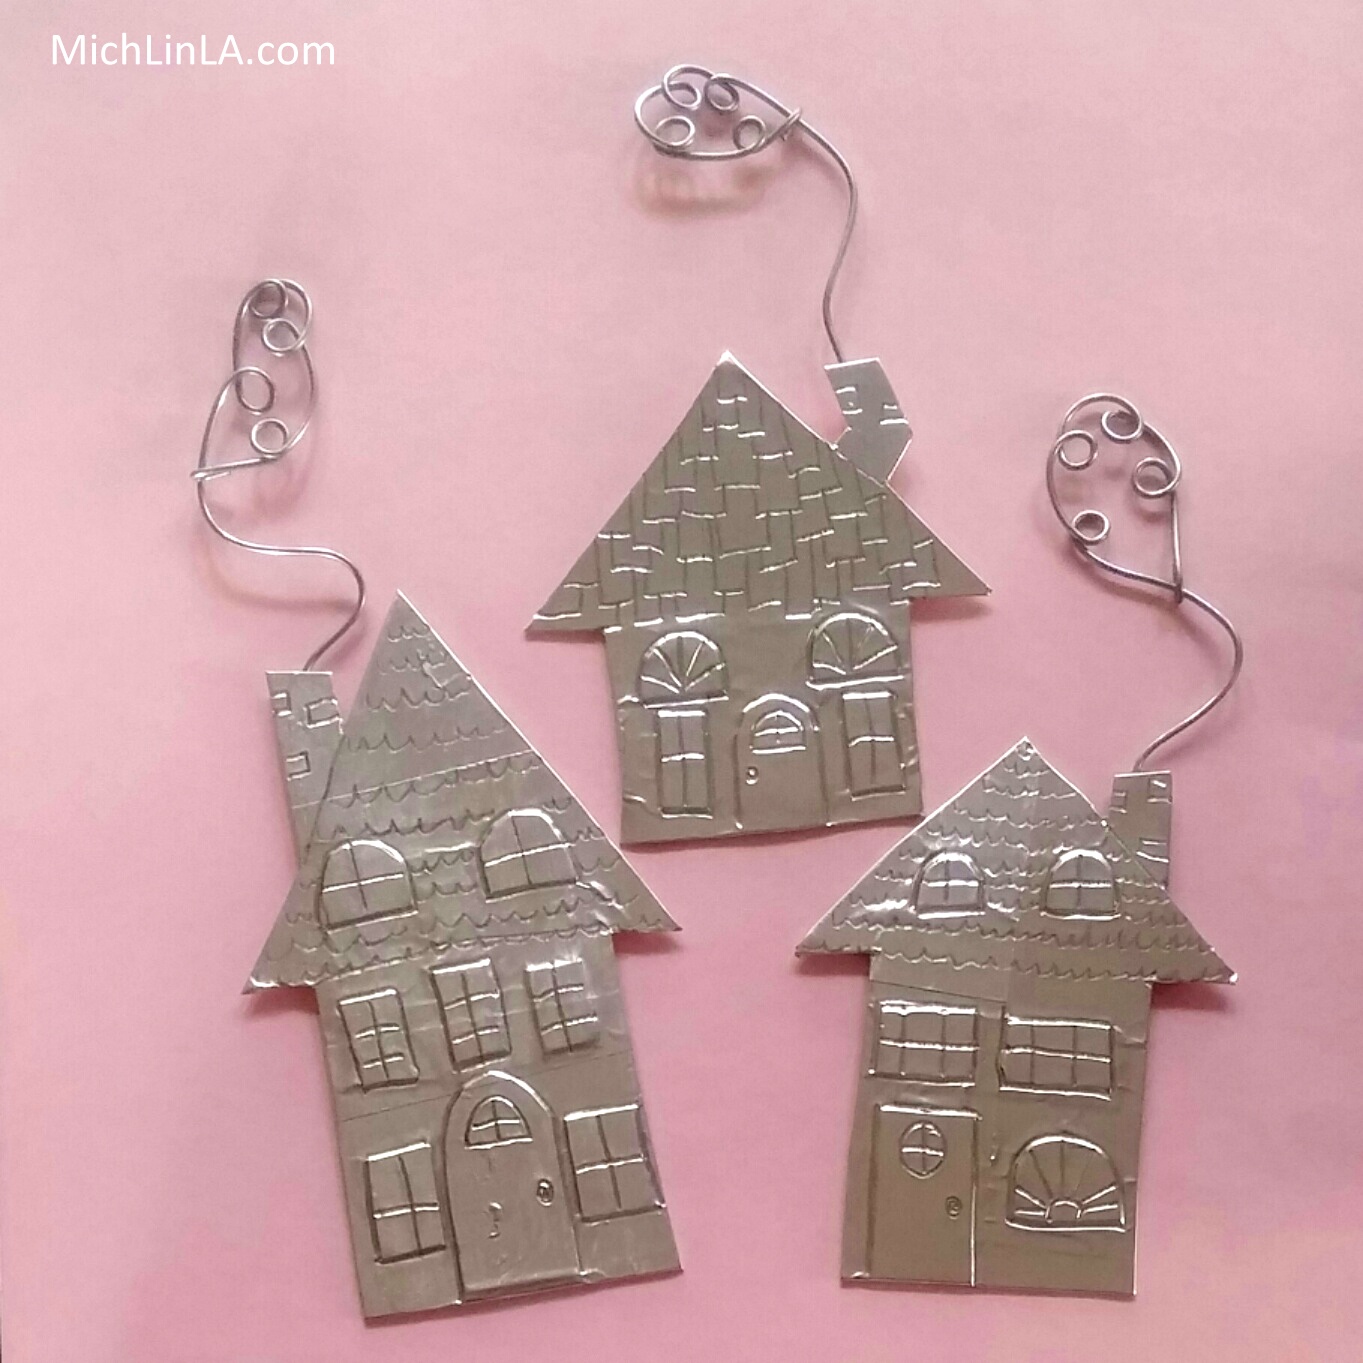
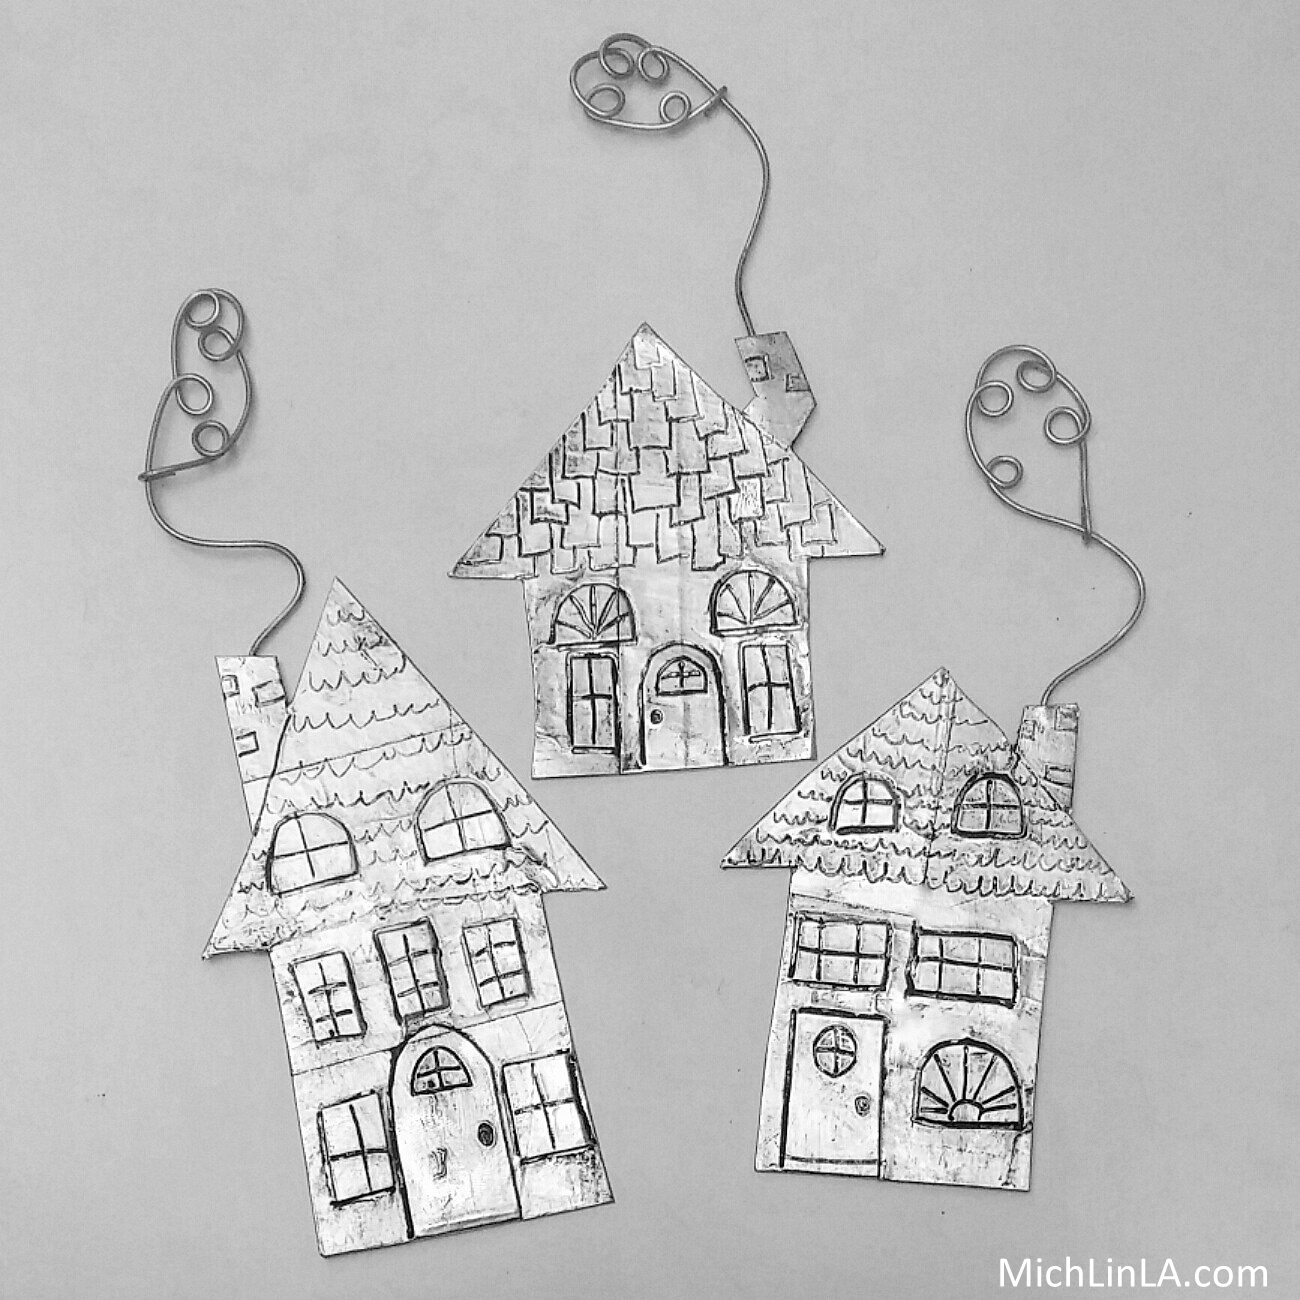
Once, long ago, I made some teeny little silver house ornaments, using recycled cardboard. These new ones are a bit bigger, with a fresh technique and several different uses. And...antiqued!
They can still be used as ornaments, but they are also fun turned into fridge magnets...
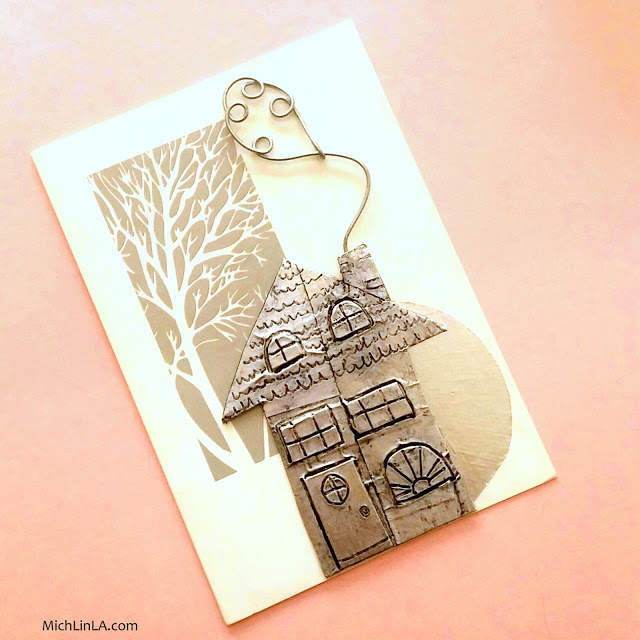
...or greeting cards...
...or standing up anywhere: your mantel, a side table, even the kids' room, hee hee.
They are eco friendly and so fun to make. For tools, all you need are scissors, a pencil and wire cutters. Materials:
-cardboard scraps
-aluminum duct tape
-double-stick tape
-shoe polish
-craft wire
Ready? Here comes the DIY!
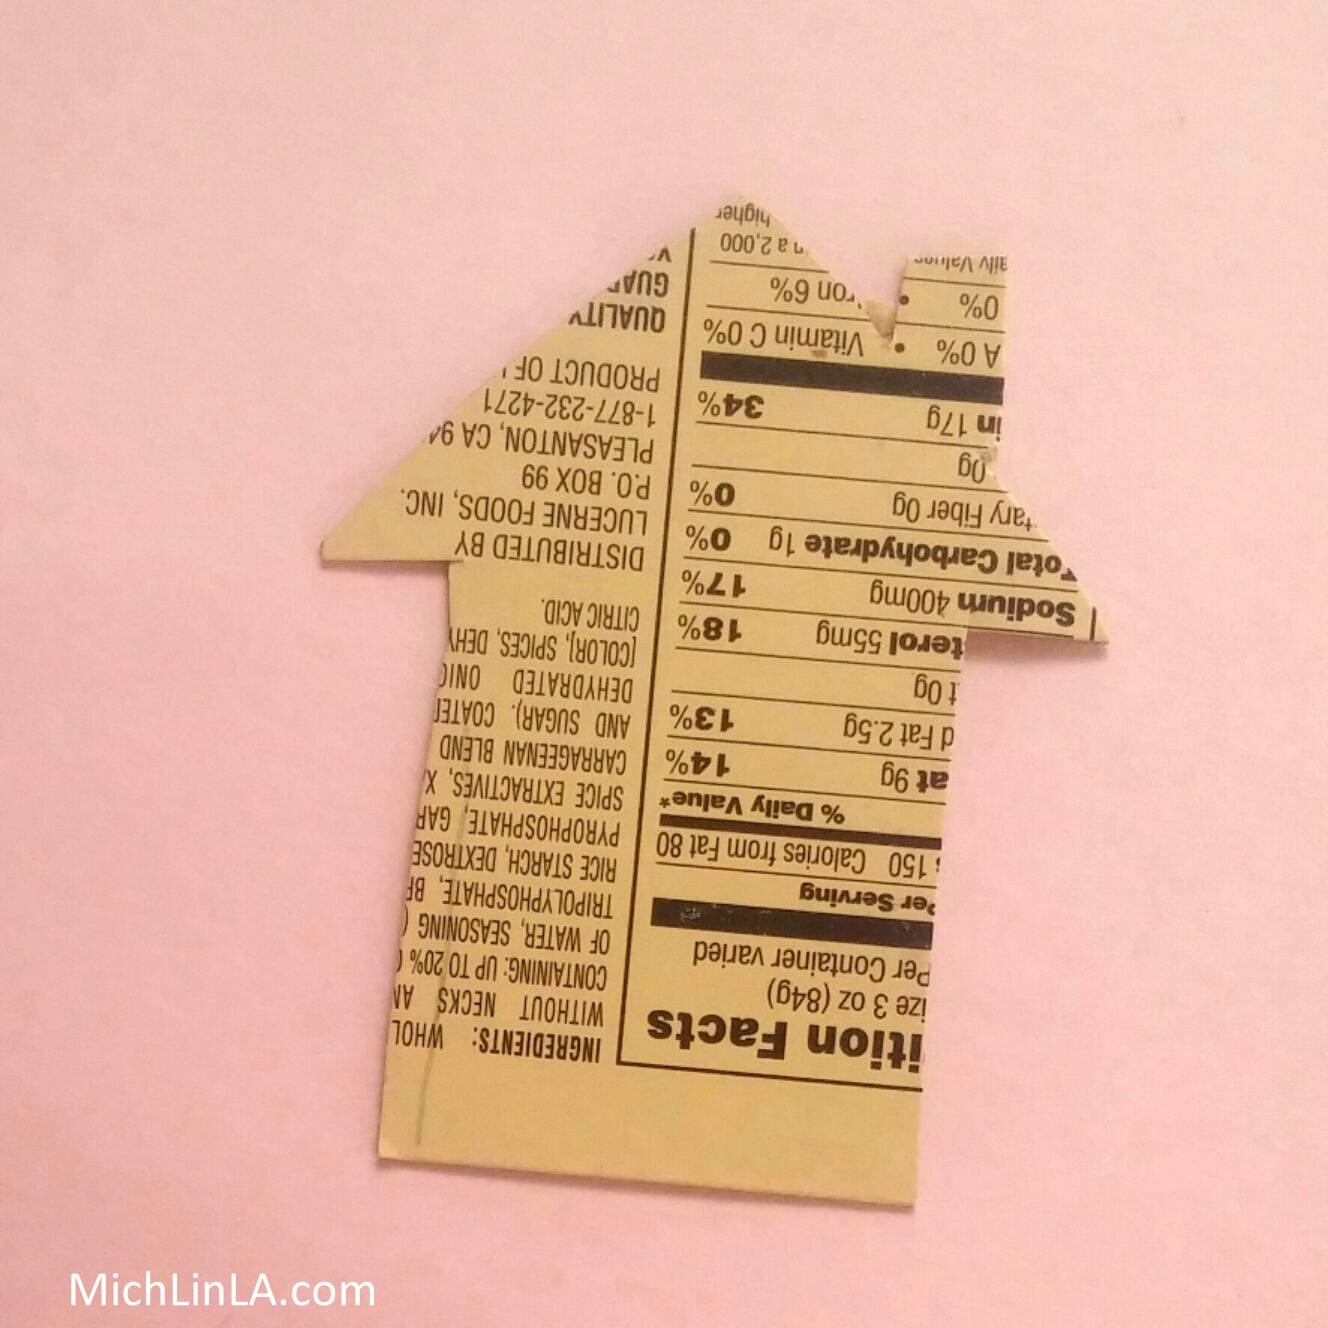
Cut a little house from scrap cardboard.
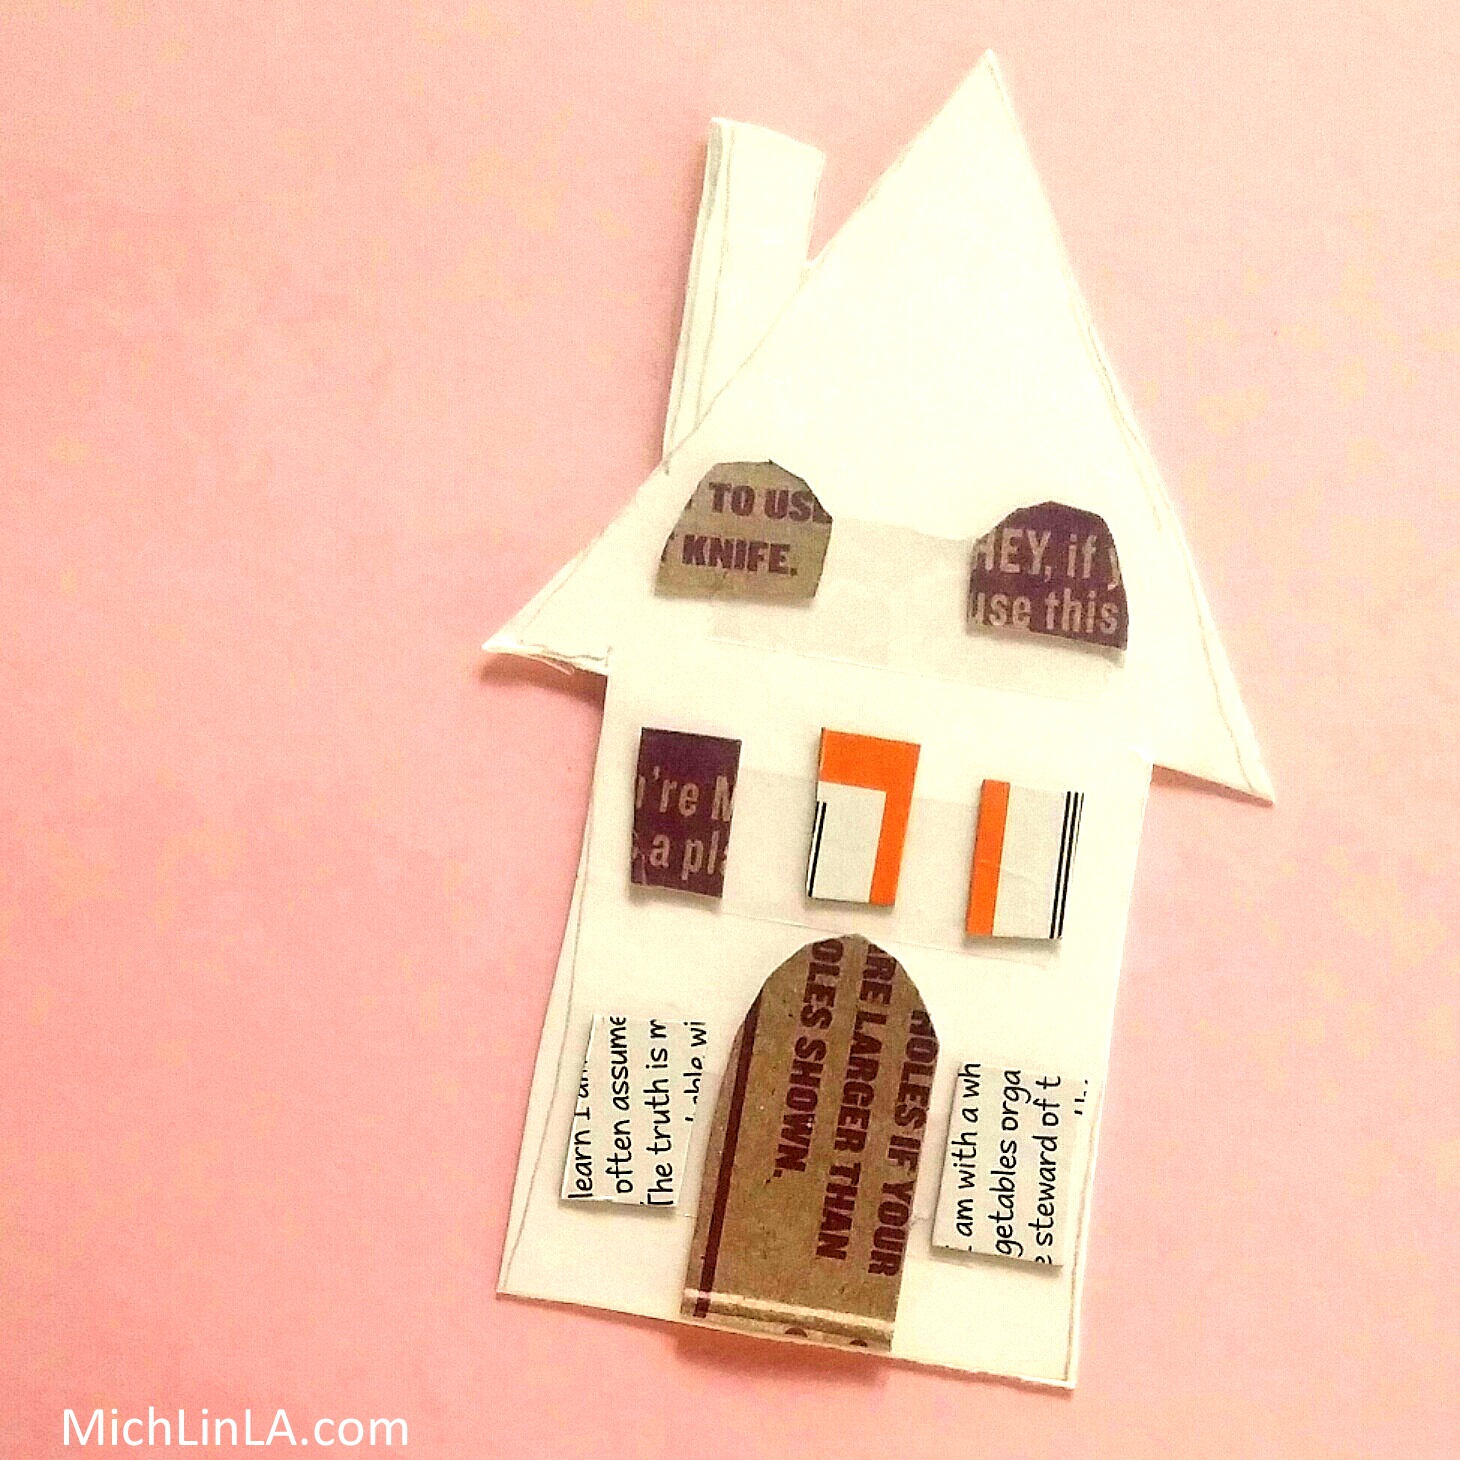
Roughly cut out a tiny a cardboard door and some windows. They don't need to be straight or the same size! Lay down short strips of double stick tape, then stick down the doors and windows.
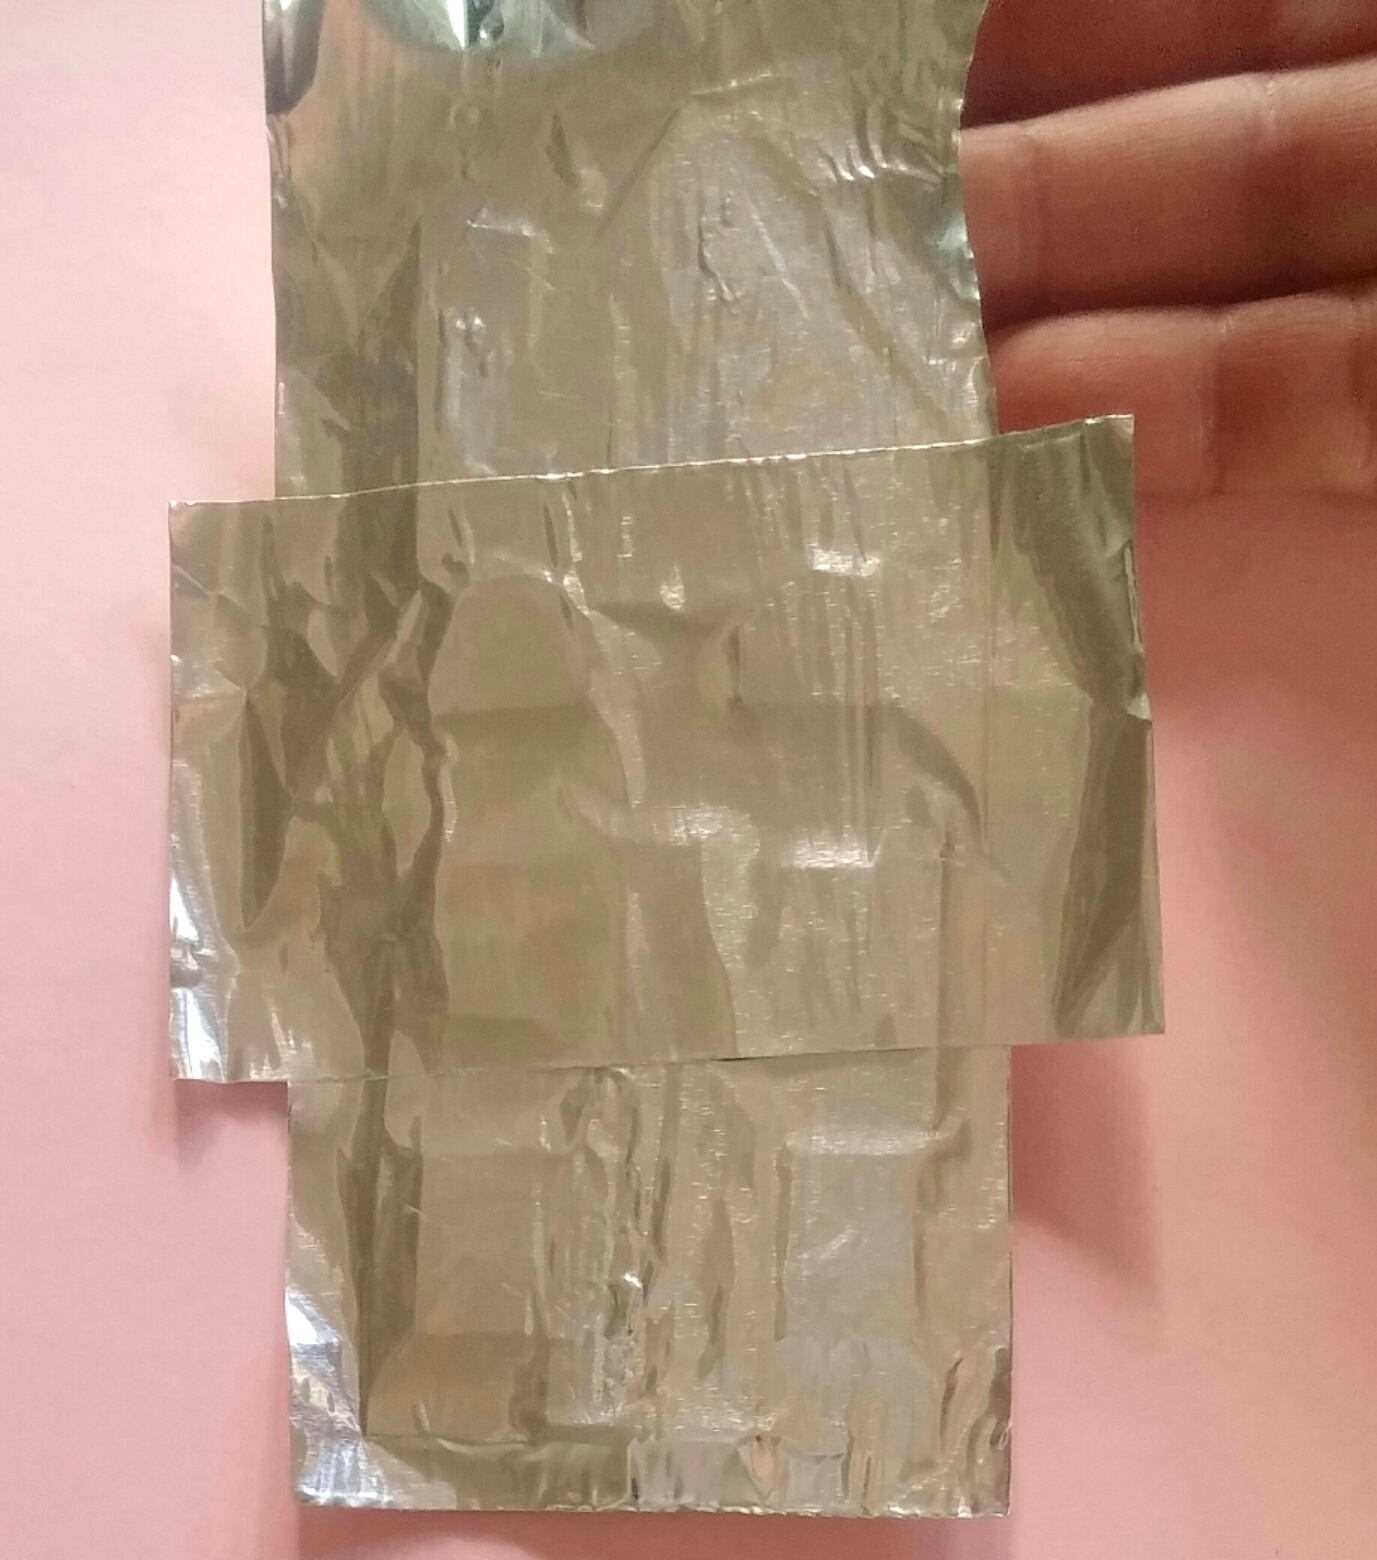
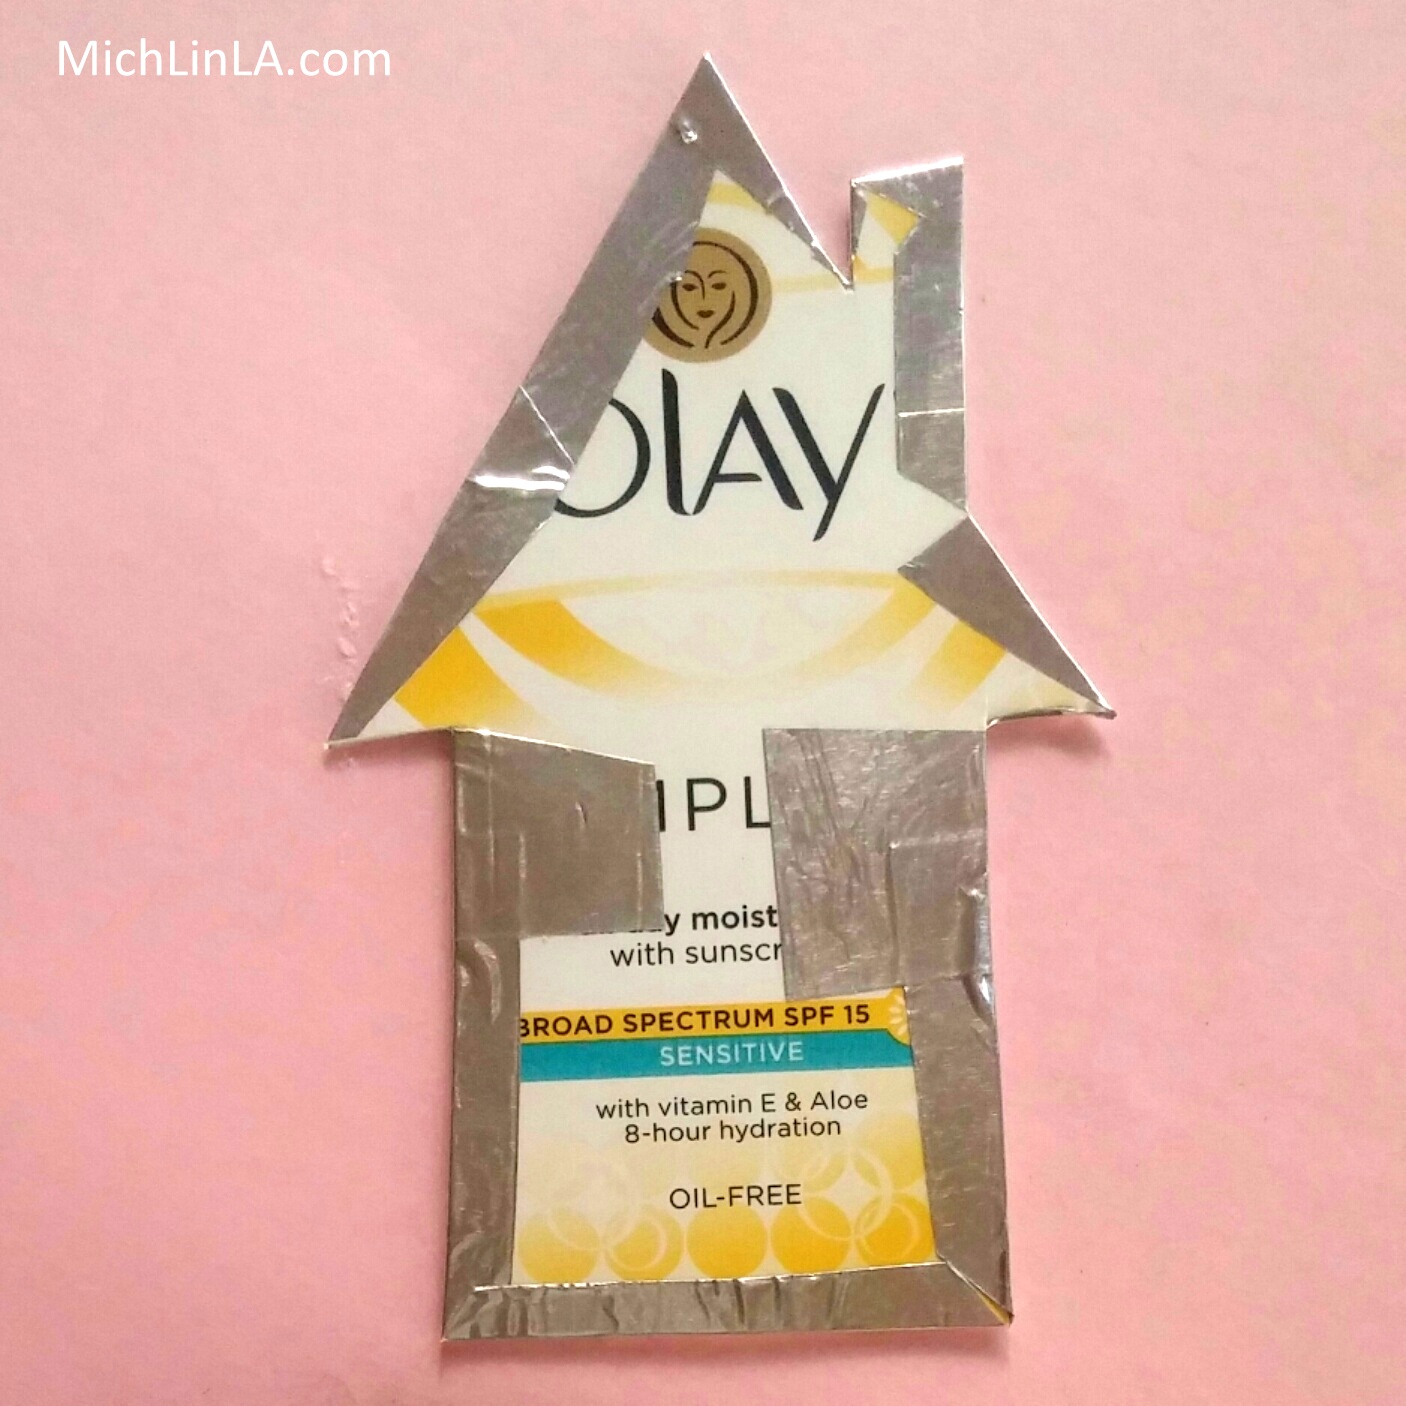
Cover the front with duct tape.
Trim away most of the extra tape. Cut slits at the corners so you can fold down the excess in back. It will probably look something like this:
You can cover the exposed cardboard with more tape - but only if you plan on seeing the back.
Lightly burnish down the tape around the cardboard cutouts, using something rounded like a pen cap (or just your finger.)
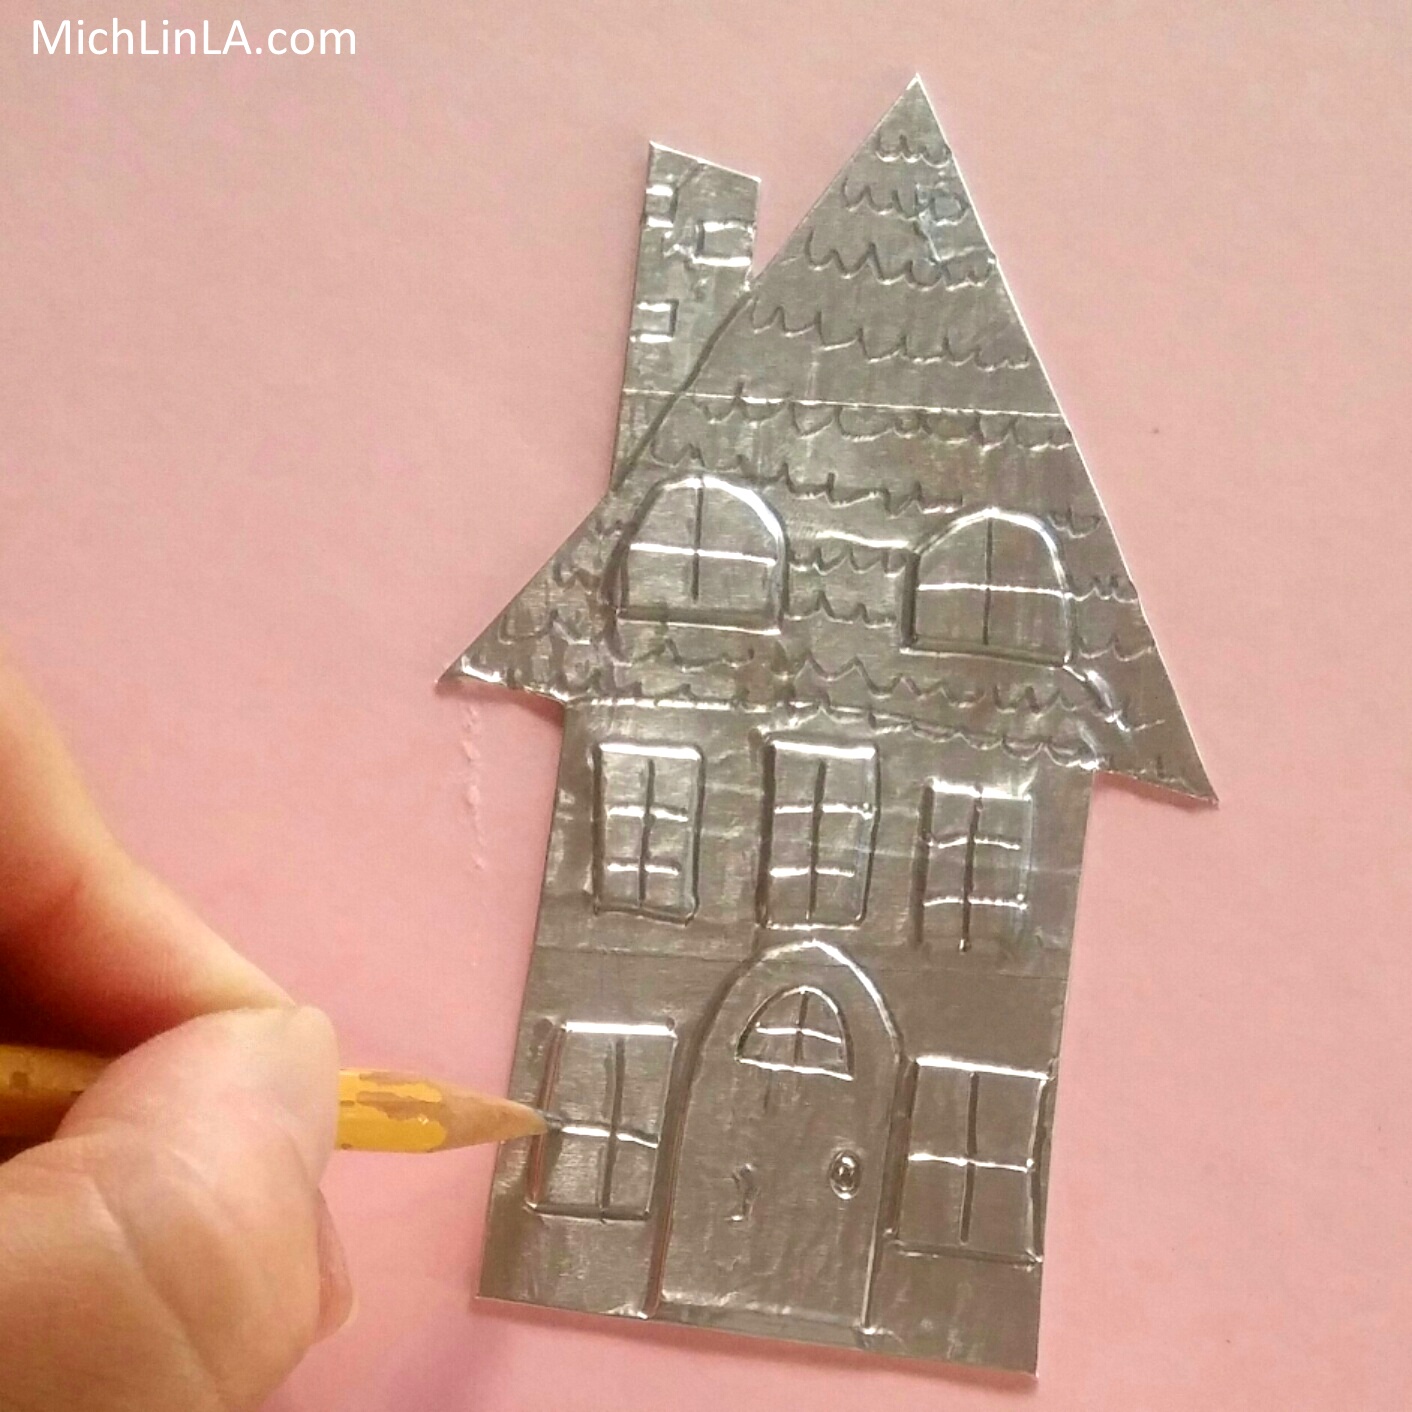
Now to etch in the details. Use a blunt pencil or a ball-point pen - very sophisticated tools, eh? Outline the raised door and windows first. Then add cross-hatched windowpanes, a doorknob and roof tiles. Maybe a few bricks on the chimney.
Remember, you are going for cute and rustic, not precision architectural drafting. Mistakes are okay.
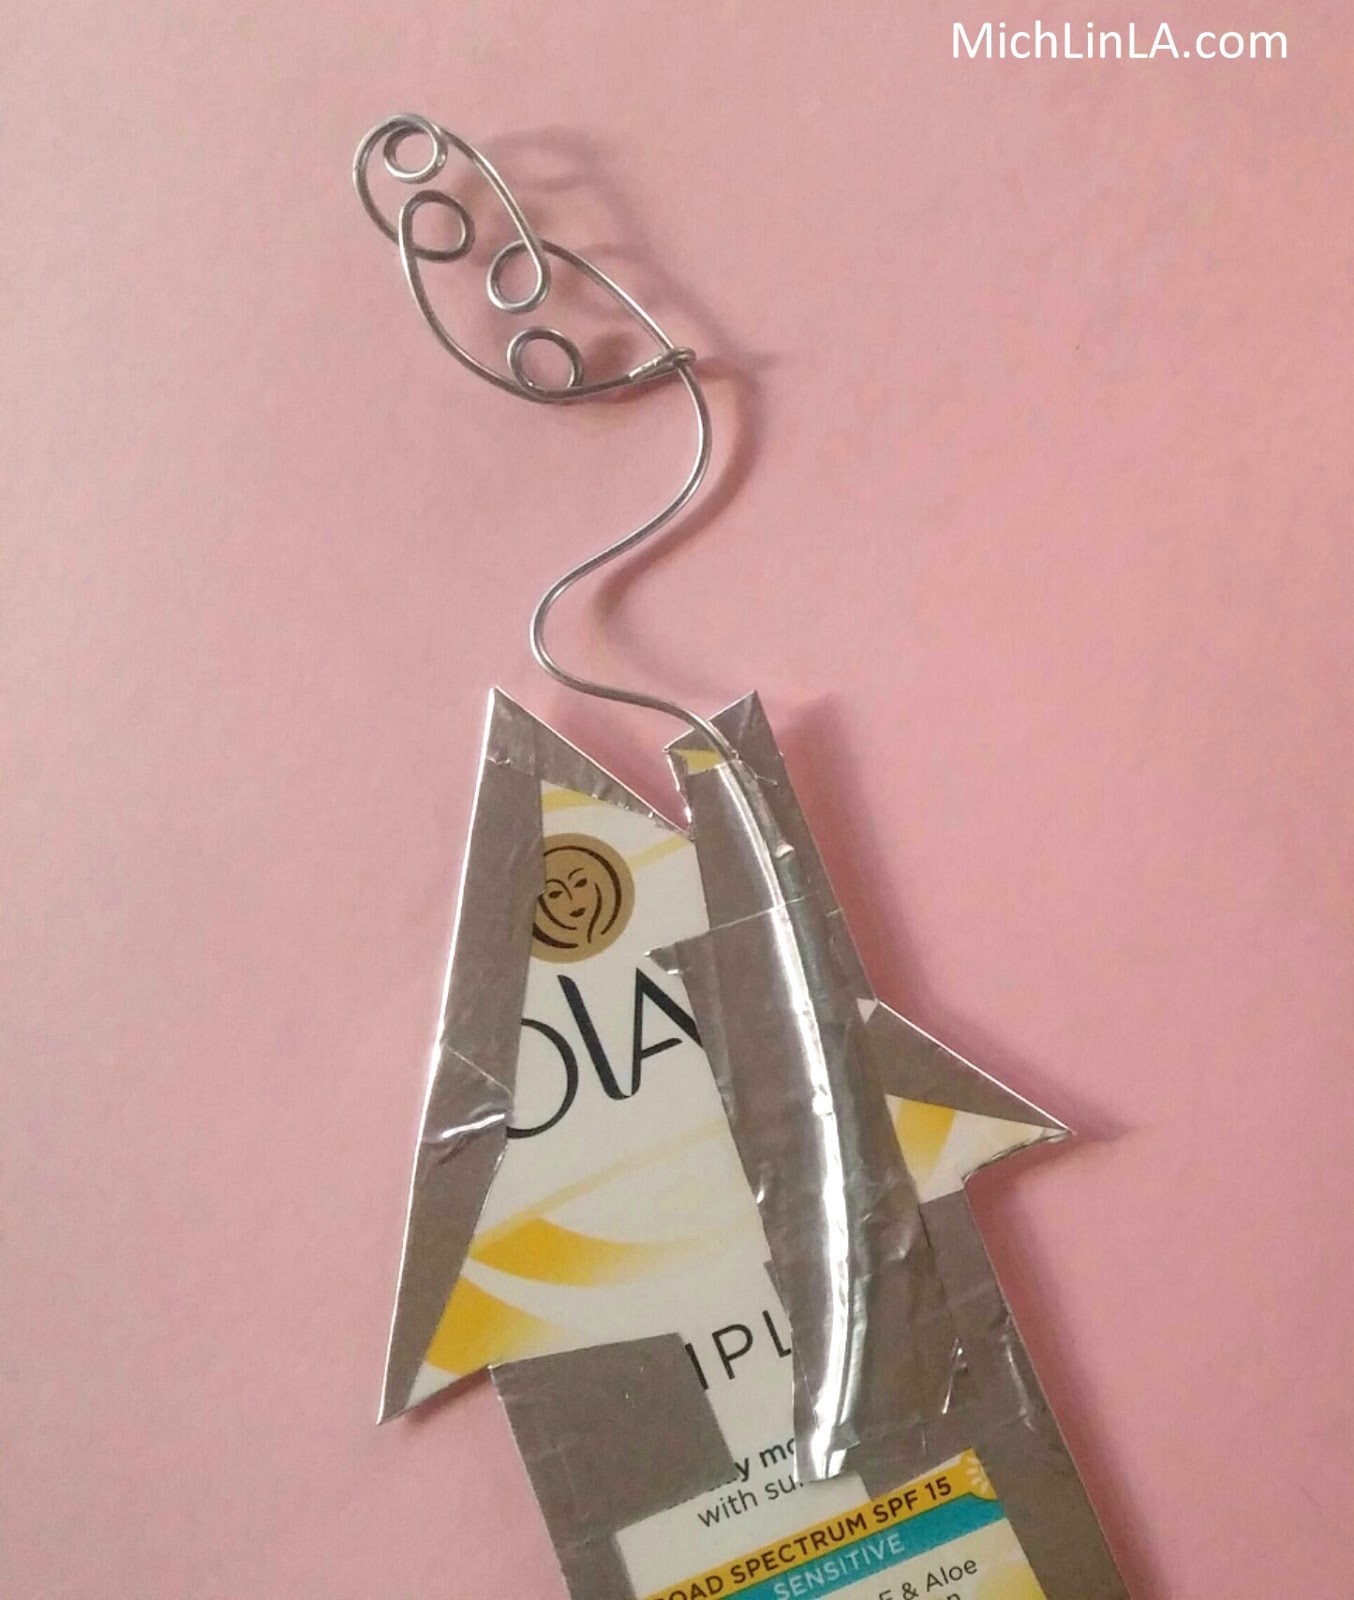
Make a wire smoke plume, to look something like this:
(For the detailed smoke plume tutorial, go here.)
Bend some curves in the wire stem, and tape it to the back of your chimney like so:
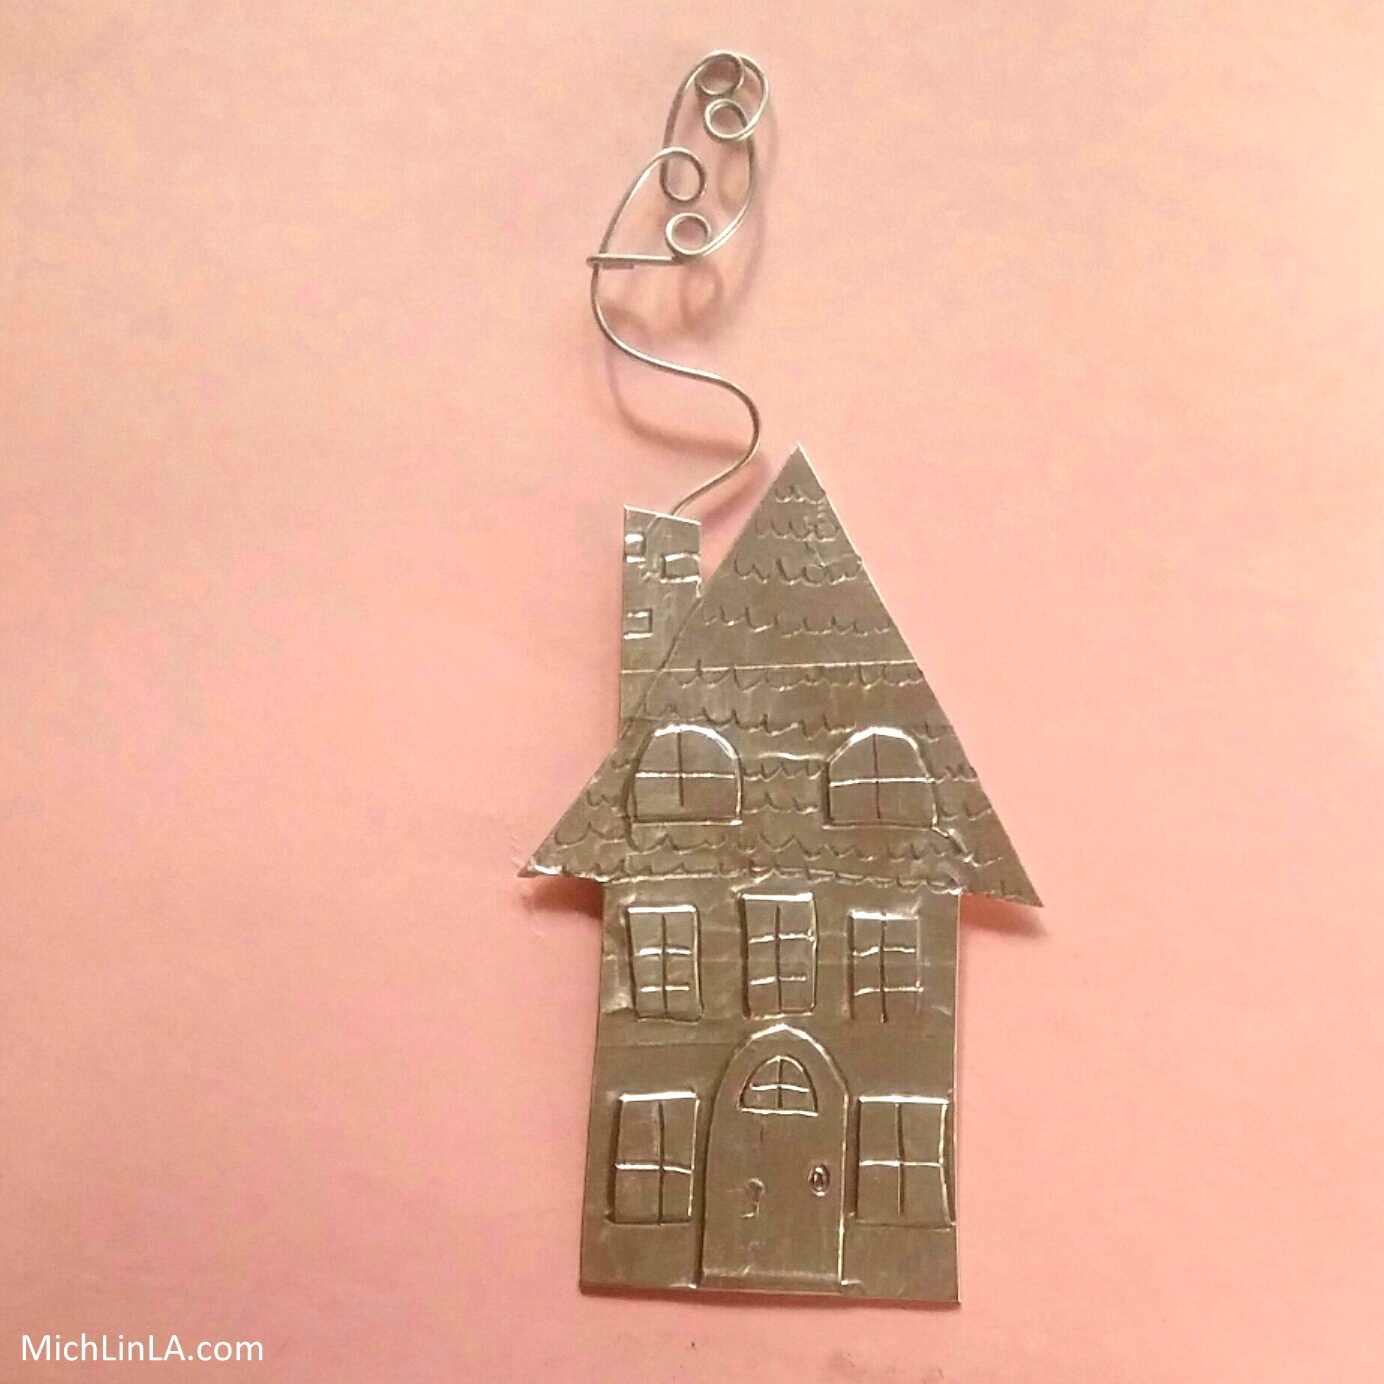
And that, my dears, is a super cool shiny silver house! Adorable.
If you like, you can stop right there. I actually love the shiny silver version as-is.
But wait, there's more. The antiquing step is next, and it's so simple. Just rub on some solid shoe polish, then buff it out until you have the amount of antique finish you like. See the difference:
To make an attached stand, cover a scrap of cardboard with silver tape, then attach it to the house with more tape forming a hinge. Here you can see the stand in the mirror:
Here's one more thought I just have to share: a wonderful gift idea. Make a replica of a real house, and present it to the owner! Wouldn't it be awesome for someone moving into a new home? Or a senior who is moving to a smaller place? Yes, it would.
To make a replica house, refer to a photo of the house front, and approximate the main features with your cardboard cut outs. Then proceed as above for a custom mini house!
Well, that's the dealio! Hope you like it.
Thanks for coming by, friends; see you another day.
P.S. If you made one, what would you do with your mini house?
Mich