Hi, all! This week I made two jewels from hardware store ball chain. I did it using a fun trick with a finding meant for a different purpose.
First the jewels, then the trick!
I started with this beautiful multicolored ball chain, isn't it the prettiest stuff?
I found it at a local Ace Hardware. (If anybody knows an online source, leave it for us in the comments, eh?)
The finding in question is a type of bead tip (typically used for adding clasps to ball chain or strung beads). This is the kind that closes sideways instead of folding in half.
Now for the big trick. I clamped a bead tip onto the end of a short length of ball chain, like so:
And...welp, that's it! Simple, yes? And there are tons of ways to create jewelry from this interesting component.
To assemble an earring, I used these ingredients:
Using jump rings, I added the ball chain segments to a filigree.
Then I connected the fishhook ear wire to the top.
If you have two ears, make a second earring. Done!
Note: if you have been coming here long enough, you know that I don't have pierced ears, so instead I wear ear cuffs. Here's my ear cuff version:
Either way, these earrings are awesomely swingy and surprisingly light to wear!
The necklace went together pretty quickly, too. They key difference: put bead tips on both ends of each ball chain segment. This close-up shows the construction a bit better.
I made three double-ended chain segments in graduated sizes. I threaded them onto craft wire, separated by silver beads. I finished with a small loop on each end - and added more ball chain for the necklace.
If you can't find the colorful chain, use regular silver or gold tone. Just think how many ways you can use these little ball chain segments! How about fringe at the bottom of a large multi-loop pendant? How about individual skinny ball chain earrings? How about a great big tassel?
Let's hear your suggestions!
Alrighty, then, that's today's project - thanks for visiting, hope you enjoyed!
p.s. Interested in making your own simple ear cuffs? Check out this tutorial.
Hi, all! Check out these flittery, fluttery butterfly earrings.
This design is really at its best when worn - the true effect is a little hard to capture in a photo. That's because they have lots of movement and, when hanging free, tend to cascade in almost a spiral. This pic shows it a bit better:
I know it looks complex, but it's not really so difficult, I promise. Tutorial begins now!
Put four butterfly beads on headpins, with one pin a little shorter than the other three. Turn a loop at the top of each one. You will end up with four butterfly dangles, with empty lengths of pin exposed. Like this:
Swivel open the loop on one of the long dangles, and add it to the empty section of the short dangle. Close the loop. It should look like this.
Do the same with the next two dangles, adding each butterfly to the empty pin section of the one above it. You will end up with this interesting geometry:
Now add an earring finding to the loop at the top of the cascade (the short butterfly dangle).
If you have two ears, make a second earring. And you're done!
Aren't they fun? I used some little polymer clay butterflies from a bracelet I took apart, and some carved beads in a stone called strawberry quartz. There are so many cute butterfly beads out there, I bet you find just the thing to make your heart flutter.
In a good way. Not in a tachycardic kind of way.
Hope some of you decide to give it a try!
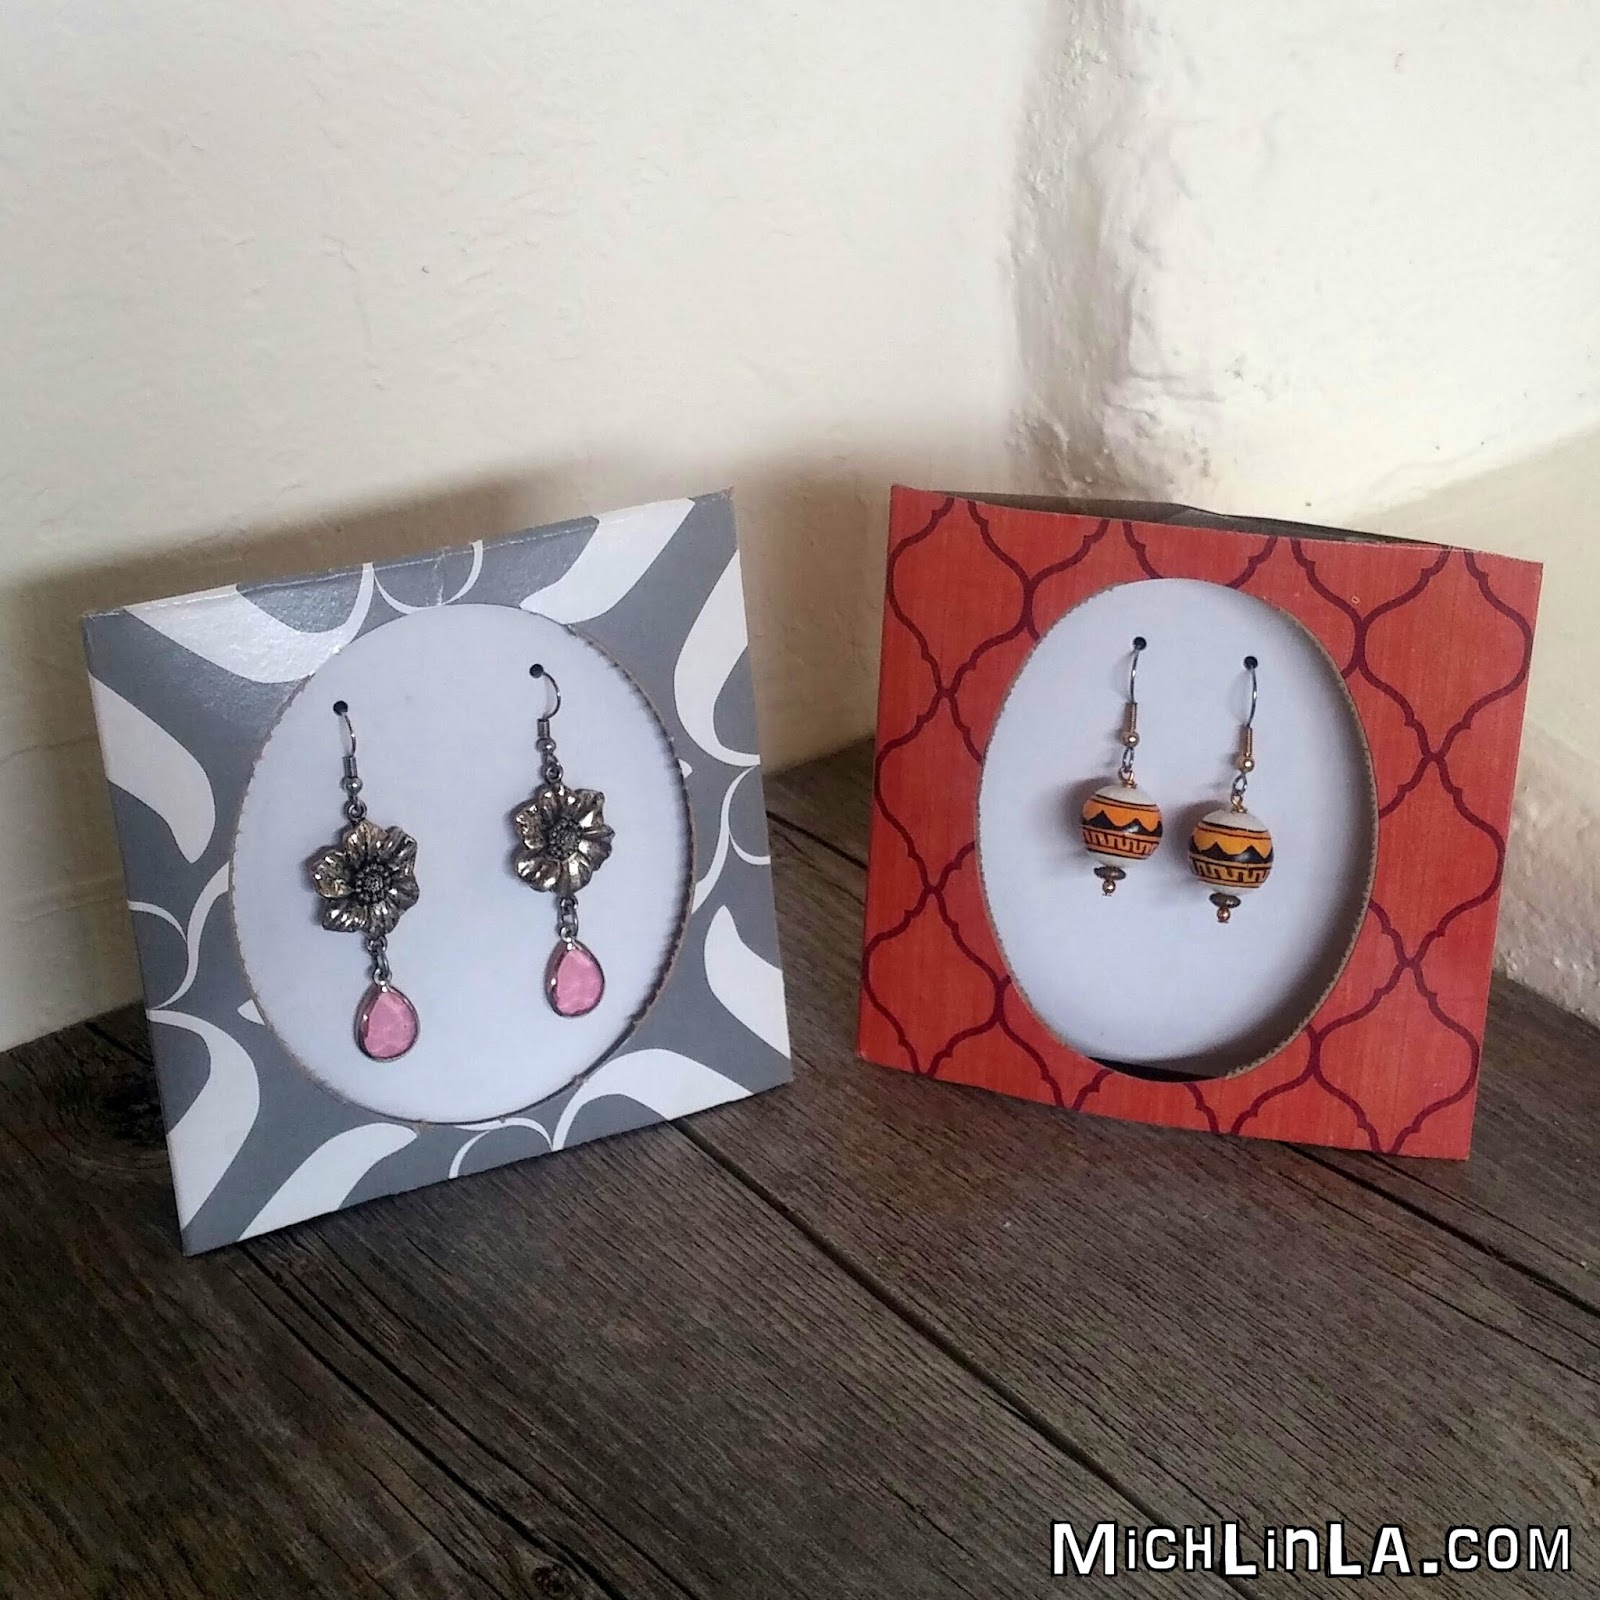
Hey, here's something I've been meaning to show you for a while. I have a lot of these ranged around my studio. Penny-pinching, earth friendly, practical jewelry displays...and they do brighten everything up!
Can you picture the top of the tissue box and how I used it? Got 5 minutes, scissors and a stapler? Here's the ridiculously simple DIY.
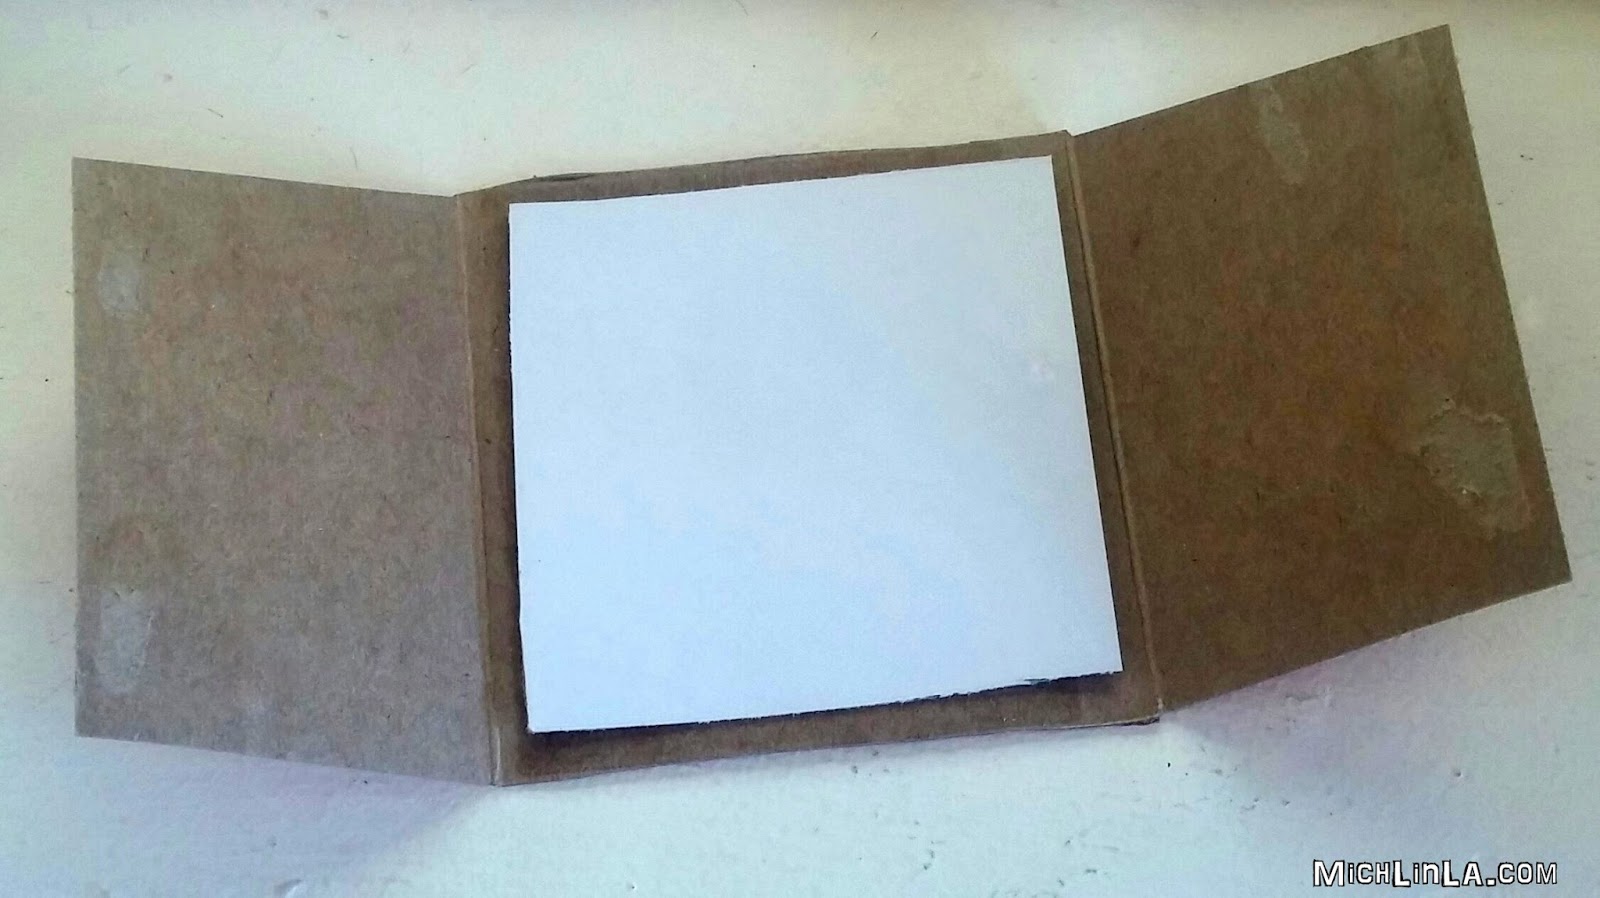
Cut the top and sides from a square tissue box, like so:
Cut a piece of scrap cardboard to cover the opening.
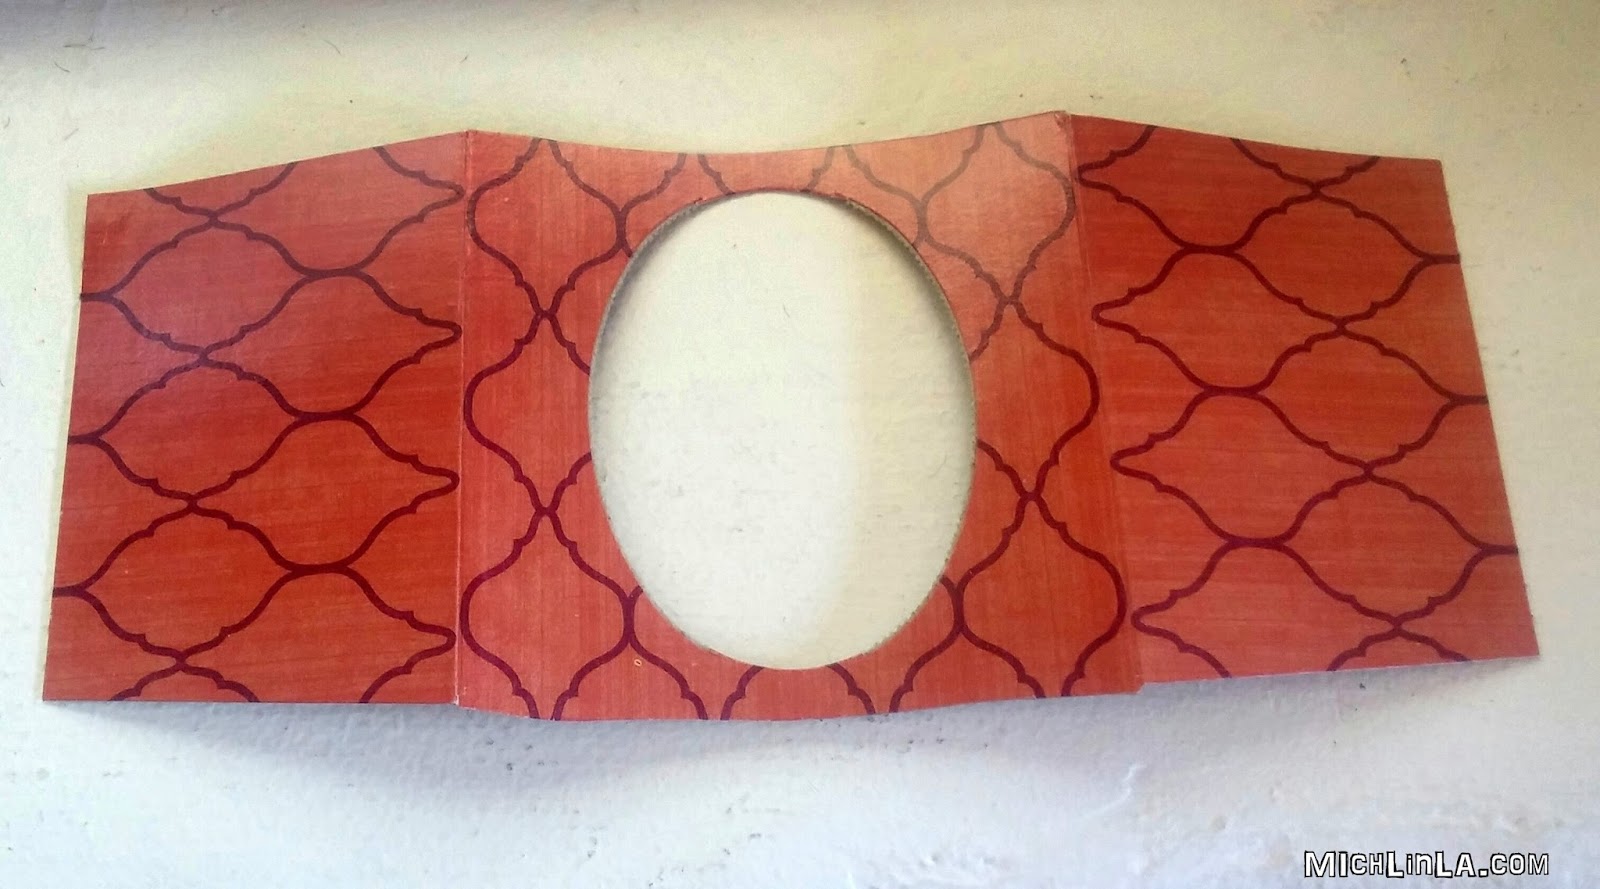
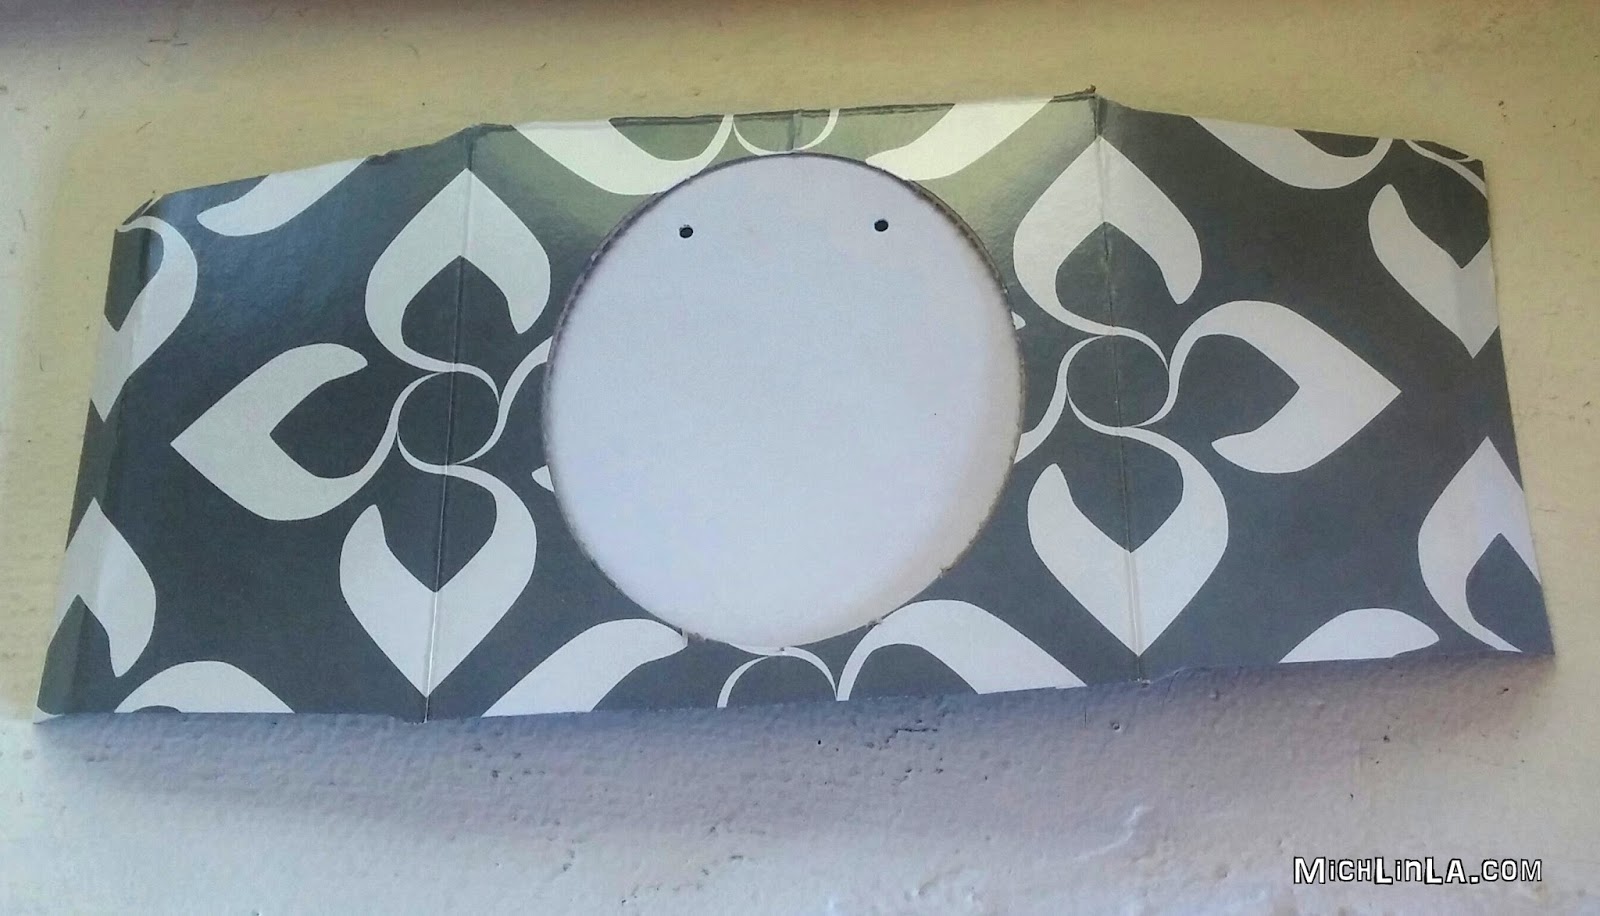
Glue or tape the cardboard to the inside; I use packing tape because it's a strong hold. Then poke a couple of holes near the top. Here's how it will look when flipped right-side-up:
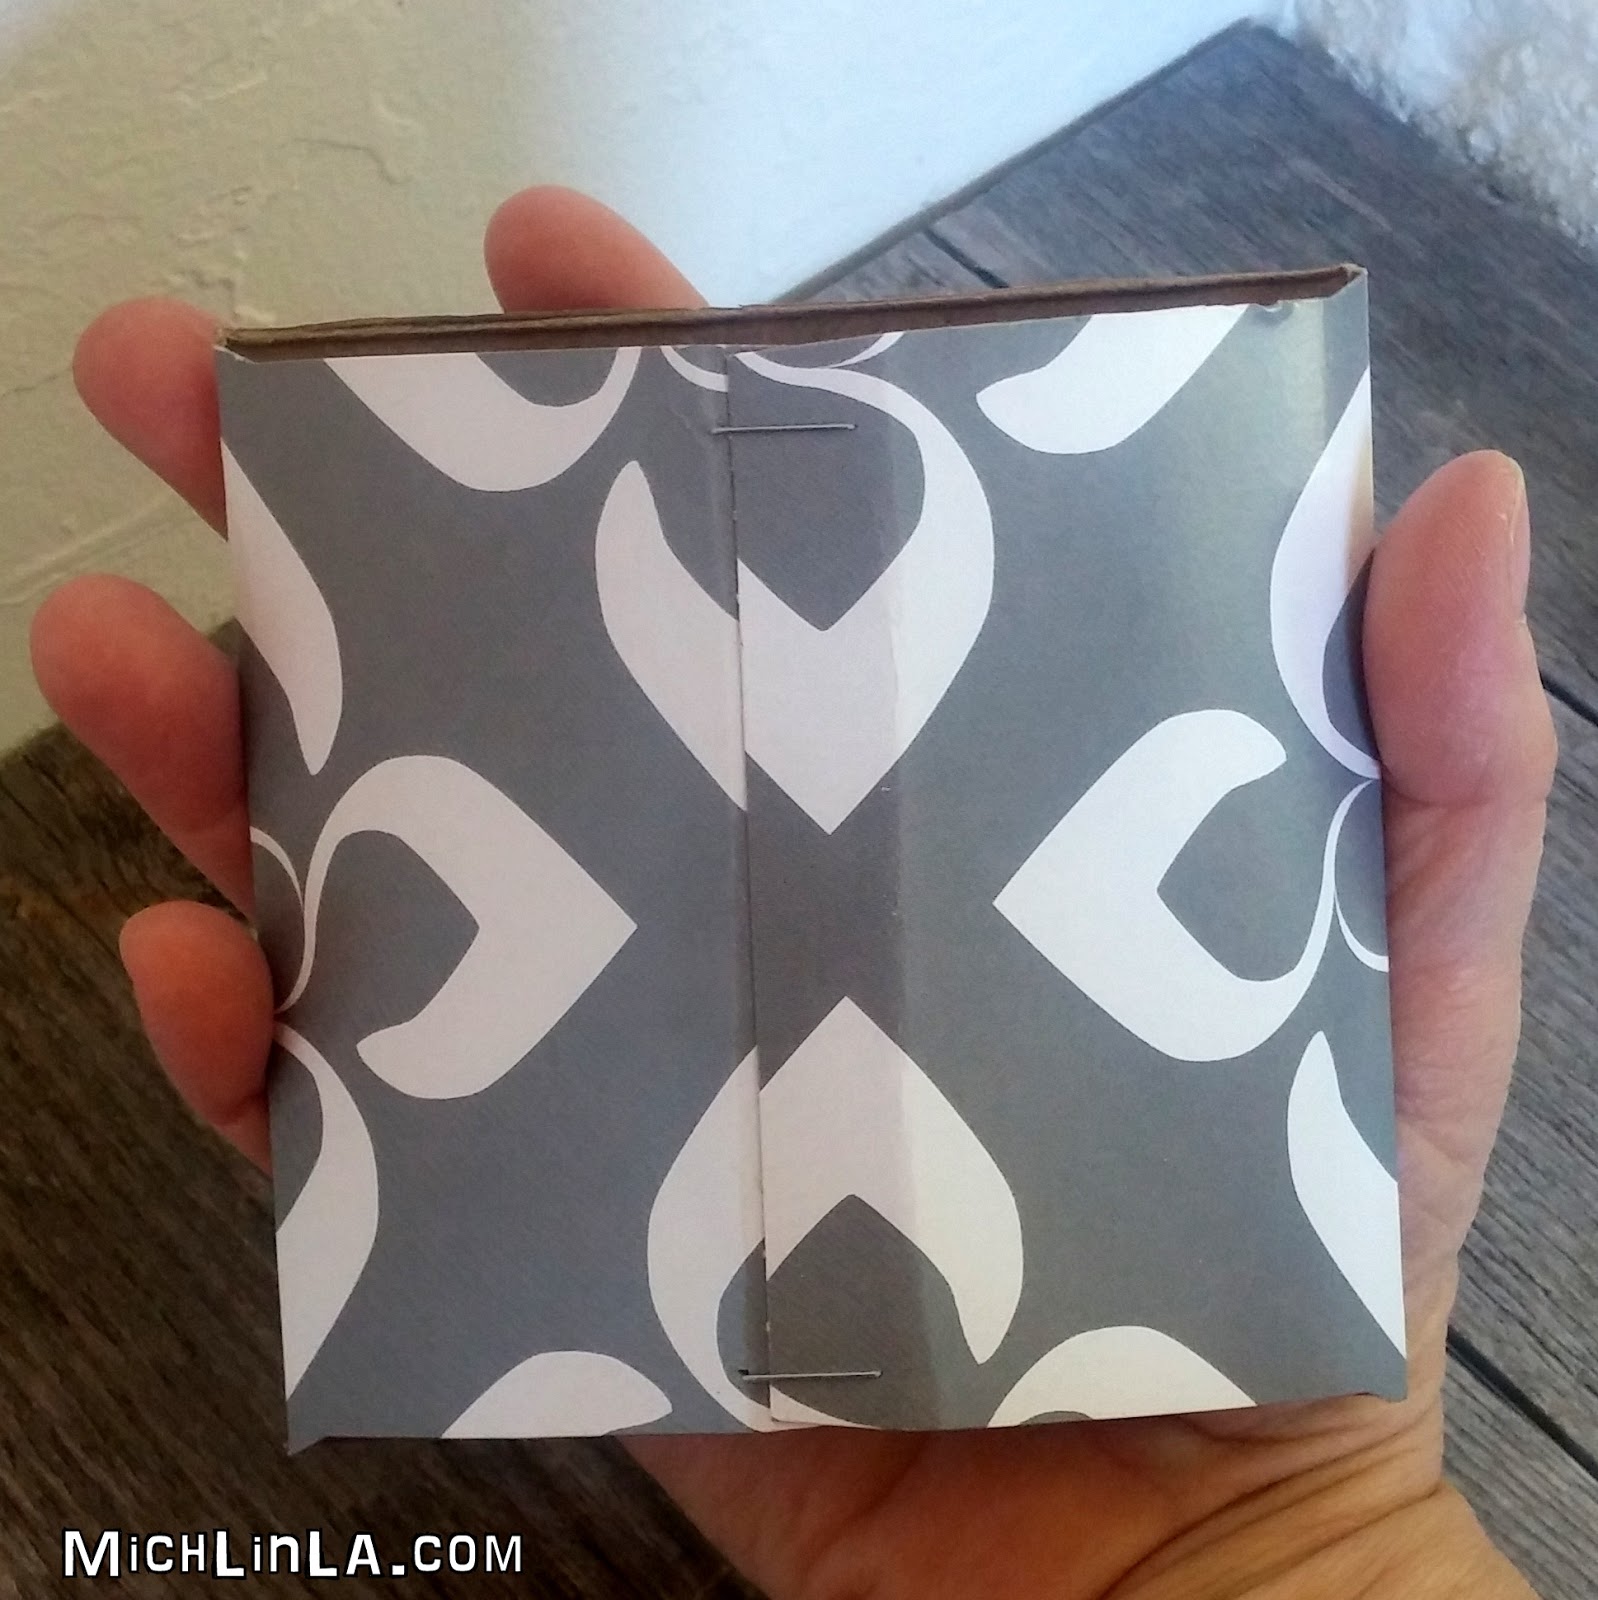
Now staple together the two sides - one staple at the top, one at the bottom. And that's it! Here's your 3-D frame seen from the back:
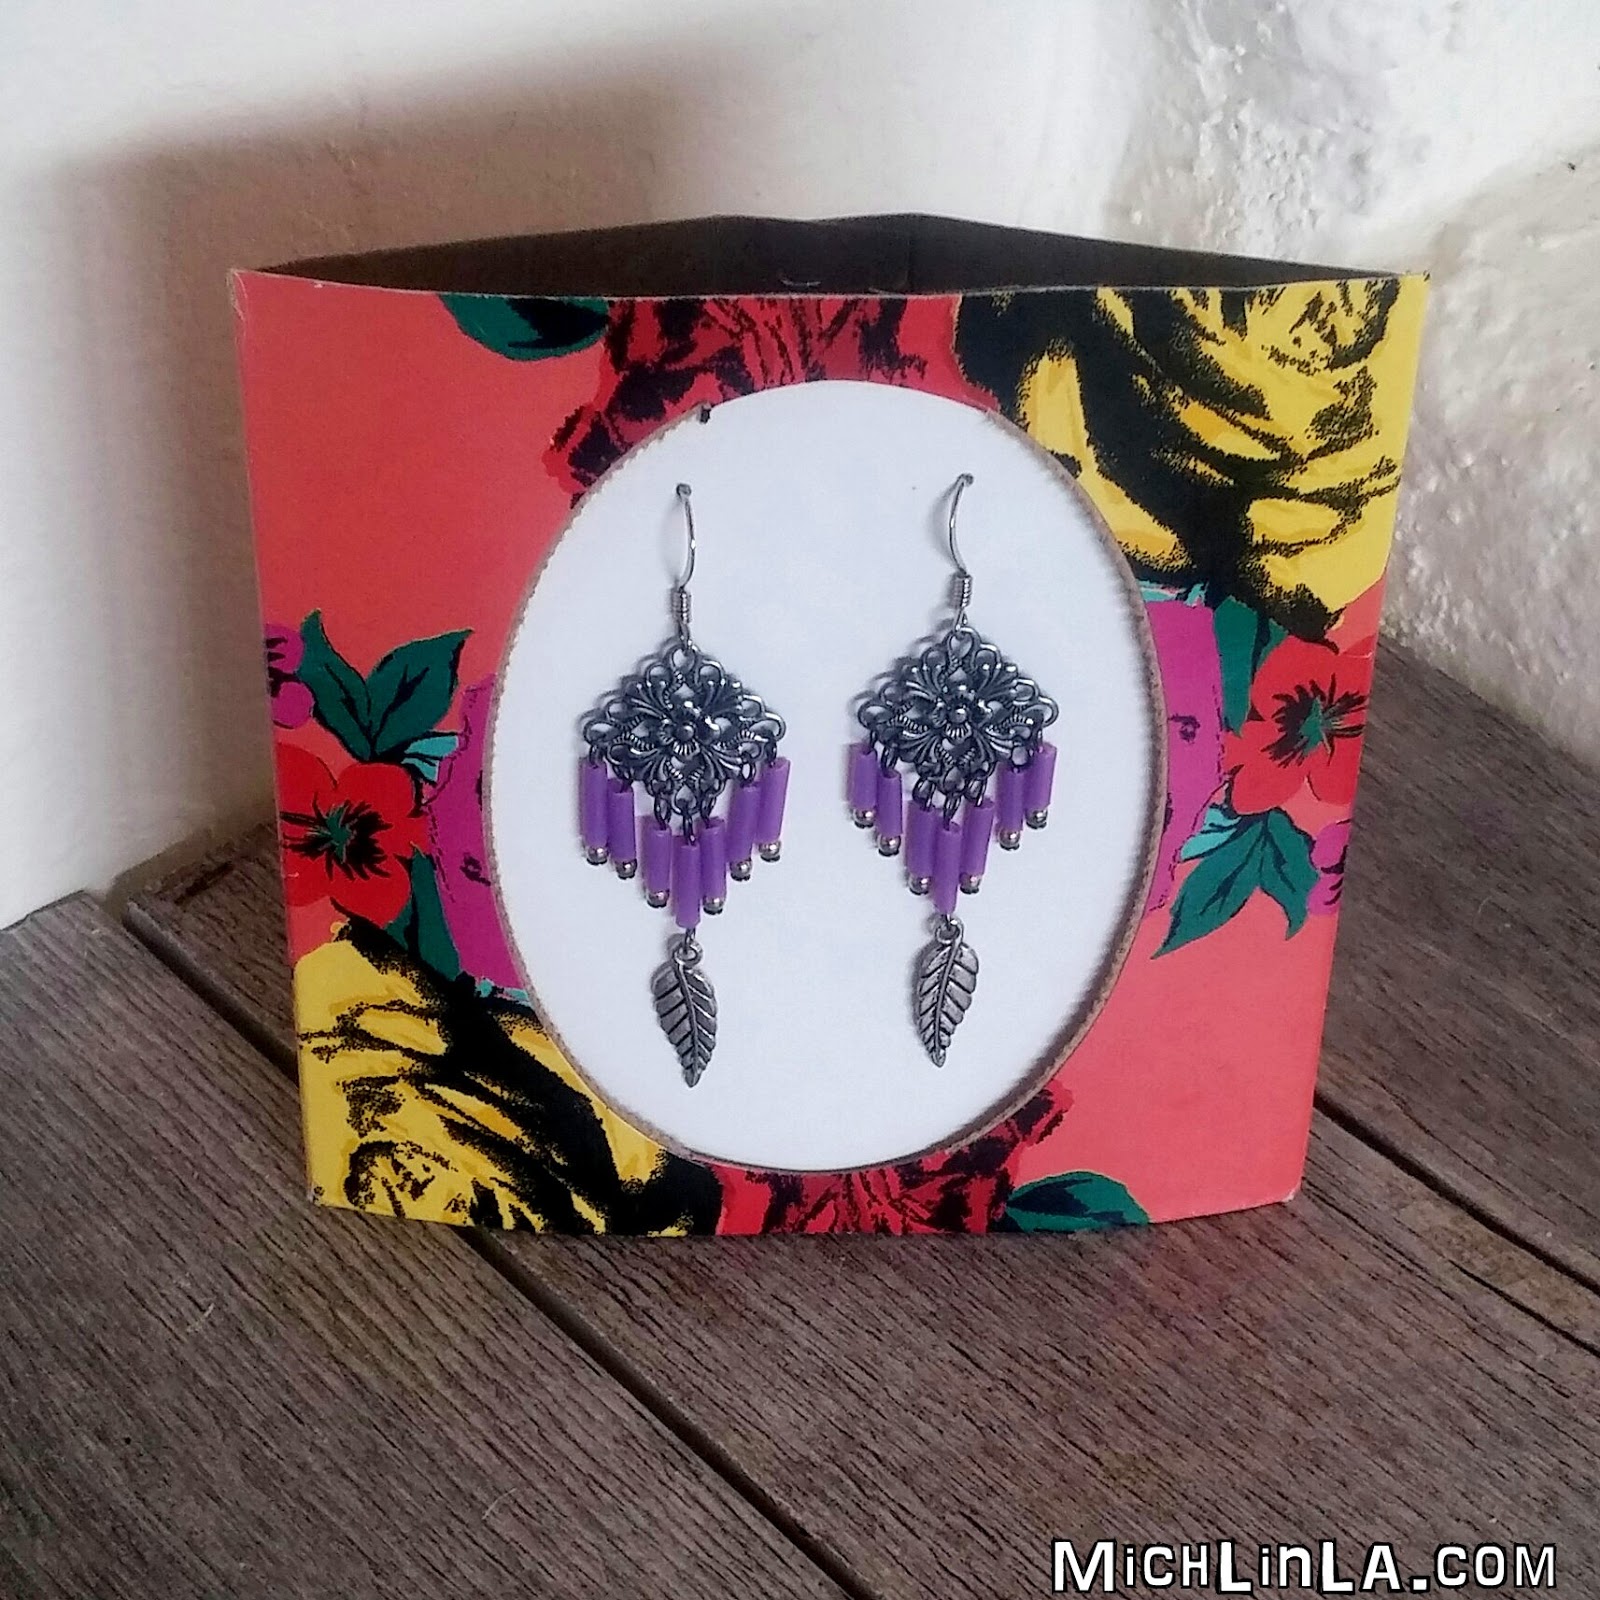
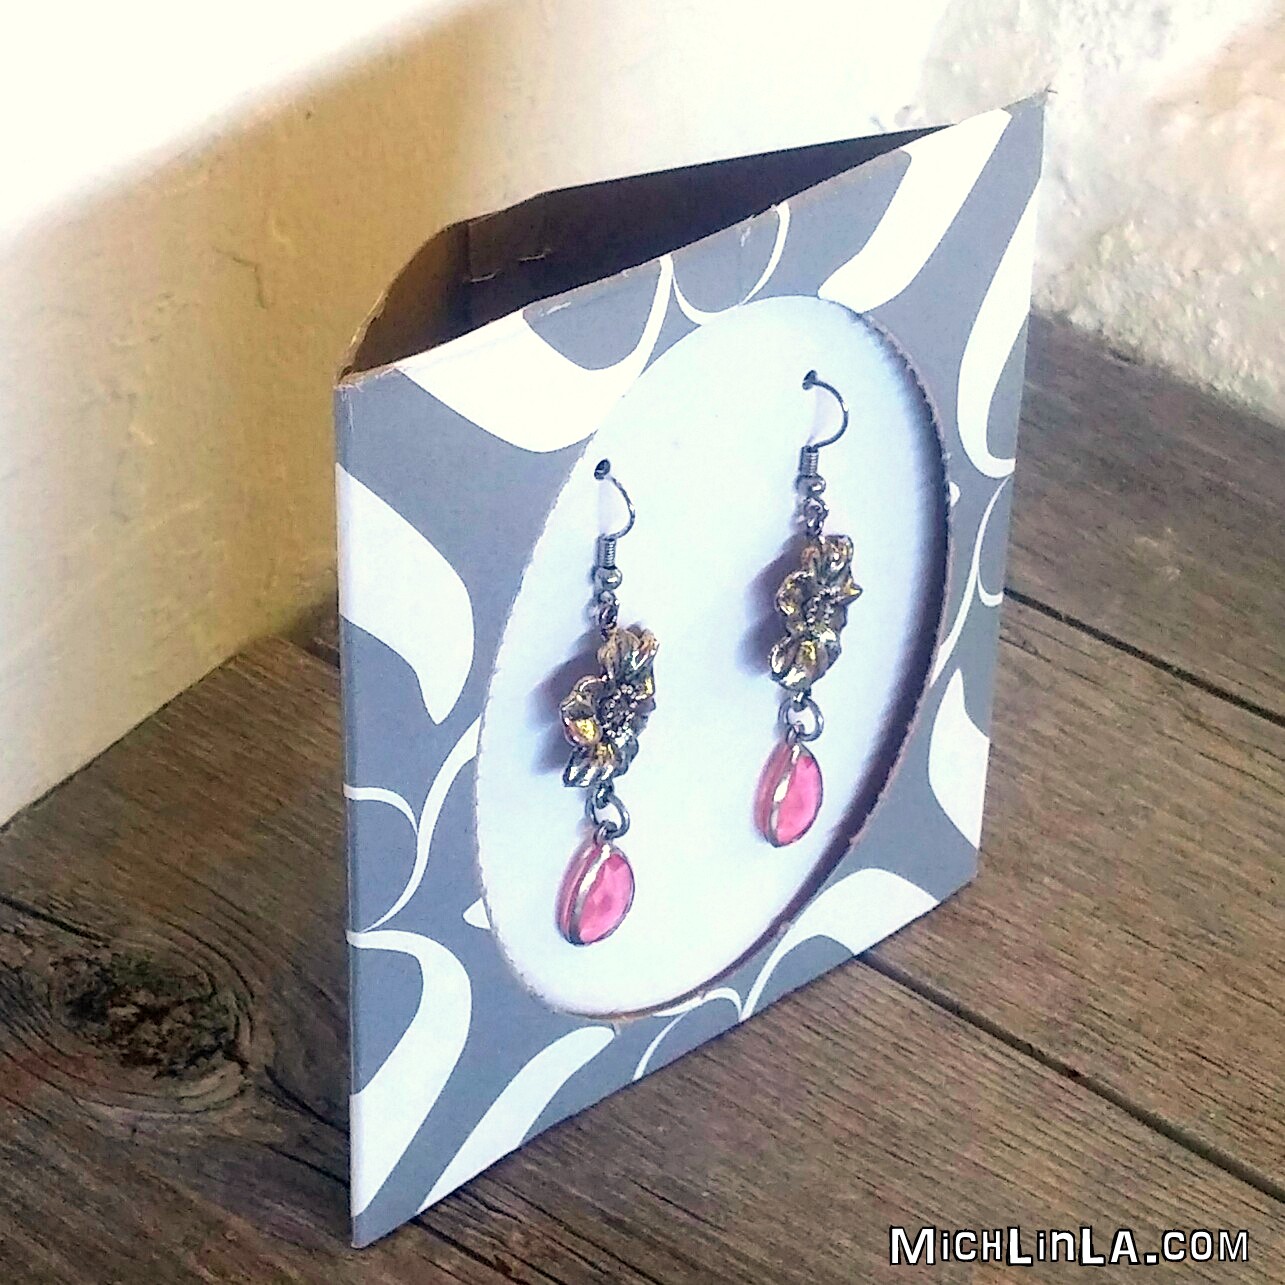
Hang earrings inside and stand it up. So darn cute! And it's fun to match the earrings to the frame.
Tissue boxes are so pretty nowadays. Find one you like and give it a second life.
Later, gators.
It's the most wonderful time of the year: that month when you can buy jingle bells at the dollar store! (Okay, you can buy them other places too. So I'm told.)
Why is this wonderful? Well, duh, they make everything more jingly. But even more significantly -
You can turn them into flower buds.
They are awfully fun to use in crafting. Delightful for jewelry...
I love to use them in home decor projects (more about that in another post), and for cute flower gifts like these key rings.
If you try, bet you'll come up with all kinds of cool things to use them for.
The DIY is easy - you can probably figure it out without a tutorial. But I have a neat little trick to show you, so bear with me all the way to the end - you might decide to do it my way. Ready? Here we go.
First the basic technique - this is how I used to make them before figuring out my super secret maneuver. And it's a perfectly fine way to do it.
1. Use a fingernail or pliers to open out the petals just far enough to jettison the jingler.
2. Grab a petal between pliers and bend it over - as little or as much as you like.
Do it with all four petals and - yep, that's it! Flower done!
But here comes my awesome trick. Watch carefully now.
Pop a round plastic bead onto one tip of the pliers.
Now grab your petals (with the plastic bead on the outside) and bend.
The round bead will protect the metal and make a prettier, unmarked petal! This photo shows what I mean:
A tiny - but interesting - difference, is it not?
I hope you enjoyed this idea! Perhaps there's a trip to the jingle bell store in your future?
P.S. check my next post for another awesomely adorable idea for the jingle buds!
Today I thought I'd do a basic earring tutorial featuring a type of bead I adore: the chevron.
They are always exciting to me...even more so when randomly assorted. Who needs matching beads, anyway? I made some happily mixed-up earrings to prove my point.
Don't they look good enough to eat?
The original inspiration for the earrings came from this necklace - I made it years ago and have always loved the dynamics of all the different colors and sizes.
THE DIY - how to make my mixed up chevron earrings.
In addition to a handful of chevron beads, you will need:
Step 1: put a bead on each headpin. Snip the headpins short and turn loops to create dangles.
Step 2: use the eye pins to make two longer dangles, with alternating beads and bead caps.
Step 3: add the short dangles to the long ones.
Step 4: add an earring finding to each of the top loops.
Done!
Although sometimes chevron beads can be spendy, you only need a few for the earrings. The real fun is in choosing your combination...balancing colors, balancing designs...ooh, it's pure creativity.
That's it, dearies. I hope some of you get the urge to mix things up!