Showing posts with label Halloween. Show all posts

Friday, October 30, 2015

Hand Drawn Fuzzy Flocked Beads

Ooh!  Just look at this cute, oh-so-tiny, fluffy, fuzzy hummingbird bead.  (It's only half an inch tall!)


I also made a hedgie...


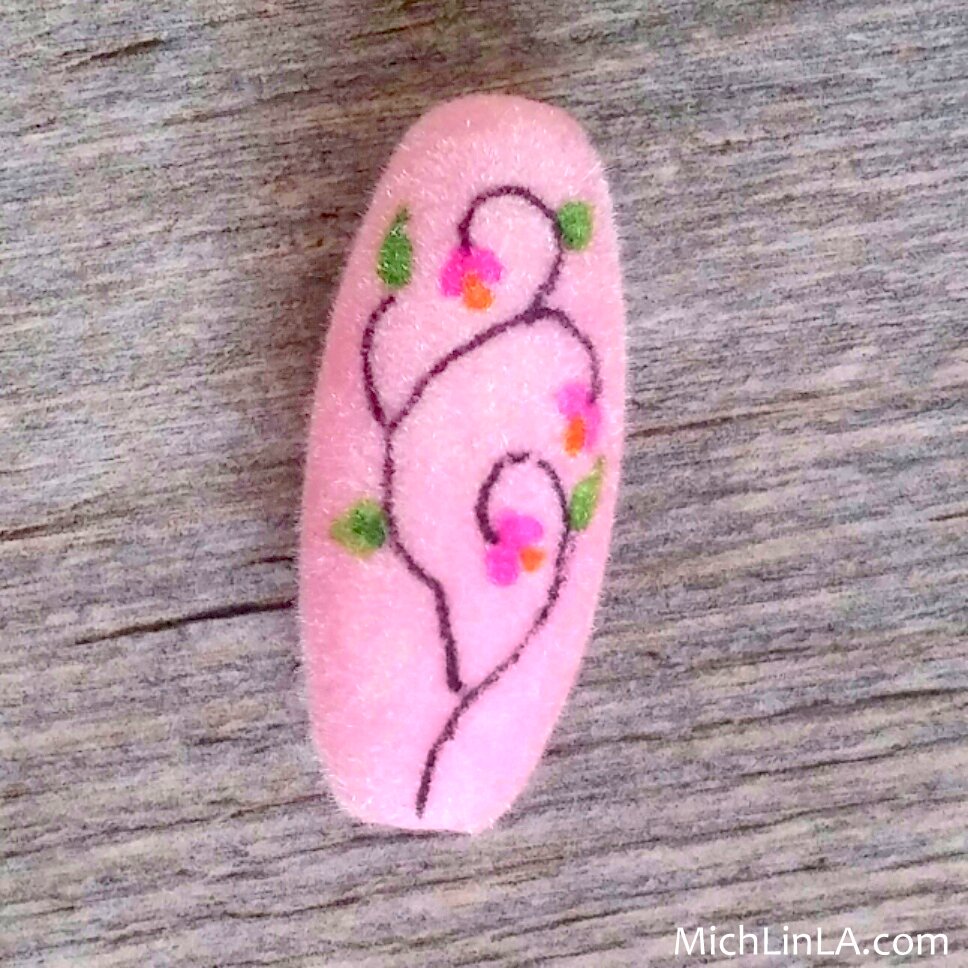
...and flowery vines...


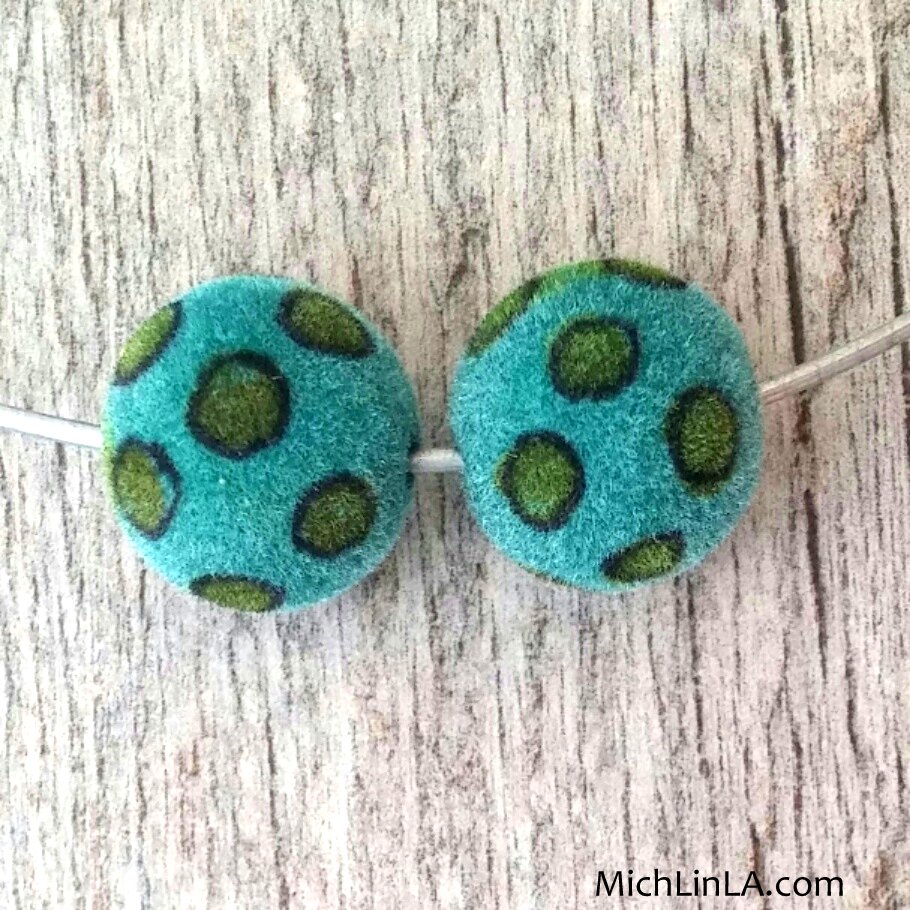
...very groovy polka dots...


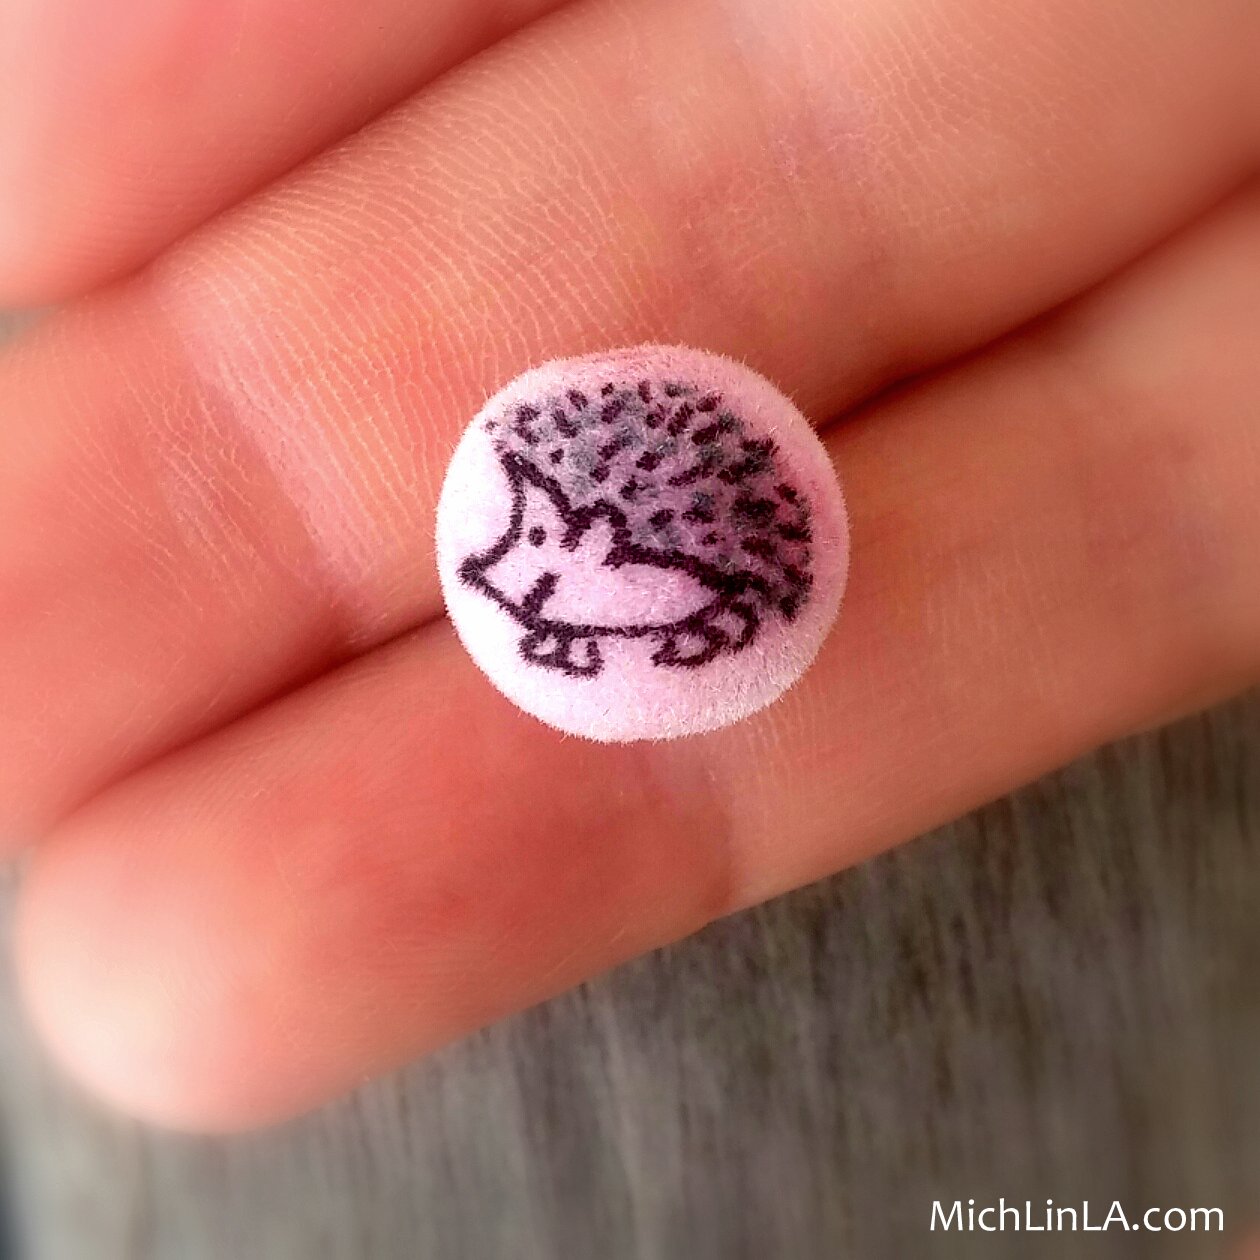
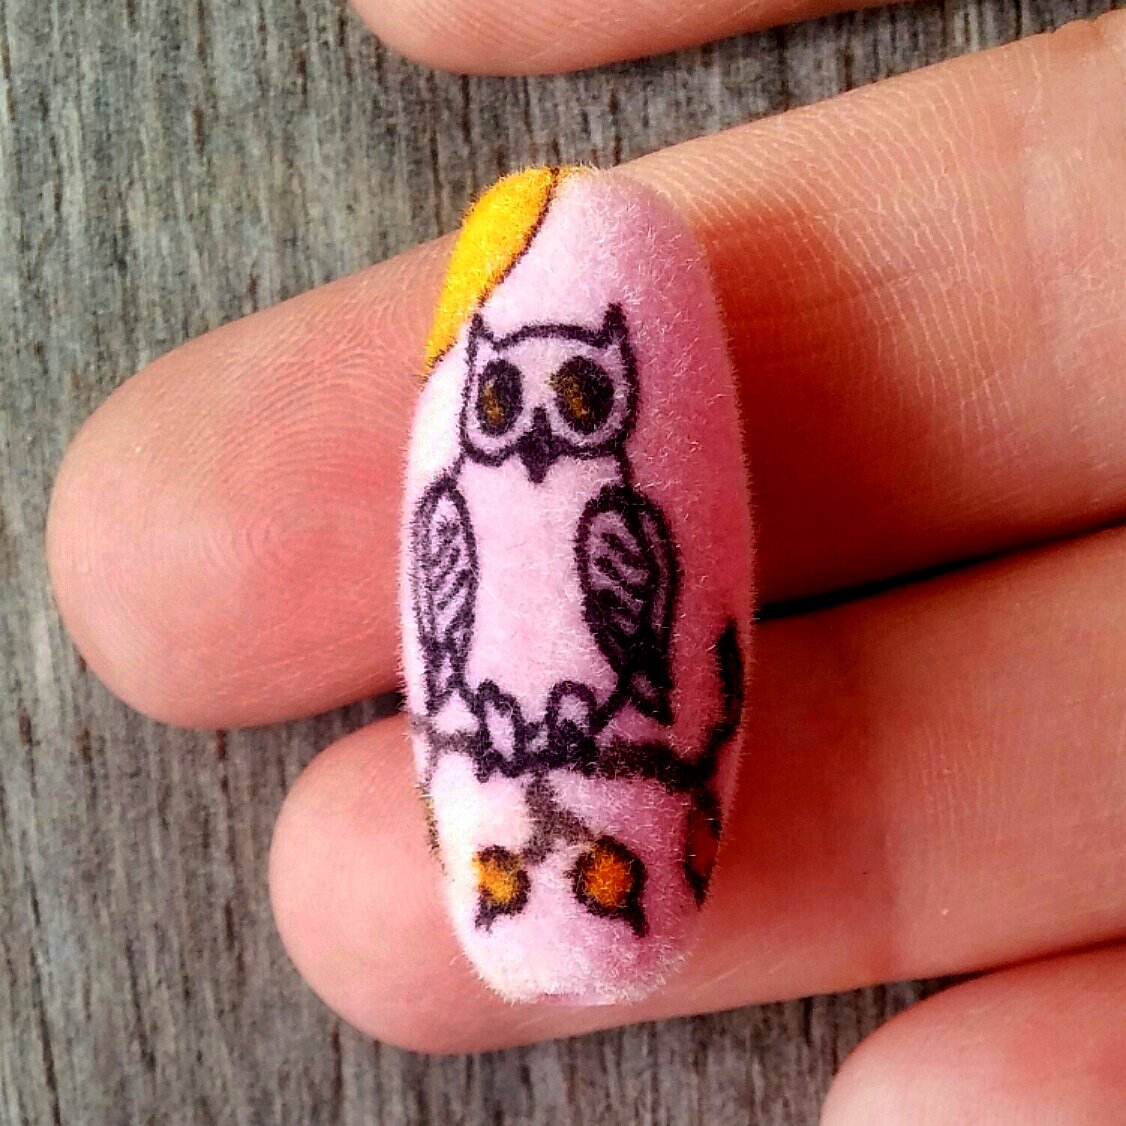
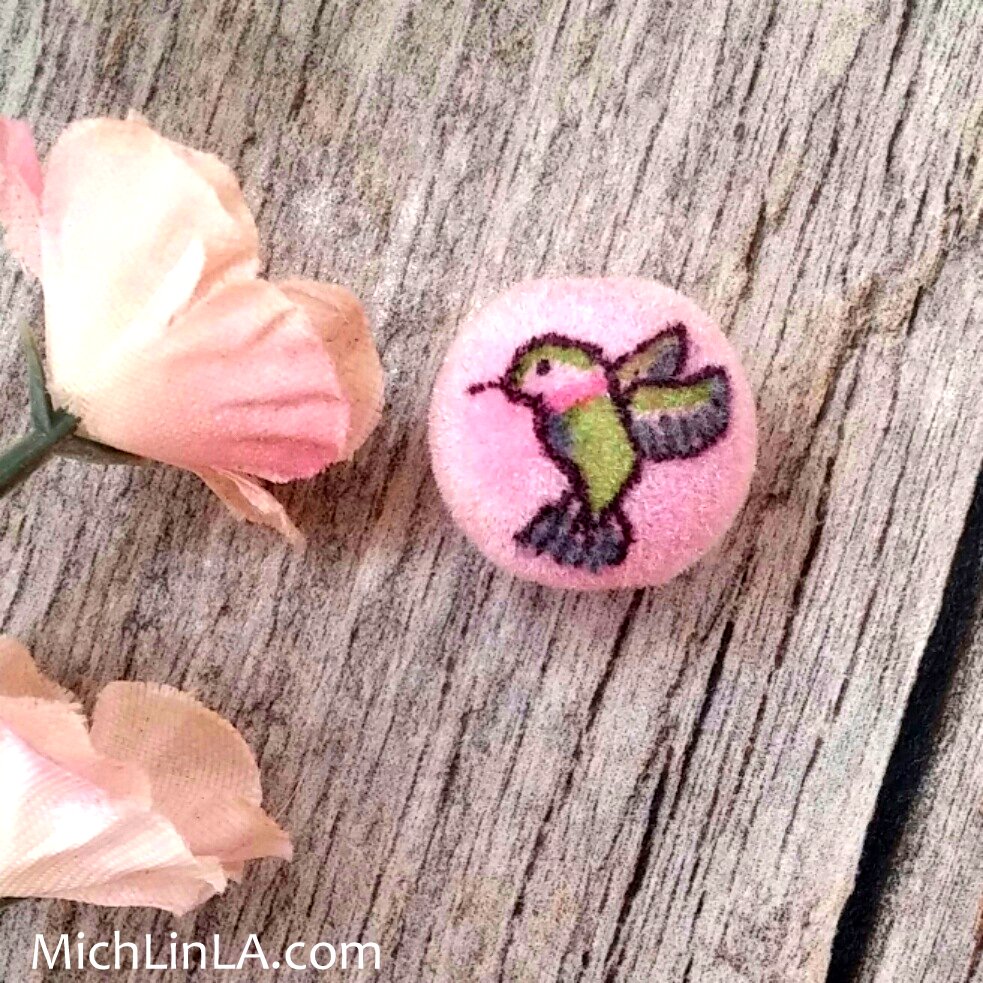
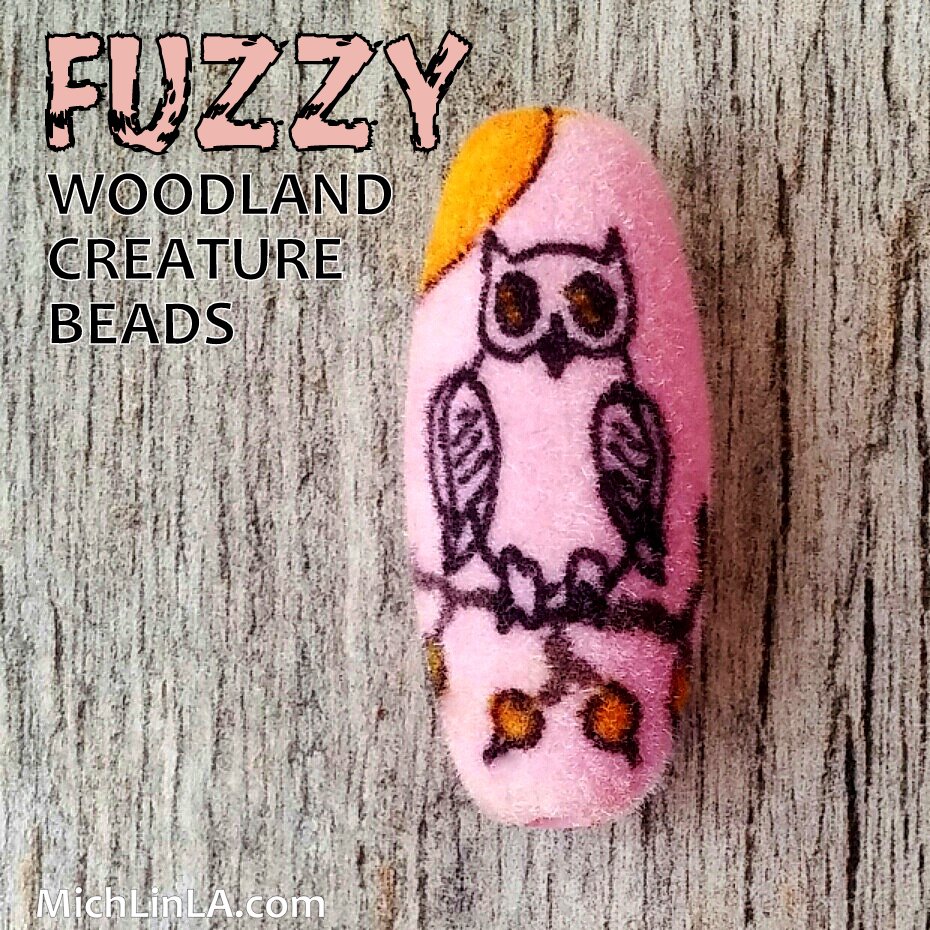
...and little Mr. Hootiepants, here.


Aren't they fun?  I used some fuzzy-coated beads I found online.  Flocked beads - who knew?


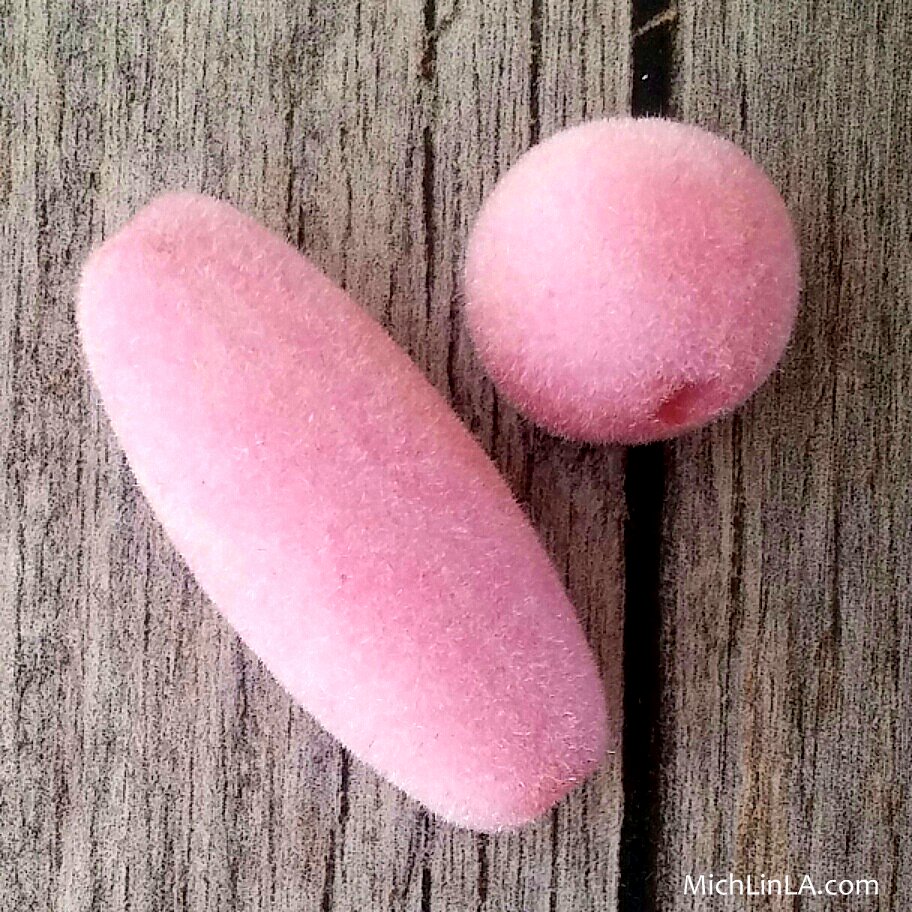
I bought mine at Fire Mountain, but have seen them elsewhere, too.

THE DIY

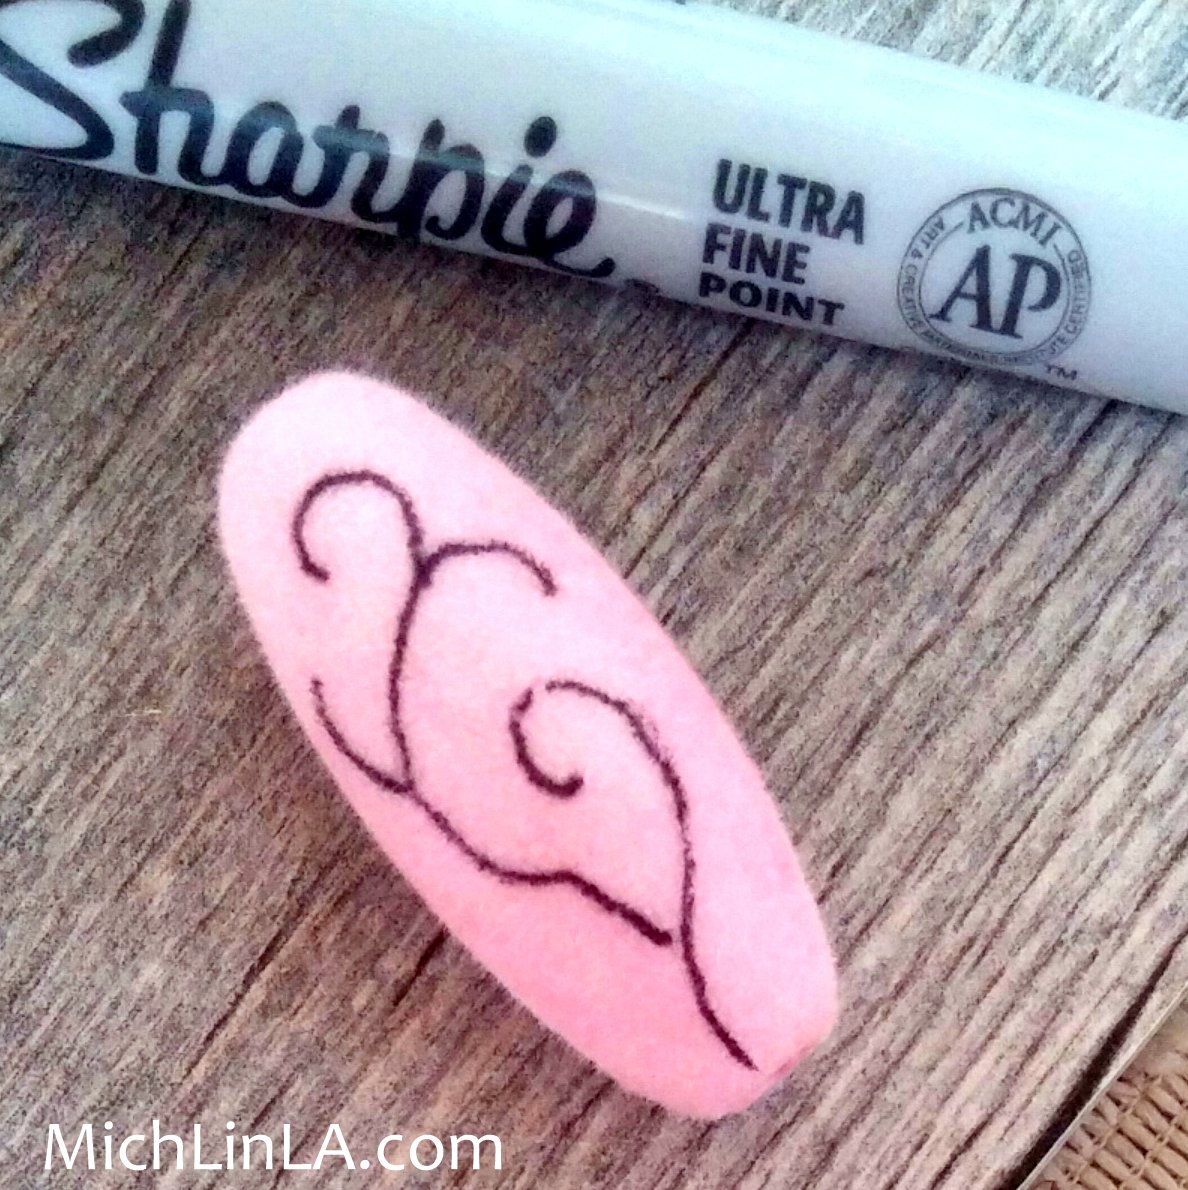
The technique turned out to be really interesting.  I drew on them with fine and ultra-fine Sharpies, but at first I found that the ink wanted to run and smear all over.  Then I discovered a very important trick.  Here's the HOW-TO!

Start with the ultra-fine point and do your black outlines.


Then add color - and immediately blot the color dry by rolling the bead on tissue or paper towels.


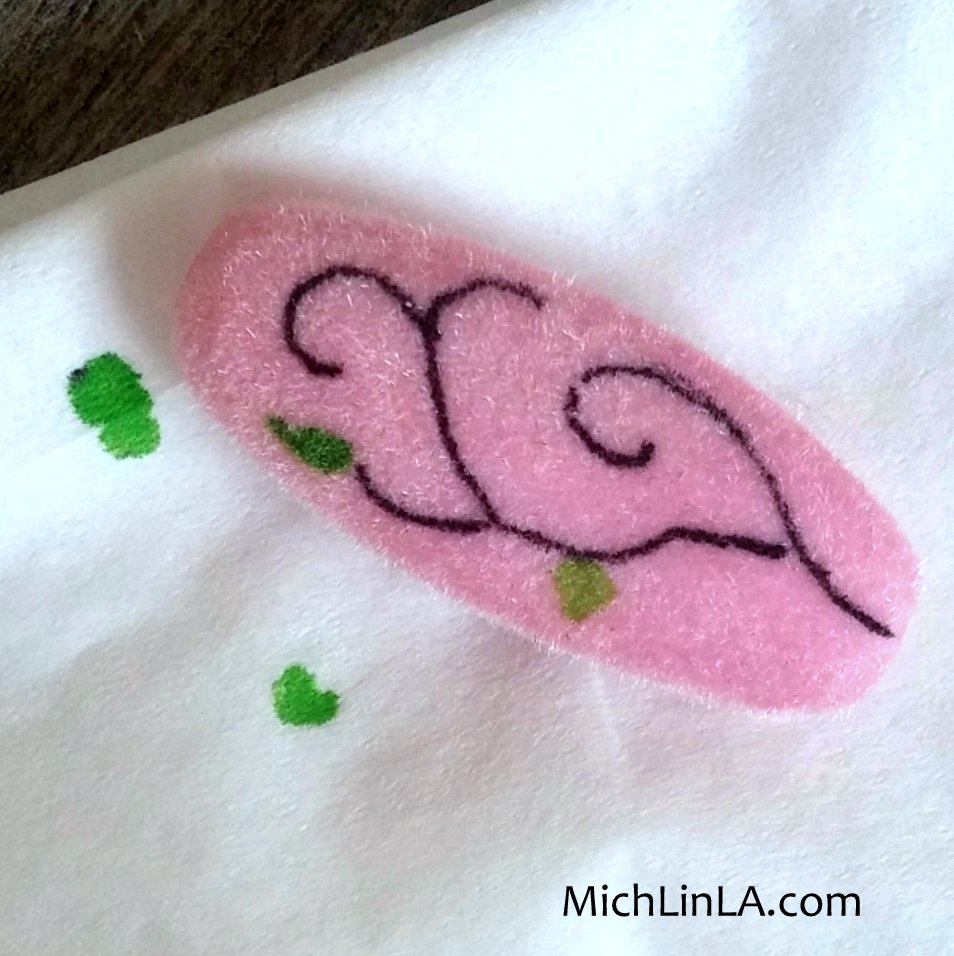
Do just one or two small bits of color at a time to avoid smears.  Keep adding color until your drawing is done.  Let it sit for 15 minutes before handling it much, in case there's a still a bit too much ink saturated in the fuzz.  That's all there is to it!

My vine bead is an inch and a quarter high and soft as a bunny's butt.


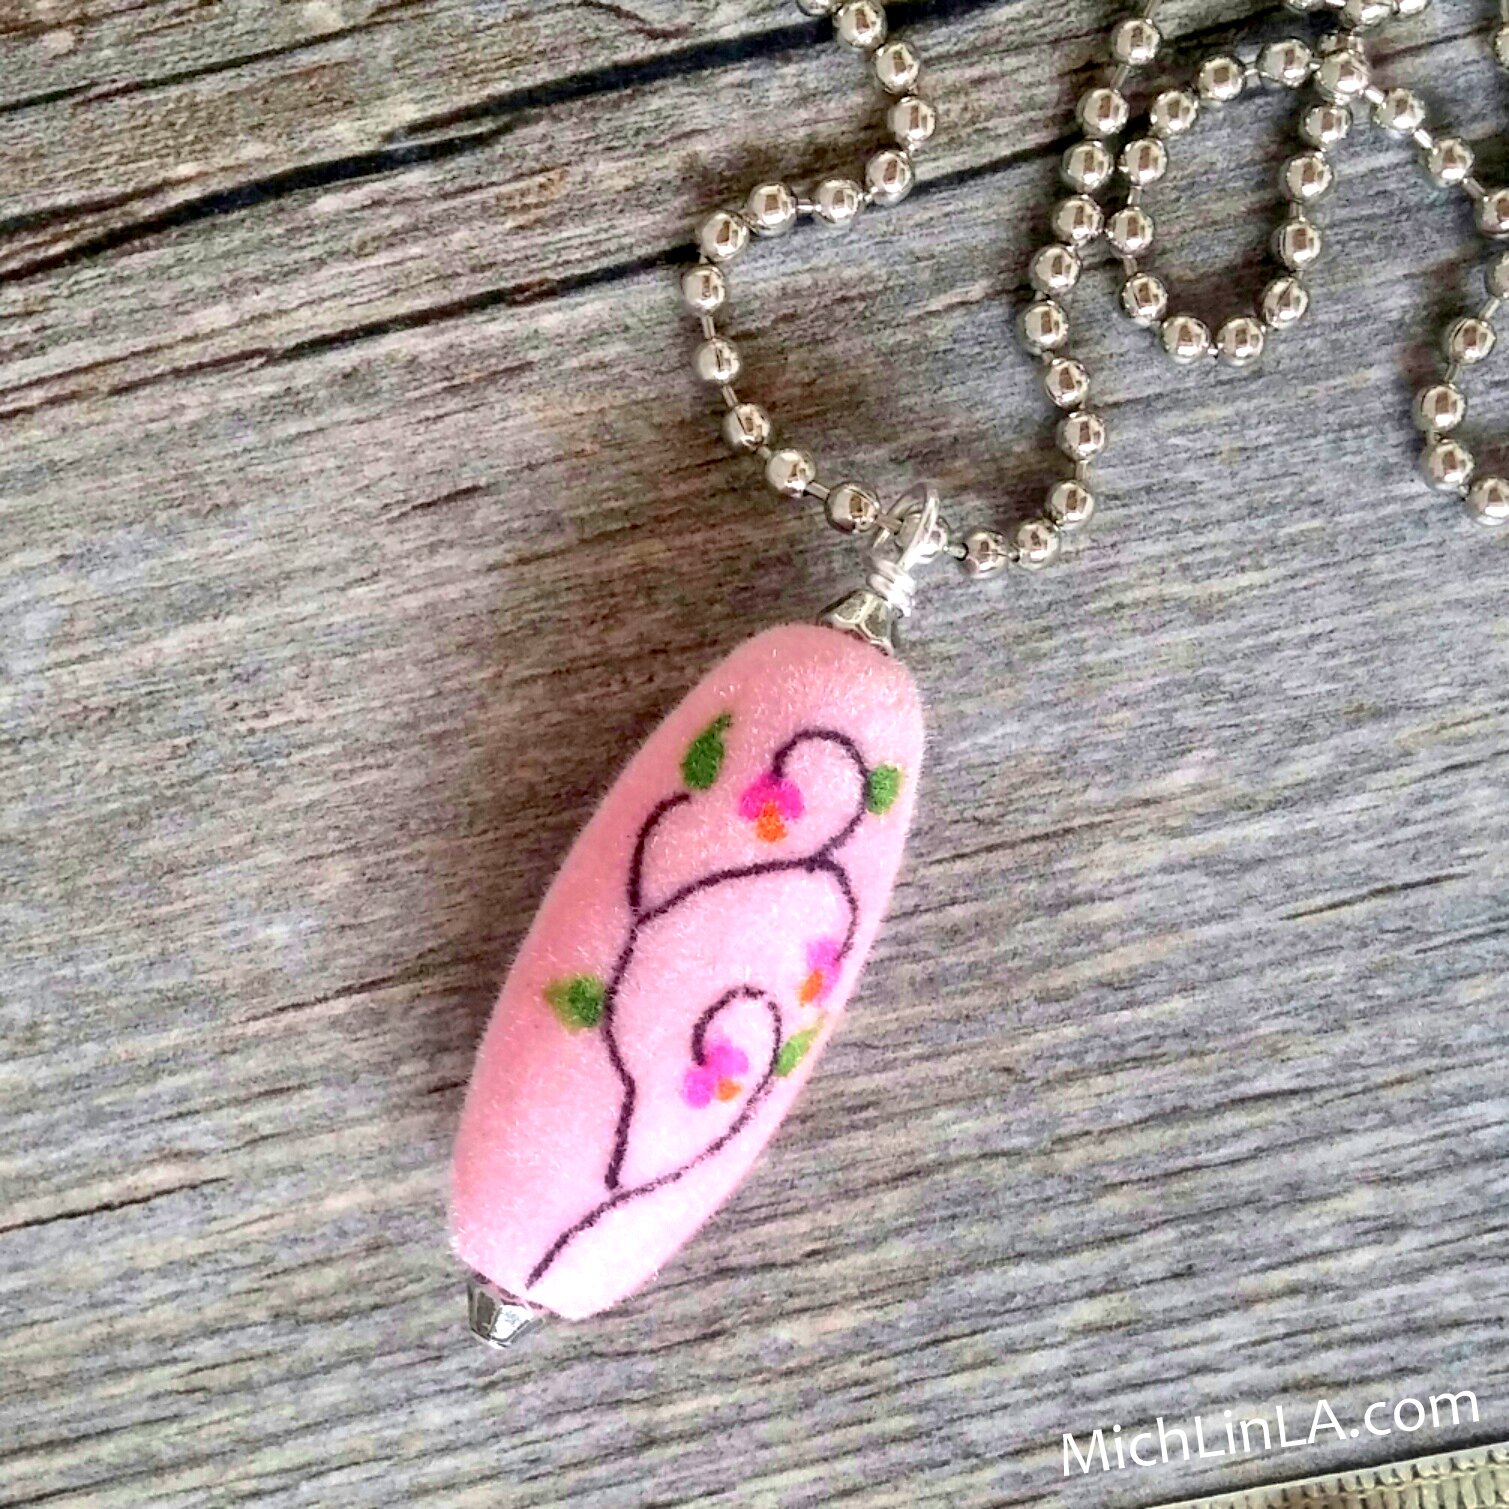
The thing I like most about this technique: you can get some almost painterly effects by adding colors and blotting in between.  Some bits even remind me of watercolor - you can see it pretty well in the hummingbird body!


Let me finish up this post with a couple of tips.

TIP 1.  I am not very good at drawing things, but I did once manage to teach myself a freehand owl, and never forgot how.  (To see, check out this old Halloween post.)  For the hedgehog and hummy, I googled "how to draw a hedgehog" and "how to draw a hummingbird," and practiced on paper first.

These flocked beads are usually pretty cheap, so I didn't mind messing up a few times.

TIP 2.  Do your best to avoid getting them wet.  Interestingly, this is not as critical as you might think.  I assumed they would be Gremlin beads, i.e., one should never never never get them wet!  But to my surprise, they can withstand a bit of moisture without any drama at all.  So just use common sense and come in from the rain.

What would you draw?  Ideas, please, because I have a bunch of flocked beads and want to make more.  I hope you enjoyed this fluffy post!


Friday, August 15, 2014

Monster Boxes! And A Great Dollar Tree Giveaway


Disclaimer: I was compensated for this post; opinions expressed are entirely my own.

So a few weeks ago I joined a thing.  It's called the Dollar Tree Value Seekers Club - basically a free-to-sign-up-for area on the Dollar Tree website, packed with crazy easy project ideas.  Seriously, I have already gleaned so many clever nuggets from the archives.  Not just crafts - some delightful life hacks as well.  (Example: DIY puppy popsicles, made with chicken broth!  My dog worships me now.)

Anywhoo, here's my version of one of the newest club projects.  Monster Boxes, rawrrr!  Funky, planet-friendly storage...what's not to like?  The DIY is the definition of basic.  1. a tissue box body and 2. paper monster teeth.  After that, embellish like mad with anything that makes you happy.

The project page has a great list of ways to use them for kids, teachers and parents.  Can't wait to make some with my little monster-loving nephews. 


Meanwhile, I made one for me, 'cause I like monsters, too. 


My twist on the idea is the lizardskin accents.  Using a realistic rubber lizard (also from Dollar Tree).


I cut apart my amphibian sacrifice with a pair of sharp scissors.


I used adhesive dots to attach the lizard bits.  (Hot glue would work as well.)  Plus a little duct tape reinforcement for that big floppy tongue.


I think he looks so cute.  I've already found a use for him - collecting crafting receipts in a corner of my workroom.


Pop over to the Dollar Tree Value Seekers Club website and check out the crafts, kid activities, home decor, clever tips and money savers.  The best thing about the projects is how madly simple they are.  Also easy to print out and take along for reference.  Every month they update it with fun new stuff.

BIG GIVEAWAY, YOU GUYS!


Once you sign up, come back, 'cause I am giving away a $50 Dollar Tree gift card to one lucky club member.  Dude.  Do you know how far FITTY BUCKS goes at Dollar Tree?

To enter, leave a comment with your email.  (Be sure it's the same email you used to sign up over at Dollar Tree, or the entry won't be valid.)  One random, lucky winner will be chosen a week from today

Oh, yeah, one last thing.  You didn't really think I was gonna let the rest of that lizard go to waste, did you?  Decapitated chameleon head backpack charm, anyone?


Hee hee.


UPDATE: THE GIVEAWAY IS NOW CLOSED - THANKS FOR ENTERING, EVERYBODY!  Congrats to the winner: entry #2 Lisa, chosen by random.org's super hi tech integer generator.  (Lisa, check for my email, coming soon.)


Friday, June 27, 2014

Spiky Wrought Iron Necklace

Hi, everybody!  Take a peek at my new upcycled necklace.


It's actually a double upcycled design.  The oval wrought iron links came from a length of ornamental garden chain:


It's easy to harvest big chain links for jewelry making.  You  just need two pairs of pliers, and a bit of gentle force in a twisting motion.


But how about those dainty Gothic black spikes?  Look where they came from!


A plastic, super realistic "wrought iron" garden fence.  From the dollar store!  Specifically, the 99 Cents Only store.  Run out and get yourself a fabulous fake fence, because here comes the DIY.

Begin with the large oval chain links.  Use a jump ring to connect a little tassel to each link.


Use another jump ring to attach the link/tassel combo to the center of a necklace chain.  I chose a chain with a dark gunmetal finish.


Now on to the spikes!  Use wire cutters to snip the pointy bits from the garden fence.


If needed, take little snips to make them all the same length.


With a push pin, poke a starter hole near the top of the spike.  Then enlarge the hole a bit, using small scissors or a skewer.  It just needs to be wide enough to admit a jump ring.


Add the jump ring and connect your spike to the chain.


Now just continue building the necklace, with evenly spaced links and spikes.  I used a chain long enough to go over my head, so I didn't bother with a clasp.  (If you prefer a shorter look, add a clasp at the back.)

And that, my fiends, is that.


It is surprisingly light and fun to wear - heck, I'm wearing it right now.  And it's not even close to Halloween.


Thursday, November 1, 2012

The Mystery Thing Revealed: The Black And The Orange.

Have you been playing along with this week's Guess The Mystery Thing challenge?  Let's take one last look before I reveal the orange-and-black solution.  The challenge: identify these mysterious, Halloween-hued hoops.


What can they be?  It's obvvy, right?  (Insert evil cackling here.)


Think you know?  Did anybody get it right?  Read on to find out...


Tuesday, October 23, 2012

The Matryoshka Zombie and the Great North American Glitterbellied Owl

Whee!  Today I am excited to show you two new Halloweenish pendants that really make me happy.  All of a sudden, I seem to be making progress with hand painted projects - something I never felt confident doing before.  Presenting:

The Matryoshka Zombie


The Great North American Glitterbellied Owl


The inspiration for both these pendants was the fun shape of the beads.


The trade term for this silhouette is 'carved vase.'  These particular carved vases are a semiprecious stone called feldspar, and I found them online for less than a dollar for a sixteen inch strand!  Say what?  (I'll wait while you go and order some....got 'em?  Good.)

If you, like me, are nervous about hand painting, let me show you step by step - you can totally do this.  For the surprisingly easy deets, read on!


Thursday, October 18, 2012

Strangely Bewitching Winter Branches Wreath

So I am not normally a wreath person.  At all.  But today, surprising even myself, I have for you a wreath tutorial.

Take a look:


Kind of minimalist, yes?  Bare winter branches and berries.  Oh, and it has  a little secret...thanks to some cool glow-in-the-dark Puffy Paints, it, um, glows.  In the dark.


As you can prolly guess, I started with a basic black dollar store witch hat.


Now, really, I ask you: how fun is that? Want to make one?  Read on for the wicked simple DIY.


Thursday, October 11, 2012

Cook up something FUN for Halloween!

I have never been much of a chef; I have been known to screw up tomato soup.  From a can.  But from now on, I am definitely baking for the holidays.  Take a peek at what I just cooked up!


I created these spookified pendants using Martha Stewart Crafts glass paint on polished stone beads.


Glass paint on stone?  Why, yesMost semiprecious beads are slippery little suckers - nearly as slick as glass.  So I decided to try Martha's glass paints - which you bake in the oven to cure.


They are cool.  Thirty minutes in the oven creates a permanent, durable surface, almost like fired enamel.  It totally worked, and best of all - it was really easy.  Let's get right to the DIY.


Friday, November 11, 2011

The Mystery Thing Revealed: It Was Fate.

Hi!  For the past few days, my readers and I have been playing an exciting round of GUESS THE MYSTERY THING, a game of wits and crafty intuition.  The challenge: identify the original source of the little twisty leaves in this upcycled necklace:


Think you know?  Betcha don't!

Friday, October 7, 2011

Make Jewelry From Vampire Teeth! First, Stake A Vampire...

Nyuk nyuk nyuk.  I slay me.

So here's my new upcycled jewelry project: curvy red jewels, derived from dollar store Halloween teeth.


Want to DIY?  Here, I wrote up a silly, easy tutorial, just for you!