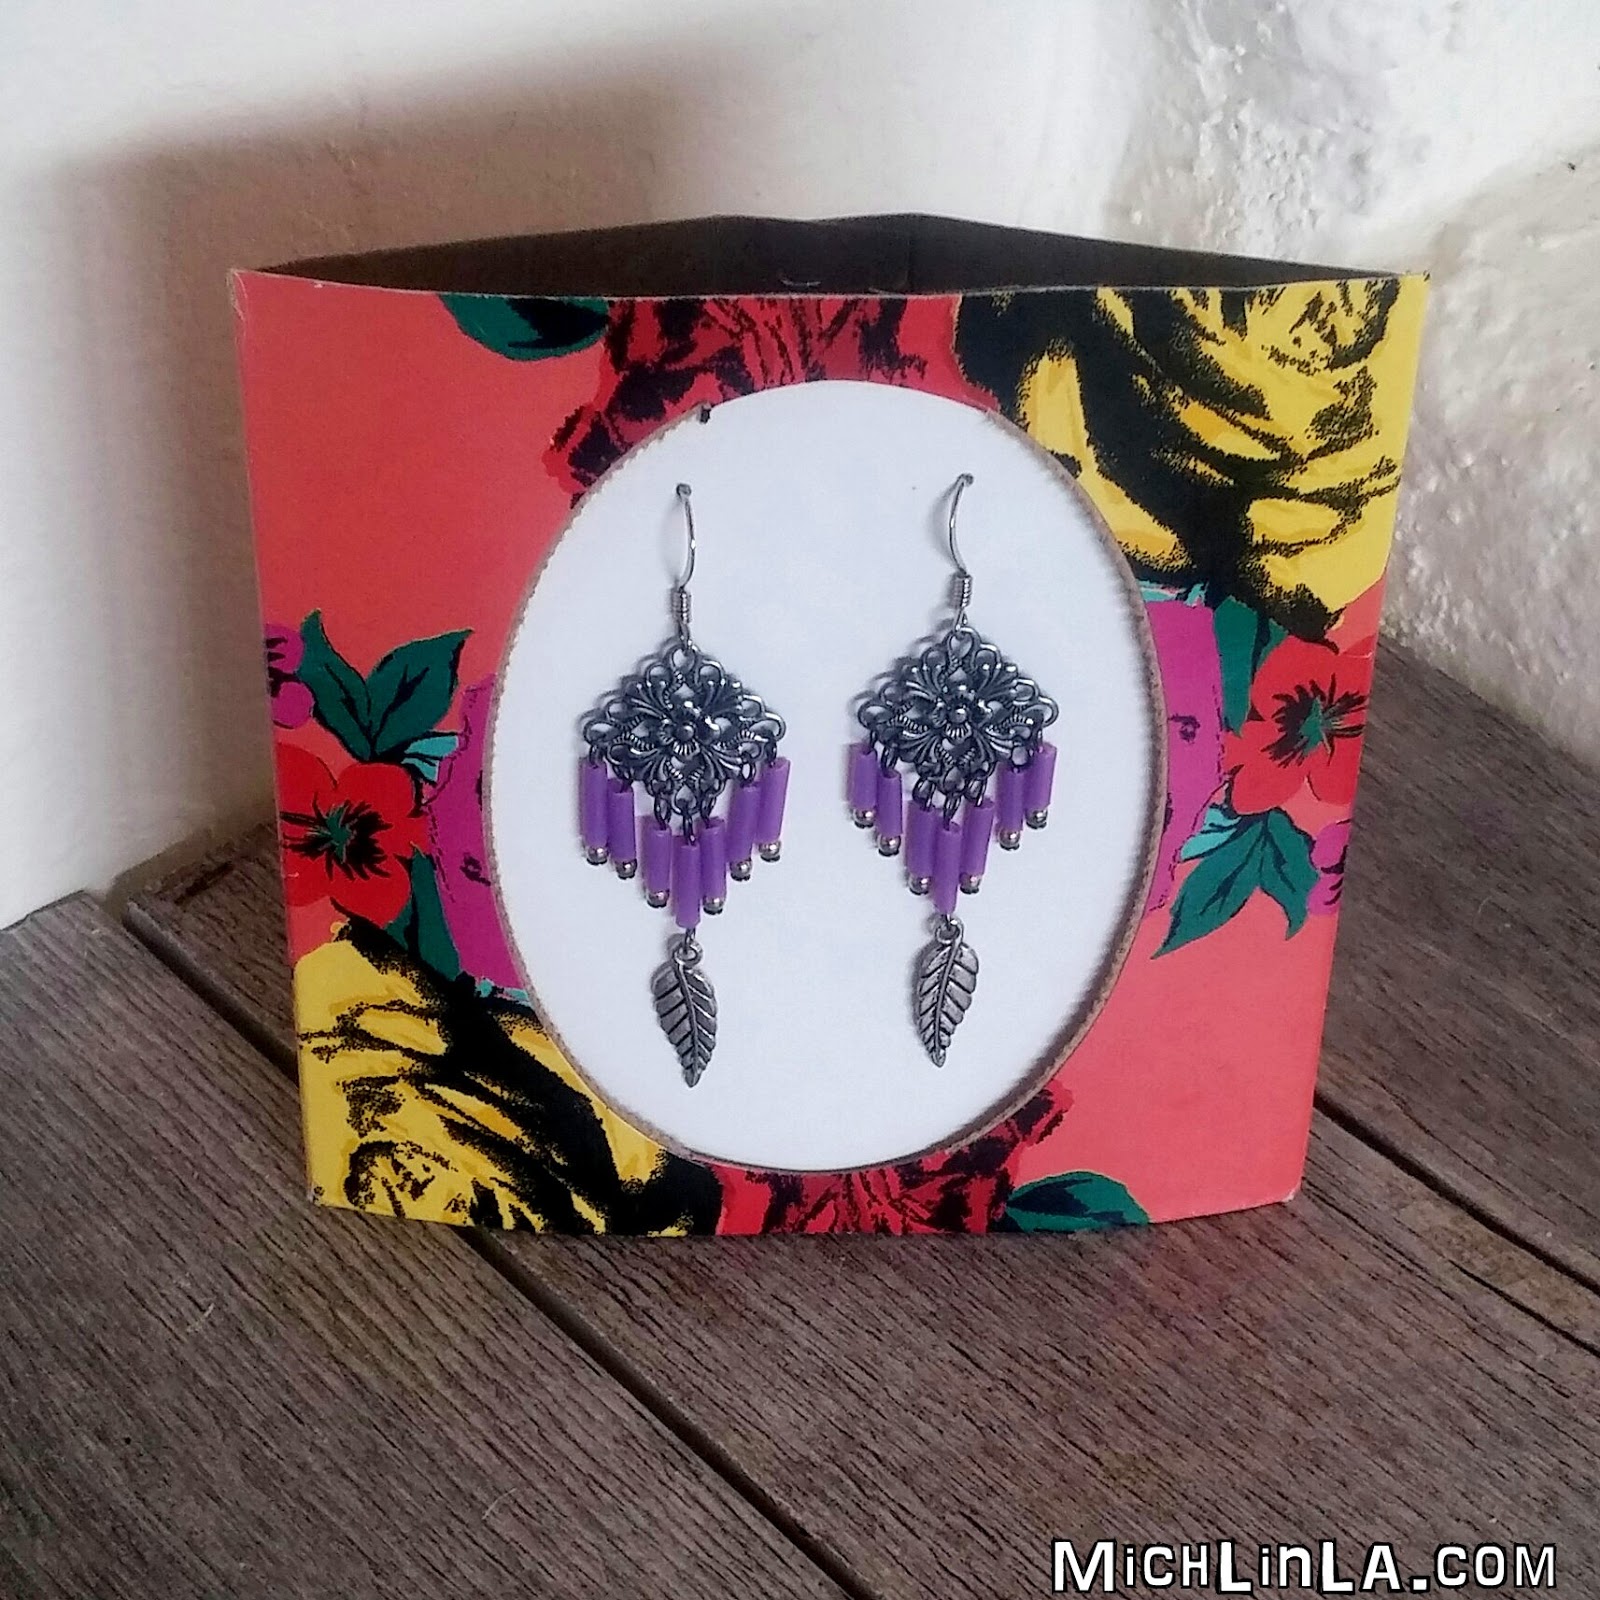
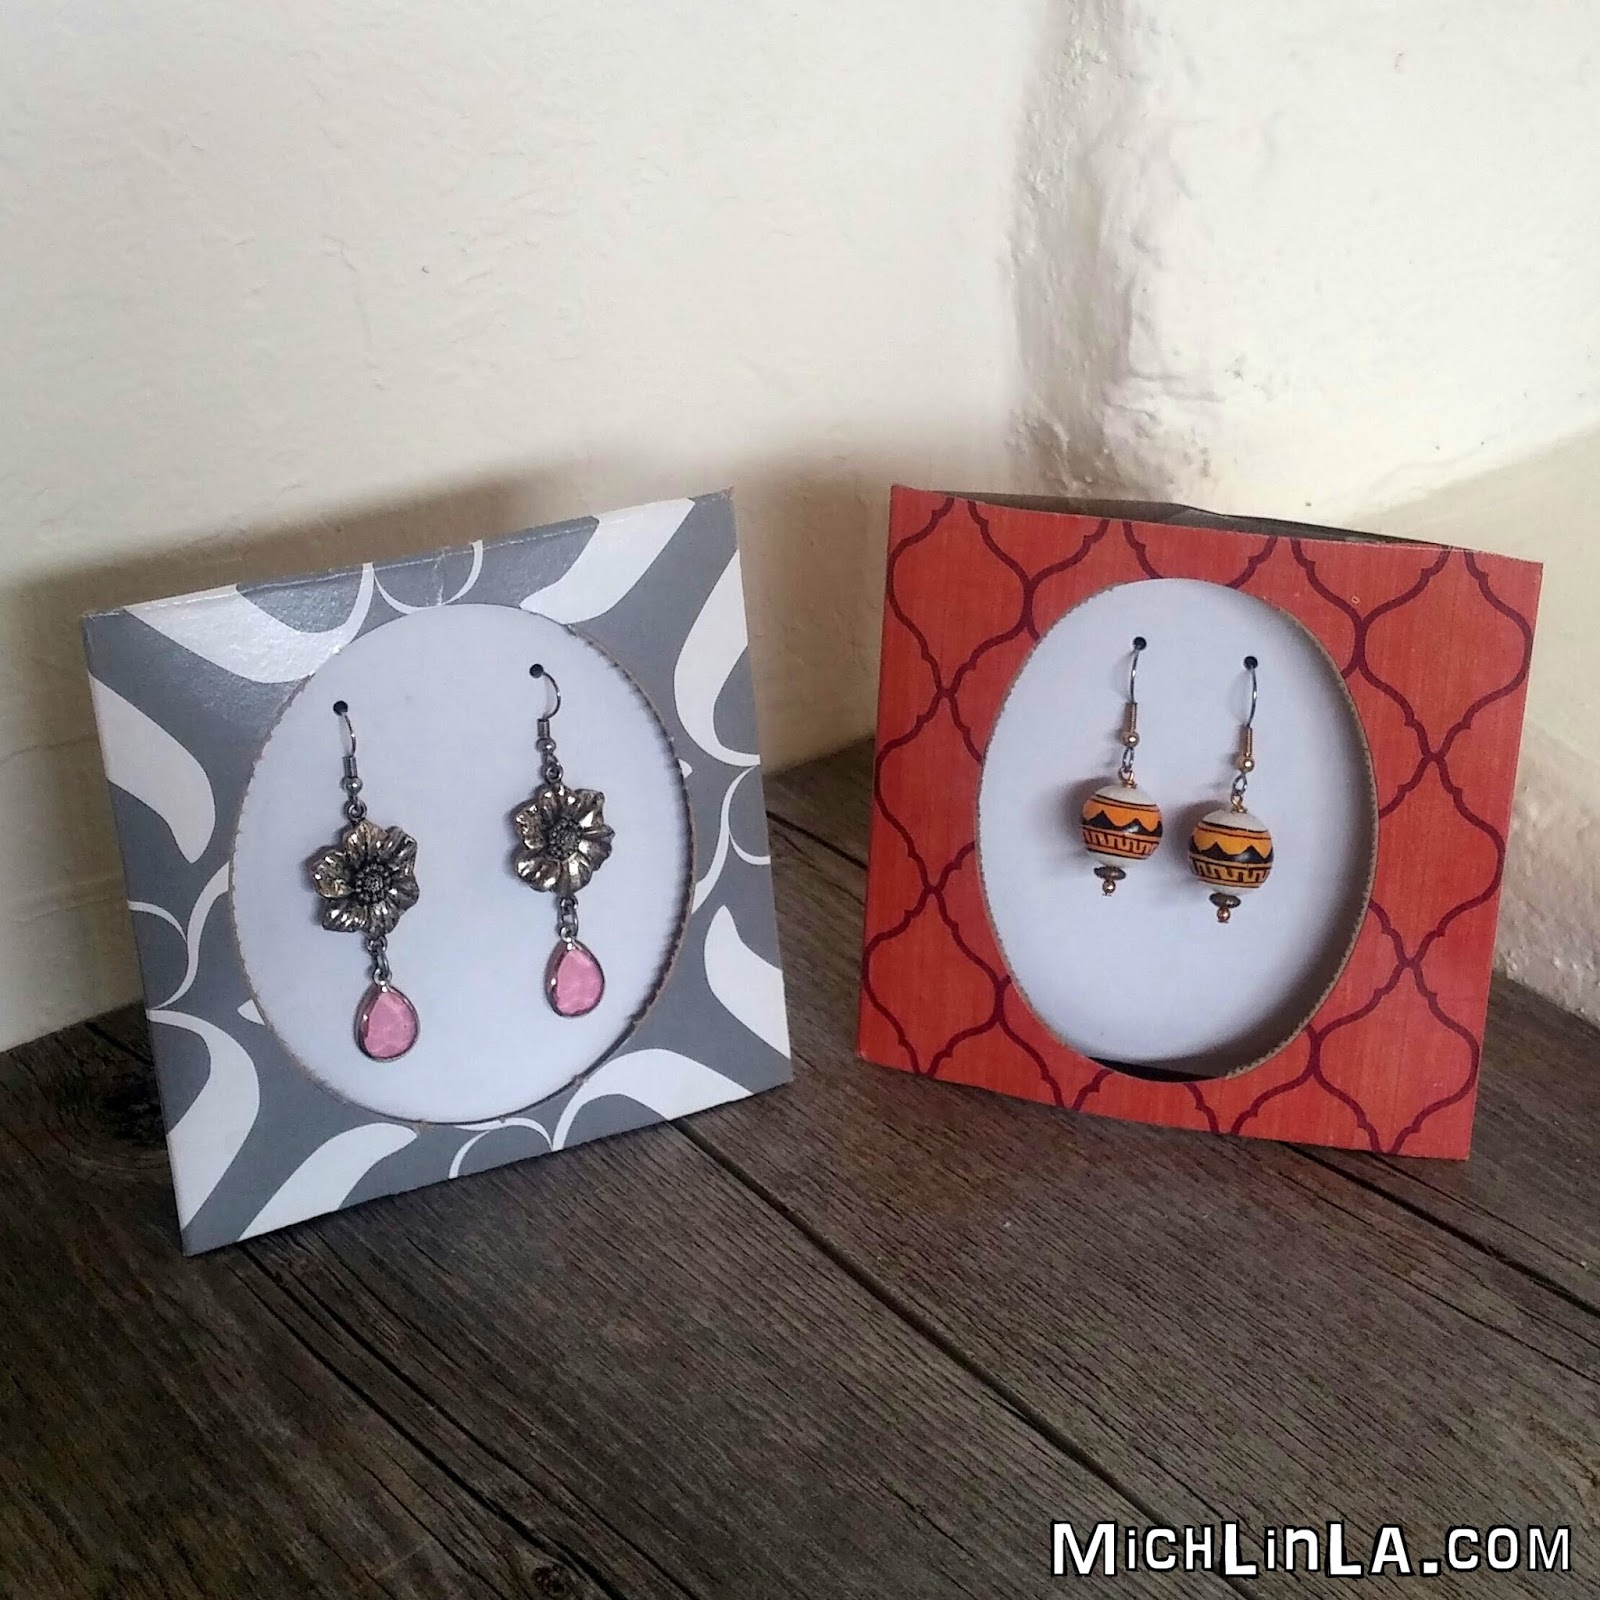
Hey, here's something I've been meaning to show you for a while. I have a lot of these ranged around my studio. Penny-pinching, earth friendly, practical jewelry displays...and they do brighten everything up!
Can you picture the top of the tissue box and how I used it? Got 5 minutes, scissors and a stapler? Here's the ridiculously simple DIY.
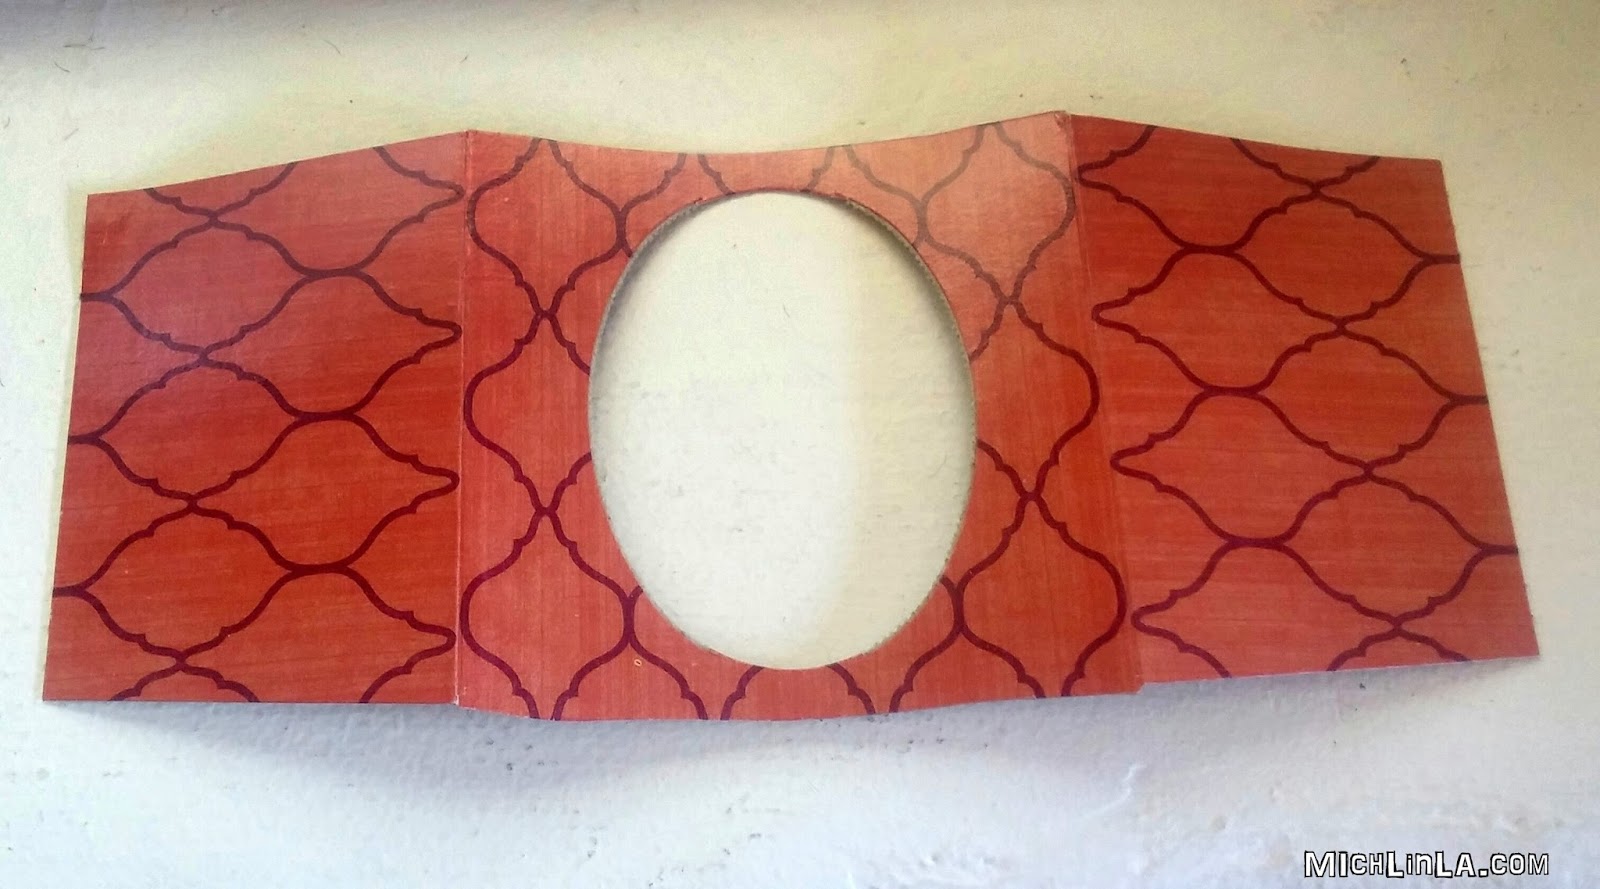
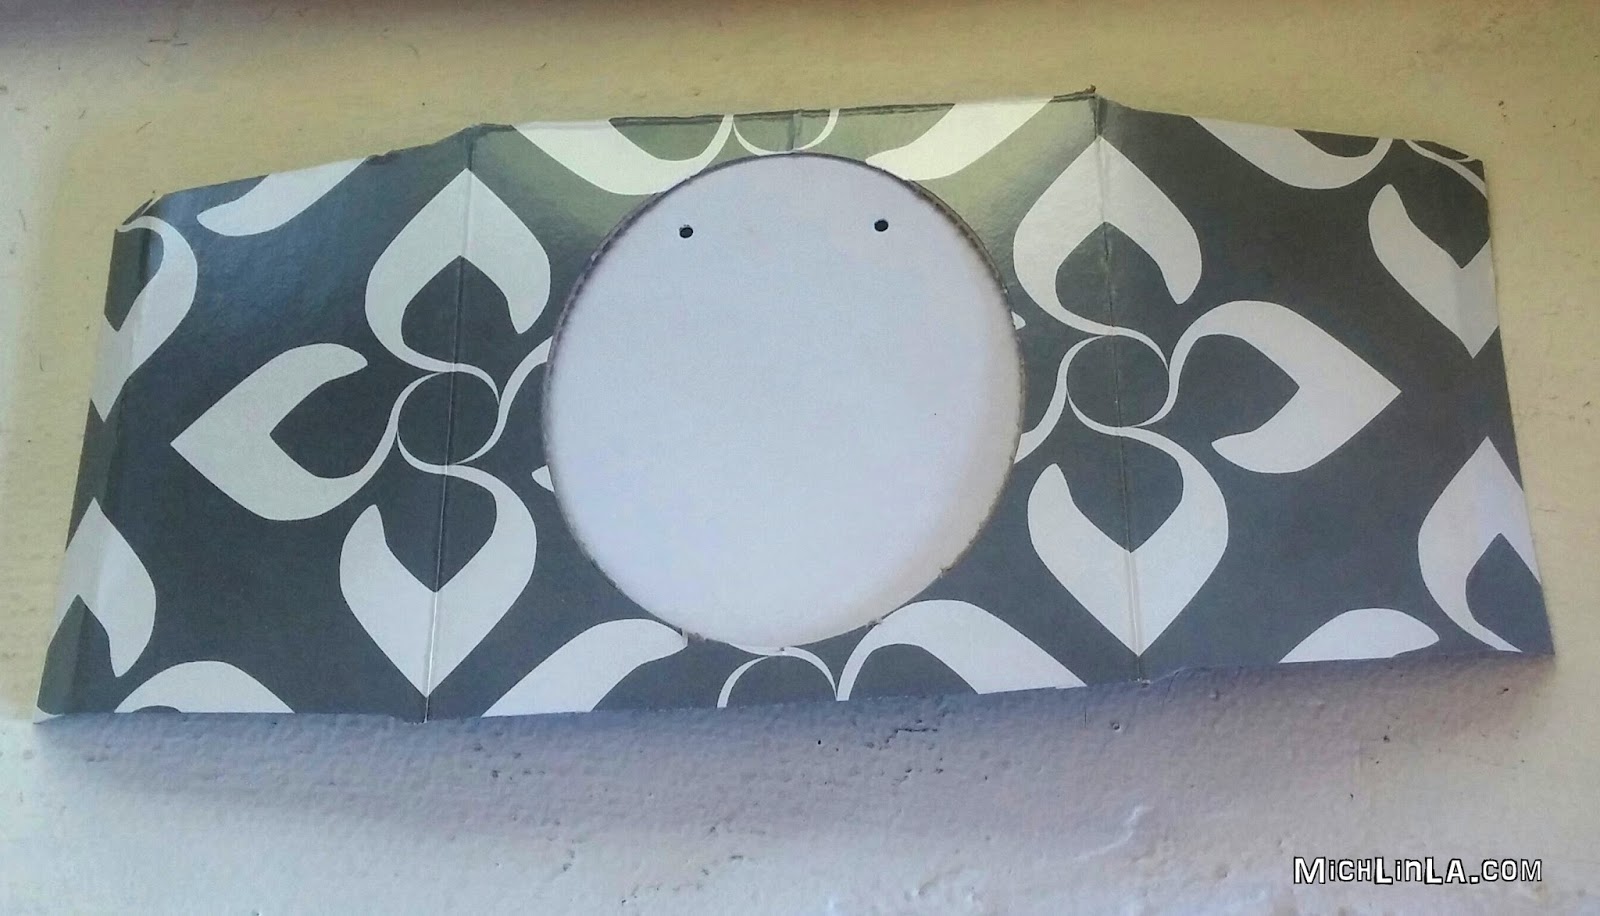
Cut the top and sides from a square tissue box, like so:
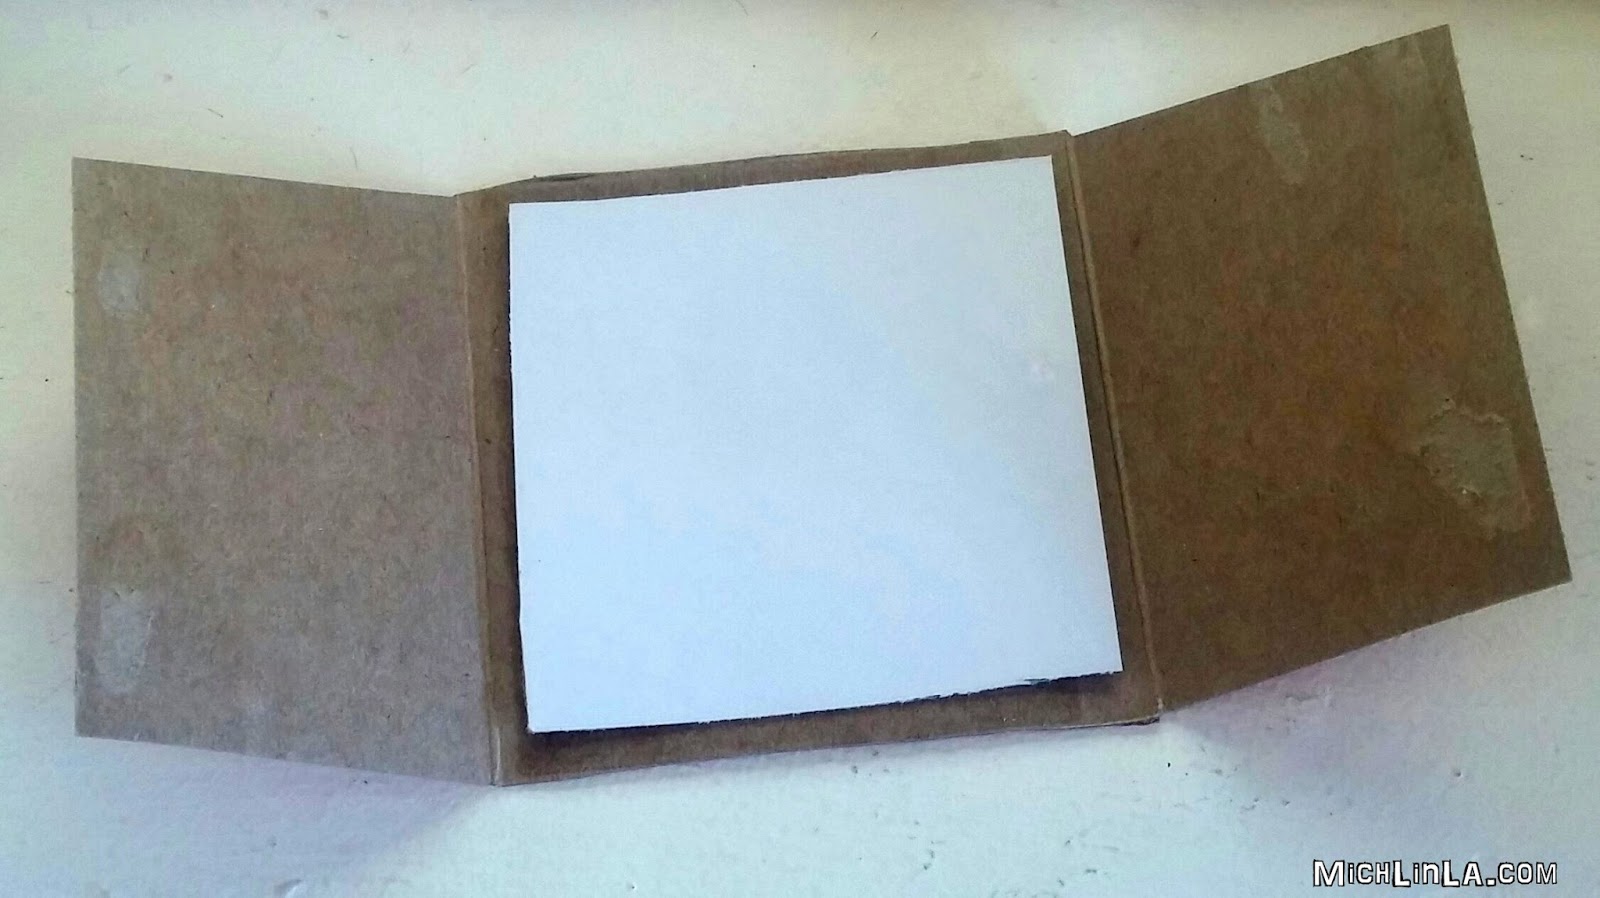
Cut a piece of scrap cardboard to cover the opening.
Glue or tape the cardboard to the inside; I use packing tape because it's a strong hold. Then poke a couple of holes near the top. Here's how it will look when flipped right-side-up:
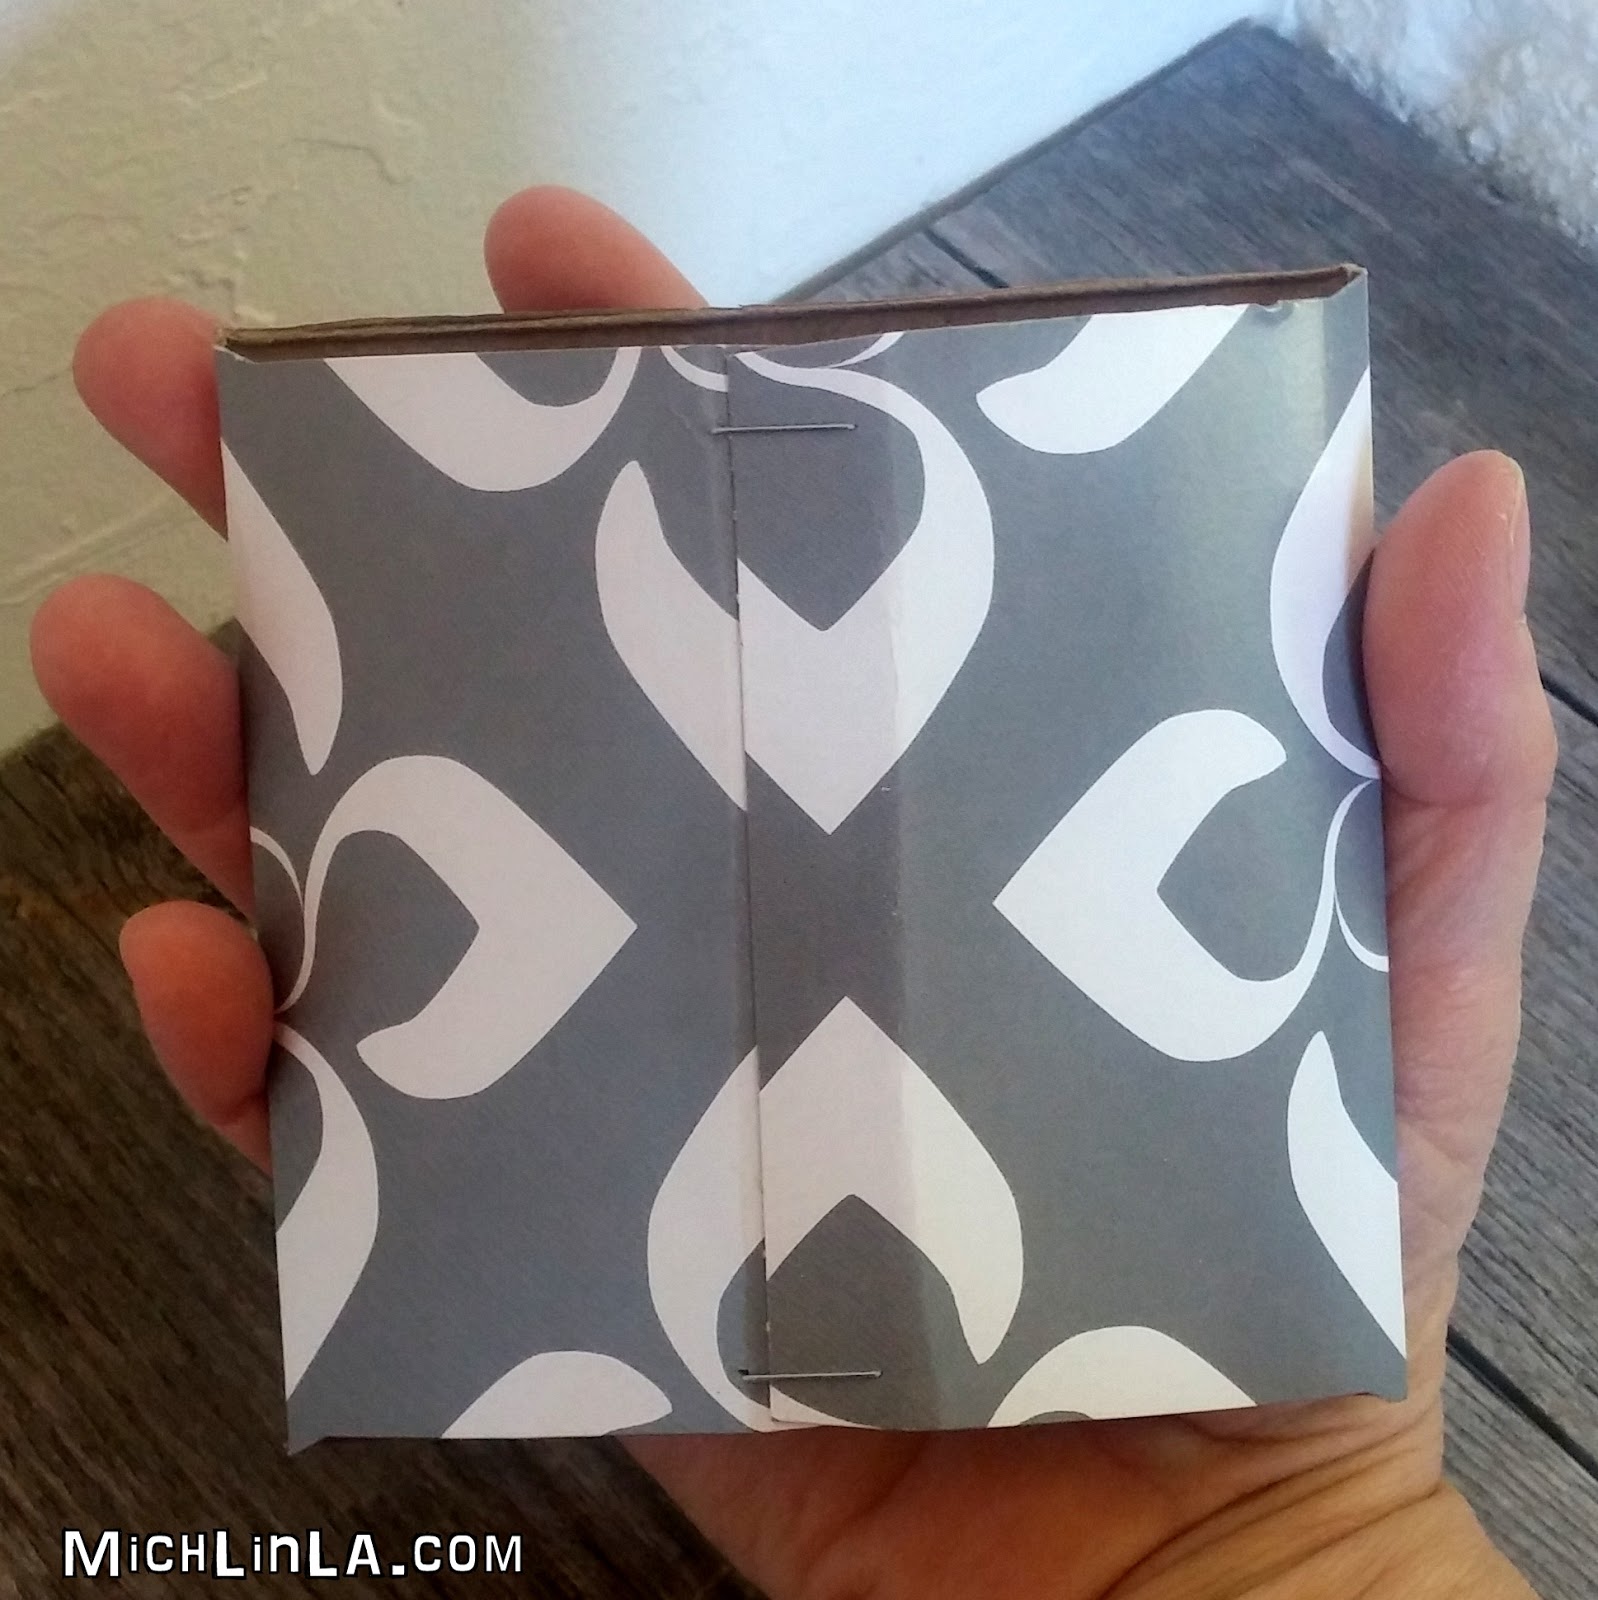
Now staple together the two sides - one staple at the top, one at the bottom. And that's it! Here's your 3-D frame seen from the back:
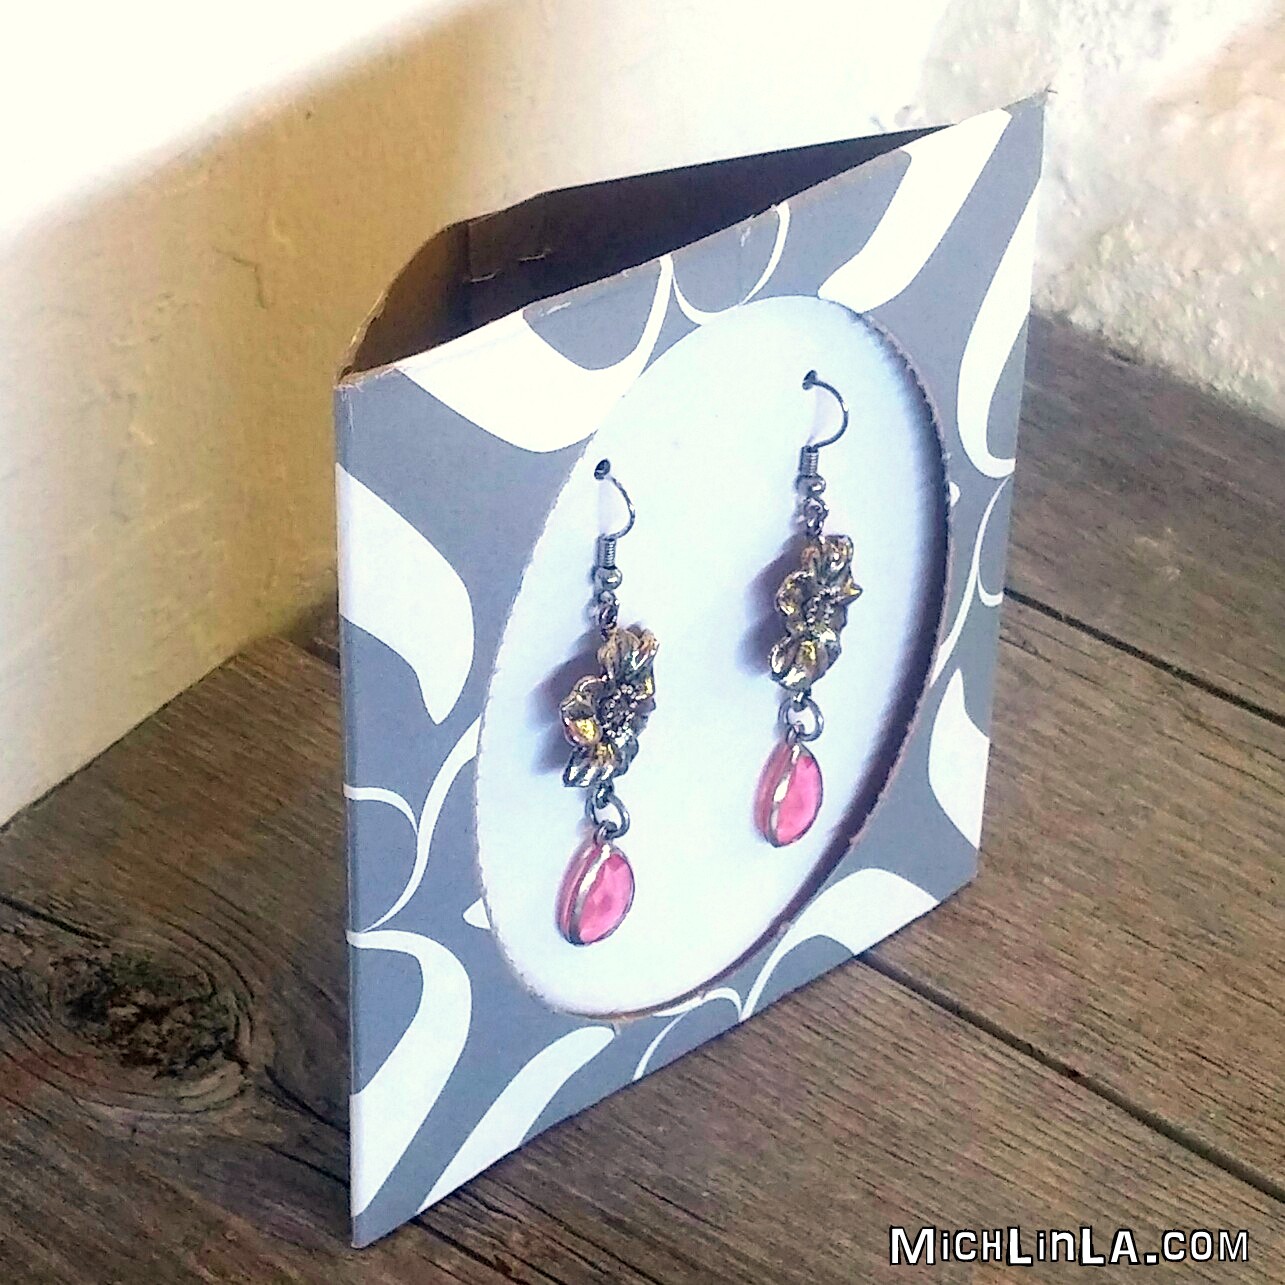
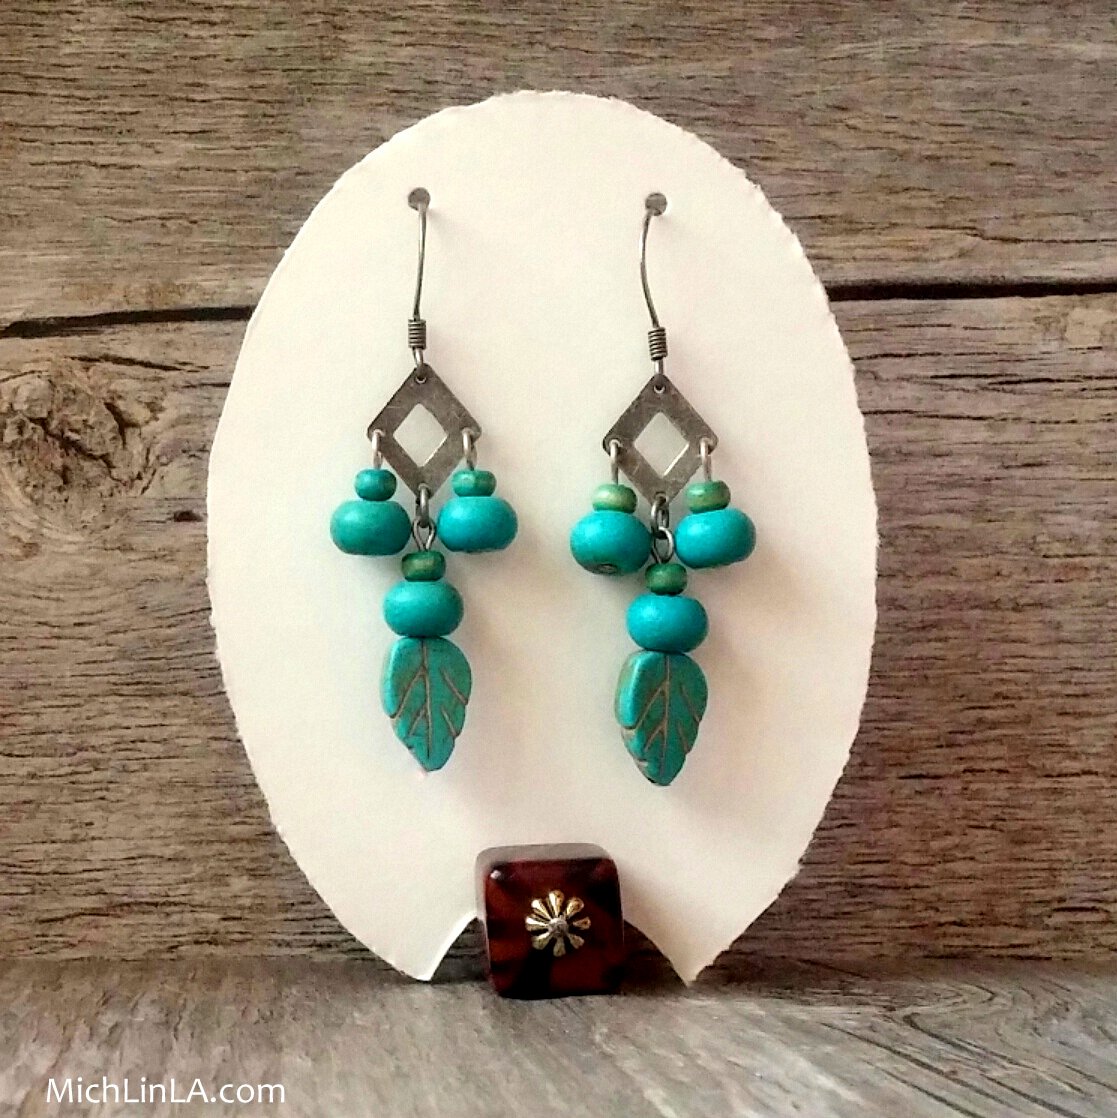
Hang earrings inside and stand it up. So darn cute! And it's fun to match the earrings to the frame.
Tissue boxes are so pretty nowadays. Find one you like and give it a second life.
Later, gators.
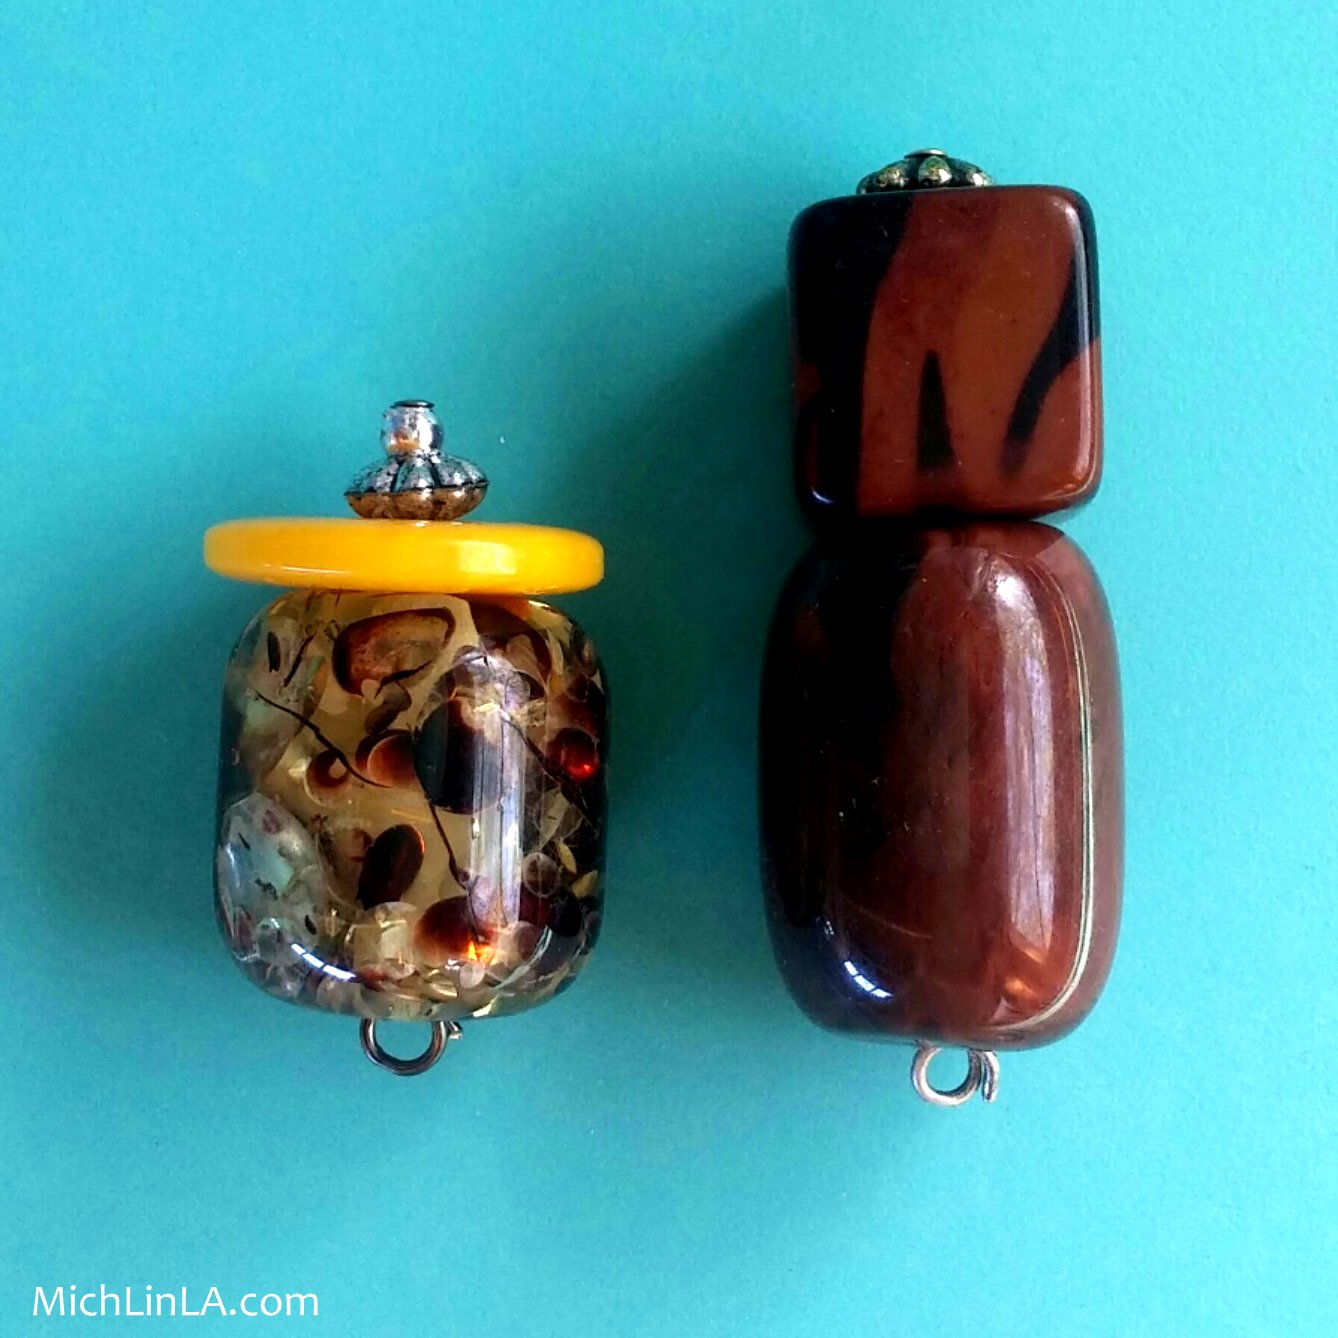
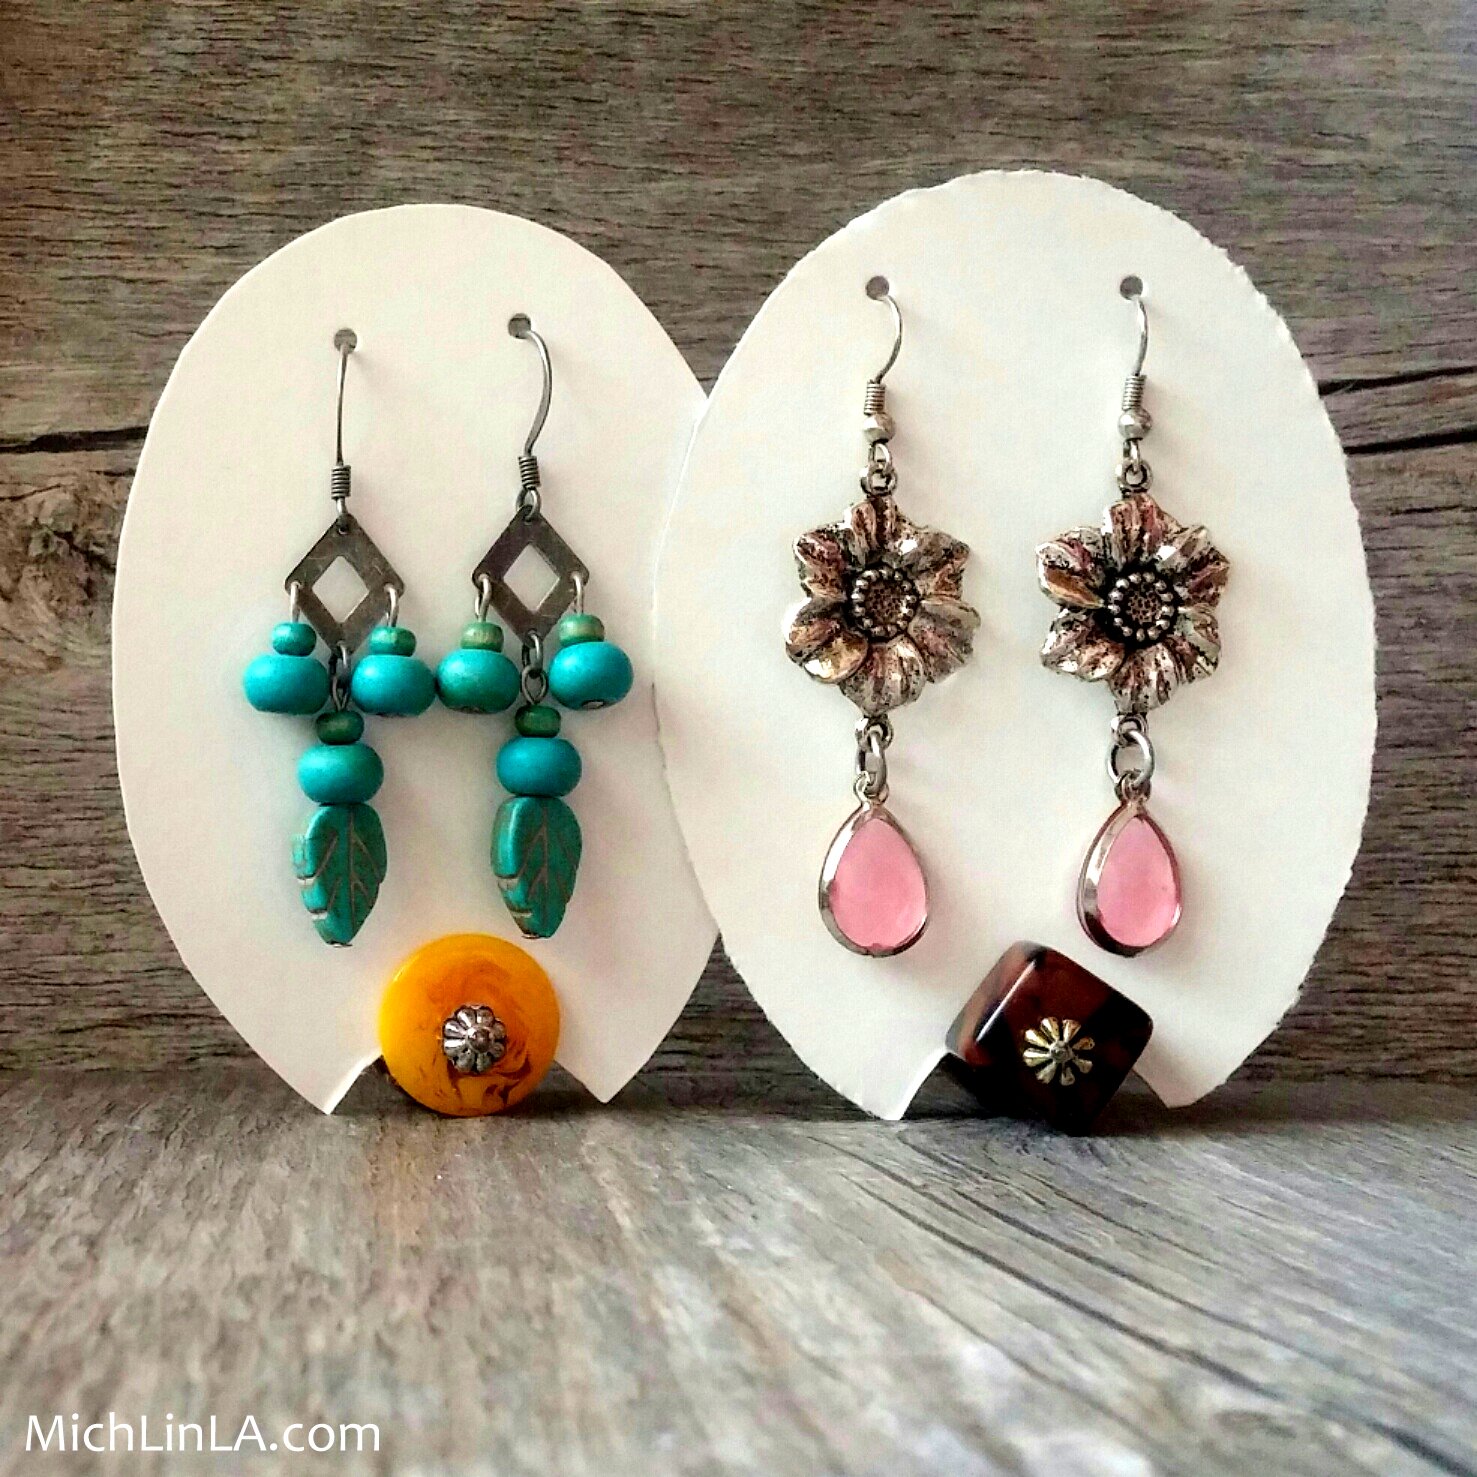
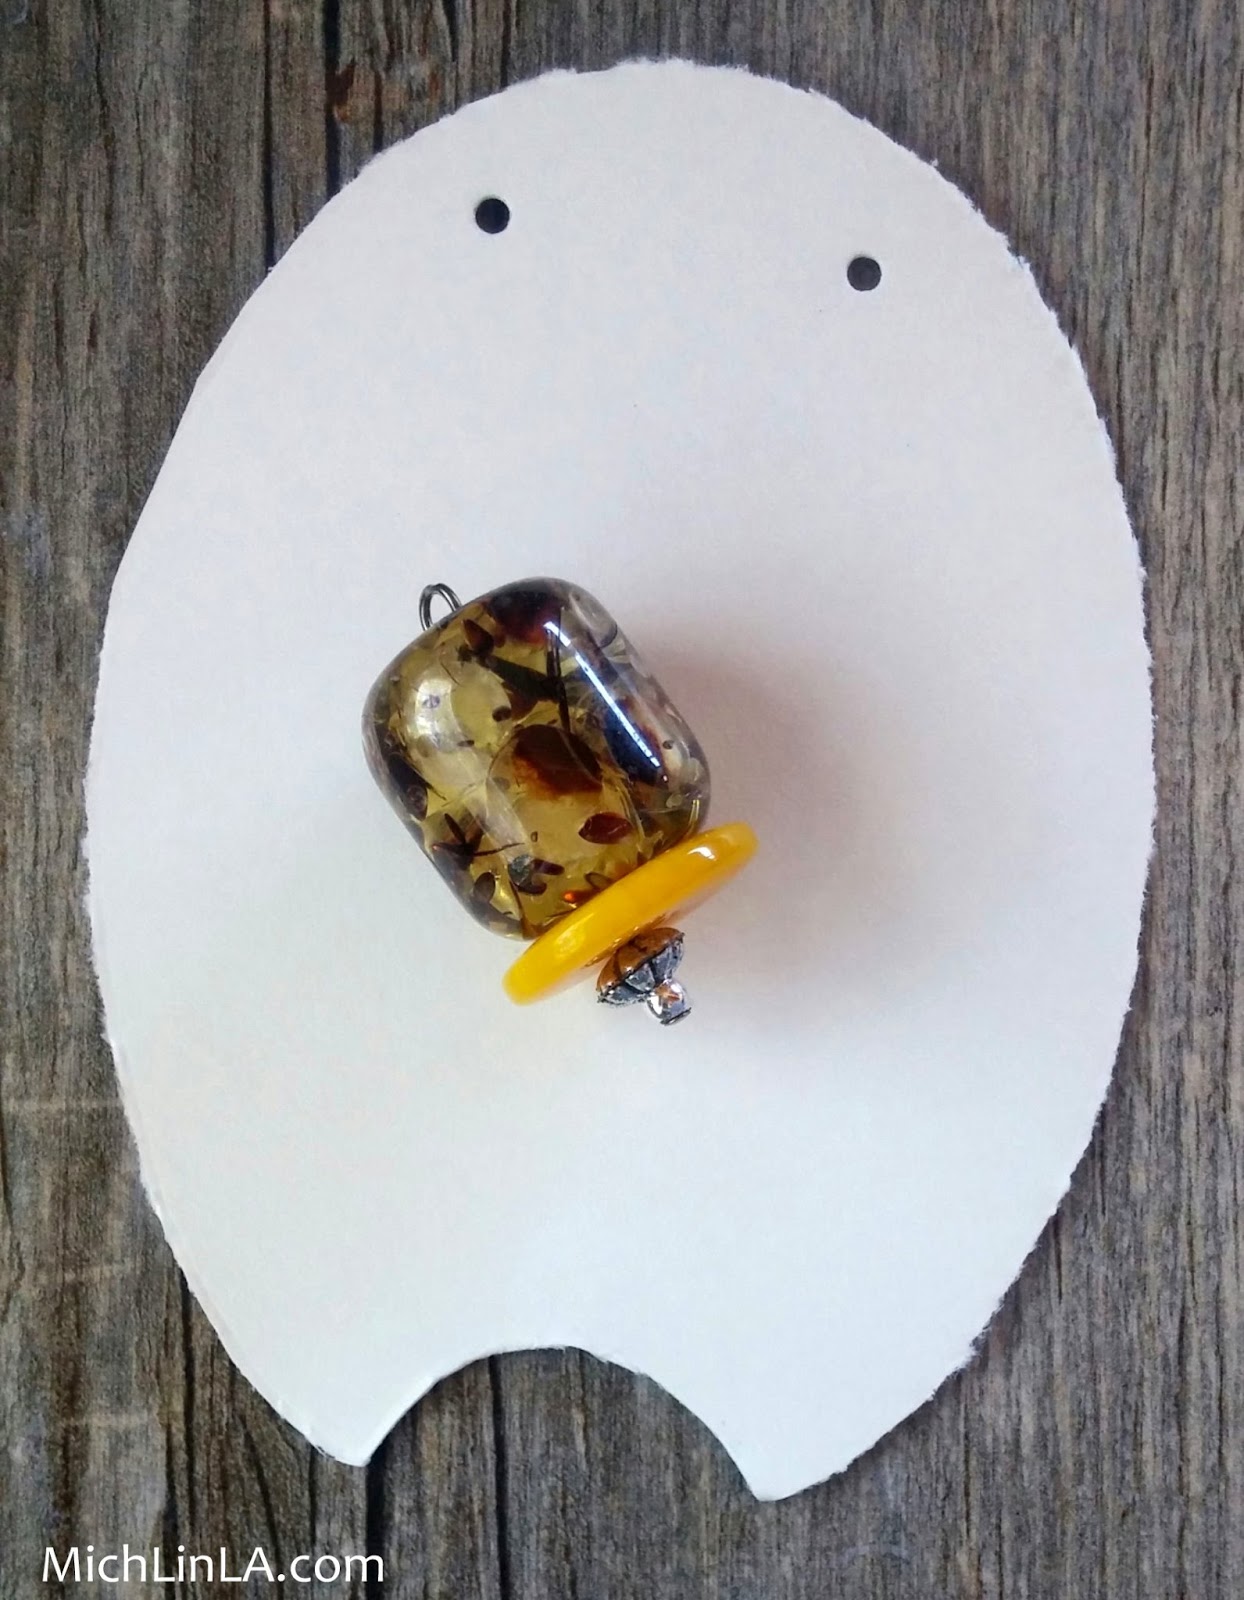
Here's a reverse mystery for you! Look at these strange tiny objects, made with two big beads.
What are they for? They are a much loved little invention of mine, a contraption I've been making and using for years.
Puzzle your head for a few moments and see if you can guess! Then scroll down to see the answer.
Scrollin'
Scrollin'
Scrollin'
Check it out...bing!
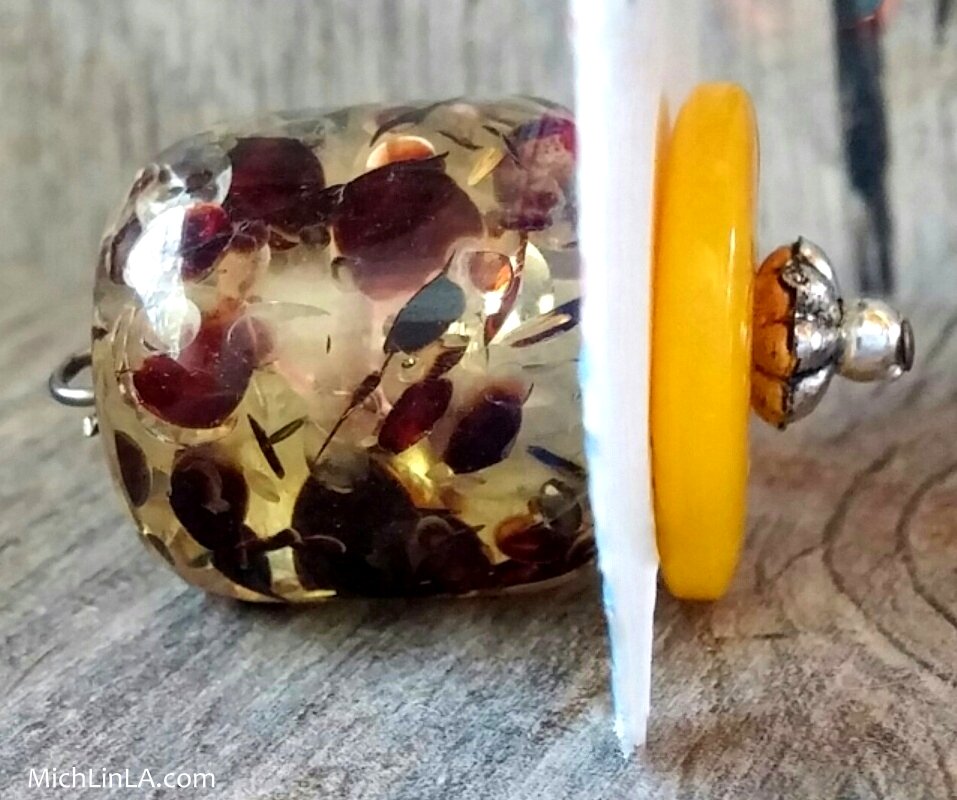
Just tuck some recycled cardboard between the two beads, and voila, earring display stands! Yep, they stand up on their own.
I love these mucho. One, they're way cute. Two, they take up hardly any space when not in use. And three, they are an AWESOME way to use up big clunky orphan beads that I'd probably never use for jewelry.
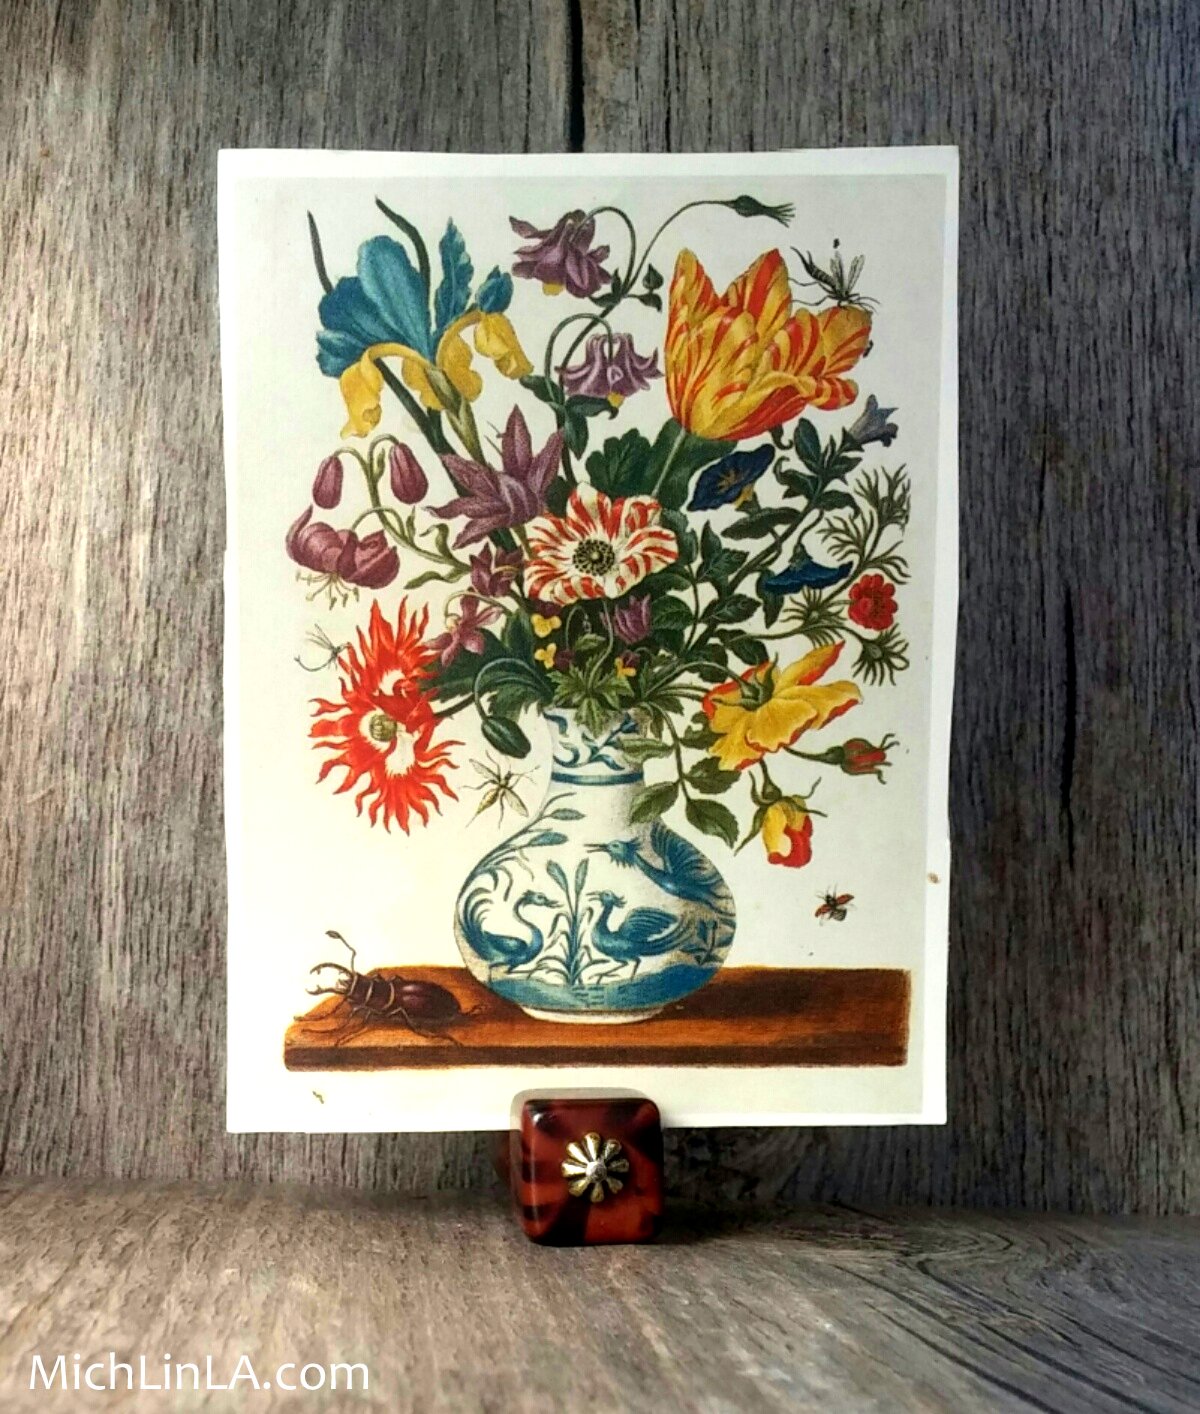
I also use them as mini holders for small photos or art:
They have lots of other uses, too - like place card holders, buffet table signs, anywhere you need to label or display something while maintaining a tiny footprint. Fer example, they make the darlingest business card display:
Pretty cool, eh? Wanna DIY? Here goes!
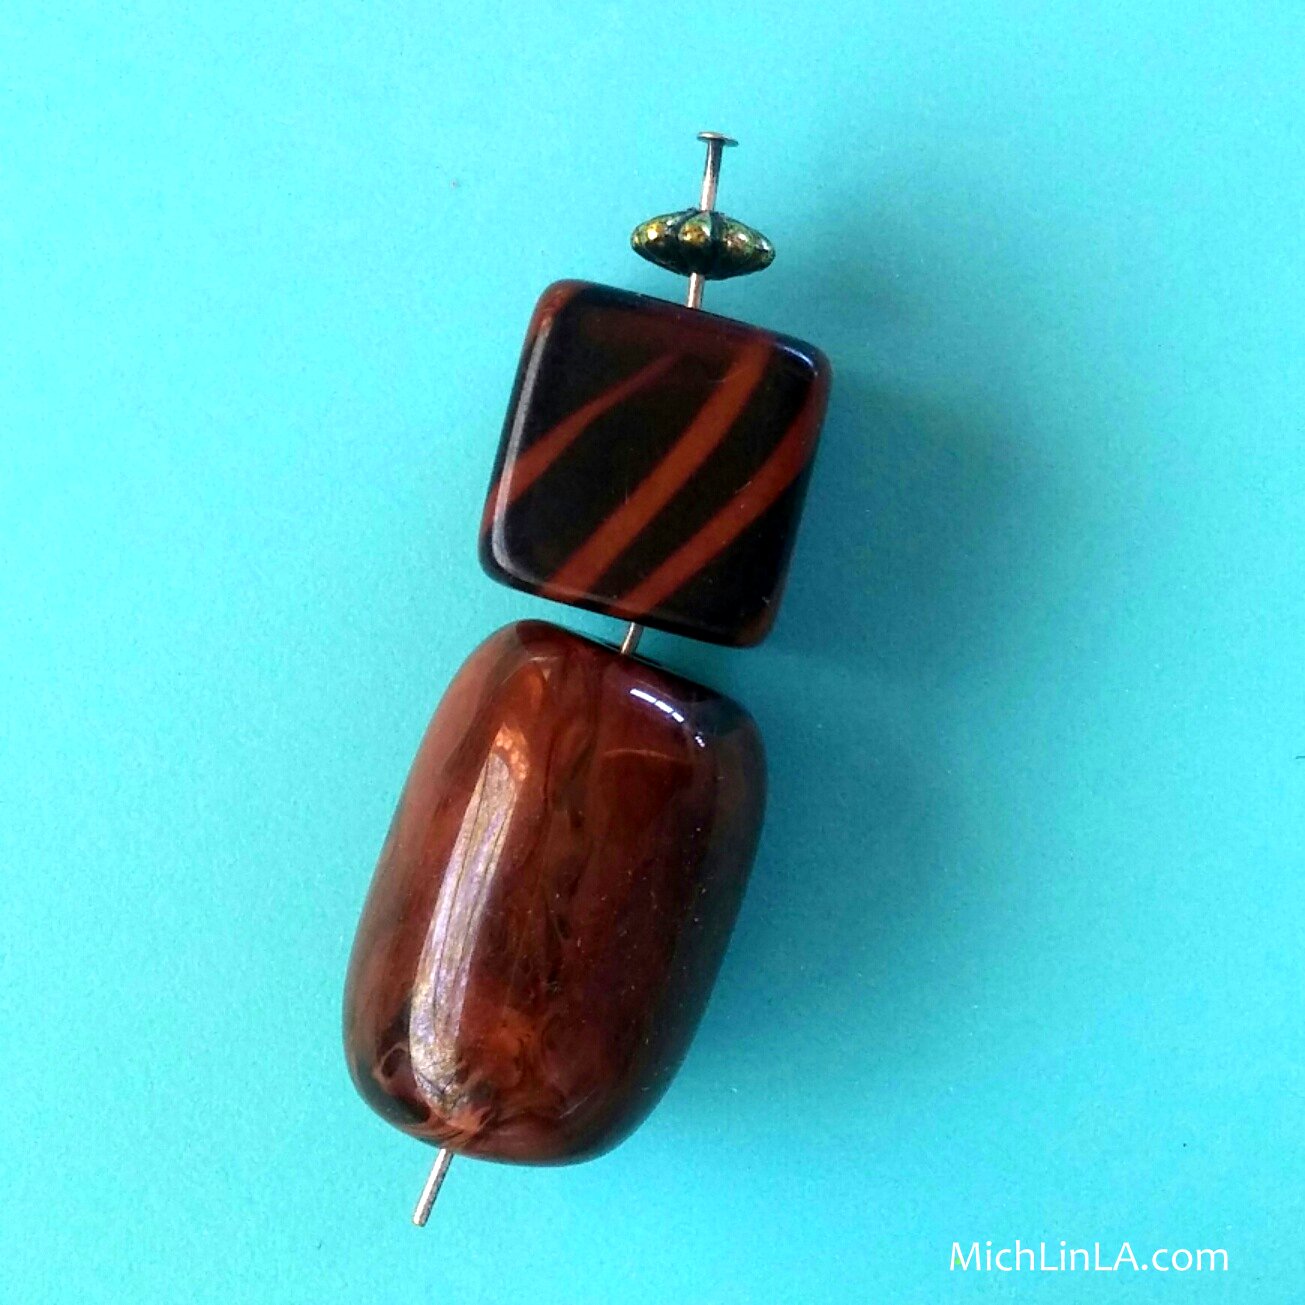
Stack two big beads on a headpin, with a little spacer bead in front to schmancy it up a bit.
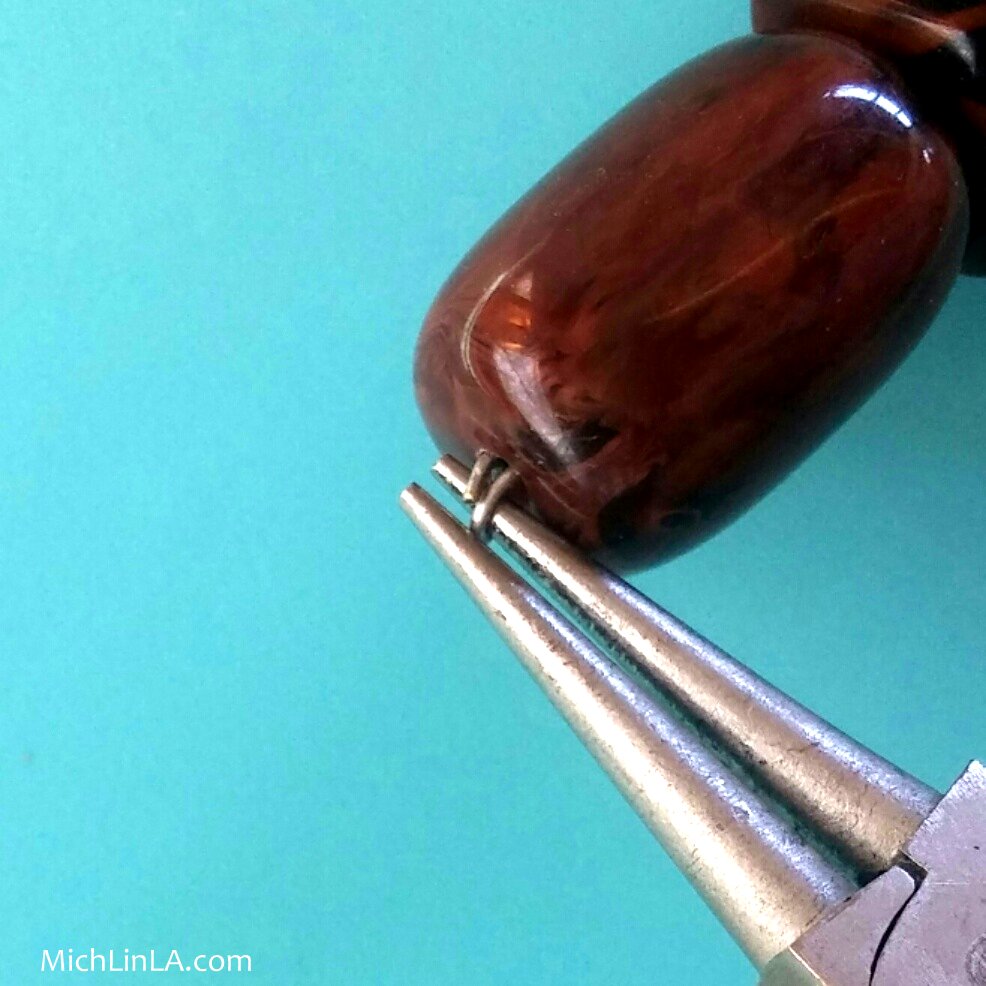
Use round-nose pliers to turn the tail of the headpin in a loop. Cinch it all the way down tight against the bead.
For the earring card, cut a cardboard shape with a small bite out of the bottom. Looks a bit funny, but it helps balance the weight of the earrings.
Then just tuck the cardboard into the slot. Here's a side view:
How easy was that?
For party or wedding place card holders: instead of orphan beads for those, you might decide to choose beads in your favorite colors and make matched sets to decorate your table.
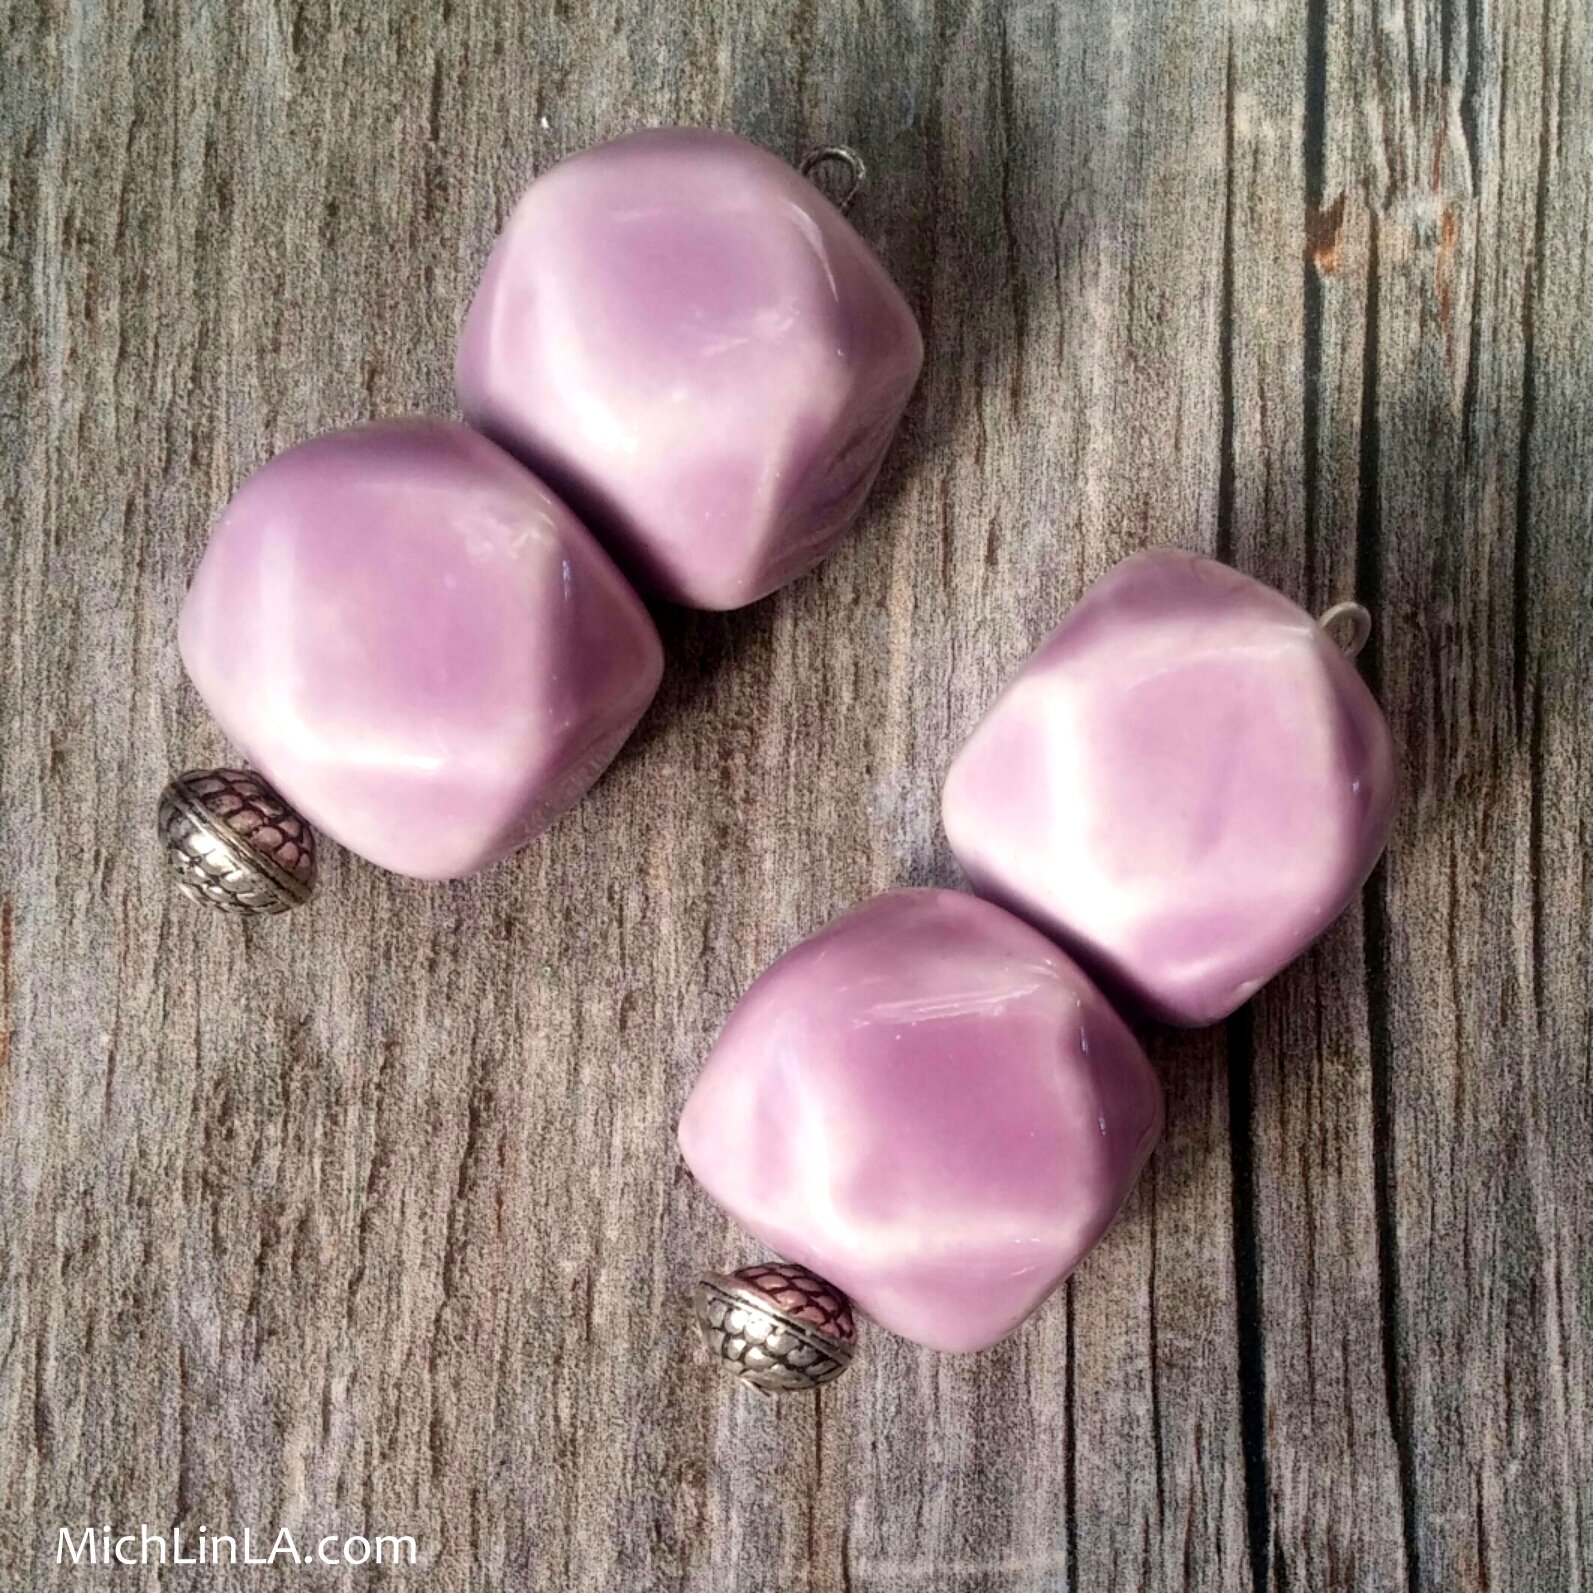
Here are some tips on making these. 1. Use beads with flattish ends rather than round. 2. Beads with the same approximate diameters work best together. 3. I used acrylic and porcelain beads here, but any material will do. Heavier beads will support slightly larger photos or earrings.
So ends The Mystery Of The Thing With Two Beads. Did you figure it out before scrolling down? Do tell.
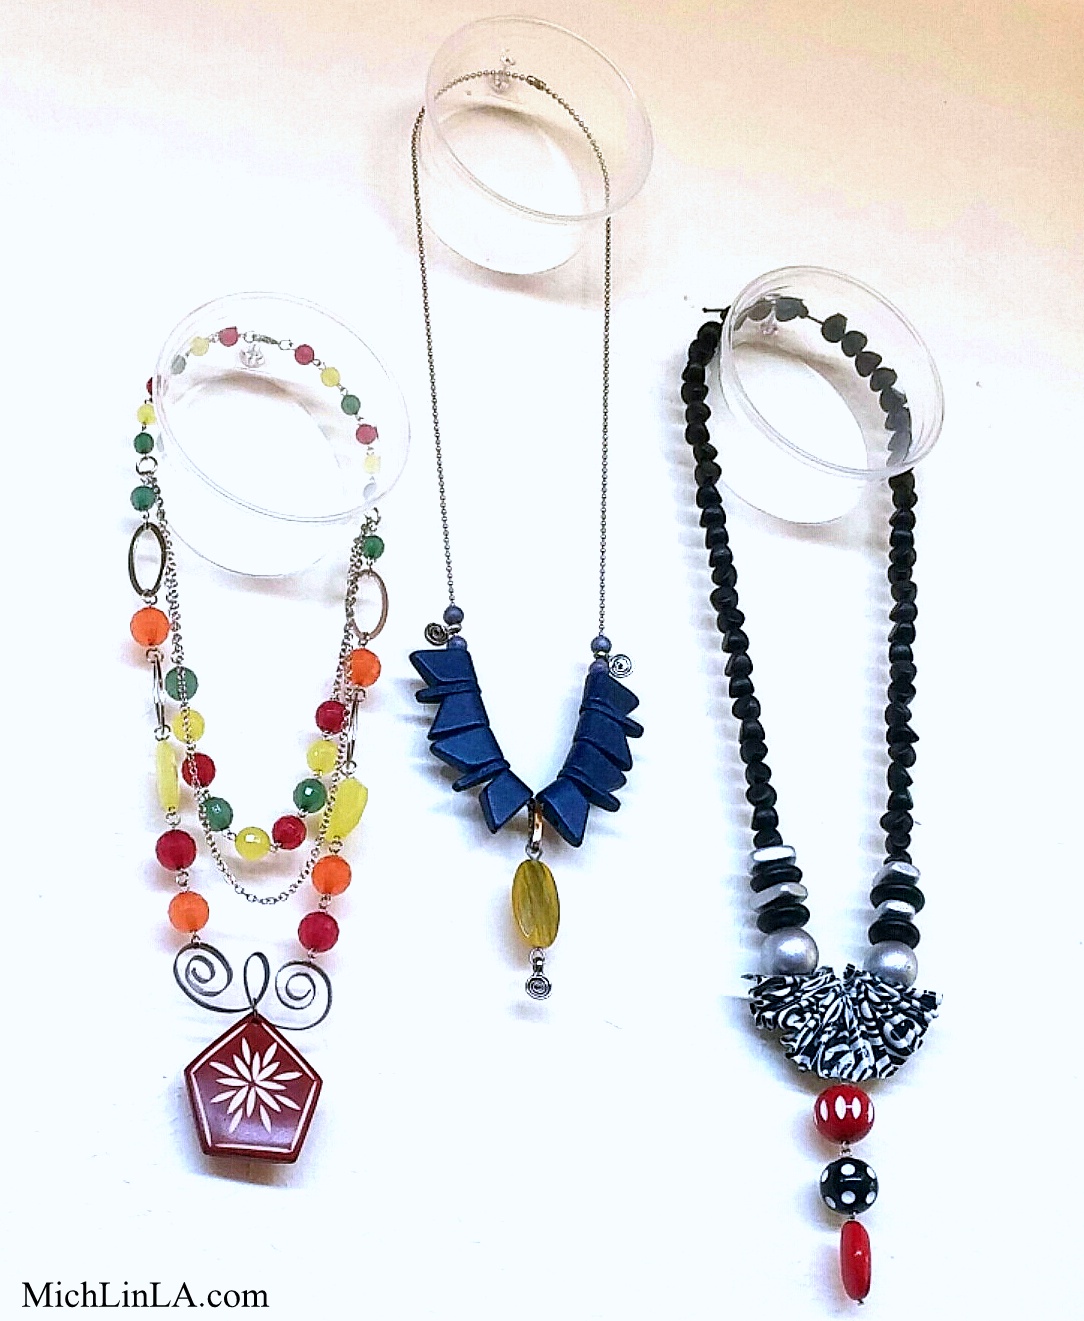
Oooh, check out this eerie phenomenon...
A wall of jewelry, displayed on invisible necks!
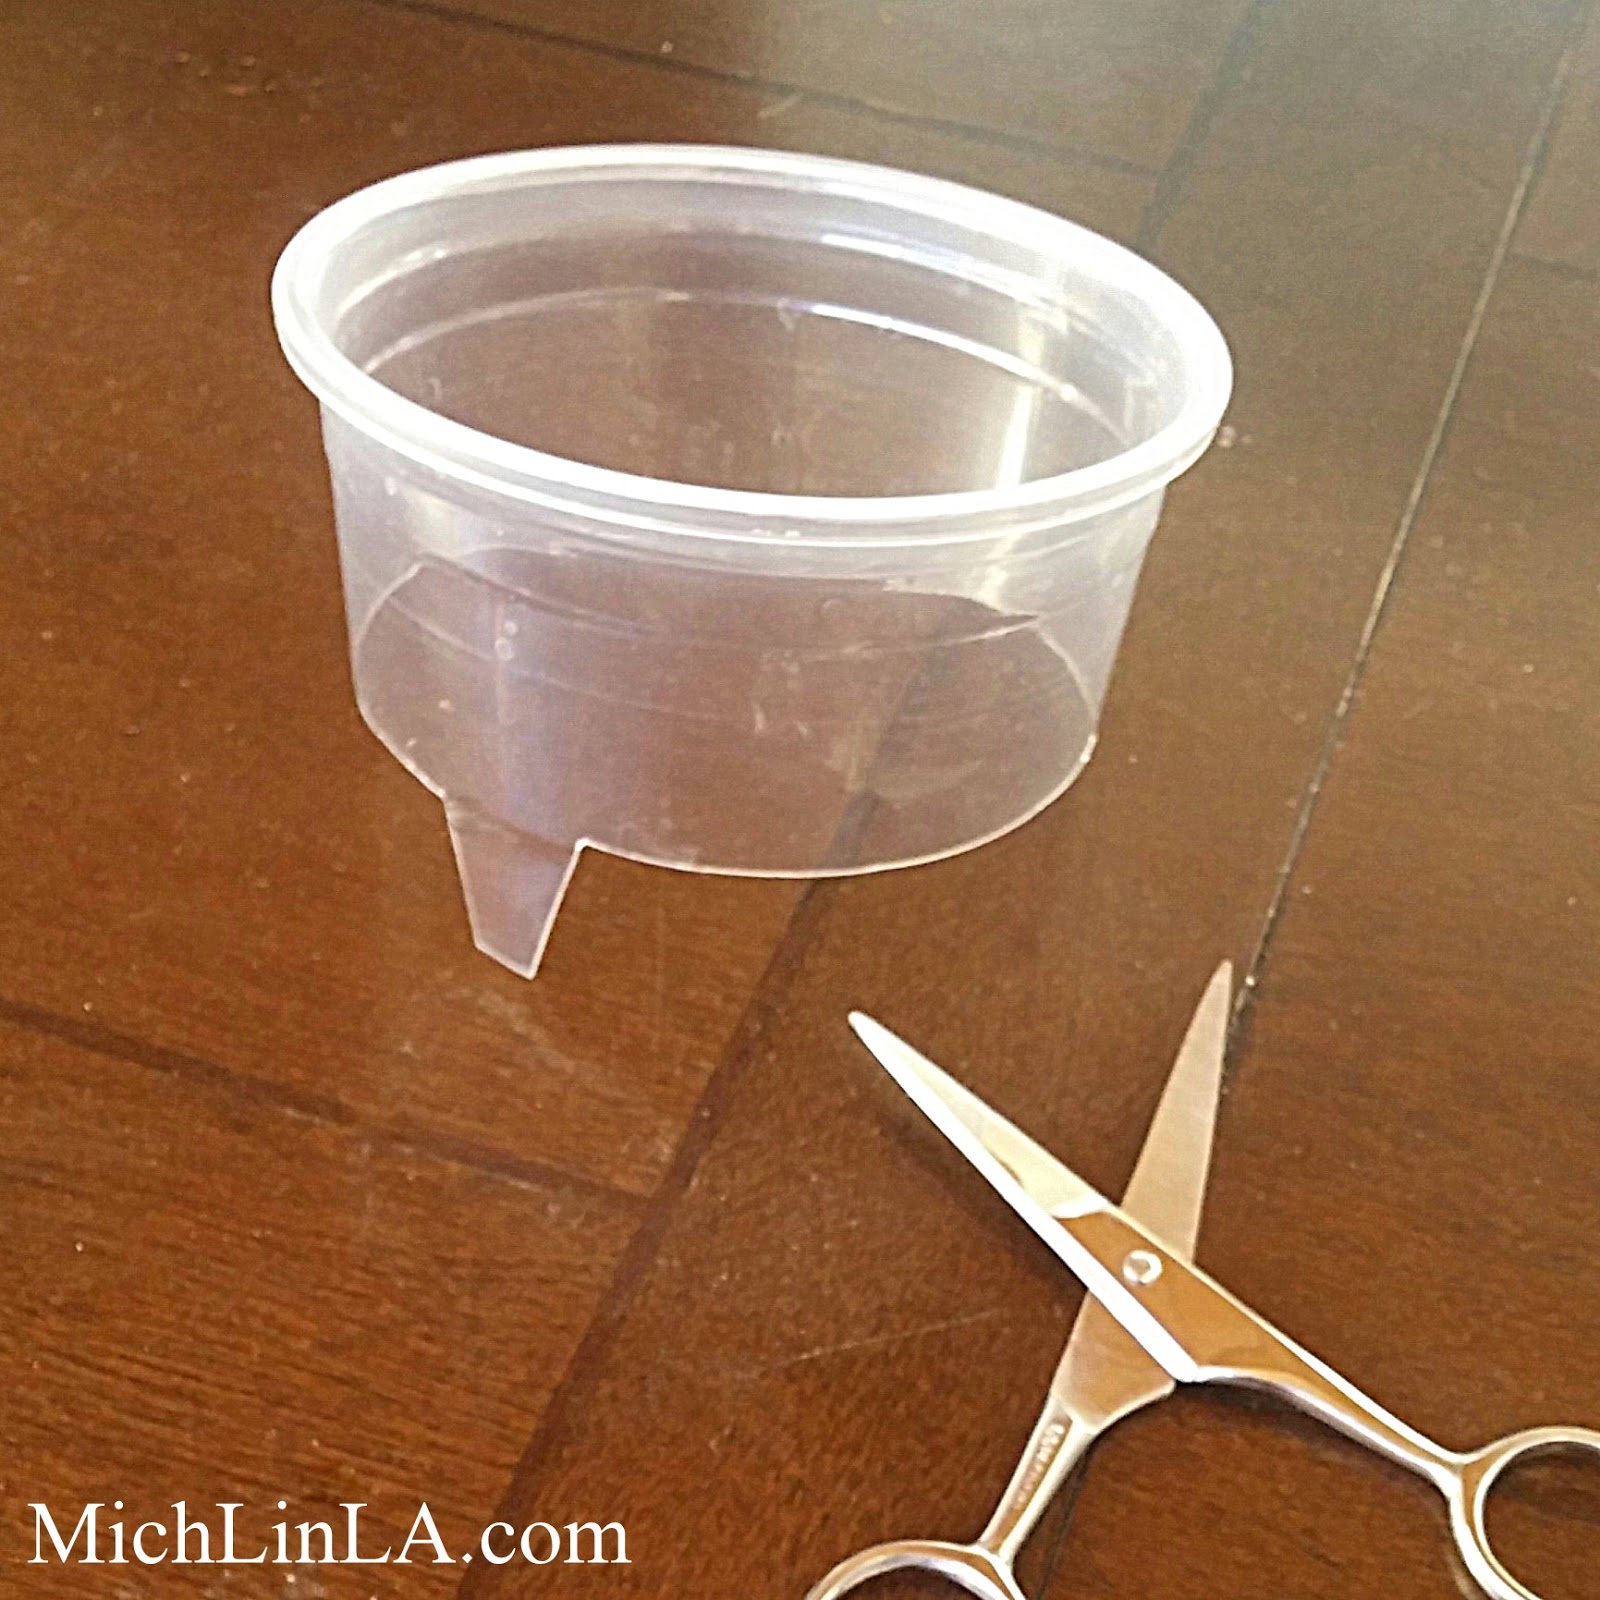
How'd I do it? I think you're gonna love this. It's a crazy easy eco-craft project, starting with some plastic cups (not easily recyclable) that were destined for the trash.
The DIY takes about 30 seconds. Half a minute, people! Just think how quickly you could fill up a wall with phantom throats.
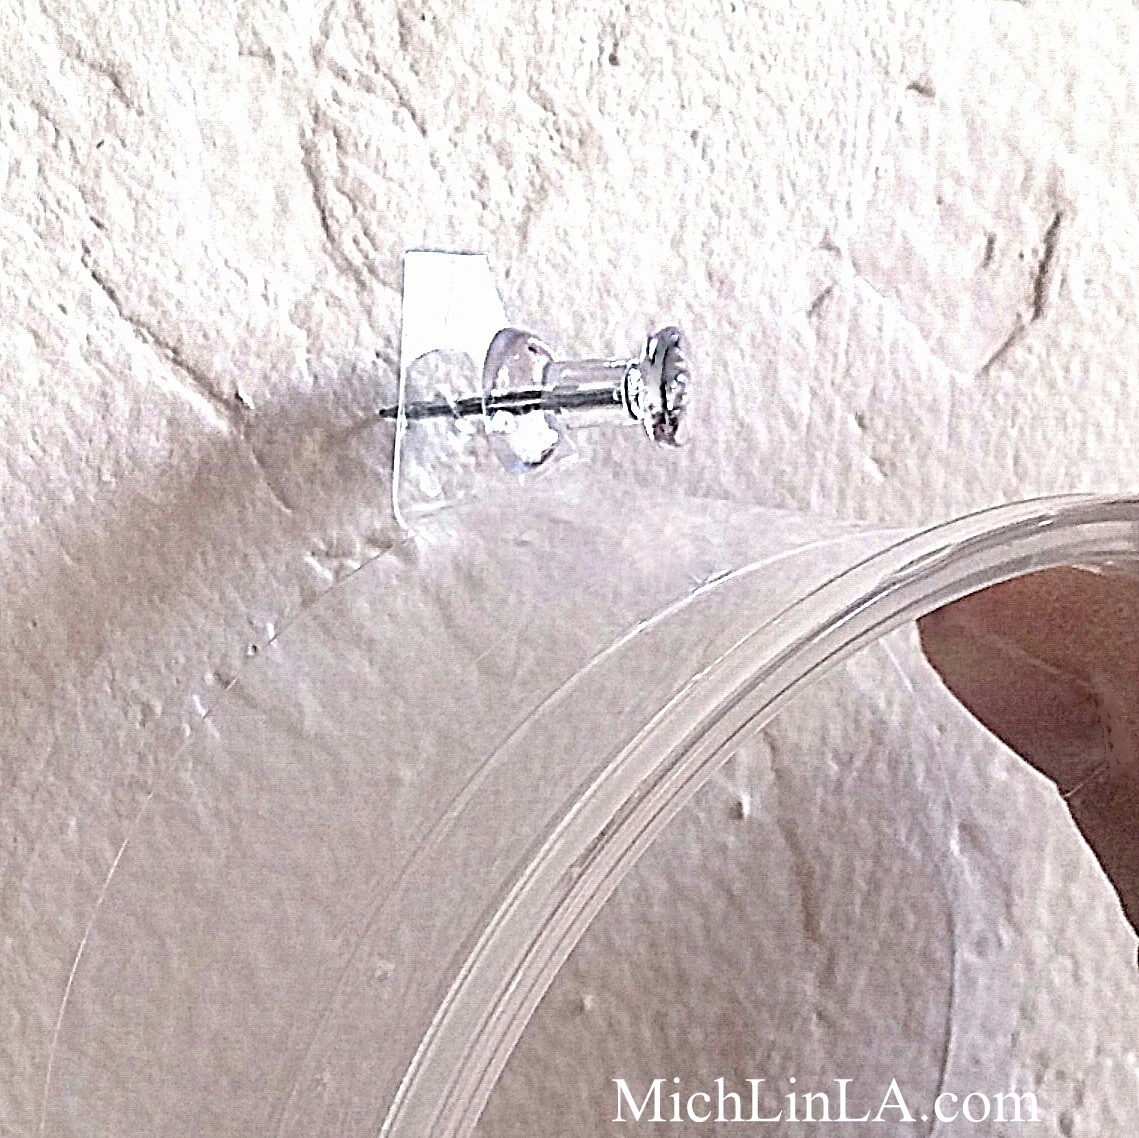
Here's all you do. A couple of inches from the rim, trim nearly all the way around. Before you cut it completely off the cup, jog your scissors to leave a little tab attached, like so:
Then just bend the tab up and affix it to the wall with a clear thumbtack.
That's it!
At first I thought my invisible necks would be a bit flimsy, so I started with one necklace each...
But it turns out they are surprisingly sturdy. I piled on more weight and they didn't even flinch. I might go for three per neck...wish me luck.
This is a big deal for me, as I'm deeply in the throes of creating a new craft studio in a loft room of my desert Southwest adobe fixer house. I sorely needed an unobtrusive way to show off lots of necklaces. The recycled element is just a wonderful bonus.
I'm having a great time finding ways to repurpose these iced coffee cups. To see what else I've come up with, check out these earrings:
And these awesomely fancy fleurs:
I may not be done yet...got some more ideas up my sleeve that I hope to share soon. See ya!
Well, hiya! Today brings a fresh new Guess The Mystery Thing challenge. Can you guess the origin of the fancy half-spheres in these cute earring holders?
As always, we are playing on the honor system. Do NOT be peeking until you be guessing! So take a moment and really concentrate...what are those mysteriously familiar objects?
Got your guess? Then start a-scrollin' for the answer!
*
*
*
I think (maybe, possibly, perhaps?) this is an easy one. Hint: I found them at the dollar store.
*
*
*
Ready?
*
*
*
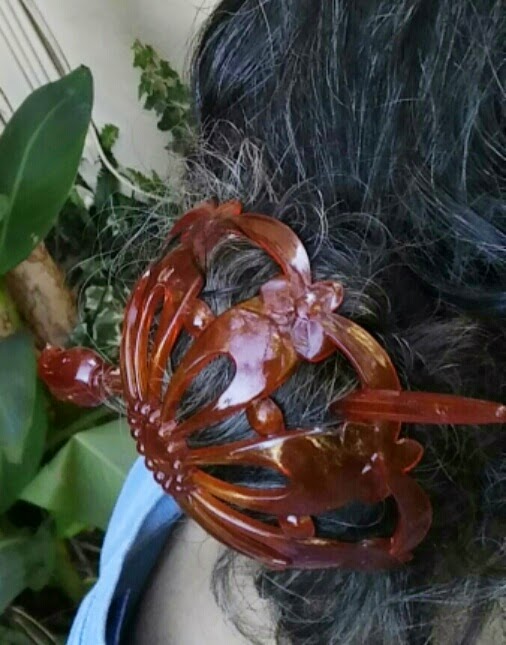
Okay - check it out.
Plastic hair bun covers! You know what I mean, right? It's really difficult trying to selfie the back of one's own head, but here's an attempt:
The DIY:
For the tortoise-shell one, I used a headpin to combine two bun covers, with a heavy bead underneath for weight, and a rubber washer in between for stability. For the white one, I just glued a bun cover into an upside-down crystal candlestick. Nothing could be simpler!
Now, do tell: did you guess the Mystery Thing? Let me know in the comments!
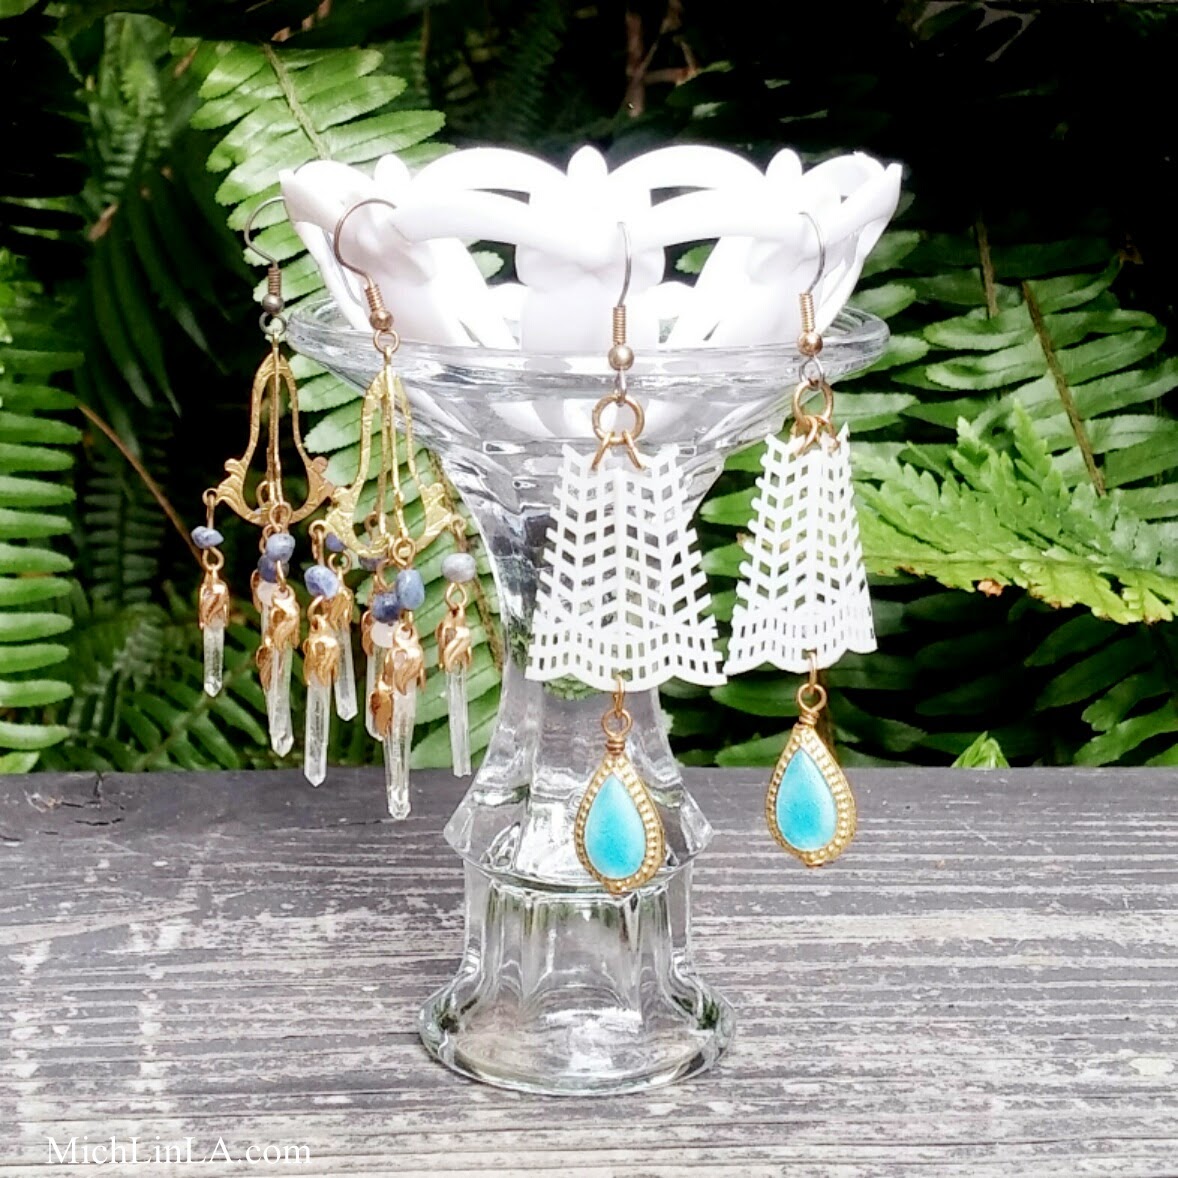
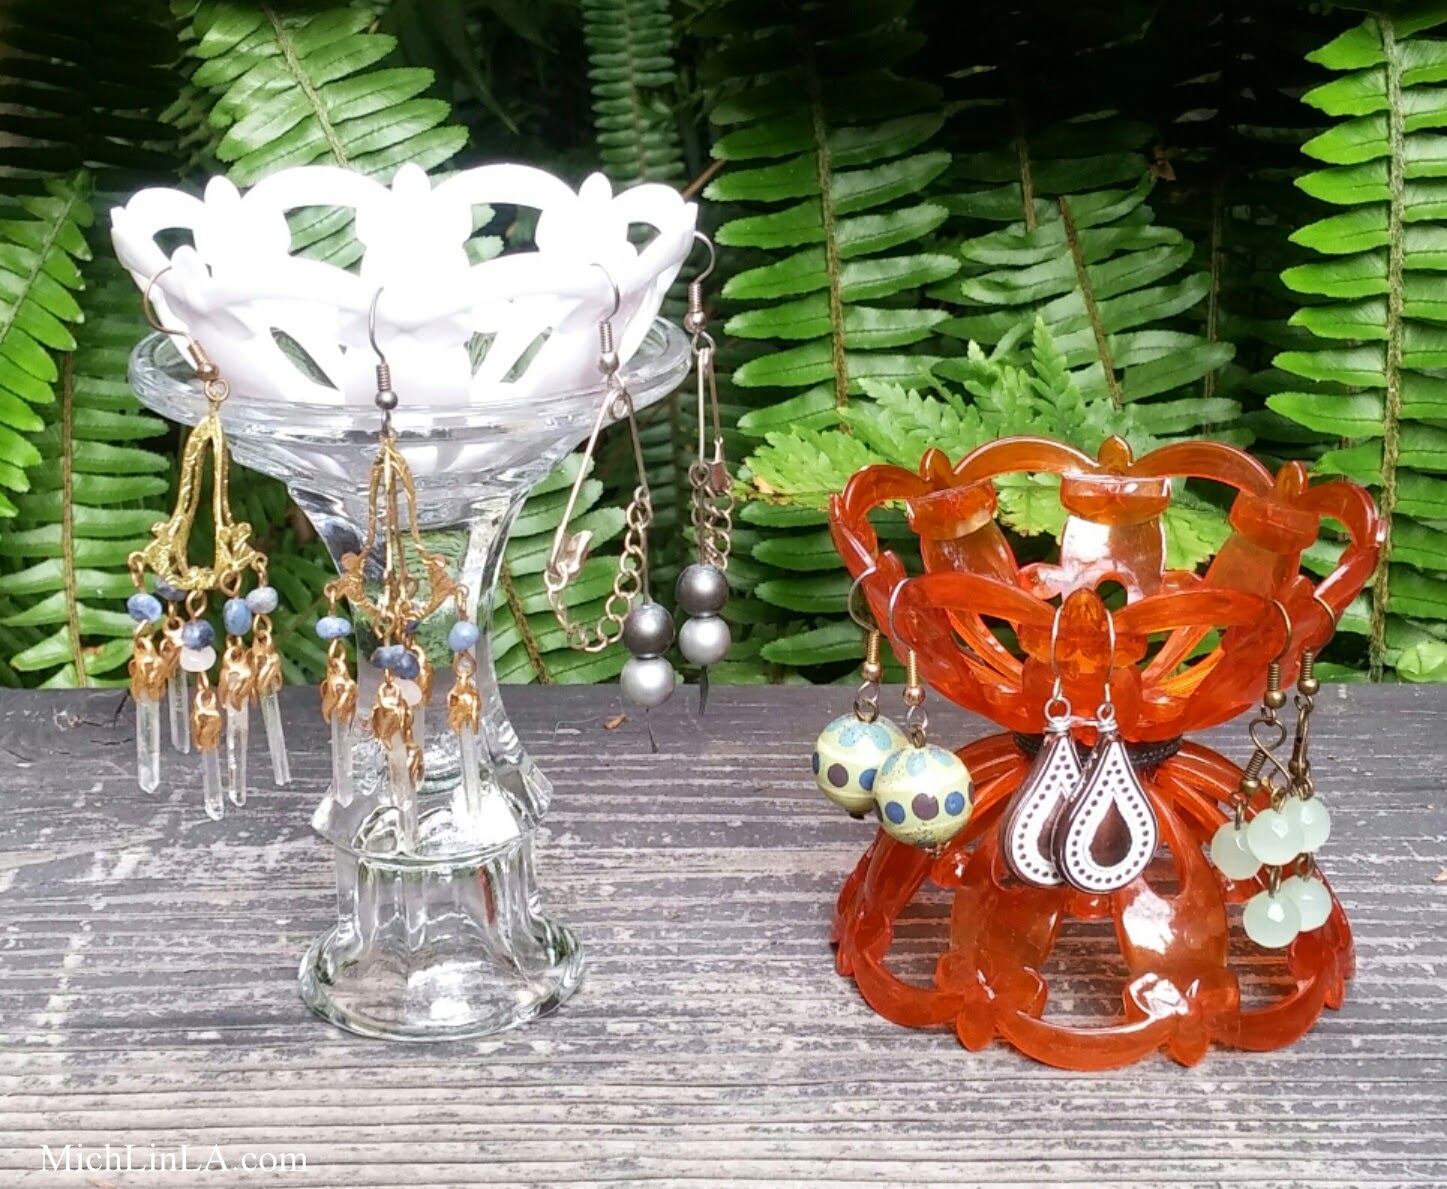
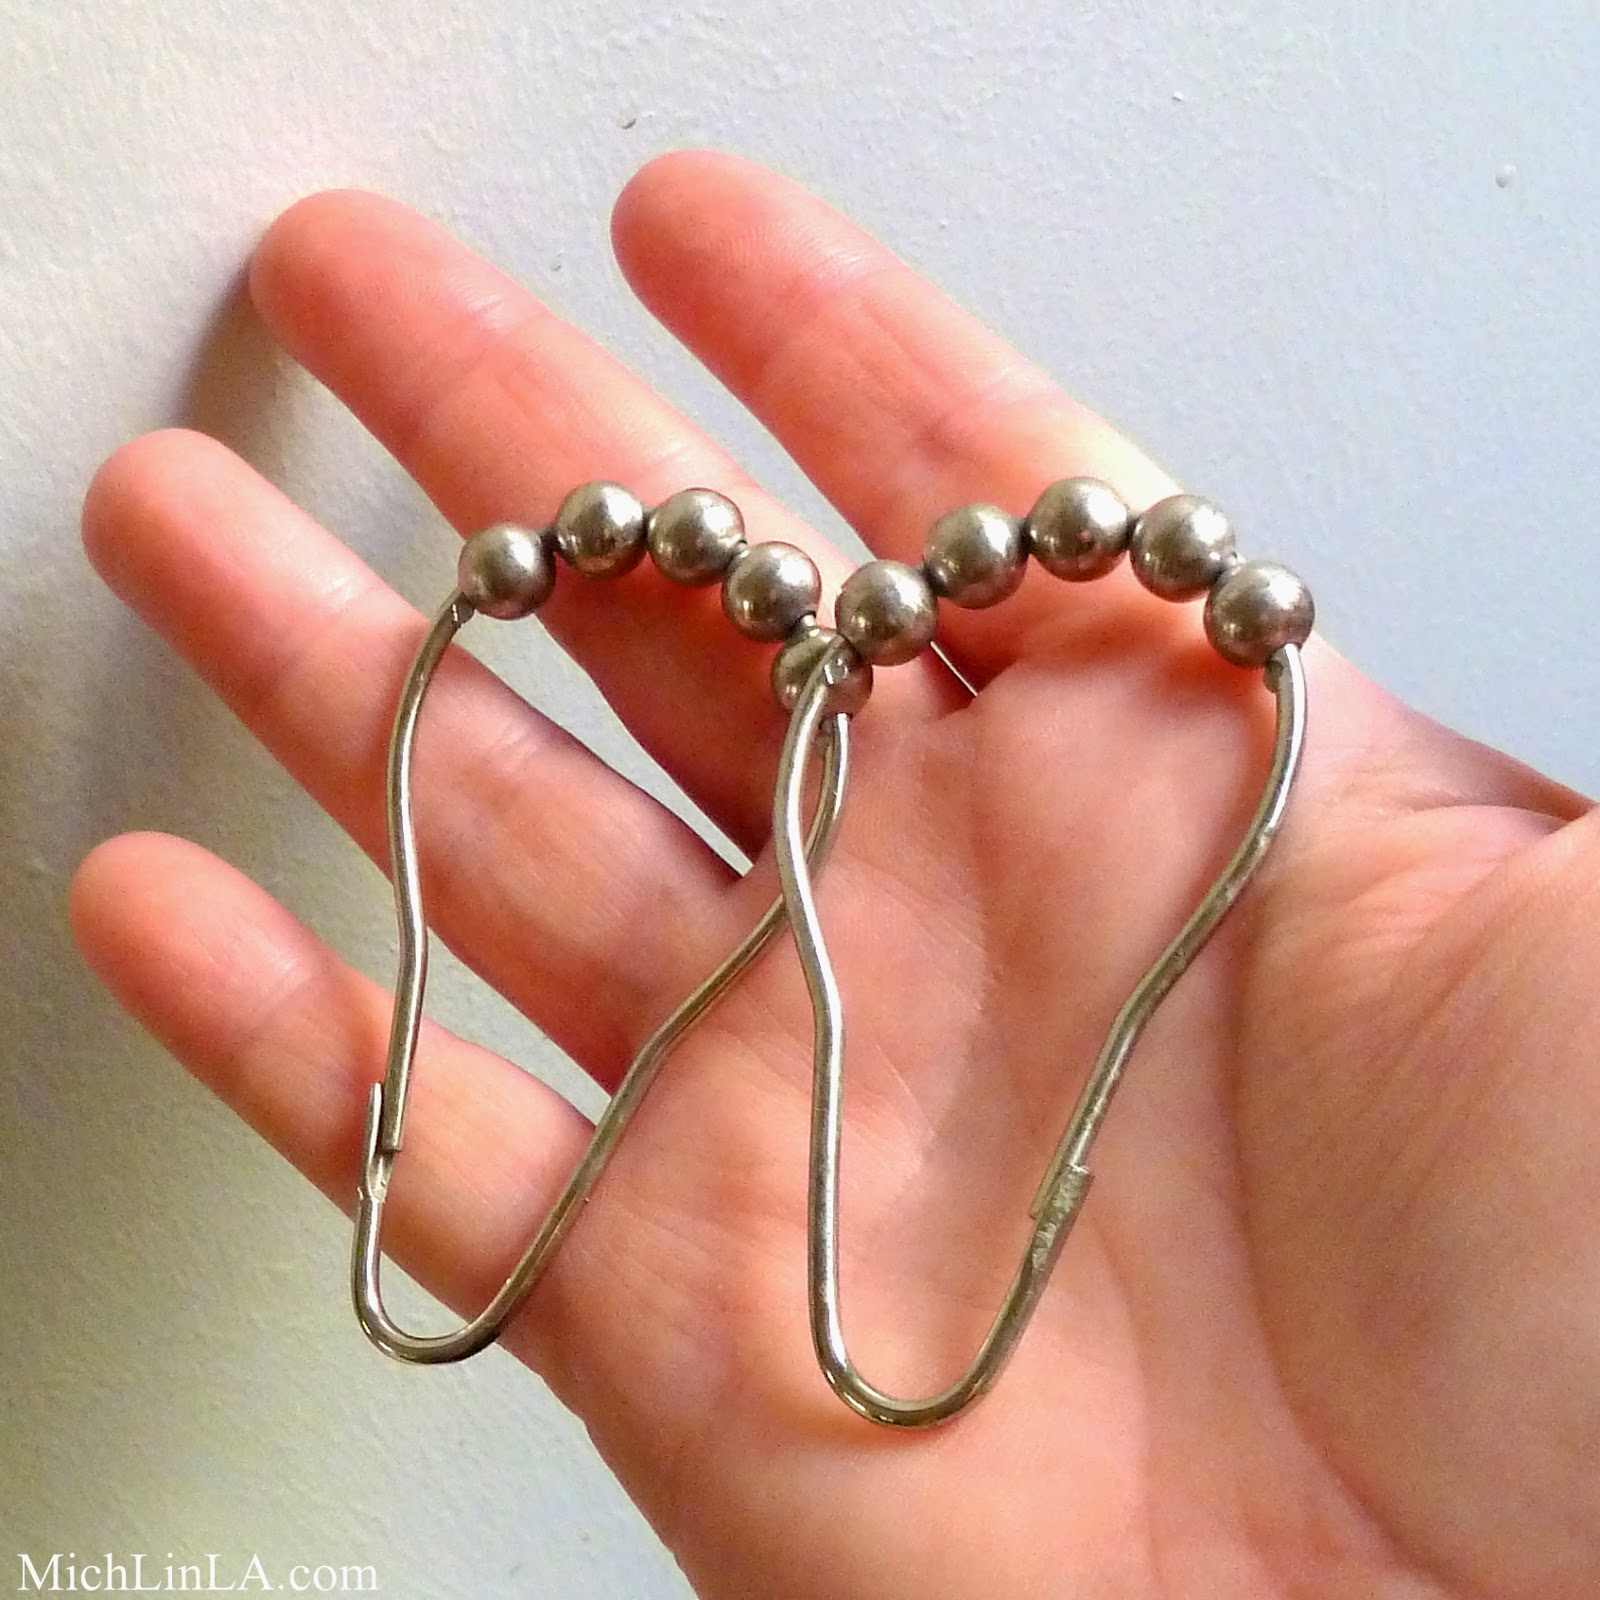
Welp, time for another Guess The Mystery Thing scroll-down challenge! Take a look at these curvy beaded earring hangers:
This idea came about when I needed a way to organize lots of BIG statement earrings. (All the ones in this post are more than 3 inches long. I like big bobs and I cannot lie!) Mine were always getting tangled up, with each other or with other earrings hanging nearby. I came up with this trick to keep those statement earrings separated and on display.
So what are these handy dandy little things?
You know how it works. Honor system, people! No peeking until you have closed your eyes, made a wish, prayed to the gods of Mystery and come up with your own guess.
Think you know it? Then let's scroll!
*
*
*
*
Keep a-scrollin'...
*
*
*
*
Annnnd the answer is:
*
*
*
*
Bing!
Shower curtain rings! The kind with built-in beads for rolling along the shower rod.
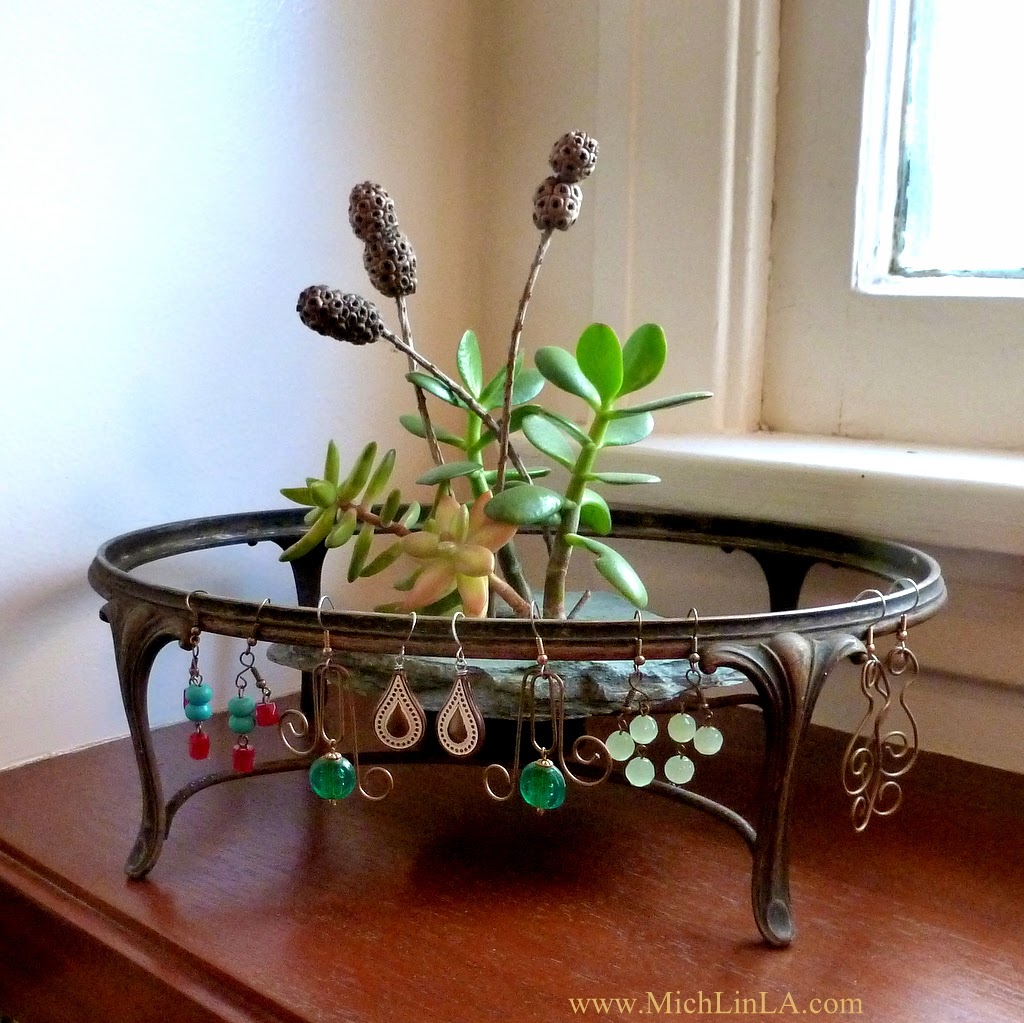
I discovered that a great way to use them is hung on a tie rack, to allow a bit of space between the big earrings and the wall:
So now comes the honor part....did you Guess The Mystery Thing? Or did you think of something different? Do tell!
p.s. If anybody's curious about the earrings, they're all upcycles of one sort or another. Here are the links:
Flamingos: http://www.michlinla.com/2011/11/mystery-thing-revealed-gold-bird.html
Woven Silver Teardrops: http://www.michlinla.com/2010/07/interesting-notion.html
Weird Flames: http://www.michlinla.com/2014/07/jewelry-before-and-after-leafy-linkers.html
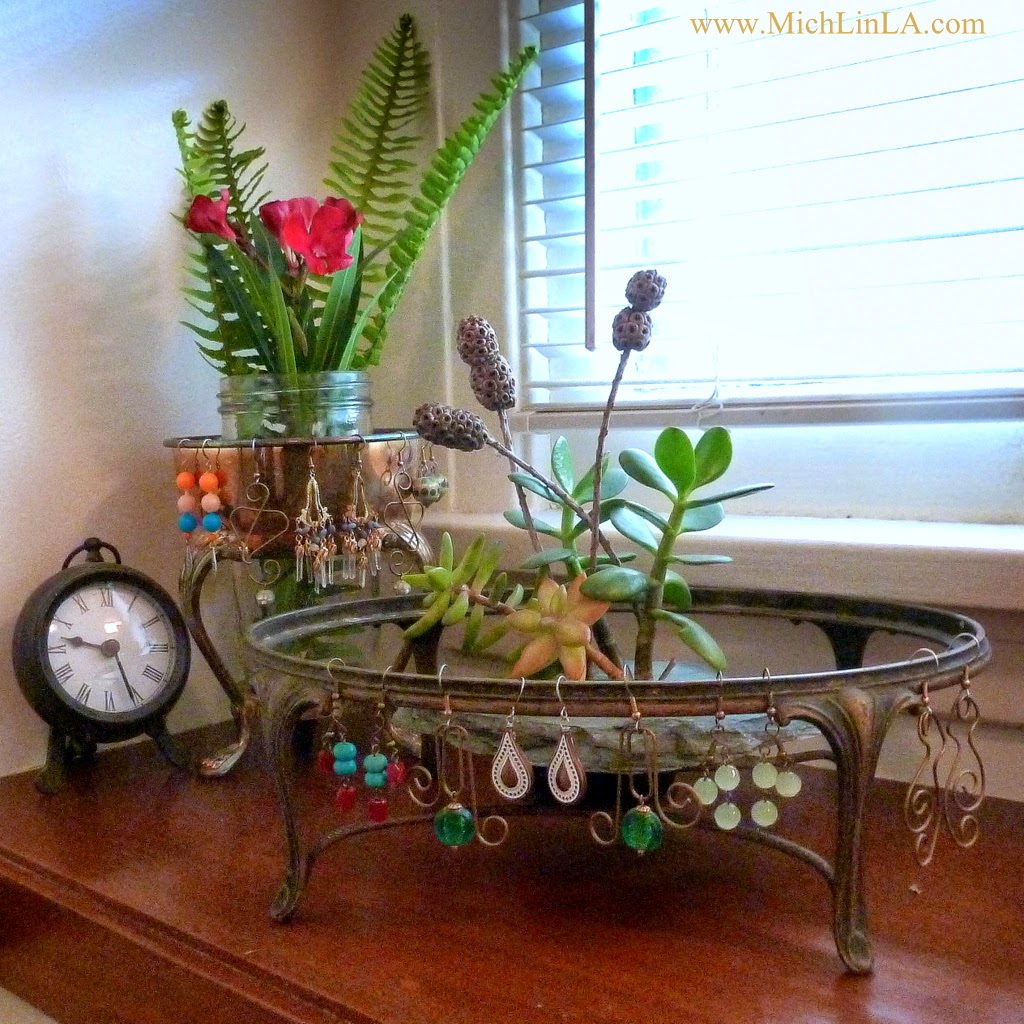
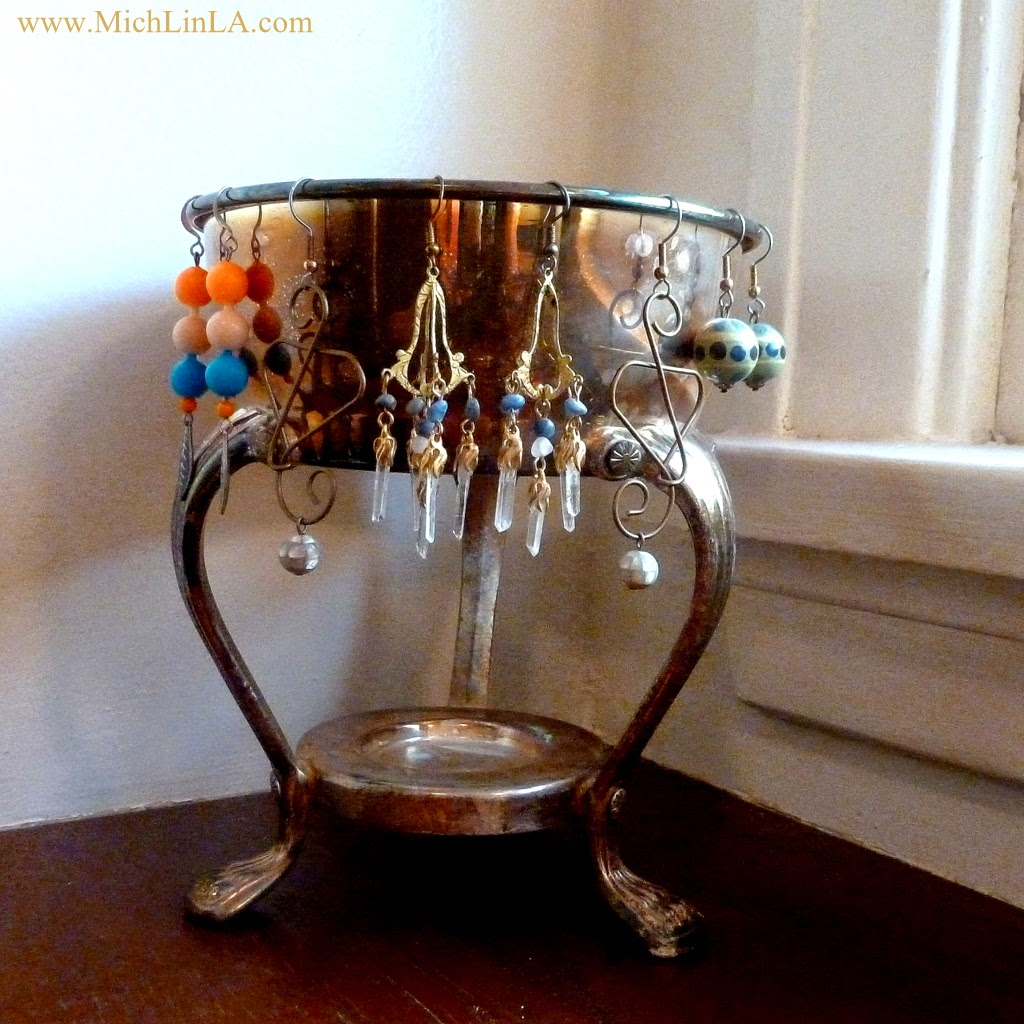
Hello again! Hey, here's a neato idea for storing earrings.
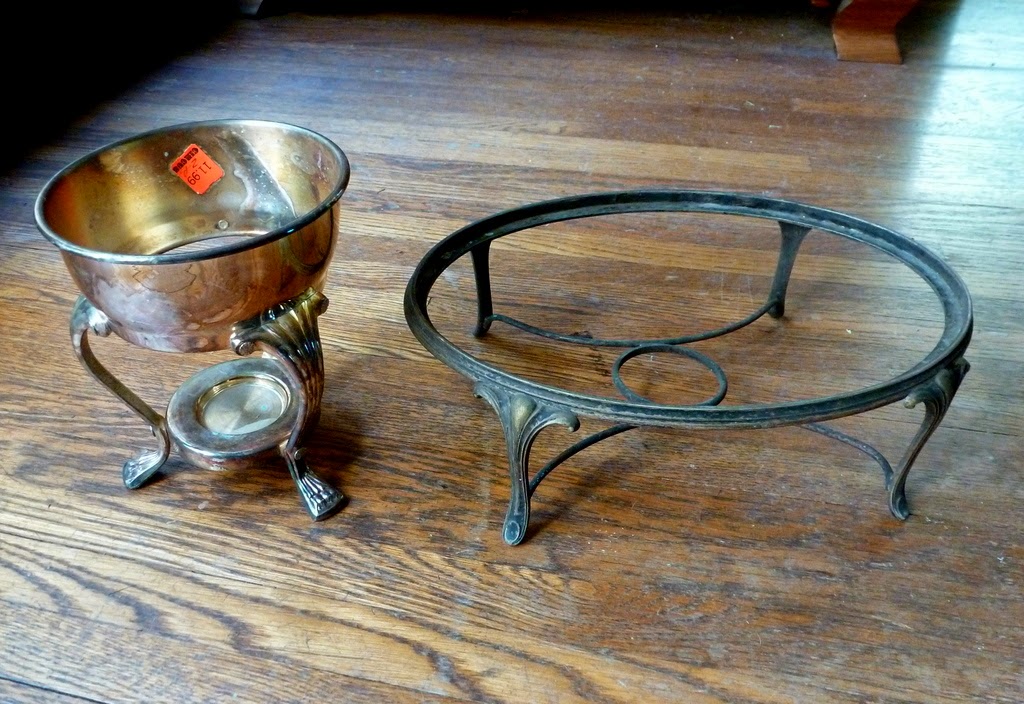
At practically every thrift store and yard sale, I come upon these lonely chafing dish legs. The poor things have lost their chafing dishes and nobody loves them.
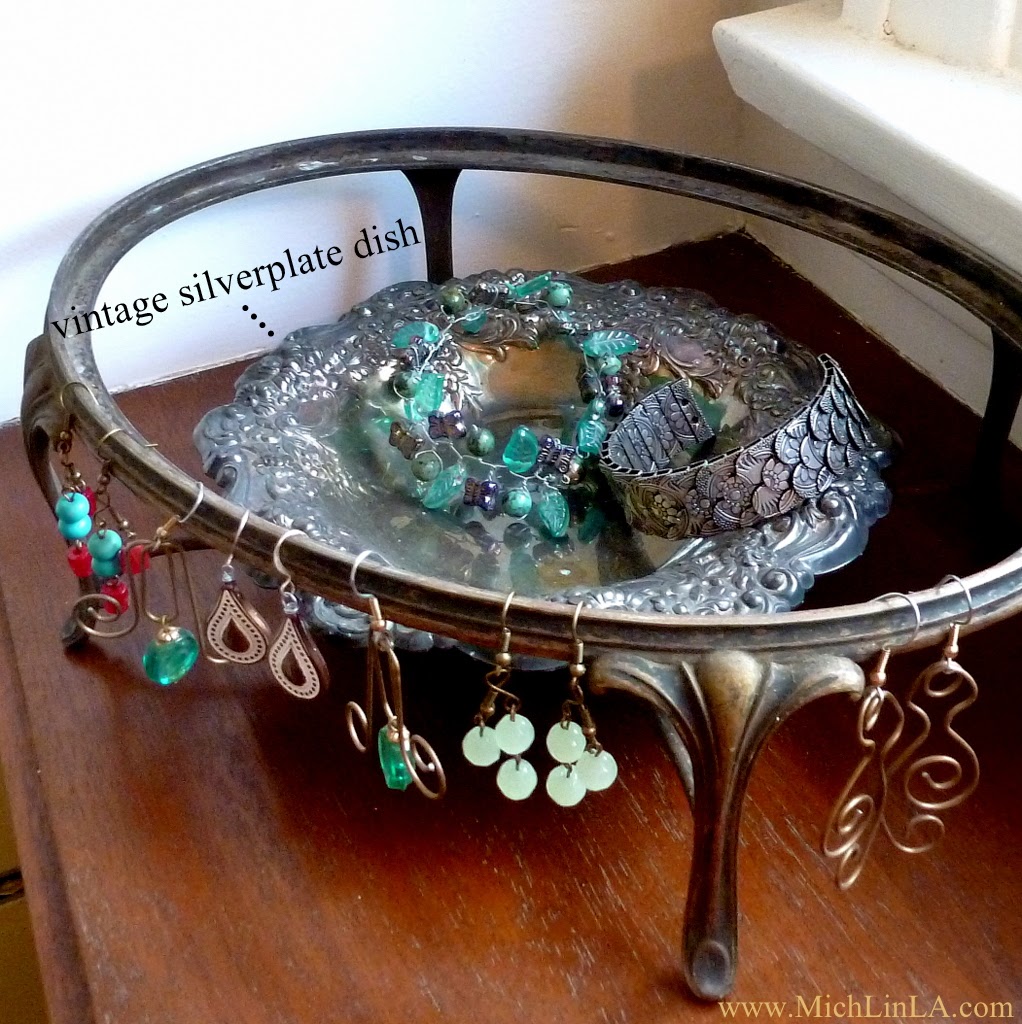
But they're so beautiful! Vintage silverplate, gorgeous lines, myriad styles. I can't resist buying them. One of my favorite uses: just add earrings.
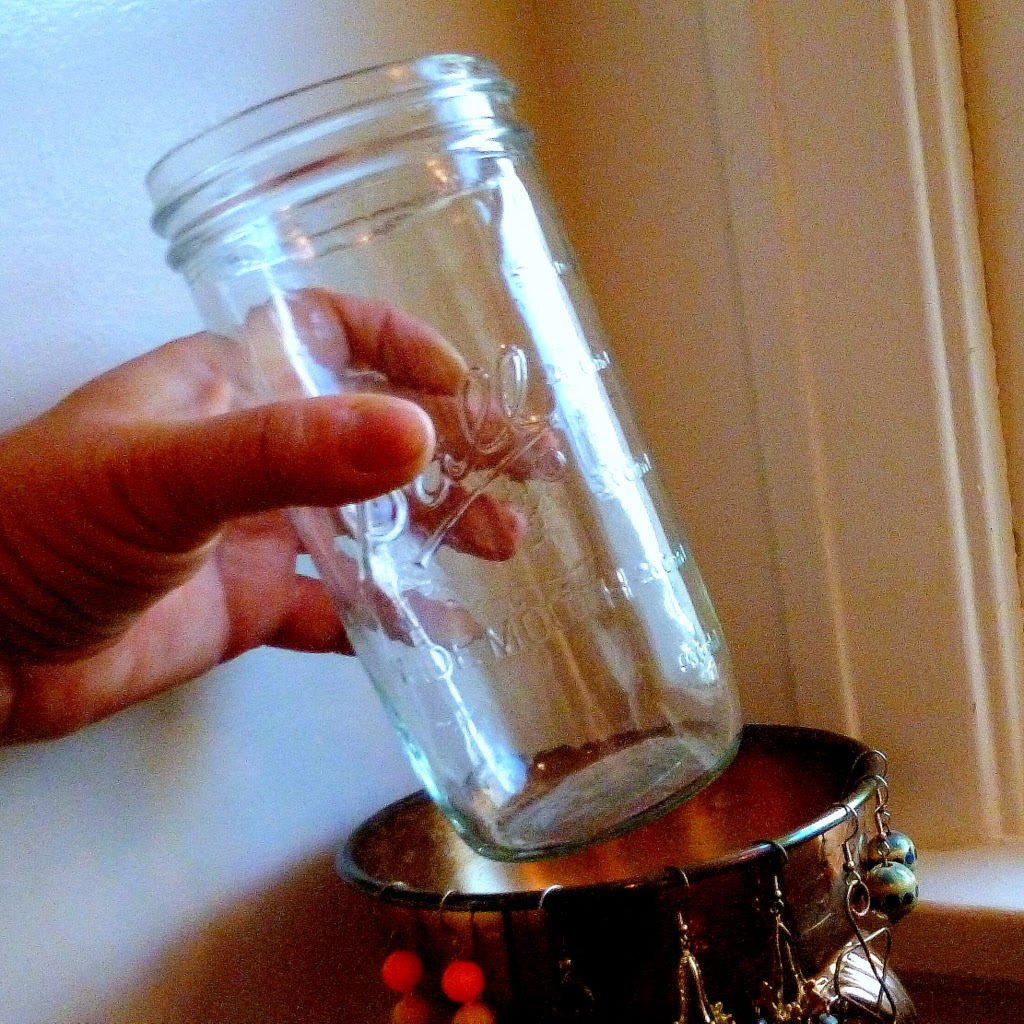
For more vavoom, I like to fill the empty center with a vase or live plant. Just place it on that little platform where the heat source would go.
Another great option: place a little dish in the center, for storing bracelets-n-stuff.
Aren't they delightful, these lovely, lonely legs? I love them mucho. I will continue to buy them and make them feel useful.
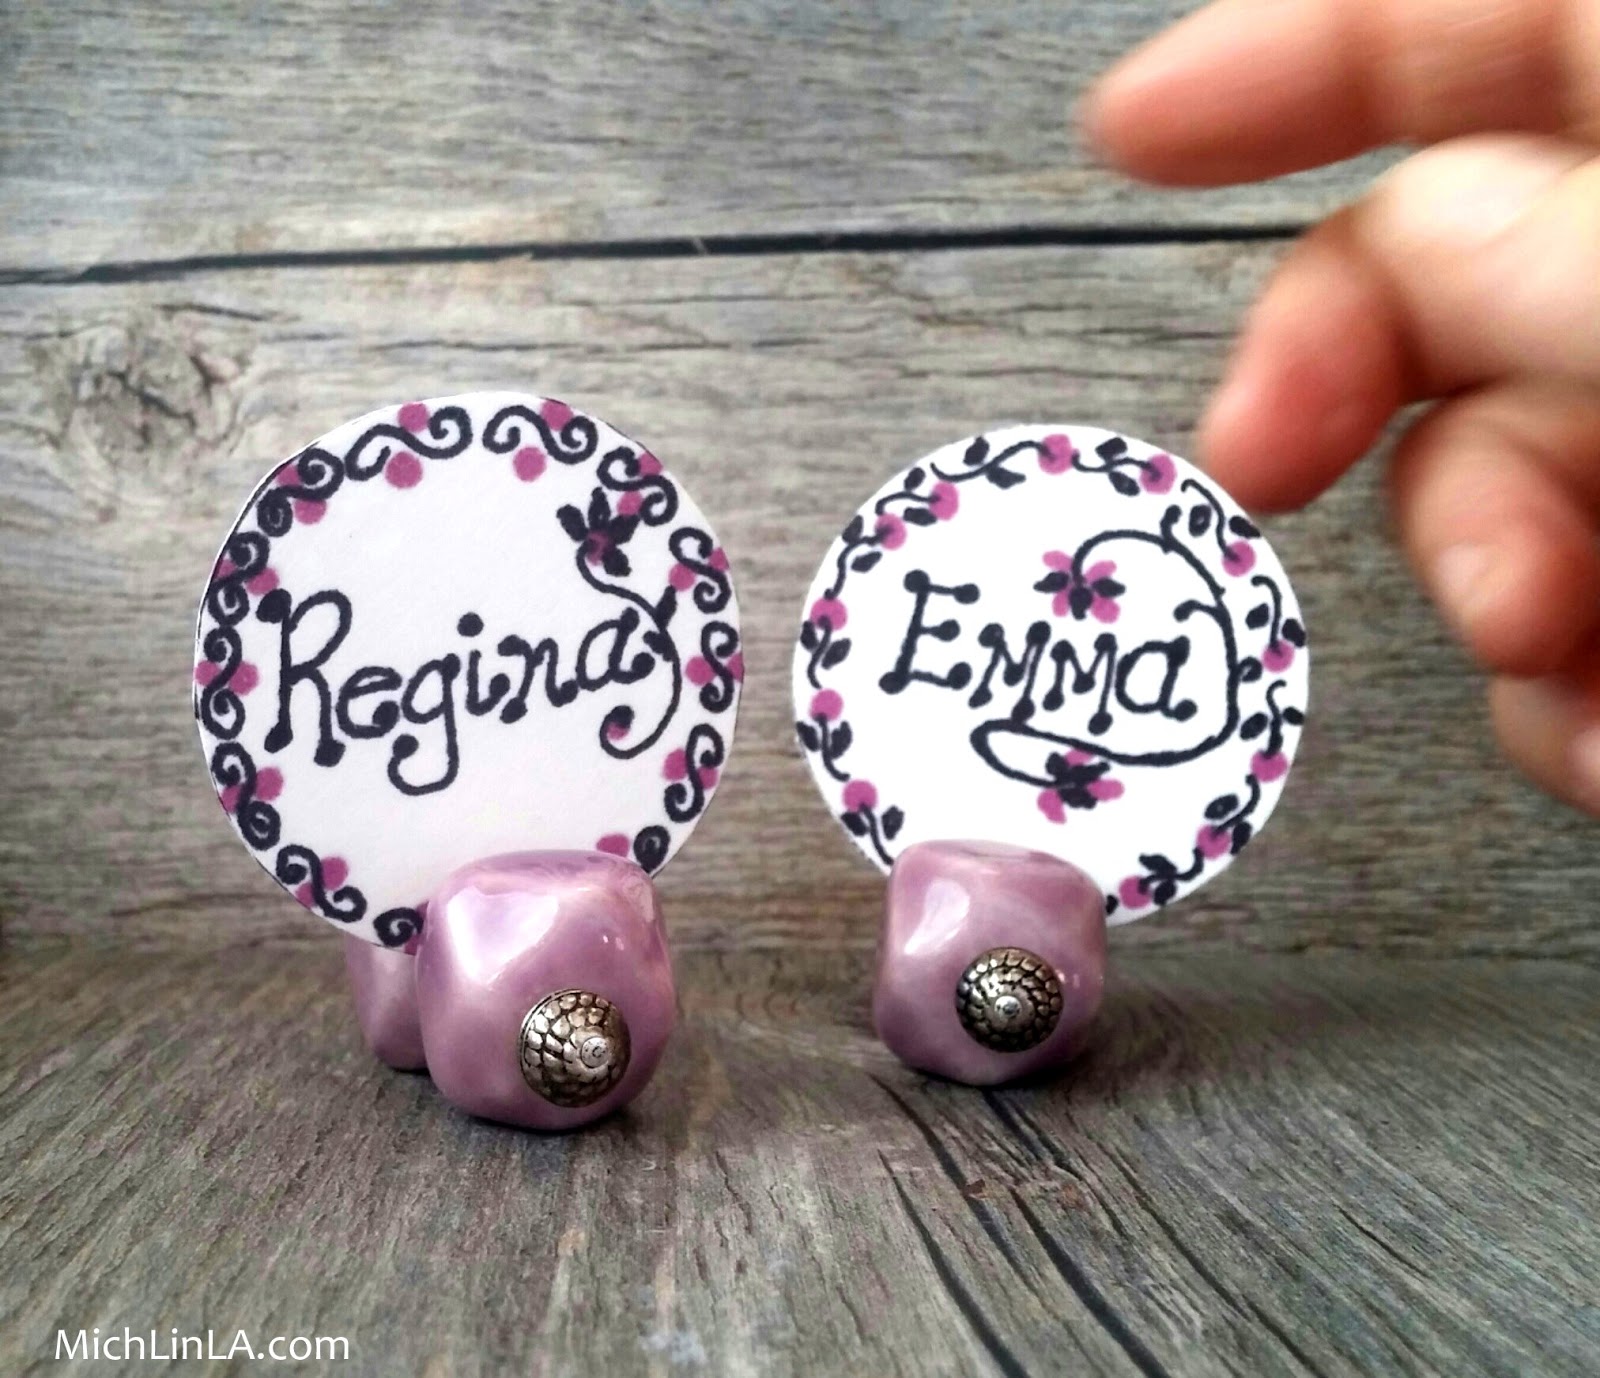
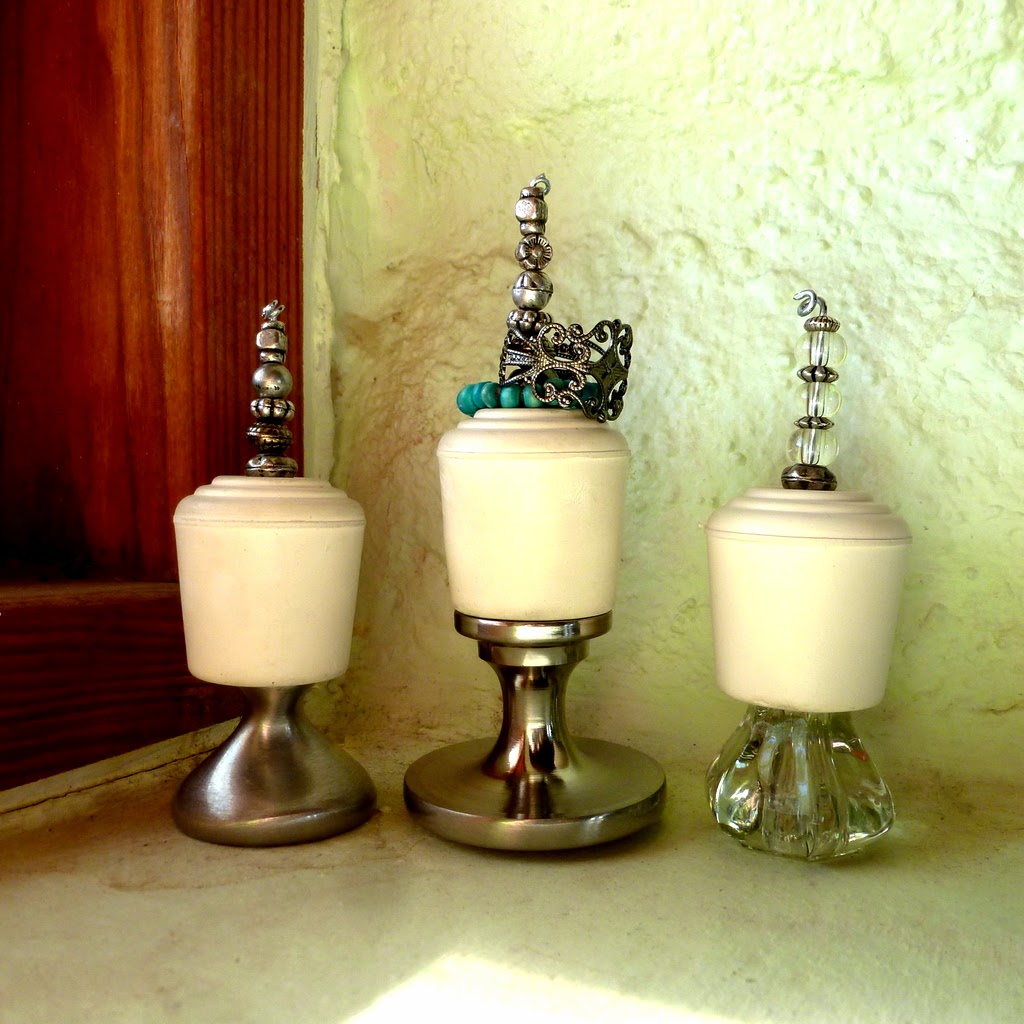
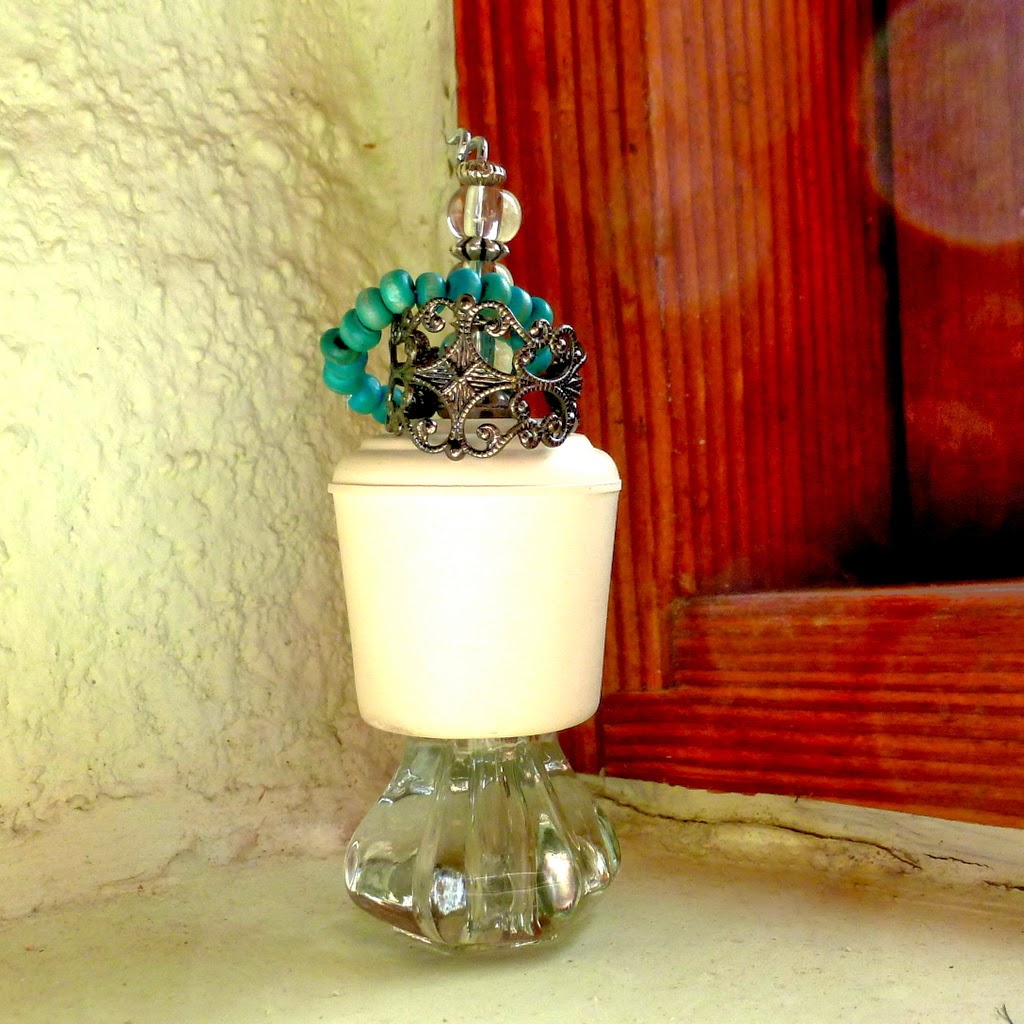
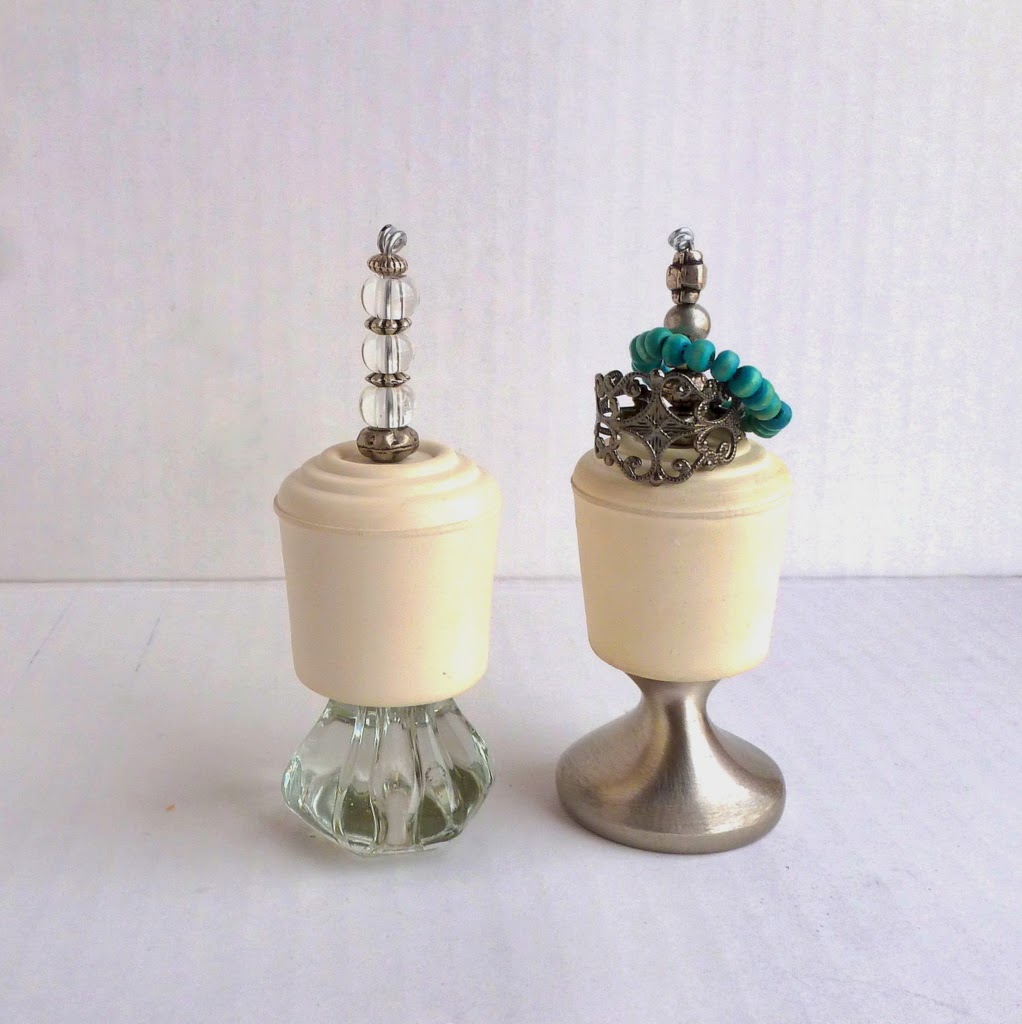
Look at my chic new ring holders!
A happy marriage of rubber chair tips from the hardware store:
And some mismatched drawer knobs from my collection of Stuff I Couldn't Bring Myself To Throw Away.
I bet you have a random drawer knob someplace. (It's probably in a random drawer.) Wanna make a ring holder? Here's the DIY.
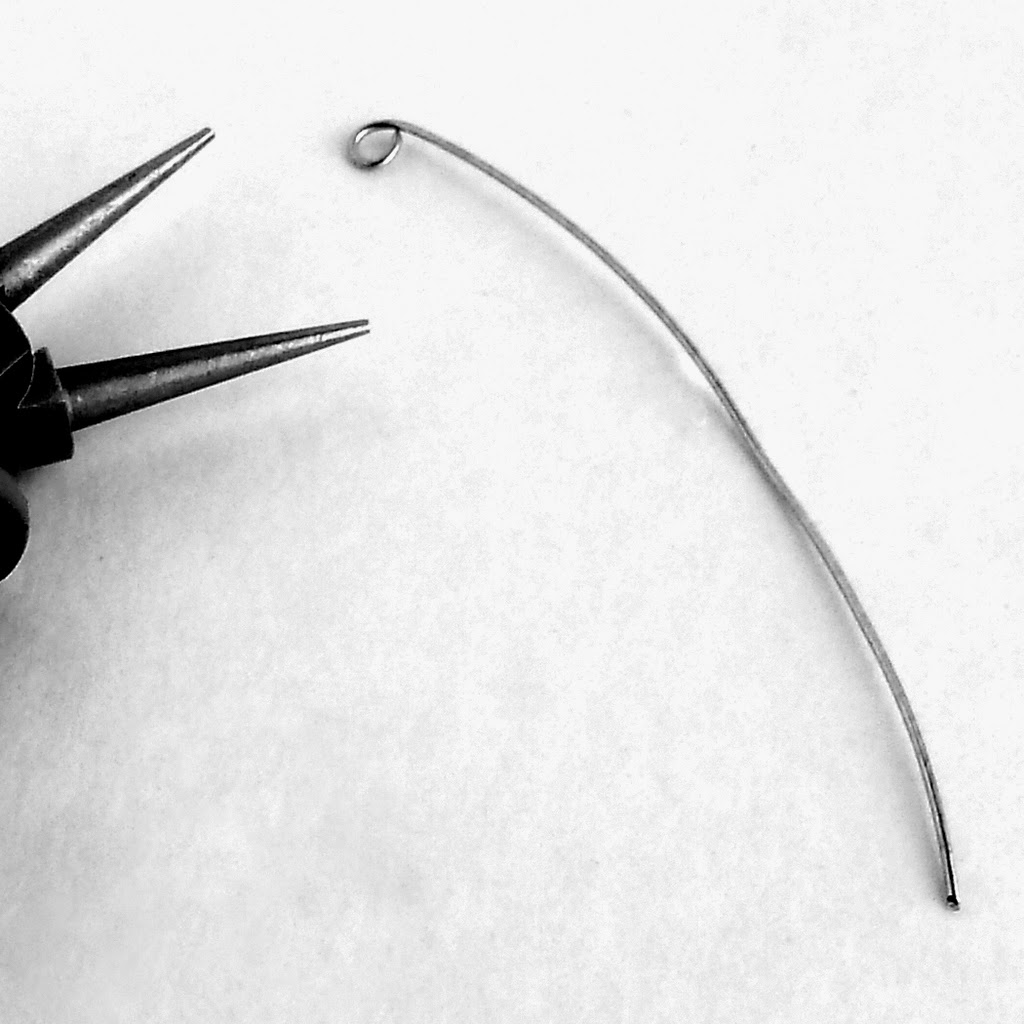
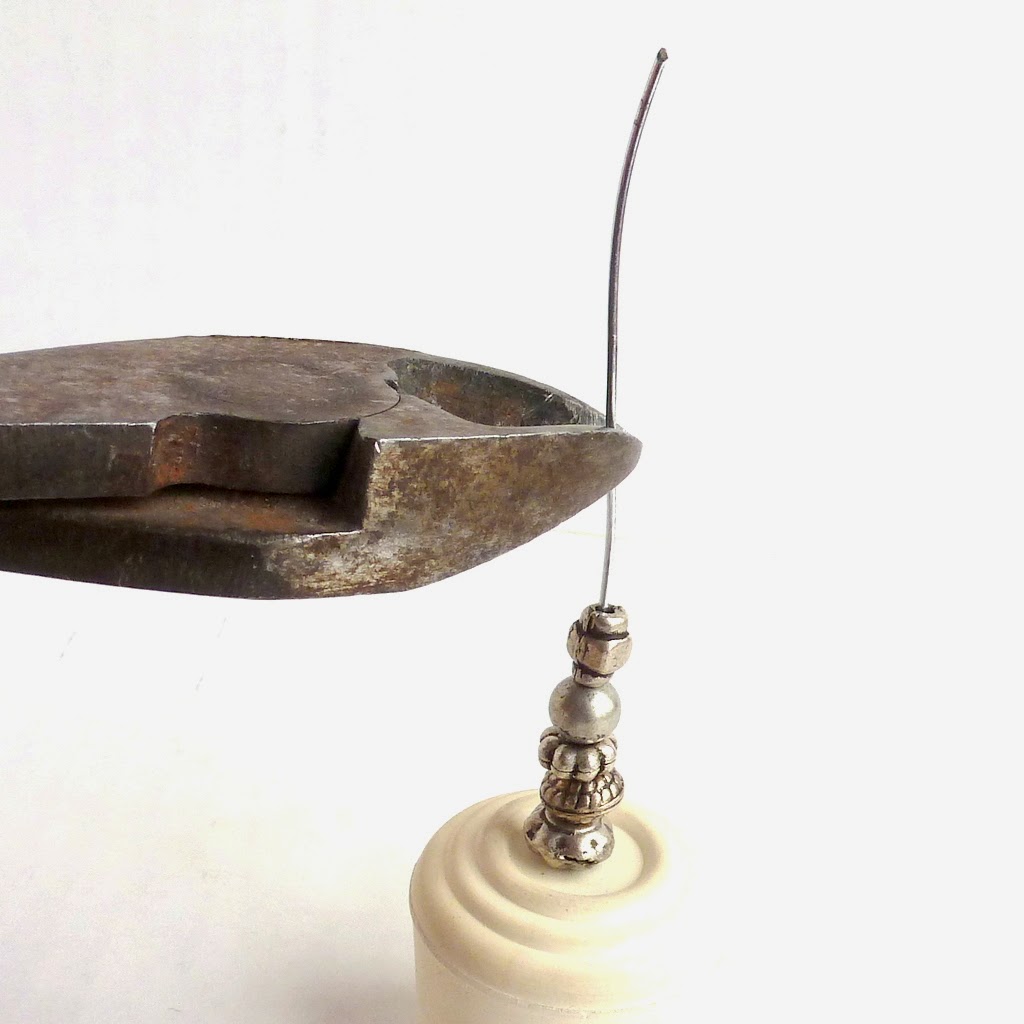
Make a loop on the end of some craft wire, 22 gauge or thicker. (Anything thinner is too floppy.)
Bend the loop at a 90 degree angle to create a faux headpin.
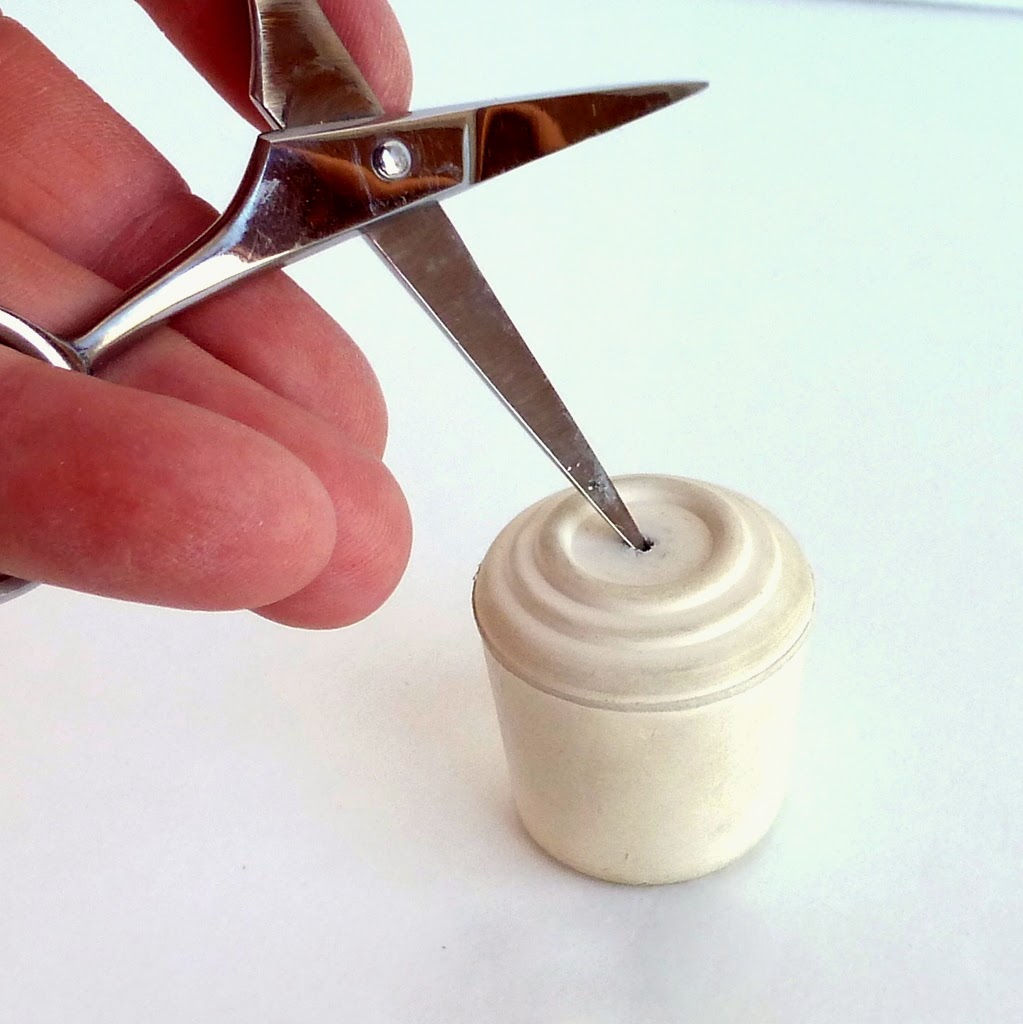
Poke a hole in a rubber chair tip and thread your faux headpin through the hole. Add some beads. Trim the extra wire to about 3/4 inch.
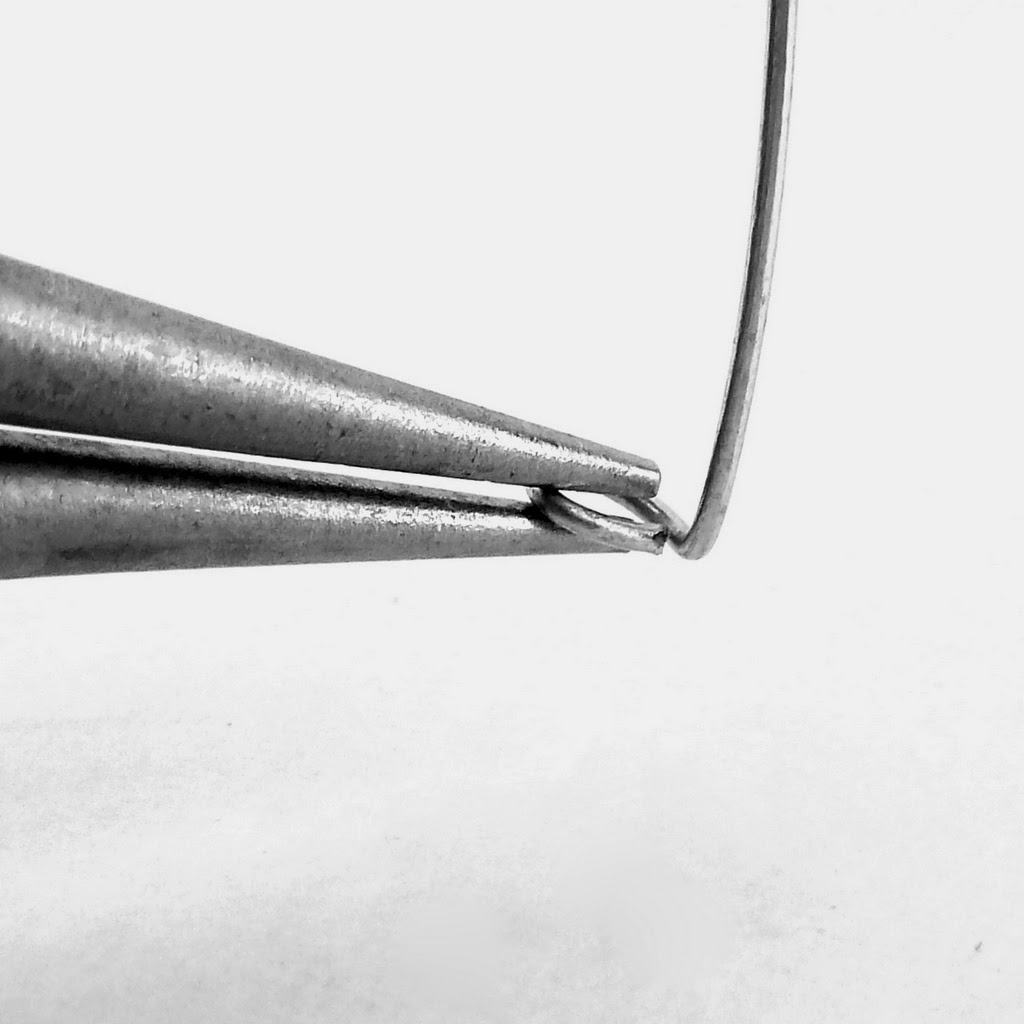
Finish with a swirly (a plain loop works, too).
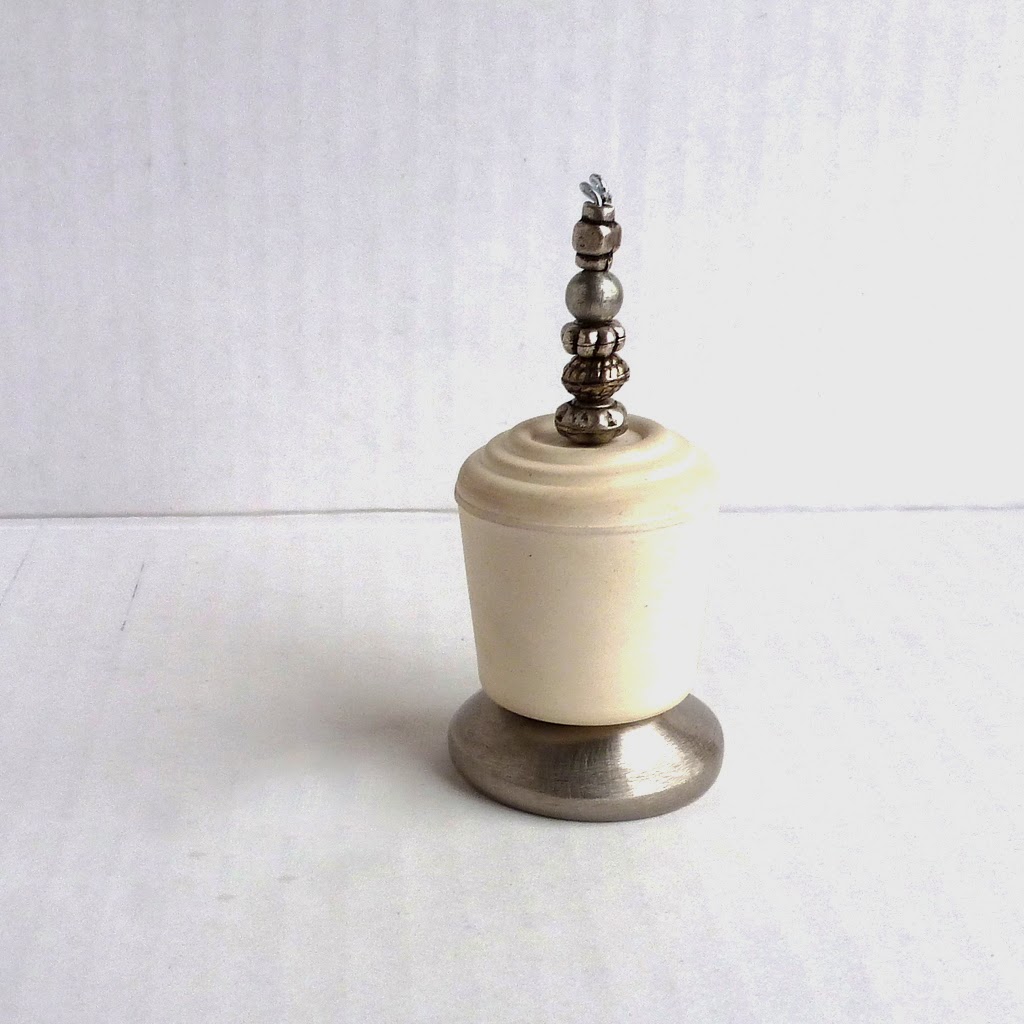
Now just pop the bead-embellished chair tip onto a flat-bottomed drawer knob. Like so:
VOILA! Ring holder!
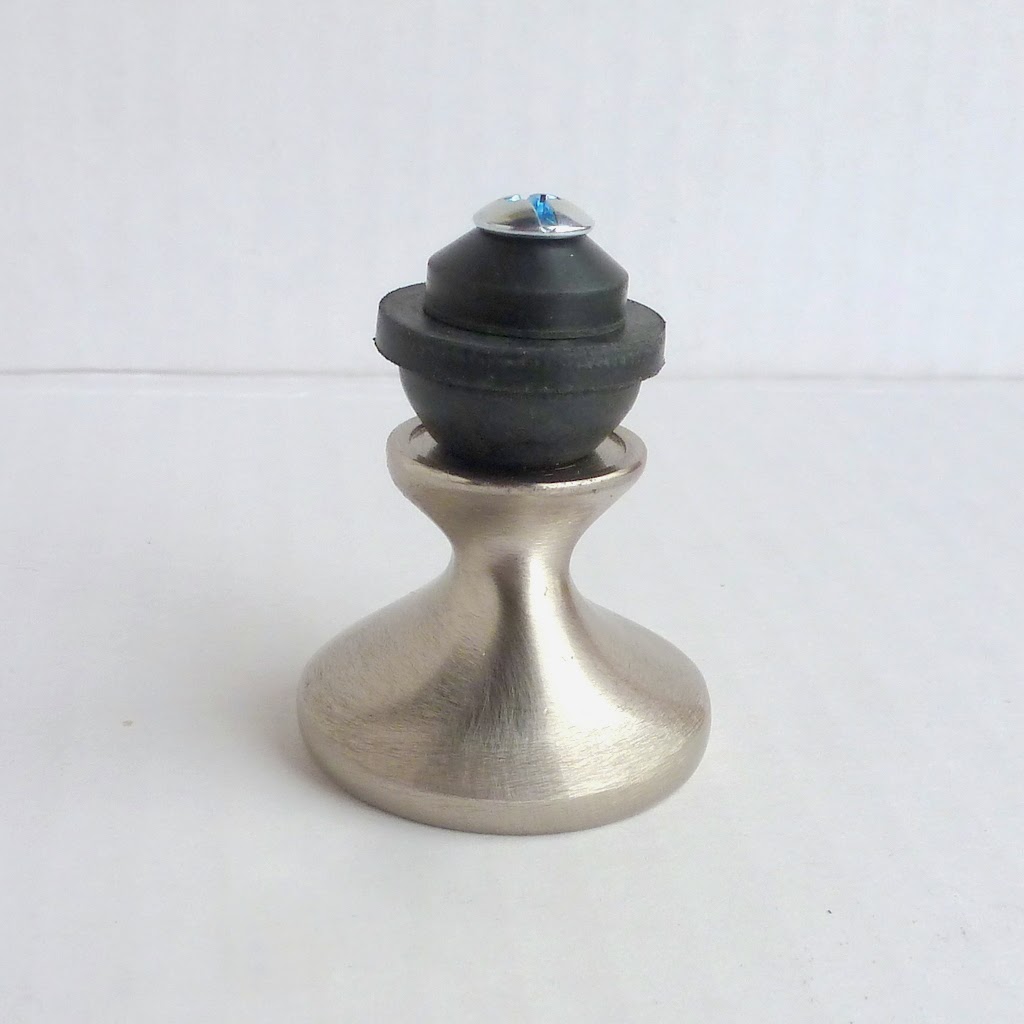
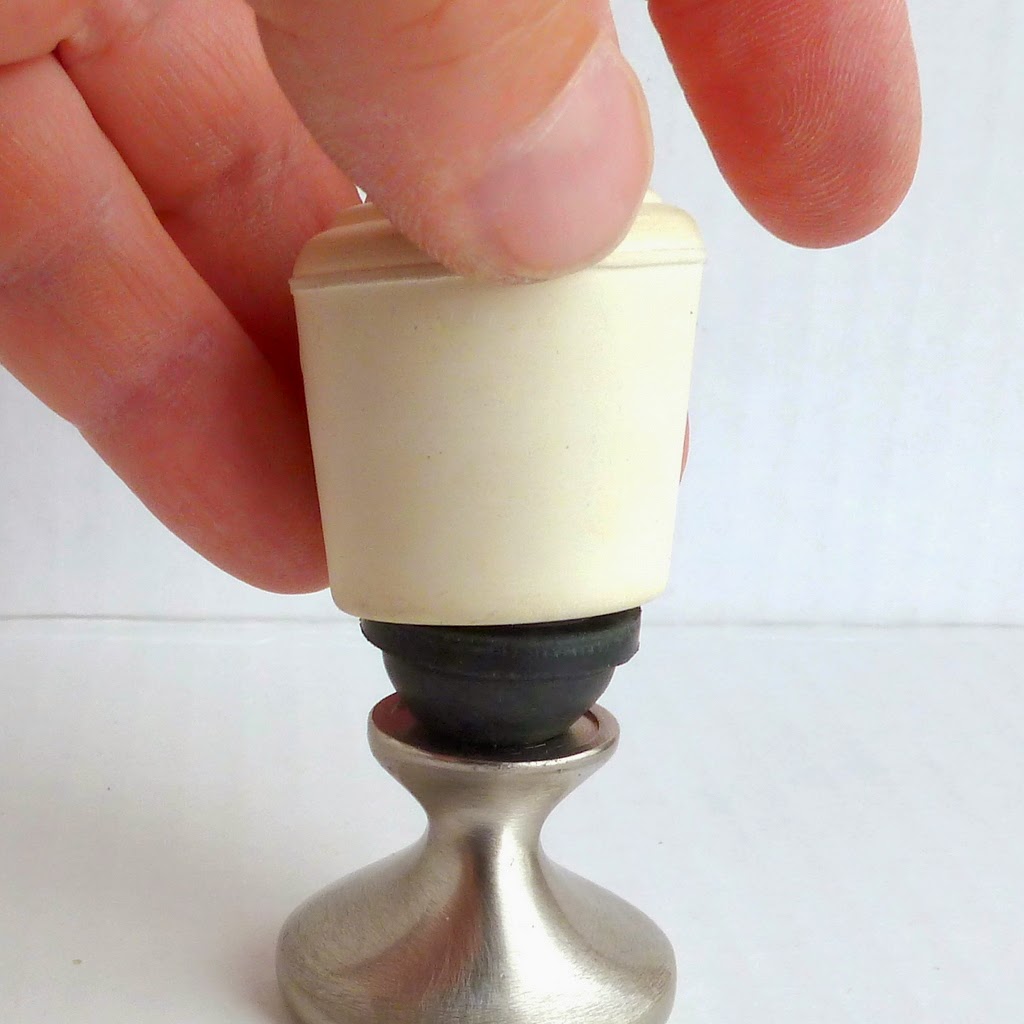
Here's a cool variation to the basic look. Use the screw that came with the knob, plus a stack of rubber washers (or even a big bead) to add some height.
Now watch what happens when you add the top part:
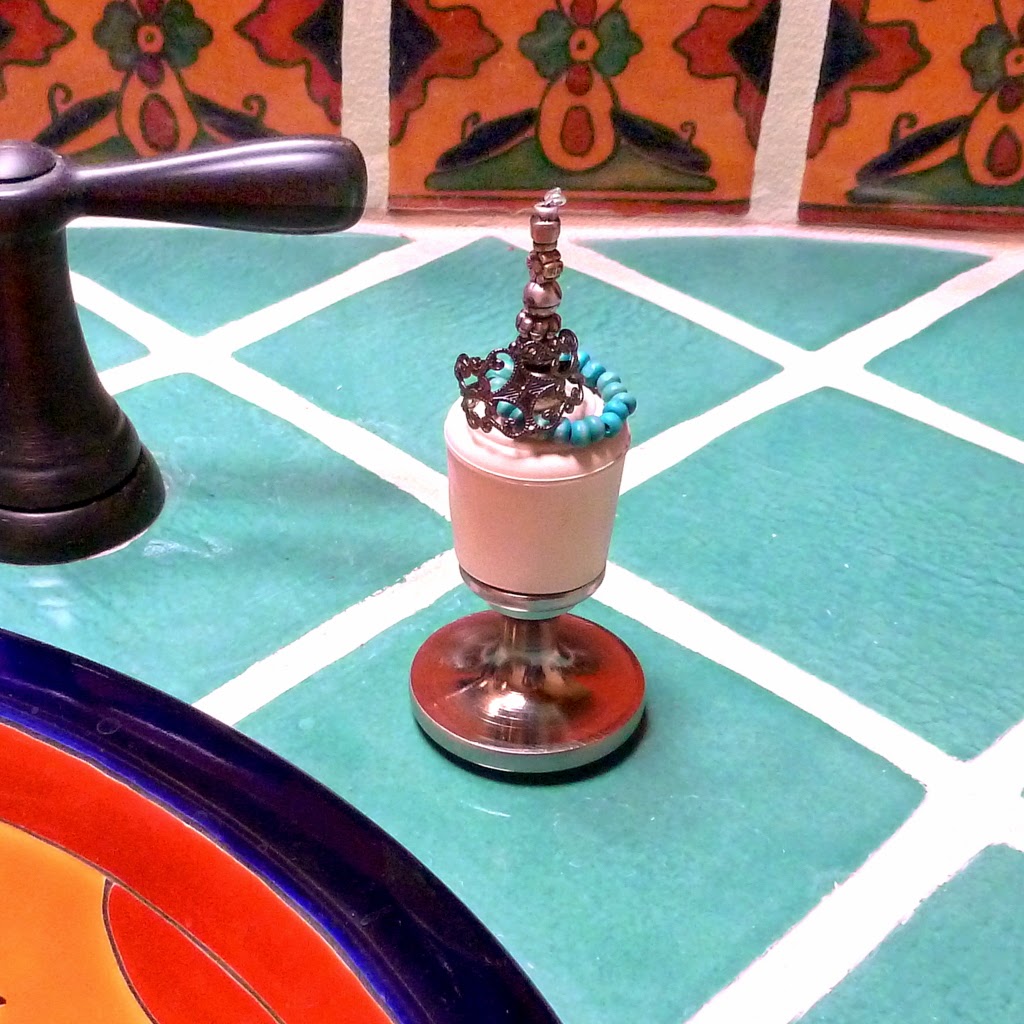
It's got a pedestal! Isn't that cute? I like these pedestal ones a lot.
But really, the low profile ones are just as purty.
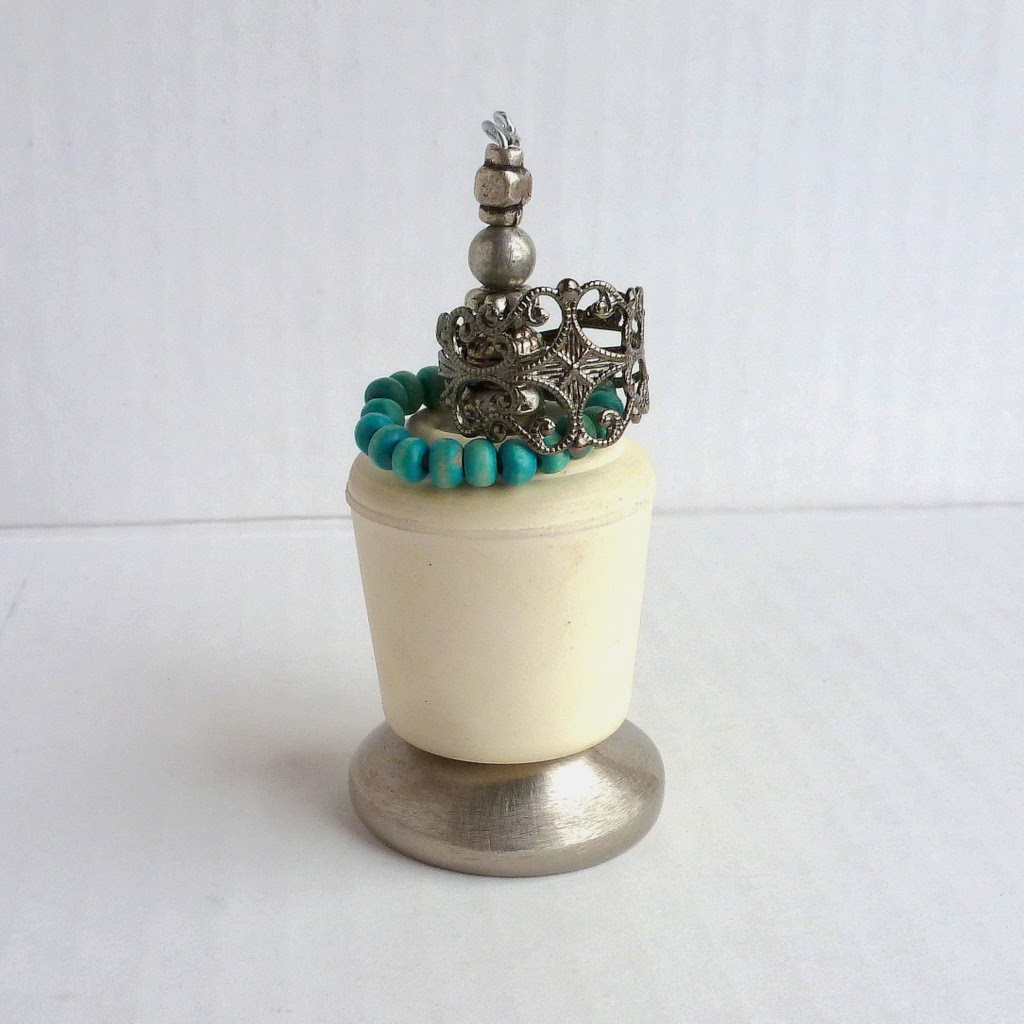
The metal or glass knobs add lots of weight to the base, making them sturdy enough to hold a whole stack of pretties! Or your biggest crazy cocktail rings...
These would make a great gift for someone who wears lots of rings. I've already given myself four: one for the bedside table, and one to put beside each sink in the house.
Thanks for checking out today's upcycle! Hope some of you get inspired to try it. See ya next time!