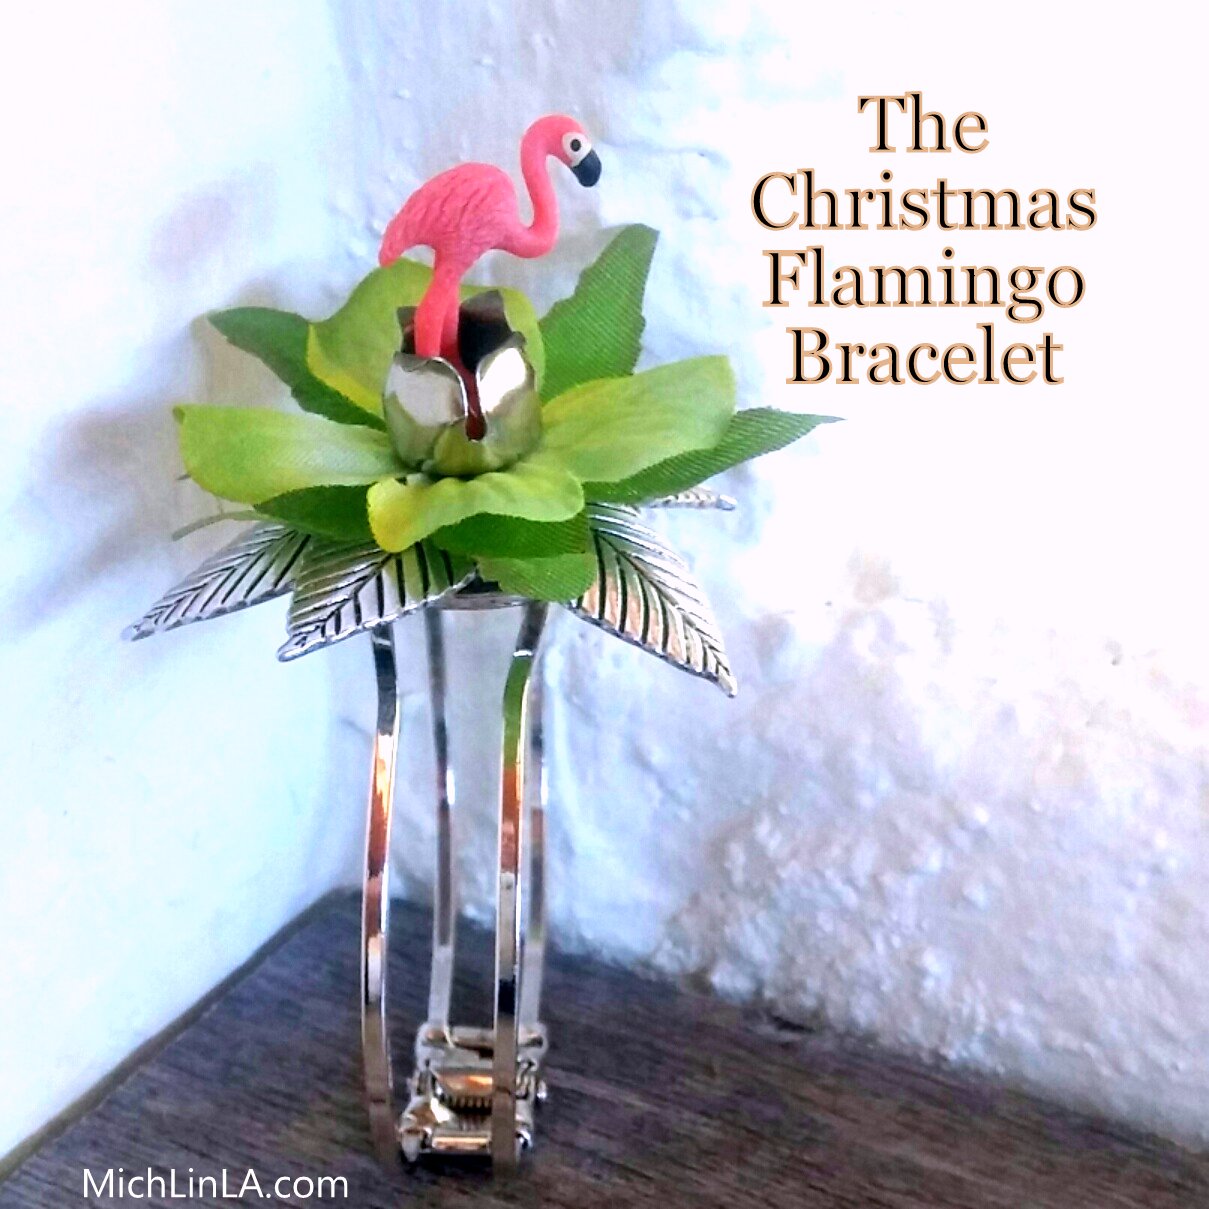
What do you get when you combine an off-the-shelf bracelet kit, a miniature silicone flamingo and a not-very-mysterious Mystery Thing?
Can anyone guess the Mystery Thing? It's the little silver flower bud in the center:
Gosh, I know it's a tricky one...okay, not so much. Have you figured it out? Get ready to scroll down for the answer.
*
*
*
*
Keep scrollin'...
*
*
*
*
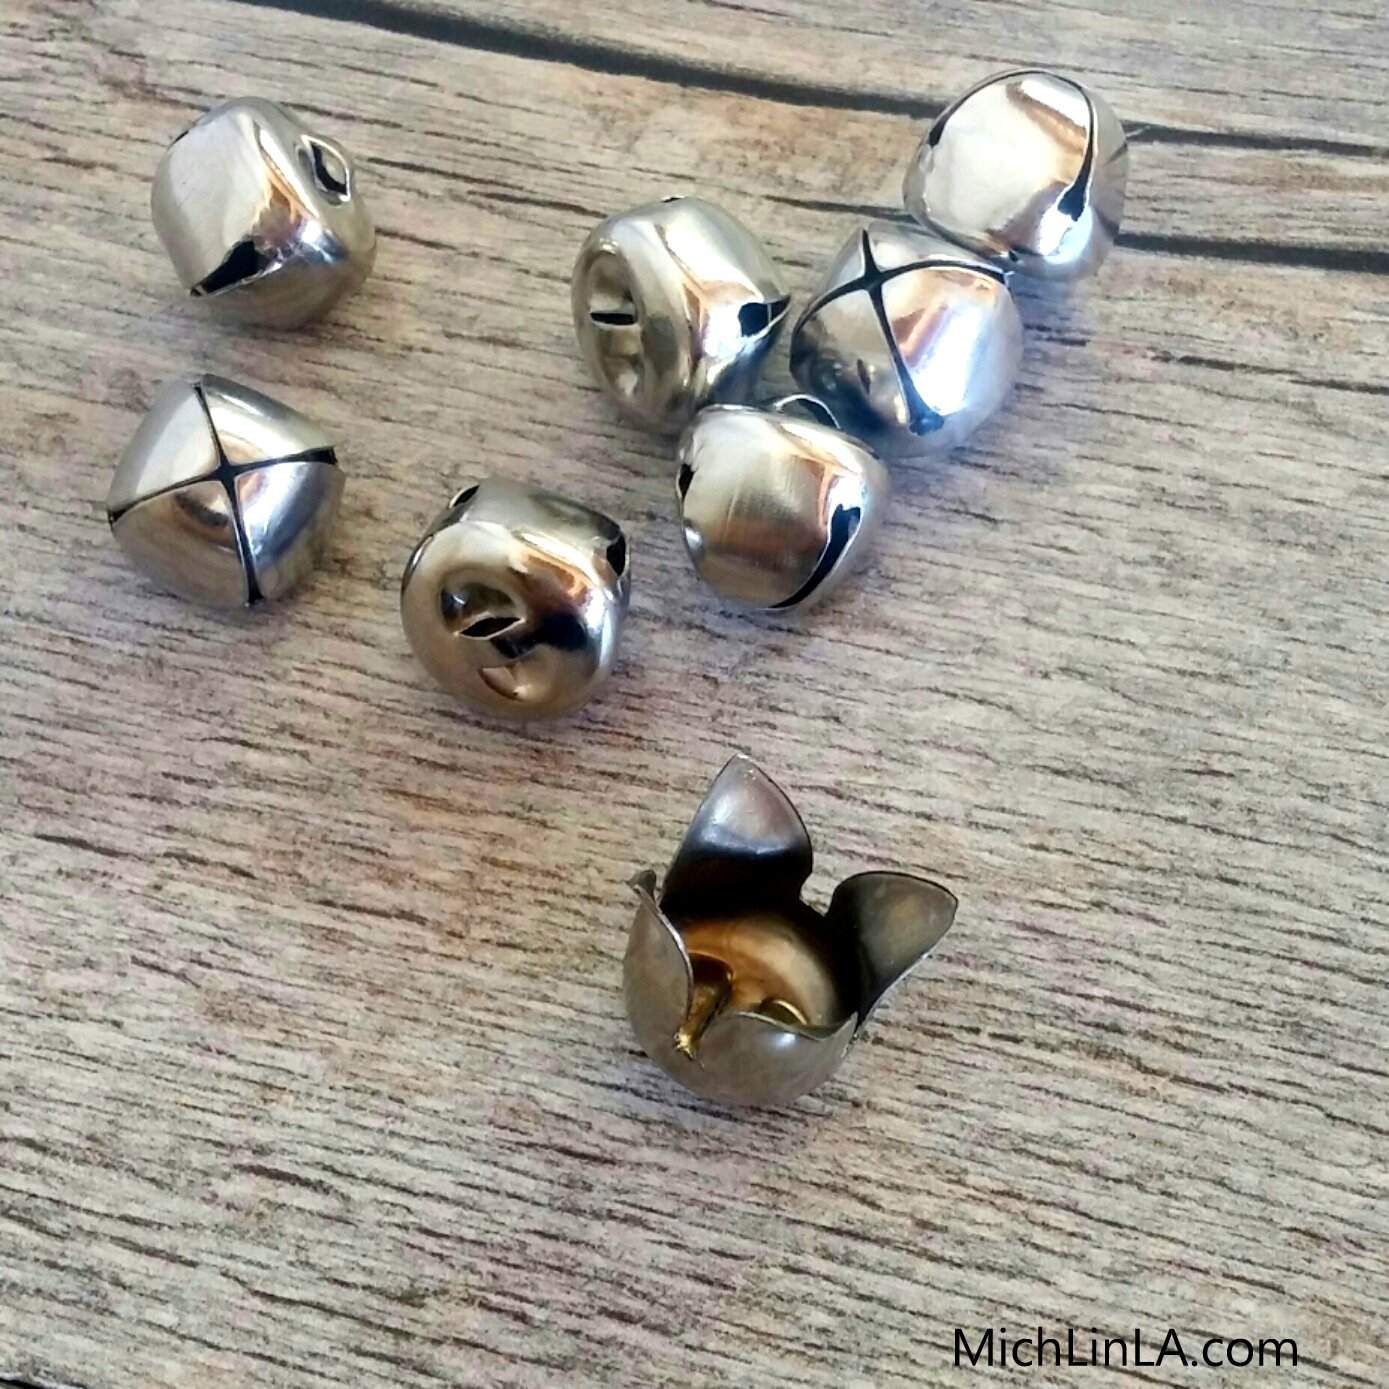
And here's the reveal!
Yes indeed, it's a jingle bell!
I bet you guessed it. But that's okay, we all need an easy win right now, eh?
I make flower buds from jingle bells all the time. Will post a mini tutorial soon, because this is the season for buying jingle bells.
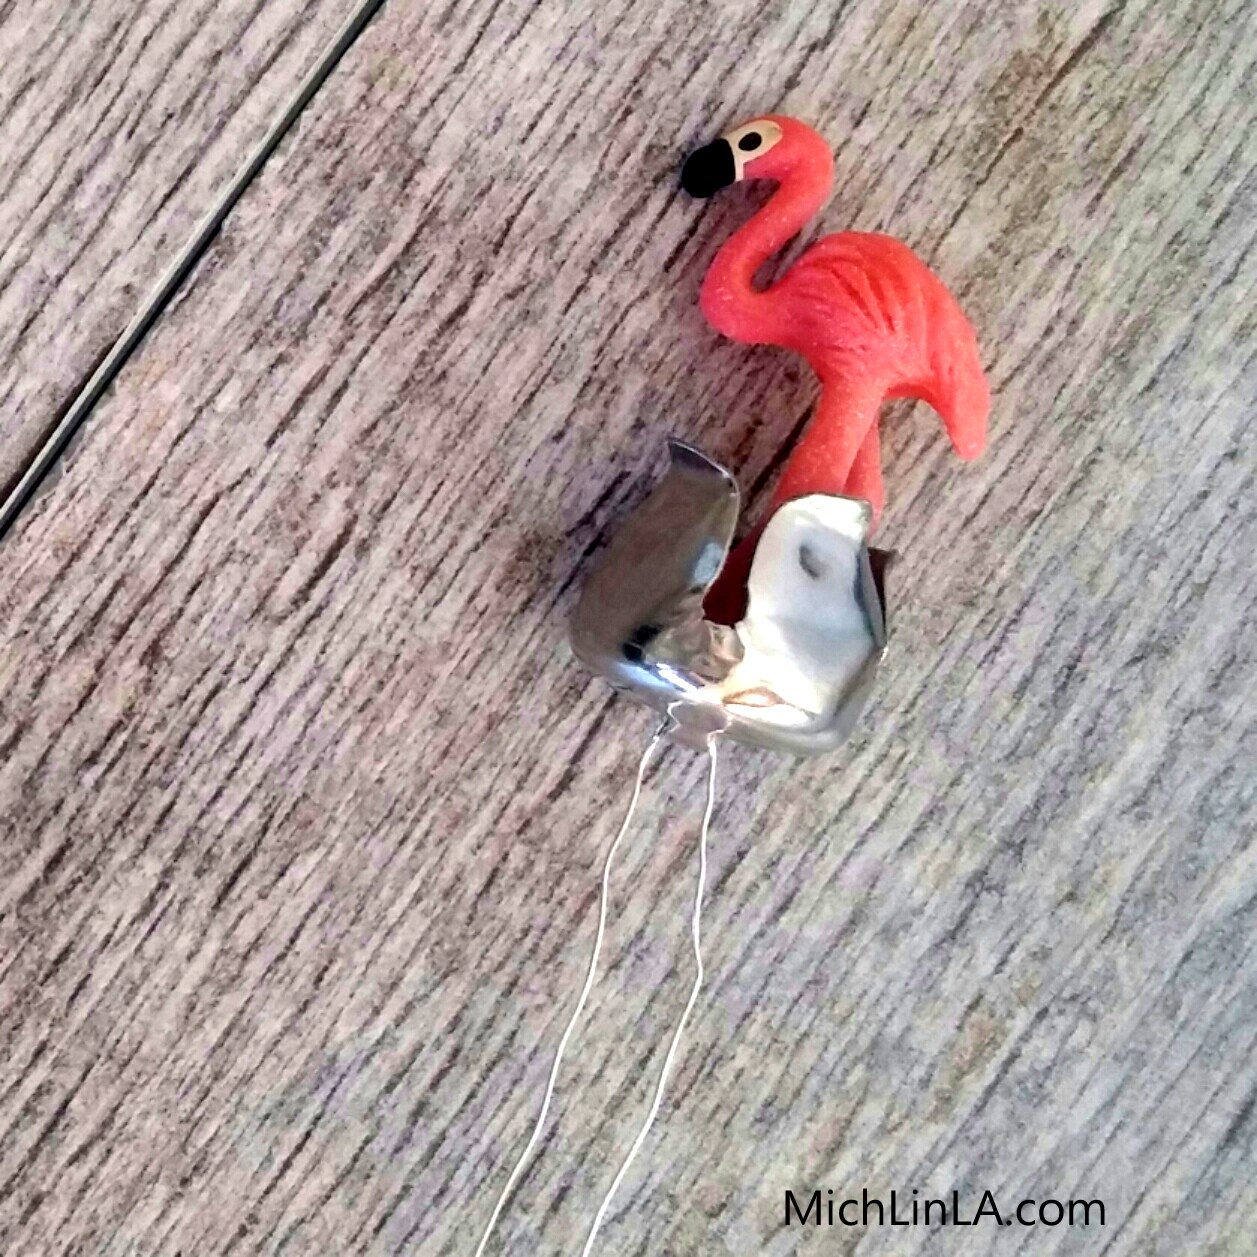
In this instance, I simply wired my flamingo to the "jingle bud," like so:
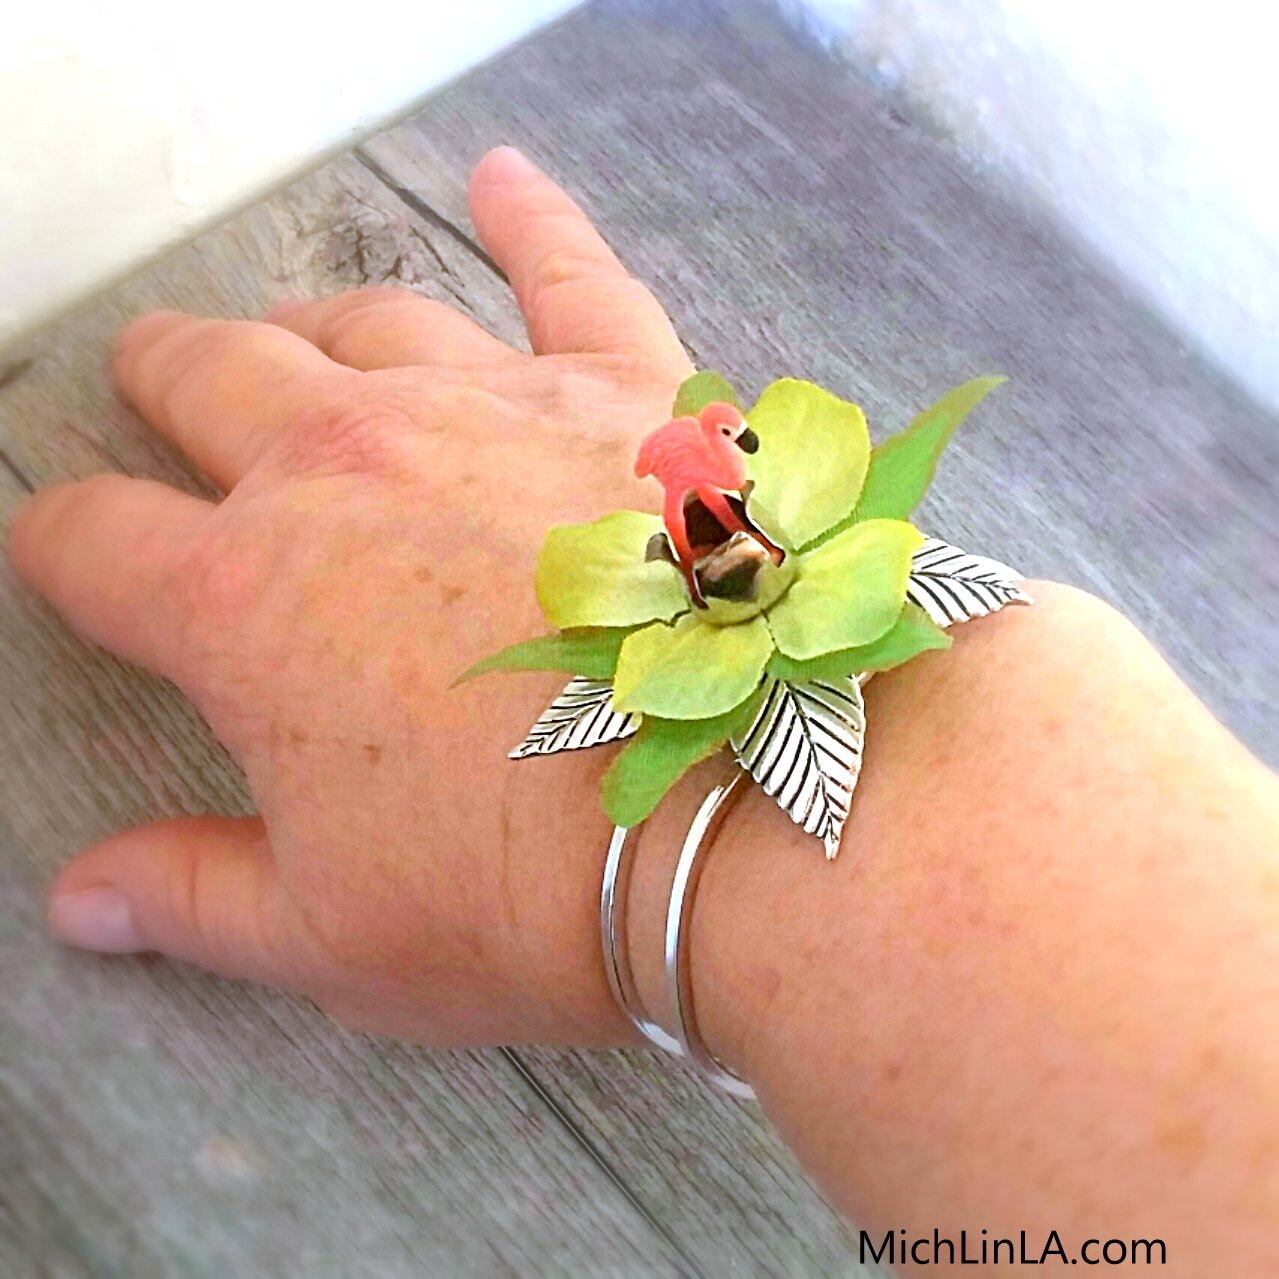
Then I wired it to the bracelet base.
Hope you smiled at this one!
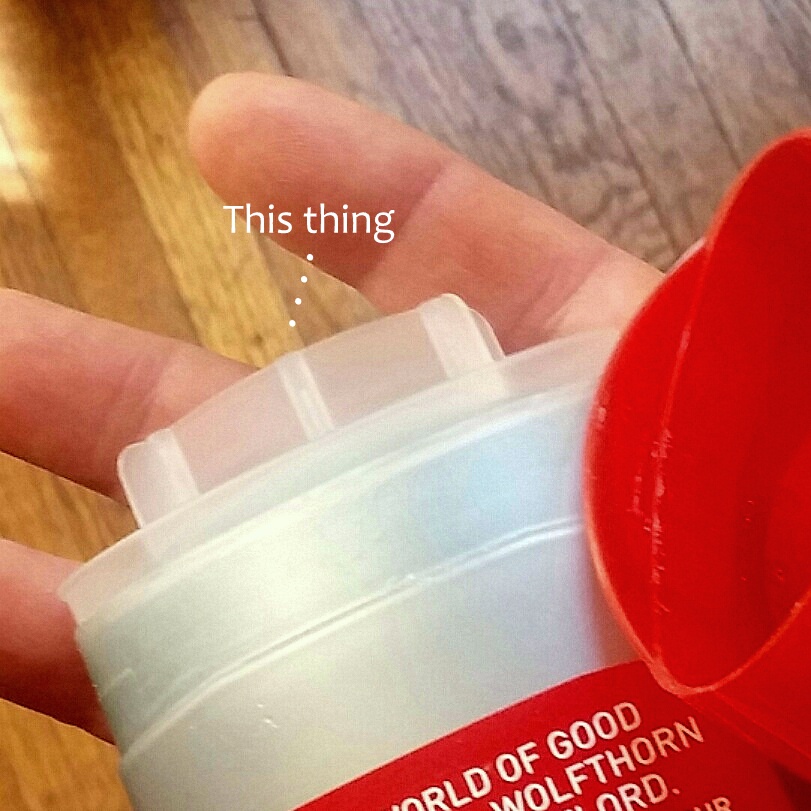
Hi, all! Last week I posted a Guess The Mystery thing challenge. I wondered how many of you could identify the weird little found object in these upcycled necklaces:
The Mystery Thing is that silvery, oval shield-like item. Does it look a teeny bit familiar...or not? Take a sec to think about, fix your guess in your mind.
Okay, then - time to reveal The Thing. Ready...set...scroll!
*
*
*
*
*
I have to say, you people are hella smart. Comments on the challenge post were running about 90% correct! I am very impressed.
*
*
*
*
And the answer is...
*
*
*
...tadaaa!
It's the plastic shield that protects a stick of deodorant.
Did you guess it? If so, you are awesome. To everyone who commented last time: thanks for playing, guys!
Want to DIY? Here's a mini tutorial.
To adapt the shield for jewelry, you need one quick trick that allows it to lie flat when worn. It's this: use wire snippers to trim off a bit of the curve in back. Like so:
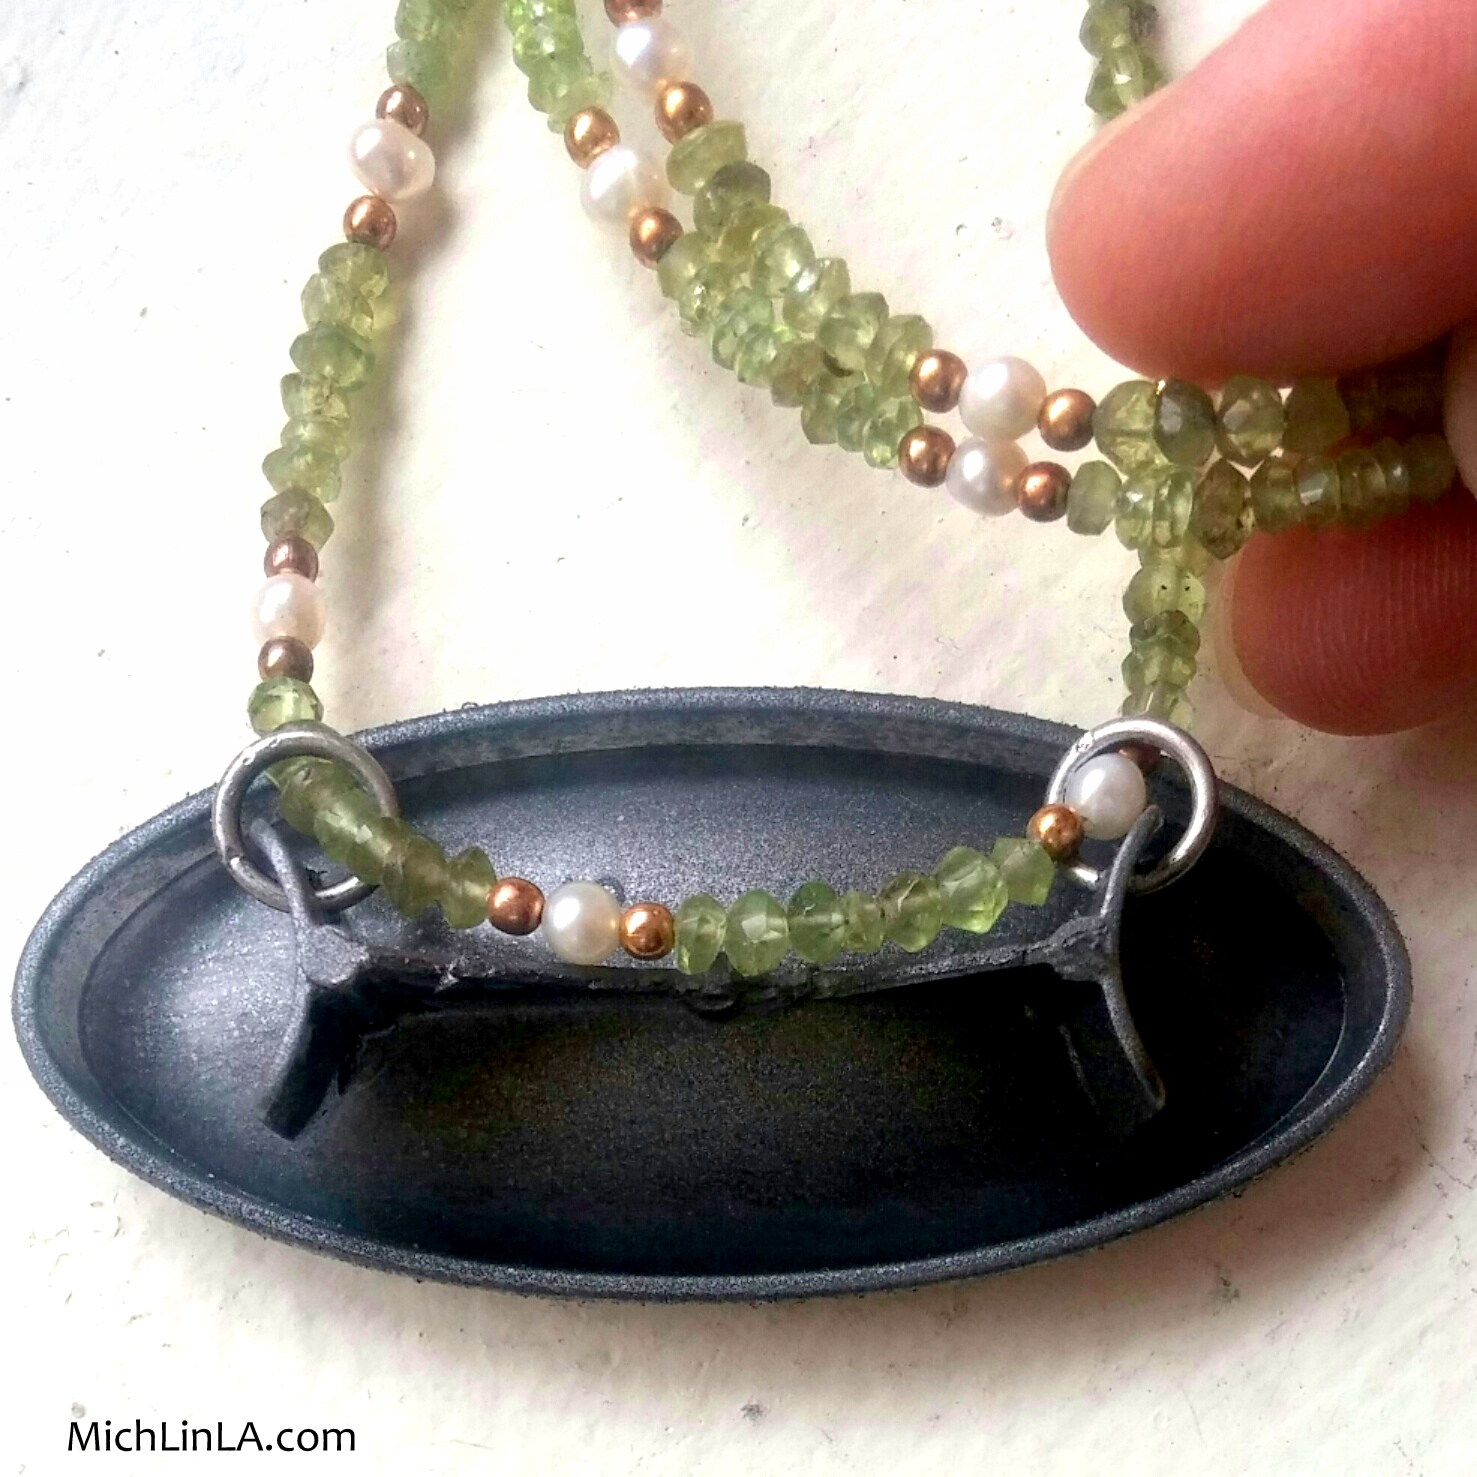
Next steps: I melted holes in the flanges, spray painted everything silver, and added two jump rings for attaching a necklace. Here's what it looks like in back so you can see what I mean.
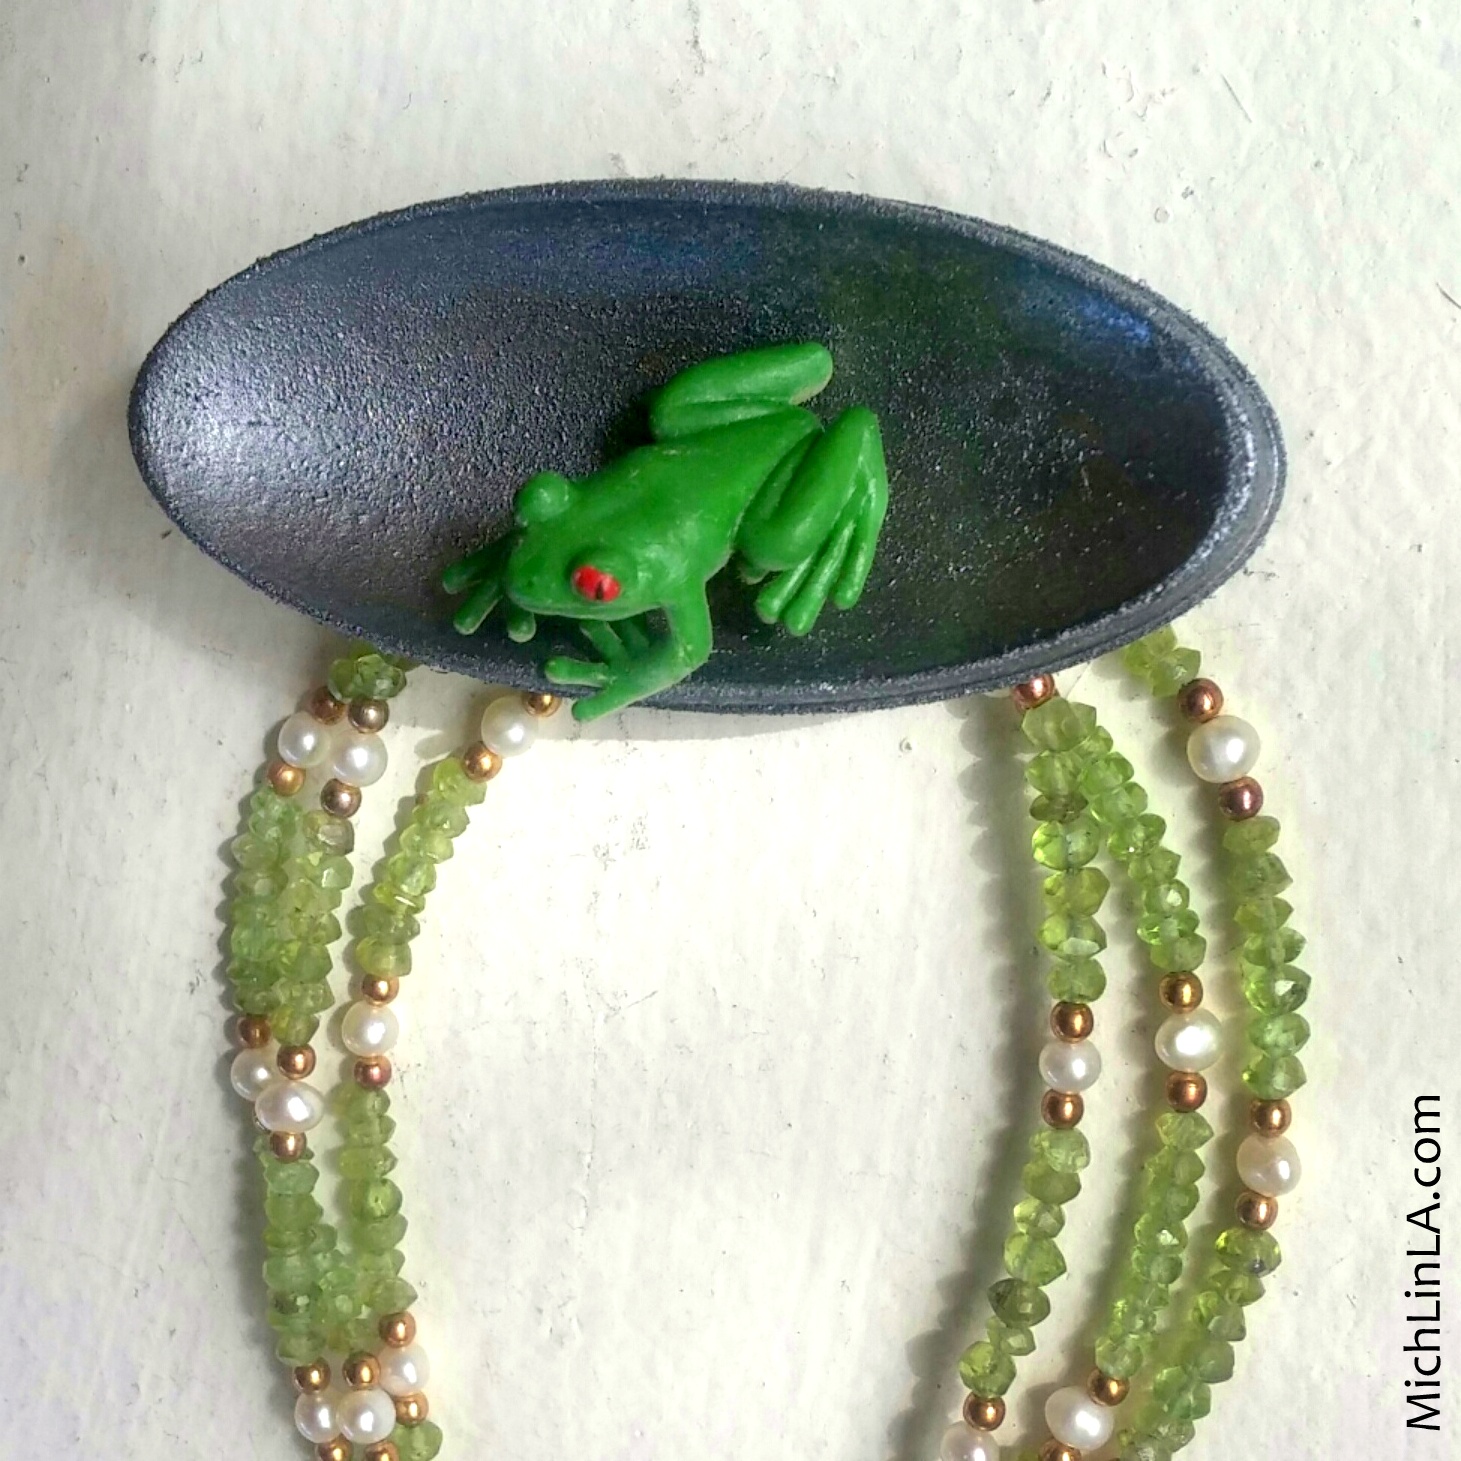
See, not hard at all! After that, I had a delightful time embellishing with elephants, dragons and frogs.
For attaching the animals, I made some extra holes, strategically placed, and simply wired them on.
Since my teeny critters are made of rubber, I didn't trust adhesive to hold. More about these cuties in my next post...elephants, dragons and frogs, oh my.
See you then!
Hello! Ready for a new Guess The Mystery Thing challenge? Come one, come all! Test yourself against my fearsome powers of obfuscation!
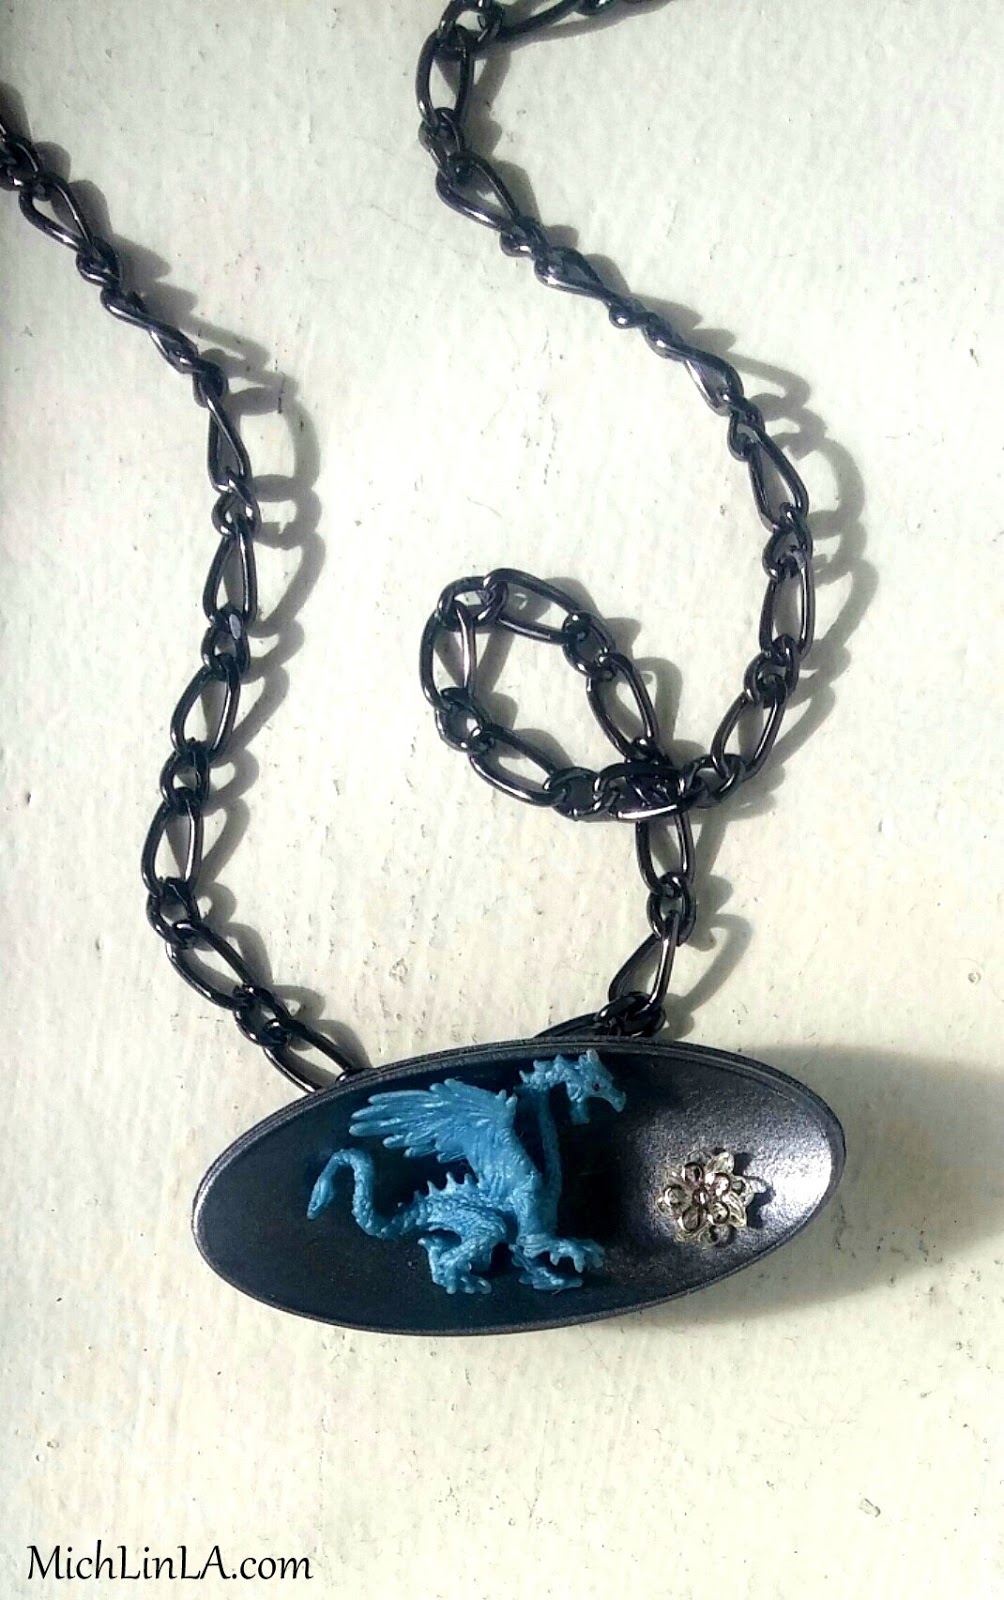
The challenge piece: this nifty dragon necklace.
Your mission: identify that silvery, shield-like setting surrounding the dragon.
Here it is naked, hung from three strands of peridot with pearls:
Looks familiar, right? Or does it? Bwah ha ha ha.
And hey, while I have you here, I have been trying to decide between two versions of the peridot necklace. Should it be a leetle frog in a nest of greenery?
Or a tiny 3-D elephant?
Help me out! Which would you choose?
Leave your guess and your vote in the comments. Honestly, I'm not sure if this Mystery Thing is ridiculously easy or fiendishly difficult. How quickly can you guys solve it? I guess we'll find out!
Check out the thrilling reveal HERE!
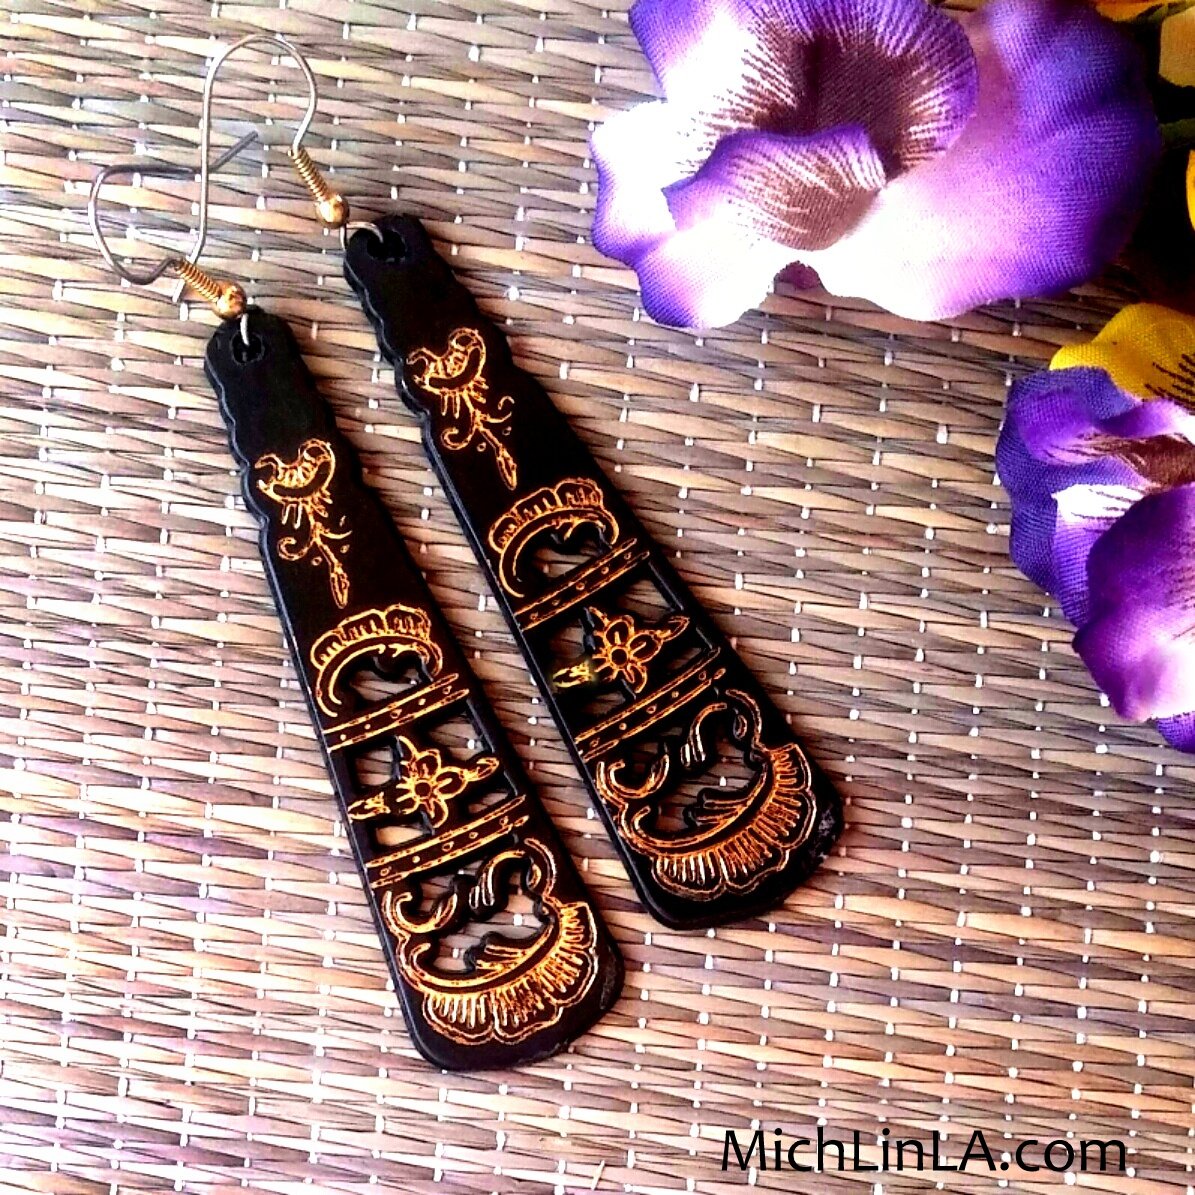
Here's a pair of lovely, lengthy earrings - along with a little mystery.
Can you guess which inexpensive item I took apart, altered and reworked to make them? Now, don't be hasty! We are playing on the honor system here, so don't scroll until you have a guess firmly seated in your brain pan.
Are you ready to scroll? Here we go...
*
*
*
Keep scrollin'...
*
*
*
Hint: I found this item at the dollar store, a favorite haunt of mine. Hmm...does that make you want to change your guess? There's still time.
*
*
*
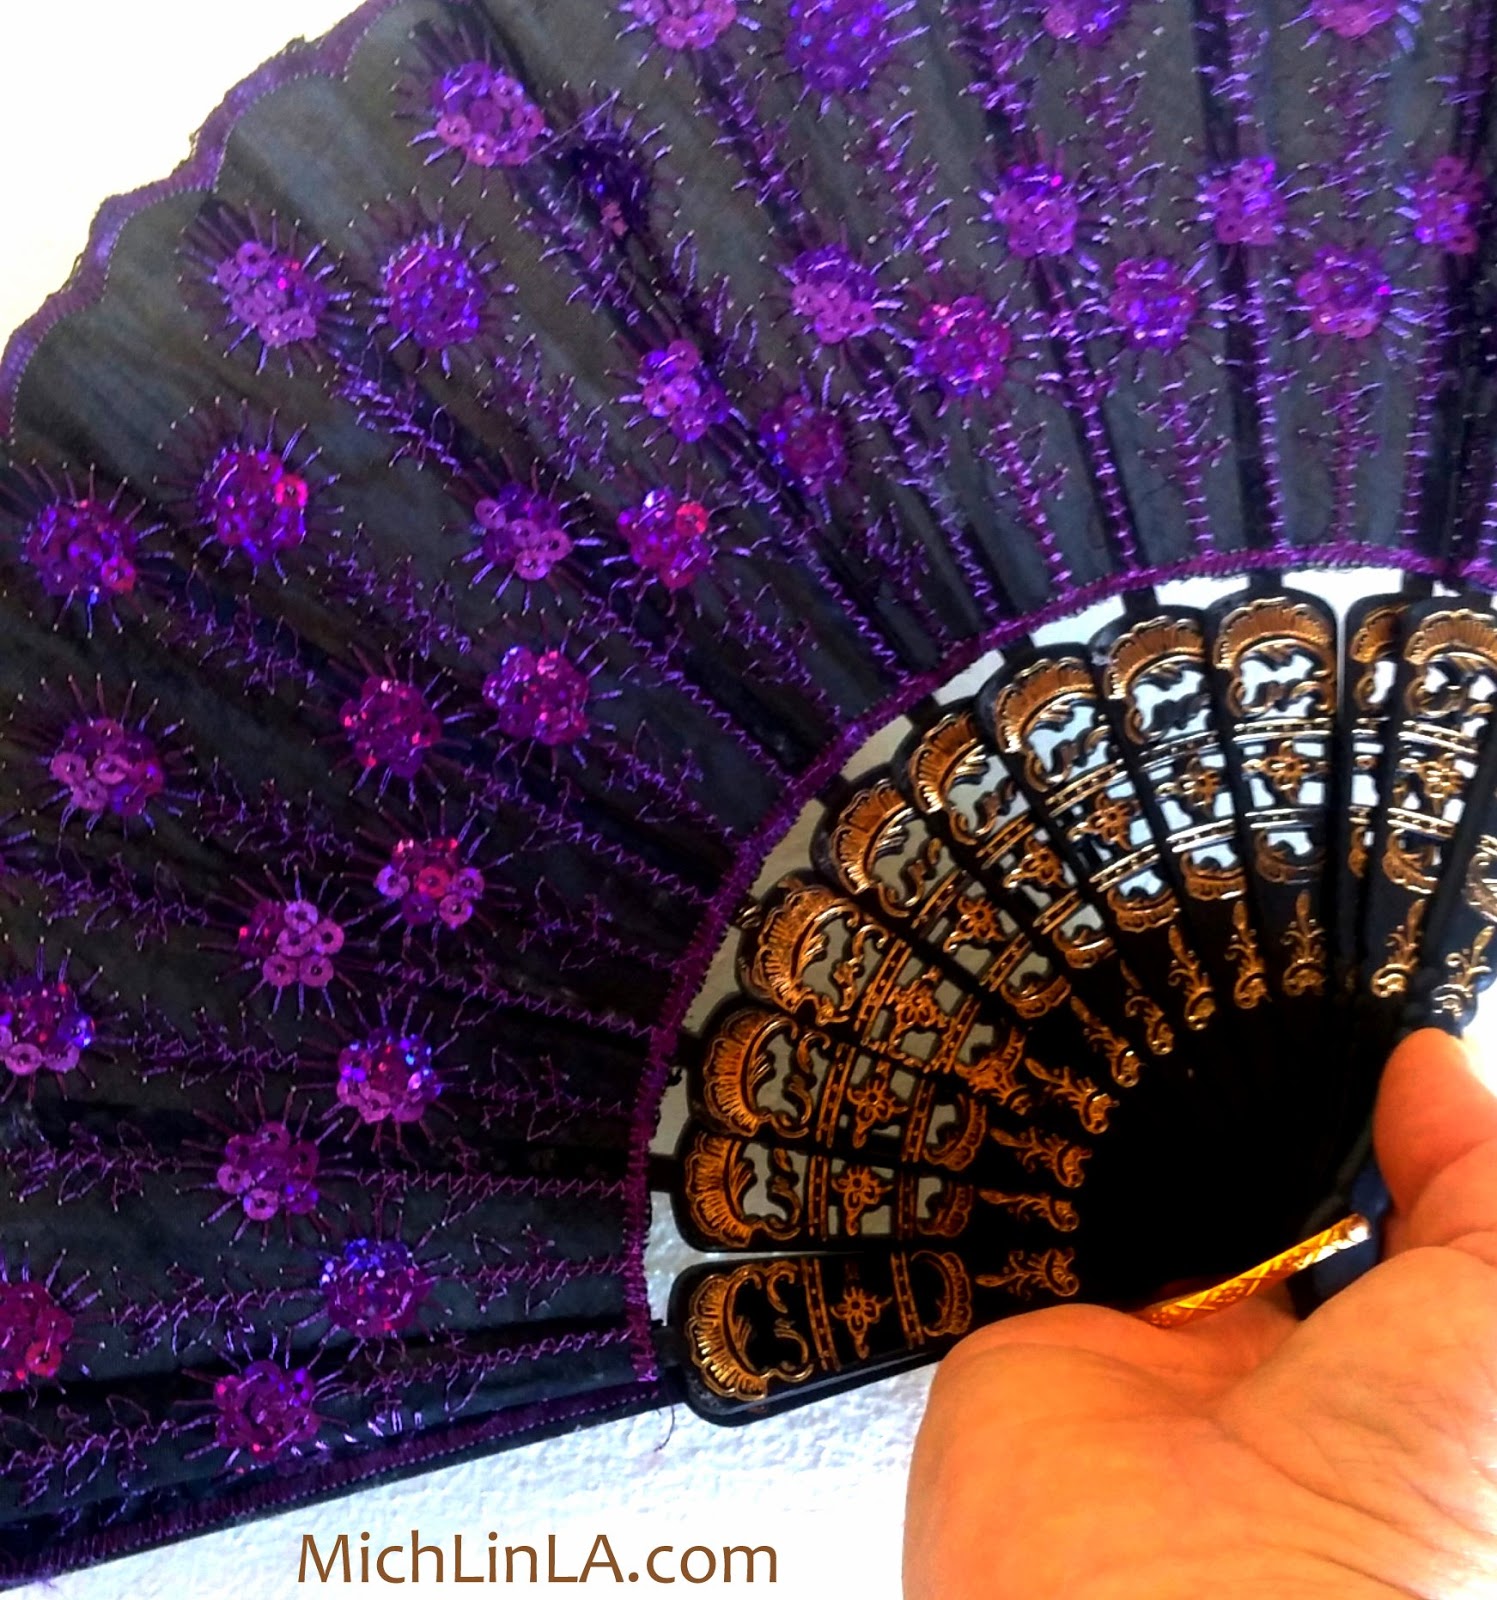
Okay, friends, here's the answer. It's..it's..tada!.
A dollar's worth of frilly, fancy plastic fan. I bought some for fanning myself because it's HAWT. And some for disassembling and reassembling into jewelry.
The DIY:
1. Use wire cutters to snip apart the connector holding the fan together.
2. Use the same wire cutters to trim two of the decorative spokes into a matched pair of dangles. Tip: snip small bits at a time to shape the top and bottom - better to cut too little than too much.
3. If needed, run some sandpaper along the cut edges to smooth them.
4. With a heated poker, melt a hole near the top of each dangle.
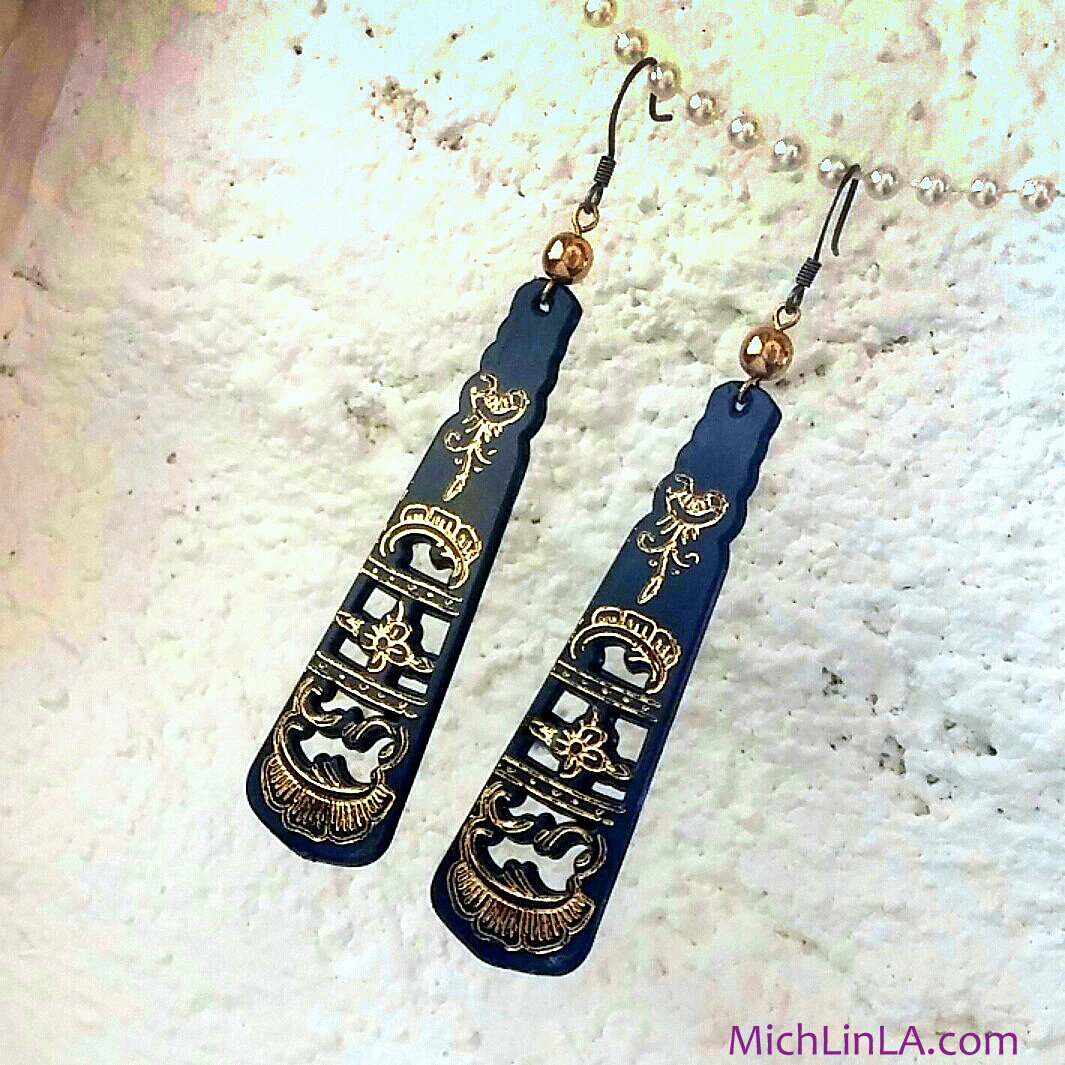
5. Add earring findings to the two holes, as seen in the version at the top of the post. Variation: make gold bead connectors to join the dangles to the earwires, like this:
Done! Do you like them? I do! I have been wearing them every day since I made them. Although, since I do not have pierced ears, I wear them as ear cuffs.
(Interested in ear cuffs? For the world's easiest ear cuff DIY, click here!)
Okay, peeps, signing off for now. I sure hope you had fun trying to guess. See ya!
P.S. re-read the title of this post...see what I did there? Tee hee.
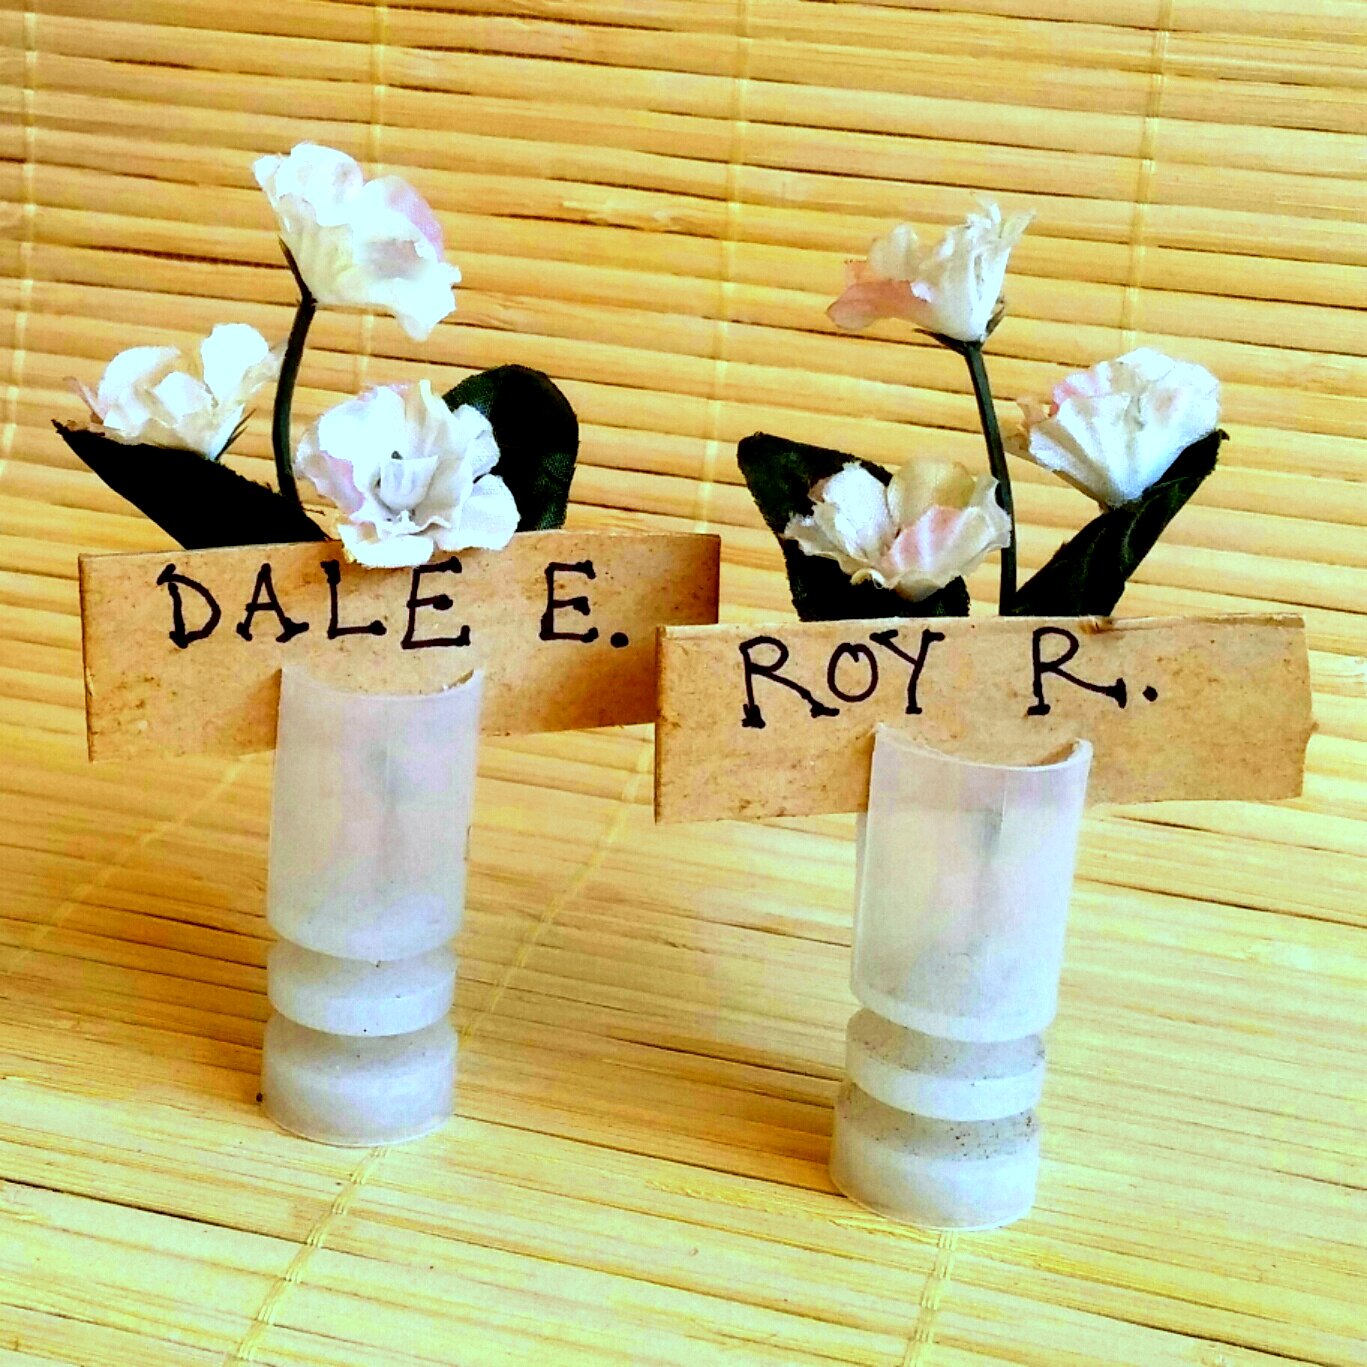
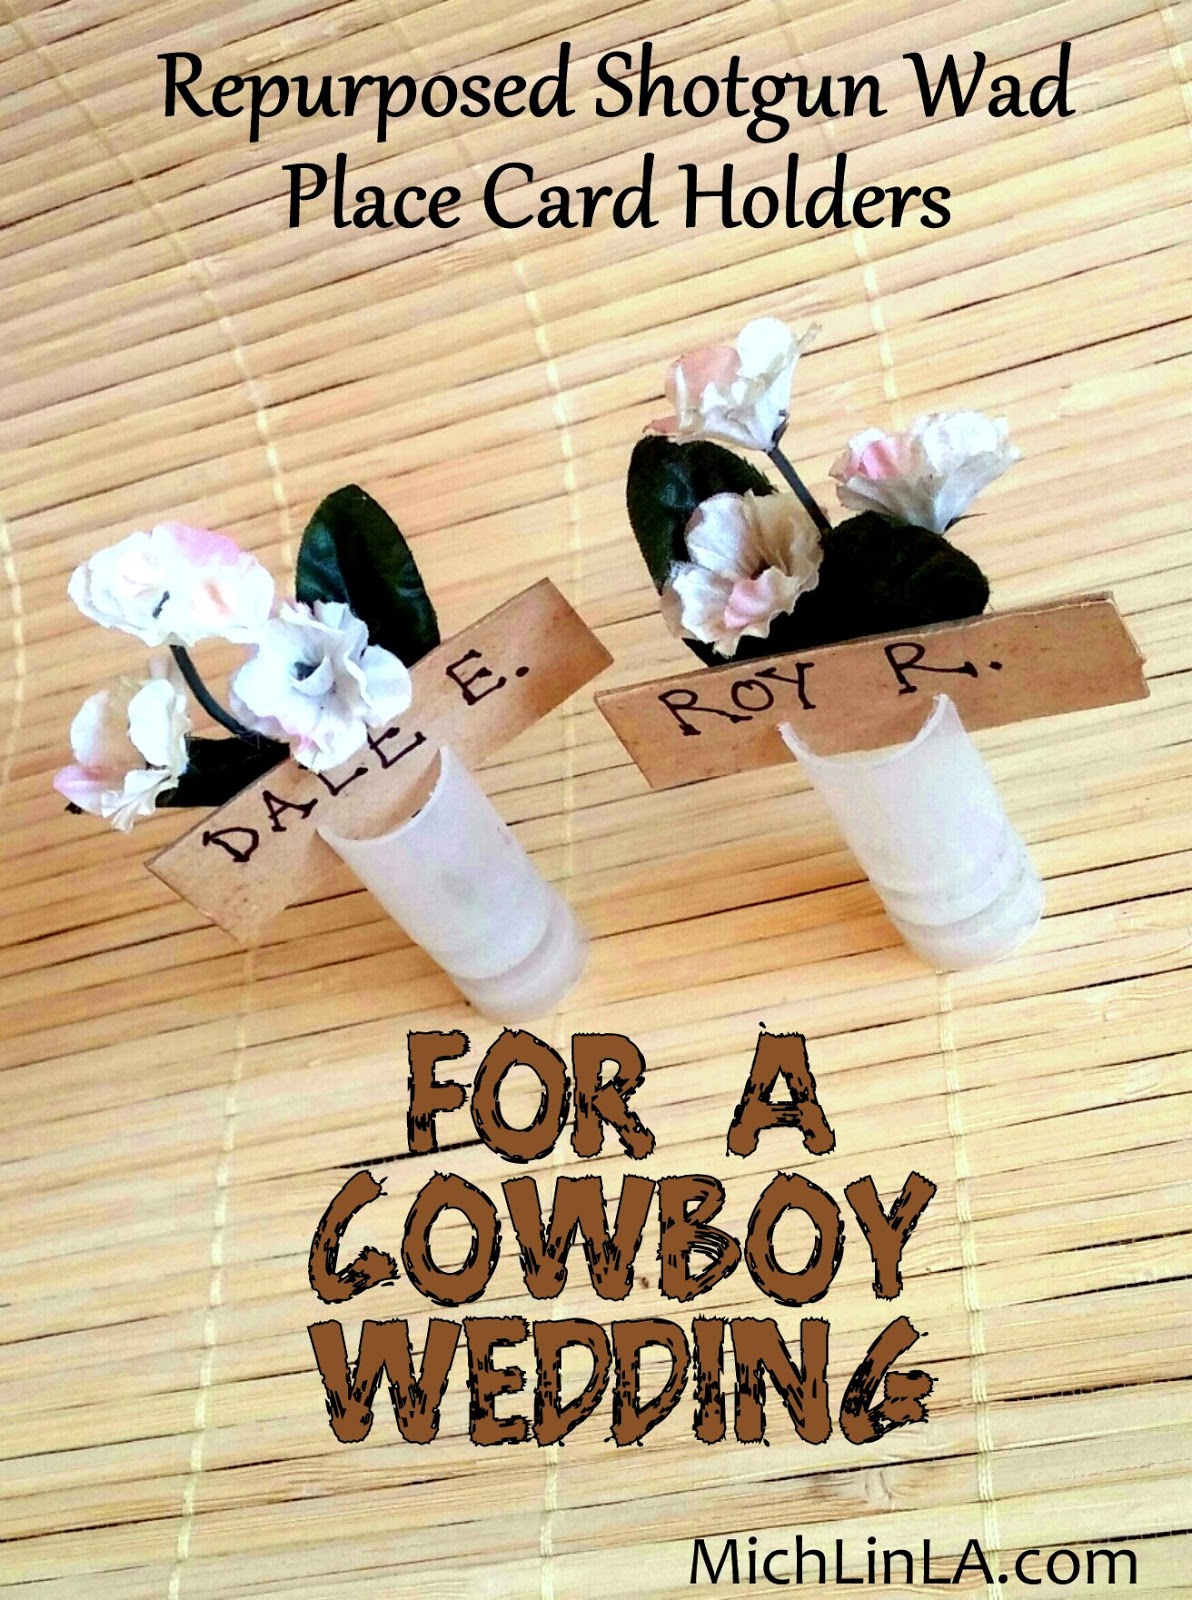
This summer, some friends of mine are going to a rancher's wedding. Location: New Mexico cattle ranch. Dress code: cowboy! Doesn't that sound fun?
Here's a mini Guess The Mystery Thing challenge, inspired by the event. Check out these fun little place card holders:
Who can guess the identity of those interesting white bases? Now hold your horses! Whoa, dogies! Take your time and don't scroll until you have it in your head.
Got your guess? Okay, here comes the scroll down.
*
*
*
*
Some of you will know the answer on sight.
*
*
*
Some of you might be offended. Maybe? I'm not sure...
*
*
*
*
Ready?
Steady?
Okie.
Dokie.
The Mystery Thing is...
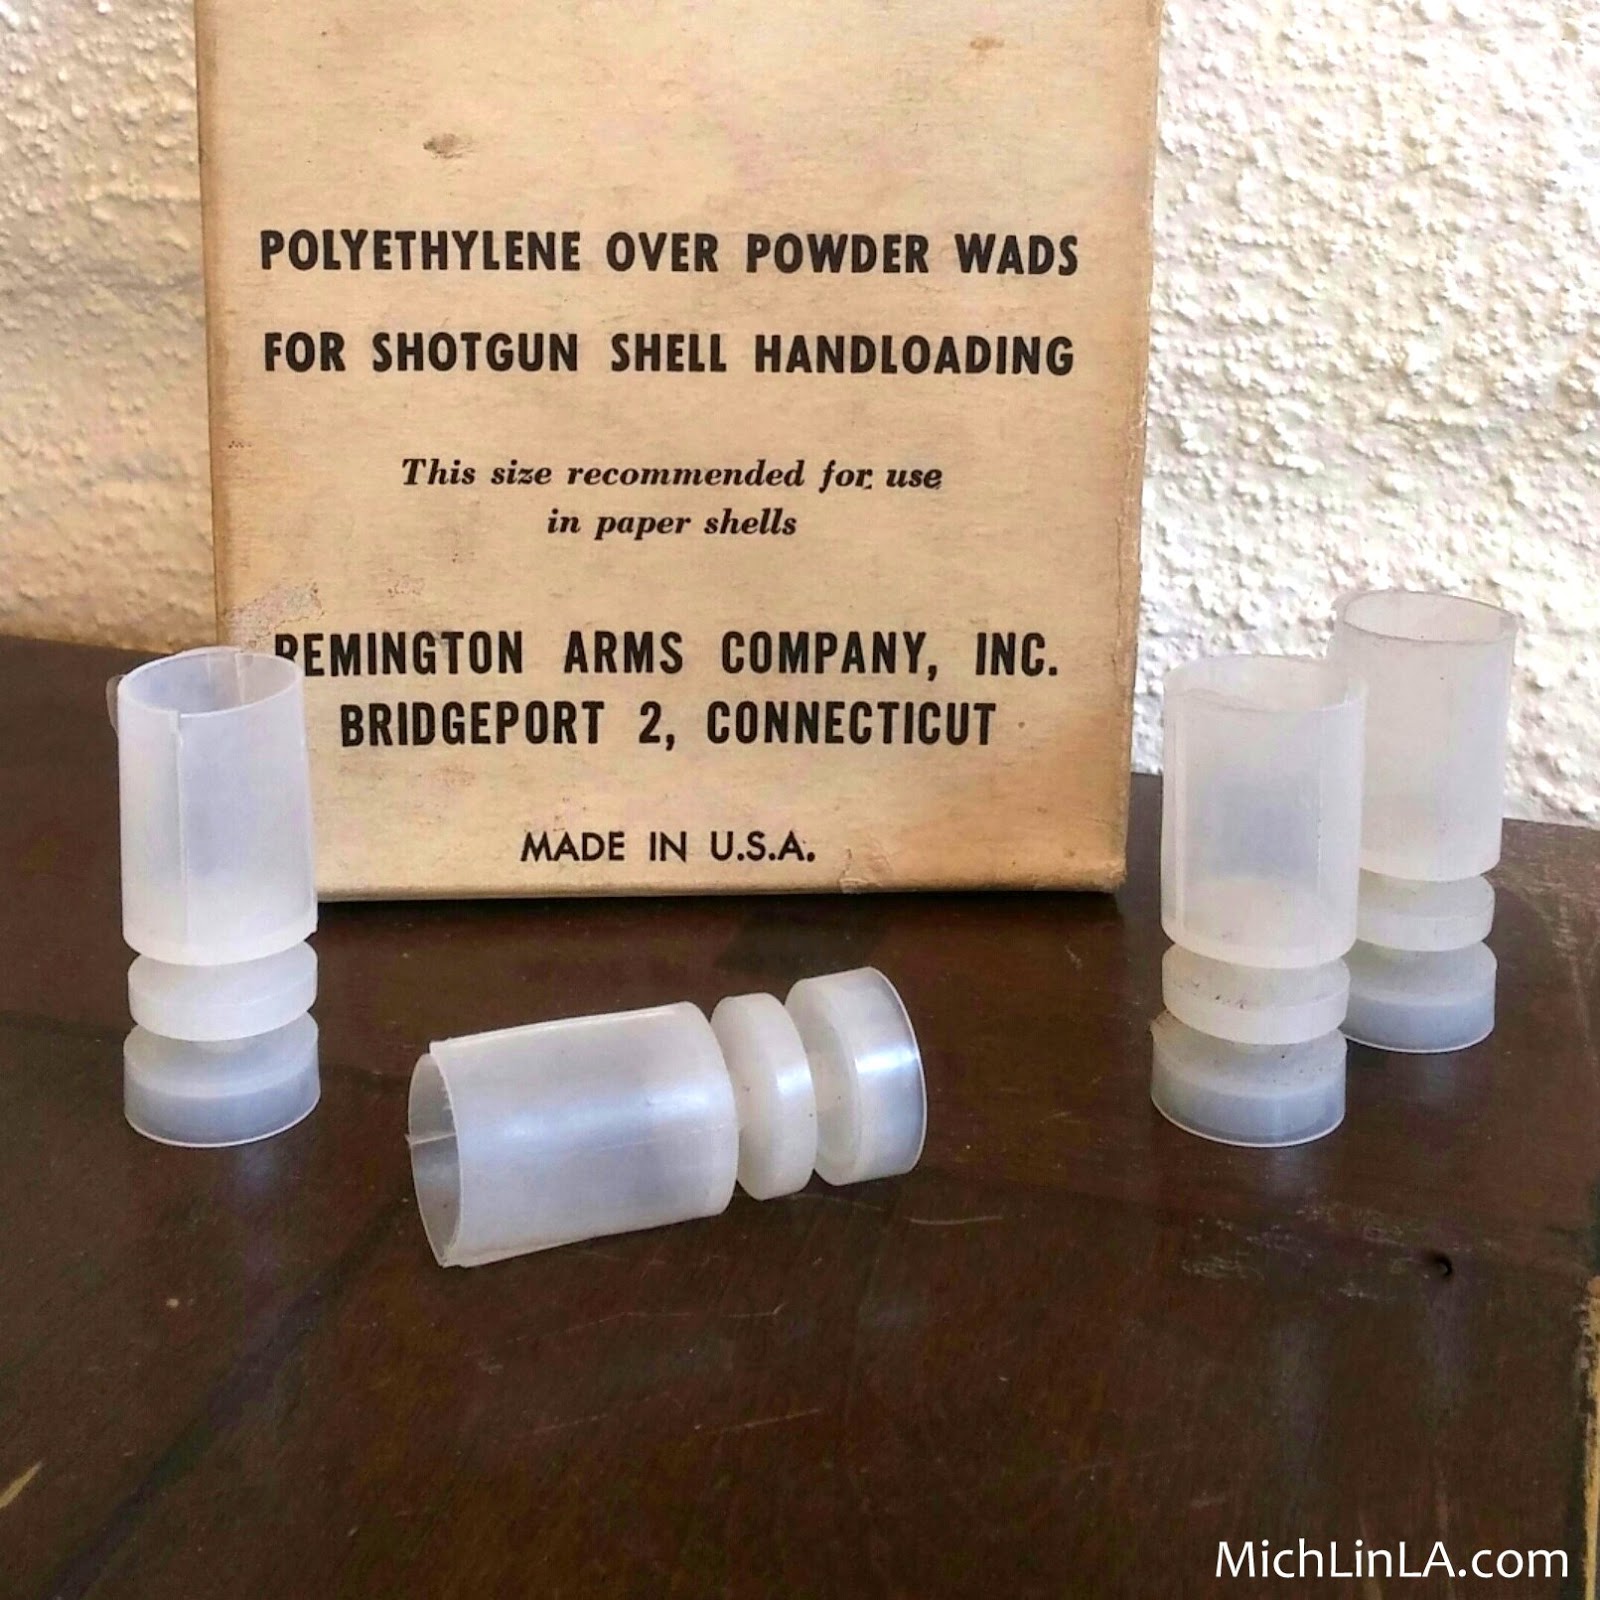
Oddly attractive shotgun loading wads. (That's what she said.) Don't be offended. They are so darn cute, with their little space age feet and ready-made slits to hold a place card!
Hope you got a laugh out of this one. Later, dogies!
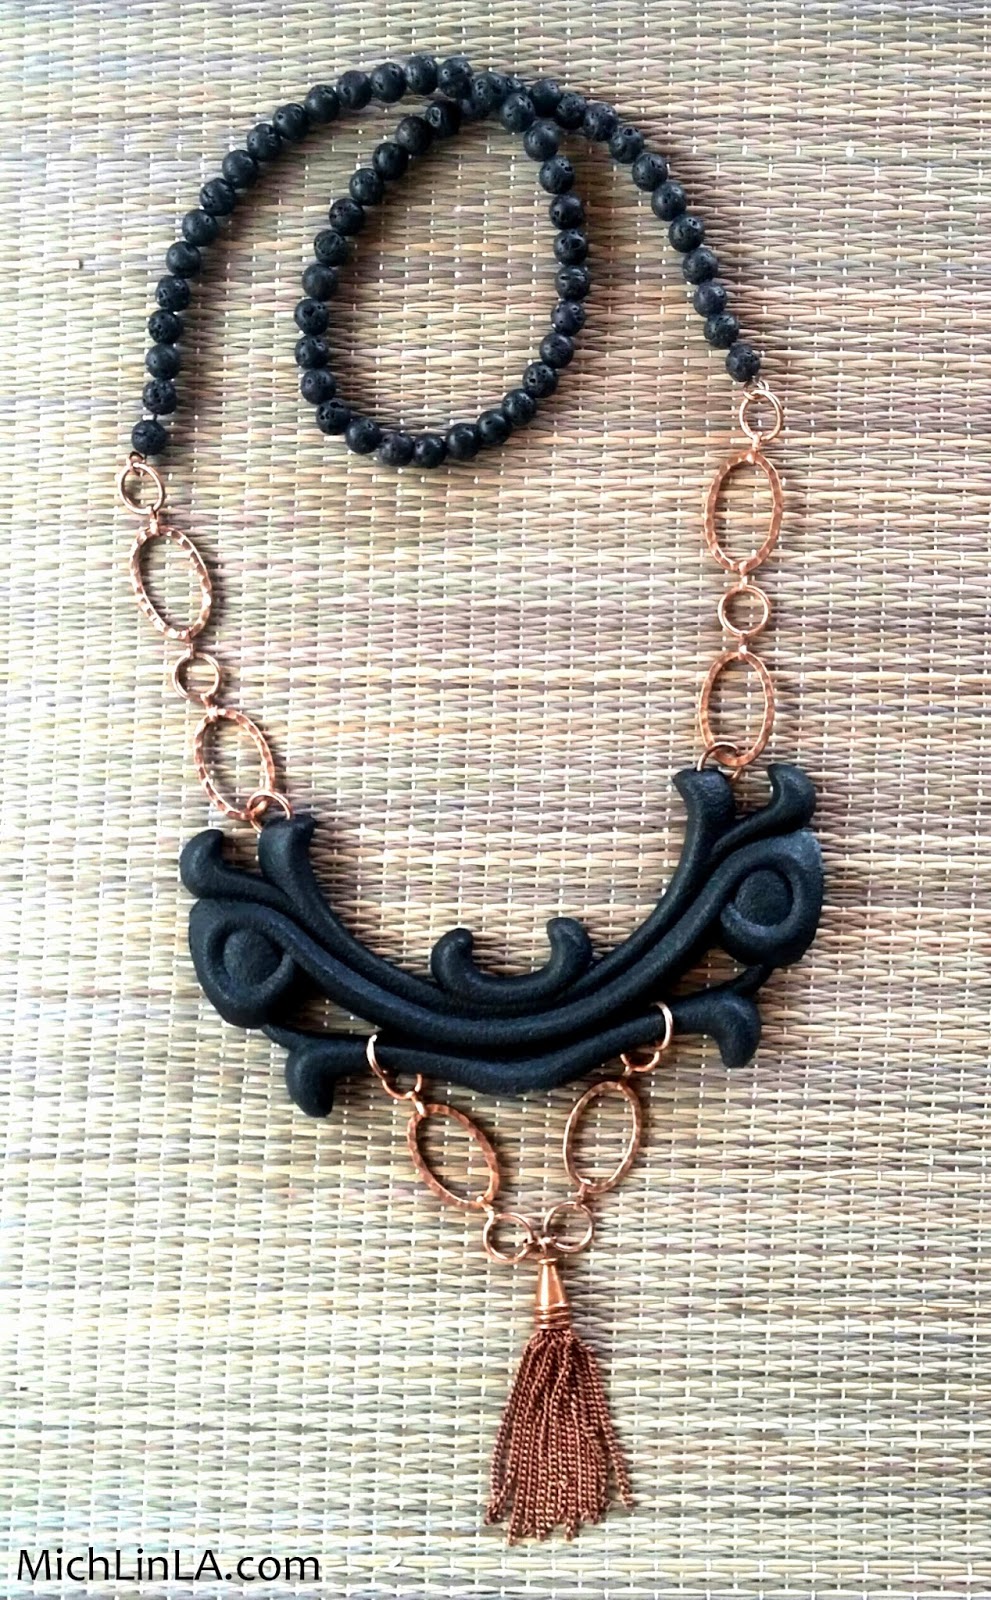
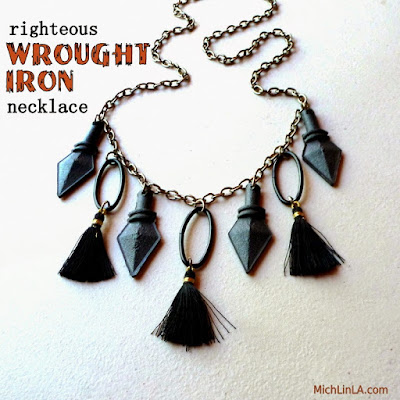
Hi, all! Here's a mystery for you to tackle. Take a look at this big, bold upcycled necklace:
Do you like it? Me, I am superduper pleased with how it turned out. Now for the mystery part. Who can guess the origin of that crazy, swoopy black focal piece?
Wait! Don't scroll until you think you've got it. Take your time...don't be too hasty...
Got your guess? Okay, scroll away!
*
*
*
Wait for it...
*
*
*
Okie dokie, here's the answer! It's...it's...
A faux wrought-iron garden fence. Plastic. From the dollar store.
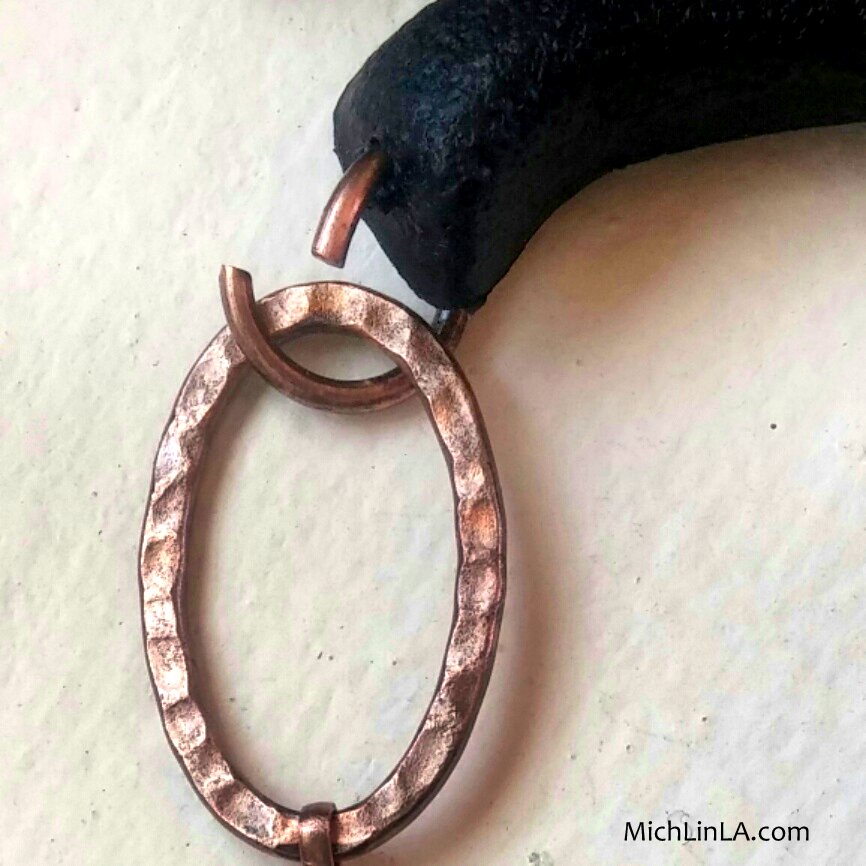
I just love the shape of the inner swoops! They remind me of American Indian tribal motifs from the Pacific Northwest where I grew up. I isolated one of them, like so:
To turn it into a necklace, first I melted holes in the top with a heated poker.
Using large jump rings as connectors, I added some big coppery chains and findings:
I added a beaded strand to complete the length, and boom, that's the necklace!
The strung strand is made of lava beads - I chose them because they are matte and bumpy in texture, very similar to the fence material.
Hope you enjoyed this one! Let me know in the comments if you guessed right - or if not, what you thought it could be.
Oh, and I can't sign off without mentioning that other time I made a necklace from a different (but equally cute) plastic dollar store fence:
Here's the link to that tutorial. A very different look, isn't it? It's a fun one.
Thanks for coming around, you guys! See ya!
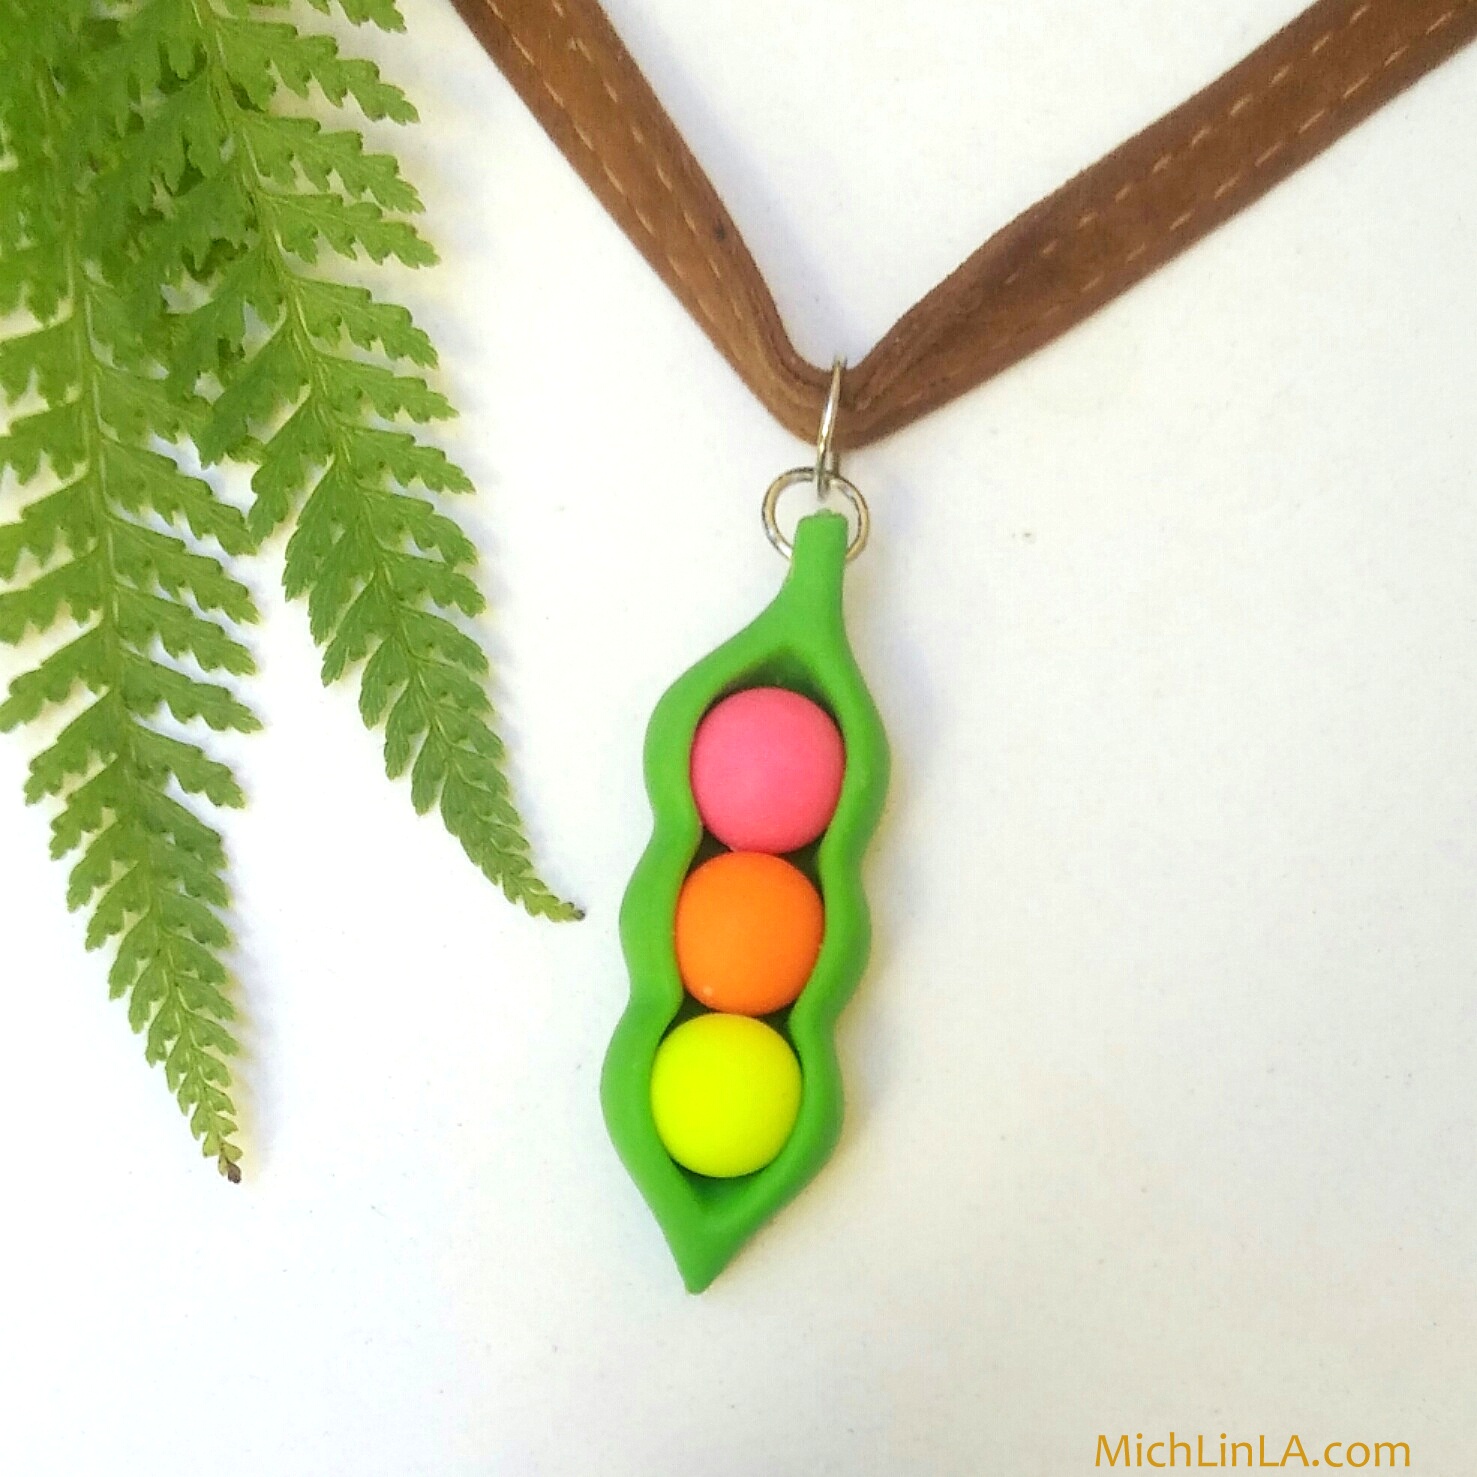
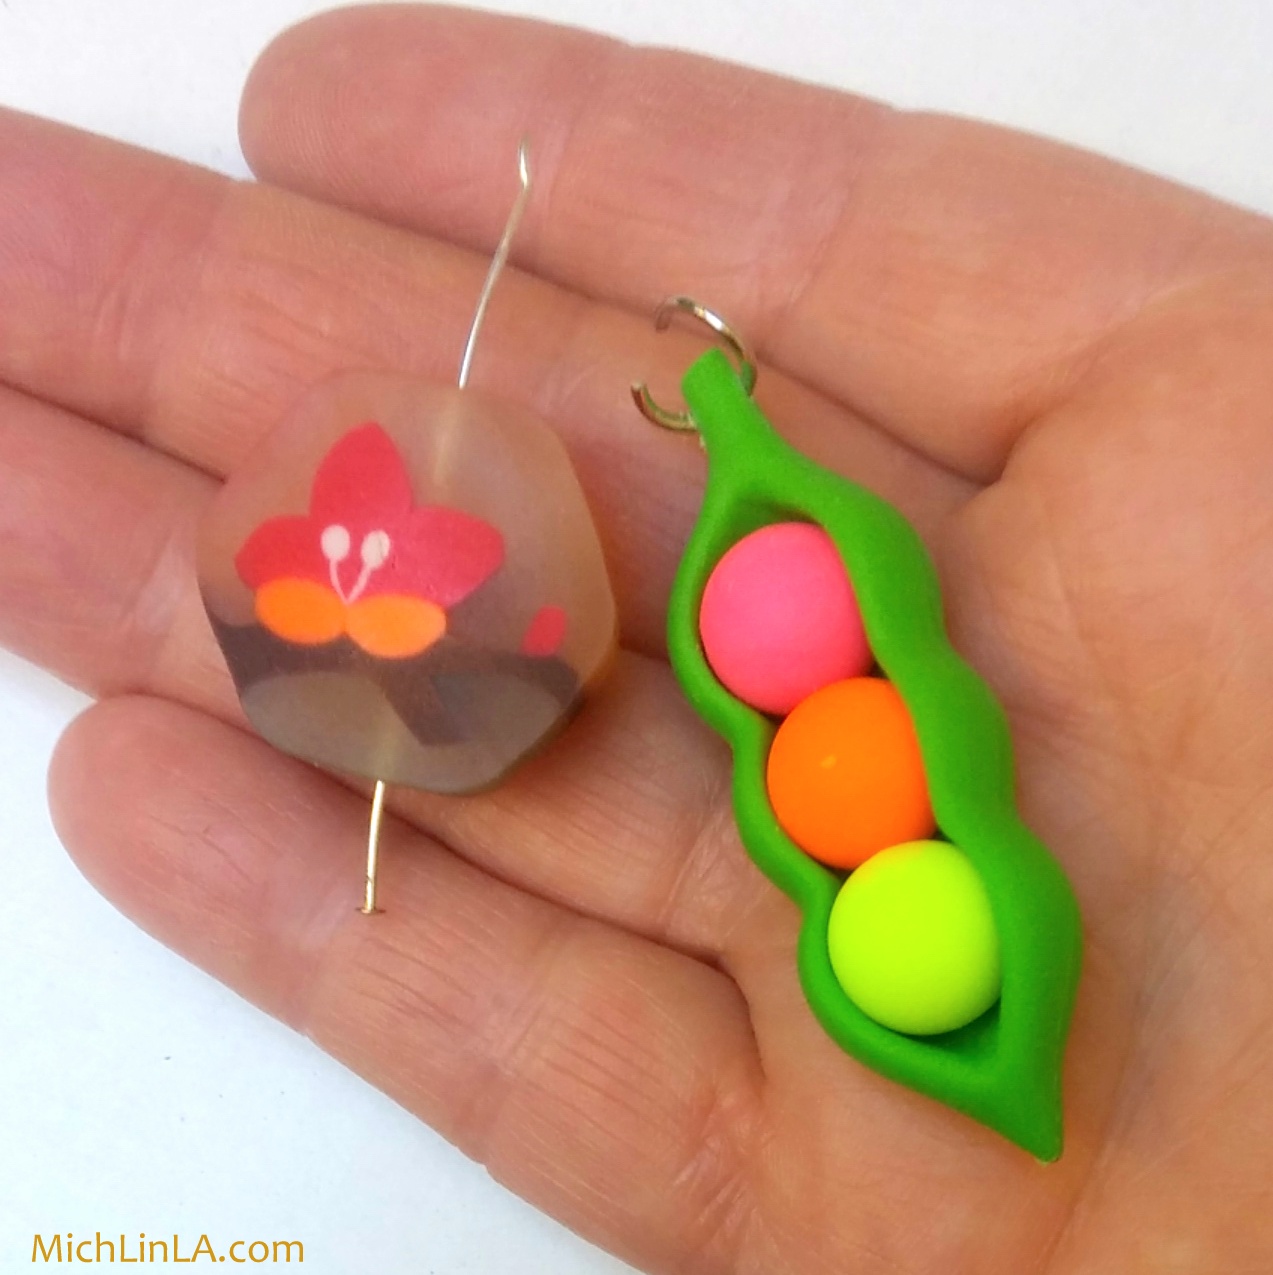
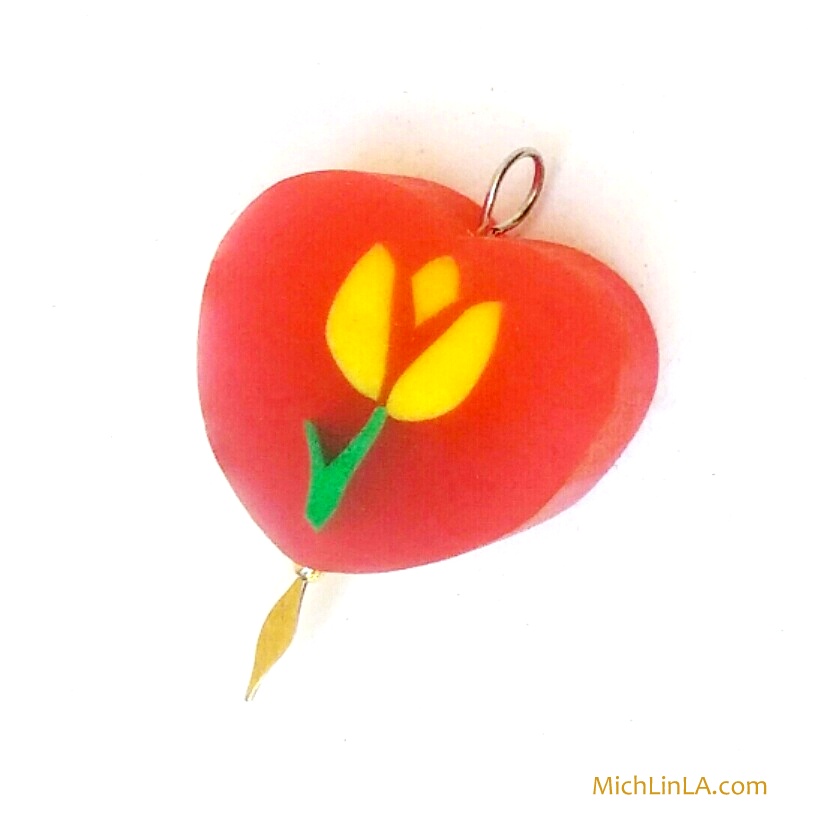
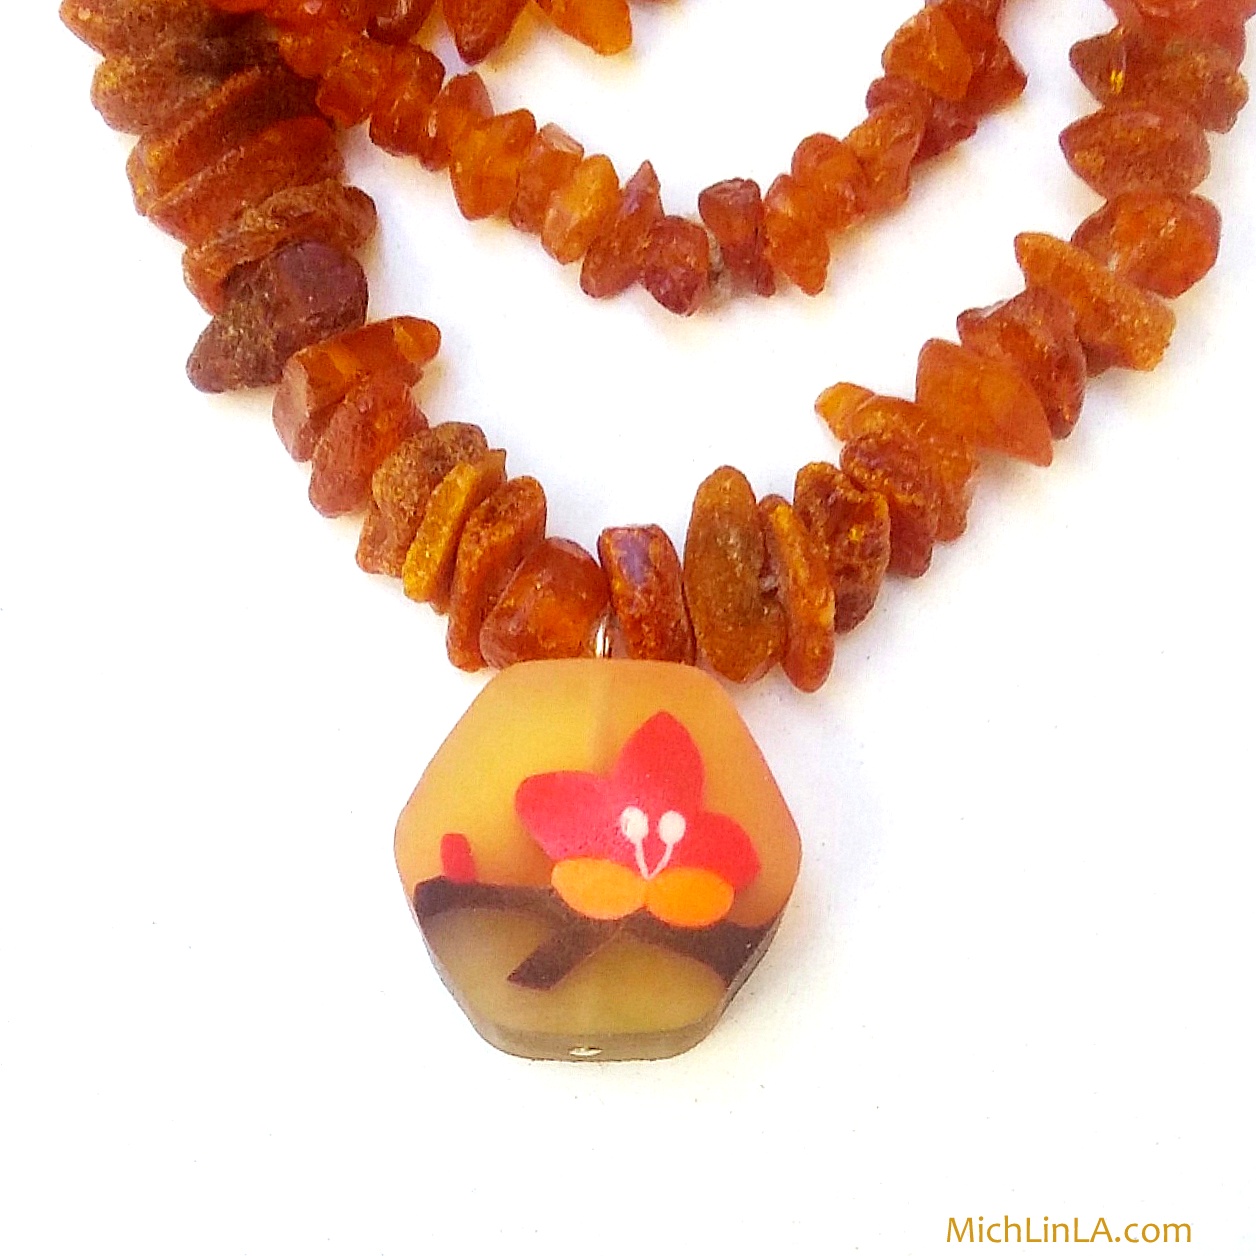
Hi again! Today, a fun, kinda weirdo upcycled jewelry idea. What do these pendants have in common?
They're made from erasers.
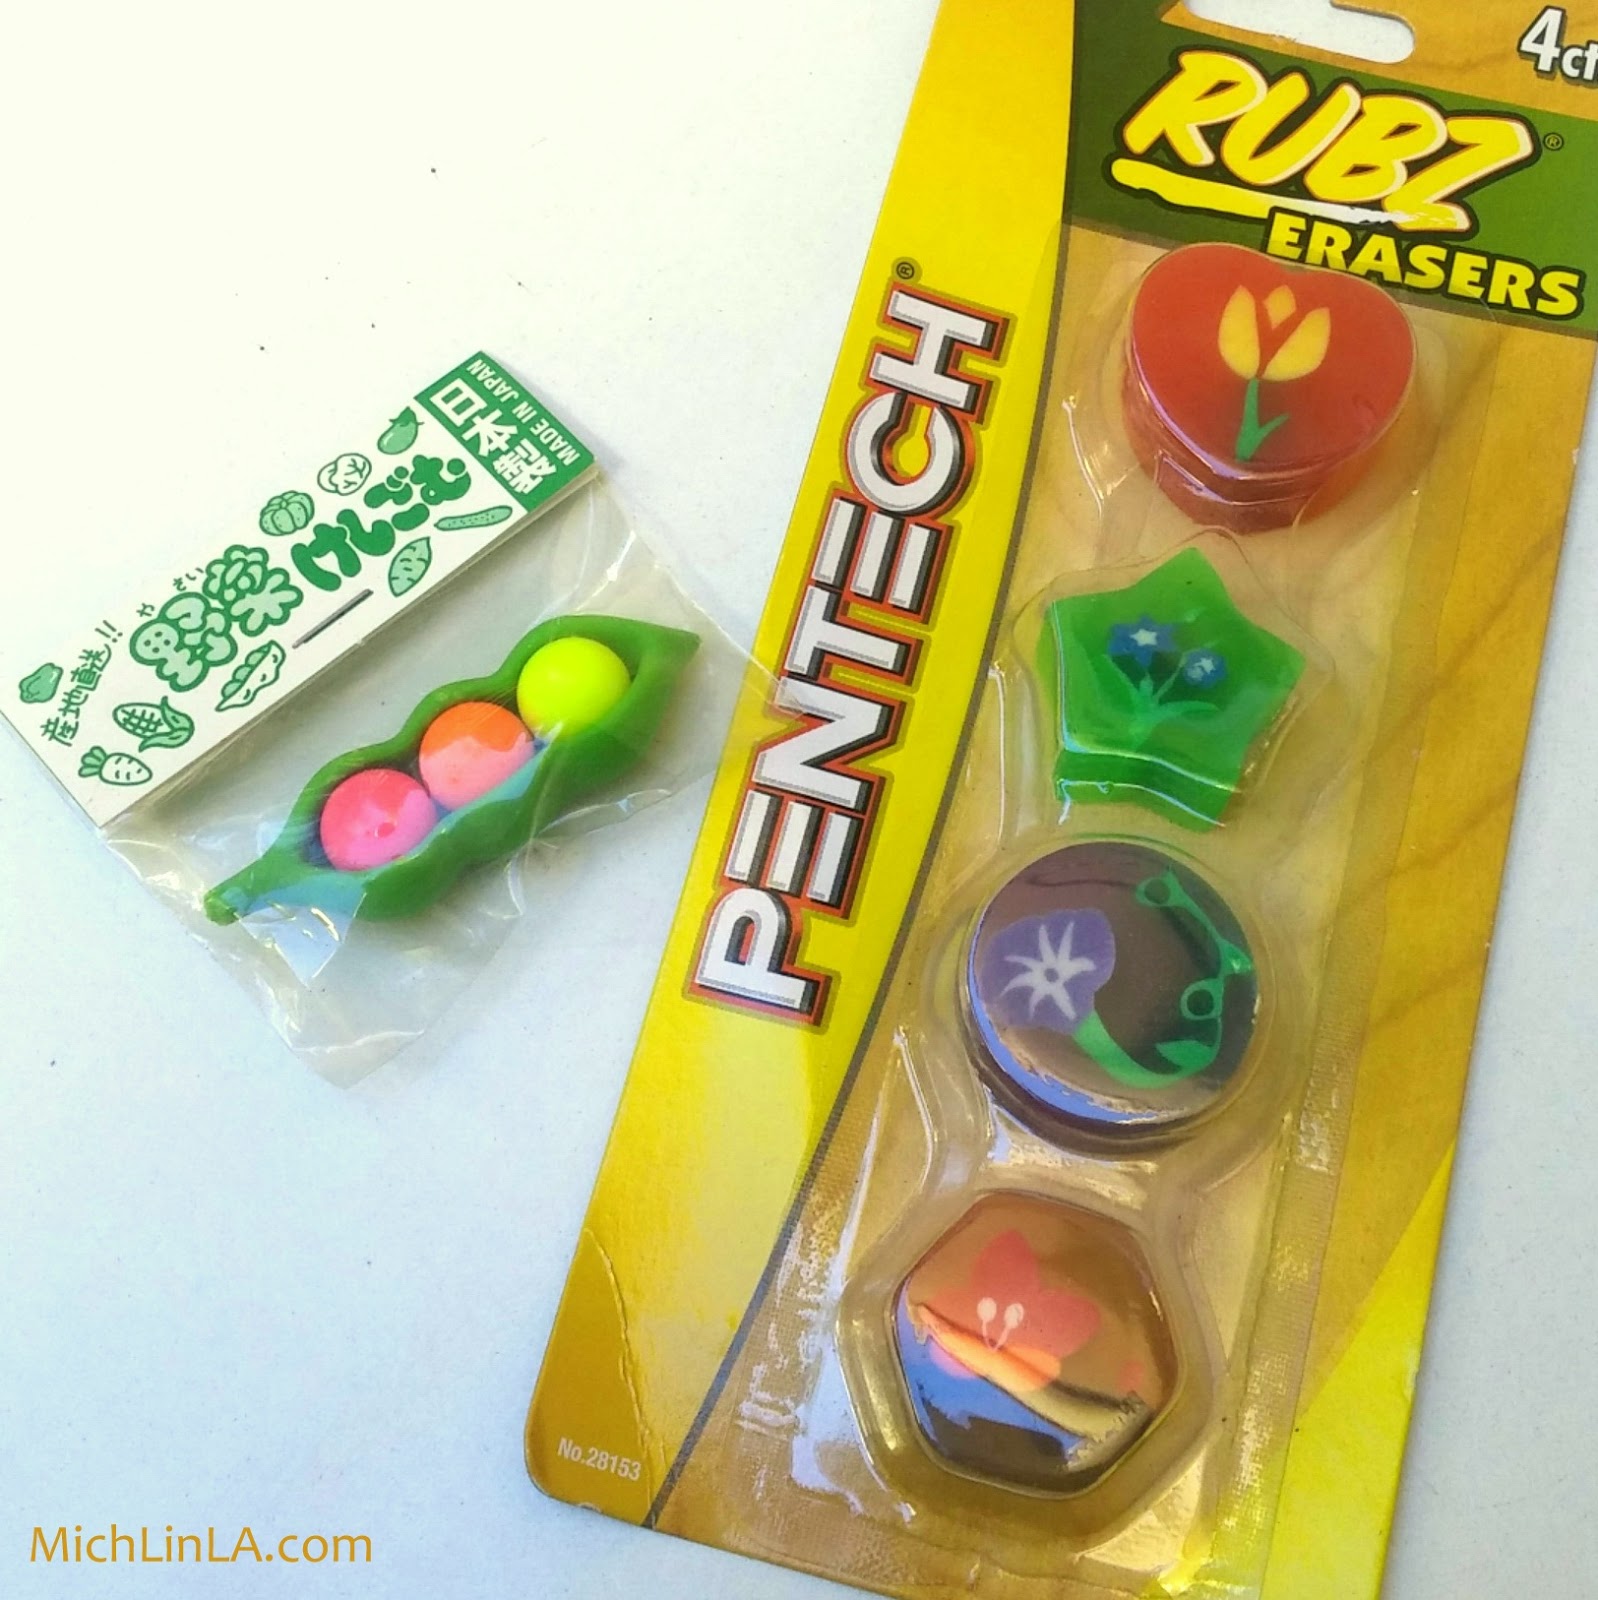
The flower ones are from the dollar store - four for a buck. That awesome peapod came from the gift section of a Japanese grocery. (Kawaii rules.) There are fabulous erasers everywhere, some of them nothing less than works of art.
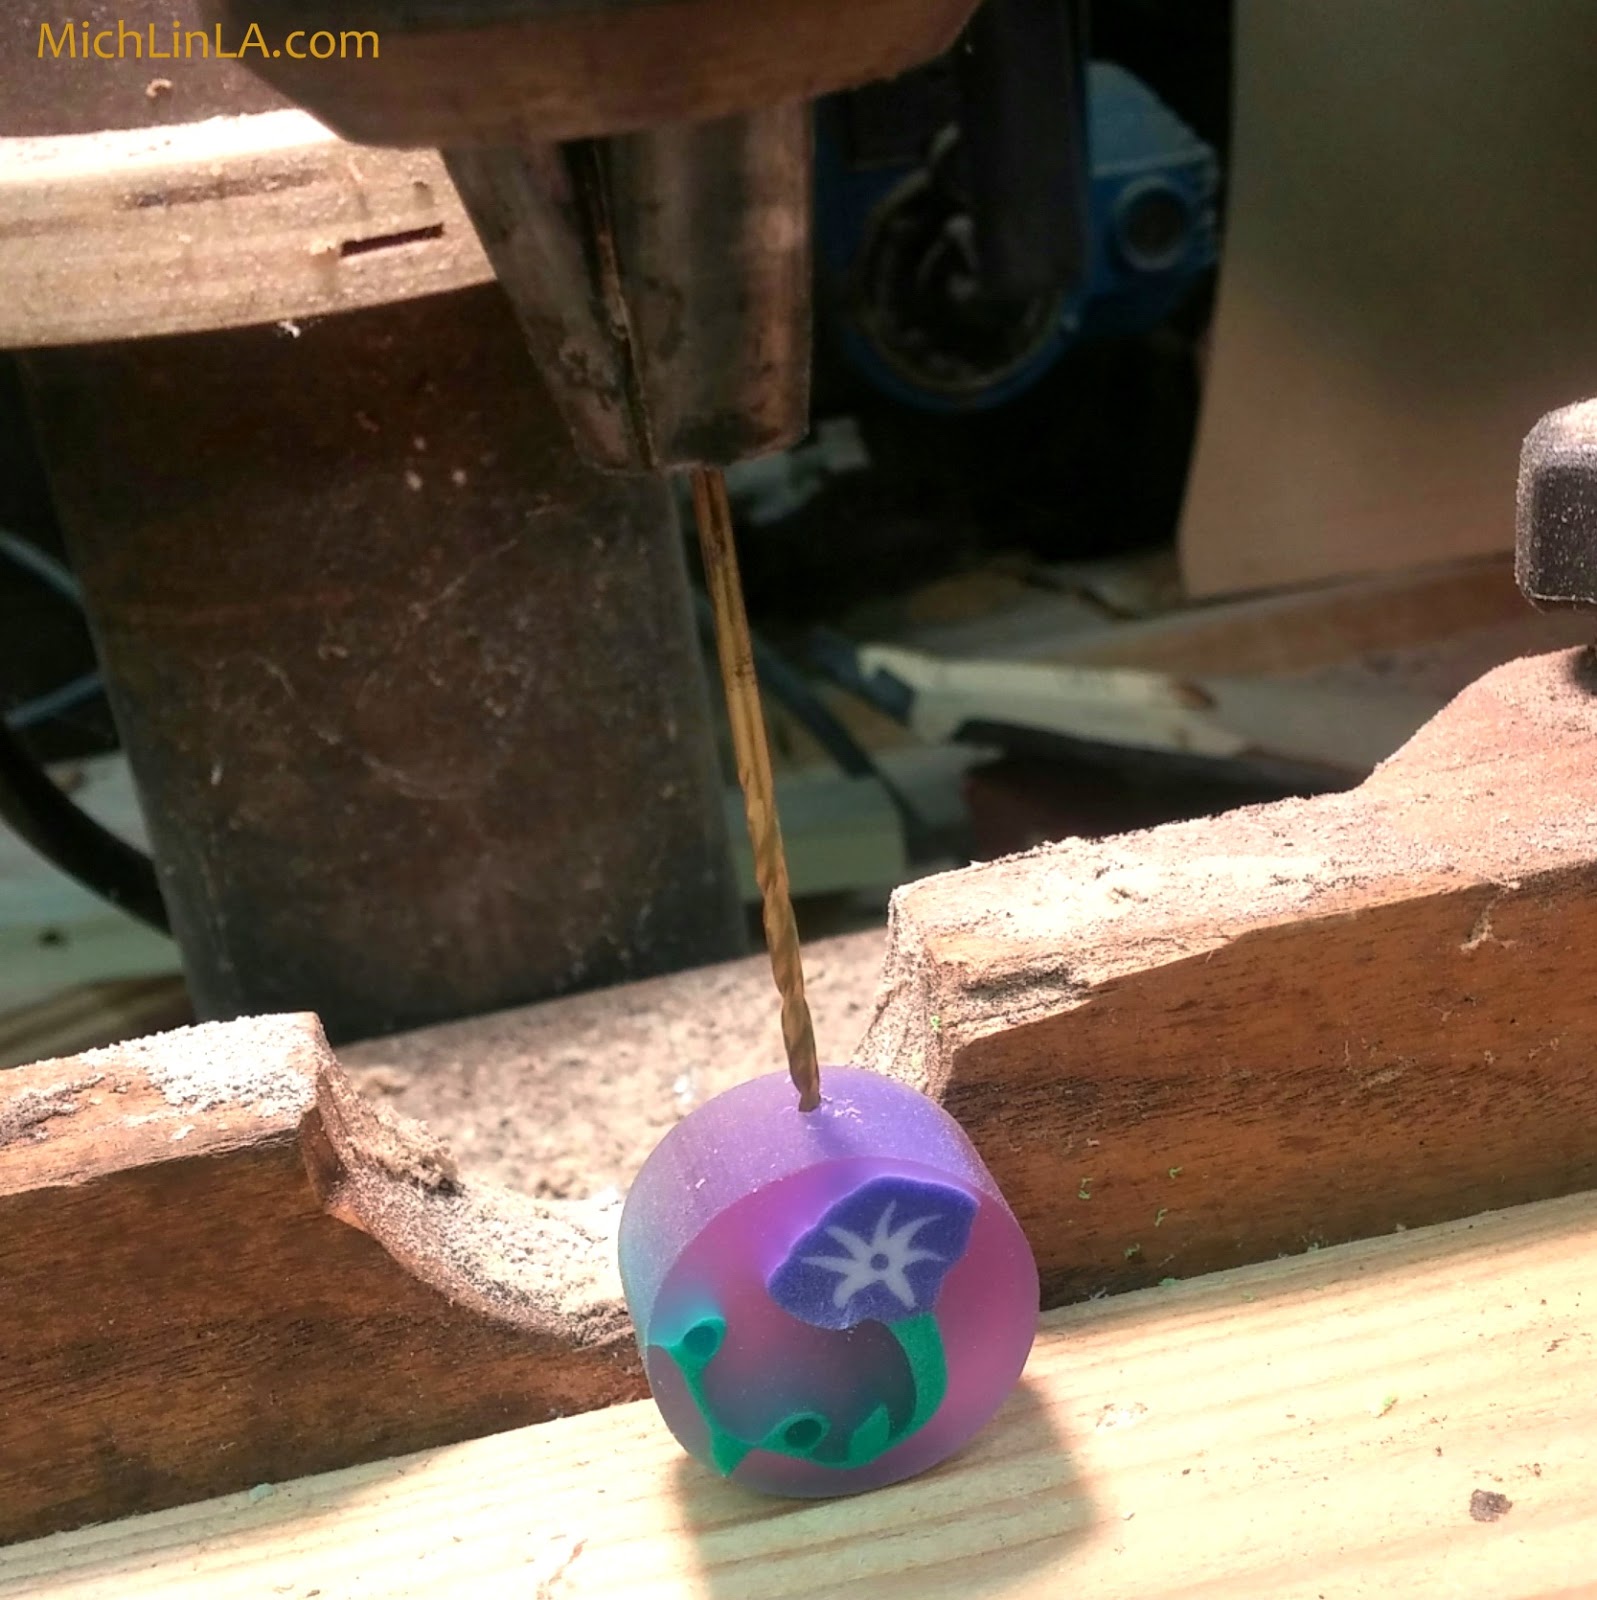
To turn an eraser into a pendant, you need a hole. I wonder if you have ever tried making a hole in an eraser? It's tricky. You can't melt a hole like in plastic. Poking a hole is possible but difficult - either the material crumbles and splits, or the hole is too tiny to be useful.
So what's the trick? Power tools. Yep, to get the job done, gotta use a drill.
I used a drill press, but a Dremel tool works, too. You get a nice clean hole without splitting the material. Huzzah!
Once you have a hole, add a headpin or jump ring.
For the pendant bail, simply close up the jump ring, or make a loop above the eraser like so:
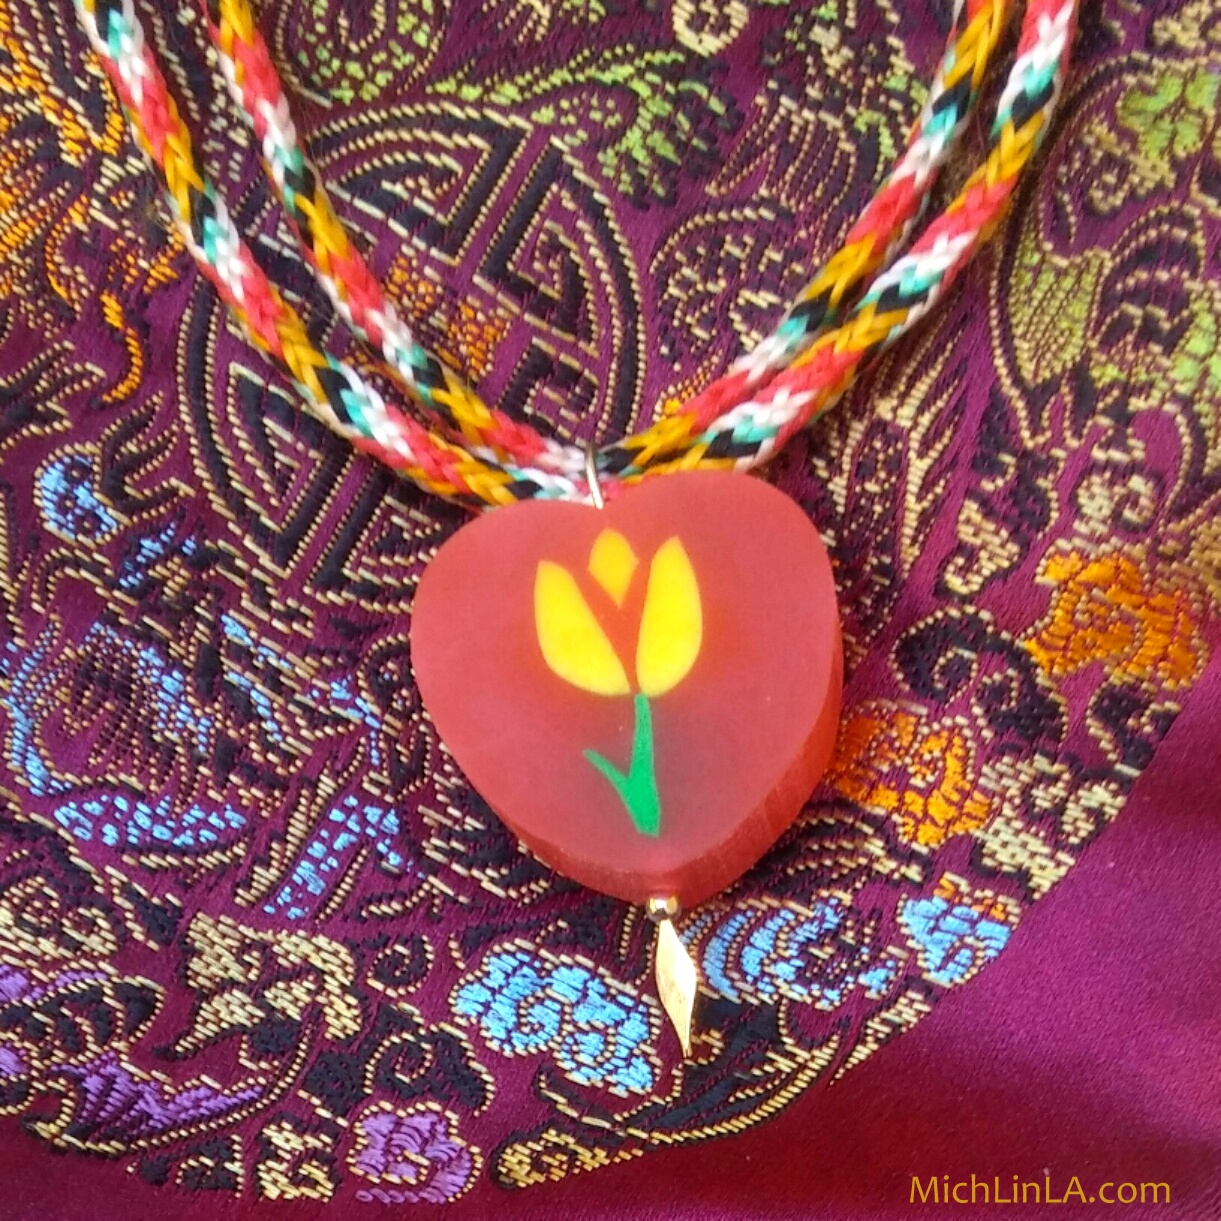
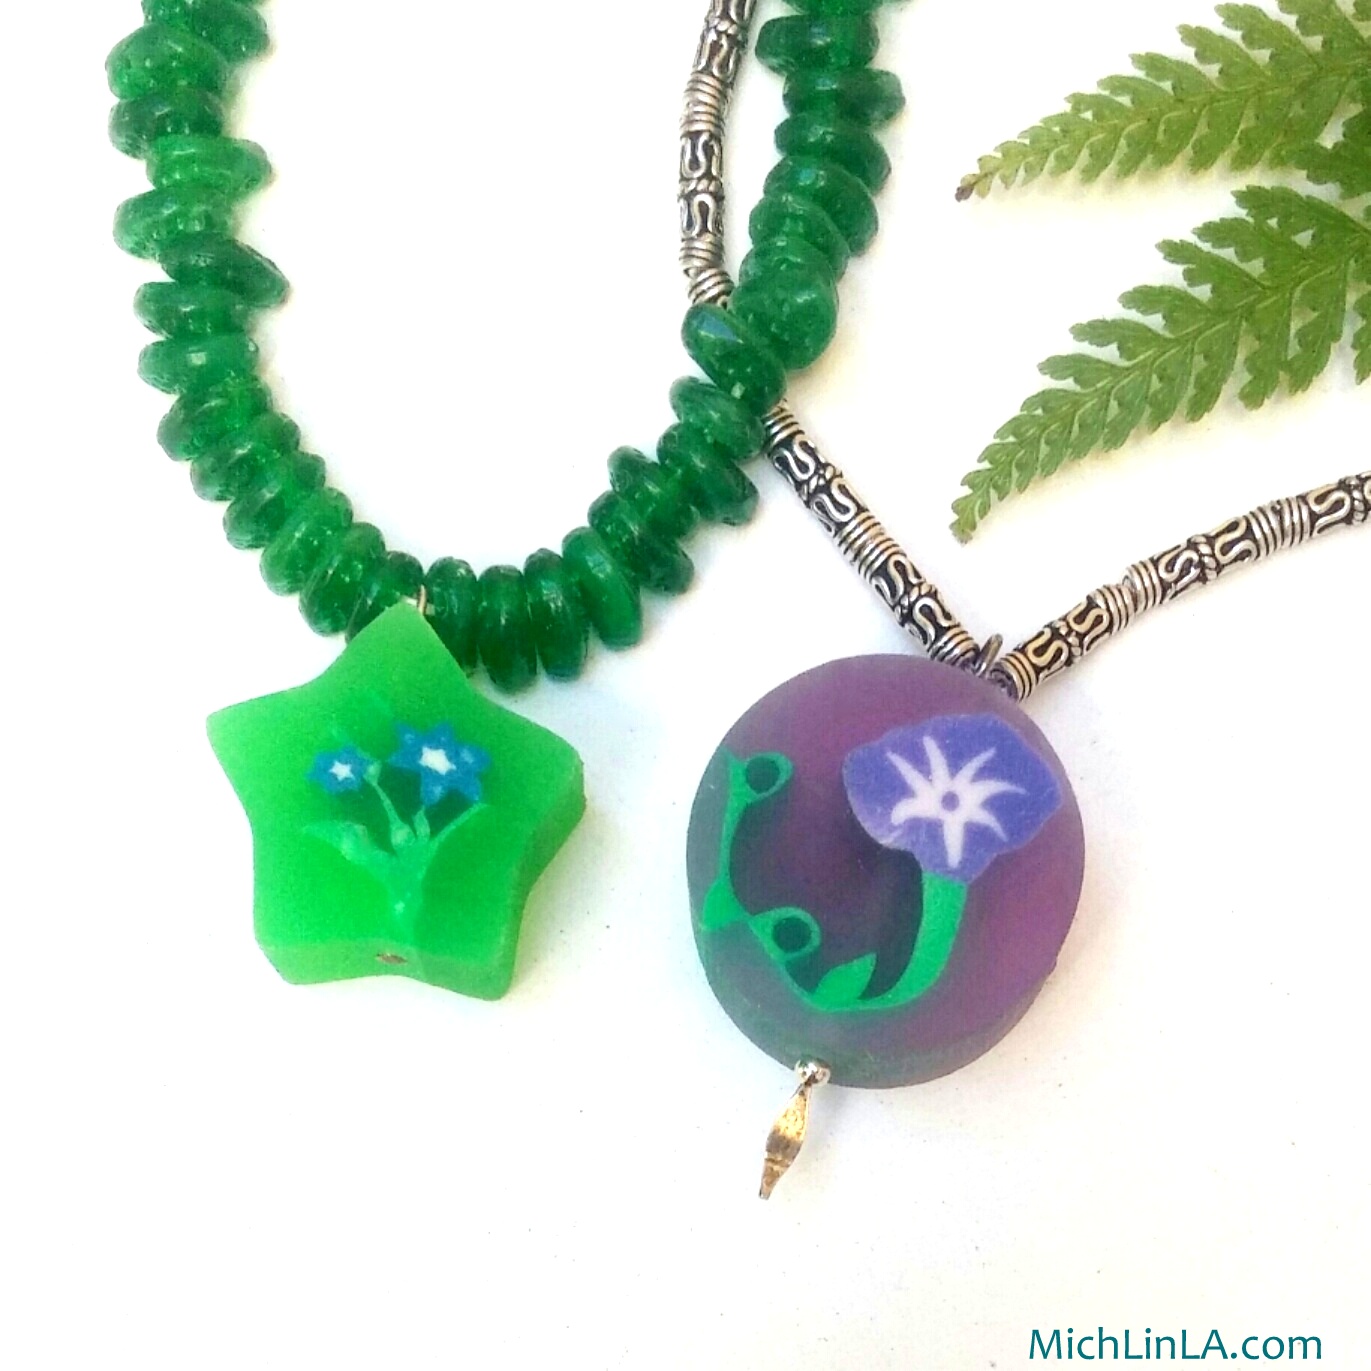
Then string onto a necklace and enjoy the cuteness.
I really like that last one - the raw amber is interesting with the strange jellylike pendant...it's certainly unexpected, anyway!
Thanks for visiting, you guys! See ya.
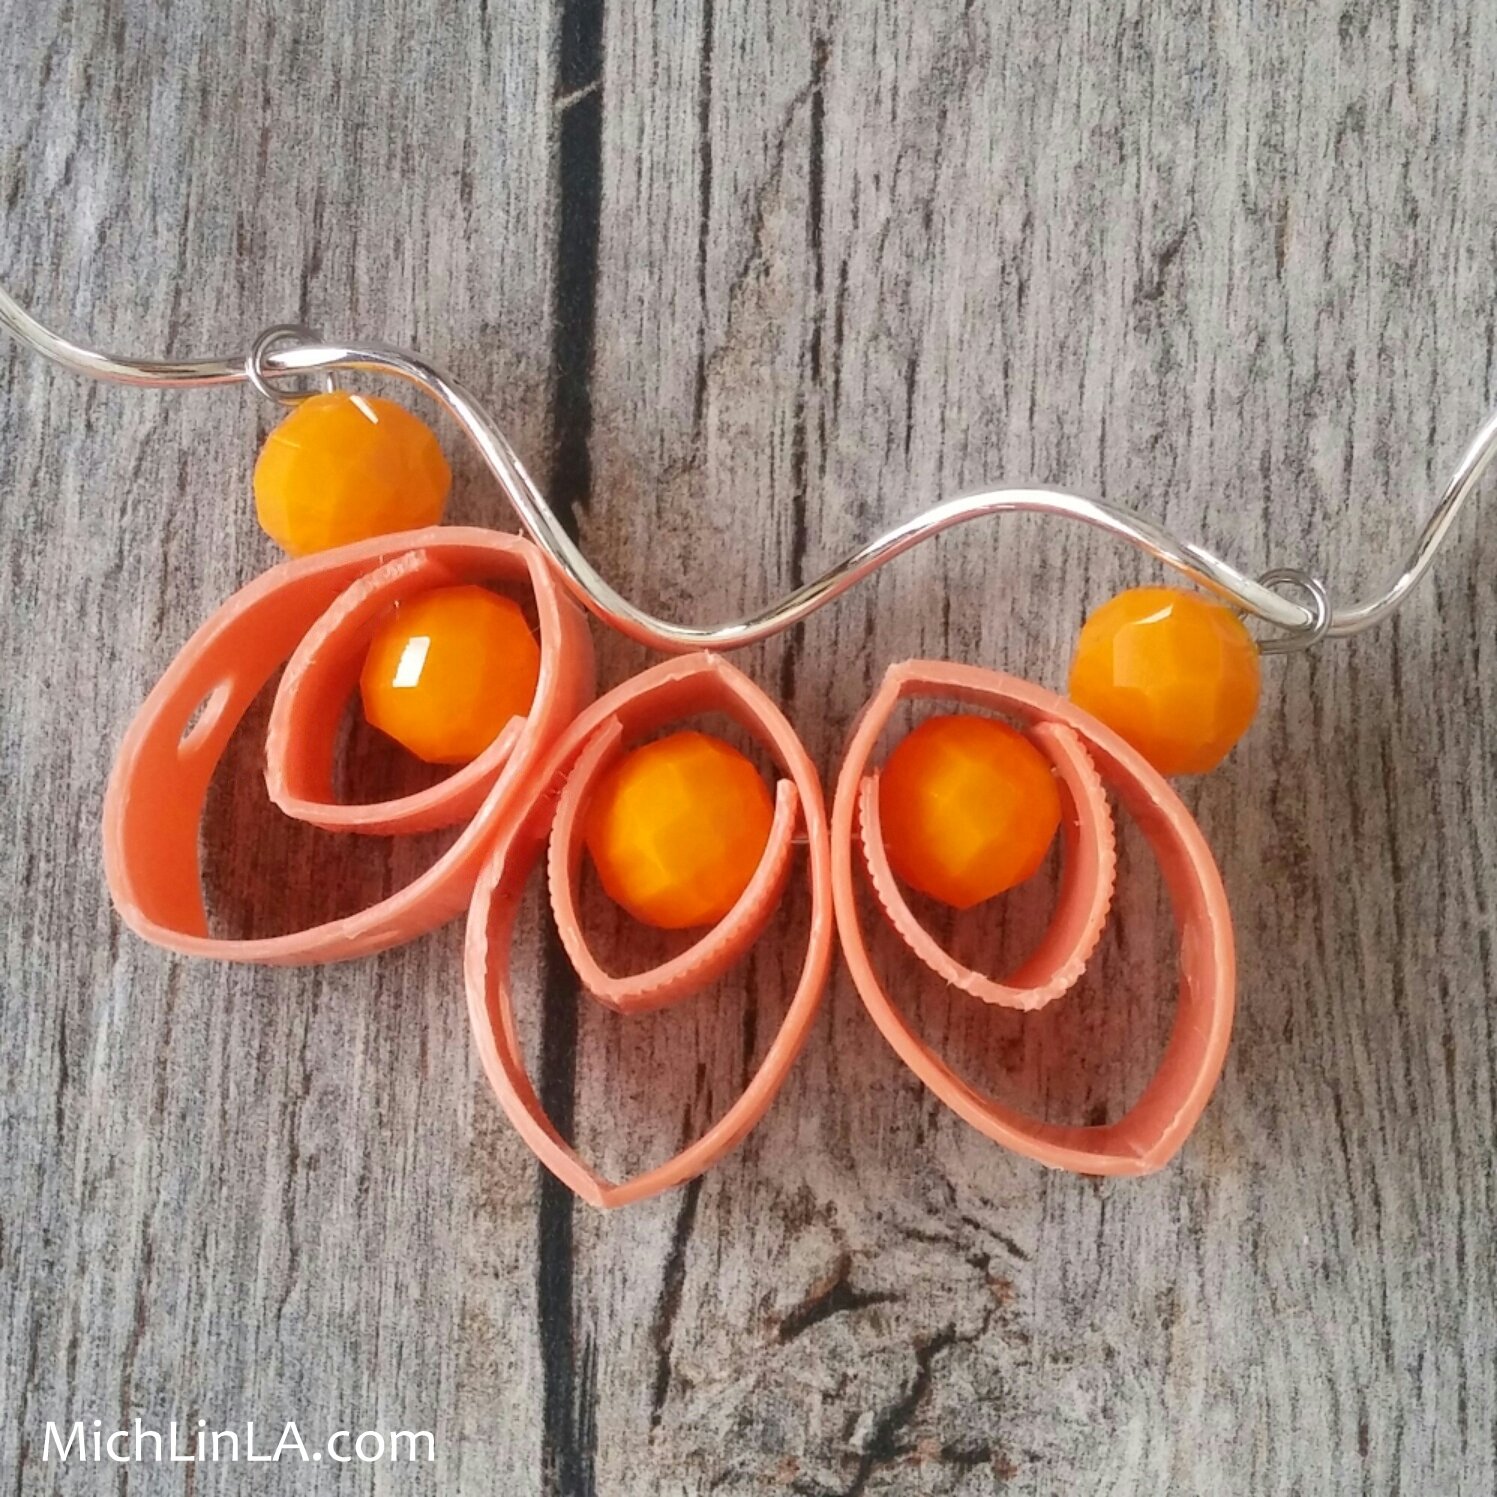
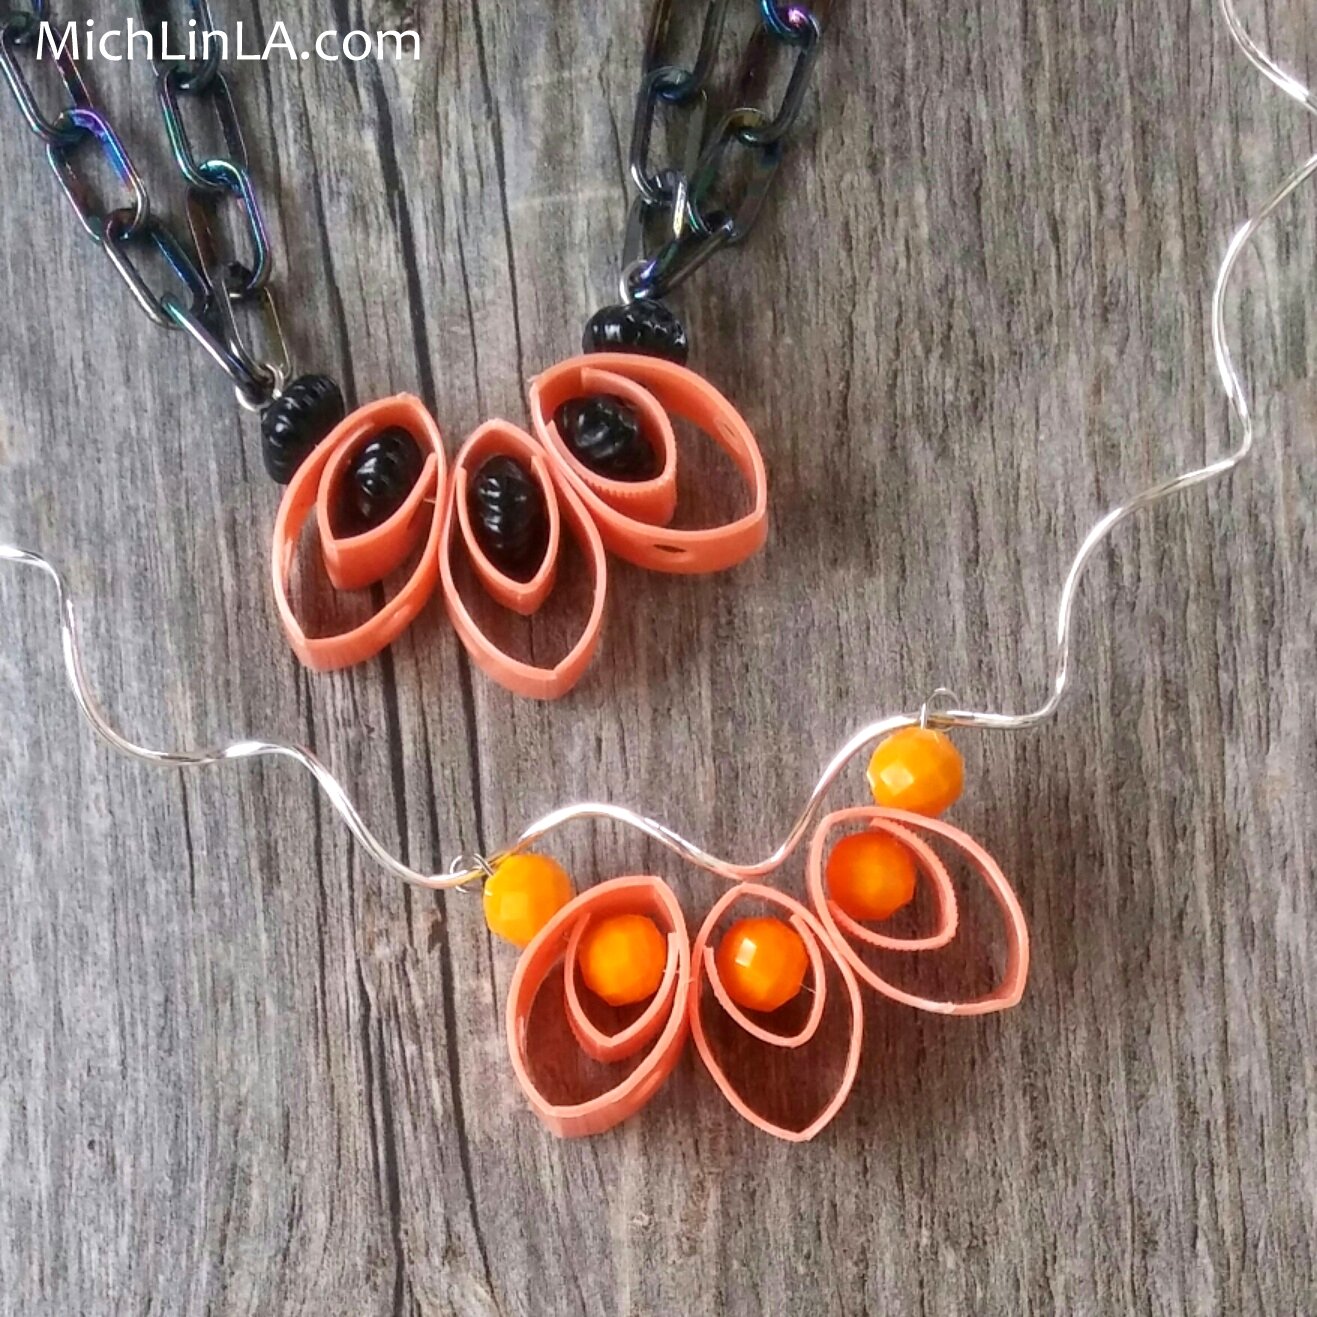
Ready to play a round of Guess The Mystery Thing? See if you can guess what I used to make these open-structured little pendants:
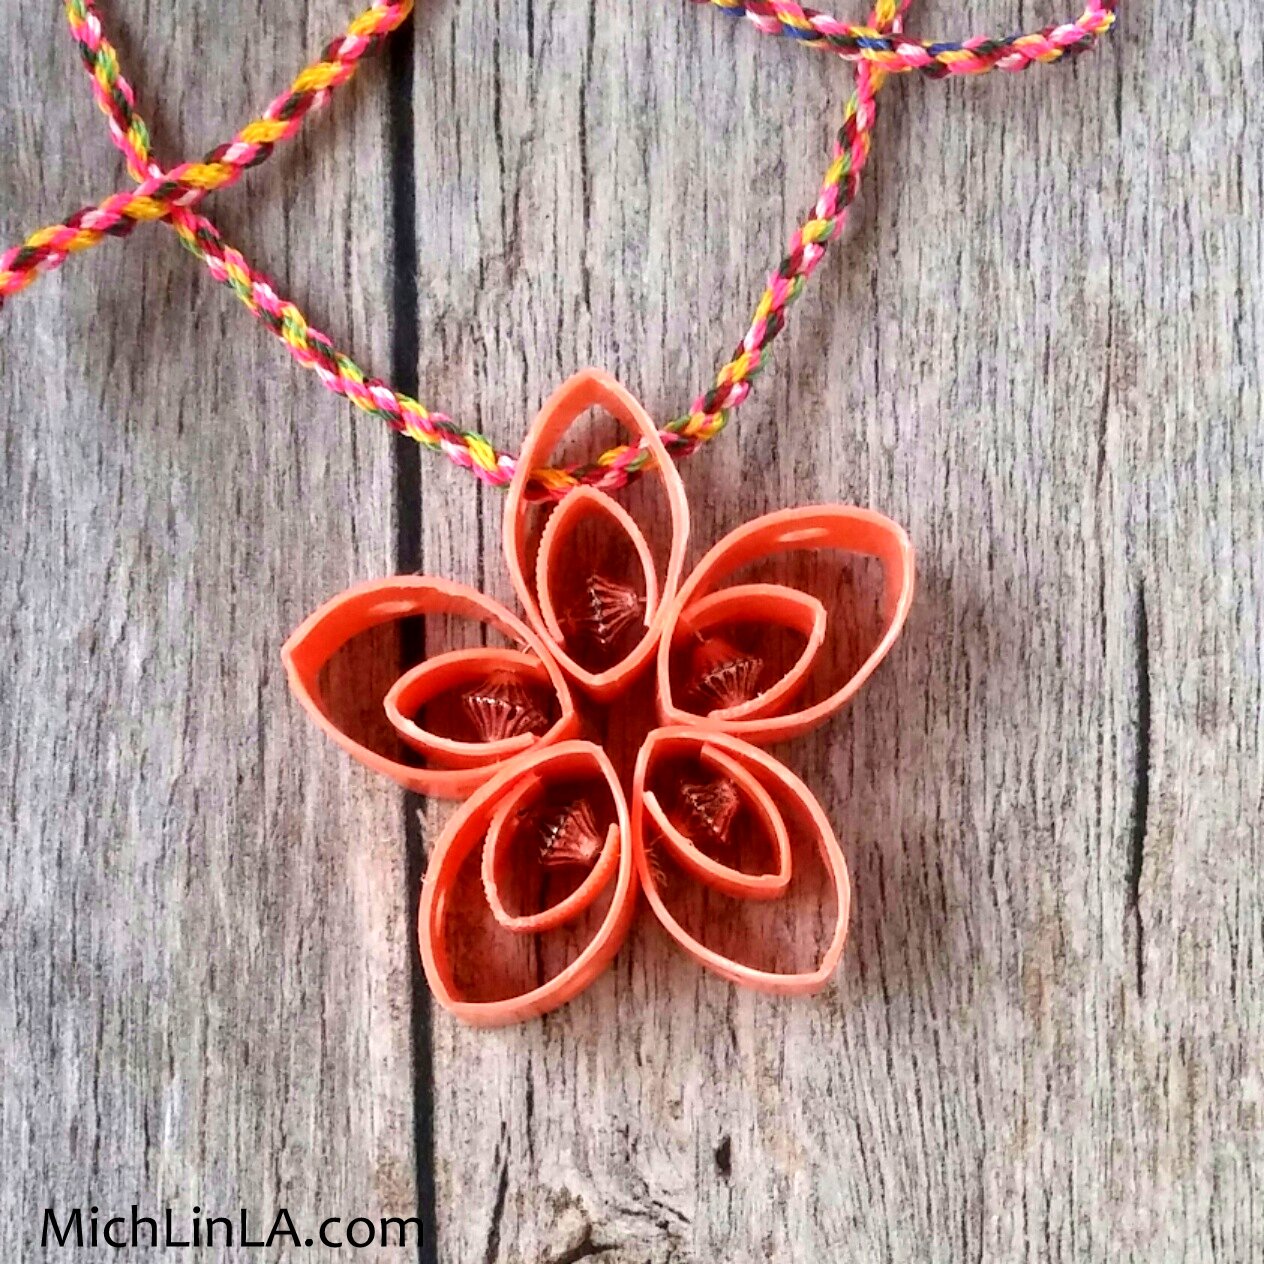
Here's another version, done up as a flower:
The Mystery Things are the curvy coral-pink shapes. What are those mysterious items? Something you've seen before? Something you have never met in your entire life? Or something from another dimension in time and space? Hmmmm...I wonder how many of you will get this one.
You know the rules. Absolutely NO peeking until you have your guess firmly in mind.
Got your answer? Okay - now you can scroll down to see the reveal.
*
*
*
*
Keep going...
*
*
*
*
Ready? You still have time to change your guess...
*
*
*
Okie dokie! Here it comes.
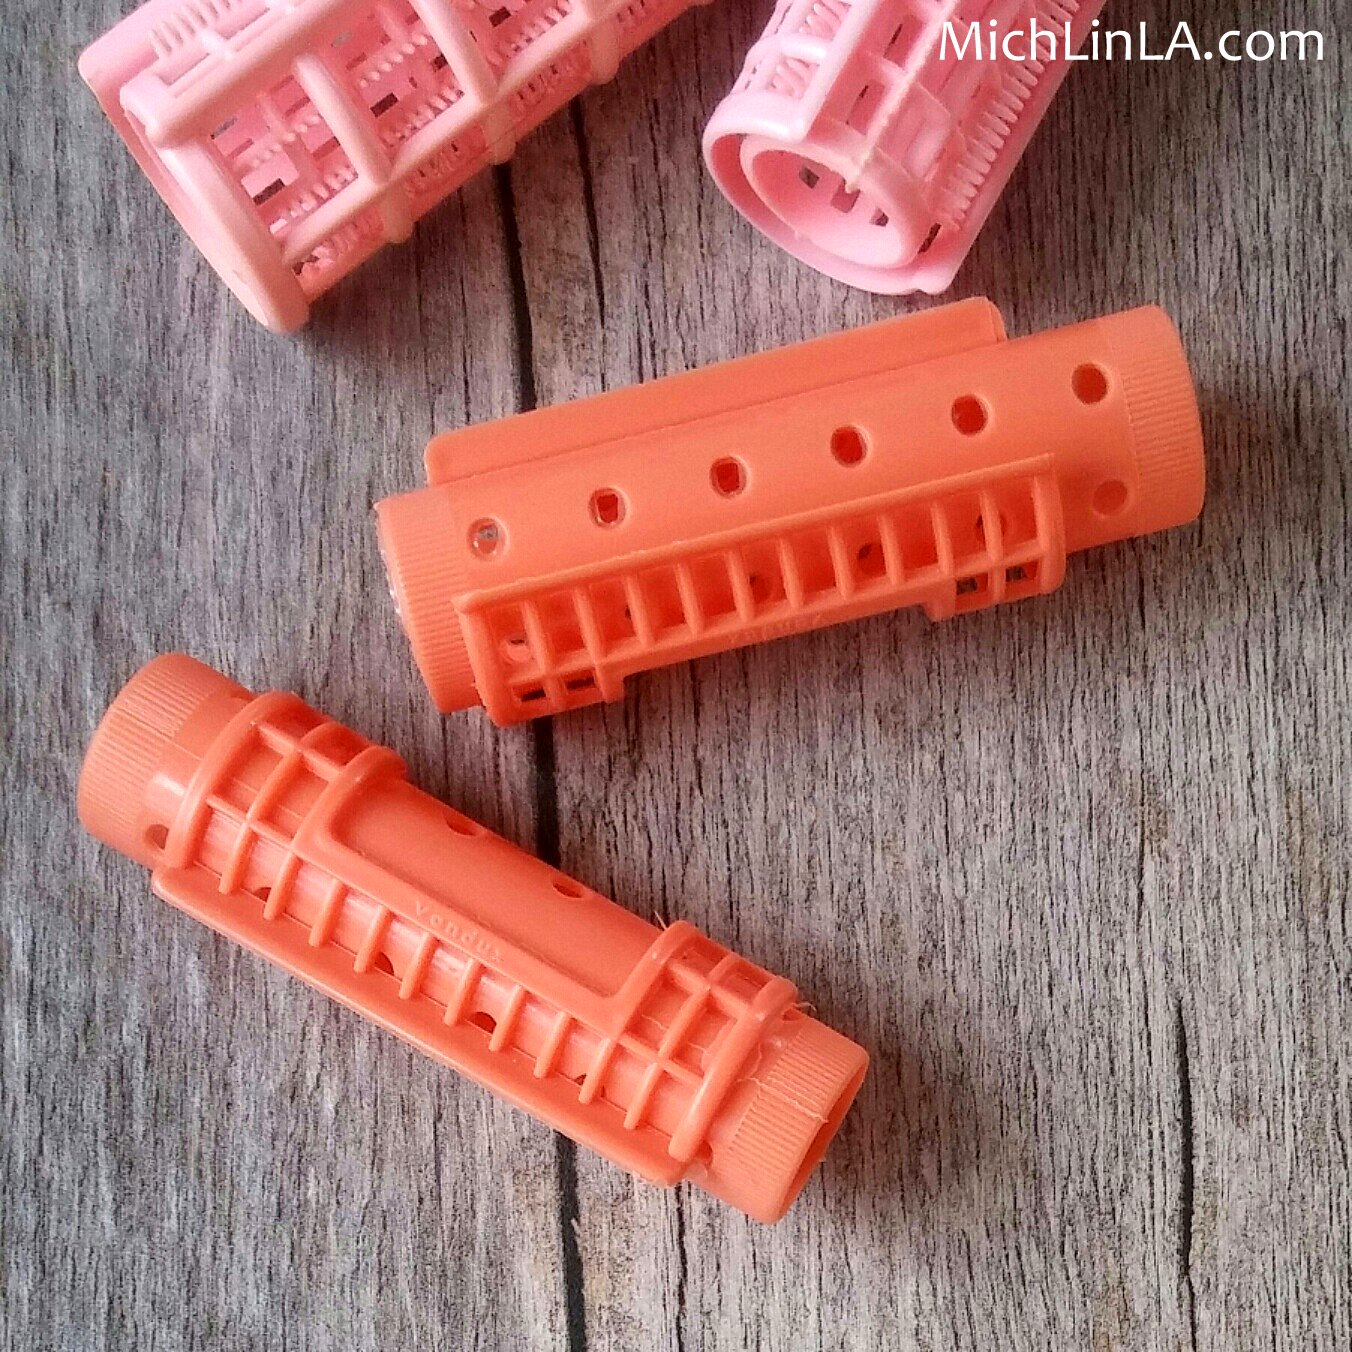
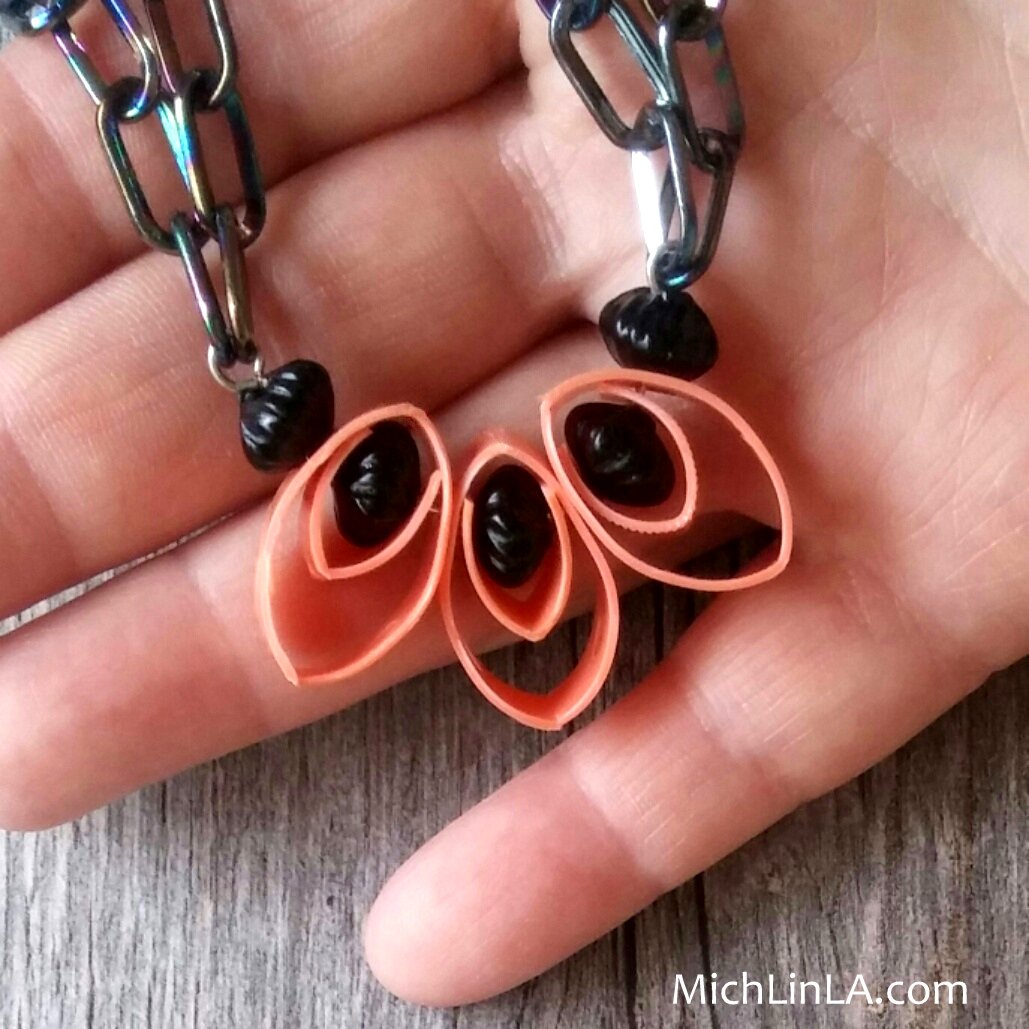
Behold the Mystery Thing!
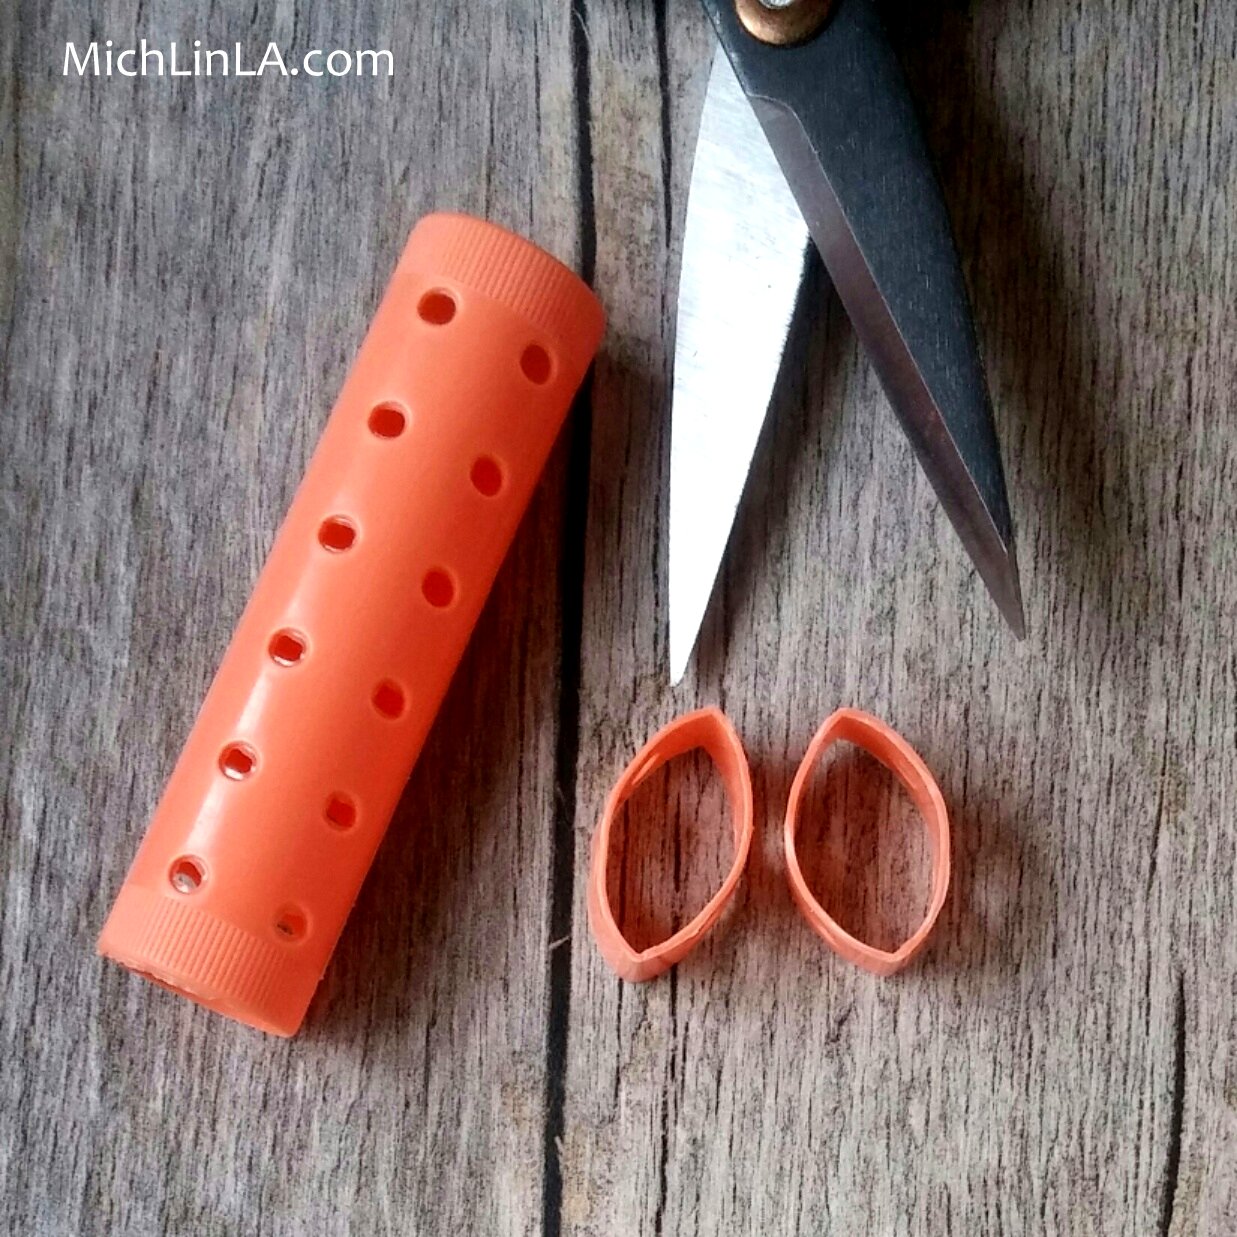
The inner parts of these vintage plastic hair rollers! Rescued from the 'free' box at a recent yard sale.
First thing I did was wash them in a solution of water and bleach. You know, because of reasons.
Then I snipped slices from the inner rollers, using garden shears.
Cutting the slices had the effect of squishing the ends, forming that pointy-ended shape that looks like an eye. In two dimensions the shape is called a lens. When expanded into three dimensions, it is called a lenticular hyperboloid.
But you knew that.
Once I had a bunch of lenticular hyperboloids, I began to play. Stringing them together through the existing holes, in various combinations - seeing which way the shapes would hang together. Much fun! And I always love taking advantage of ready-made holes in things.
I'm quite pleased with my funny pink pendants.
I also did a Christmas ornament version of the flower, look!
Without beads in the center, it's nearly weightless, and so darn cute! I'm going to use up a whole bunch of rollers making these.
So - who guessed this one? If you thought it was something different, what was your idea? Do tell!
Next time, another hair roller idea, something so completely awesome that...well, you'll see. Click right here to check it out!
Until we meet again...


