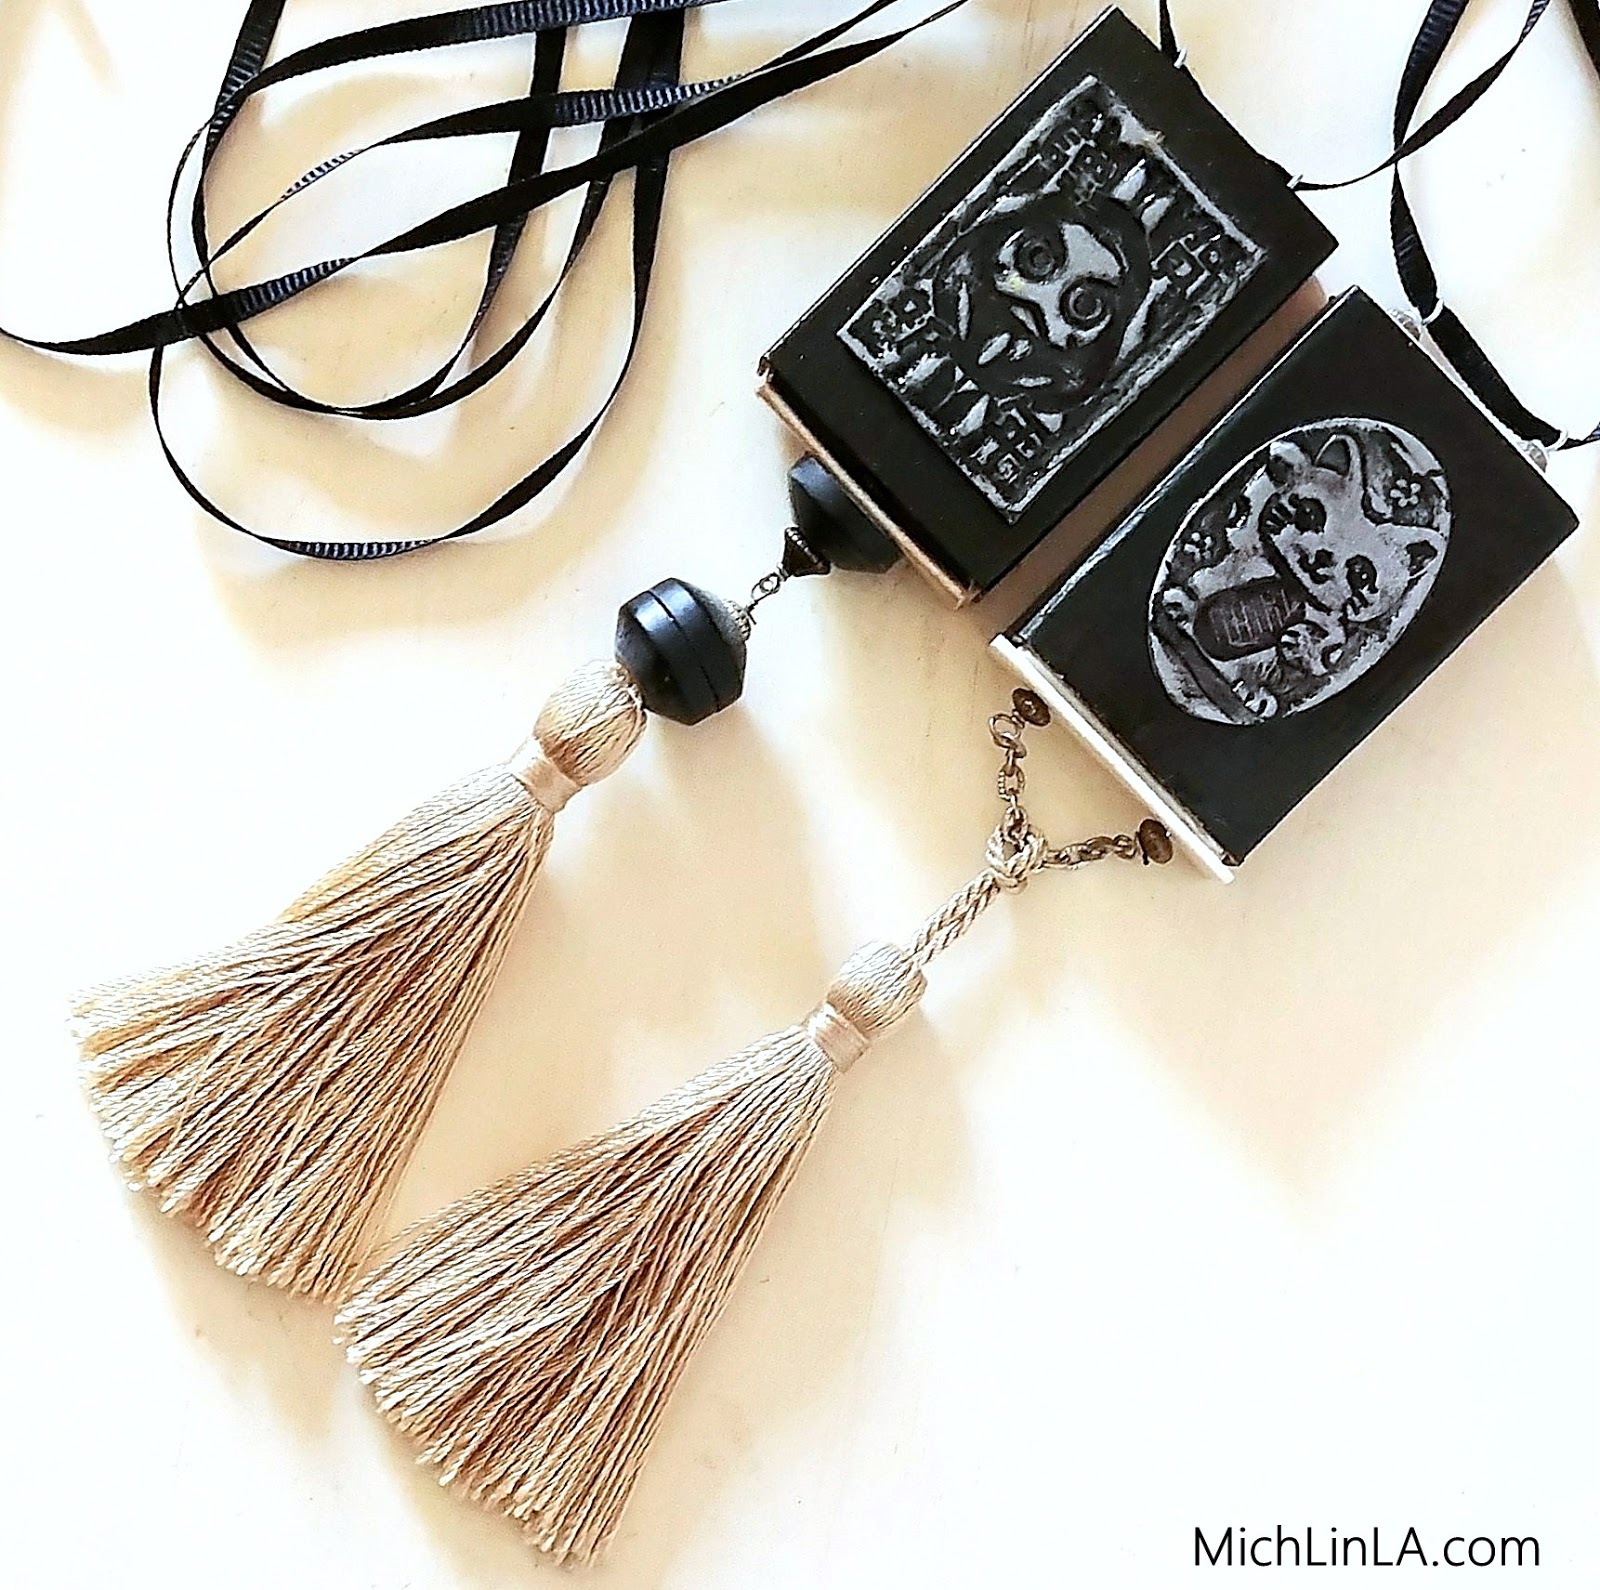
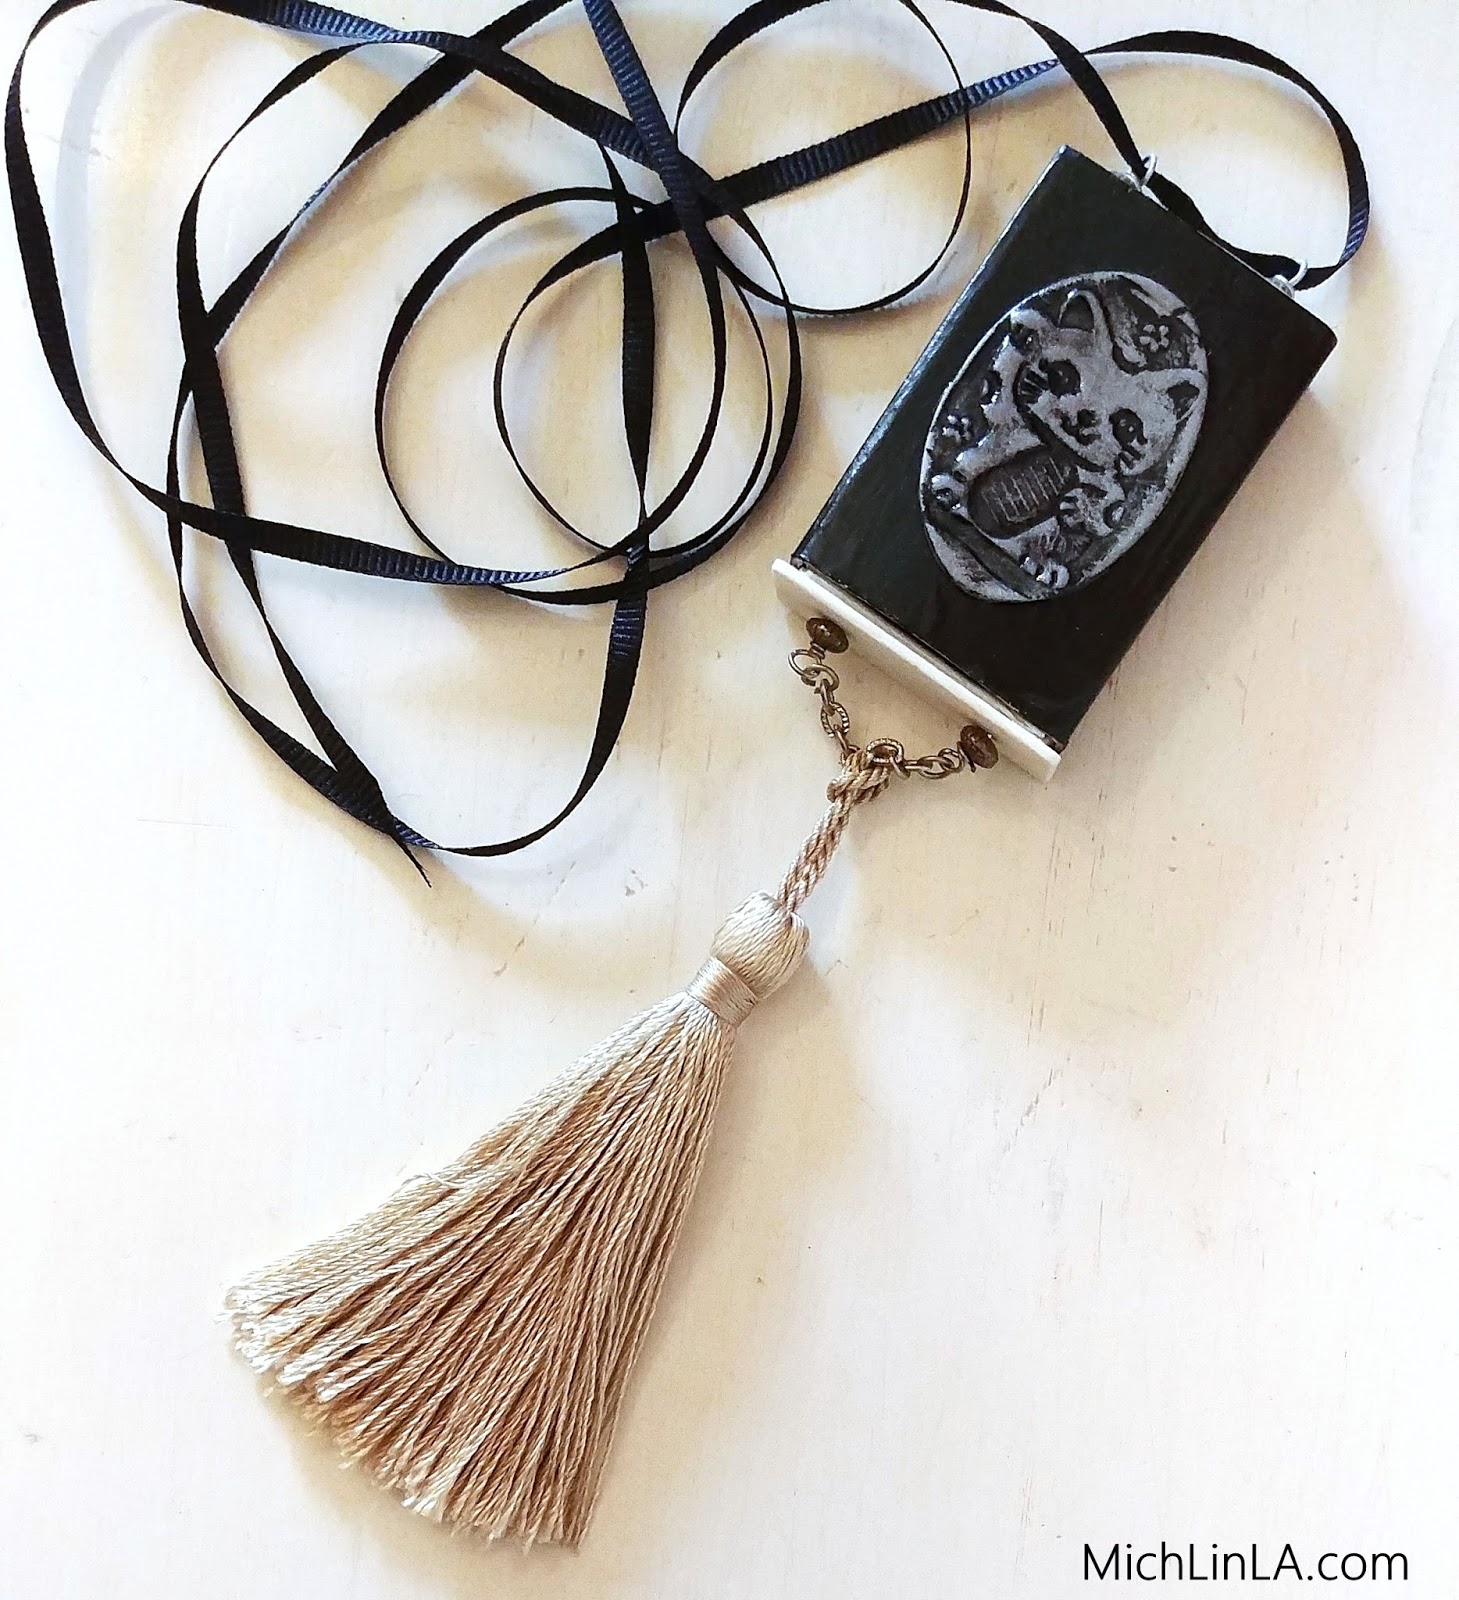
Greetings, friends! I propose that it's time to start thinking about handmade gifts. This recycled necklace gift can charm nearly anyone: a simple matchbox turned into a secret-compartment pendant.
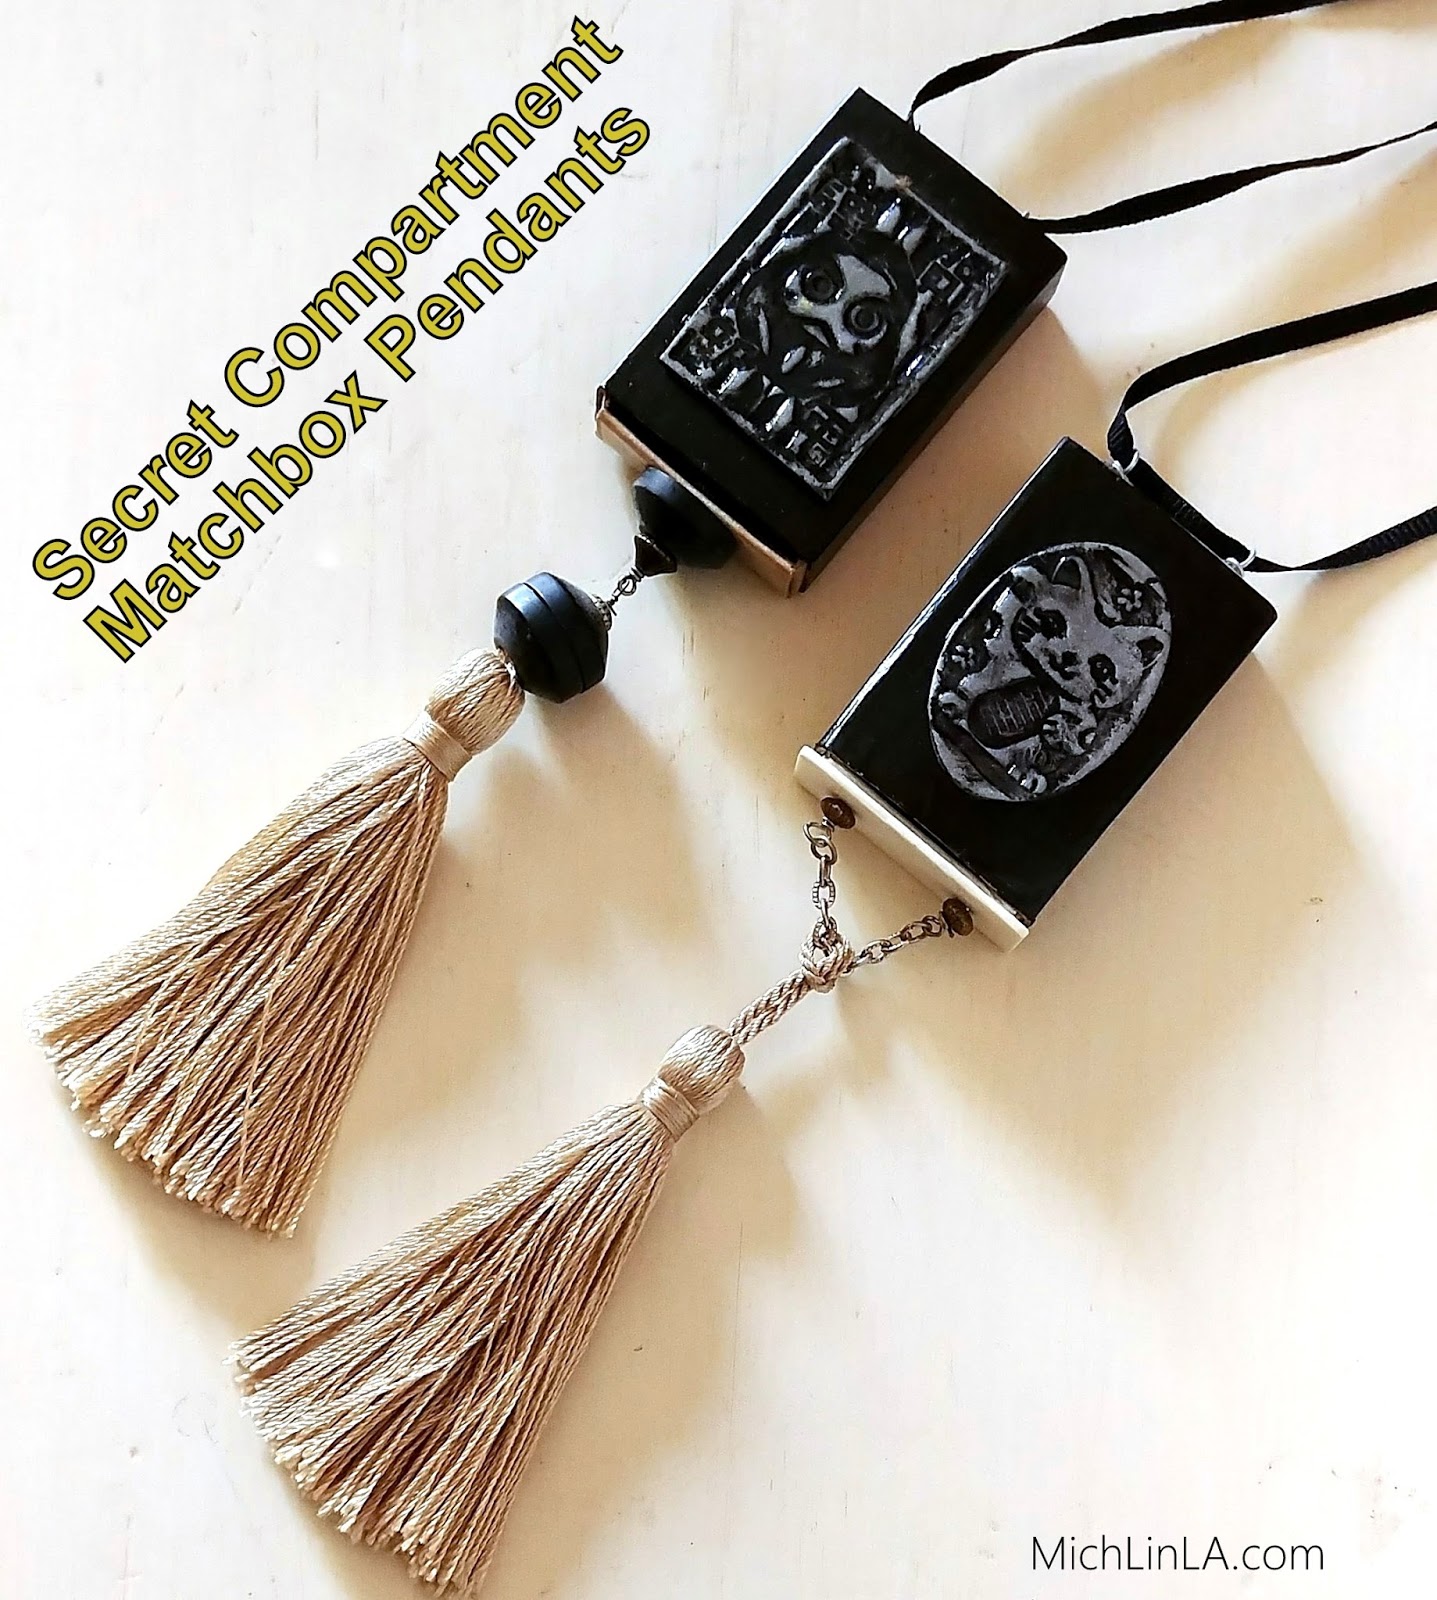
The awesomeness is threefold. 1.) It's simple and eco friendly. 2.) Customize the art to your loved one's style and interest. 3.) Because there's a tiny secret compartment, you can include an additional mini-gift inside! Here's the secret drawer:
Aren't they fun? Want to make one? Here's how.
Tools:
jewelry pliers
wire cutters
something pointy for poking holes
Materials:
a matchbox
clear packing tape
acrylic craft paint
craft wire
1 or 2 headpins
a tassel
glue or mod podge
1 or 2 accent beads OR a strip of recycled plastic
spacer beads
optional: a bit of chain
The DIY
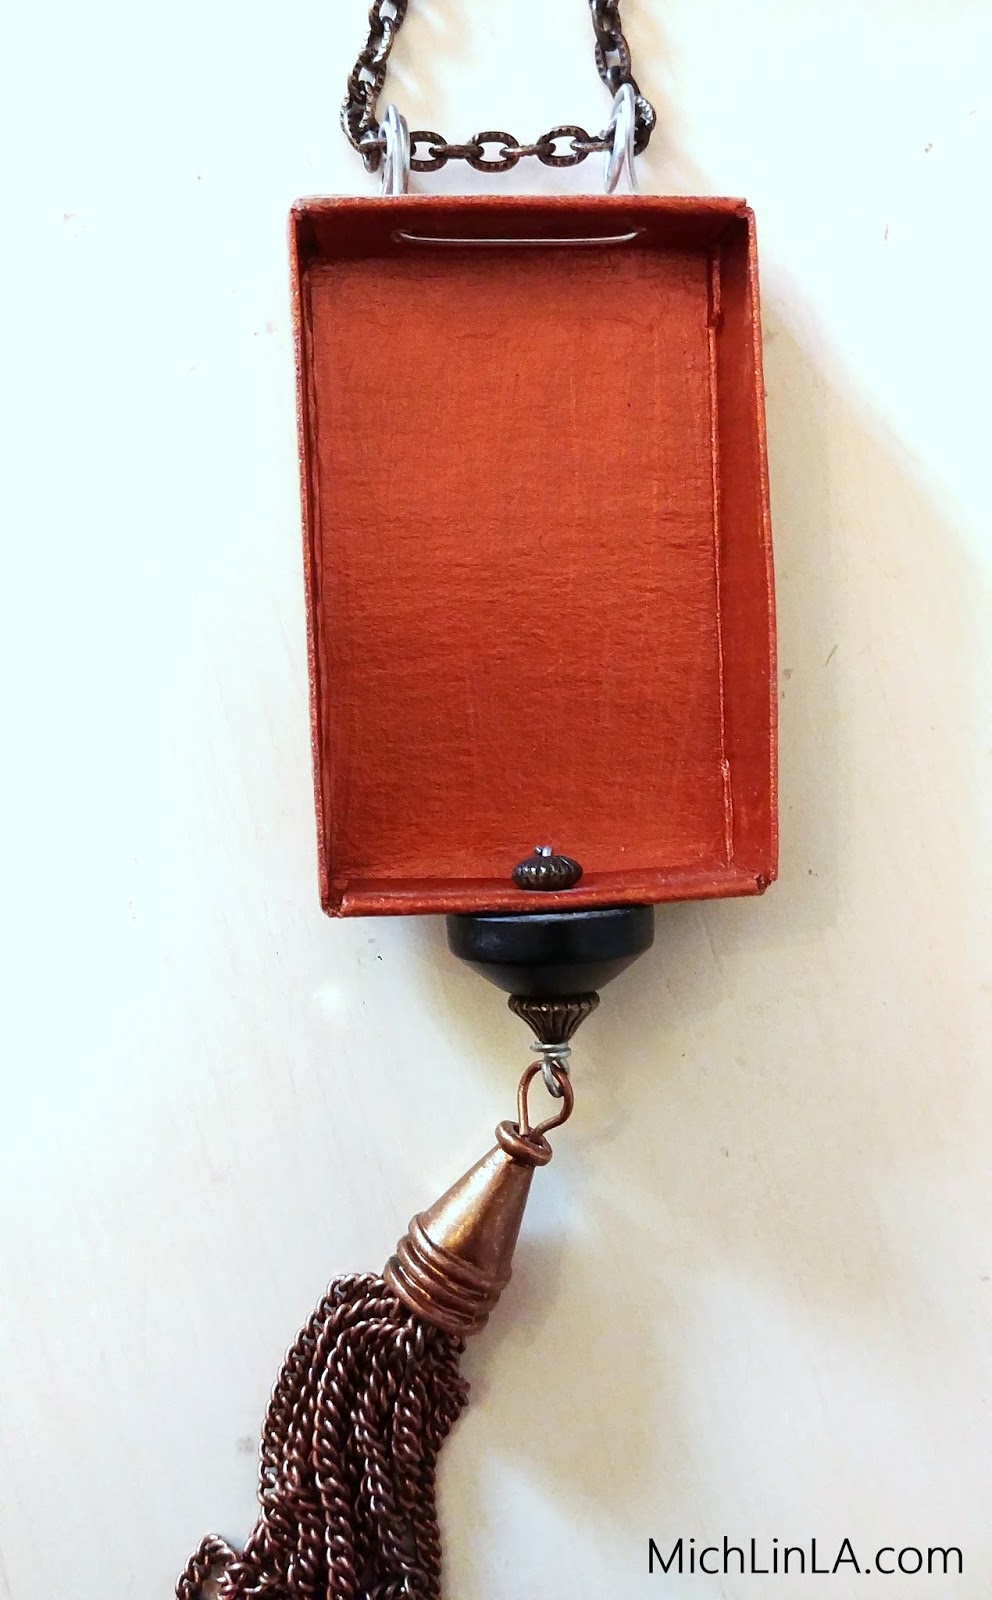
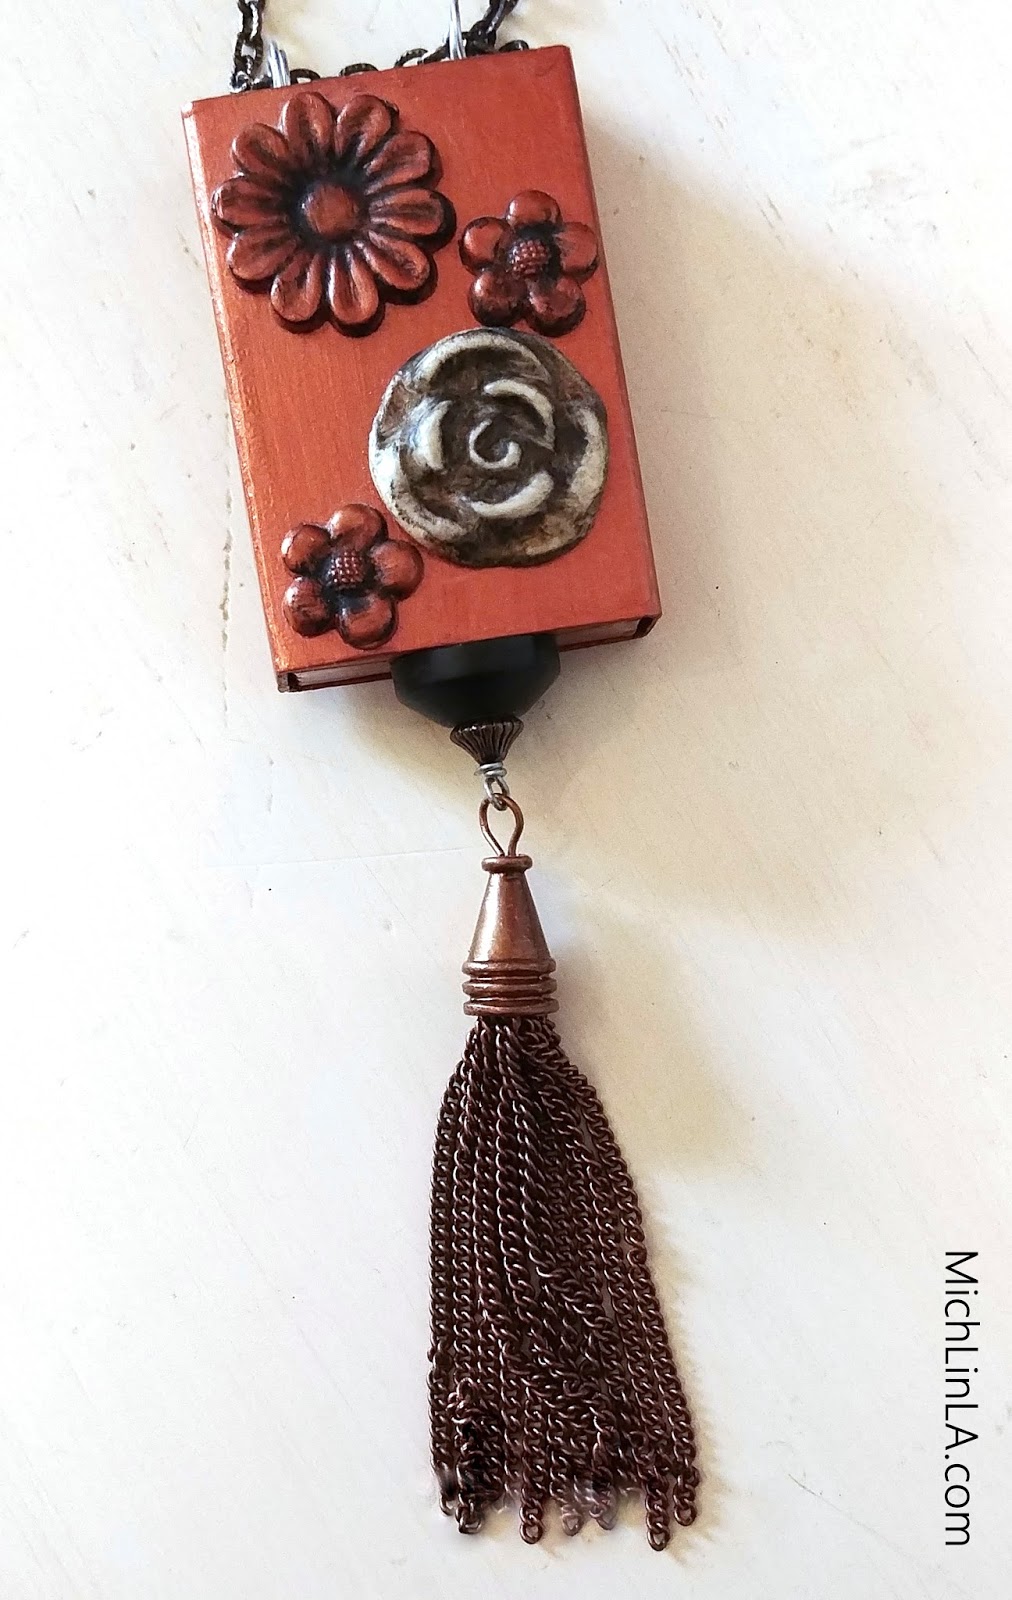
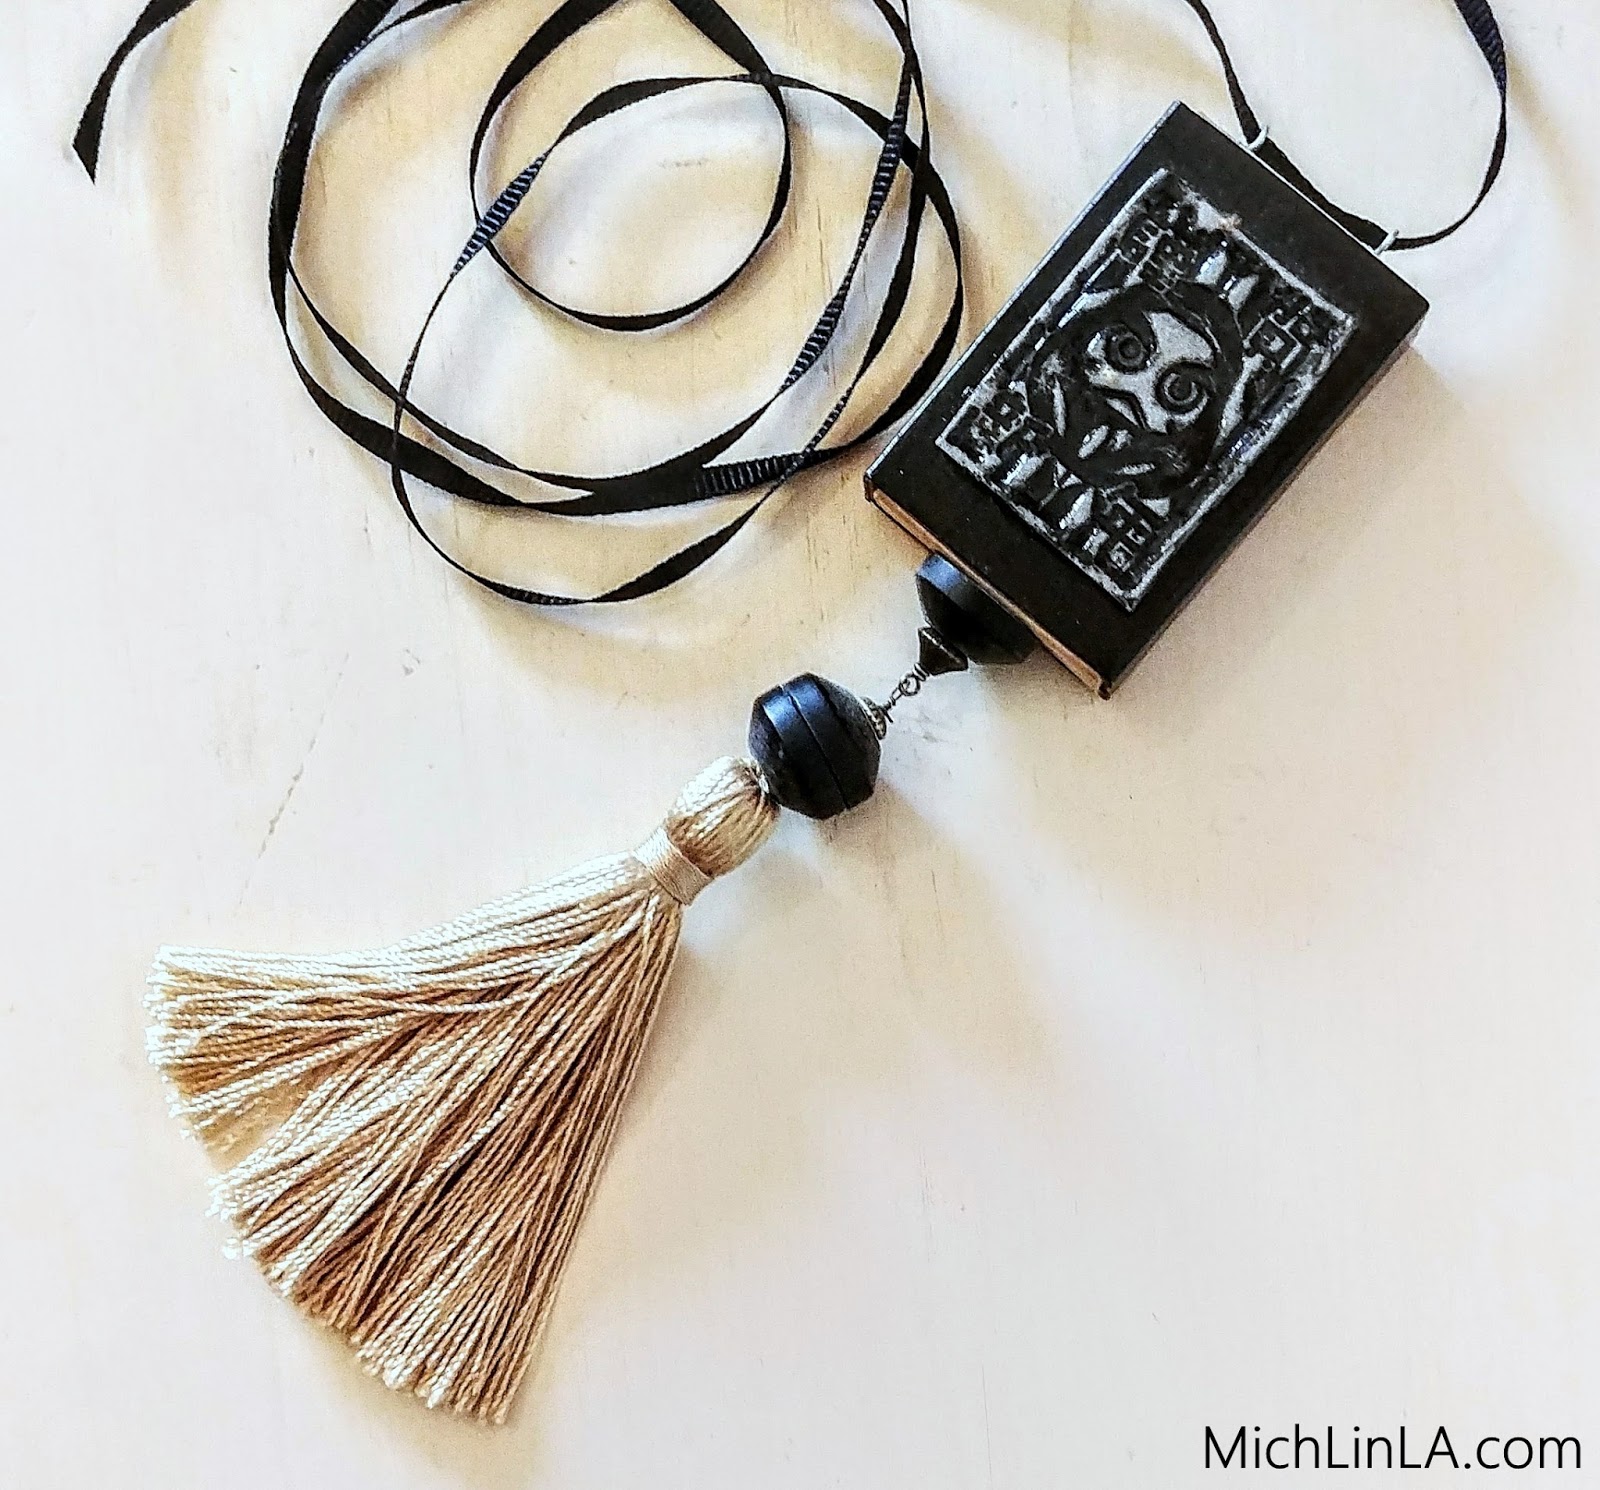
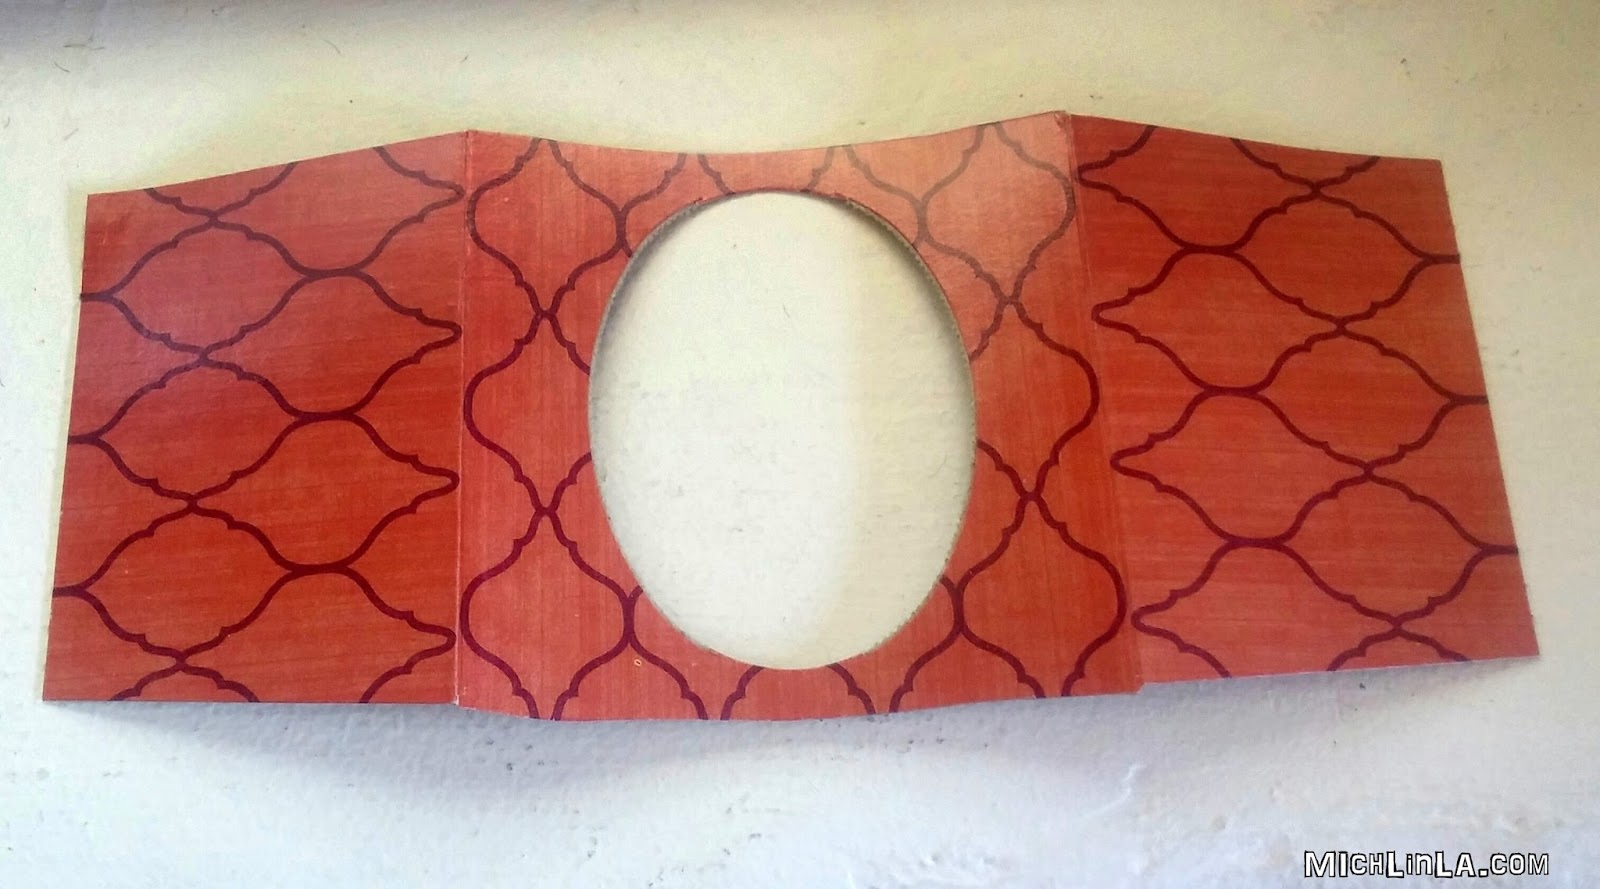
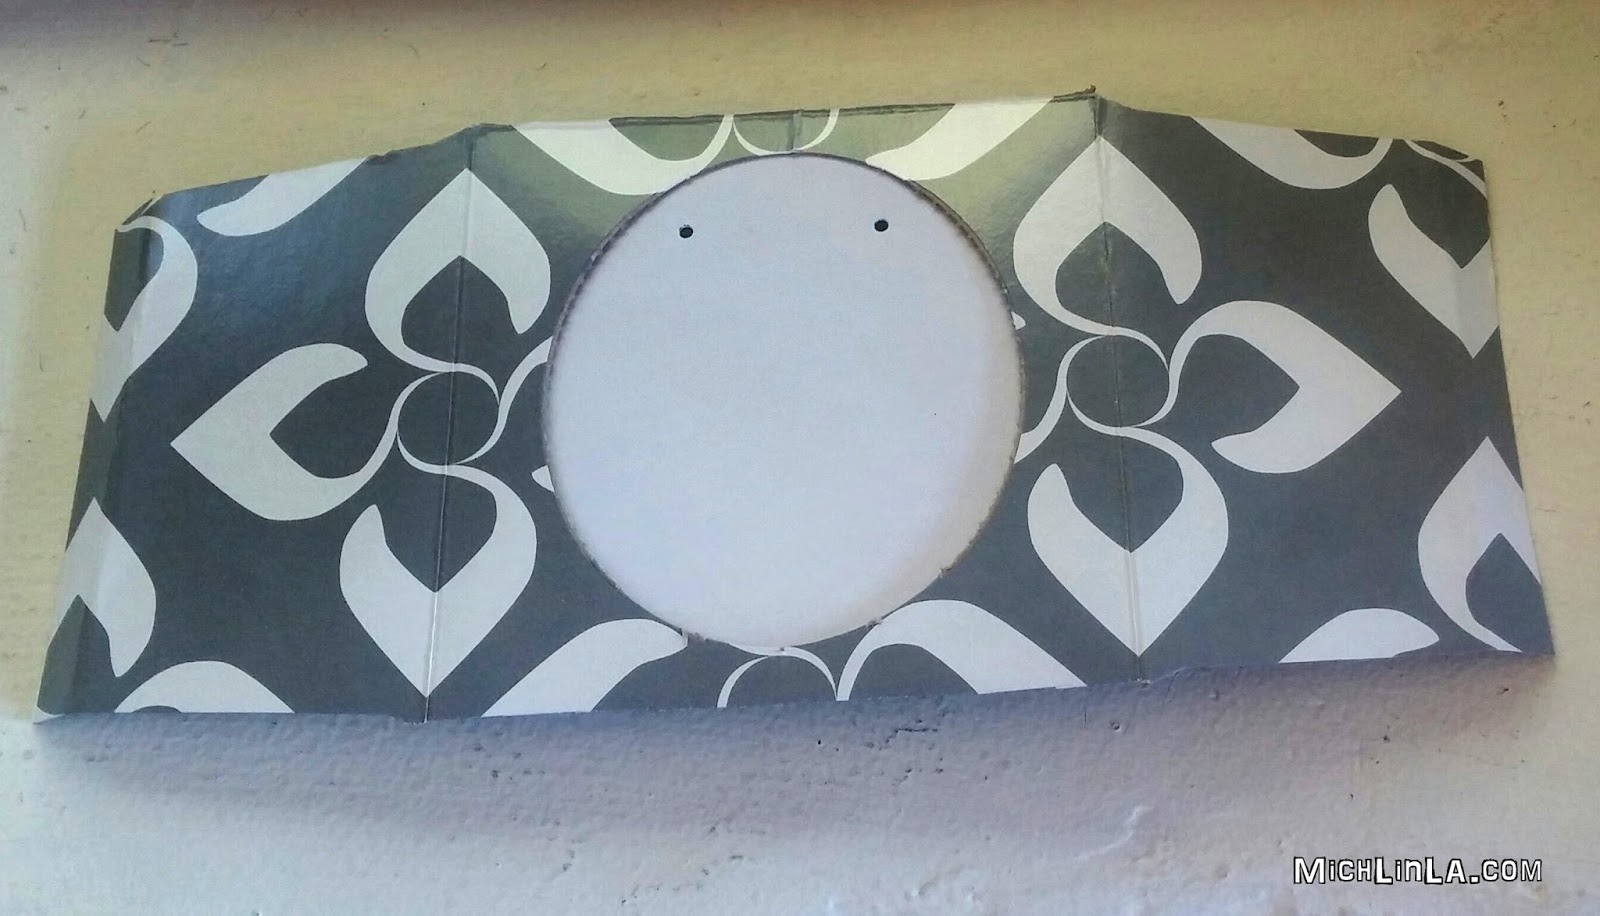
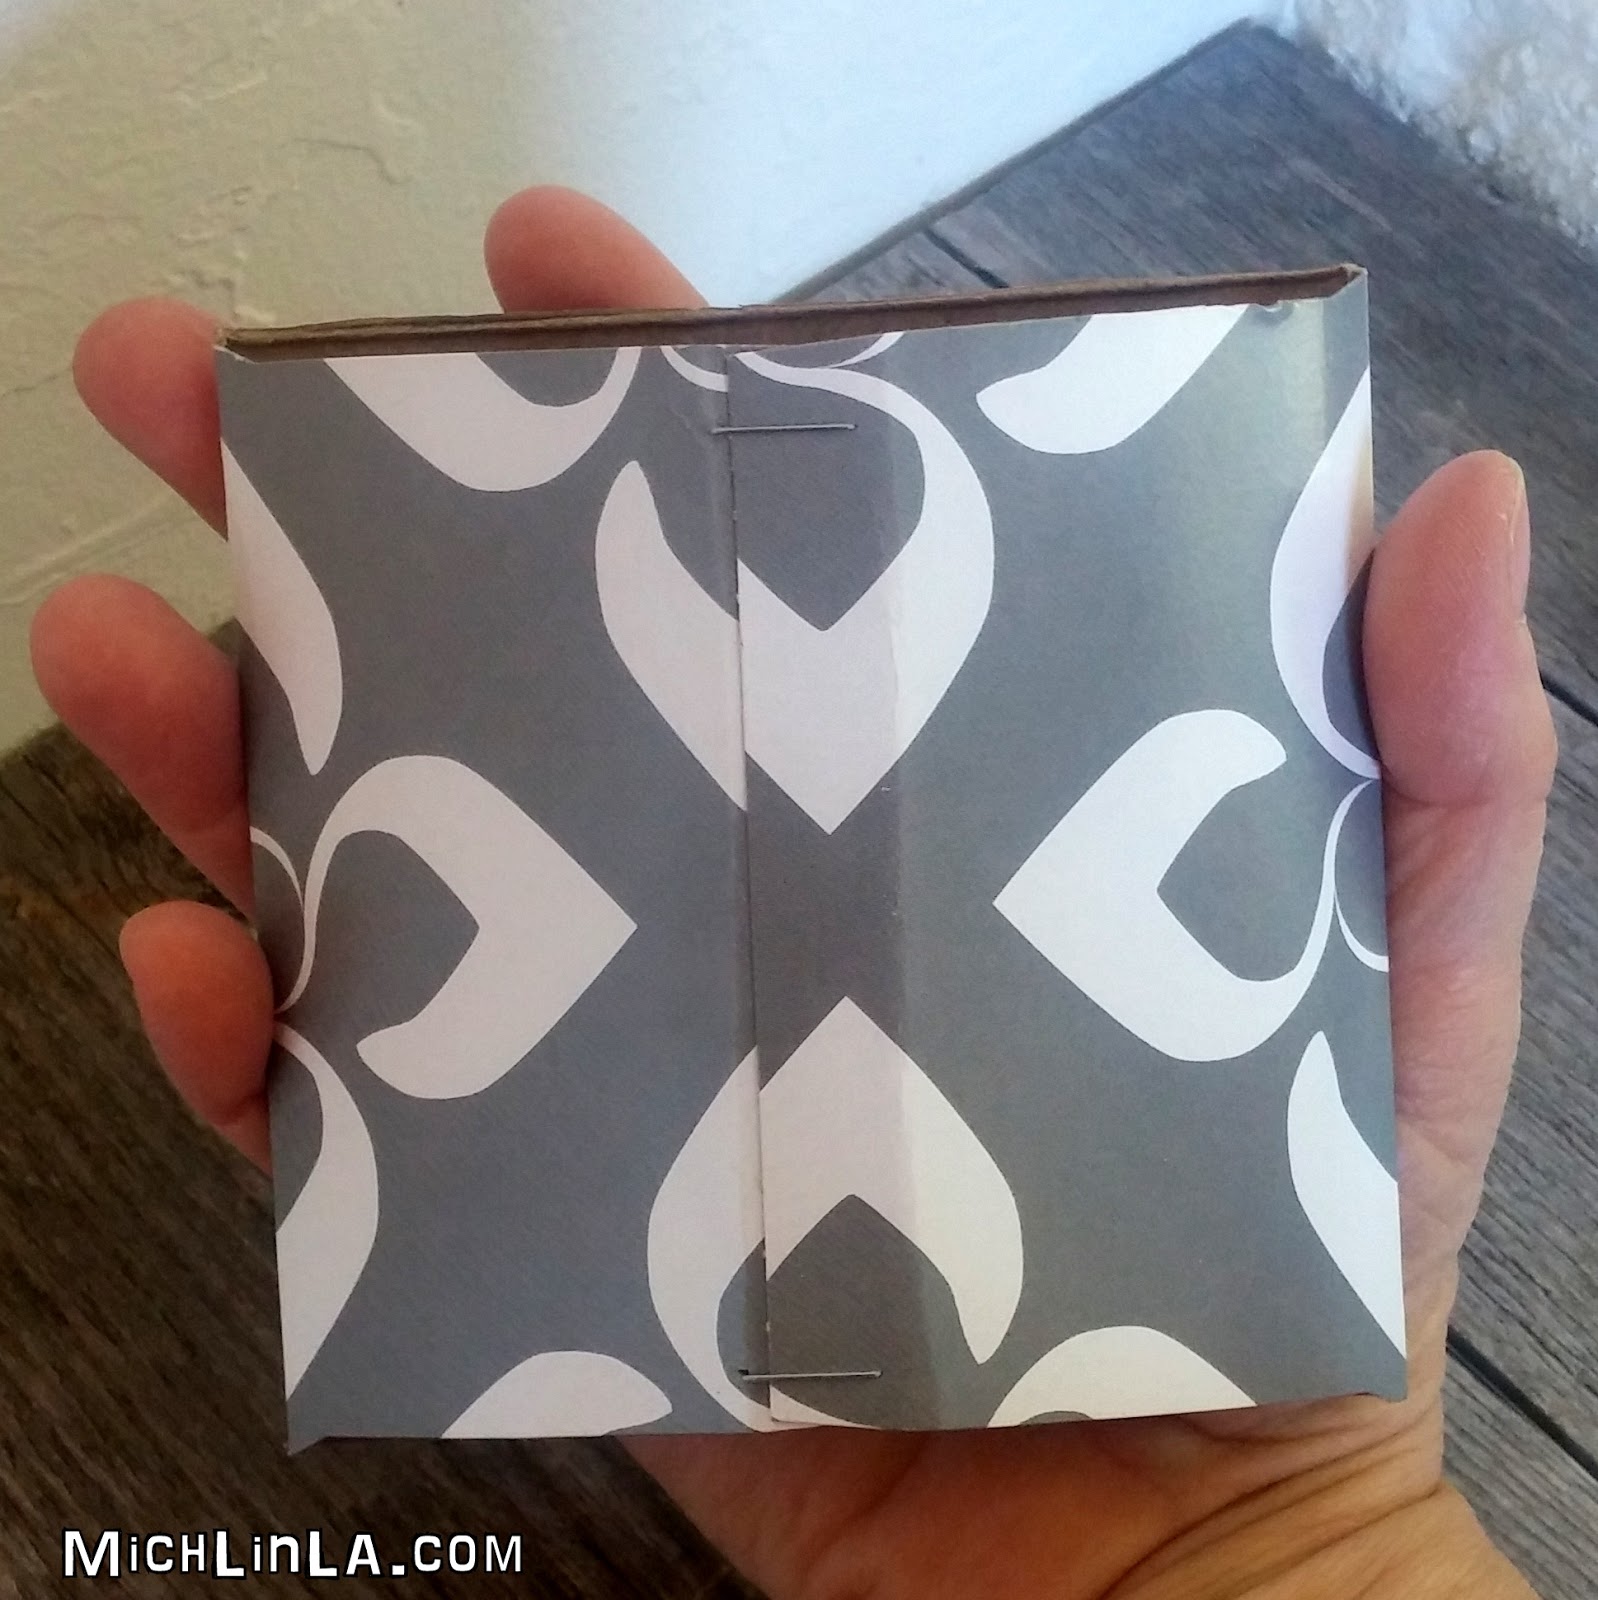
1. Embellish. Paint the matchbox's outer sleeve. If you like, paint the inner drawer as well. Then embellish! Adhere something delightful to the top of the matchbox - anything you like. (A few ideas at the end of the post.)
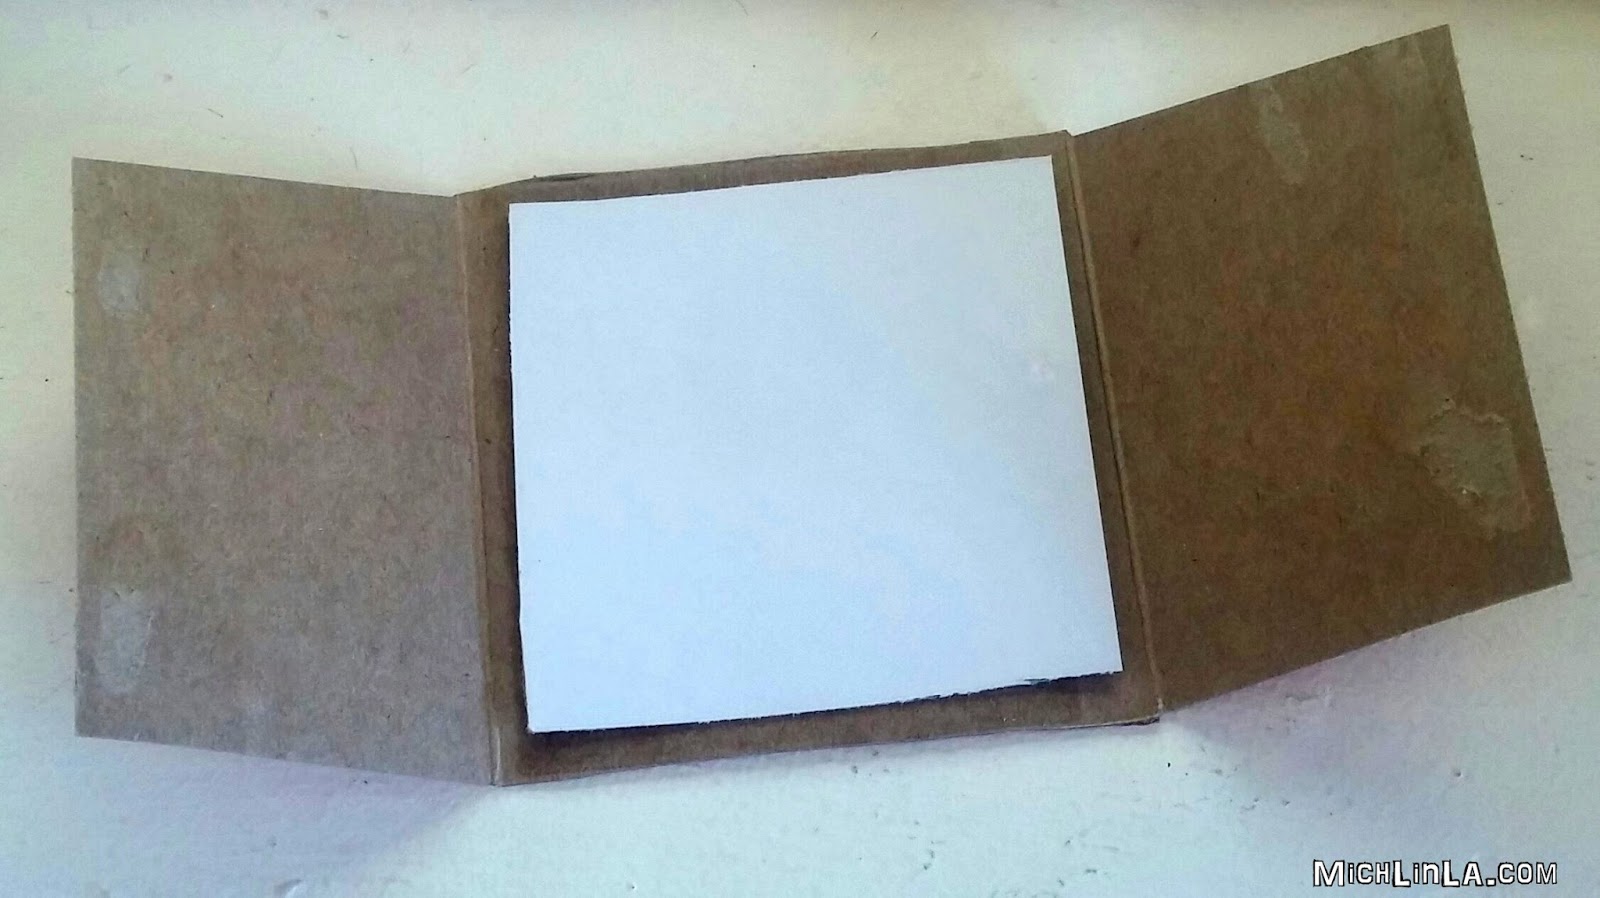
2. Reinforce. Reinforce the matchbox drawer with clear packing tape: cut 2 strips and crisscross them in the back, wrapping the tape over the edges and into the inside of the drawer. Reinforce the inside of the matchbox sleeve with a bit more hidden tape (that you tuck inside and smooth down).
3. Turn it into a pendant. First, poke two holes in the top of the inner drawer. Thread craft wire through the two holes and make two loops at the top. It's easy! Like this:
To finish the bottom, there are two versions.
ONE HOLE VERSION: At the bottom of the inner drawer, poke one hole in the center. Add a spacer bead to a headpin, thread it through the hole, add an accent bead and make a loop. Add a tassel. It will look like this:
TWO HOLE VERSION: At the bottom of the drawer, poke two holes. Using the same headpin method as above, add either two accents beads or, as in the Lucky Cat version seen below, a rectangle of plastic with two matching holes. Make two loops underneath. Add a bit of chain, with a tassel suspended in the center. Like this:
Functional Note: the accent beads or plastic strip should be just a bit wider than the matchbox. This prevents the sleeve from sliding off. (My accent beads in these examples were repurposed rubber washers, because I liked how they looked. But any bead is just fine.)
Ideas for how to embellish the pendant:
Modpodge some original or found art.
Paint it, glitter it, doodle it.
Glue stuff on, like charms or buttons.
Add a polymer clay panel. (I made my Japanese-themed panels from polymer clay, impressed with rubber stamps I bought at a 100 yen store in Tokyo.)
Ideas for mini gifts inside the matchbox:
Photos
Love notes
Funny coupons to be redeemed
Candy
3 carat diamond earrings
Ca$h
Who can suggest some more tiny gifts for inside?
Alrighty, you guys - thanks for visiting, hope you enjoyed this one!
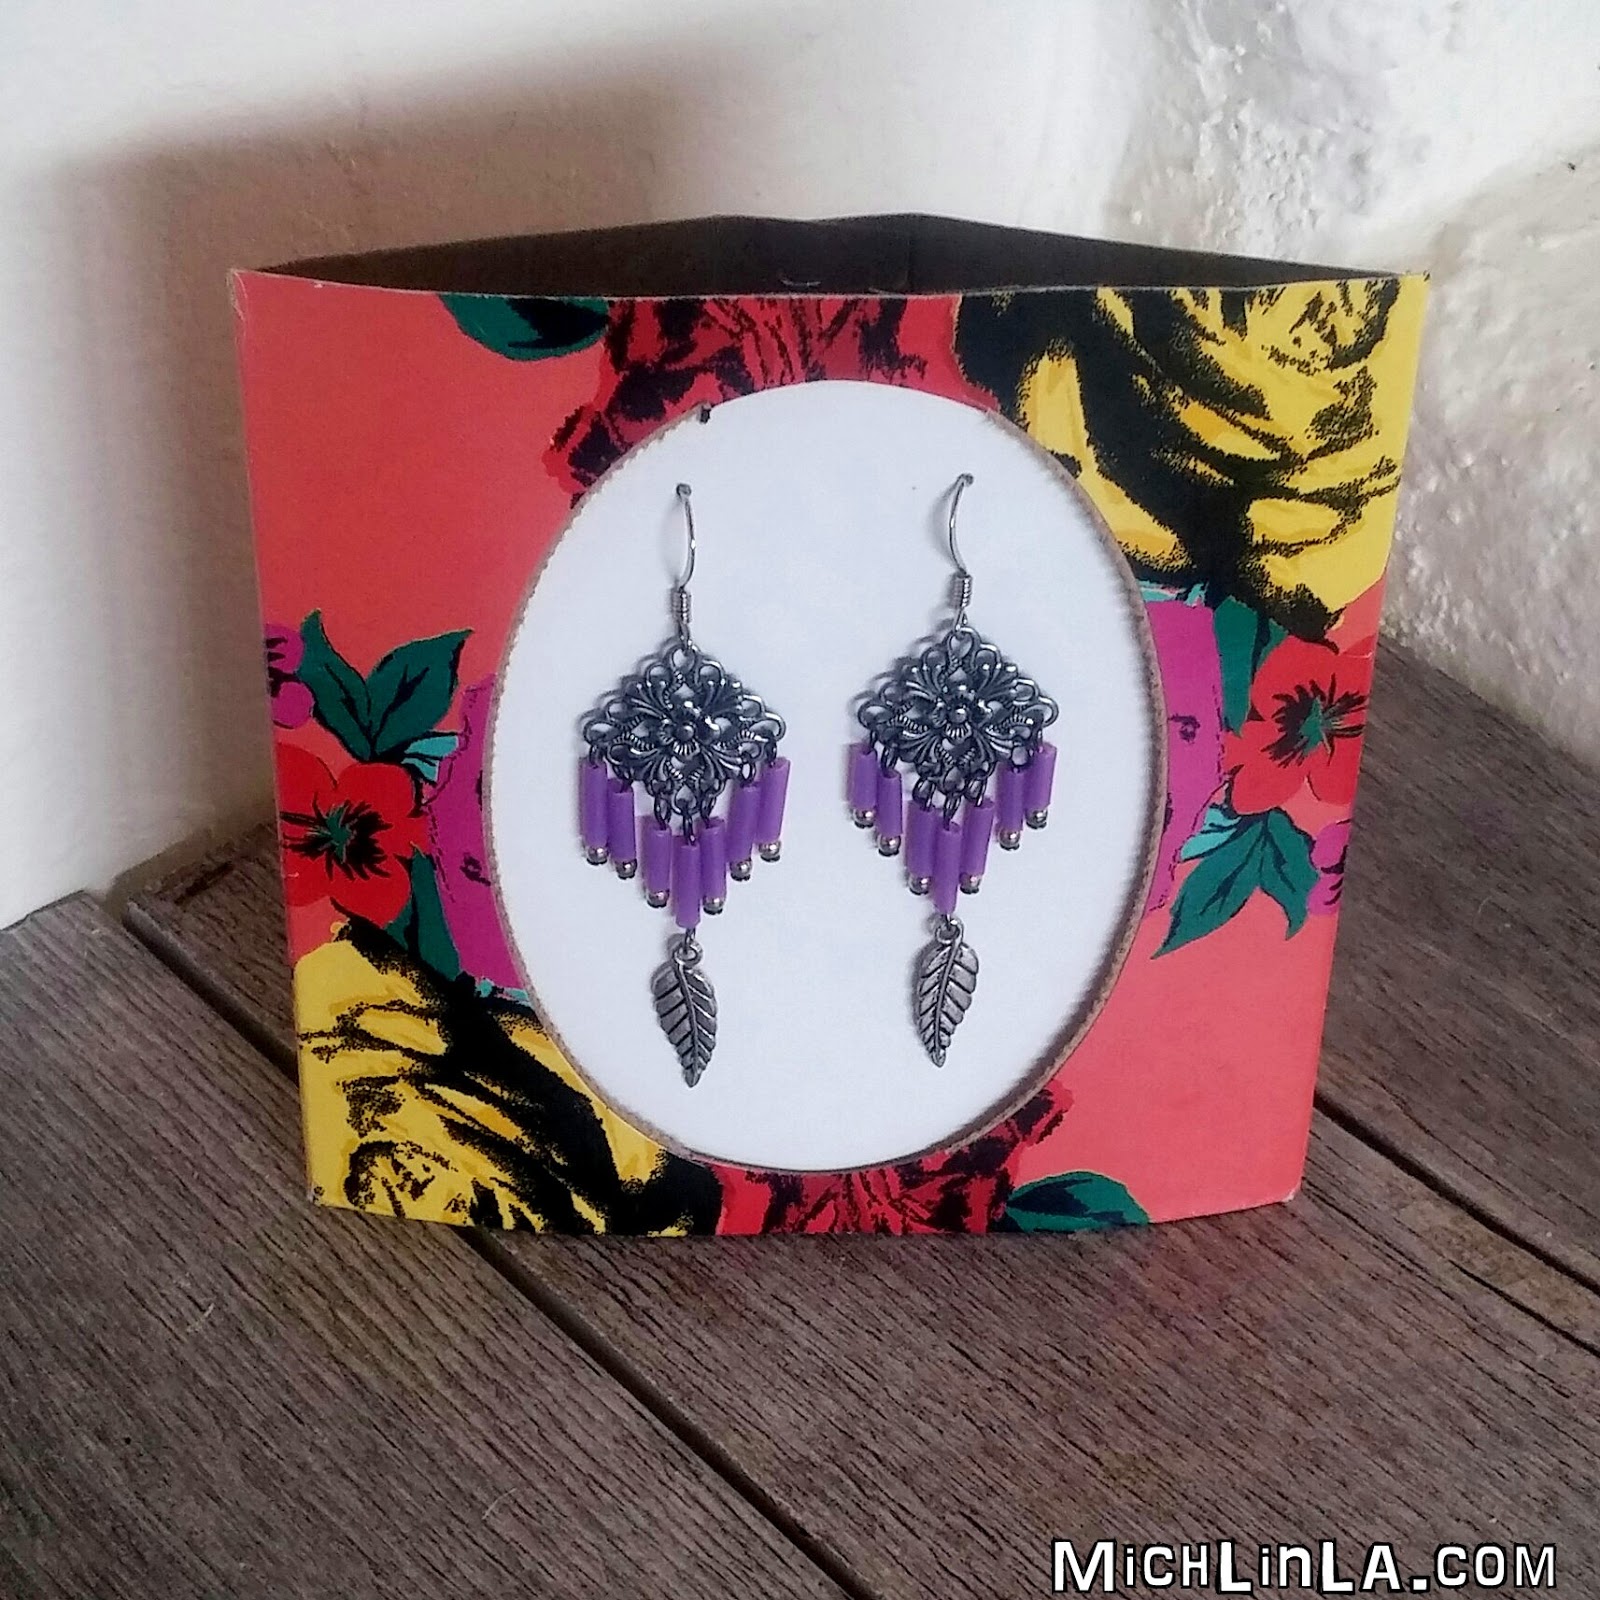
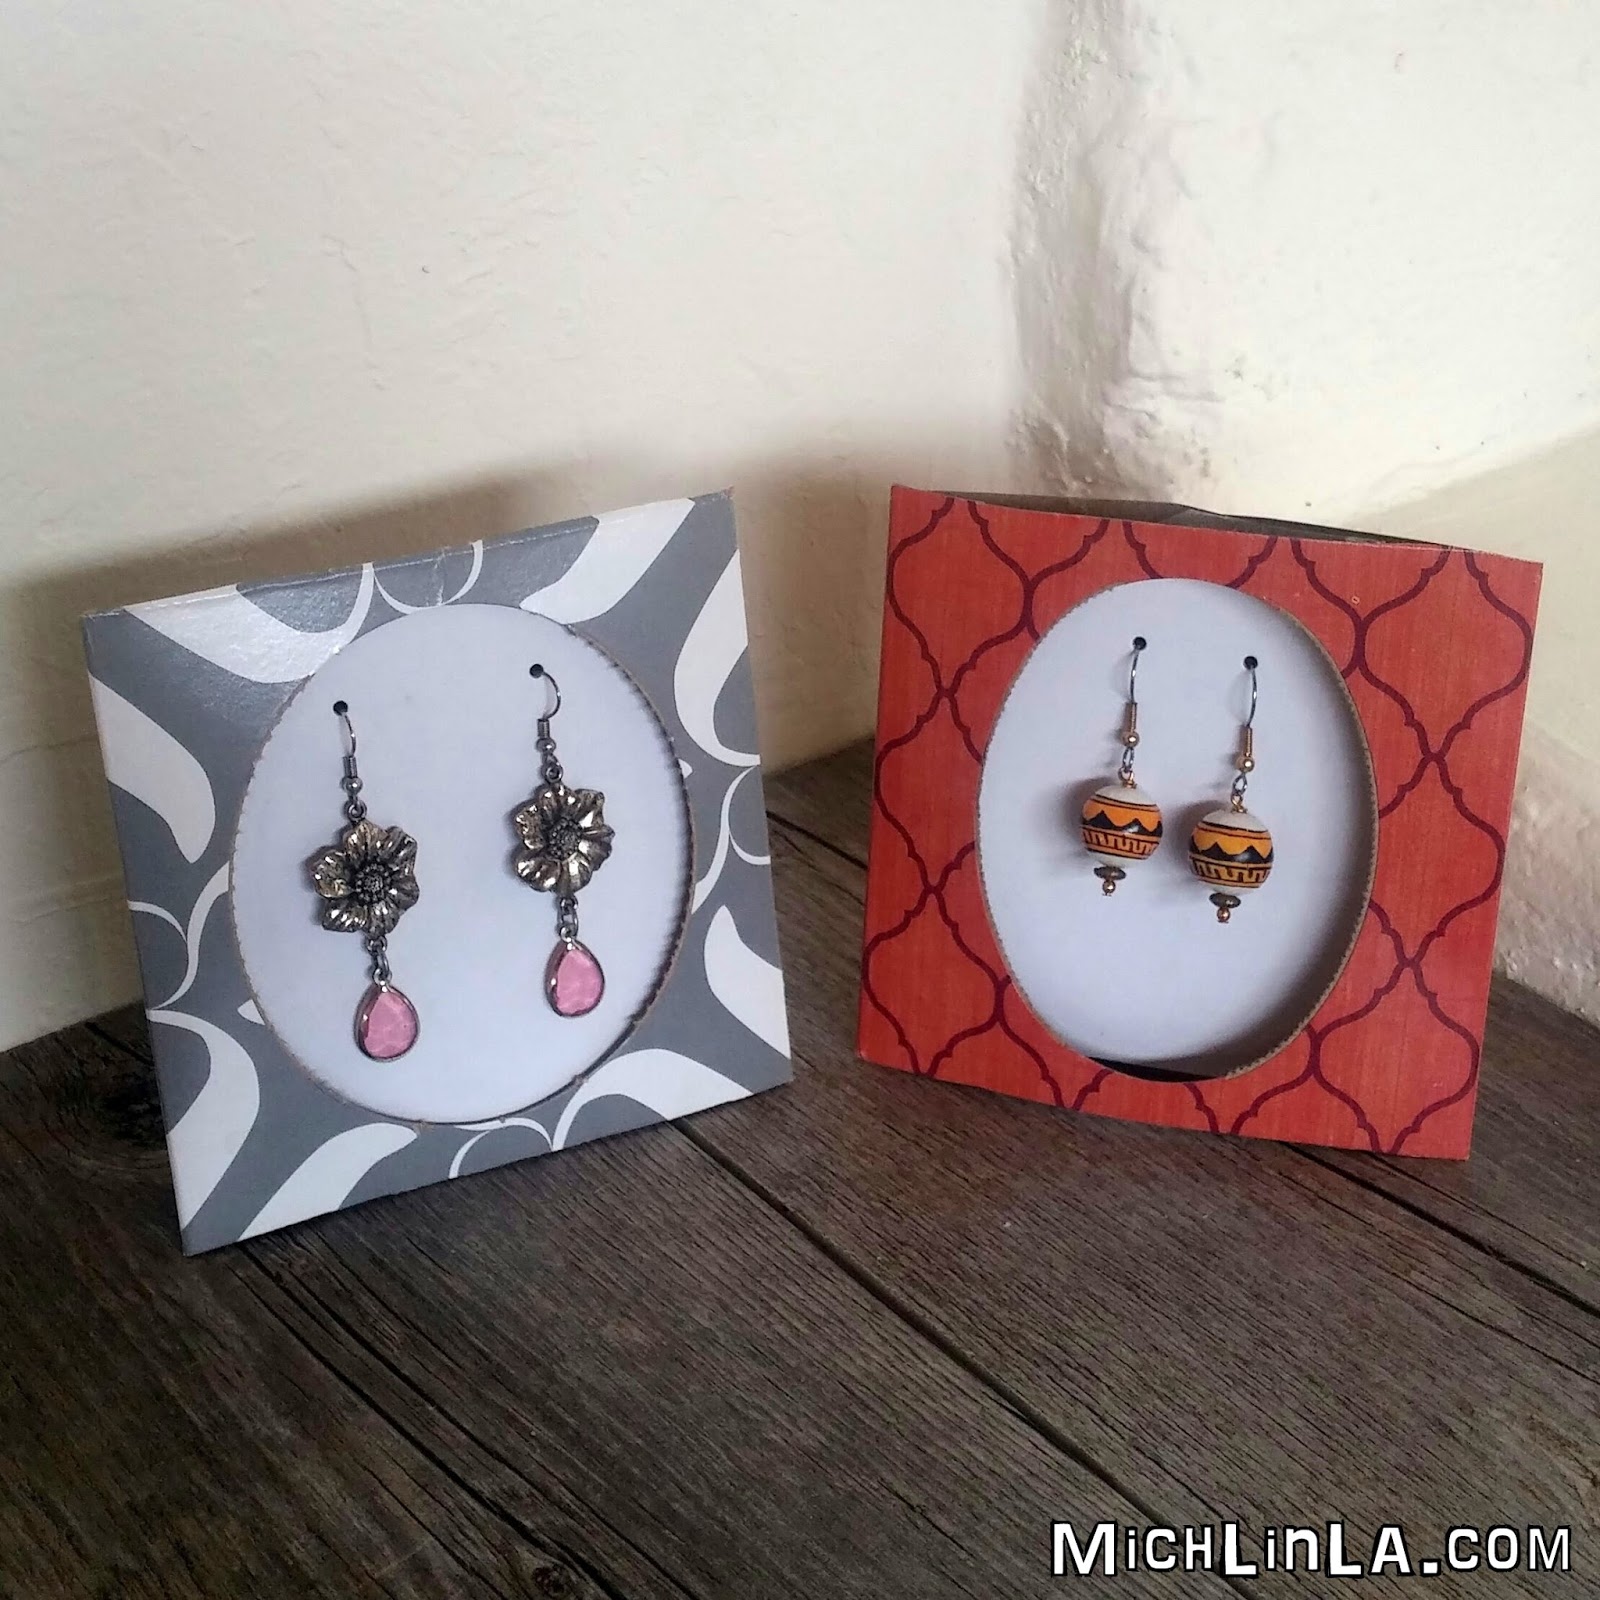
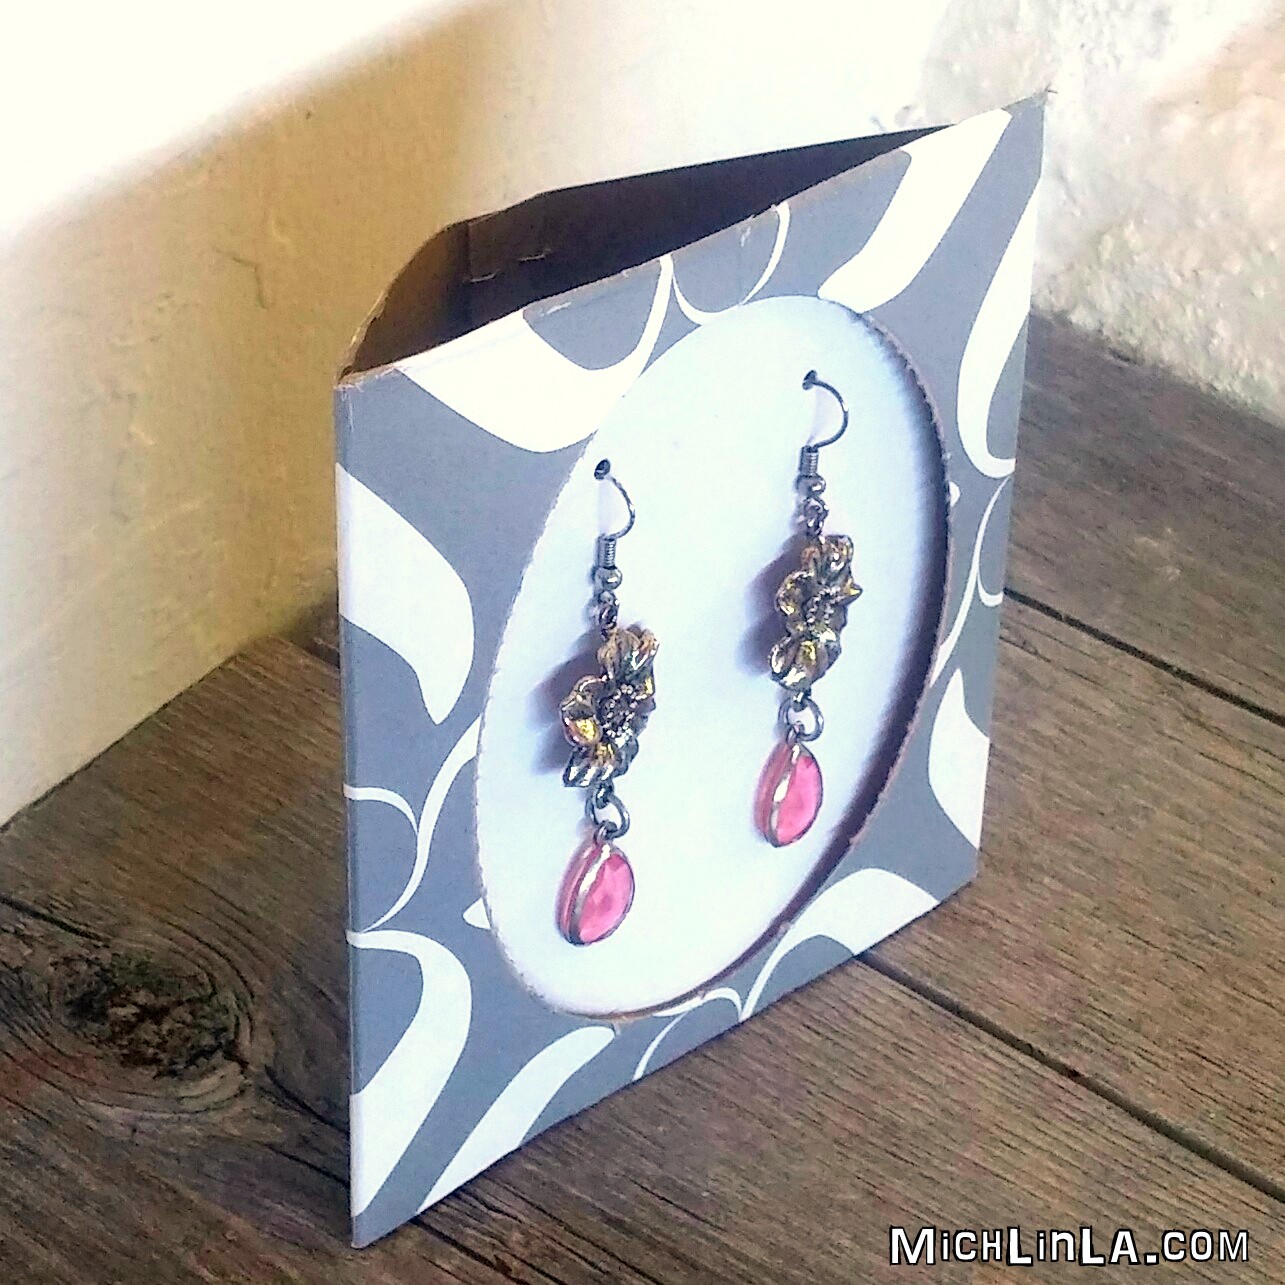
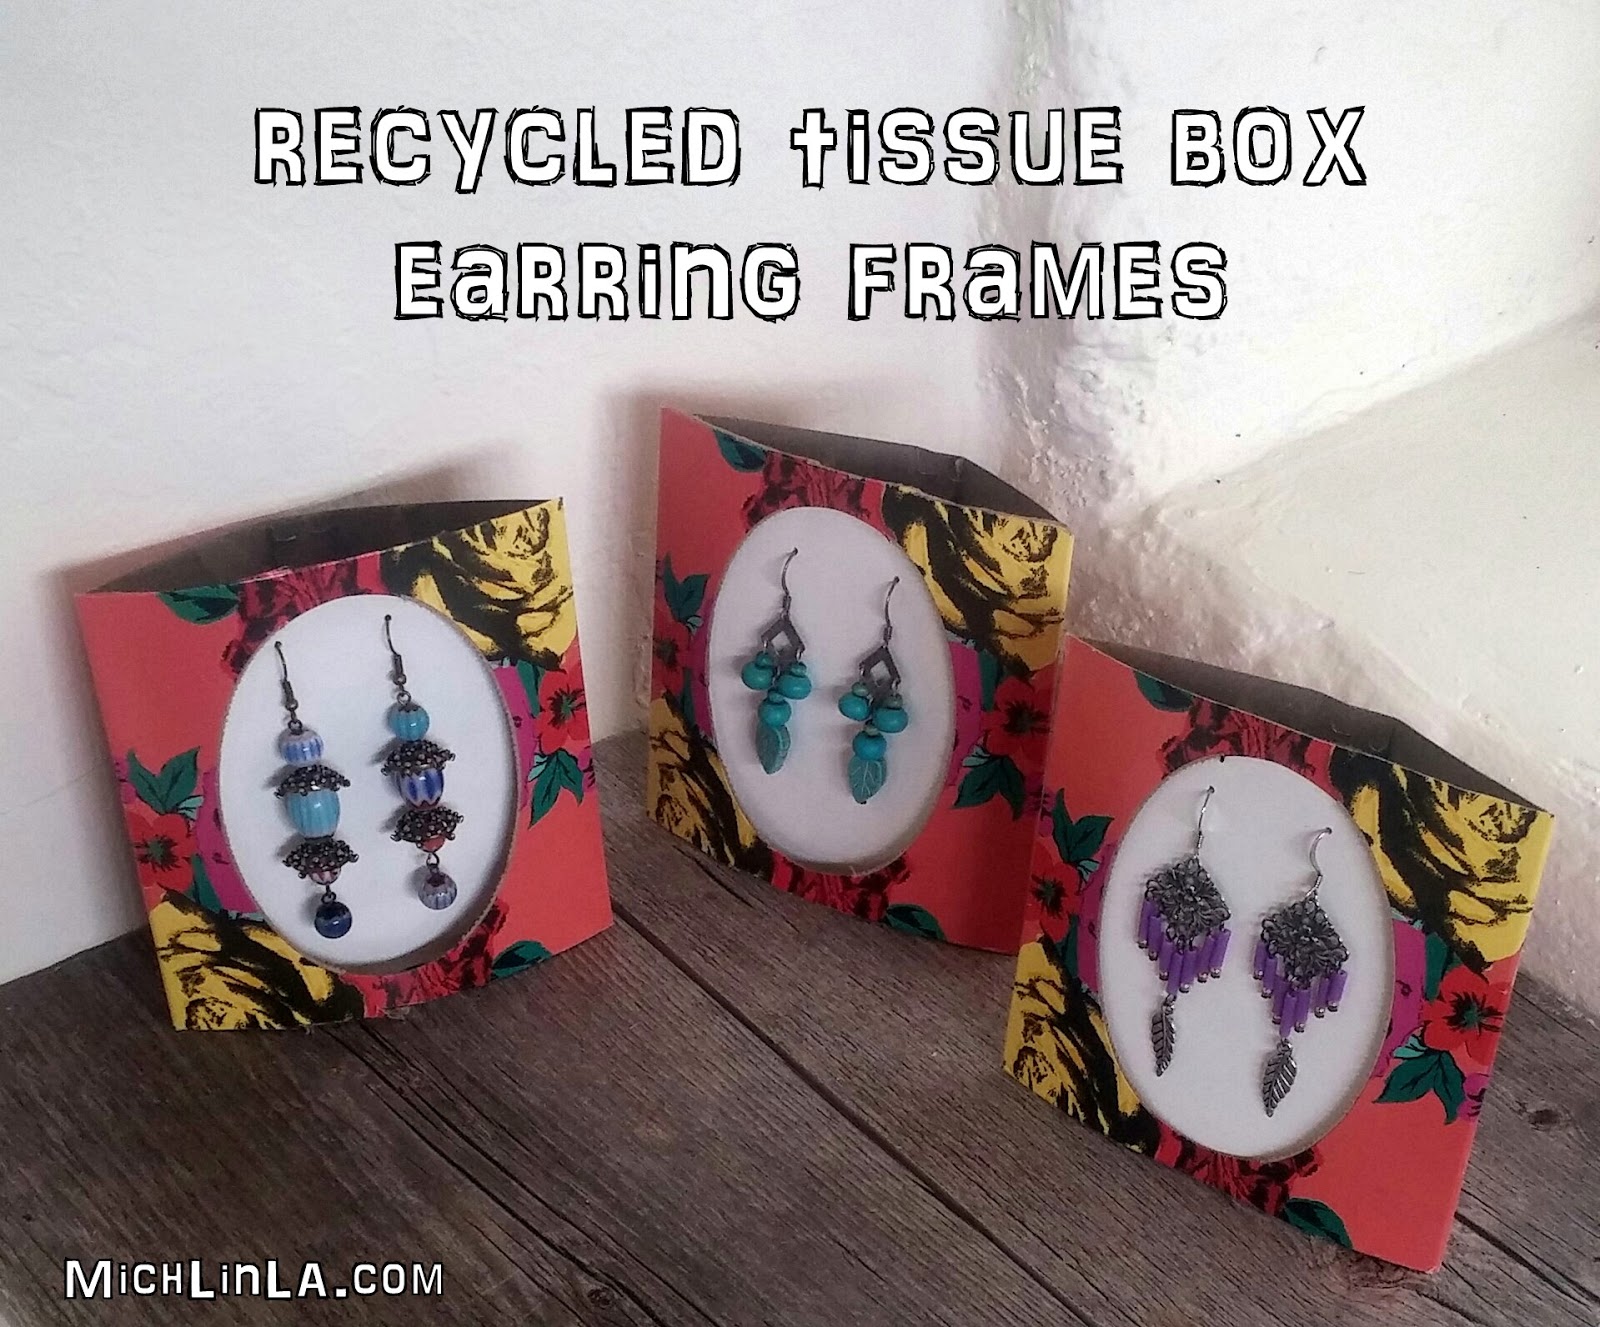
Hey, here's something I've been meaning to show you for a while. I have a lot of these ranged around my studio. Penny-pinching, earth friendly, practical jewelry displays...and they do brighten everything up!
Can you picture the top of the tissue box and how I used it? Got 5 minutes, scissors and a stapler? Here's the ridiculously simple DIY.
Cut the top and sides from a square tissue box, like so:
Cut a piece of scrap cardboard to cover the opening.
Glue or tape the cardboard to the inside; I use packing tape because it's a strong hold. Then poke a couple of holes near the top. Here's how it will look when flipped right-side-up:
Now staple together the two sides - one staple at the top, one at the bottom. And that's it! Here's your 3-D frame seen from the back:
Hang earrings inside and stand it up. So darn cute! And it's fun to match the earrings to the frame.
Tissue boxes are so pretty nowadays. Find one you like and give it a second life.
Later, gators.
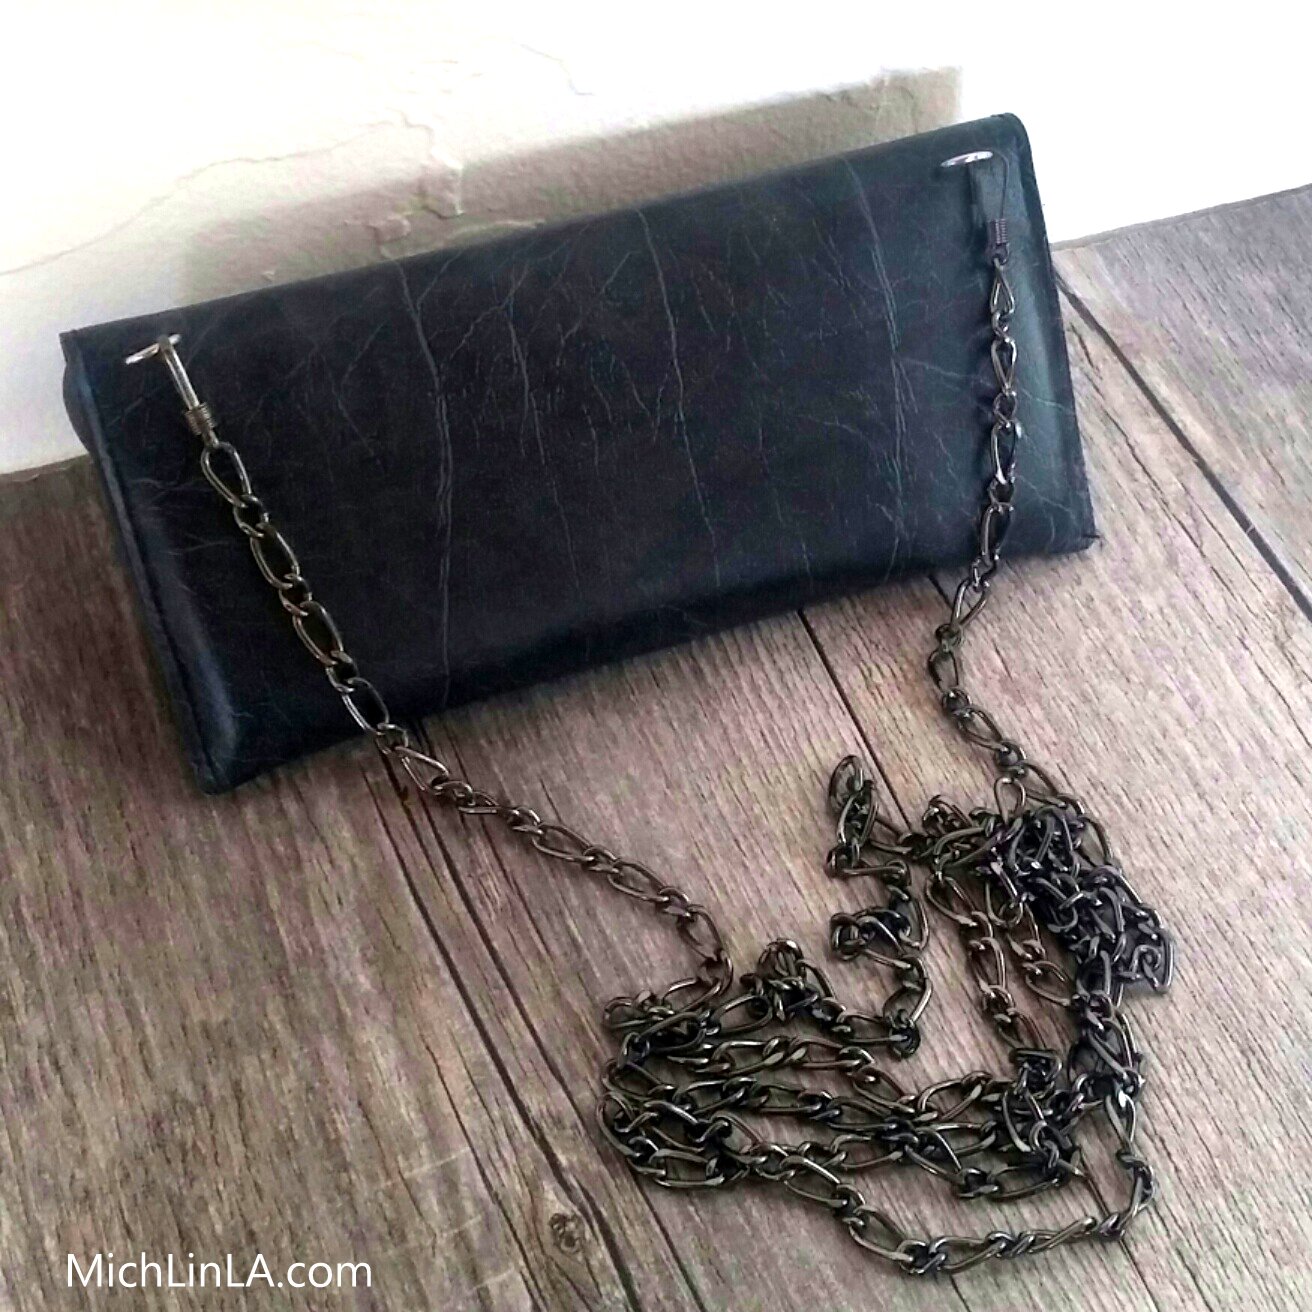
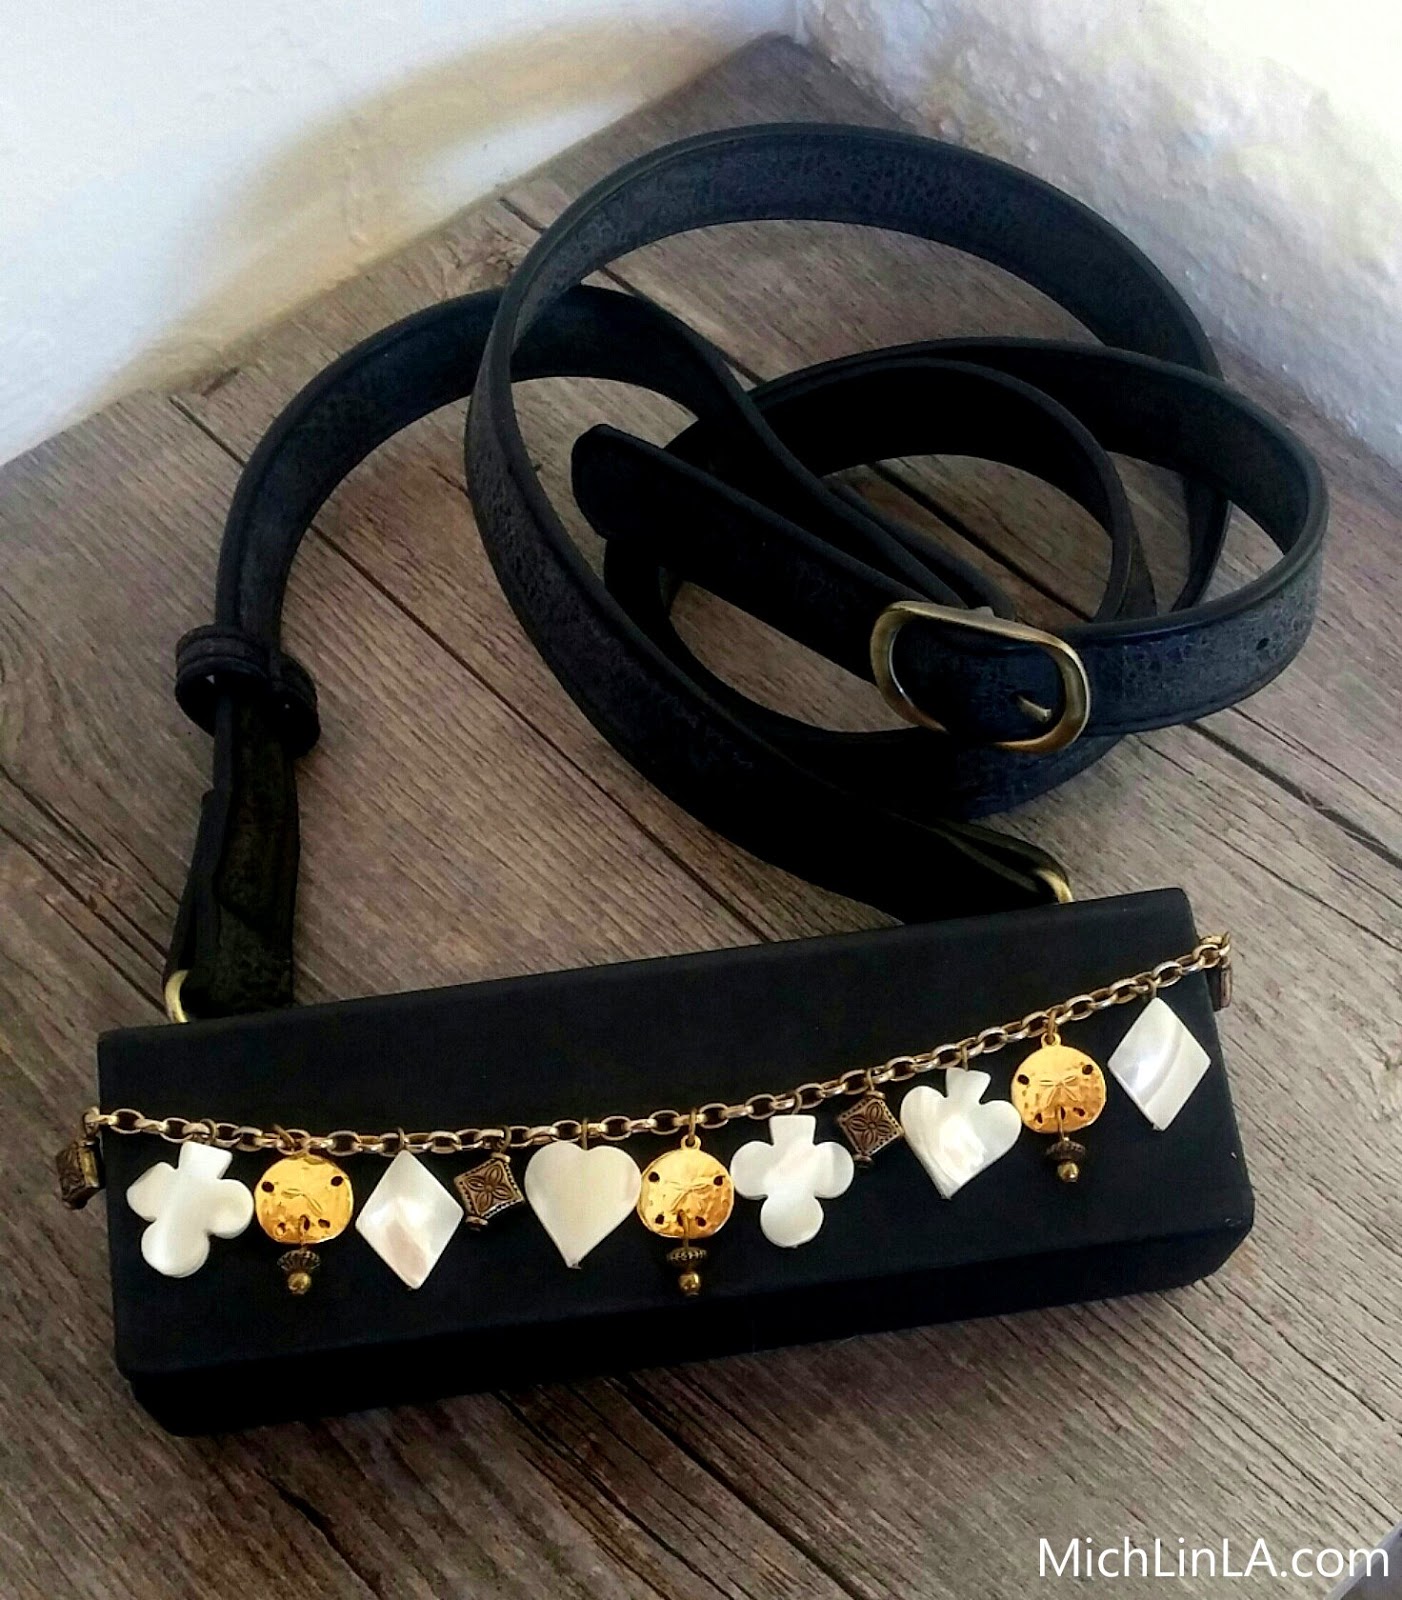
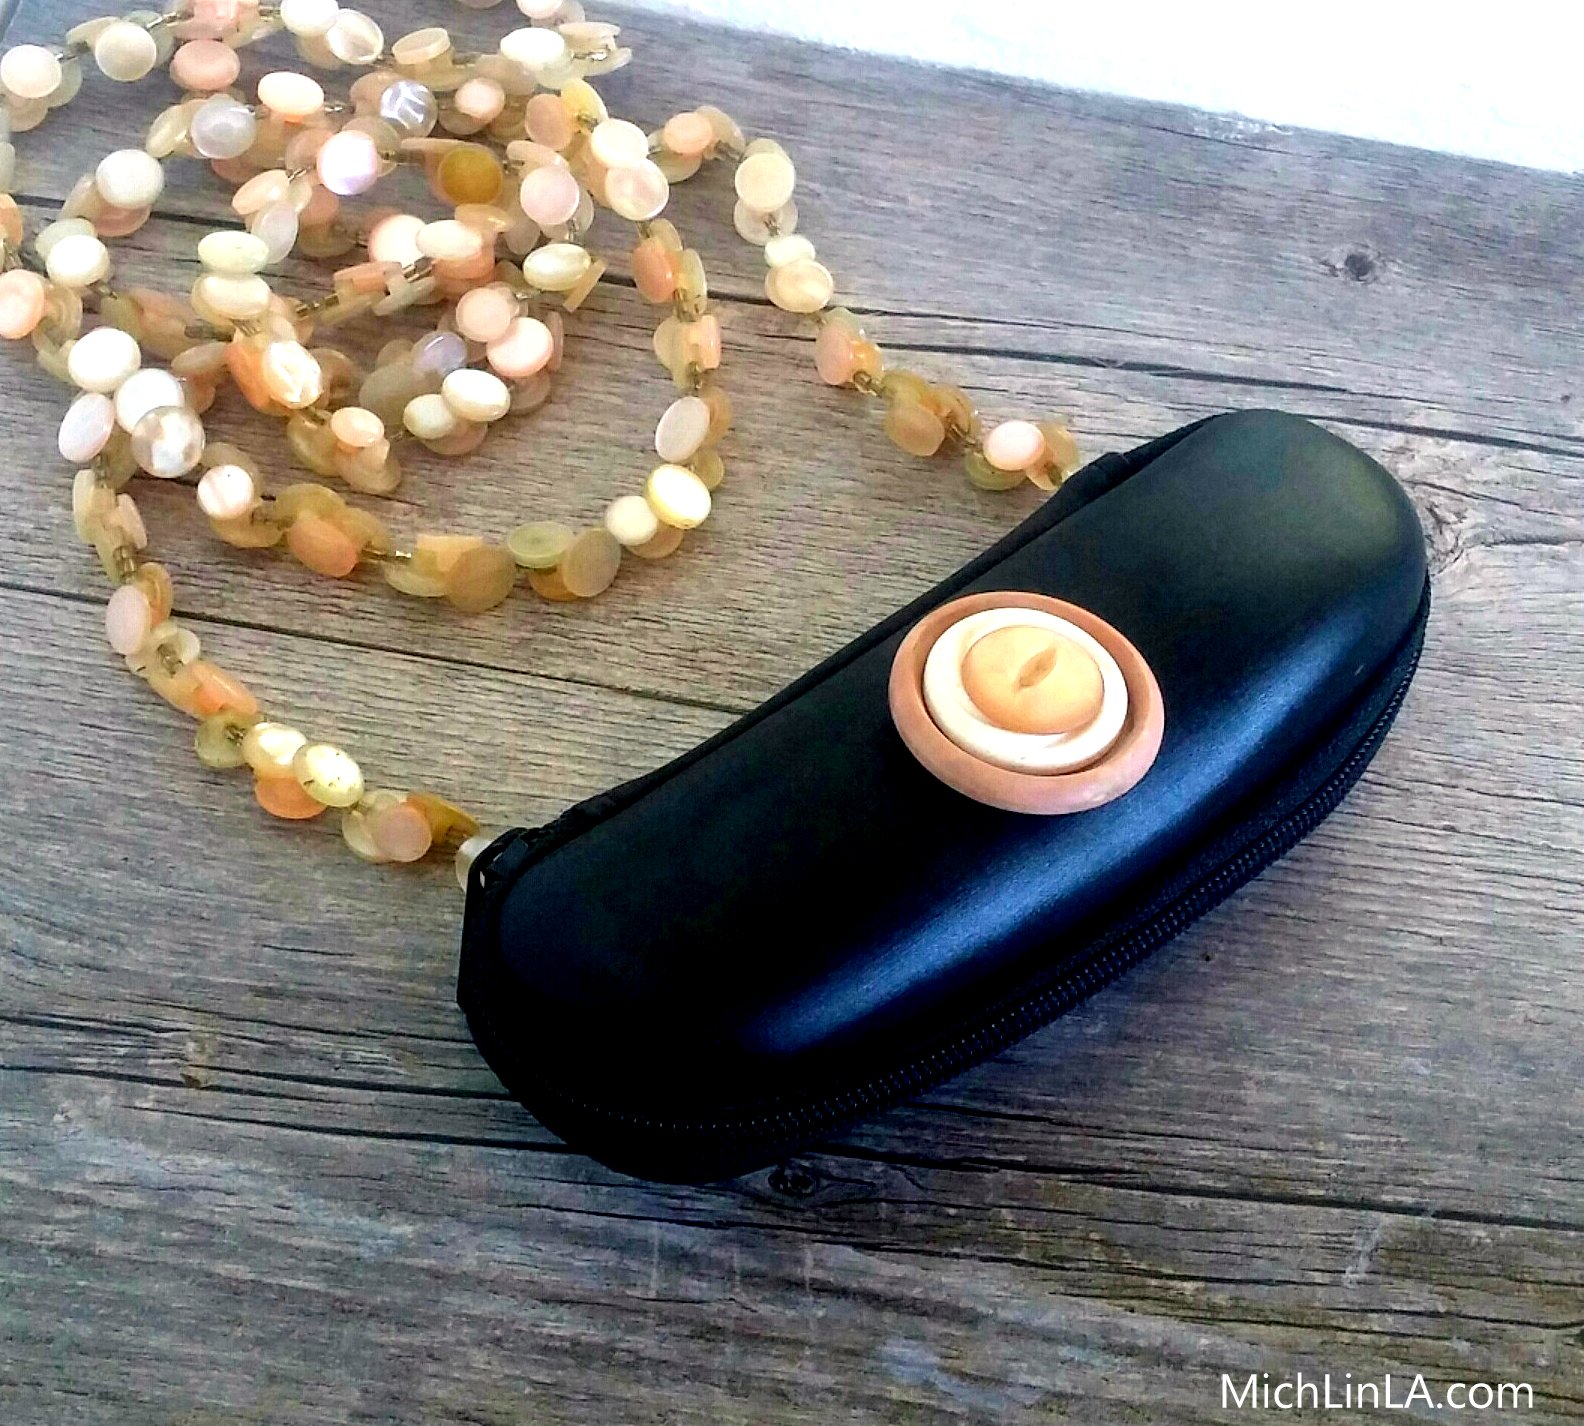
Look - a teeny tiny cross-body purse!
I've never been accused of being trendy (trust me on this). But little bitty mini bags - one of my absolute favorite accessories - are suddenly madly fashionable, showing up on runways and stores in every style you could dream up.
Here is a super quick upcycled version - make it in about ten minutes and wear it out on the town.
The upcycled element: an old eyeglass case.
I always have a multitude of these, as my husband gets new glasses every year. (Some tips on the right types of cases to use for this project in a bit.) Let's get to the DIY!
You will need:
-an eyeglass case
-a short chain of beads (from an old necklace or bracelet)
-4 big jump rings
-a long purse strap
-a push pin (or a hammer and nail)
-jewelry pliers
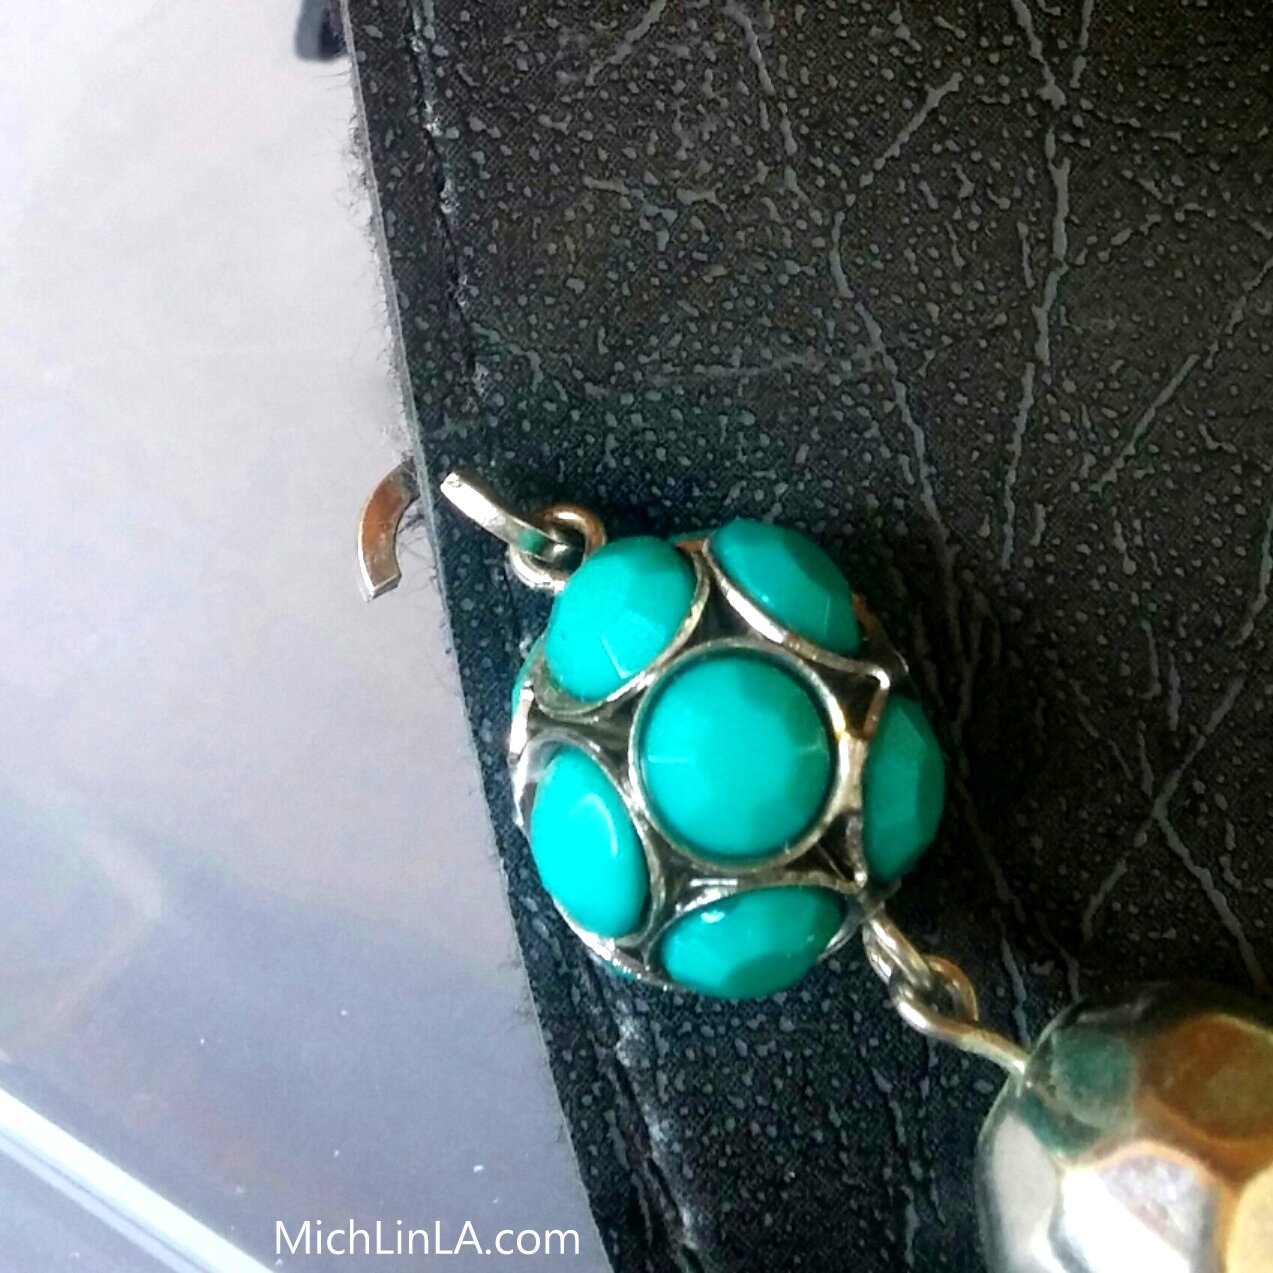
With a sharp nail or a push pin, poke 2 holes in the front of the eyeglass case: one near each edge, about halfway up. (If there's a hard structure underneath, pound the nail through with a hammer.) Thread a jump ring through each hole, and add the beaded chain. Like so:
Close the jump rings securely. That's it for the front!
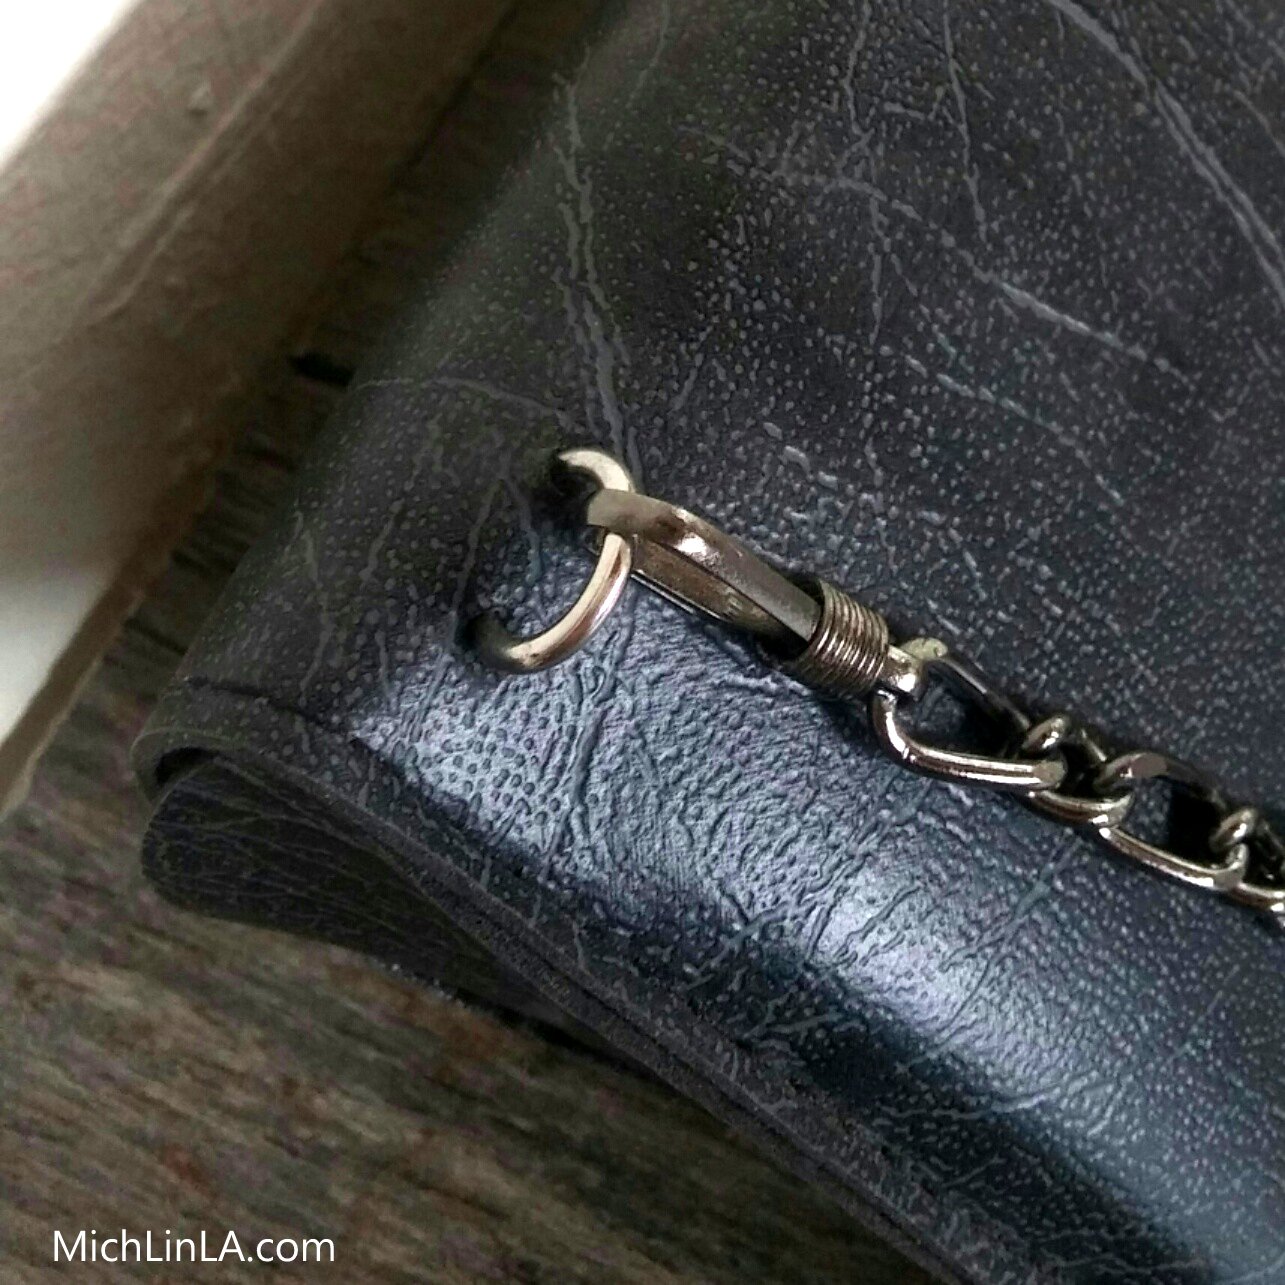
To add the strap in back, you will attach two more big jump rings, but using a slightly different method.
For each jump ring, poke a set of two holes, about 1/4" apart. Thread the jump ring through both holes. Add the purse strap and close up the jump ring. Here's a closeup so you can see what I mean:
When done, the back will look nice and neat.
Annnnd...you are done, baby! Fun and fast, eh?
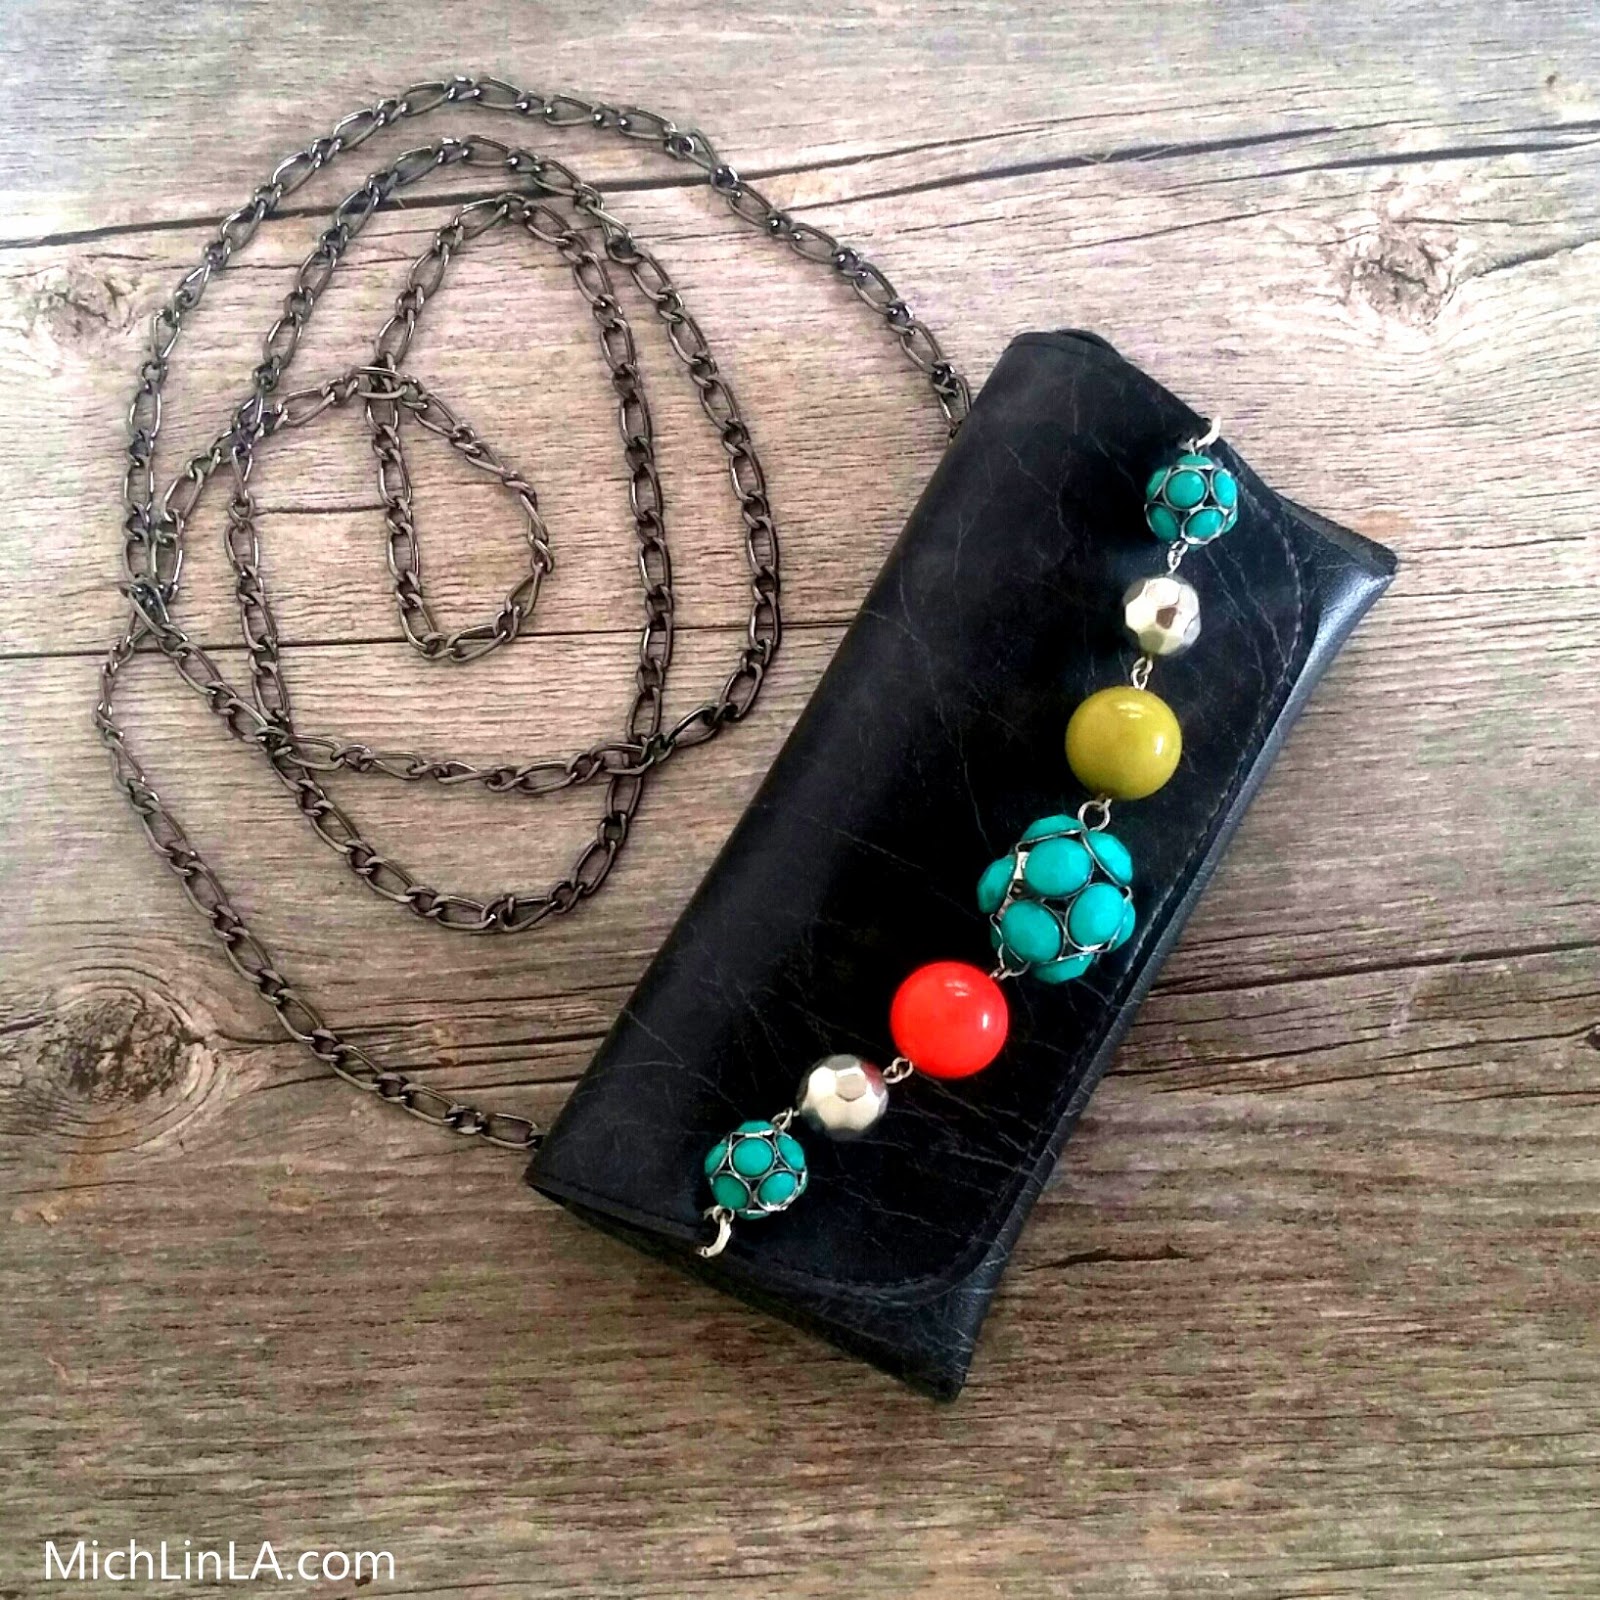
Of course, the bead chain ornament is just the simplest of ways to decorate your purse. The eyeglass case should be considered a blank slate, to be embellished in a thousand ways!
Here are just a couple of other examples.
This one sports a thicker leather strap (super comfy to wear). Instead of a bead chain, I embellished with a charm bracelet I made ages ago but never wear.
This next one is really adorable! It features a strap made from vintage mother-of-pearl buttons - an awesome thrift shop find. I added a little stack of buttons to match:
Tips:
* Choose an eyeglass case with solid sides (so your stuff won't fall out). There's room for a credit card folder, keys and lip gloss. What more do you need?
* Avoid magnetic clasp cases - often they aren't really secure enough for a cross-body bag that will be swinging around a bit. Best closures: a zipper or strong velcro. And hey, you can add a velcro closure to any case, so that's another option.
* Find cute purse straps at thrift shops, yard sales, even dollar stores. I sometimes buy an ugly, ugly purse just for the strap. Alternatively, borrow a removable strap from a bag you already own.
Okay, that's my little idea. It could be a fun one to make with tweens or teens, don't you think? Hope some of you decide to give it a try.
See ya!
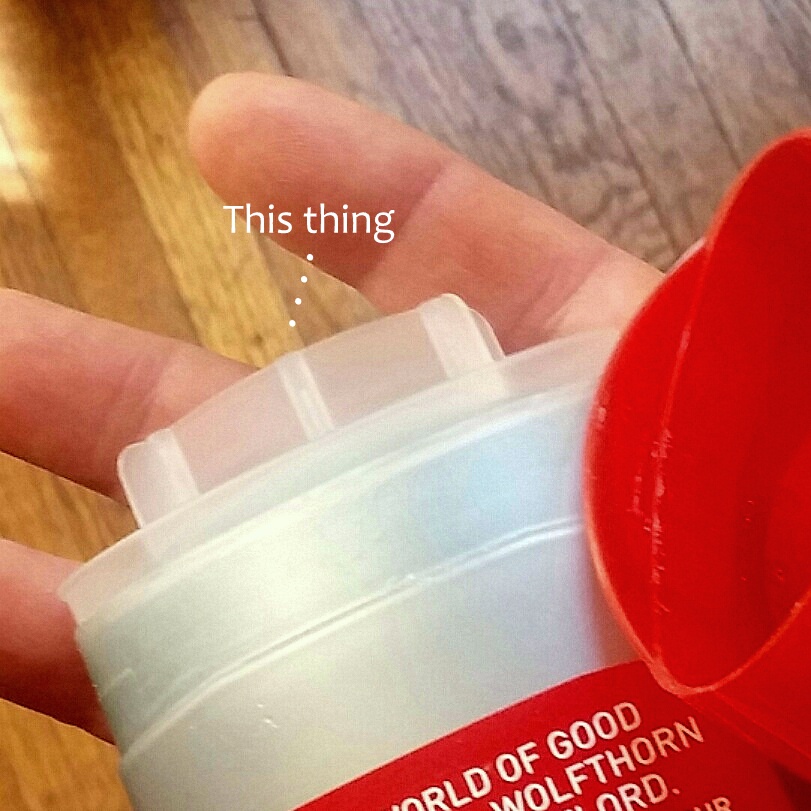
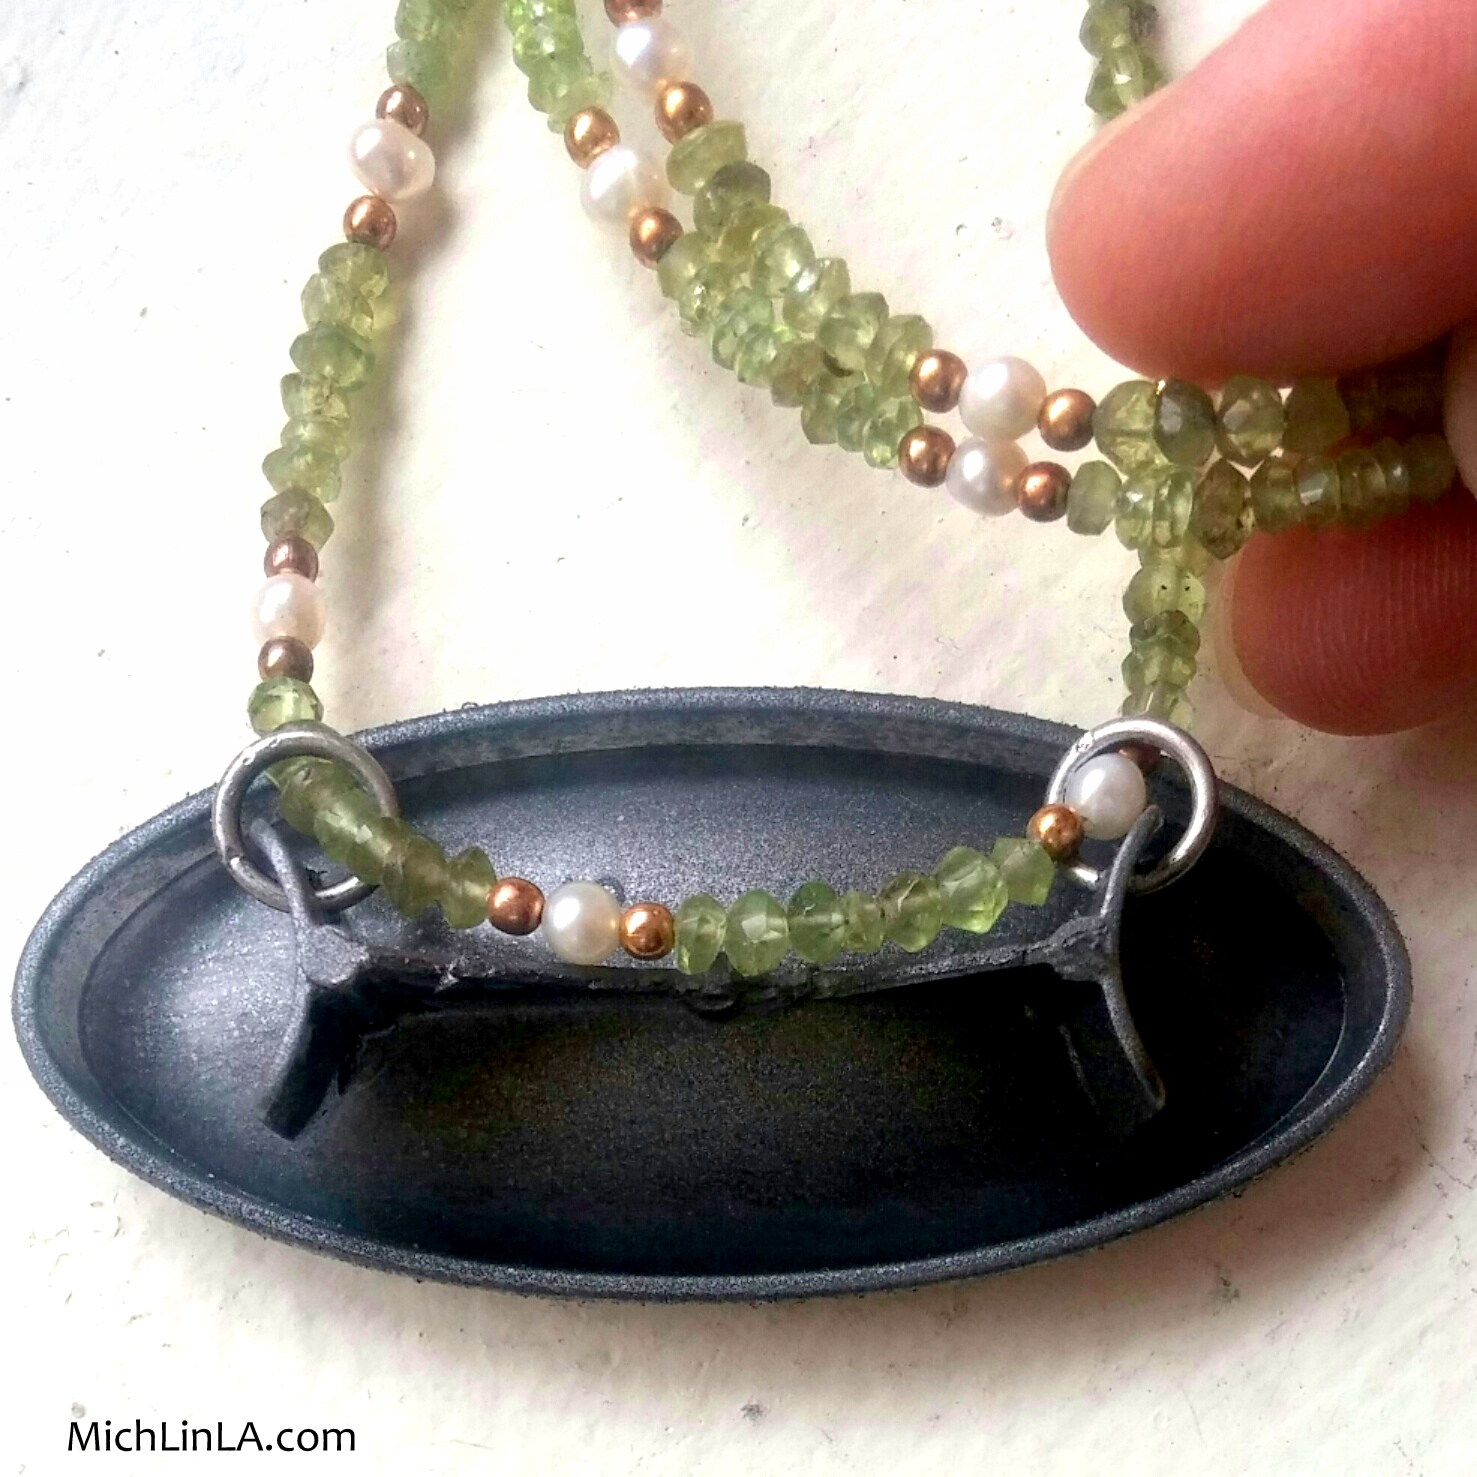
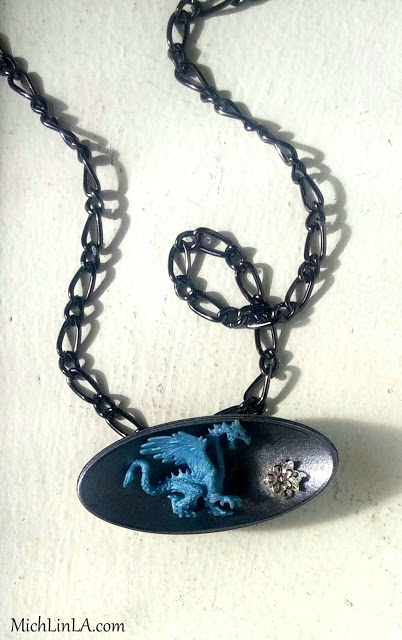
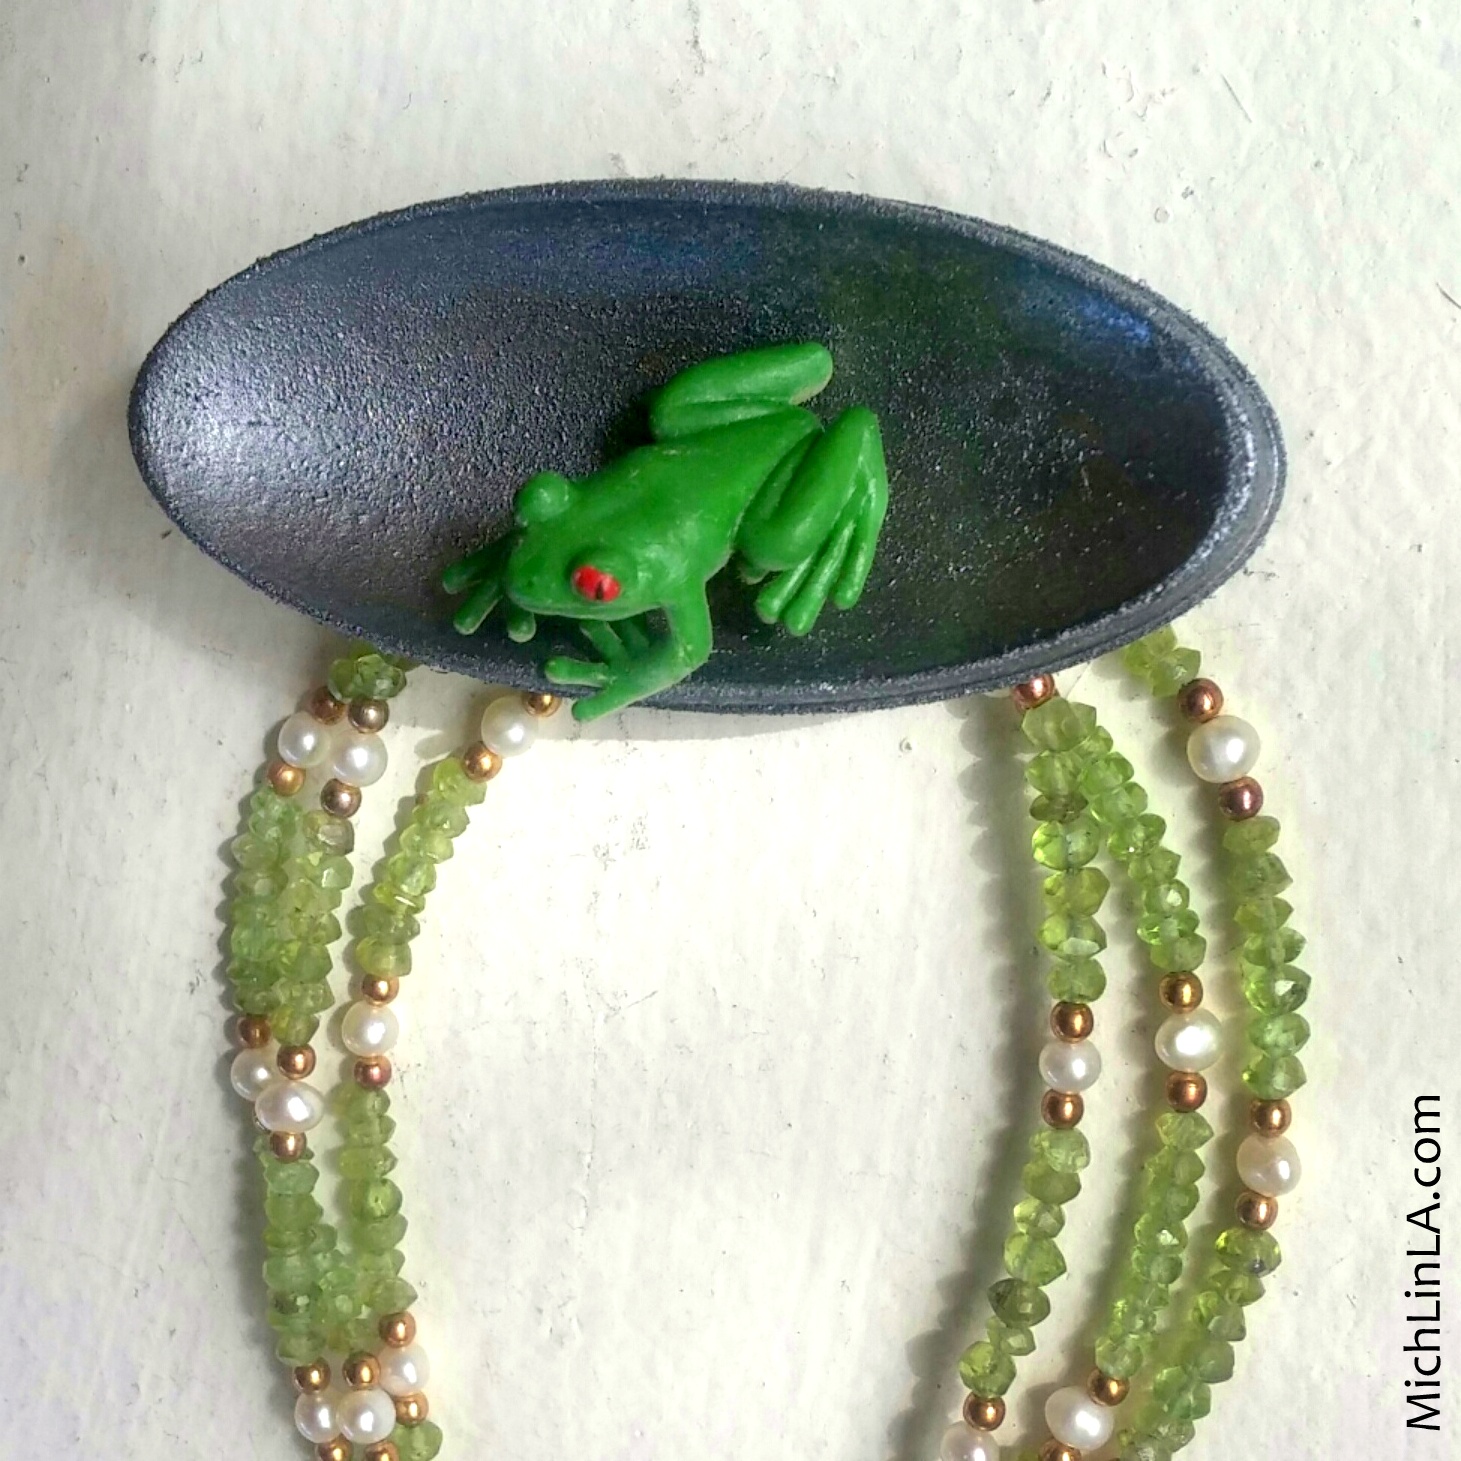
Hi, all! Last week I posted a Guess The Mystery thing challenge. I wondered how many of you could identify the weird little found object in these upcycled necklaces:
The Mystery Thing is that silvery, oval shield-like item. Does it look a teeny bit familiar...or not? Take a sec to think about, fix your guess in your mind.
Okay, then - time to reveal The Thing. Ready...set...scroll!
*
*
*
*
*
I have to say, you people are hella smart. Comments on the challenge post were running about 90% correct! I am very impressed.
*
*
*
*
And the answer is...
*
*
*
...tadaaa!
It's the plastic shield that protects a stick of deodorant.
Did you guess it? If so, you are awesome. To everyone who commented last time: thanks for playing, guys!
Want to DIY? Here's a mini tutorial.
To adapt the shield for jewelry, you need one quick trick that allows it to lie flat when worn. It's this: use wire snippers to trim off a bit of the curve in back. Like so:
Next steps: I melted holes in the flanges, spray painted everything silver, and added two jump rings for attaching a necklace. Here's what it looks like in back so you can see what I mean.
See, not hard at all! After that, I had a delightful time embellishing with elephants, dragons and frogs.
For attaching the animals, I made some extra holes, strategically placed, and simply wired them on.
Since my teeny critters are made of rubber, I didn't trust adhesive to hold. More about these cuties in my next post...elephants, dragons and frogs, oh my.
See you then!