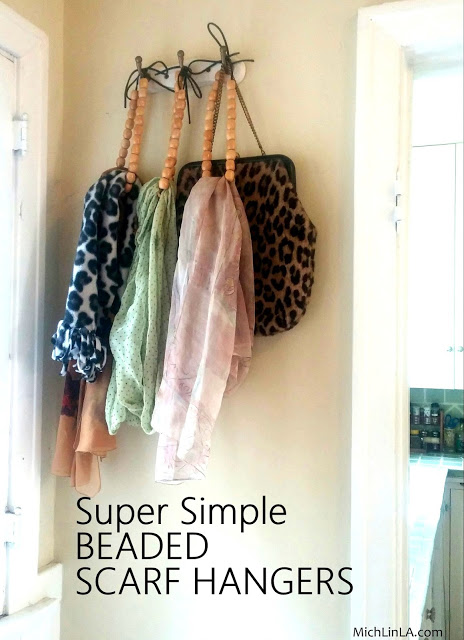
Well hi! Today I thought I'd show you the quickest, simplest beaded home decor project evah. It's practical, it's pretty, it's economical - heck, there's even a little element of upcycling in there for good measure.
It's a scarf hanger system, for storage and display.
The DIY takes about a minute. You will need:
-a buncha big beads
-an old shoelace
Ready? Go!
Thread 16-20 inches of big beads onto an old shoelace (or any bit of cord or ribbon you happen to have handy). Tie a bow, and double-knot it.
That's it, baby! Hang one (or three or six or ten!) on your wall, as demonstrated here...
Then just add scarves.
I hung mine on a cute 3-hook coat rack, but you could hang these up in a number of ways. Use little nails, or individual hooks, or even those removable hooks for apartments.
I was looking for a way to use up a vast quantity of not-so-thrilling wooden beads, and this was just the ticket. I'm a VERY scarf-y person, so it's something I actually need and use - daily!
It could also be a fun project to do with kids, tweens or teens. Let them choose beads to suit their personal style to make hangers for their own rooms, or to give as AWESOME handmade gifts.
Hope this one catches someone's fancy. See ya!
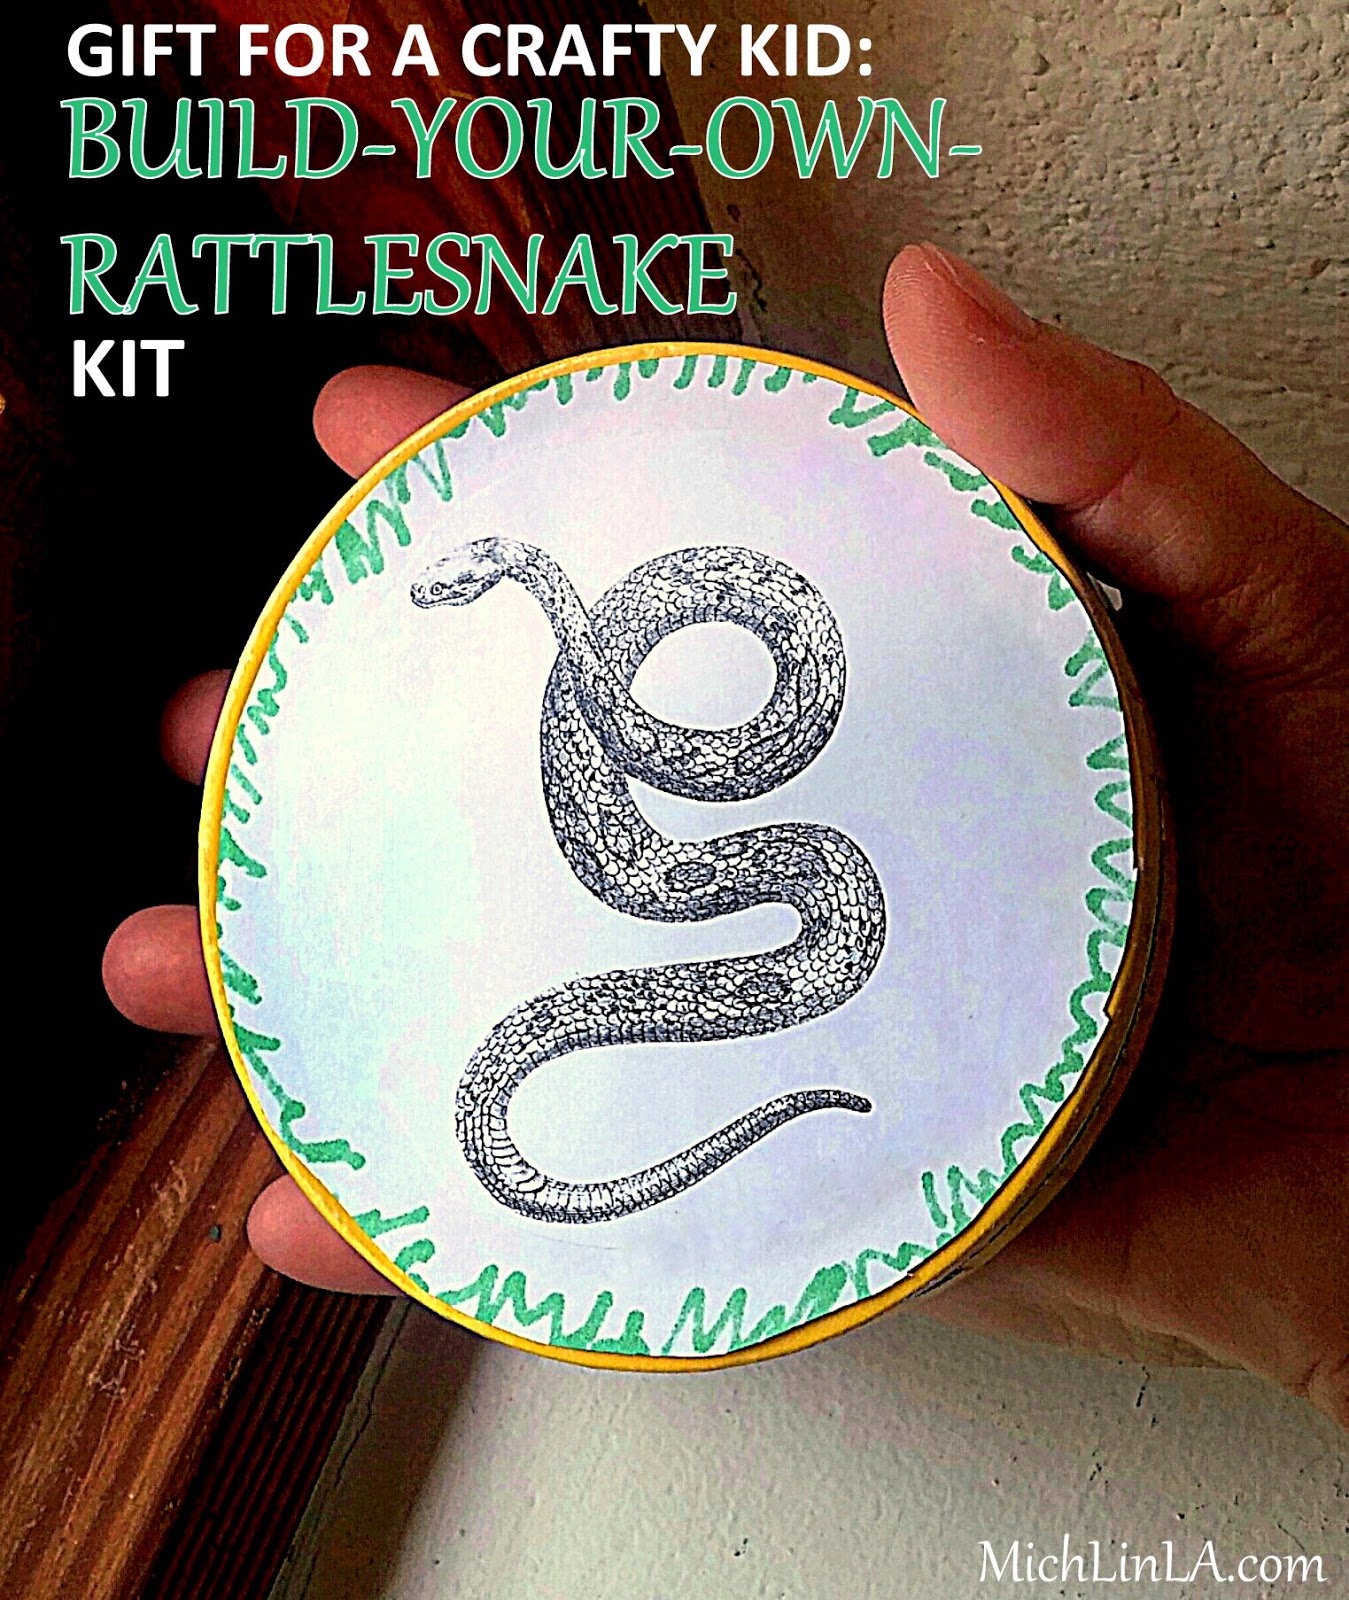
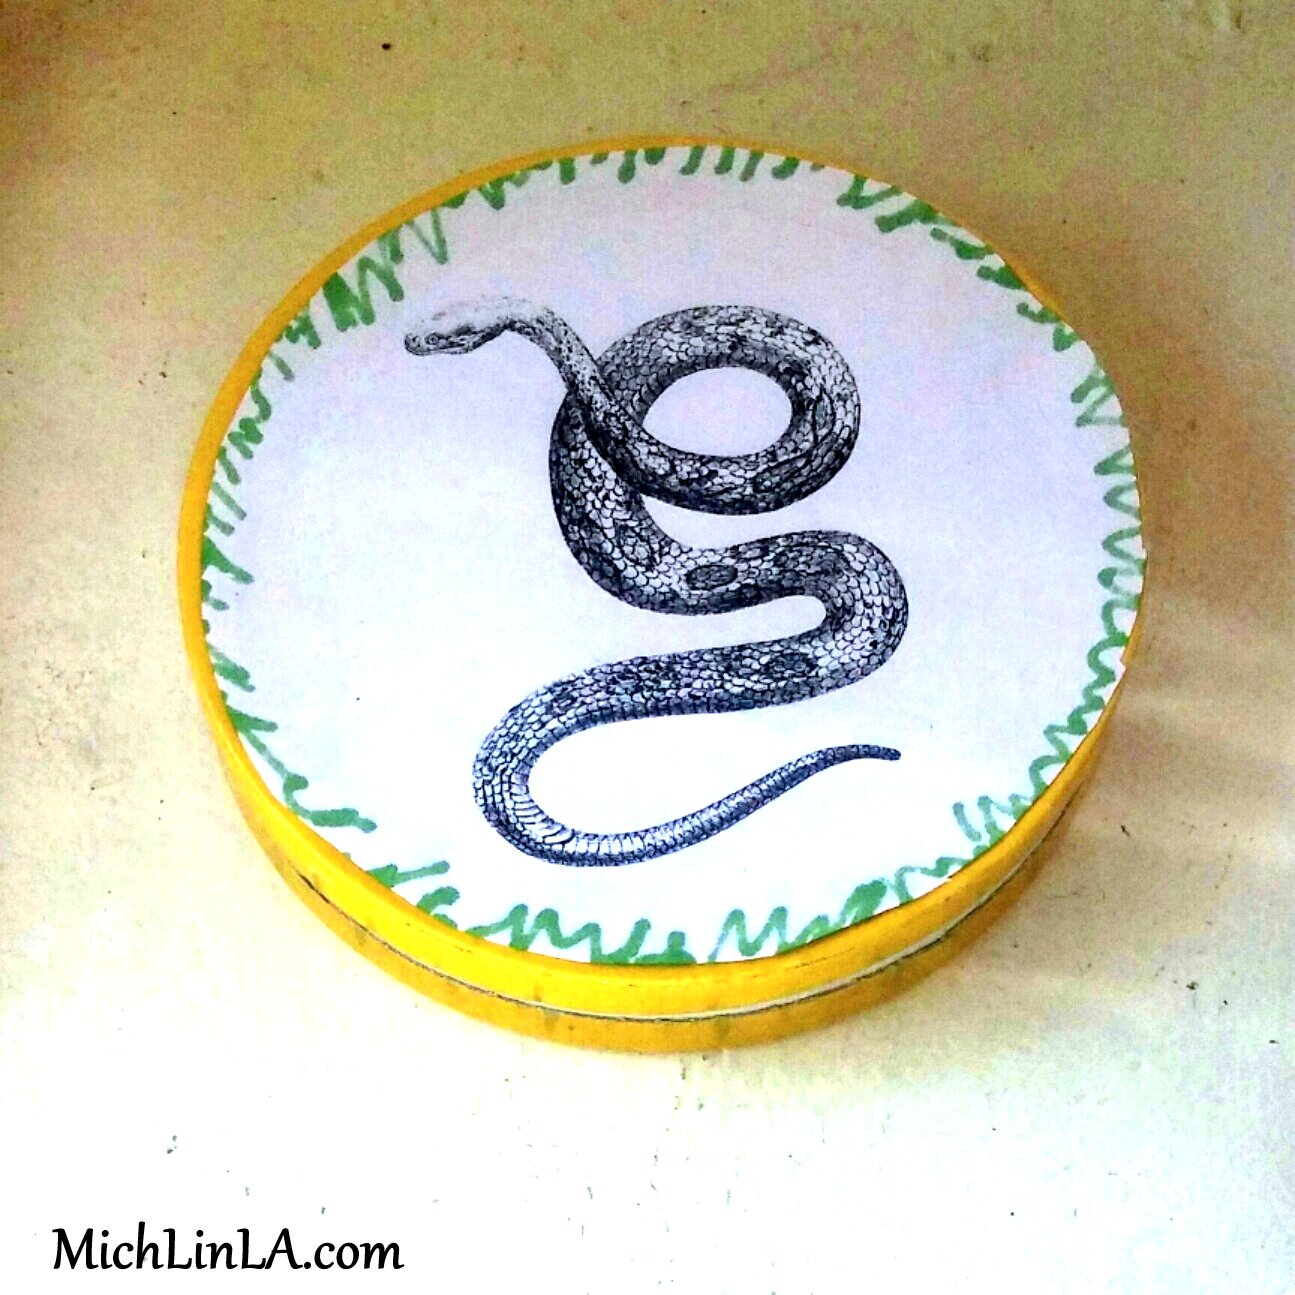
This little box - formerly a grocery store cheese container - holds an awesome homemade gift for a kid!
That's right, people, you can make a super fun, easy, crafty kit for some lucky child. All you need: a handful of beads, a bit of craft wire, and a Sharpie. A great project for girls and boys - snakes are cool for everybody.
Check out the quick-as-a-wink DIY.
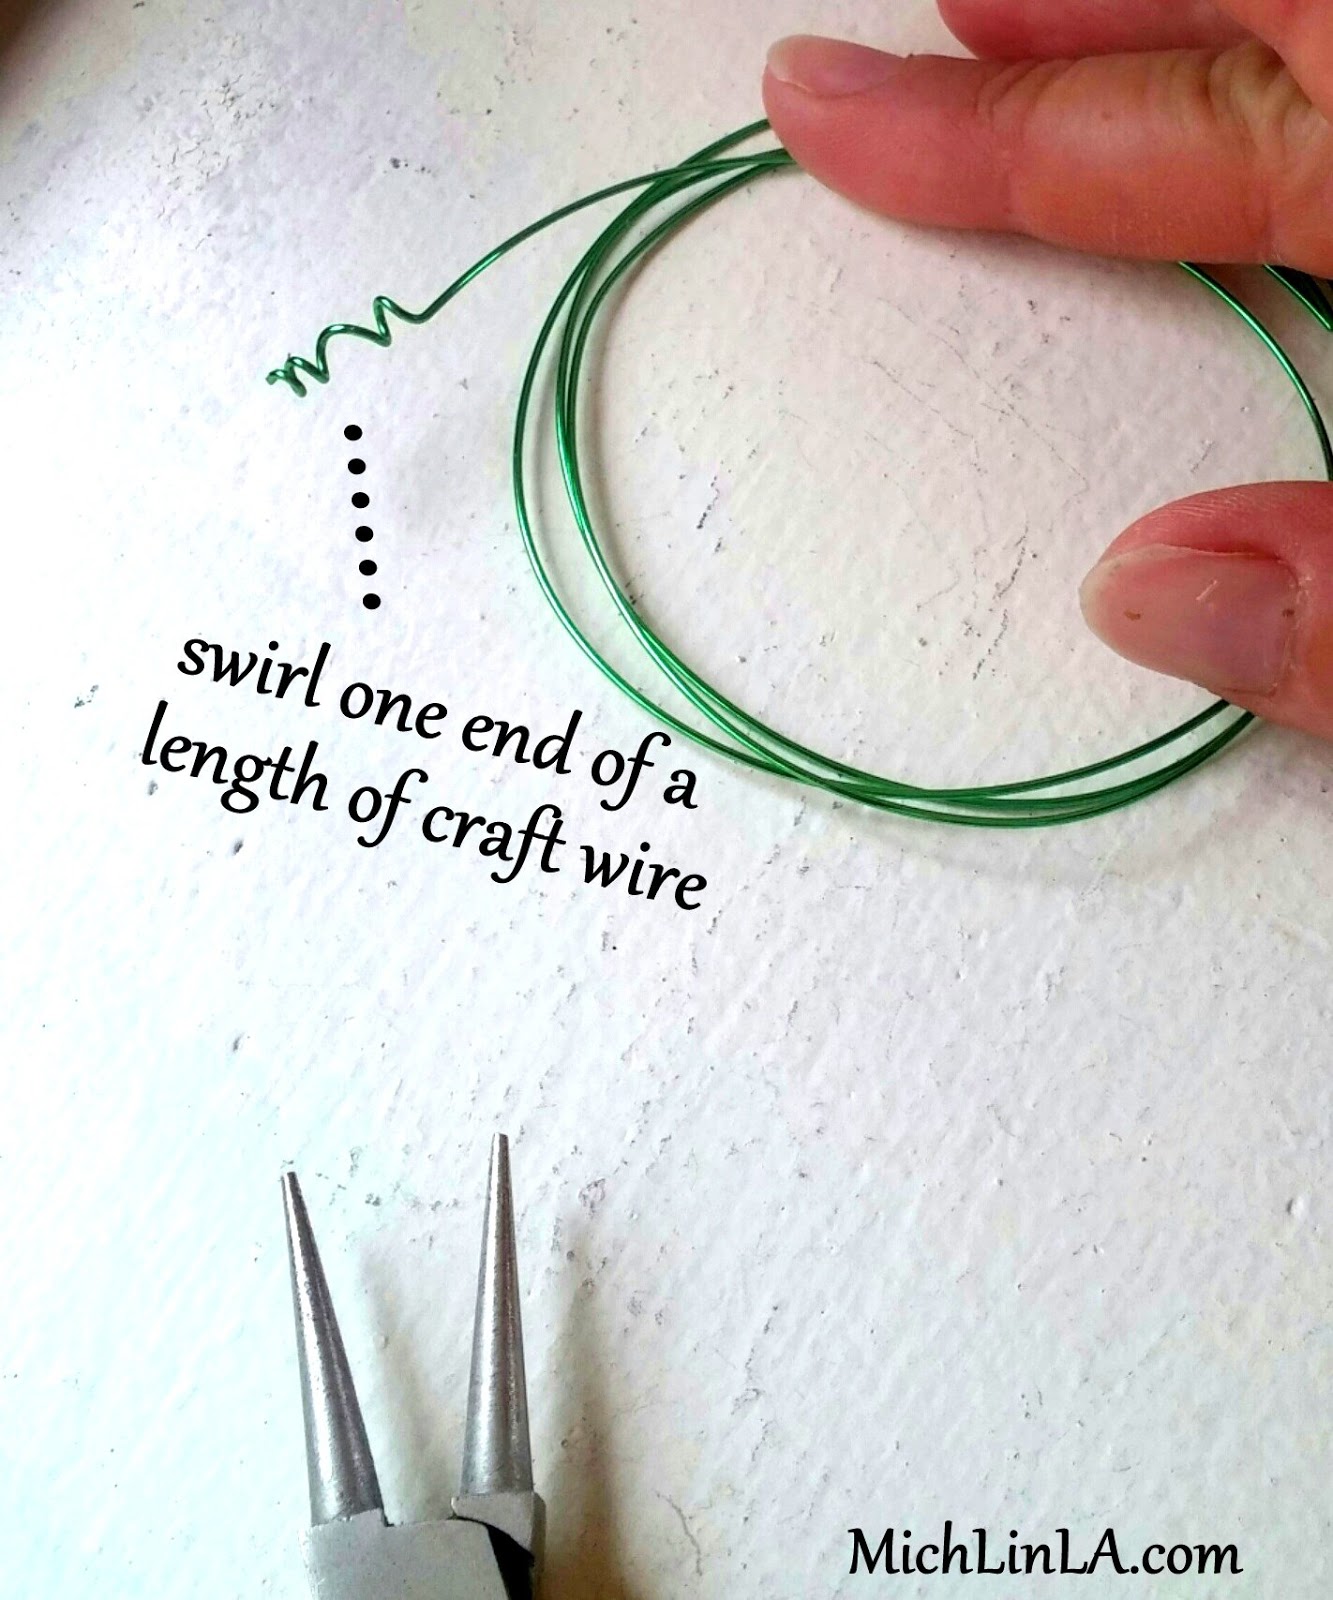
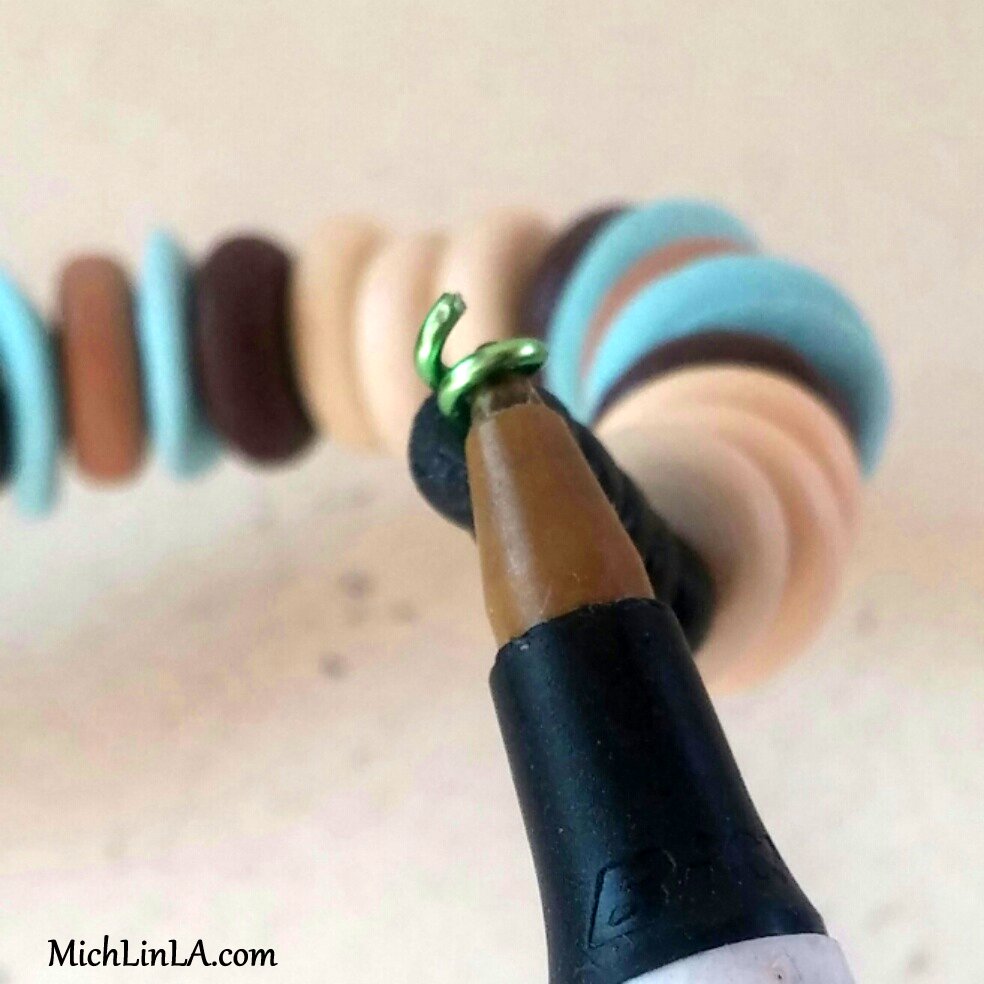
Begin with a piece of craft wire, between one and three feet long. (Some kids prefer loooong, crazy mismatched snakes. Some kids prefer shorter, regularly patterned, beautiful snakes. It's funny, but rarely do the two overlap.)
Twist a swirly onto one end, like so:
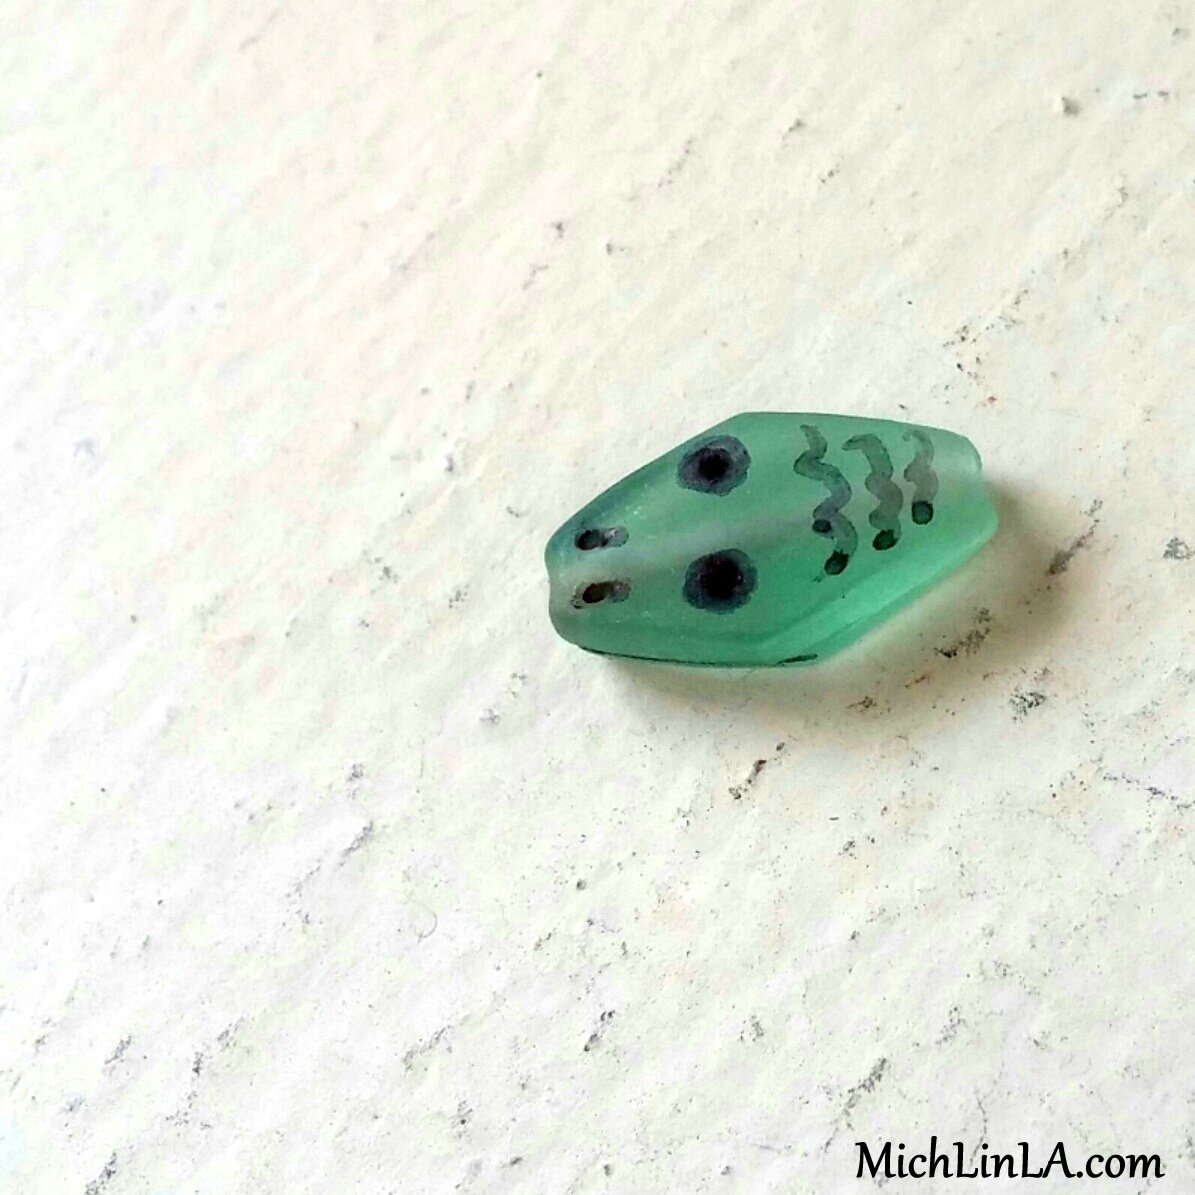
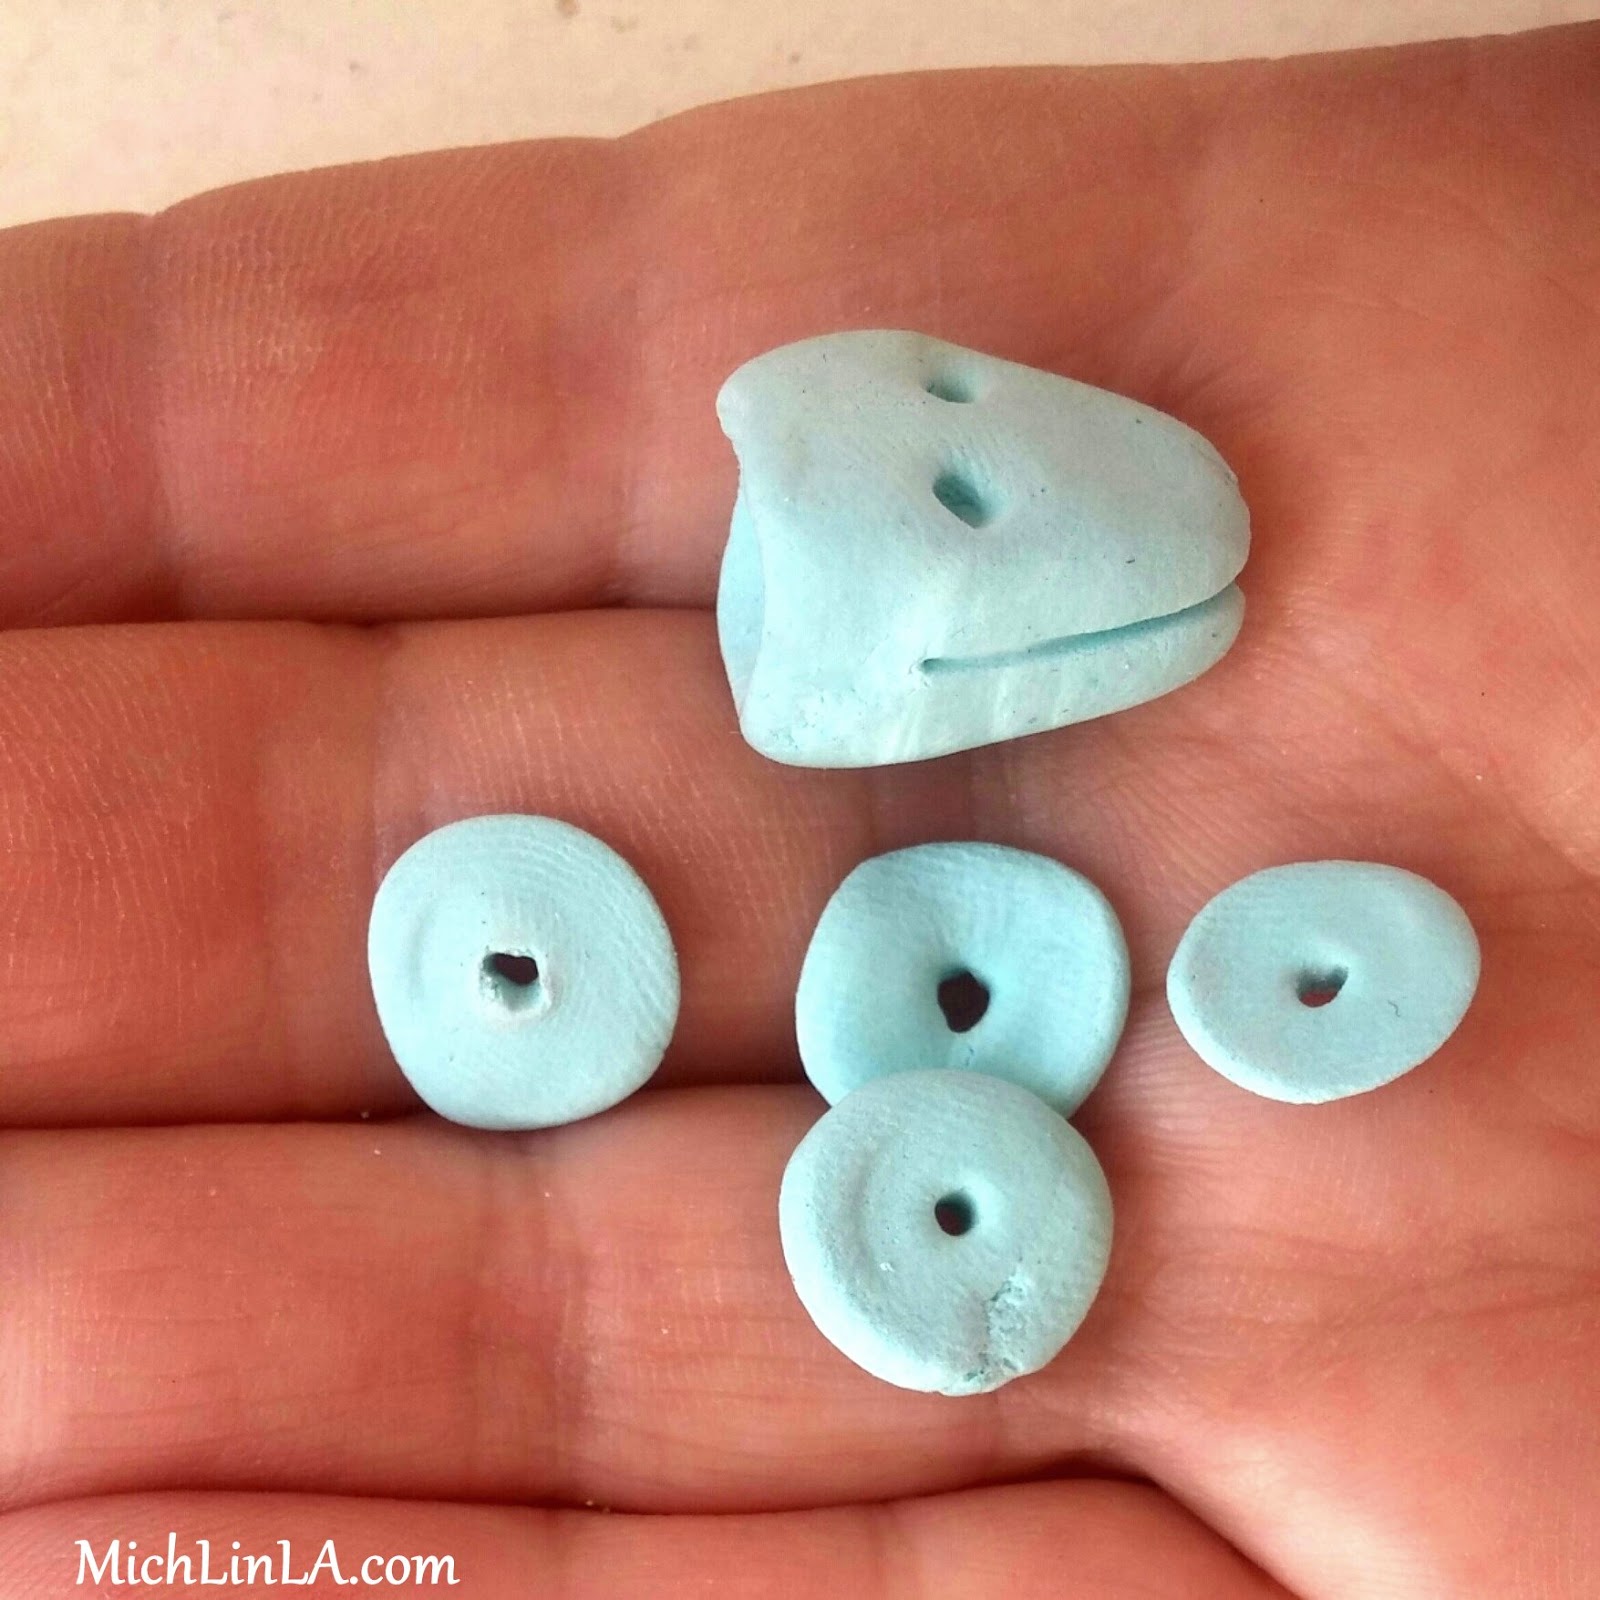
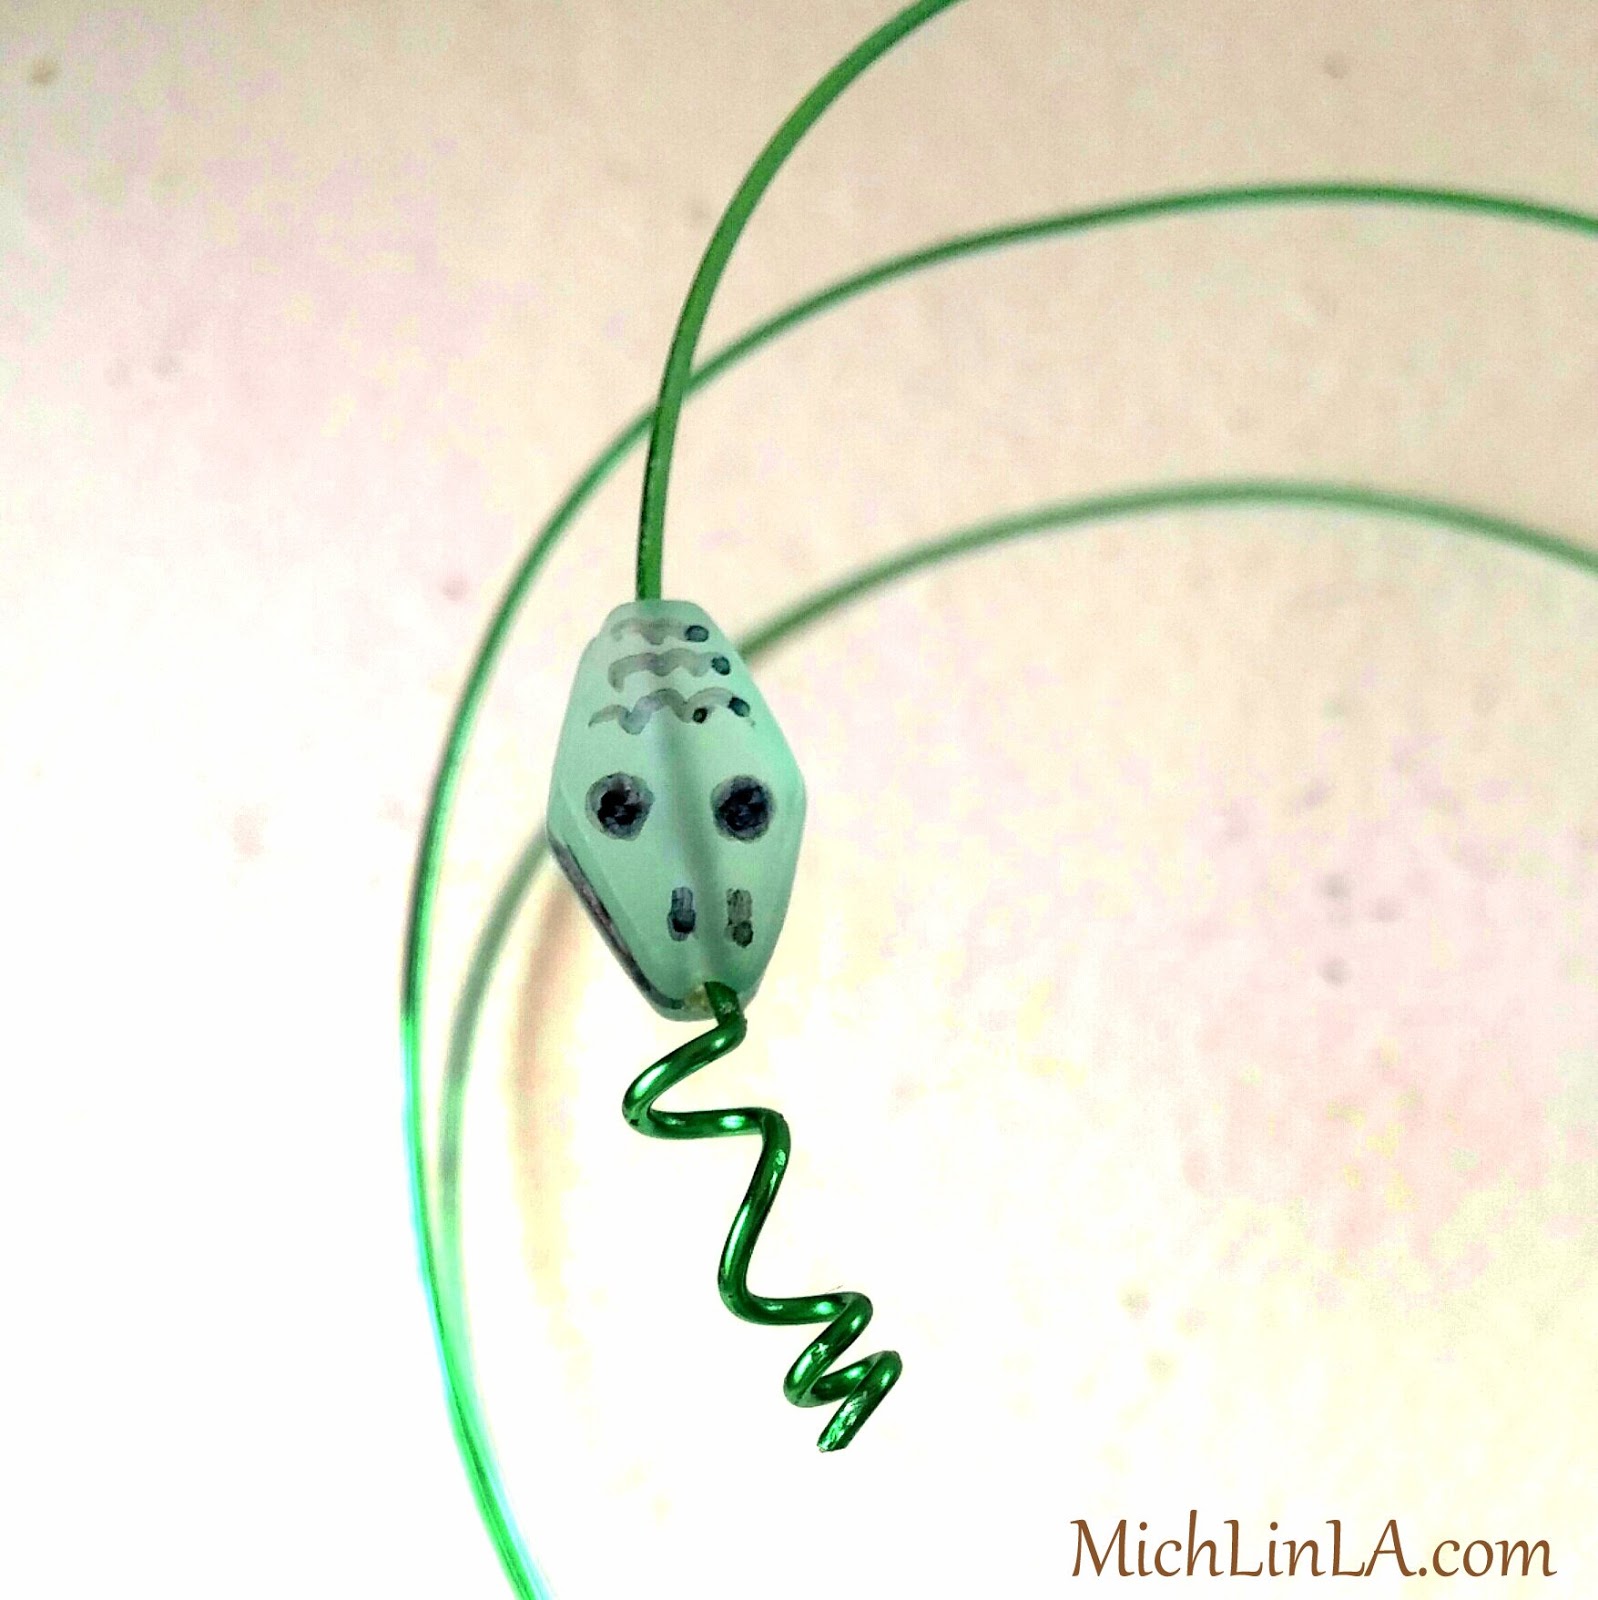
Find a flat bead that you can Sharpie on. Matte finish glass beads work well. Or choose plastic or wooden ones. Draw two eyes and two nostrils, and anything else that says snake.
Another option: make a simple snake head bead from air-dry clay. (You can add Sharpie details once it's dry.) I made some extra little disc beads to match.
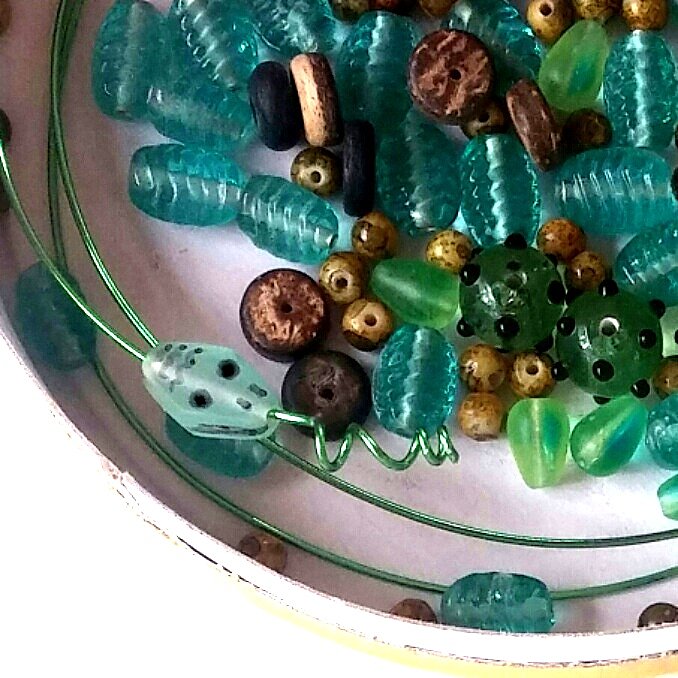
Next, add your snake head to the wire.
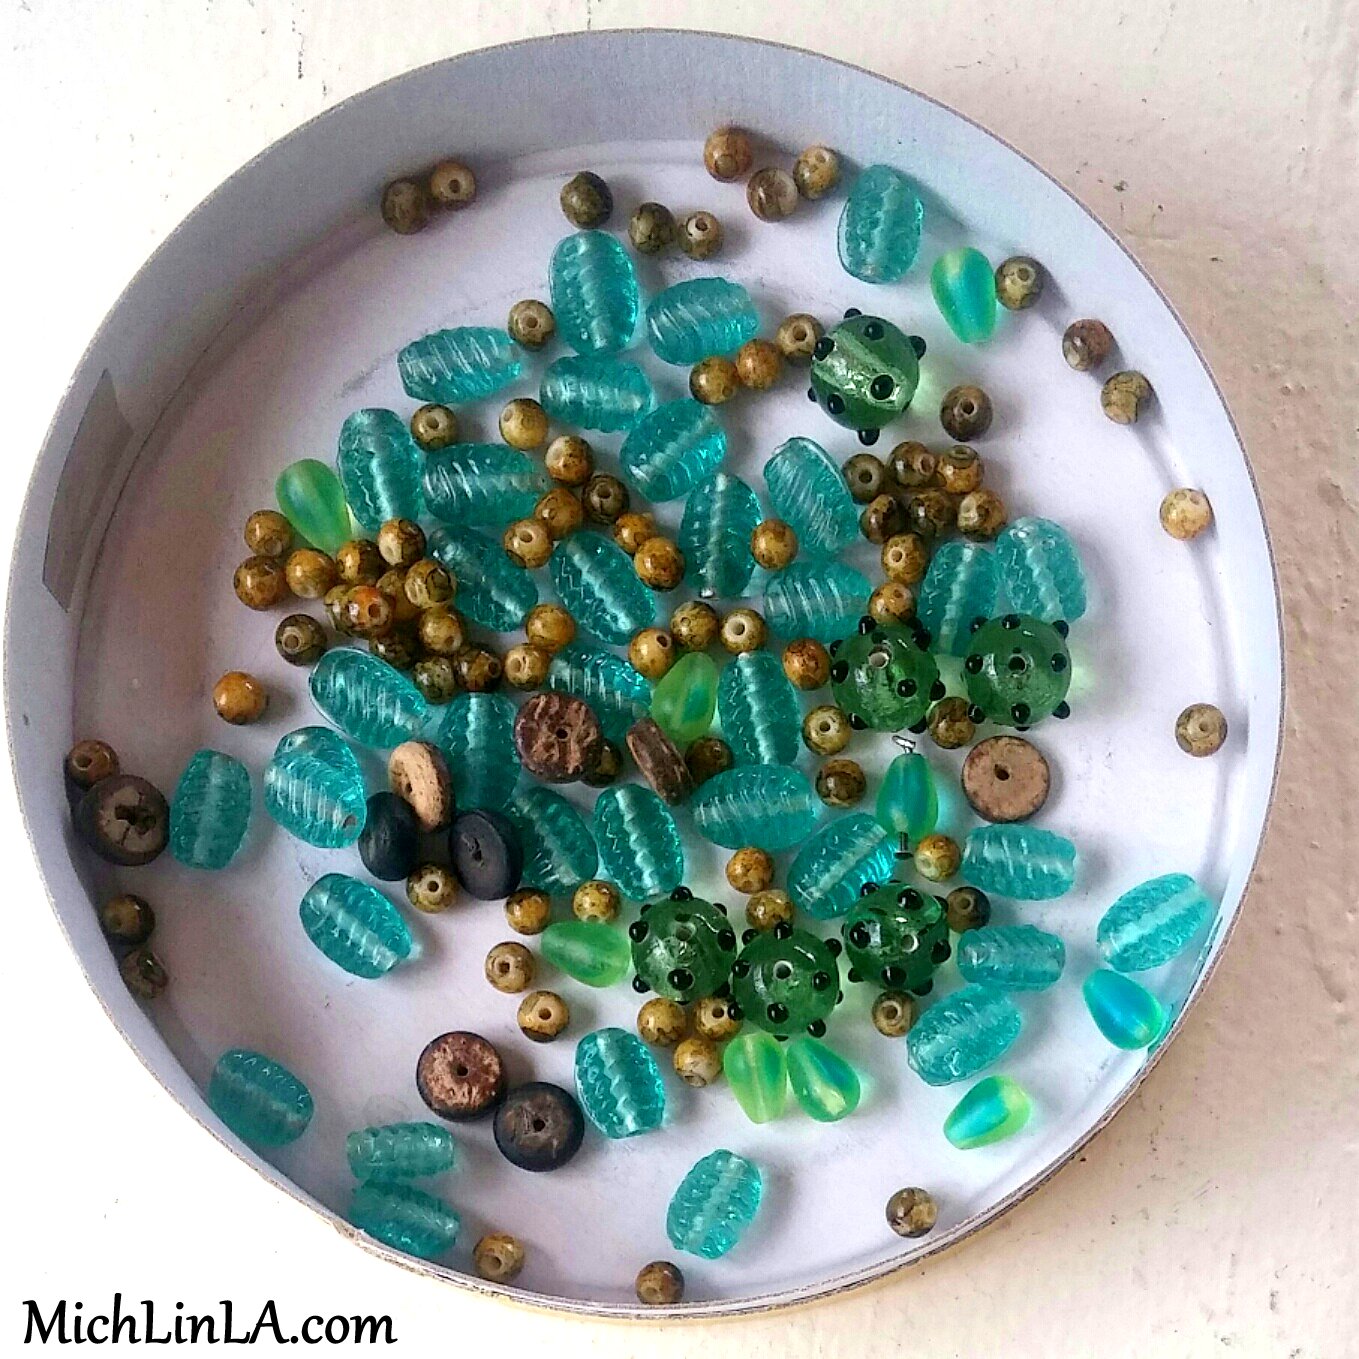
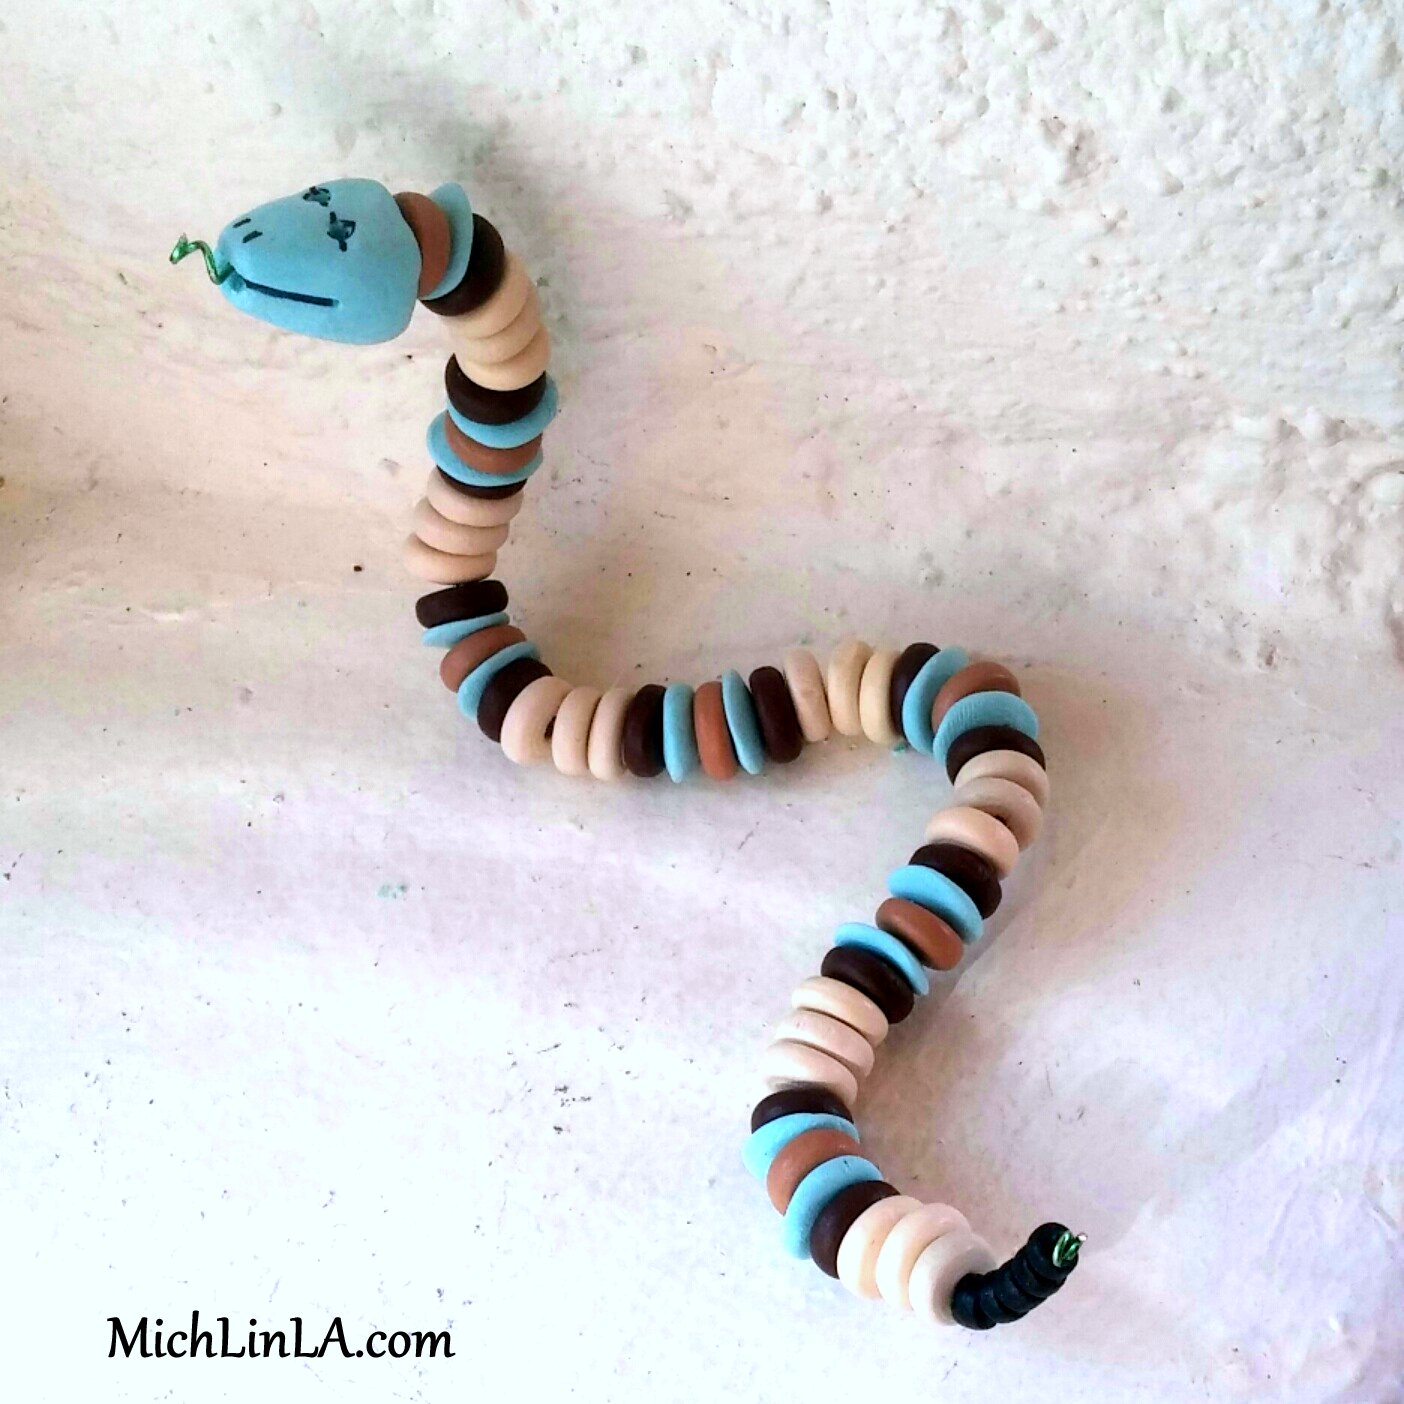
Now gather a bunch of beads and mix 'em up. You can use random, unmatched beads - a wonderful way to use up those strays! Or go with a color scheme. Or even do as I tried to do here: choose some that look kinda snaky.
Include a few small disc-shaped beads if you have 'em - they make a nice rattle at the end of the tail.
Put the bead mix in a cheese box.
Tip: some of these cheese boxes have small holes in the sides. I seal them up with bits of tape.
Place the snake head wire in the box, on top of the beads.
Print up a nifty snake picture (or draw one), and glue it to the top of the box. I found this lovely vintage rattlesnake art over at The Graphics Fairy.
That's your finished kit! Give one to a bored kid and watch the fun begin.
Instructions for making a snake:
String beads on the wire until almost the end. With the last little bit of wire, use a skinny object like a pencil point to make a small loop or swirl. Like this:
Bend some curves in your snake and display proudly!
I hope this idea rattles your cage. See ya next time.
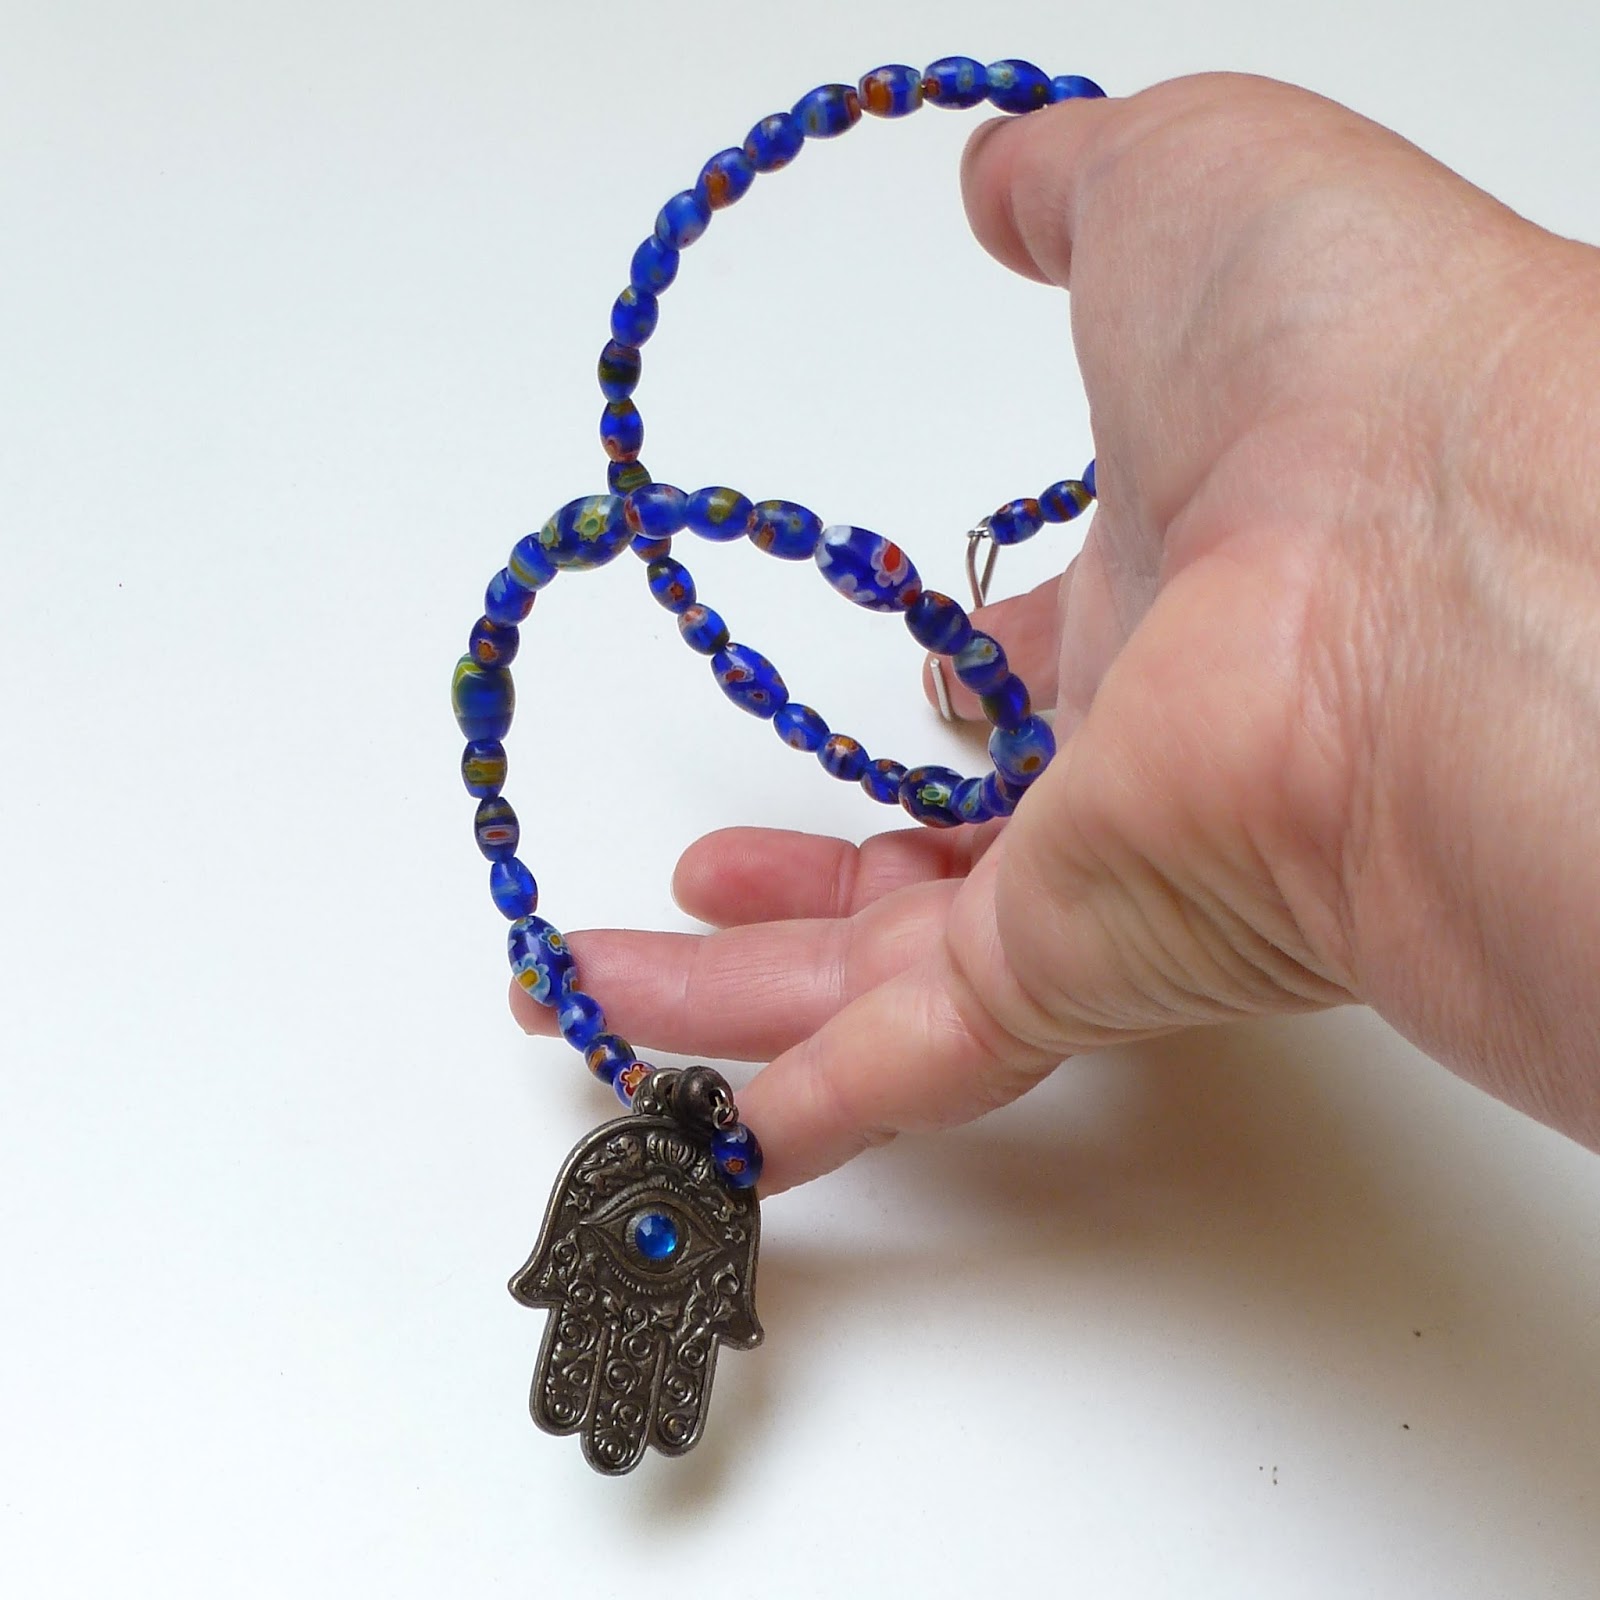
Sometimes I need a little protection. From malevolent spirits; from dragons; from windstorms generated by sad ghosts; from haunted ladies who walk weeping at the full moon.
So I make these shapely, swirly amulets to hang in doorways.
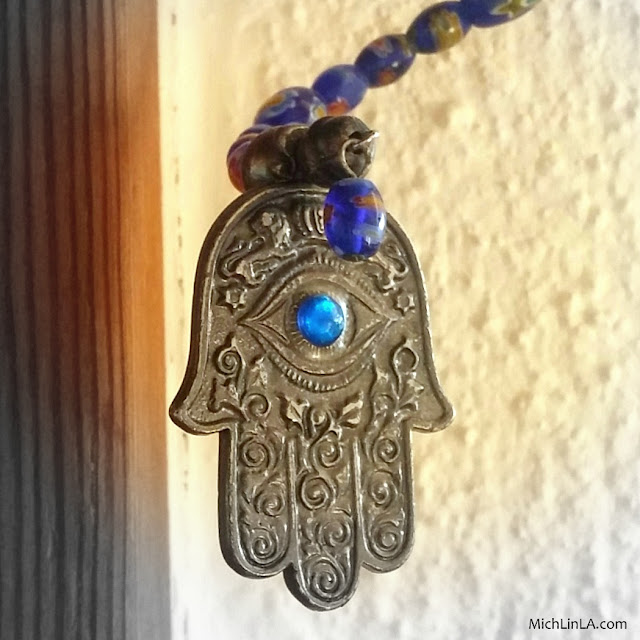
The charm is a Hamsa hand - an image of an open right hand, used for centuries to ward off dangers and the evil eye. I also make them using the Nazar or blue bead evil eye amulet.
My hanging door amulet is so simple to make! The secret is memory wire - it's what creates the springy swirl on the long stem of beads. You will need:
a Hamsa hand pendant (or a blue bead amulet)
some small blue beads
2-3 coils of bracelet memory wire
a cup hook
heavy duty wire snippers
round-nose pliers
The DIY:
1. cut a length of memory wire and make a small loop on one end.
2. thread blue beads onto the wire until nearly full.
3. when you have about an inch of wire left, add your amulet, then one final bead.
4. with the last bit of wire, make another small loop to finish the strand. Optional: add a bead dangle to the loop for a little extra movement.
Here's a closeup:
In the version above, I chose antiqued silver rounds as the final two beads, bookending the pendant.
5. screw a cup hook into your door frame. Slip the top loop of the beaded strand onto the cup hook. That's it!
Here's how it looks hanging in the doorway of my bead studio:
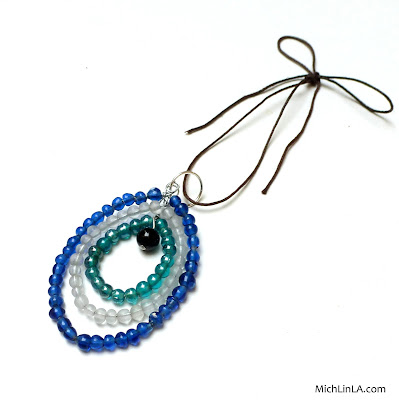
For a different version of spooky protection, here's a link to another tutorial - my beaded evil eye amulet made with craft wire and simple glass beads:
A handmade door amulet makes an awesome gift! Just right for lots of occasions. A new home...a hostess...a dude who isn't into jewelry...a Freshman dorm room...a wedding gift...
Or make one for yourself, for when the Big Bad draws near.
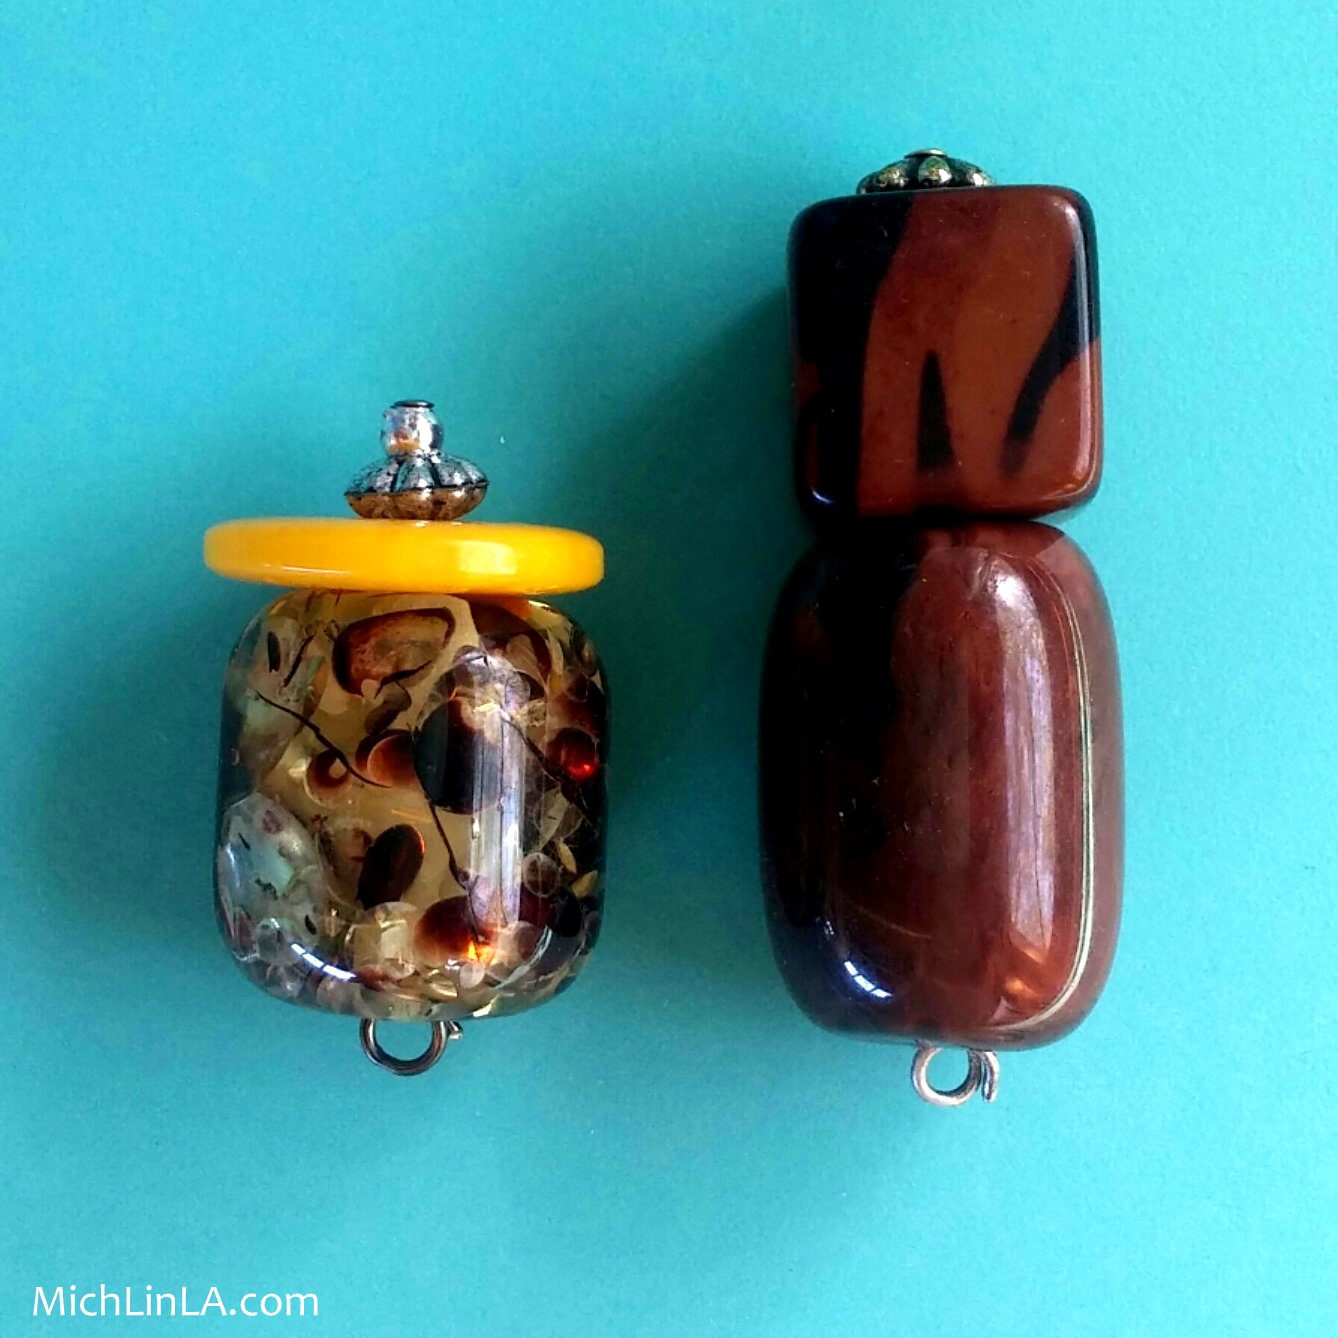
Here's a reverse mystery for you! Look at these strange tiny objects, made with two big beads.
What are they for? They are a much loved little invention of mine, a contraption I've been making and using for years.
Puzzle your head for a few moments and see if you can guess! Then scroll down to see the answer.
Scrollin'
Scrollin'
Scrollin'
Check it out...bing!
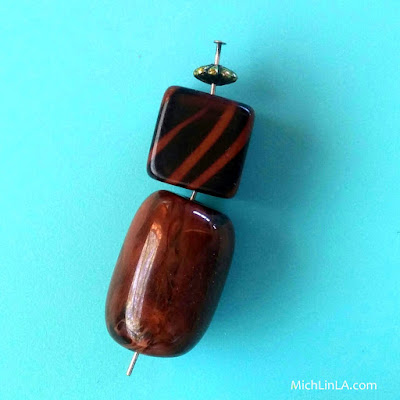
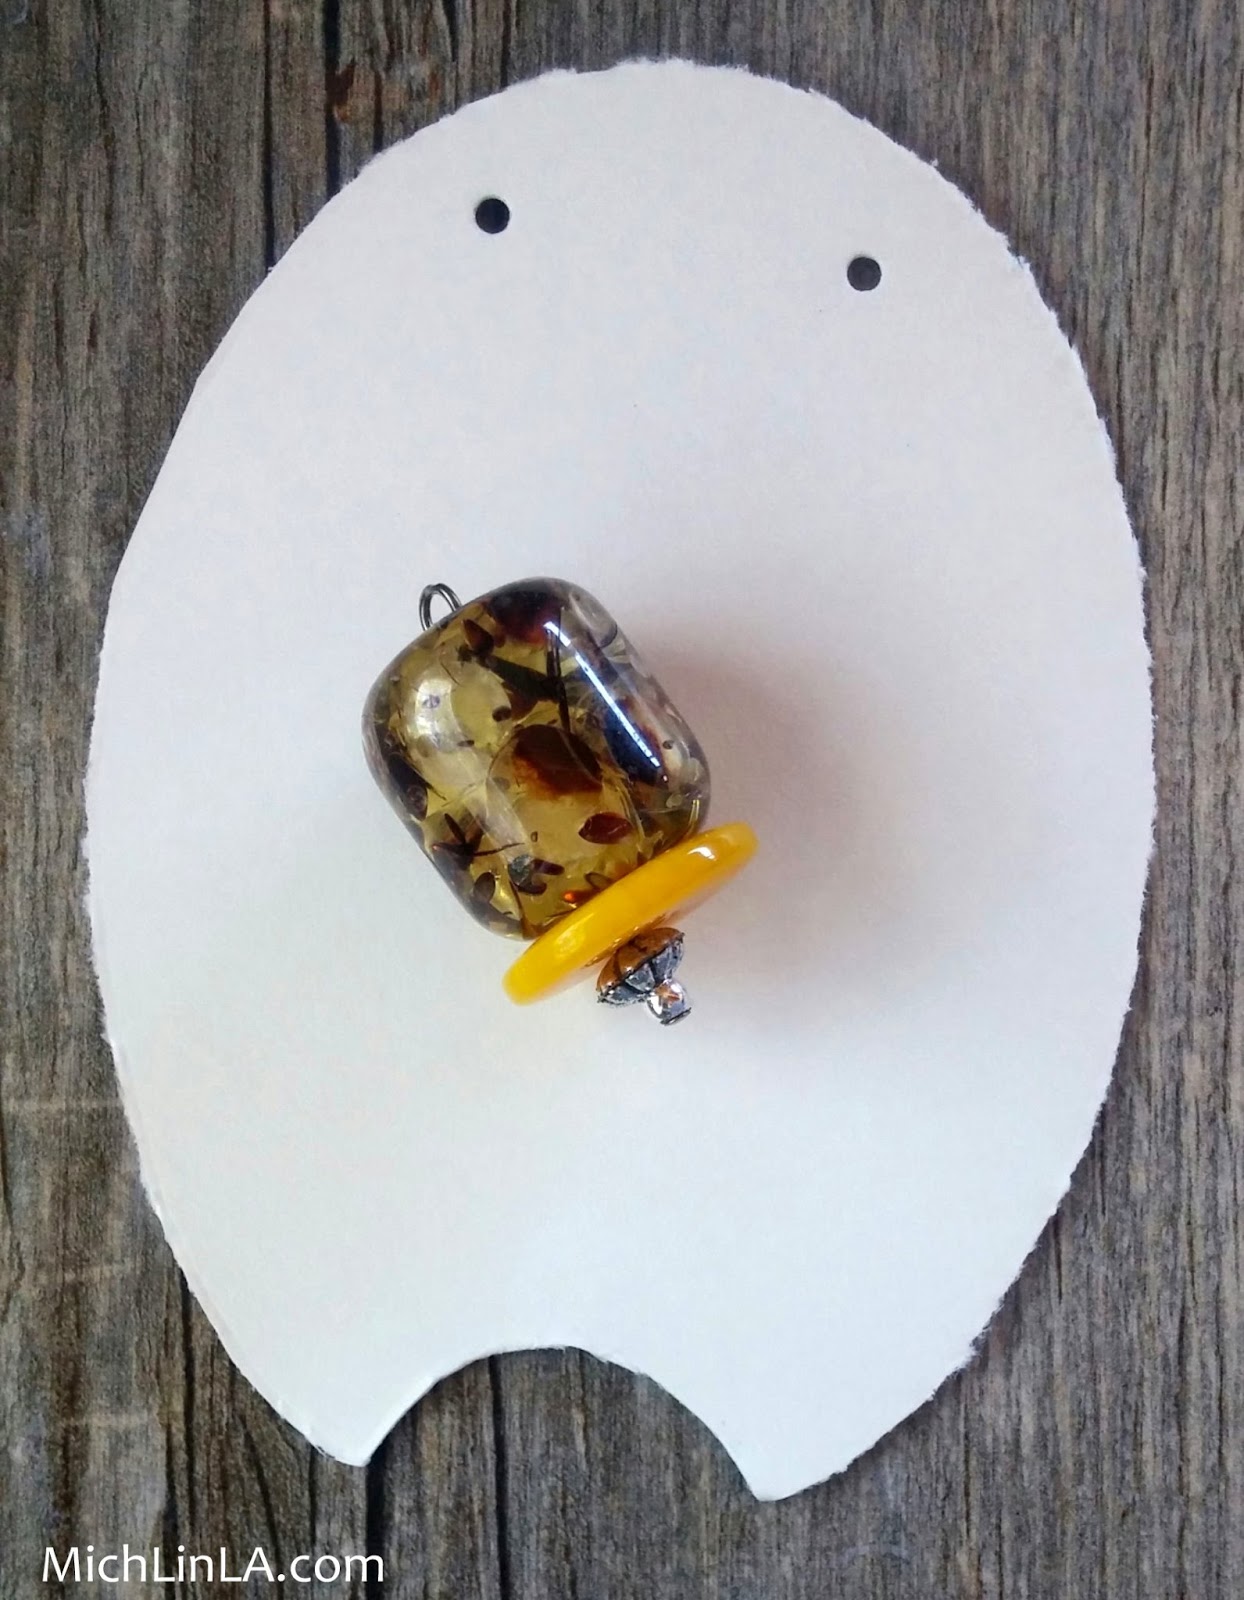
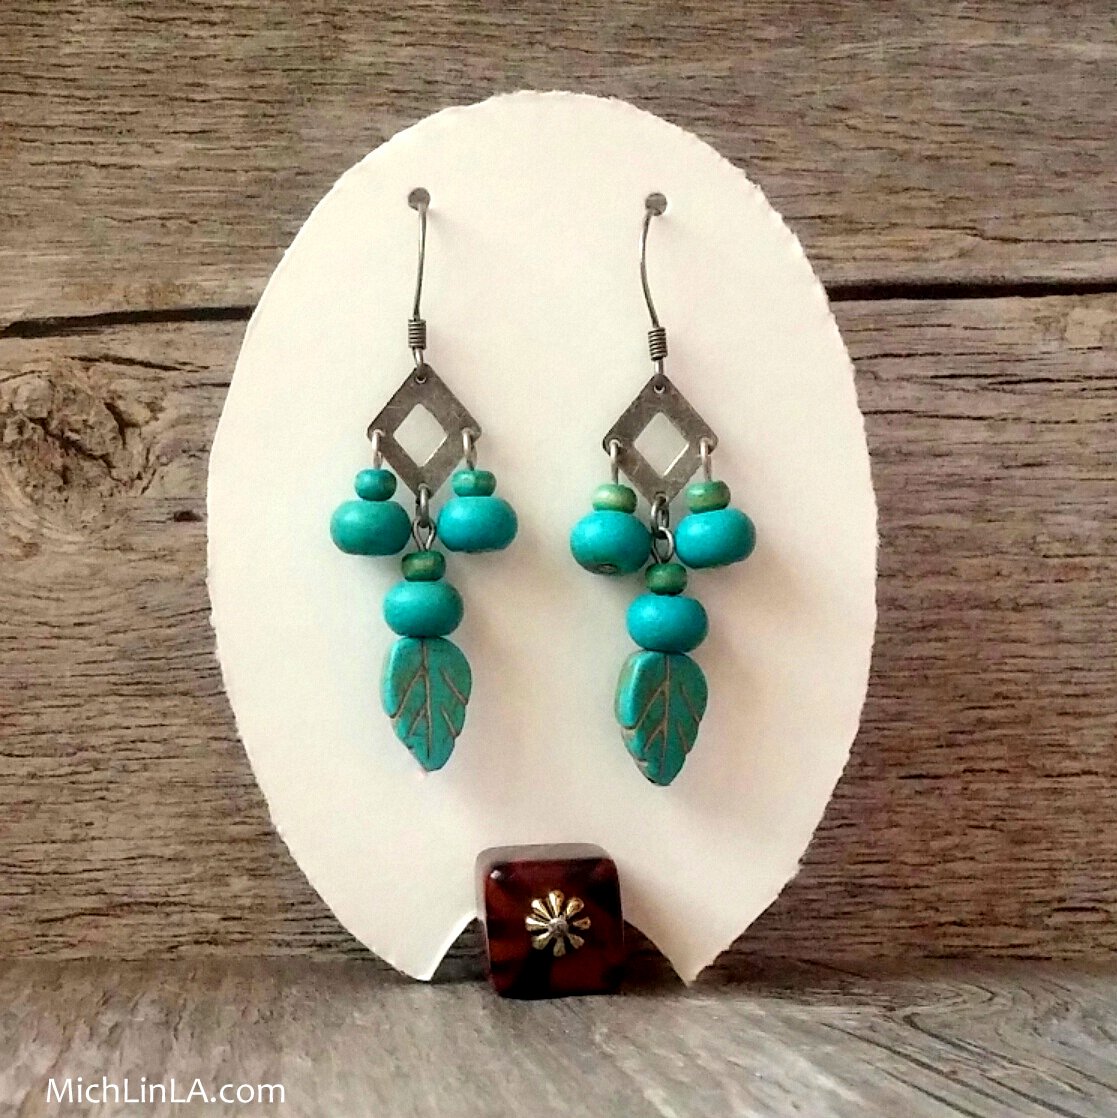
Just tuck some recycled cardboard between the two beads, and voila, earring display stands! Yep, they stand up on their own.
I love these mucho. One, they're way cute. Two, they take up hardly any space when not in use. And three, they are an AWESOME way to use up big clunky orphan beads that I'd probably never use for jewelry.
I also use them as mini holders for small photos or art:
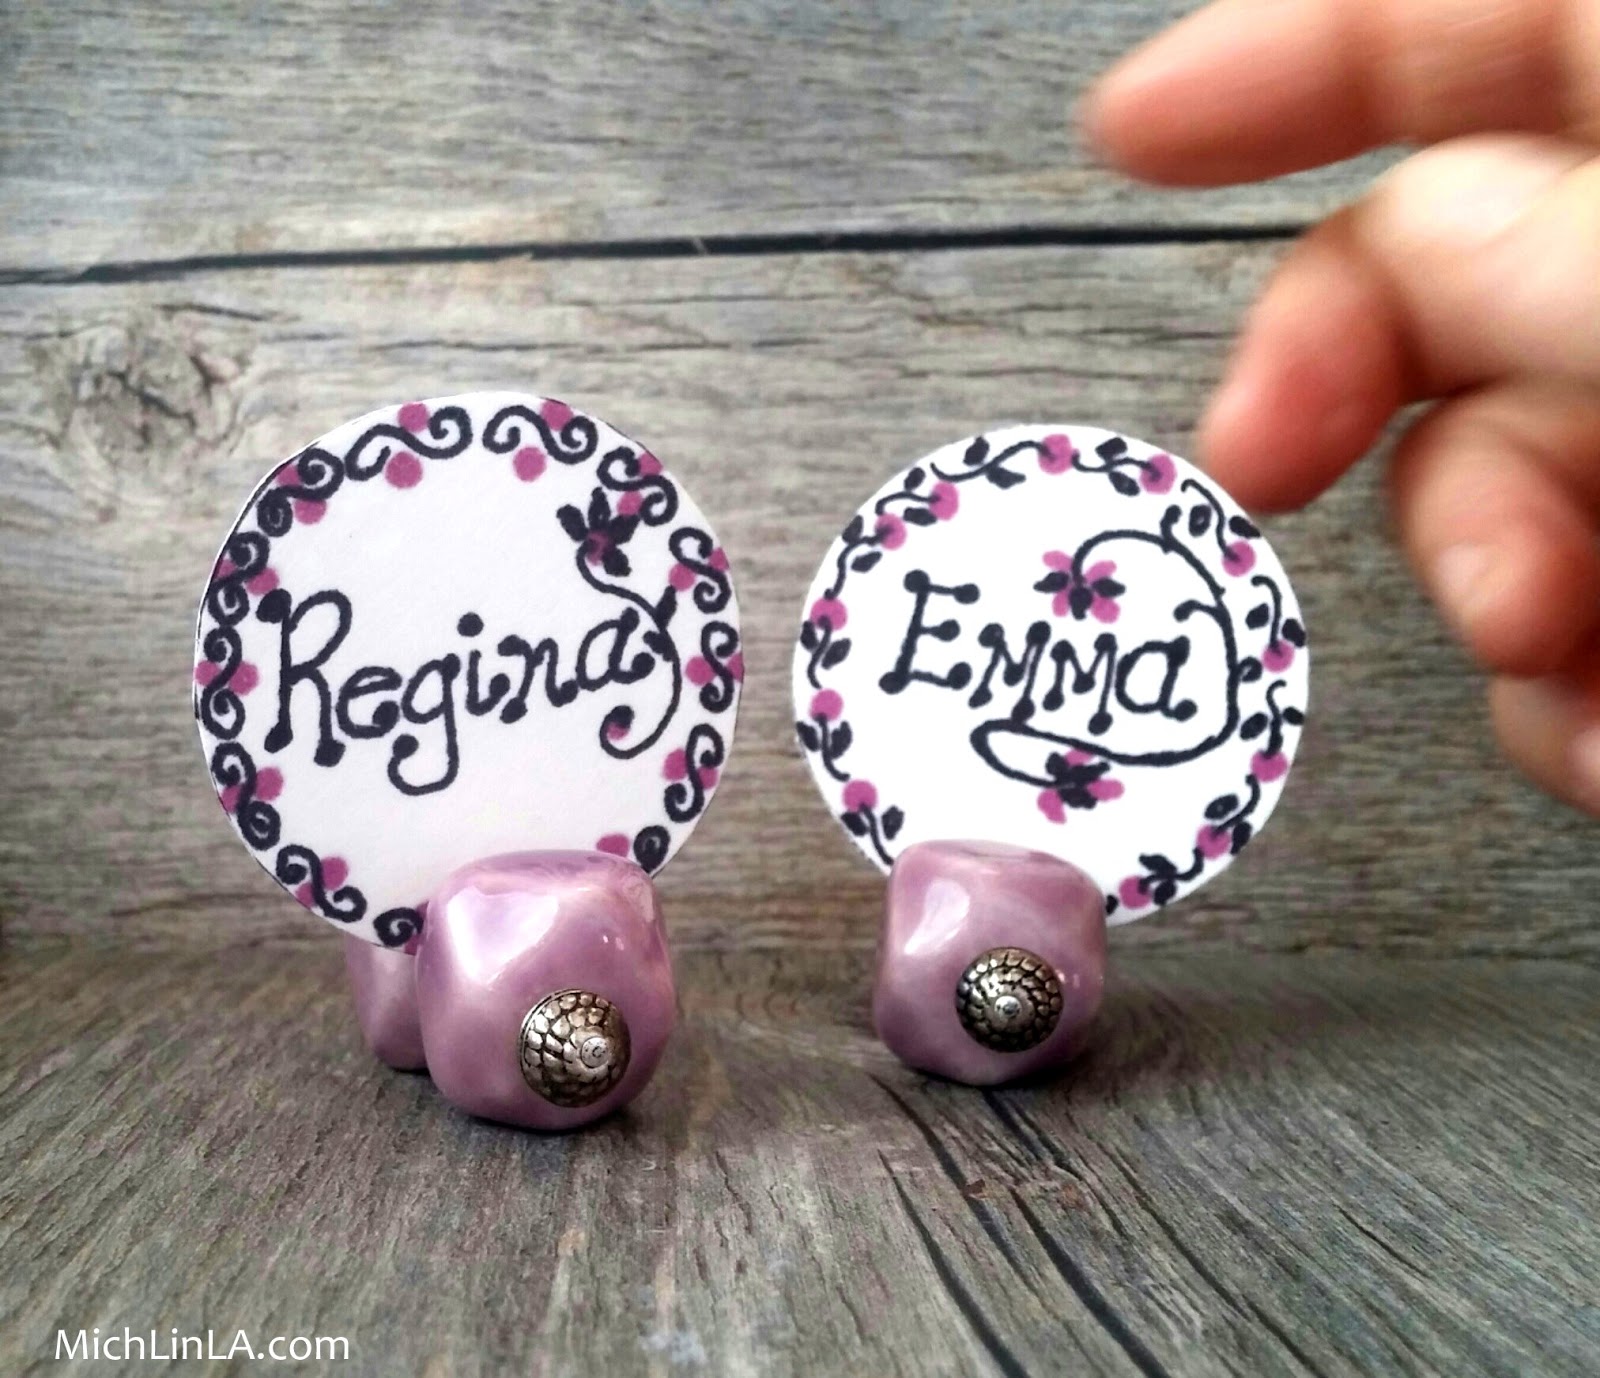
They have lots of other uses, too - like place card holders, buffet table signs, anywhere you need to label or display something while maintaining a tiny footprint. Fer example, they make the darlingest business card display:
Pretty cool, eh? Wanna DIY? Here goes!
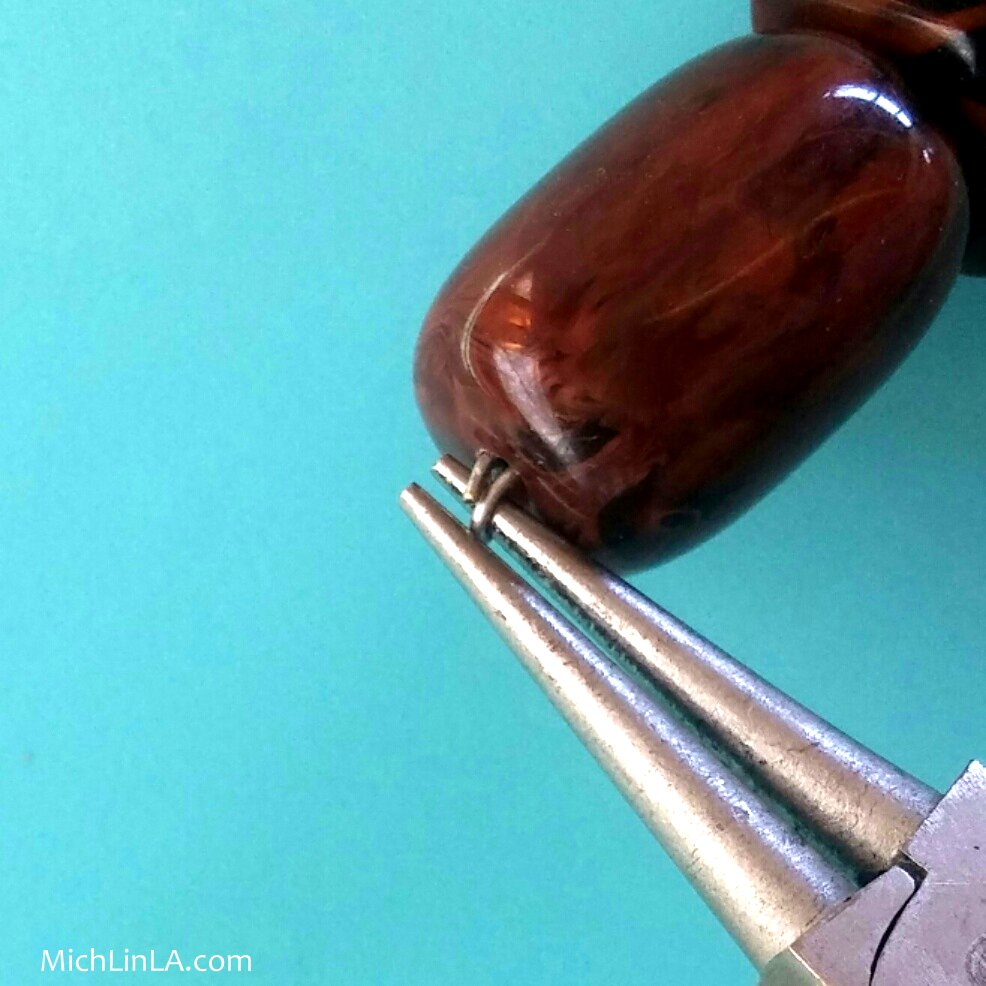
Stack two big beads on a headpin, with a little spacer bead in front to schmancy it up a bit.
Use round-nose pliers to turn the tail of the headpin in a loop. Cinch it all the way down tight against the bead.
For the earring card, cut a cardboard shape with a small bite out of the bottom. Looks a bit funny, but it helps balance the weight of the earrings.
Then just tuck the cardboard into the slot. Here's a side view:
How easy was that?
For party or wedding place card holders: instead of orphan beads for those, you might decide to choose beads in your favorite colors and make matched sets to decorate your table.
Here are some tips on making these. 1. Use beads with flattish ends rather than round. 2. Beads with the same approximate diameters work best together. 3. I used acrylic and porcelain beads here, but any material will do. Heavier beads will support slightly larger photos or earrings.
So ends The Mystery Of The Thing With Two Beads. Did you figure it out before scrolling down? Do tell.


