Showing posts with label supersecret challenge. Show all posts

Friday, June 11, 2010

A sneak peek. Into the maw of doom.

Congrats to the lucky (?) winners of the Crazy Crafty Wicked Cool Envelope of Doom inspirational challenge! You know who you are.

Just wanted to give you a teeny sneak peek:


Hmm. There seem to be a lot of them. I said there'd be five winners, but as usual, I feel so bad that so many people entered, I decided to up that to eleven. (The number of padded envelopes I happened to have in the house. Hee.)

Anywho! These terrifying envelopes will be on their way to our intrepid crafters any moment now.

Thank you to everyone who entered! And huge thanks to Heather at Dollar Store Crafts for the original inspiration. I anticipate many fun craft projects will come of this. (That is, after the inevitable nervous breakdowns that will occur upon first viewing the contents of these terrifying packages of crafty evil.)

Bwah-hah-hah-hah!

Thursday, May 27, 2010

Enter to win the Crazy Crafty Wicked Cool Envelope of Doom!

Hi, you guys! Just wanted to explain why I haven't posted lately. I've been away, traveling in a strange land. I've come home with my head (and my little rolling suitcase) stuffed with inspirations and ideas. Can't wait to share them! I'll be posting soon.

In the meantime, though, how about a GIVEAWAY (whoohoo!) combined with a really testing CRAFTING CHALLENGE? (Ooh, scary.)

When I began this blog, it was because the lovely Heather M. of Dollar Store Crafts sent me an envelope of random junk as part of her SuperSecret Stashbust challenge. Here's what was inside:

I challenged myself to make ten things from her items - I managed to do it, too! It was hugely fun and inspiring. (If you haven't had a chance to see what I made, here are all ten projects.)

But! I didn't use everything from Heather's stash. There are a number of cute, strange or beautiful items still waiting to be transformed. I could use them myself. But I thought it would be more fun to distribute them to some other hardy crafters. (And if you entered Heather's original giveaway and didn't win, here's a second crack at it!) And so! I hereby announce...

The CRAZY CRAFTY WICKED COOL ENVELOPE OF DOOM inspirational challenge!

I'm calling them 'envelopes of doom' because the items are going to be pretty eclectic. Okay, insanely diverse. And a few, possibly mind-bogglingly awful. It's up to YOU to re-imagine and transform them into wicked coolness. Here's the plan:

I shall divvy up the remaining bits of of my SuperSecret Stash into five envelopes. I shall add a bunch of nifty stuff from my own personal stash. And I shall send it to FIVE OF YOU CLEVER PEOPLE, if you promise to make at least three interesting things from the contents, and post them online for us all to see.

Also, since this is kind of a "craft-it-forward" deal, I think your assignment should be to make things for other people - in other words, come up with three gift ideas, and tell us how you gave your creations away.

If you would like to play, leave a comment at the end of this post. Deadline: June 10th. (Note:
you don't have to live in the U.S. to enter, I will send envelopes to anyone anywhere.)

Enter now! Your manila-encased doom awaits.

Oh, yes - very important - please please please, when leaving your comment, be sure to include your email address so I can write to ask where to send your envelope of doom. Seriously, I need to be able to contact you - do not forget!

UPDATE: THIS CHALLENGE IS NOW CLOSED. Stay tuned for brilliant results from the winners!

Friday, April 23, 2010

...and ten! Ten million headbands, that is.

Here it is, one last post about the 'SuperSecret Challenge' challenge. I've had so much fun! Today's project is another 'infinite convertible': a blank slate for creativity, style and thrifty re-purposing.

From the challenge stash, I took this plain headband. Sometimes, you just want a basic headband. This one fits my big head really well.

I took a two-holed chipboard tag (also from the stash), peeled off the paper, sharpie-ed black around the edges. The only other ingredients: string, and a cute found object (in this case, a fabric rose from a scrunchie that lost its scrunch).

The key to this project is the two-holed tag. Tie the flower to the tag...

...then slip the headband through the two holes.

You end up with...

Fancy headband!

I've seen them in stores with big price tags and all kinds of embellishments: huge flowers, feathers, weird 'fascinator'- type creations. You could make dozens of these and slip them on and off one headband to match any look.

No chipboard tags? Make your two-holed base from any plastic or cardboard that's reasonably stiff, thin enough to cut but still slightly flexible. These are from the recycling bin:

Here's a retro/neato variation, still using the two-hole, slide-it-on-and-off concept:

I cut some felt shapes, and made two small slits instead of holes (a little hard to see in this pic, but they're there). Then I pinned on some big brooches.
Wahlah! Fancy brooch fascinators.


I've been collecting pins forever and have a ton of pretty, retro or bizarro choices. Here are just a few ideas:

This one's my favorite:

"Ahhh! Mommy, mommy, that lady with the big head has a spider in her hair!"

Thanks again for checking out my adventures in stash busting. It's been crazy fun. Hope you will continue to visit; I have ideas percolating even now.

Thursday, April 22, 2010

Nine! Convertible hatbands.

Hi! This is project 9 of 10. For first time visitors, please see previous posts on the SuperSecret Stashbust challenge - a really fun project initiated by Heather M. from the amazing blog Dollar Store Crafts.

Today I have grabbed three items from the challenge stash: a thin strip of folded fabric, a cute linen flower and some novelty yarn:


Let's see what I did with 'em! First, I embellished two pieces of the fabric strip with a little bit of yarn, using basic white glue.


I used fabric paint to color some of the yarn robin's egg blue for a different look.


When dry, they ended up like this:


I embellished a third length of fabric with the linen flower, using my legendary "just barely manages to sew on a button" needlework skills.


Finally, I added a simple velcro closure to each piece.


I happened to have some of the glue-on kind, but you could use any kind of closure you prefer - snaps, hook-and-eye, sew-on or self-adhesive velcro.

So what have I made?

Here is my white cowgirl hat, regular.


Here is my white cowgirl hat, SuperSecret StashBusted!


My favorite thing about this simple project is the velcro idea: the ability to change out hatbands. It's thrifty...it's a true blank-slate project you can take in any direction...

And it's especially great if you have a big head and can hardly ever find a hat that fits! Yes, I am talking about my big-head self.

Who needs three hats? Who needs ten hats? All I need is one, infinitely convertible.


Yee haw!


Tuesday, April 20, 2010

Stashbust Project Eight: reversible pendant.

Today's project was an extra challenge I set myself. I decided to try creating something inspired by the object I liked least from my StashBust Challenge envelope. It was this greeting card:


In case you can't read it clearly, it says
"Sometimes you ride the wave. Sometimes the wave rides you. -Old surfer maxim"

I guess I've never felt much pull to use a quote as the focus of a piece. And the drawing on this card doesn't do a whole lot for me, either.

I thought and thought. The card was yucky! I should just abandon it and choose something better...no. I didn't want to give up, there must be something...

I realized I liked the quote for its duality. I had the idea to make a reversible pendant - one you can wear either way, depending on what kind of day you are having.

Optimism:


Pessimism:


I bet there are plenty of days in your life when the pendant would be flipped halfway through the day - and maybe flipped back again as well.


Although I didn't use an actual object from the challenge stash, this pendant has an upcycled history. It's a slice of antique walnut, from a broken headboard that our next door neighbor rescued from an alley. (Thanks, James.) People in my neighborhood are generous with their alley-scavenged treasures!

I also thought up a few variations on the theme. I want to make some as gifts targeted to specific people ; everyone has those reversible days. I bet you could come up with a couple for people in your own life. How about:

Sometimes you spin the wheel. Sometimes the wheel spins you.
Sometimes you run the household. Sometimes the household runs you.
Sometimes you crunch the numbers. Sometimes the numbers crunch you.

Sometimes you ride the wind.


Hey, sometimes you make the craft.

Sometimes the craft makes you. :)

Monday, April 19, 2010

Michelle goes a little overboard.

A quick update to the previous post. I may get some flak for this...it's a tad whacko.

So we made the cute hair combs, right? We like them, yes?


But I was a bit sad, realizing that since I never wear orange, I would end up giving them away (probably to my beautiful orange-wearing friend Kim). Then, suddenly, I wondered...

Could I alter the colors of the yarn?

I didn't want to keep the orange, but I'm fond of the second color, that chartreuse-y yellow-green. So I took a length of yarn...

And painted all the orange blobbles pink.

Yes, you read that right. I may have taken this challenge too far, even for me. But really, it wasn't that hard! It only took a few minutes, the paint dried really quickly, and I whipped up some hair combs in fresh colors.

For those of you who have not yet clicked away in horror, a mini tutorial.

I used ordinary craft paint. The neatnik version was using a Q-tip, which worked fine:


But if you don't mind getting a bit painty, it was actually easier to dip two fingers in the paint and roll each blobble between them. I did another length in purple. It was fun, look:


So that's what I did. Here's how my altered yarn turned out:


(You can click on the photo to see it bigger. The piece in the foreground is original recipe.)

Yes, I am a little embarrassed. But the challenge was to be creative about working with limited supplies, without buying anything new. Obviously, if you're knitting something or doing a project using miles of yarn, this isn't feasible. But for a teensy project like these hair combs...why not?

New combs in pink-chartreuse and purple-chartreuse:


For anyone cuckoo enough to give this a try: I attempted to Sharpie out the orange, but it didn't work so well. I don't recommend Sharpie-ing. I wonder if Ritt dye...no. No.

The madness must be stopped.


Project seven: cool hair combs! (Plus a small side of pasta.)

You guys! Thank you so much for the kind comments and the visits. So encouraging. We frugal kooks must stick together. Next time someone laughs at my weekly dollar store prowl, my yard sale brake squeal, my hoarding of useless plastic bottle lids...I will think of you all and smile like Mona Lisa. Or Dr. Eeeeevil. Because we have plans for those doubters...big plans...

Bwah ha ha ha ha ha ha! Pause for effect...

One such plan involves hair accessories! Here comes -

Project Seven

This one is so easy it truly feels like cheating. But no! There is no cheating in frugalball. If it looks like you bought it at a real store with actual money, no one has to know otherwise.

Ingredients: Novelty yarn and hair combs. (I got 12 combs for a dollar at you-know-where.)

Cut about 8 feet of yarn. Start like this:


Wrap sideways around the comb, maybe 8 or ten times. Tie off at the back. You should still have a tail of yarn attached, several feet long.


Start wrapping the tail in and out among the teeth of the comb, gathering the sideways wraps as you go:


Wrap each tooth to the end, then back again to the starting point. Tie off the ends and trim.


Bam! Your combs are complete.


You could also embellish further, with charms, beads, or anything that complements your yarn.

I have a whole bunch of naked combs left to transform, and I still haven't spent a dollar. C'mon, doubters. Gotta love that.

Next, a quick re-visit, i.e. a little side of pasta.

Remember the pendant from yesterday's post? (A little ravioli of paper, string and clear contact paper.)


I just wanted to show you a different version, much faster to make 'cause you don't need to wait for glue to dry. Swirl your string directly onto clear contact paper...


Make ravioli...


Turn into jewels!


I like them just as much as the paper version.

As a further note, I found you can actually cut the edges right up to the string, and it will still hold together. It gives a different look - less pasta, more sandwich. Like this:


I made those a few days ago, but then set them aside as a craftfail. I assumed they would de-laminate, but I was wrong! Over time, the contact paper appears to sort of meld with the string for a quite permanent connection. Now I can't pull them apart at all.

Yay! Not a fail!

Saturday, April 17, 2010

Projects five and six: string theory.

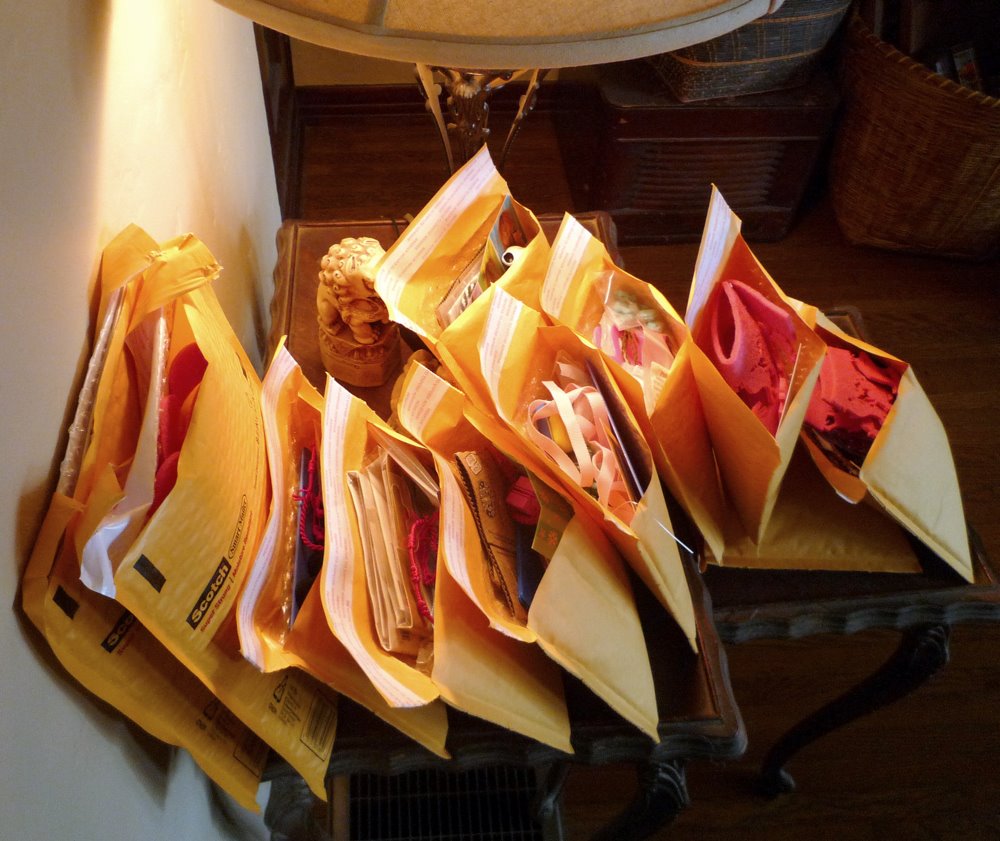
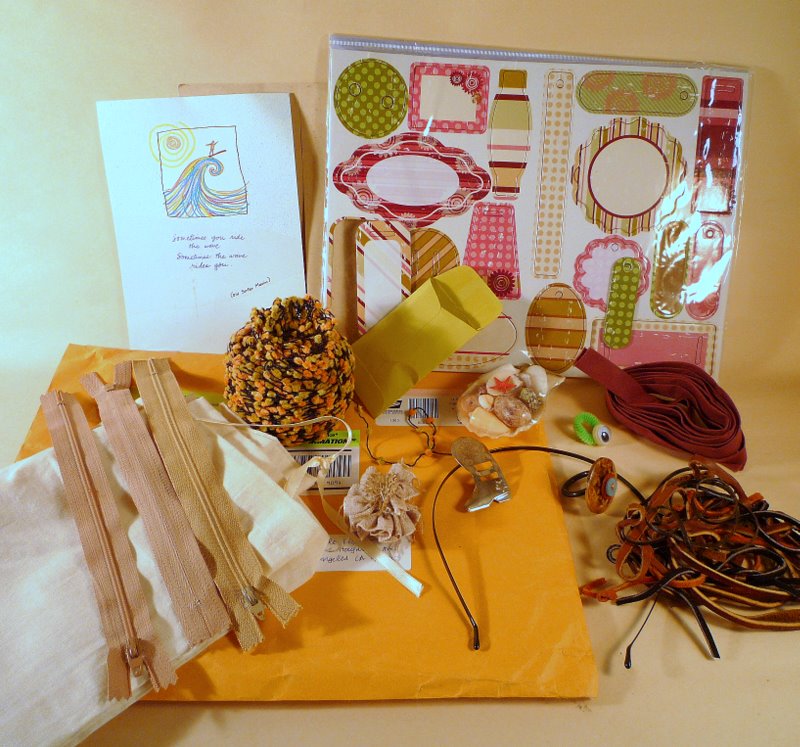
Today, two new jewelry ideas. First, let me state for the record: I cannot sew. I cannot knit. I cannot crochet. I don't seem to be able to do anything with thread, yarn or fiber beyond sewing on a button.

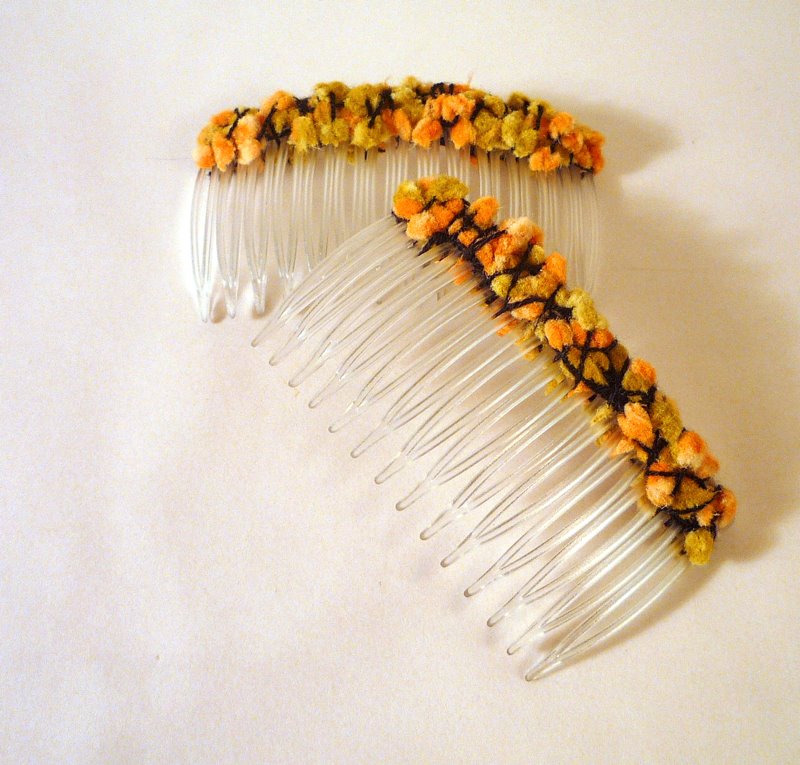
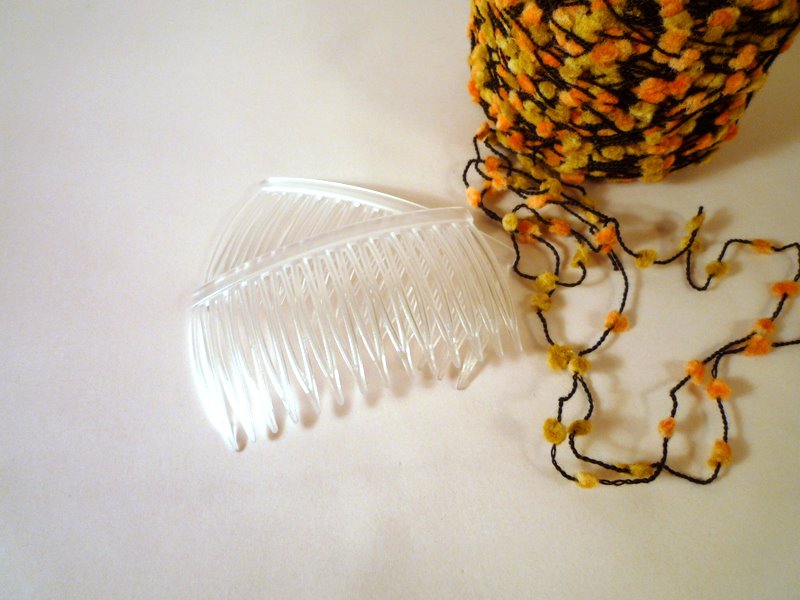
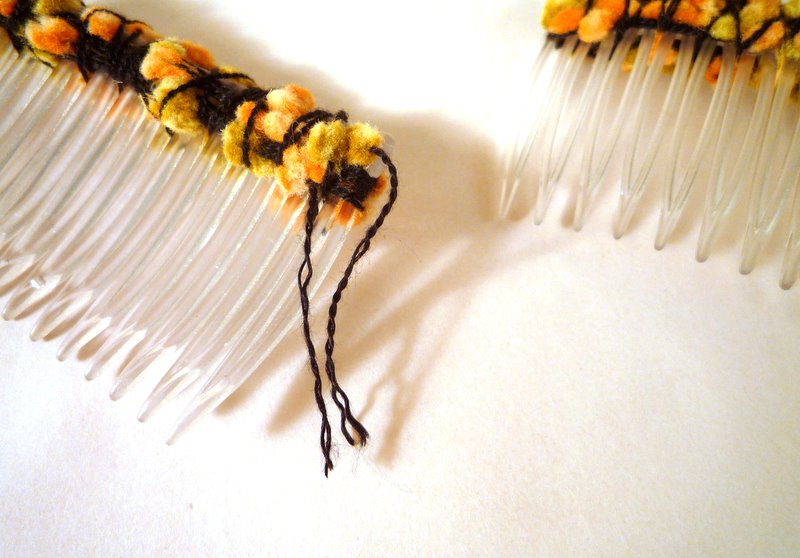
So what on earth to do with this ball of yarn-y, string-y, fiber-y stuff??? I don't know if it has a name; it must be some kind of novelty yarn. Anyway, it's pretty, and a little strange. These two projects are also a little strange.

Project Five.

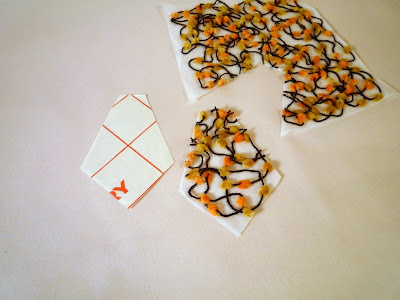
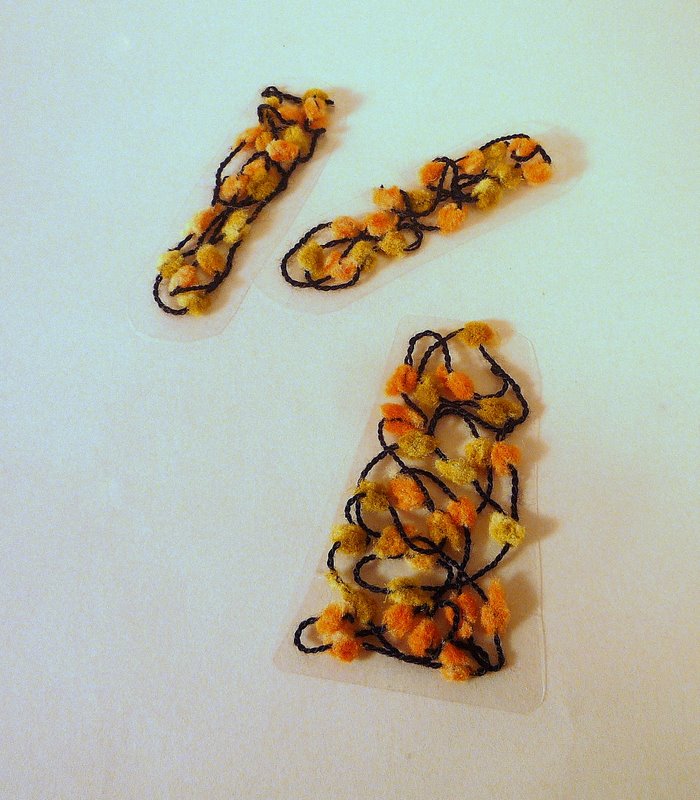
Start with a small piece of paper, about six inches square. You could use parchment or any other paper that takes your fancy. I chose tracing paper because it was in my closet and I liked the semi-transparency of it.


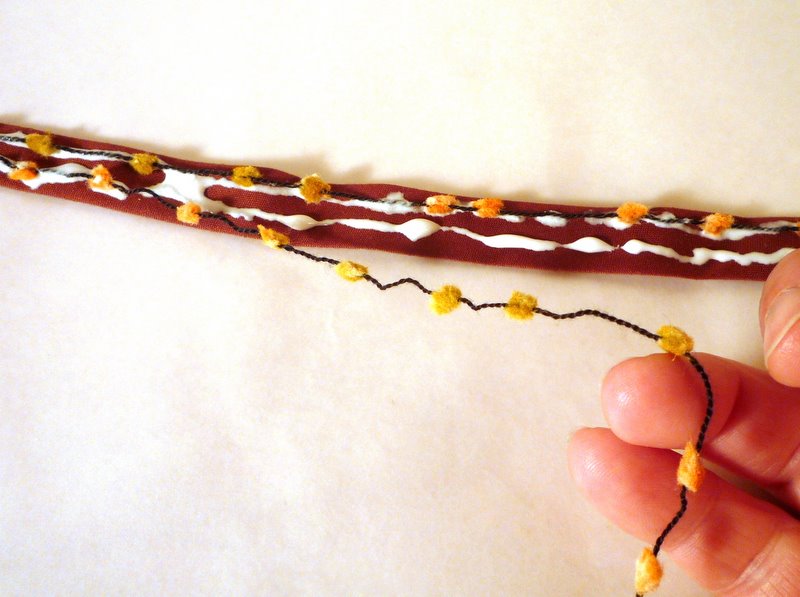
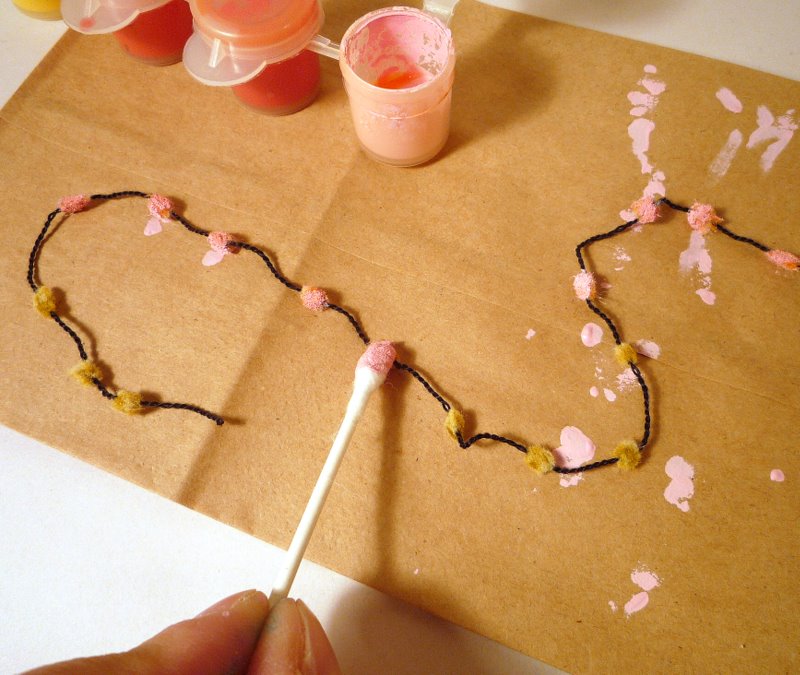
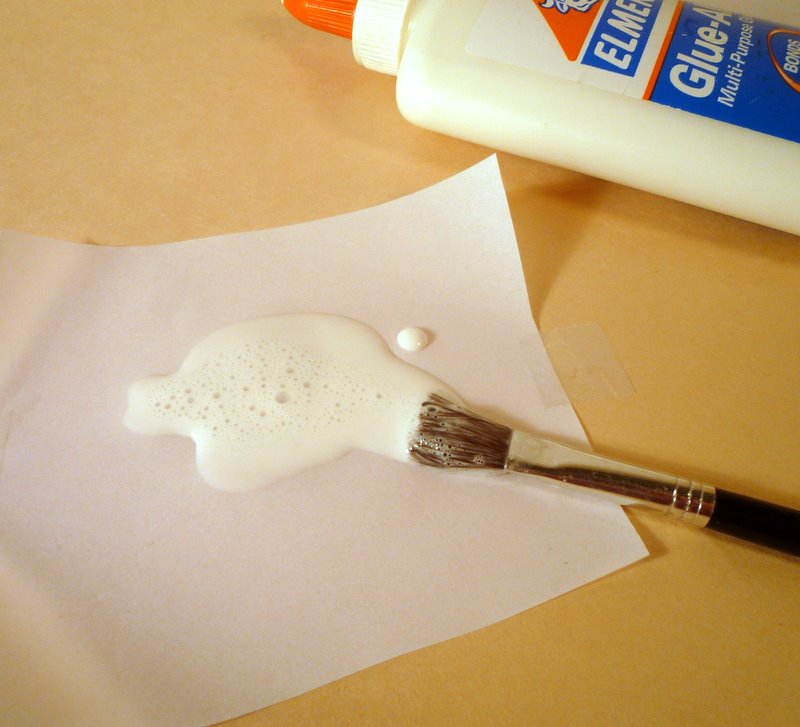
Mix 2 parts white glue to 1 part water, and brush it (or finger paint it!) all over the paper. Messy. I put down waxed paper first.


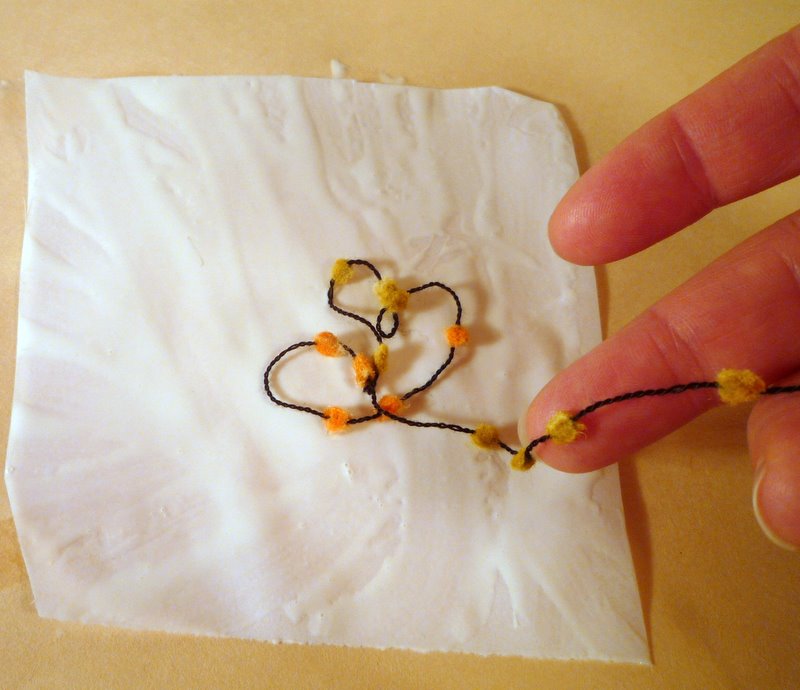
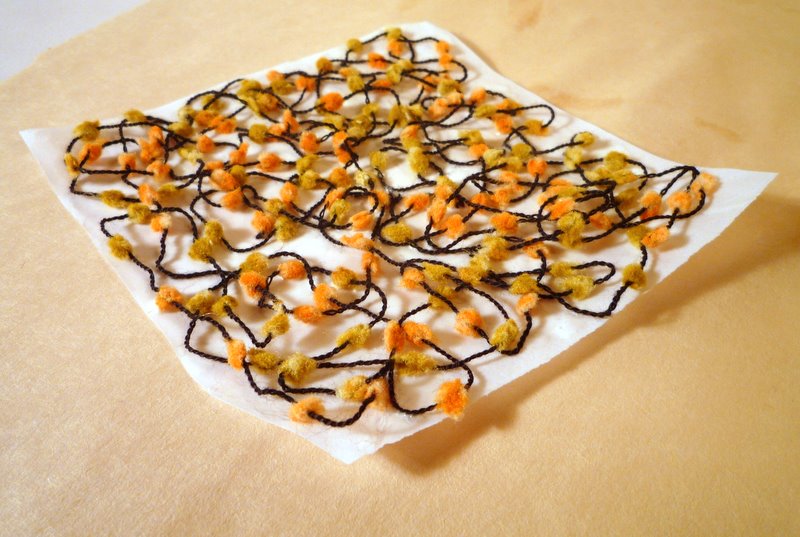
Start placing the yarn, working kind of gently. Try for swirly patterns. This part is pretty much serendipitous, although I did try to guide the little colored blobbles into empty areas to fill the paper somewhat evenly.


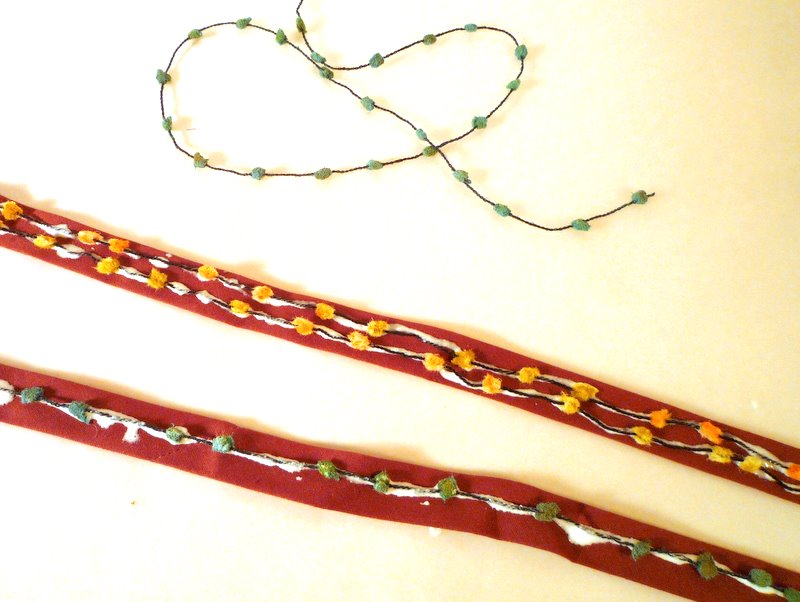
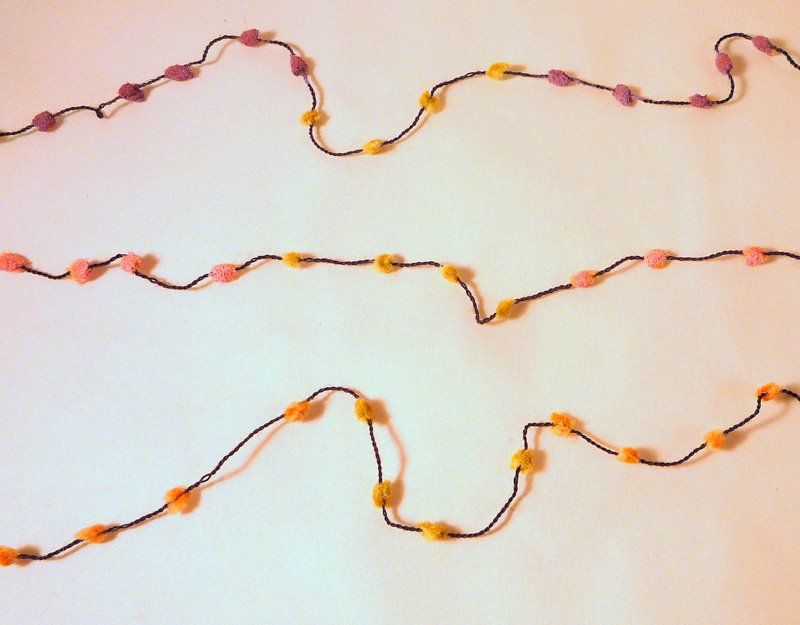
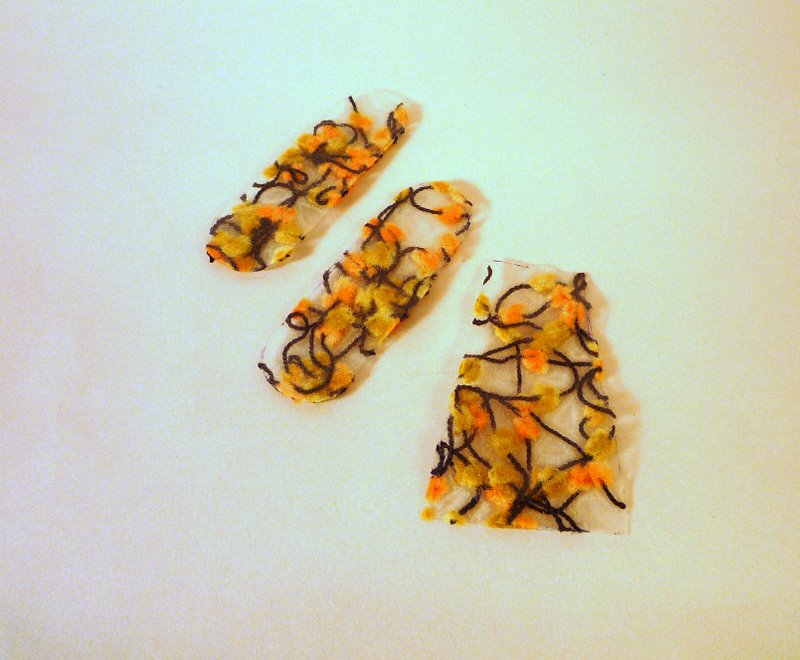
You will get something like:


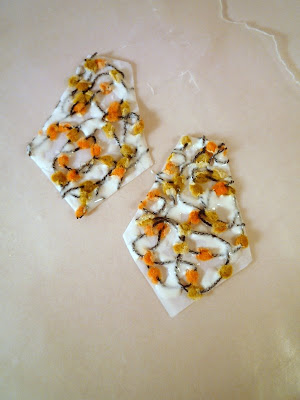
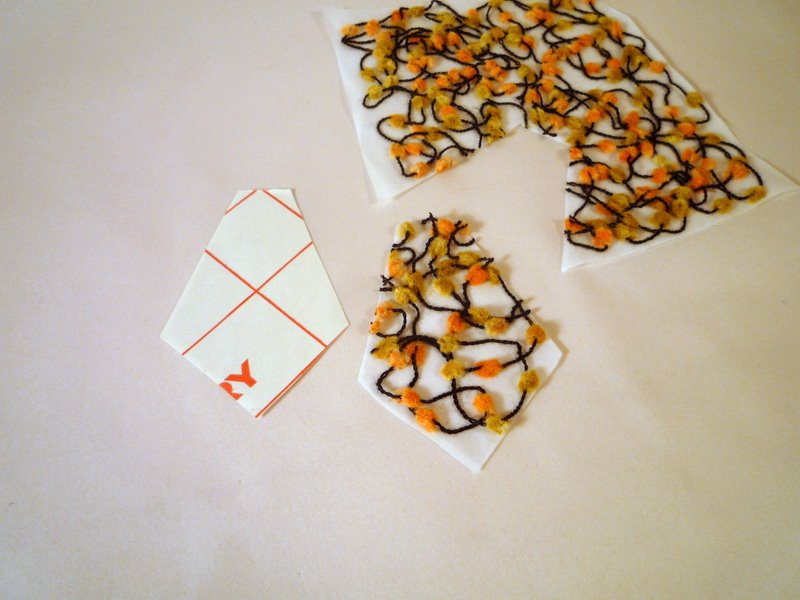
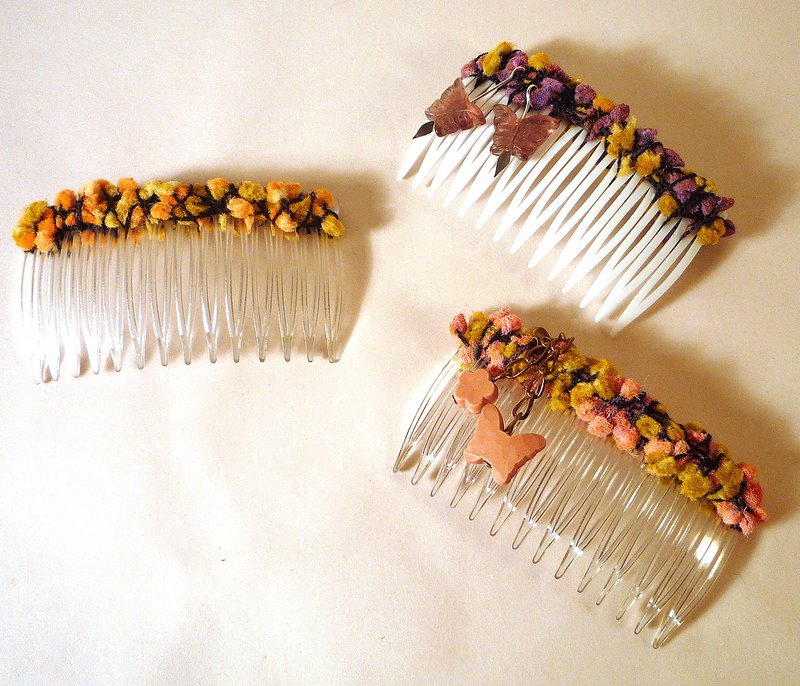
Let it dry, then cut out 2 of any shape you think would make a nice earring. I used a template so they would match.


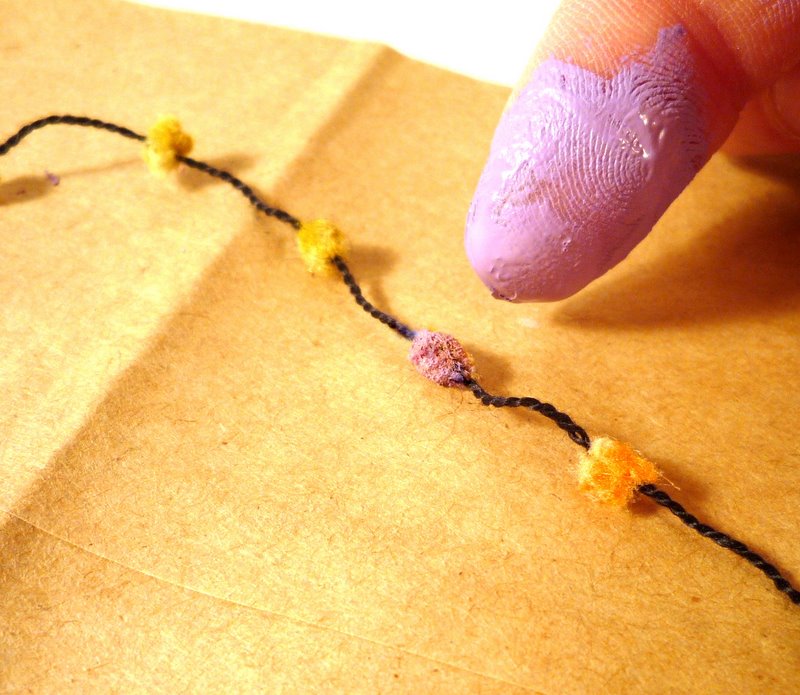
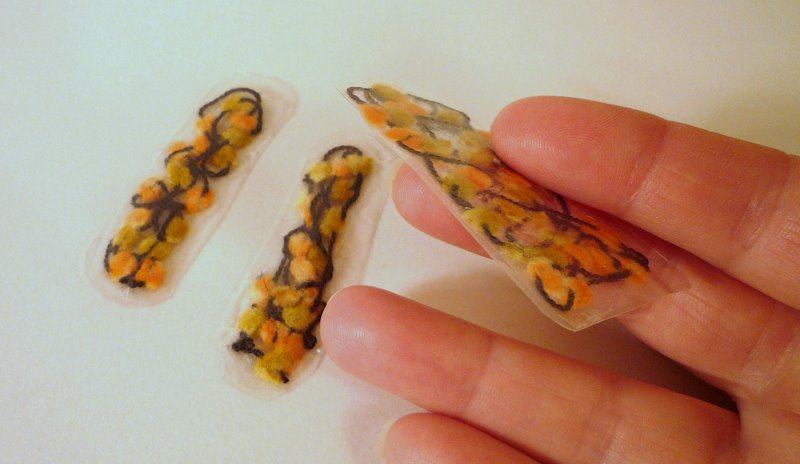
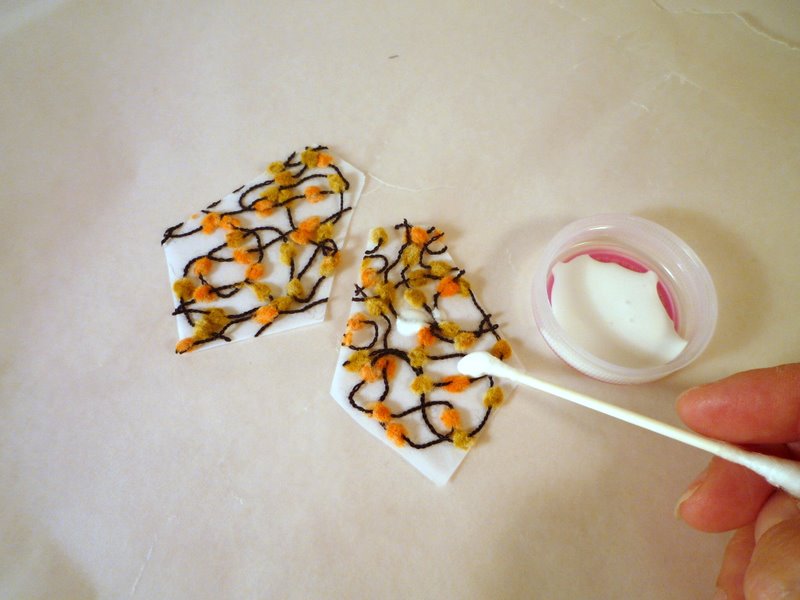
Using full-strength glue, dot over the thread parts, avoiding the colored blobbles when possible. Don't worry if glue gets on them, though - it's not too critical.


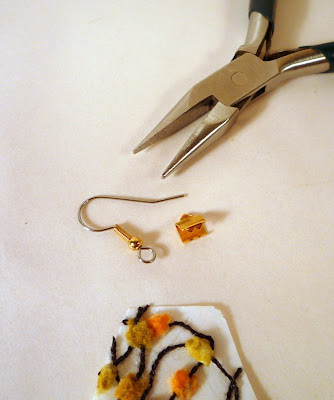
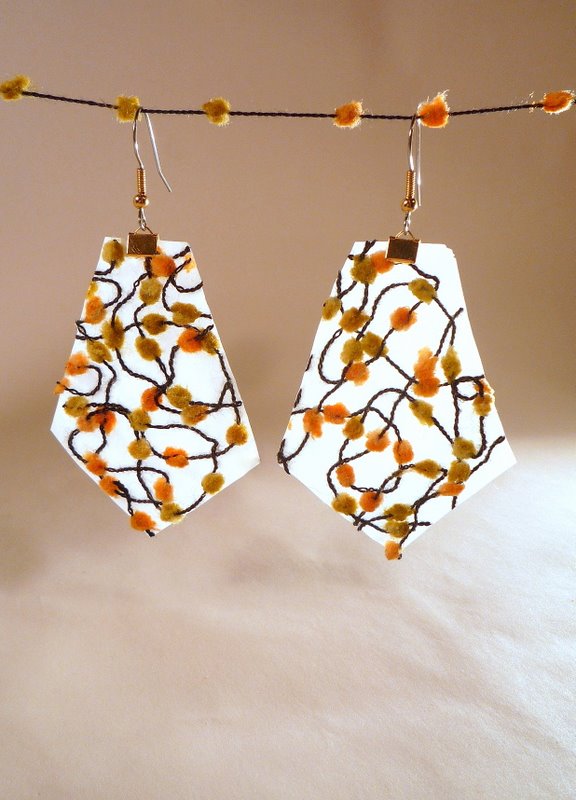
Once the glue dries completely, add a fishhook earring wire. I used a ribbon-end finding, but you could also just poke a hole in the top of your piece and attach the earwire through that..

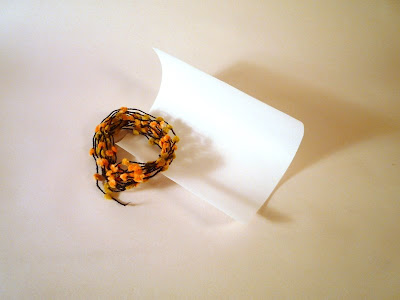
Done! Earrings! You can make them any size, but I went with big (okay, gimundo) to sport the maximum amount of colored blobbles.


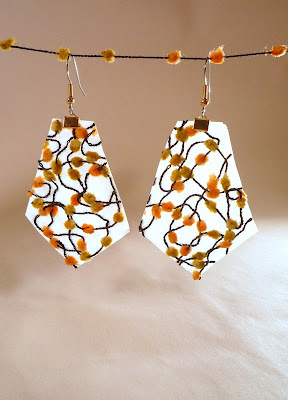
I tried to give you a photo that shows the translucence. (My husband, who knows how to light stuff, helped me get this shot - I love it!)

Okay! Let us move on to...

Project six.

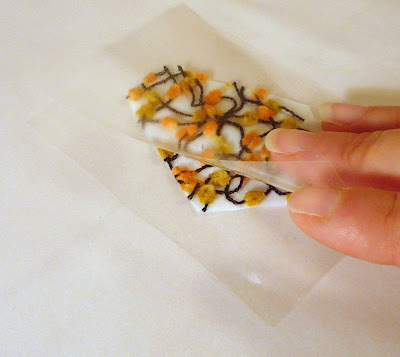
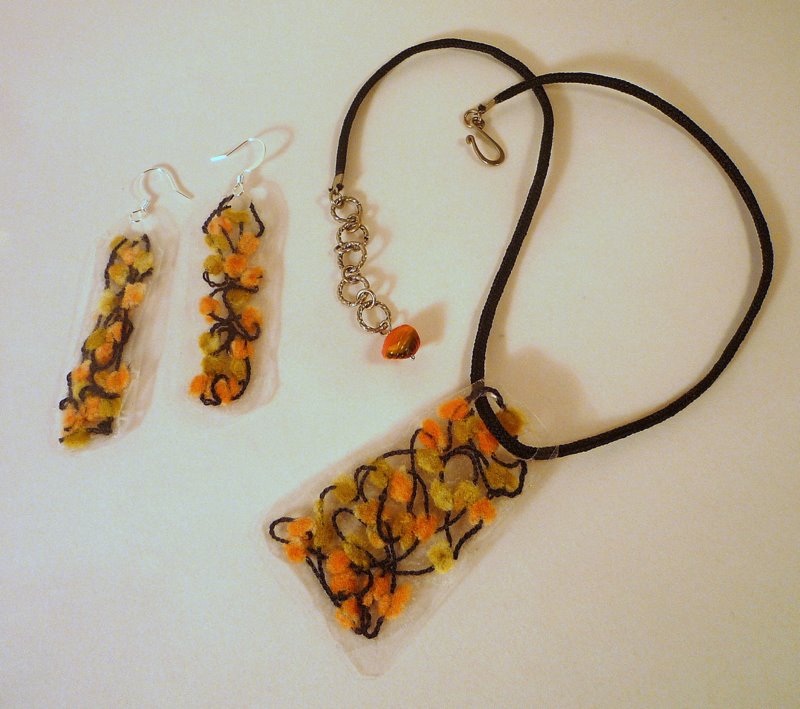
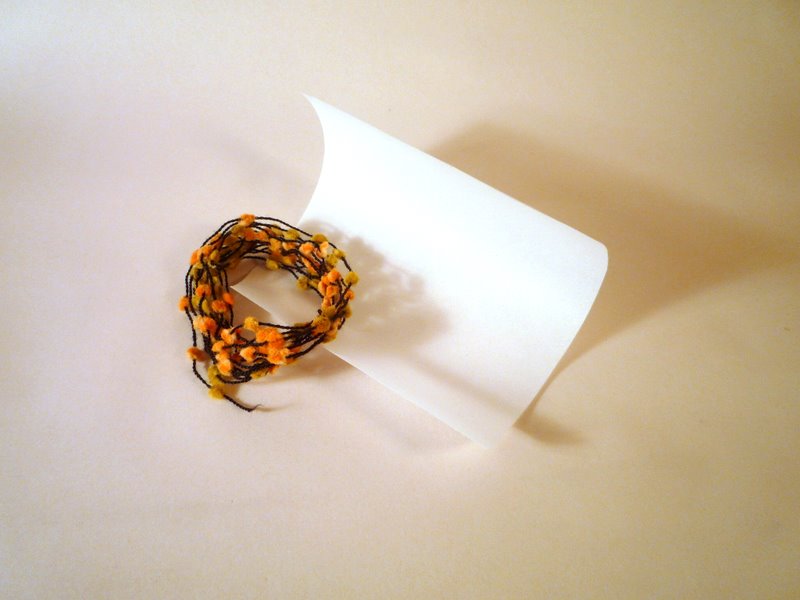
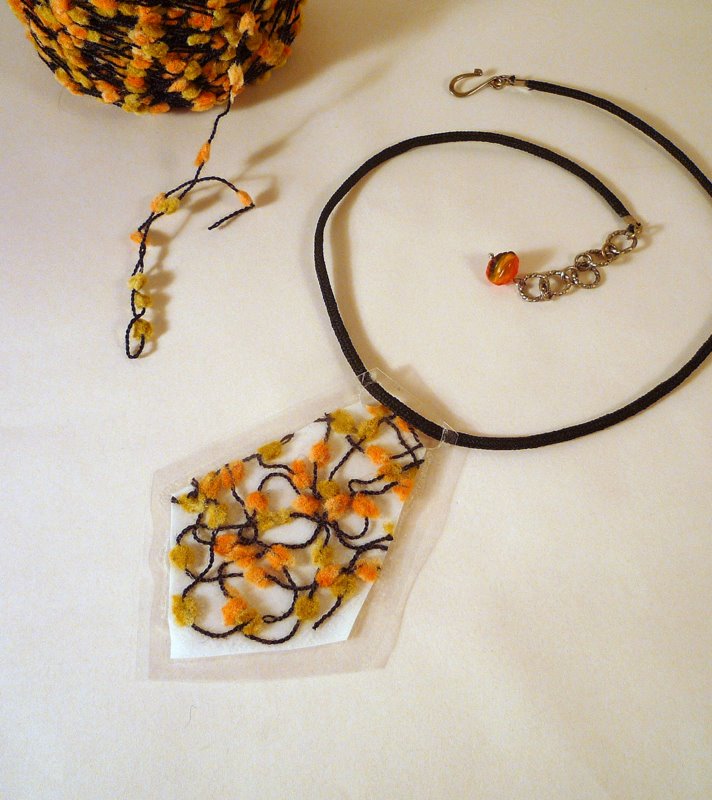
This has essentially the same starting point, with a different technique to finish. Once you have your glue-dried-string-swirled-paper piece, lay it on a small piece of clear contact paper.


Lay another piece on top, and press hard along the edges to enclose your string art. Cut around the edges, but - this is important! - you need to cut it wide, leaving a rim of clear laminate around your paper shape. You end up with:


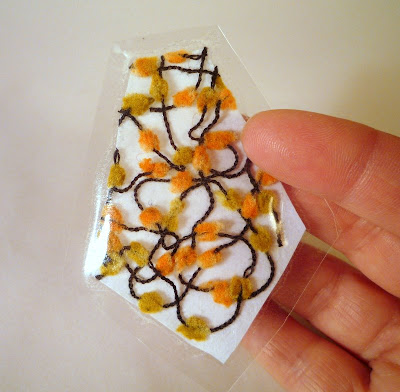
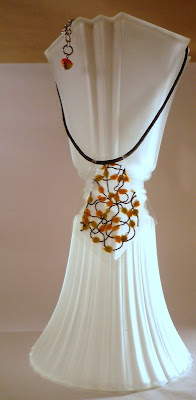
A very, very cute ravioli. I turned this particular ravioli into a pendant: punch 2 two holes, string a cord, add a matching bead. Check it out:


I think these two string projects ended up fairly unique...lighthearted...only a little bit weird. Well - the ravioli one, maybe more than a little bit. But they're undeniably fun. Now I wonder what other results you could get, with different types of novelty yarn? I know you all have some. If anyone tries it, I want to see!