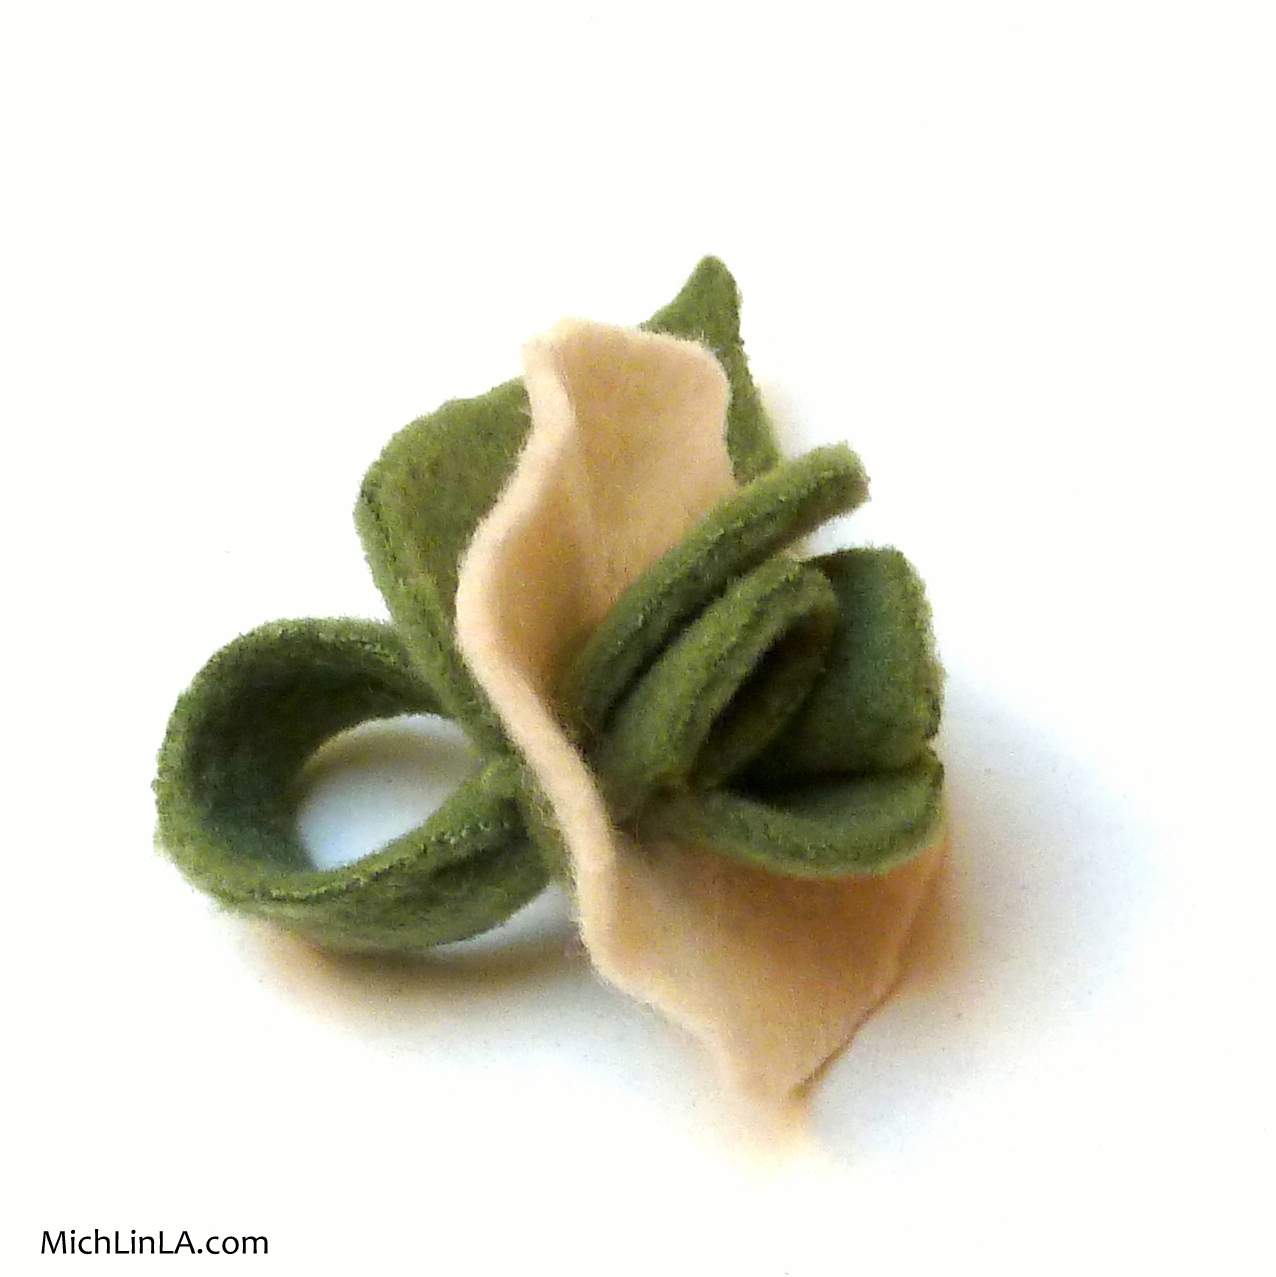
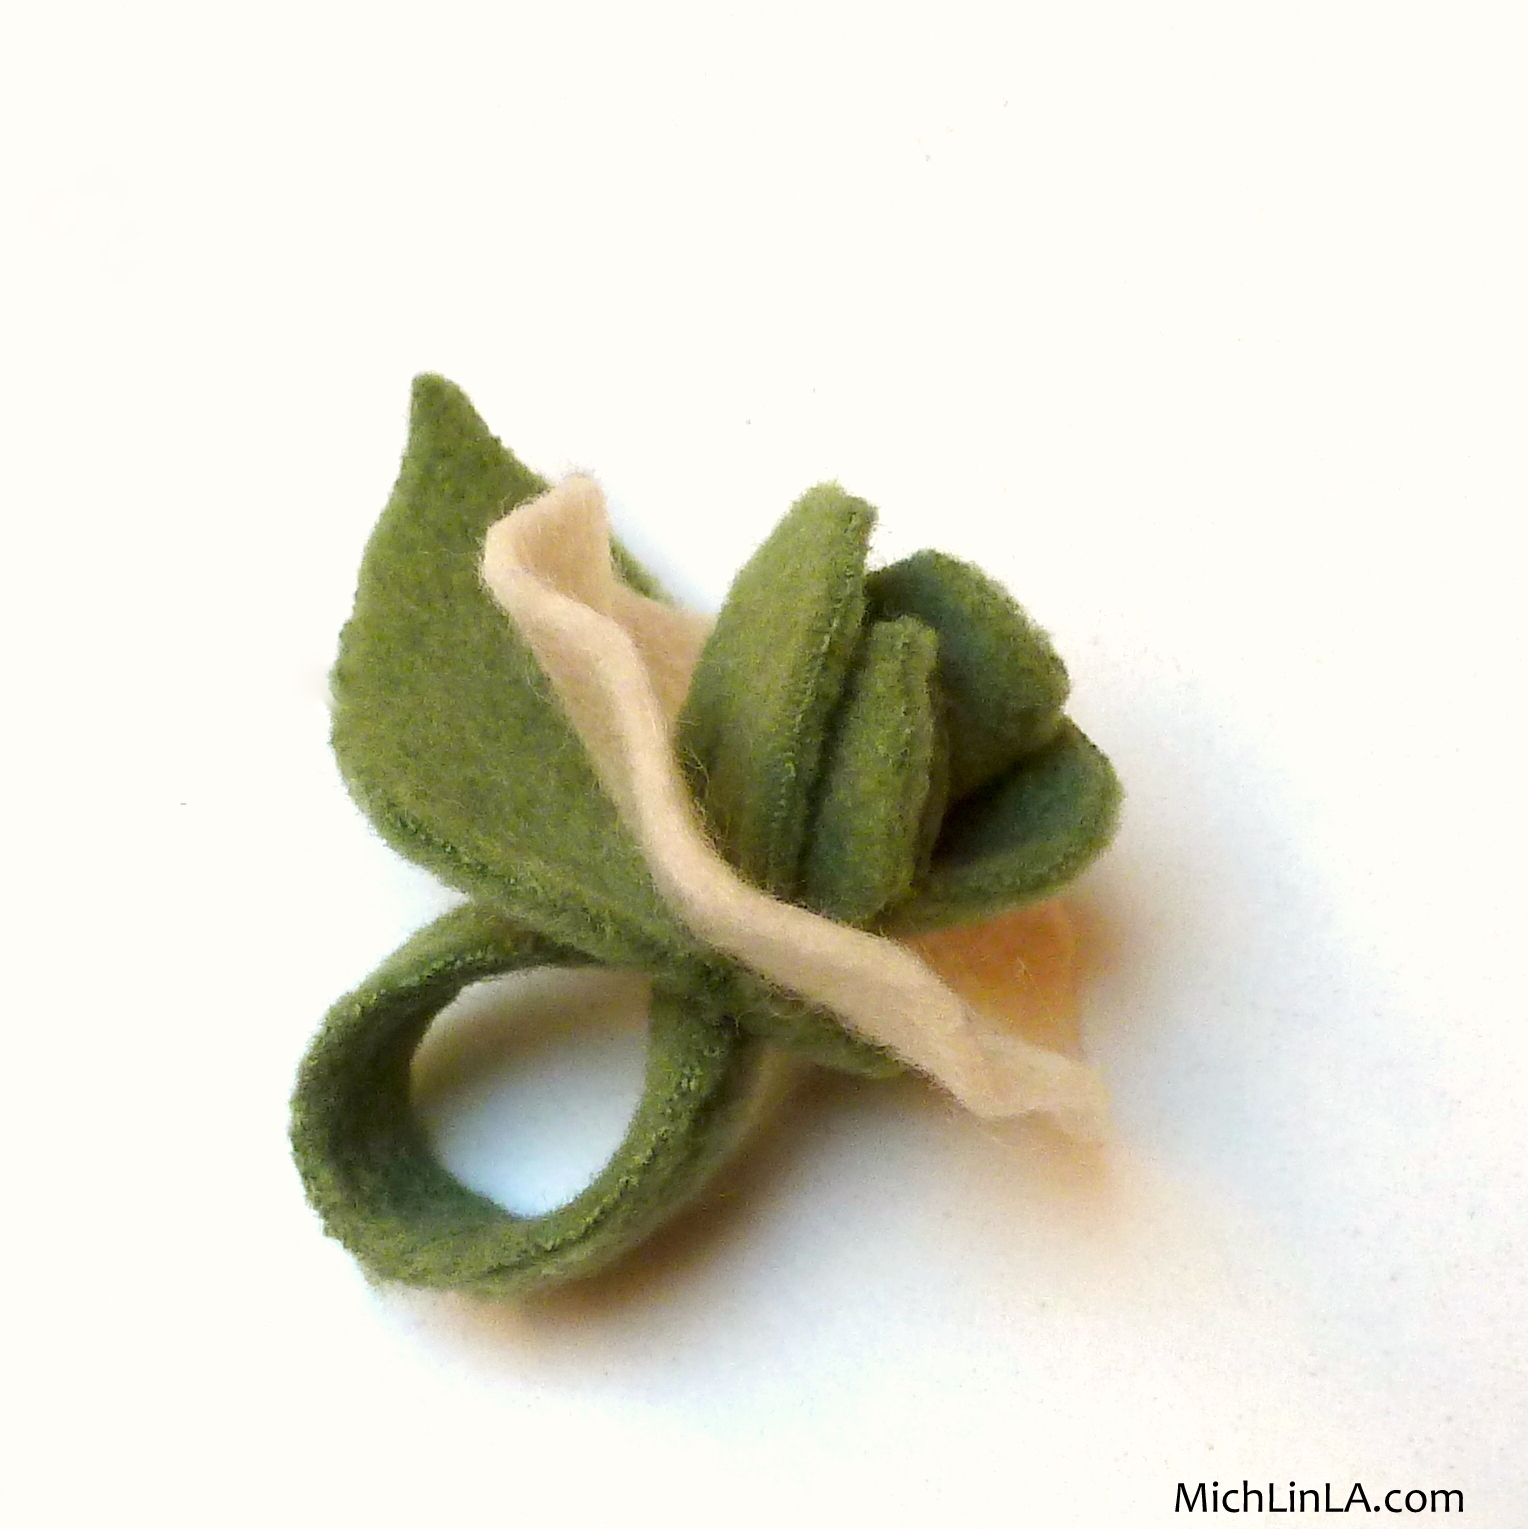
Today's craft: a DIY ring made from scraps of fleece and felt.
A five minute craft for any age and skill level. I like it plain...
And I like it patterned.
Aw heck, I just like it.
The How-To is particularly fun, and involves a dog biscuit. So now you have to try it, right? Ready? Here goes!
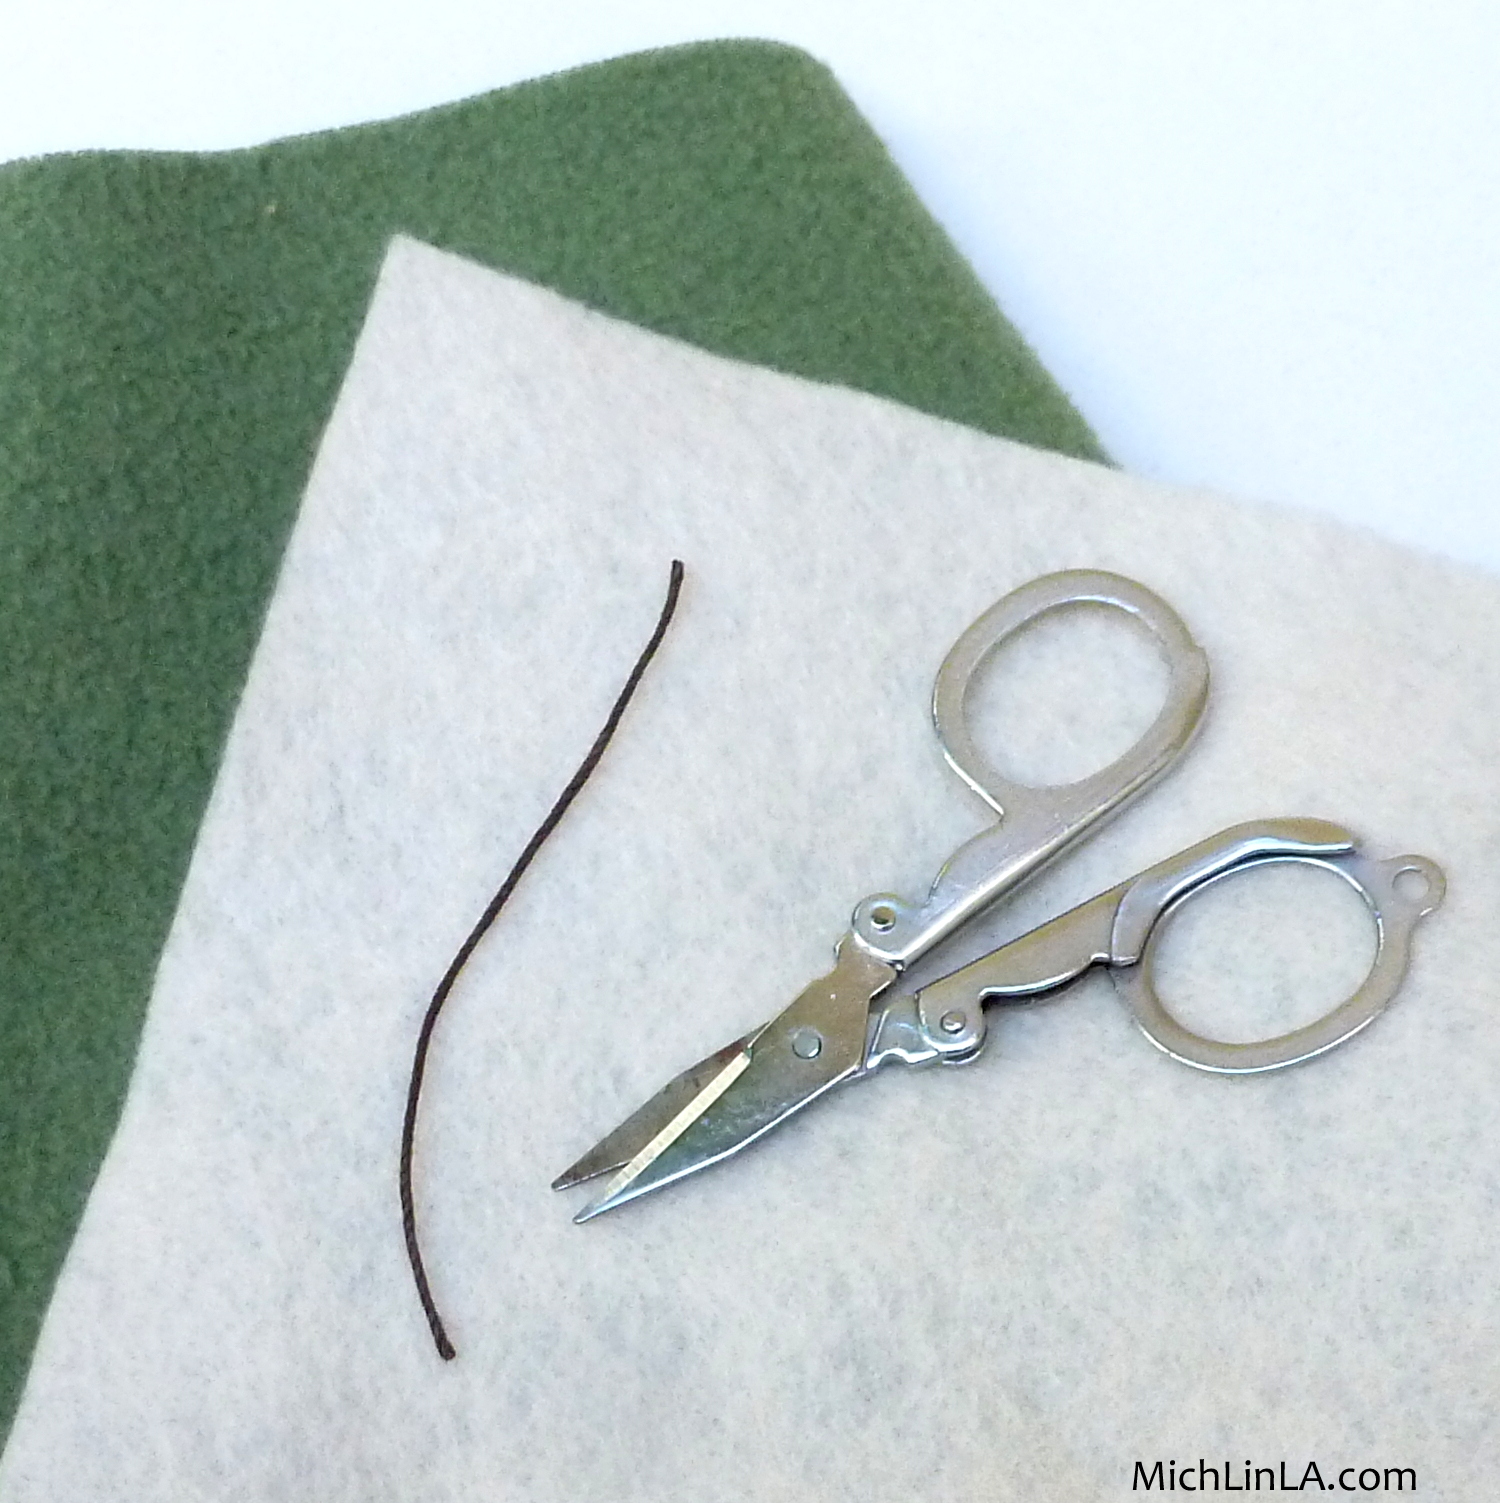
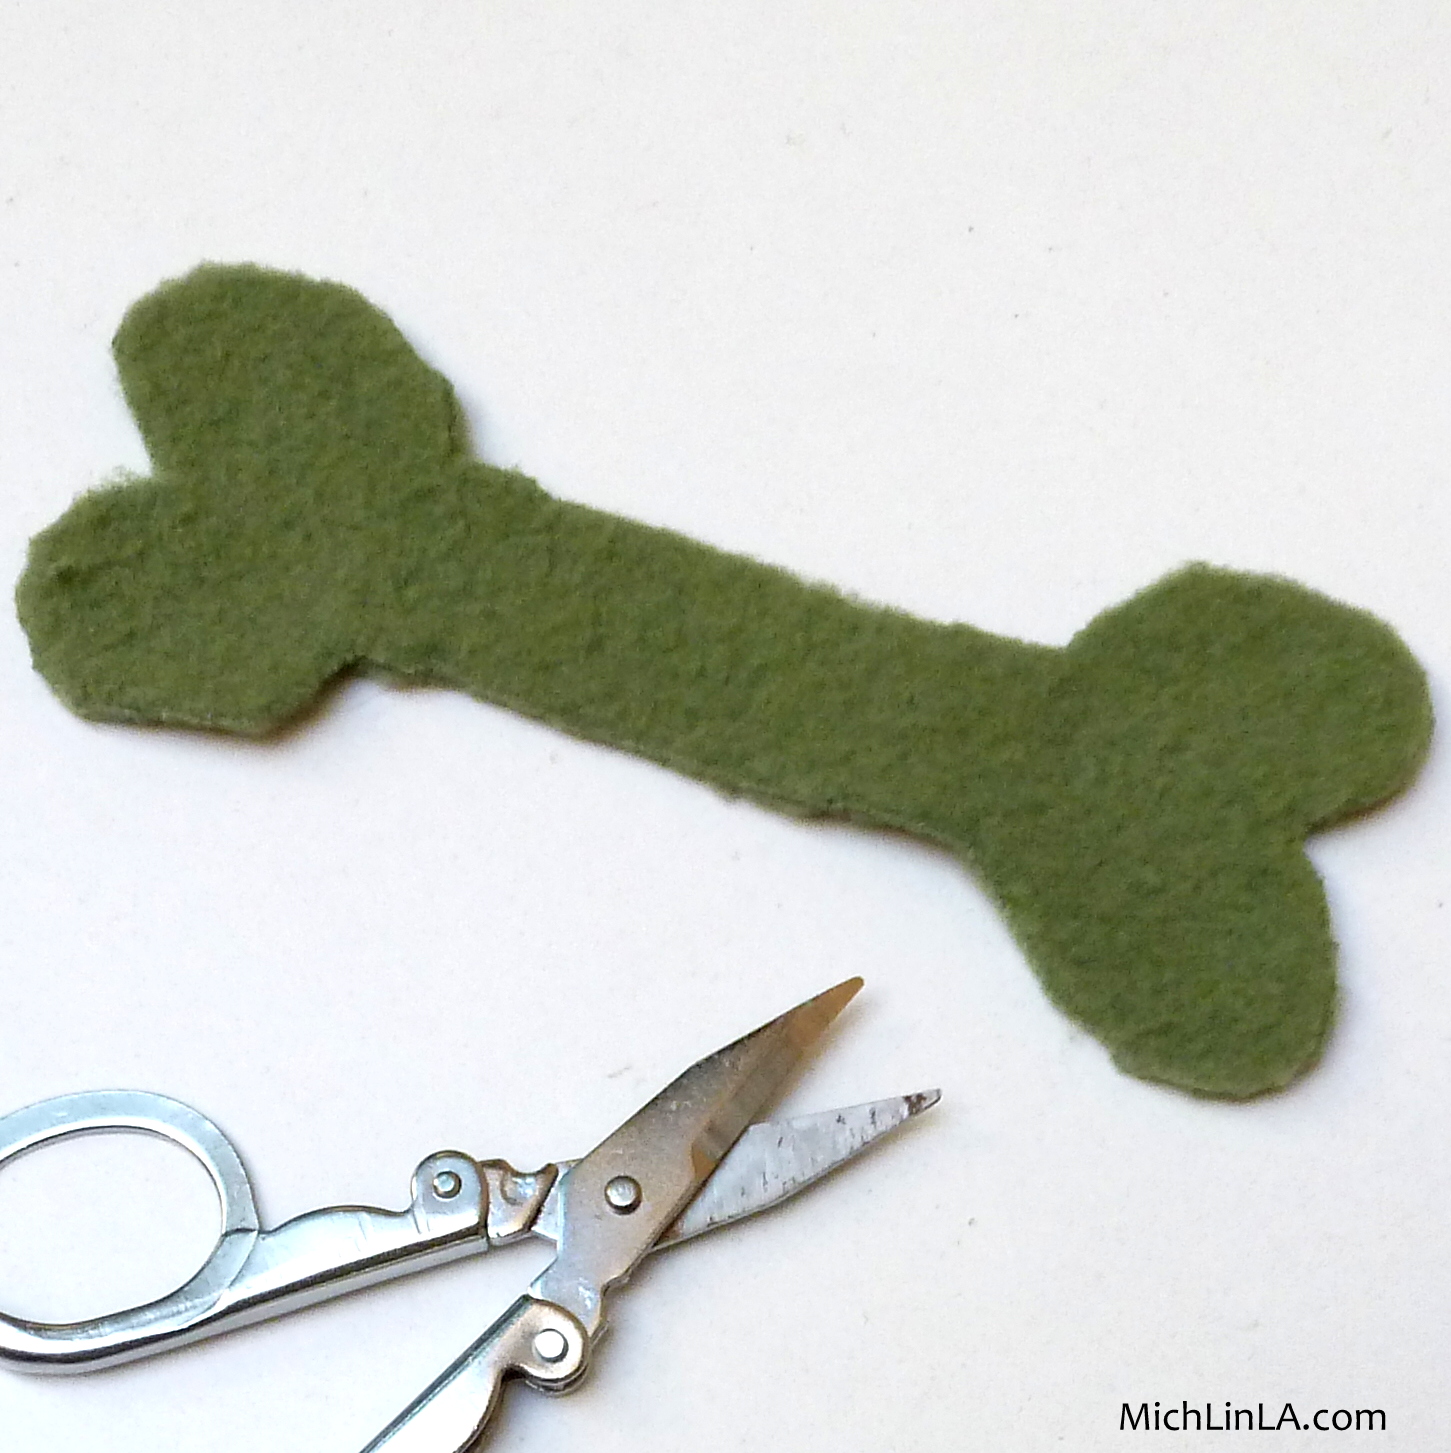
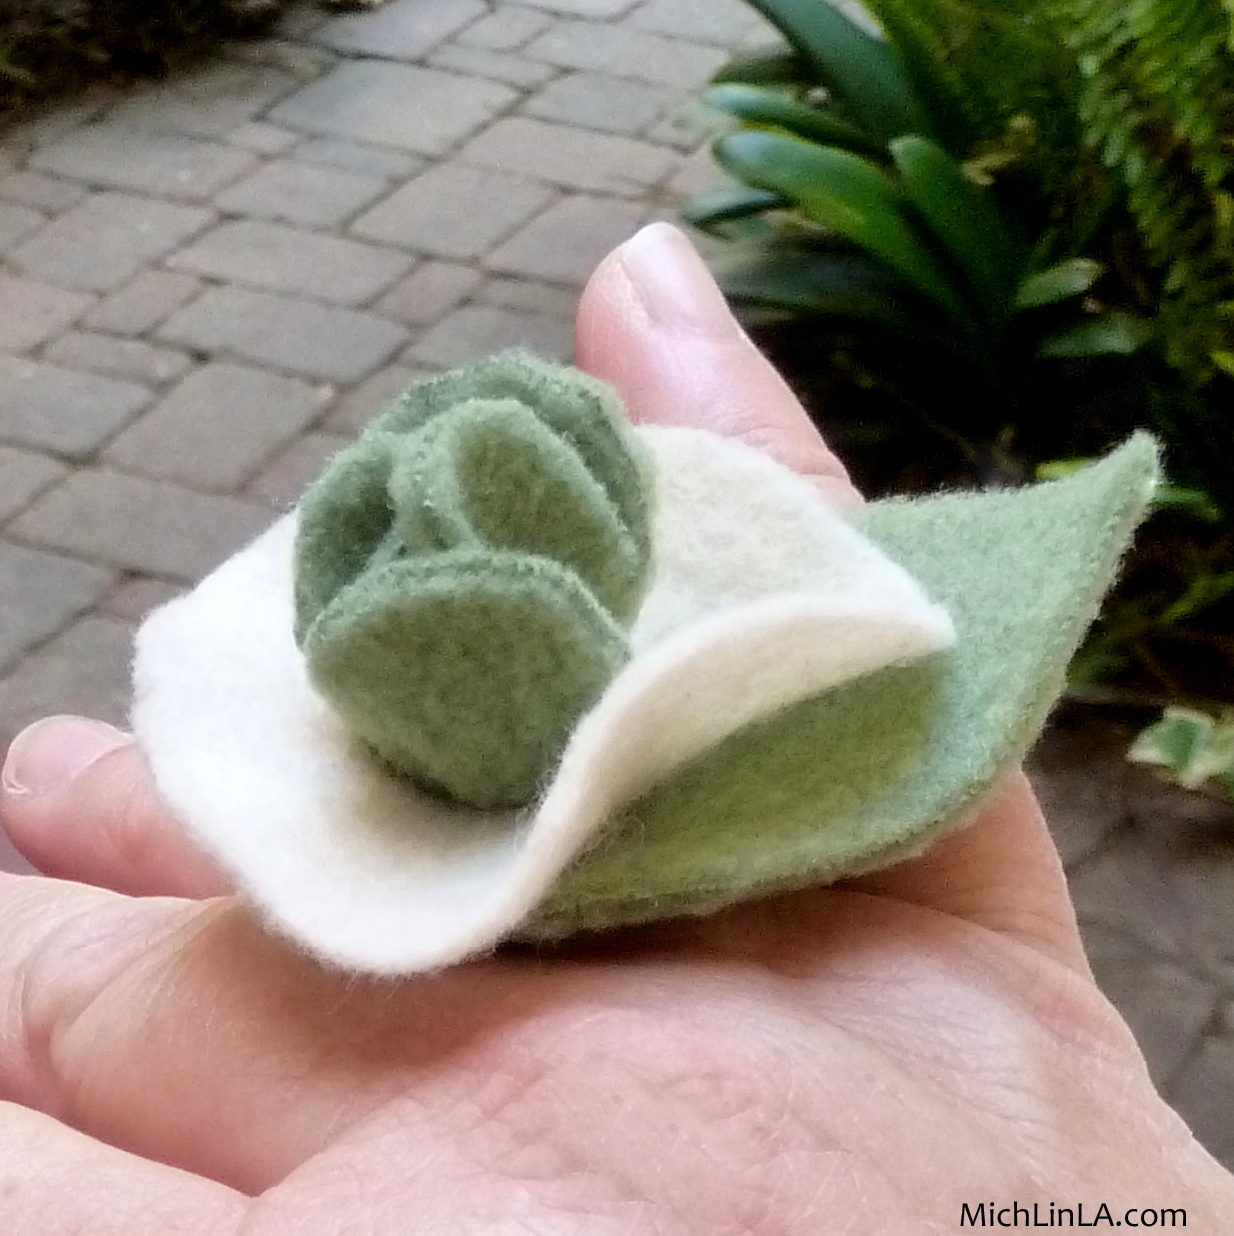
You will need some floppy scrap fleece (the green stuff) and some slightly-stiffer felt. You will also need scissors and a tiny piece of string.
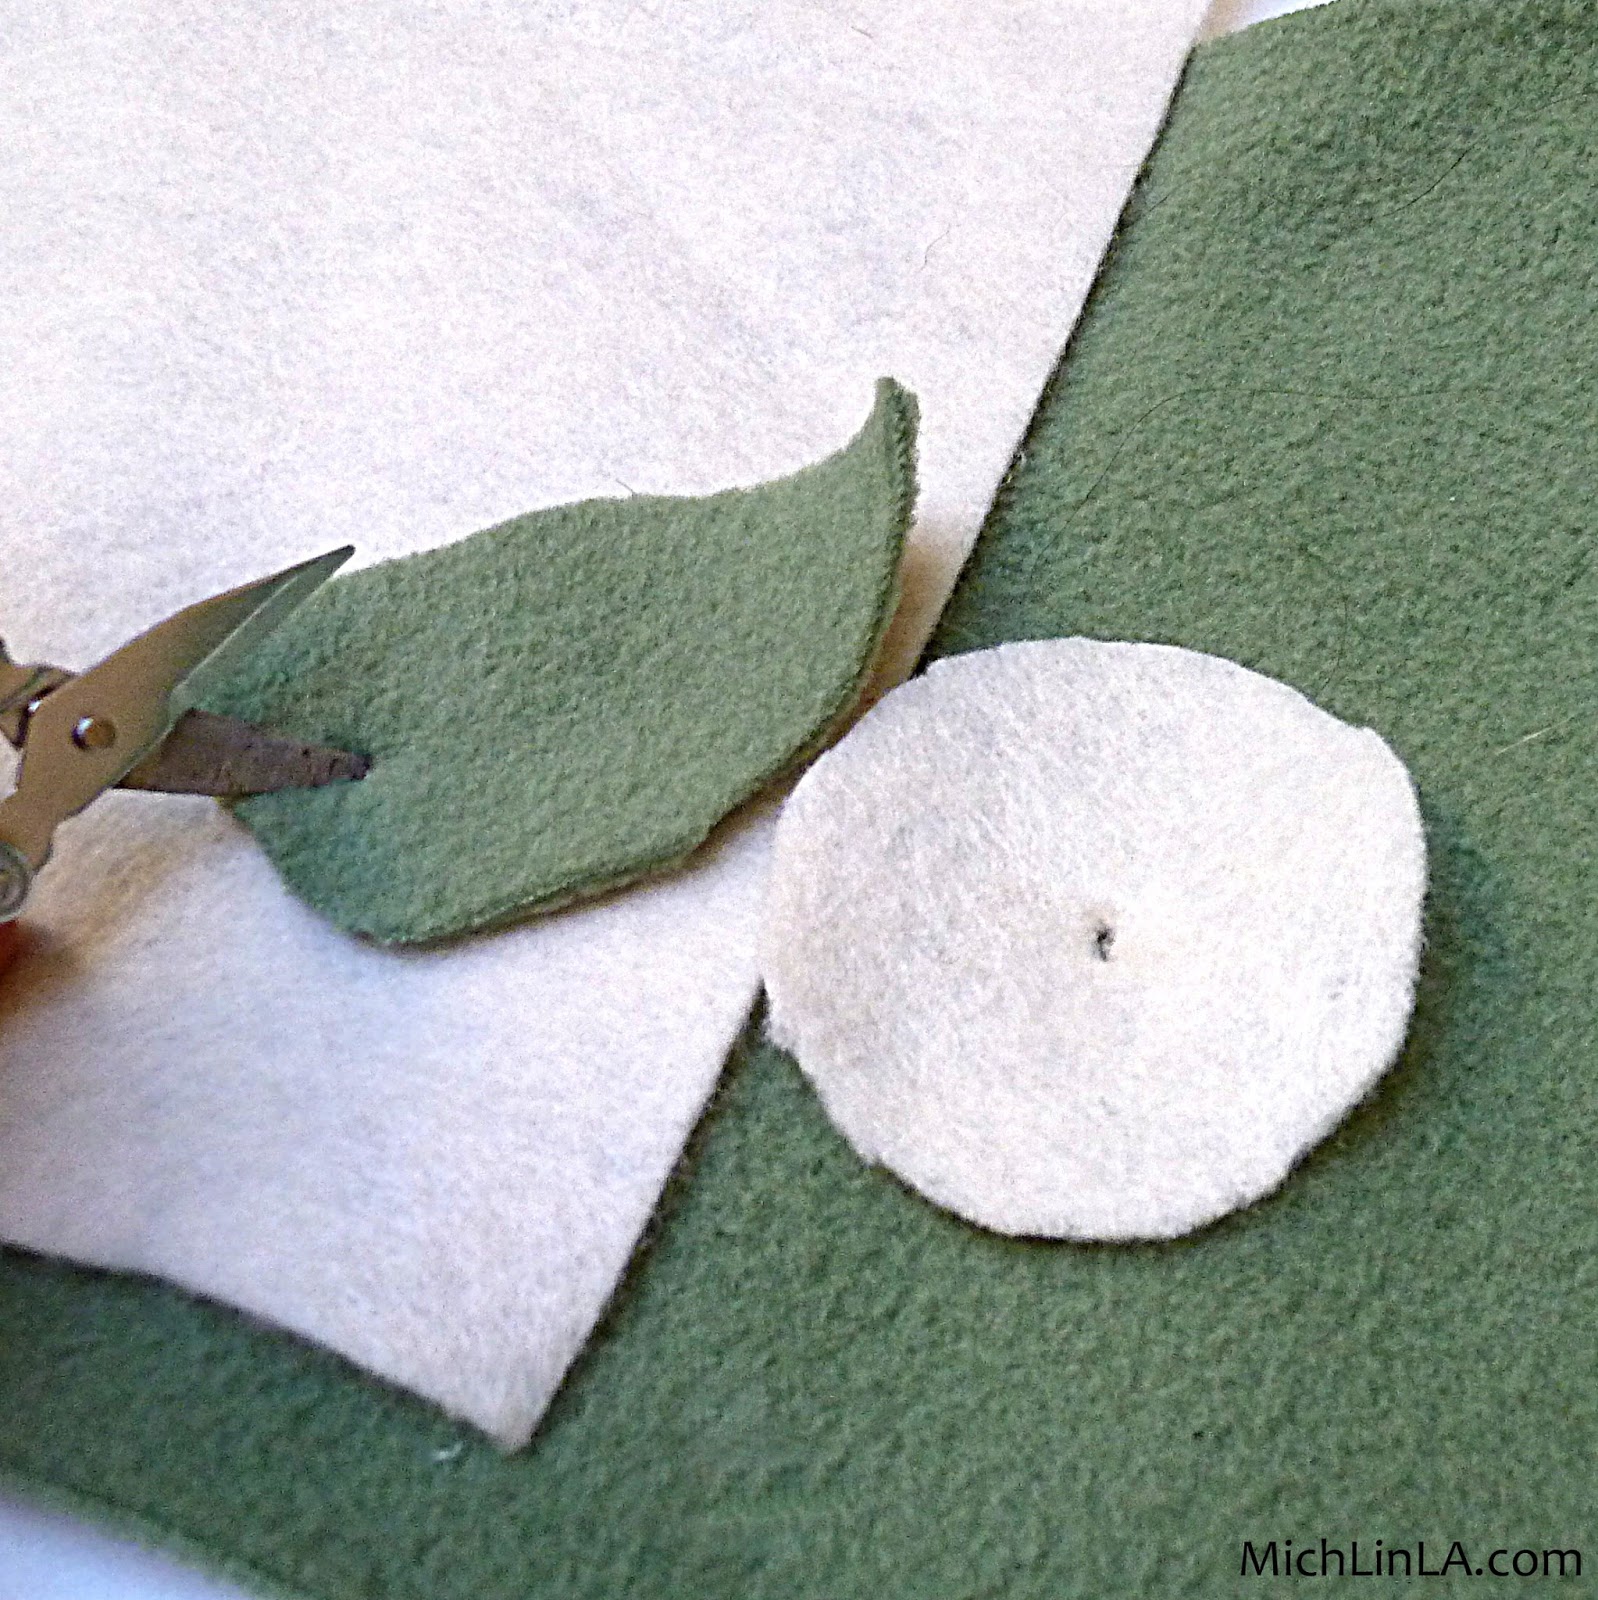
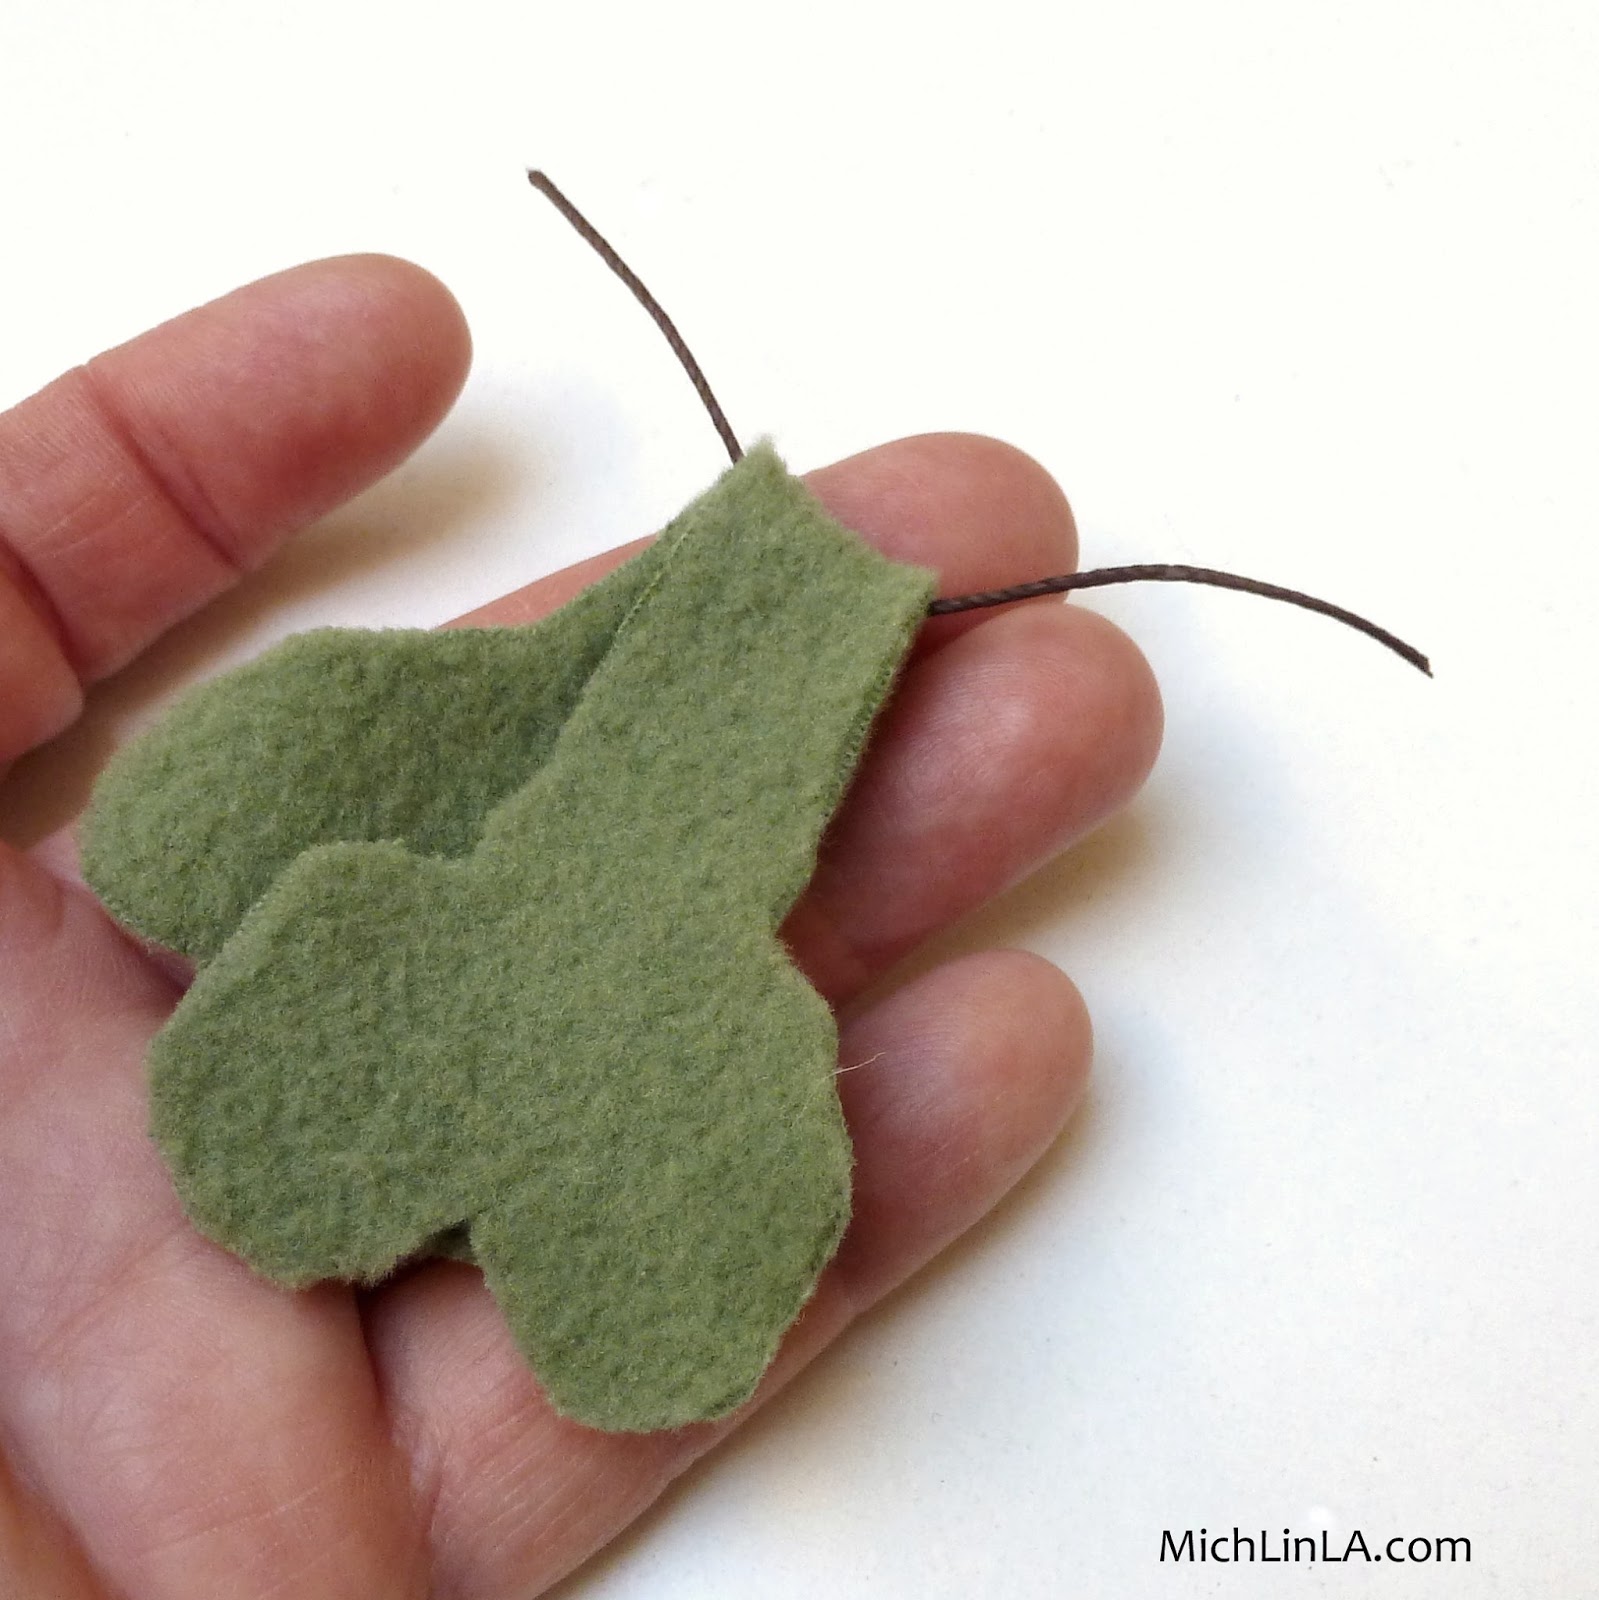
Cut a fleece leaf and a felt petal. (The petal can be a simple circle or a more flowery shape if you like.) Poke a hole in each as shown here:
Now make a dog biscuit out of fleece, like so:
Fold the biscuit in half and insert the string at the fold.
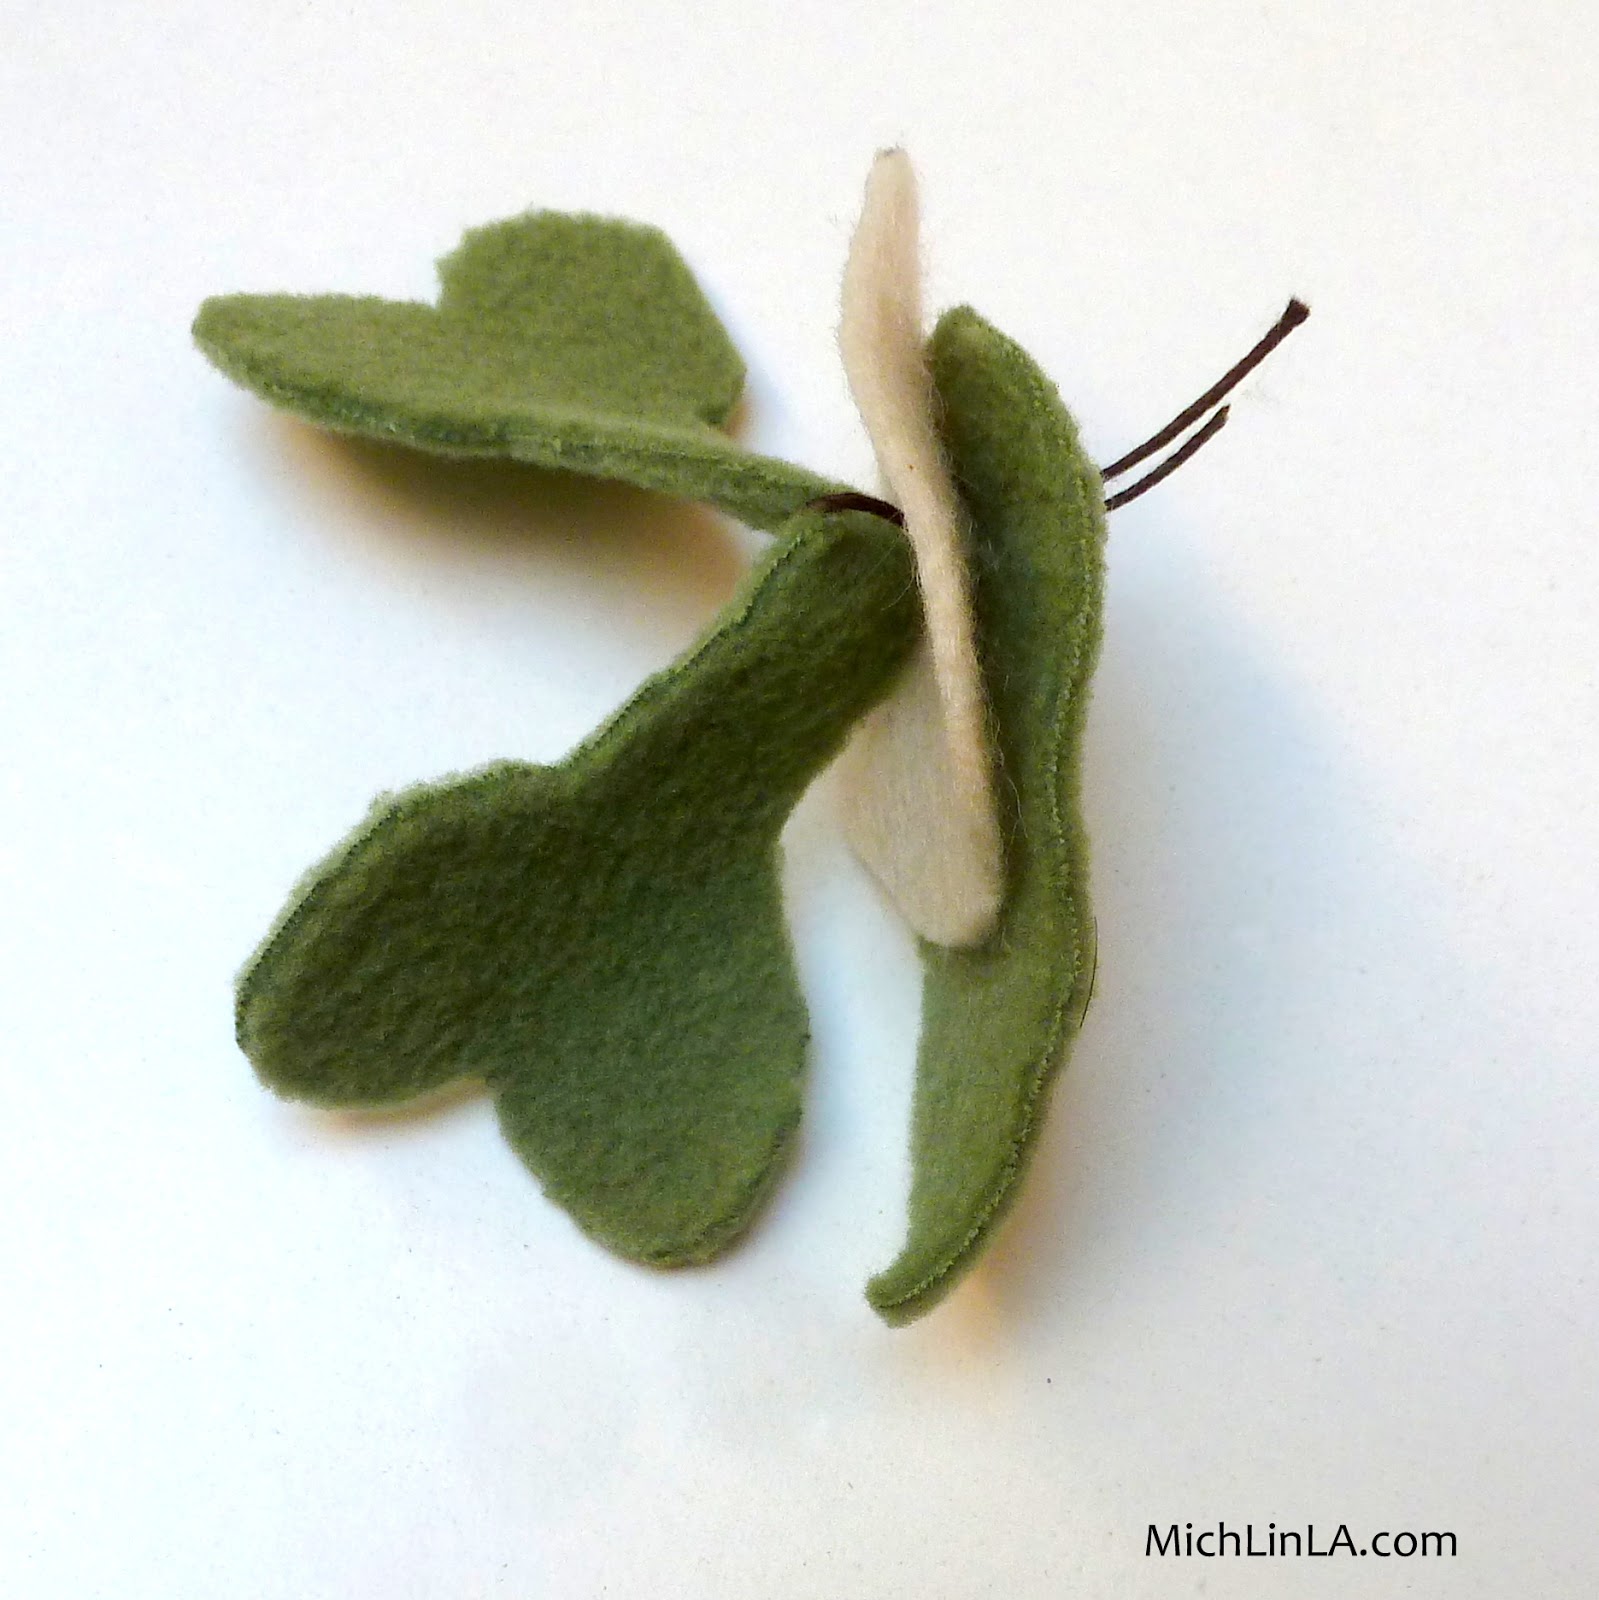
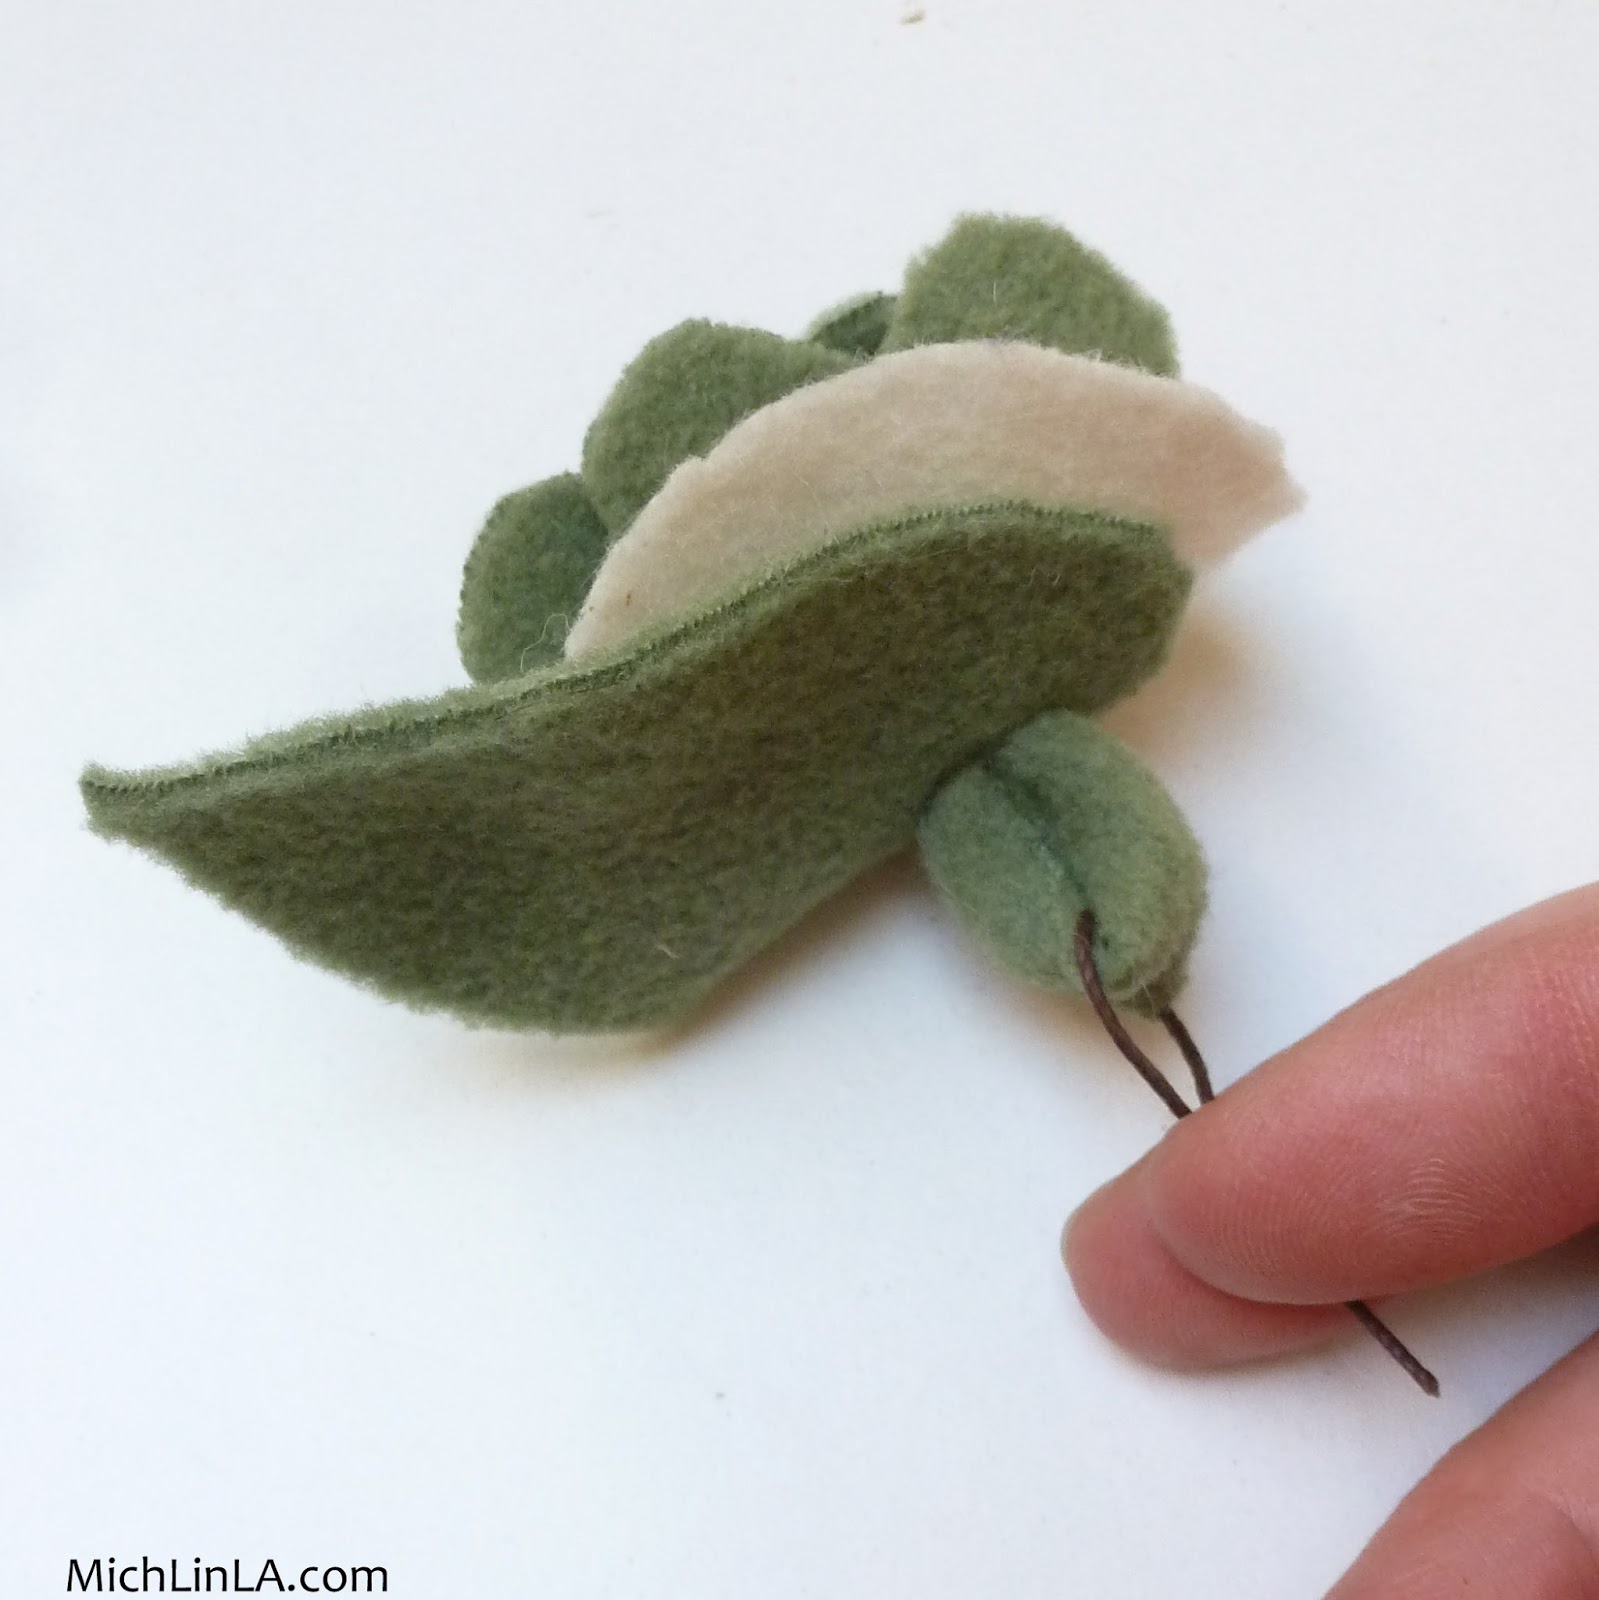
Stack the leaf and petal, then use the string to pull the folded biscuit through the holes.
Pull until the biscuit ends are bunched in the center of the flower and you can't go any further.
Done and done.
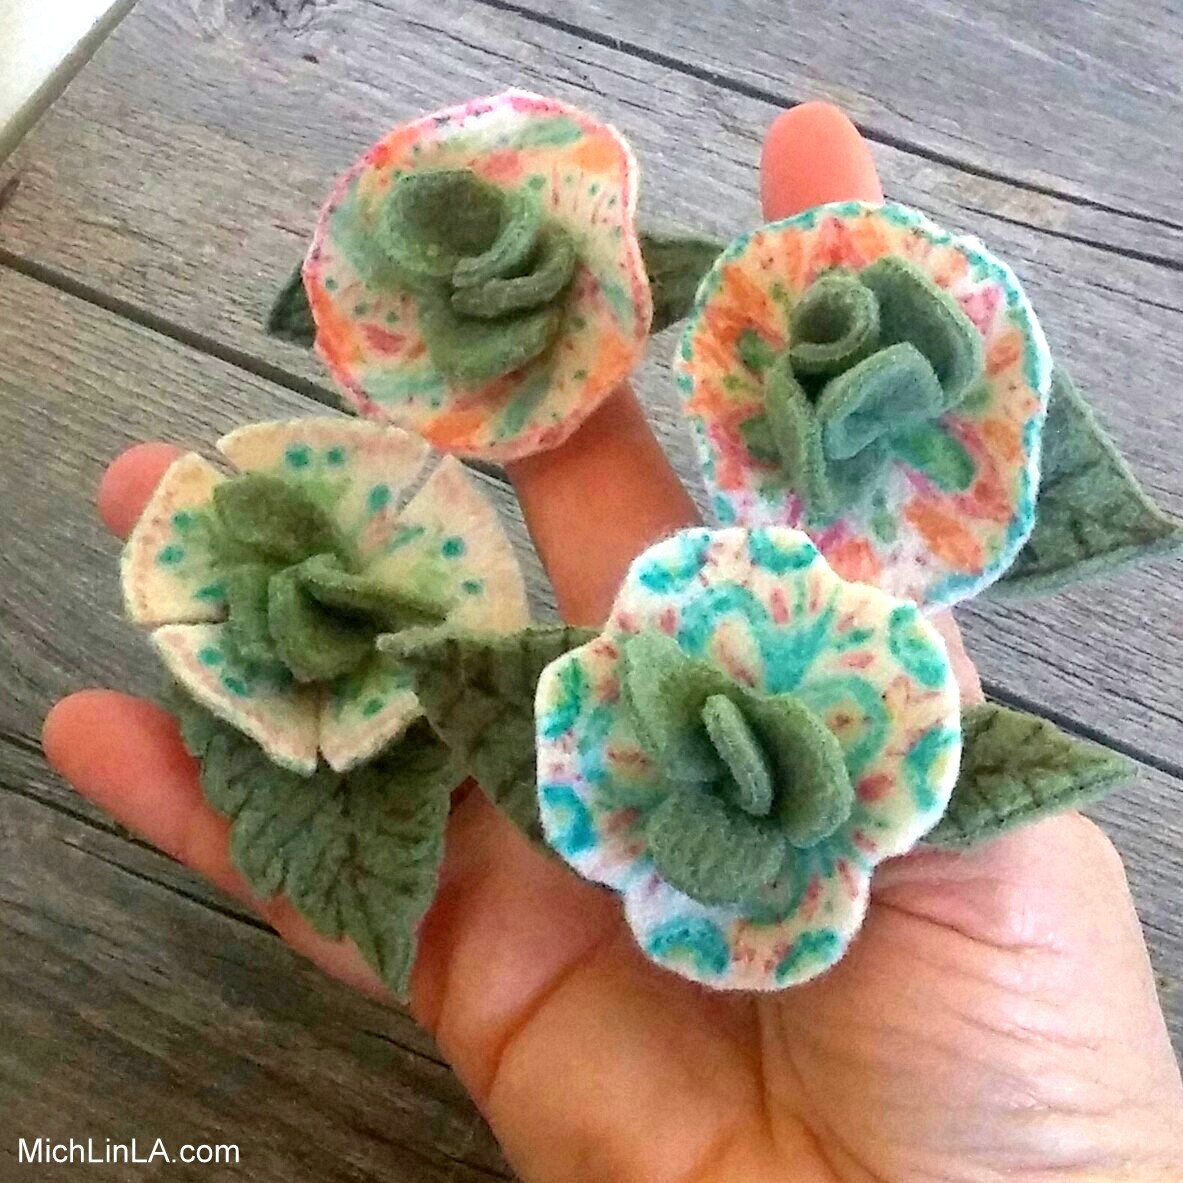
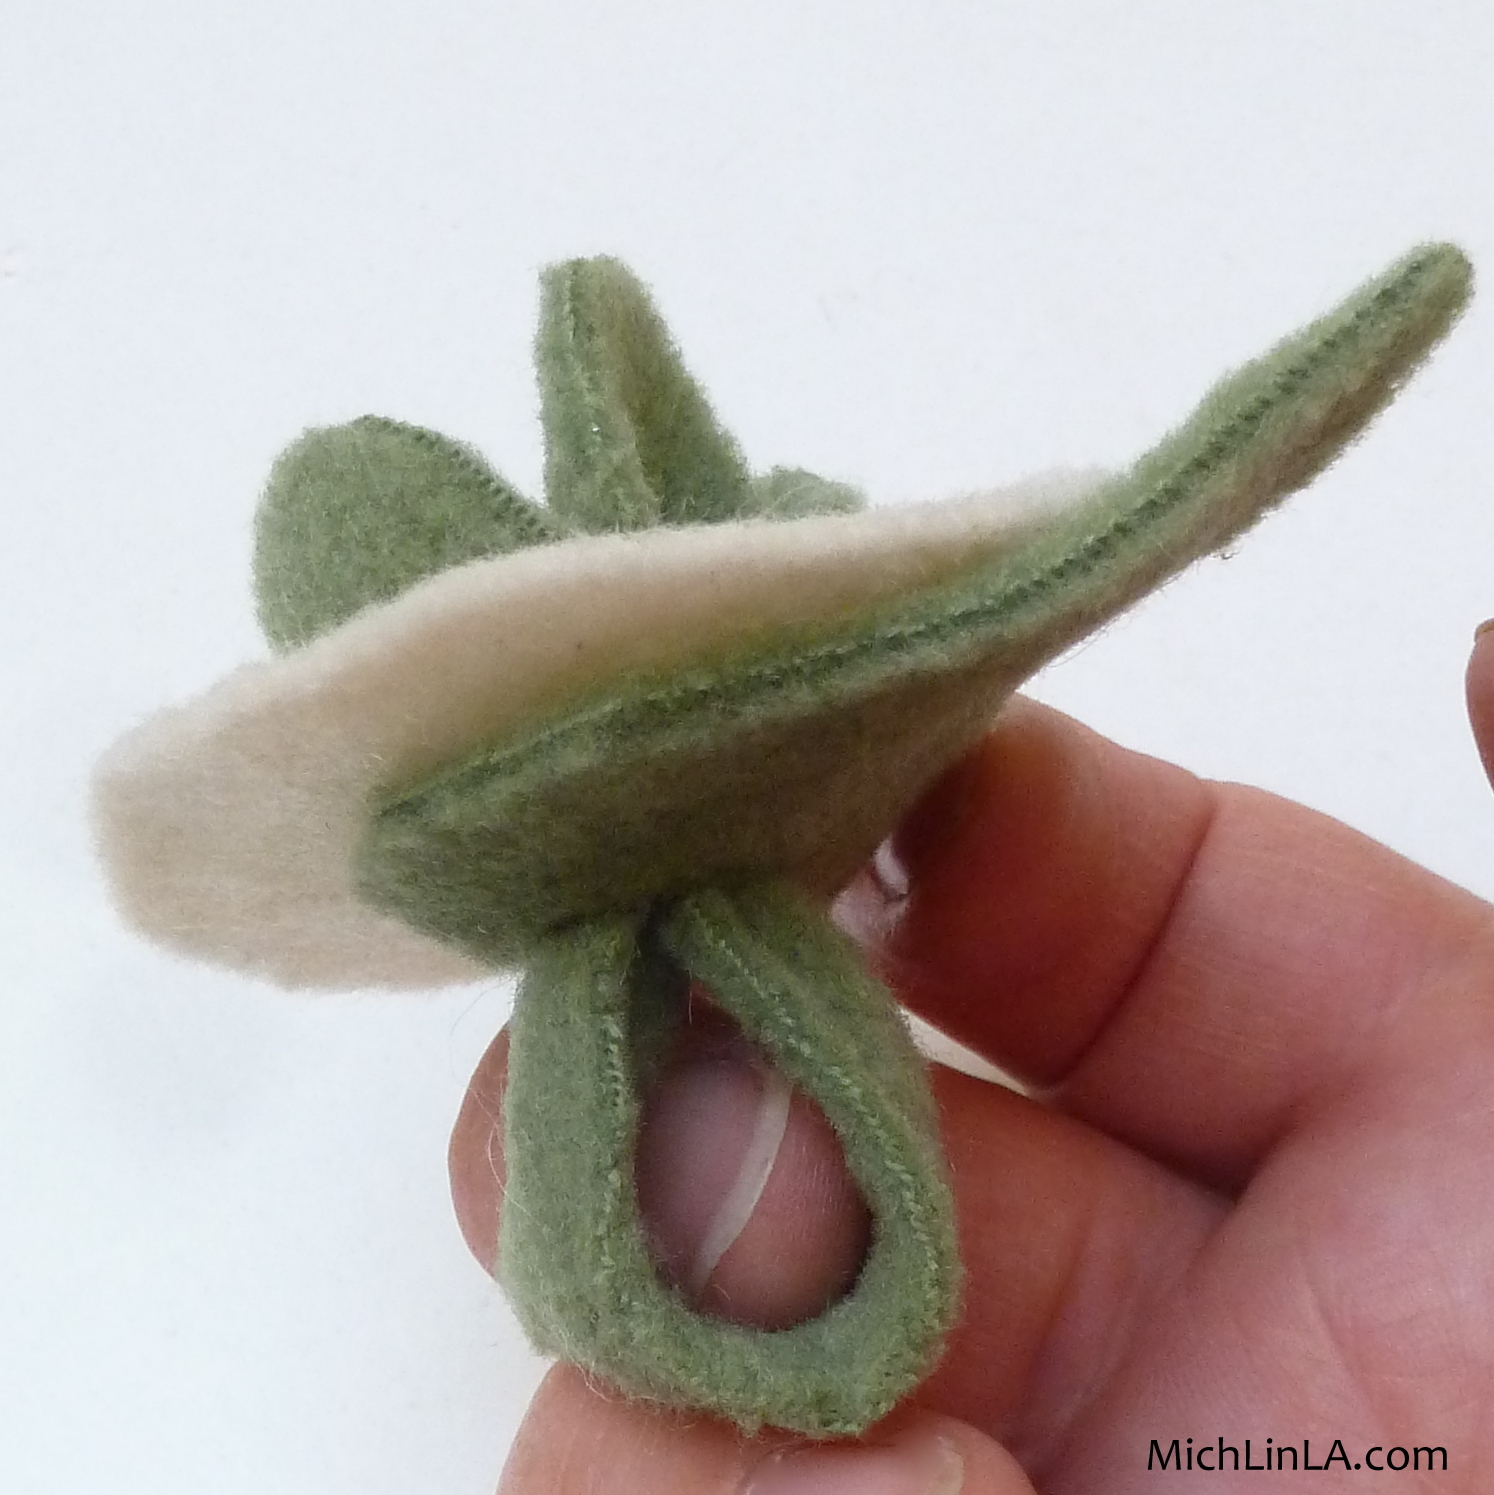
For the fancy version, I just Sharpied the heck out of both the felt petal and the fleece leaf (or leaves). Here you can see some potential different shapes for both elements:
And that, you guys, is my Scrappy Fleece Flower Ring. Sure hope you like it!
Oops, gotta go, someone has been waiting patiently while I wrote this post.
Thank you for coming by!
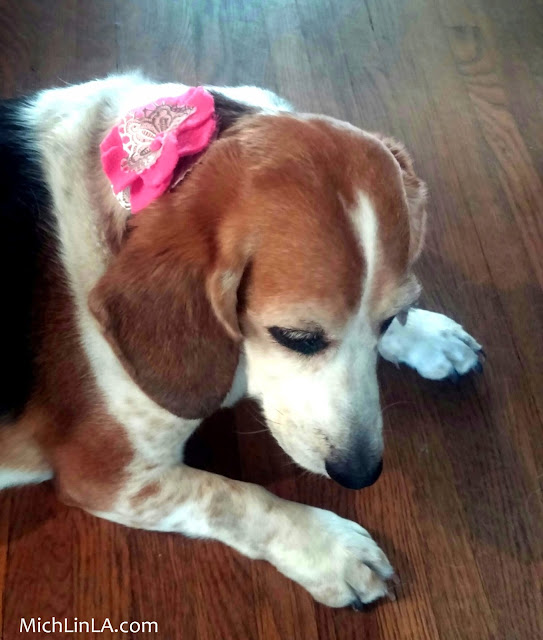
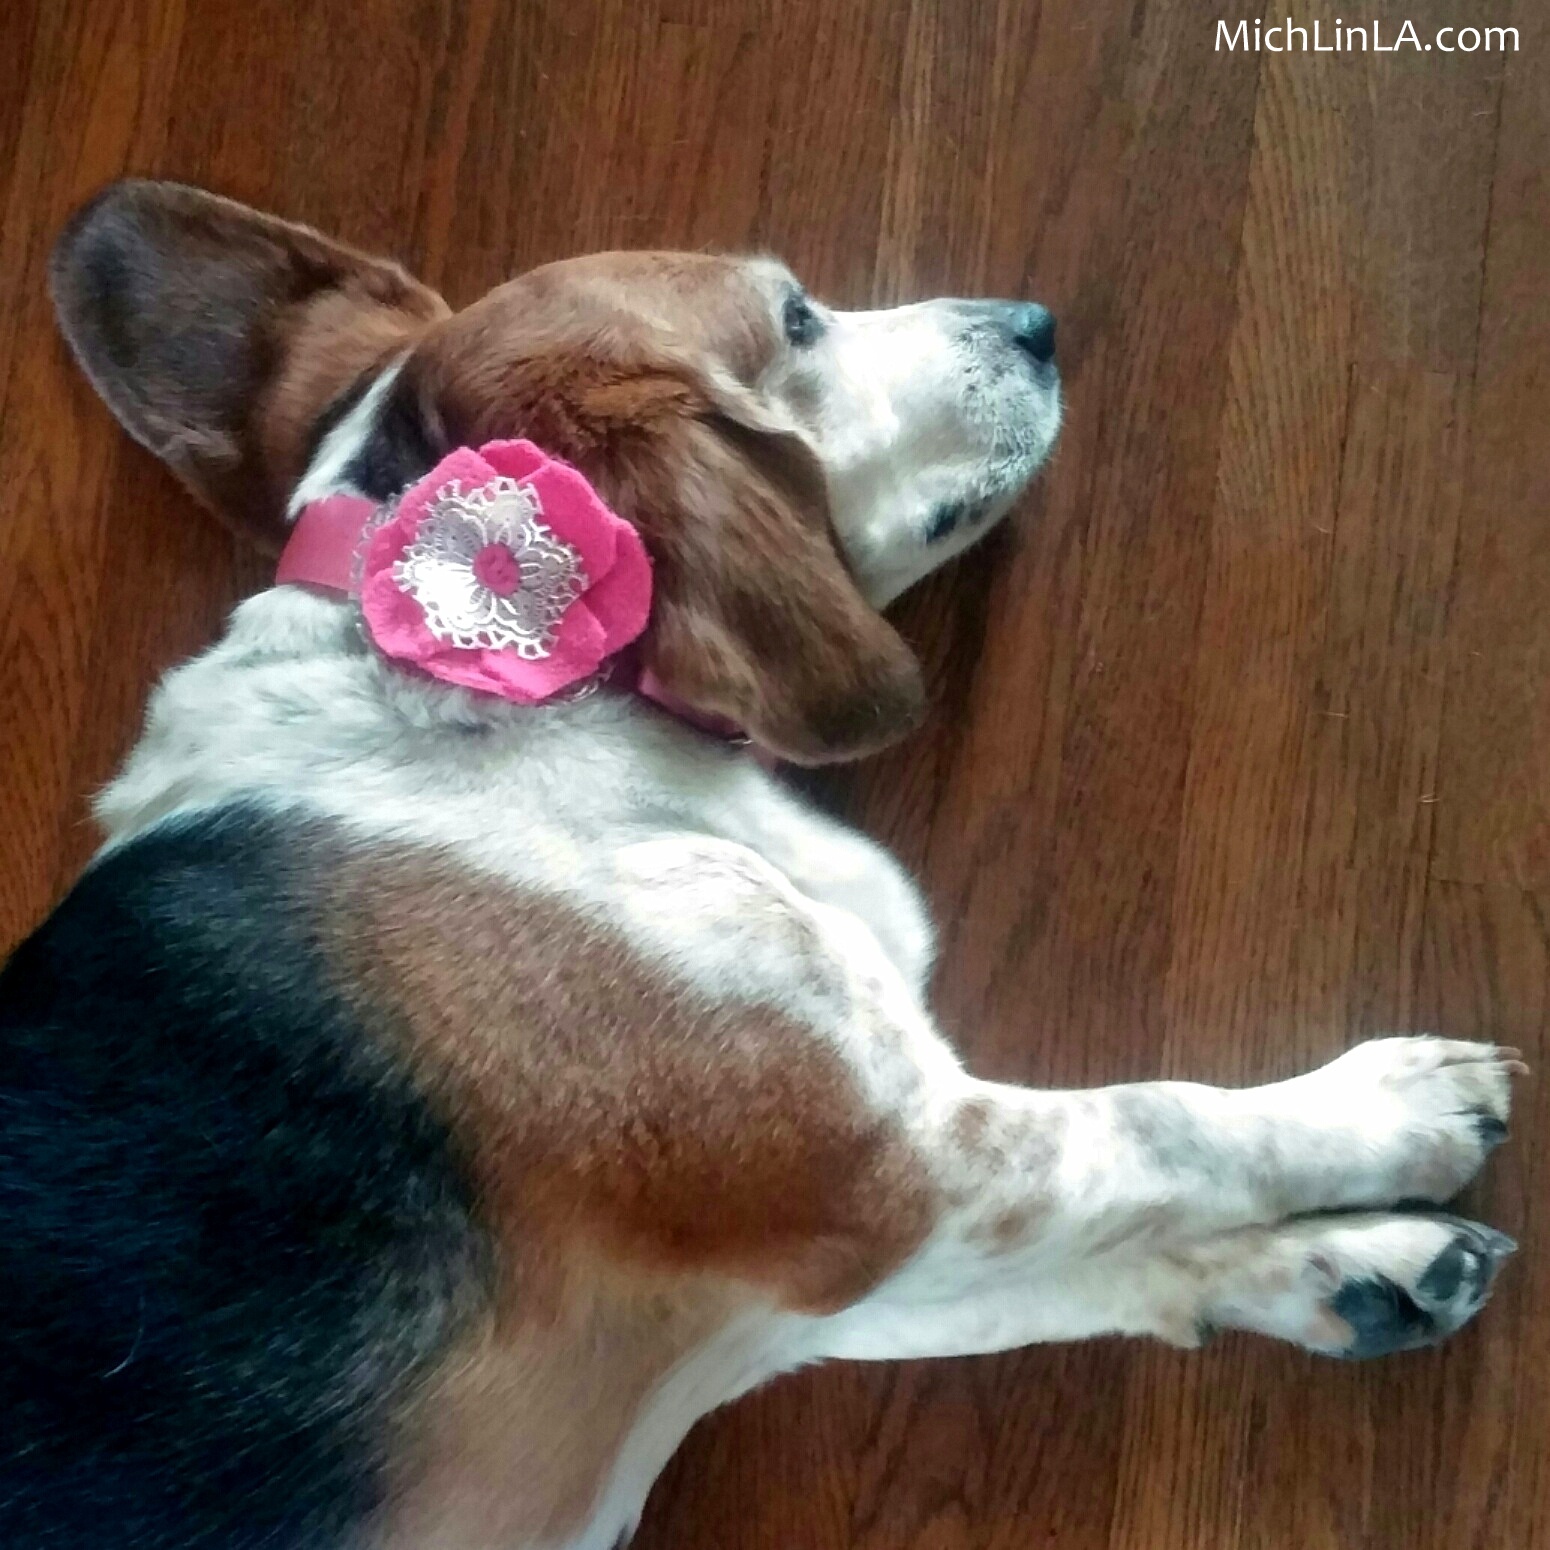
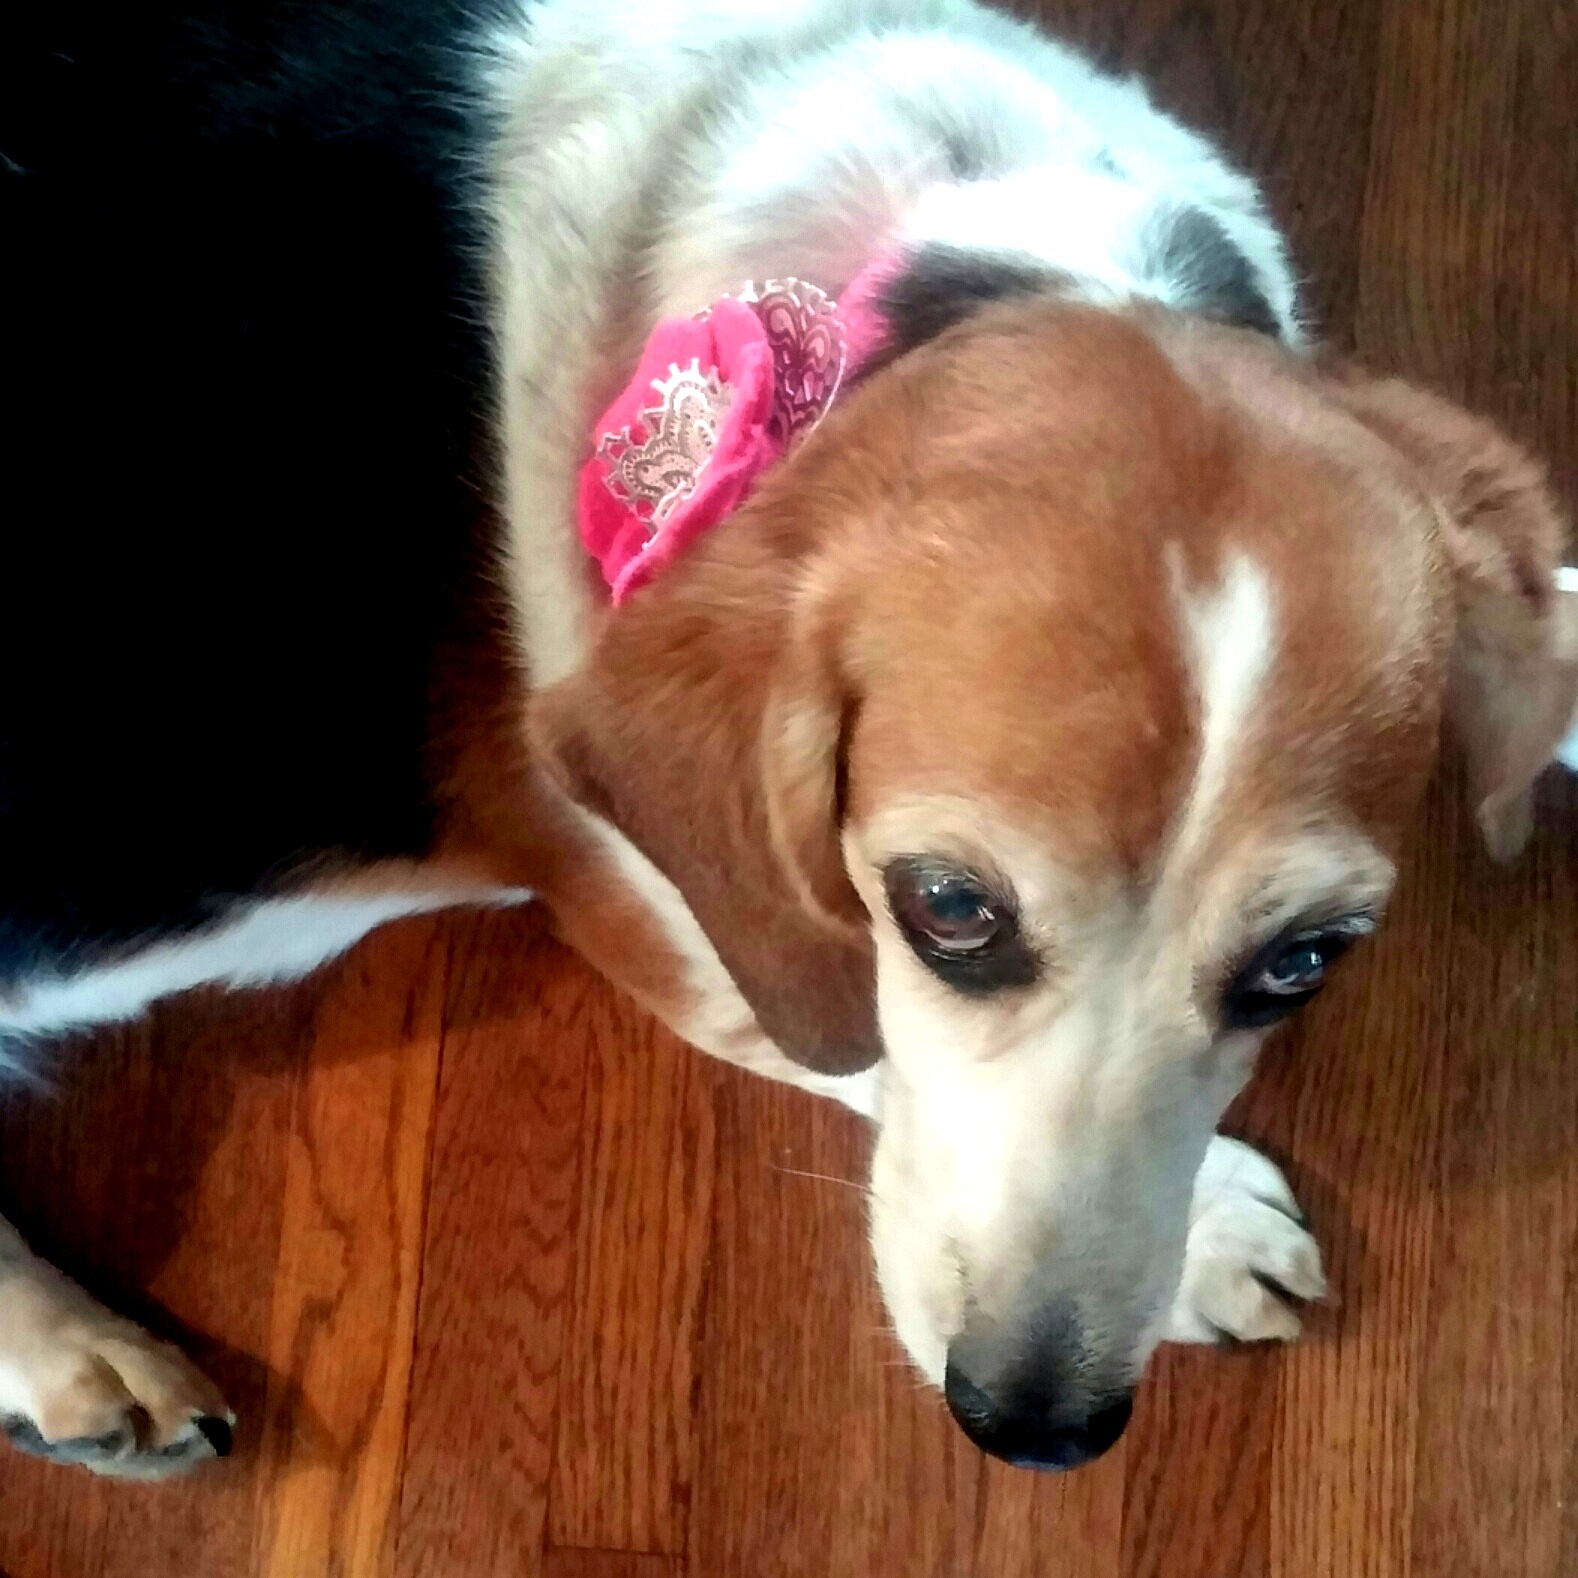
Ain't nothin' but a hound dog...
...with a flower on her collar!
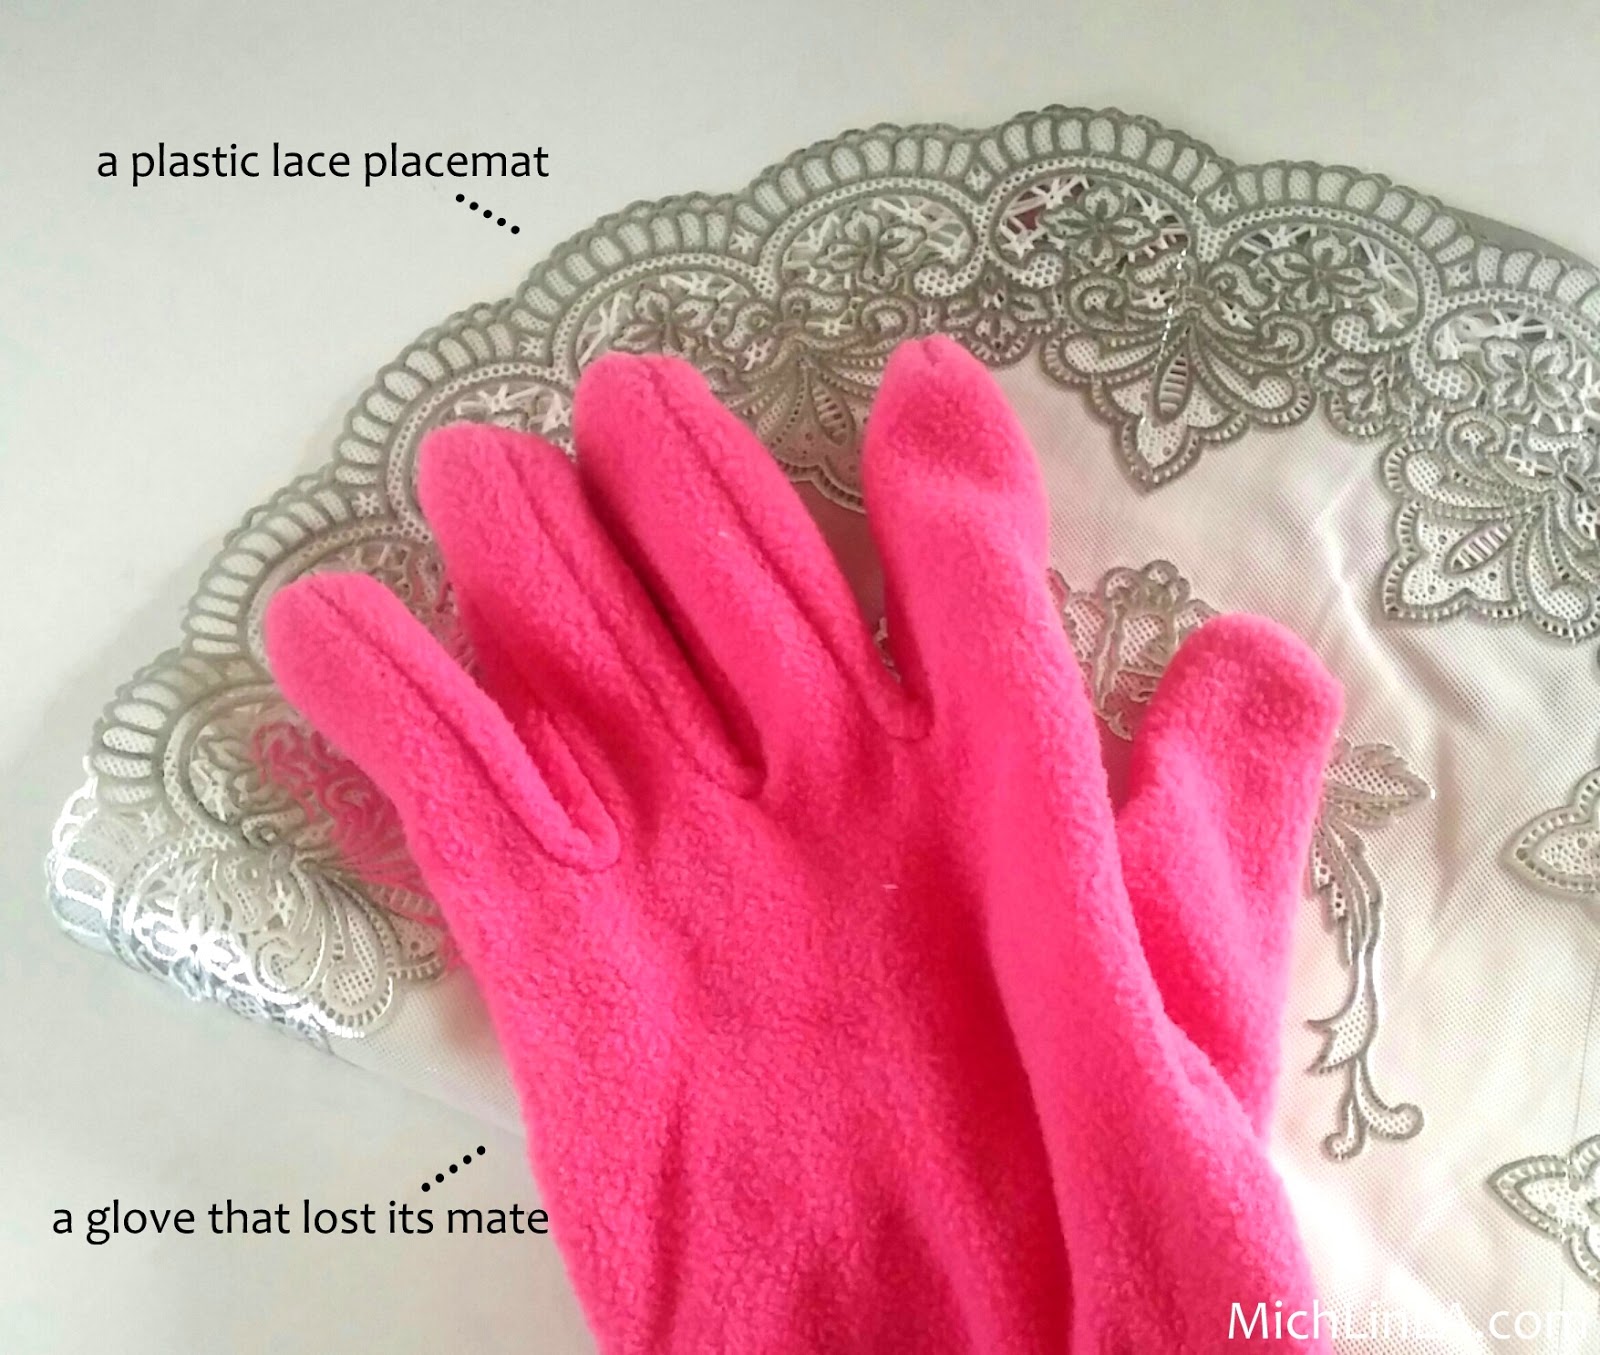
I experienced a fashion emergency this week: a trip to Vegas was approaching, and because Matilda always gets so much attention when she walks through a casino, I decided to add a pretty accessory to enhance her star quality.
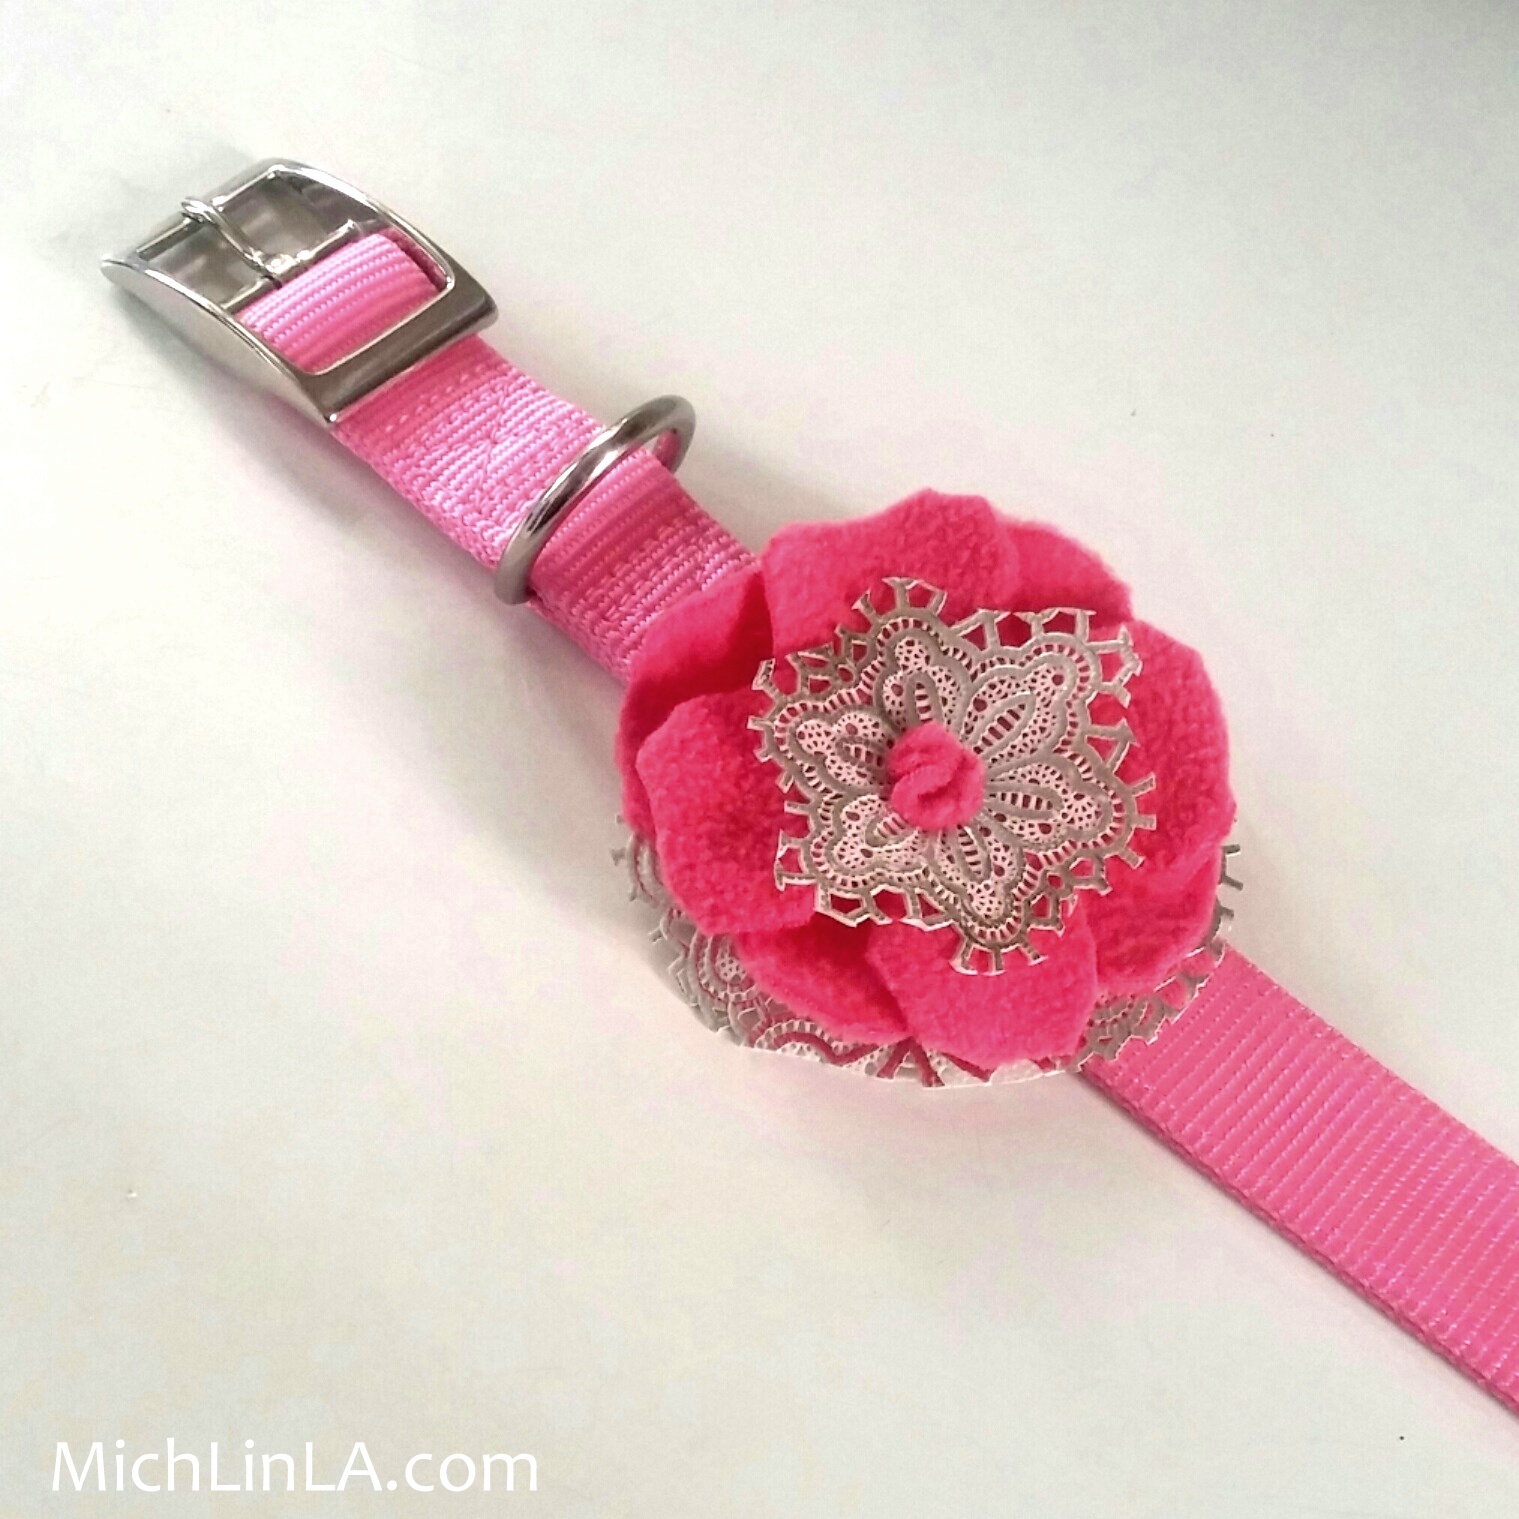
I made the cute collar flower from two waiting-to-be-repurposed items I had been saving for just such an occasion. (Both from the dollar store. I am very predictable that way.)
The DIY:
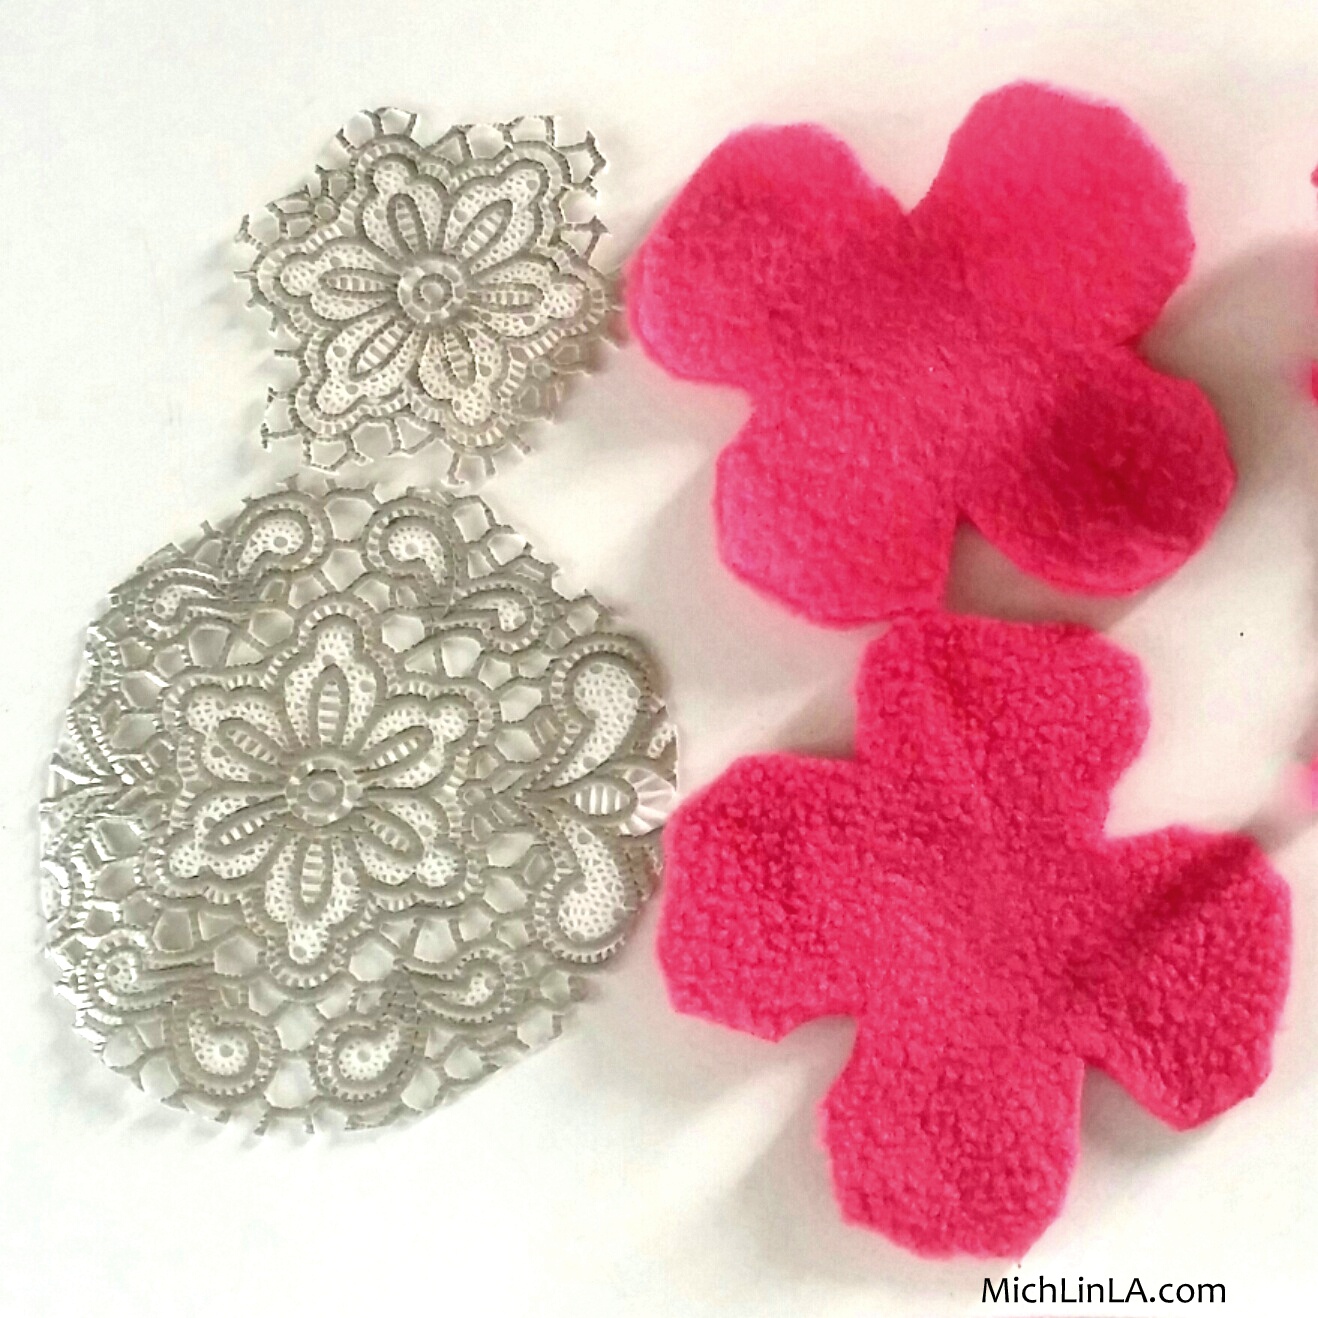
I cut two flower shapes from the fleece glove, and two simple pieces from the metallic silver placemat:
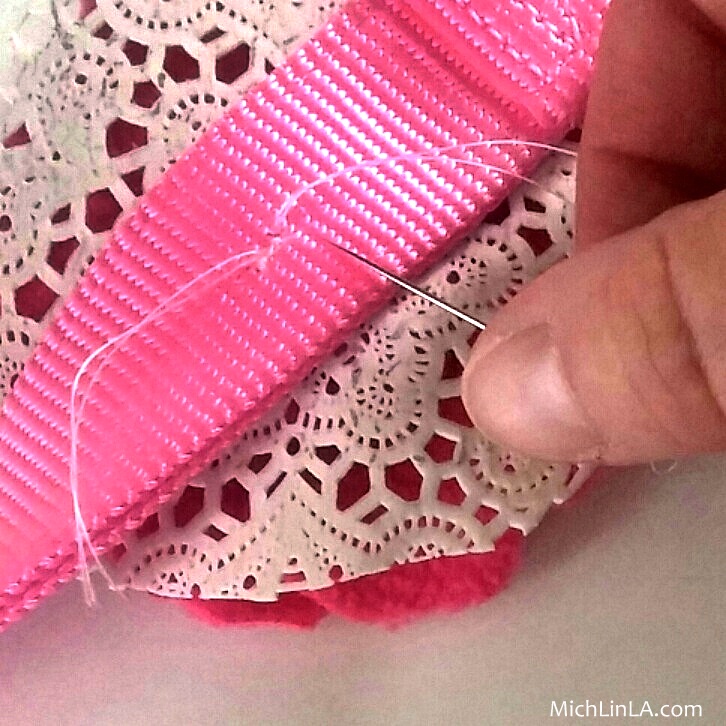
I layered the four shapes, and sewed them onto the collar.
If you look at the finished fleur, you can see I also placed a tiny circle of fleece in the center - useful for preventing the thread from tearing through the plastic lace.
Crisis averted! Princess Matilda is ready to make her appearance in Vegas.
Or as I sometimes like to call her, Princess Di.
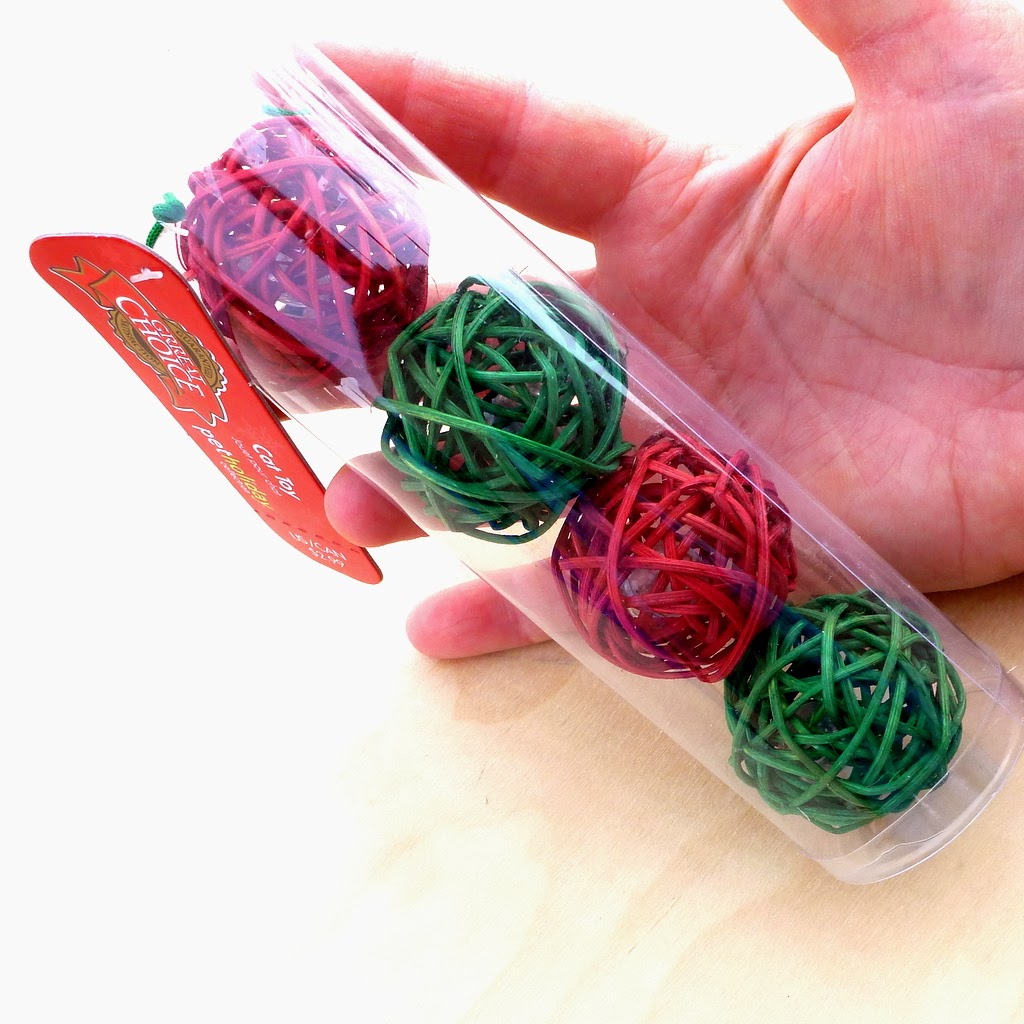
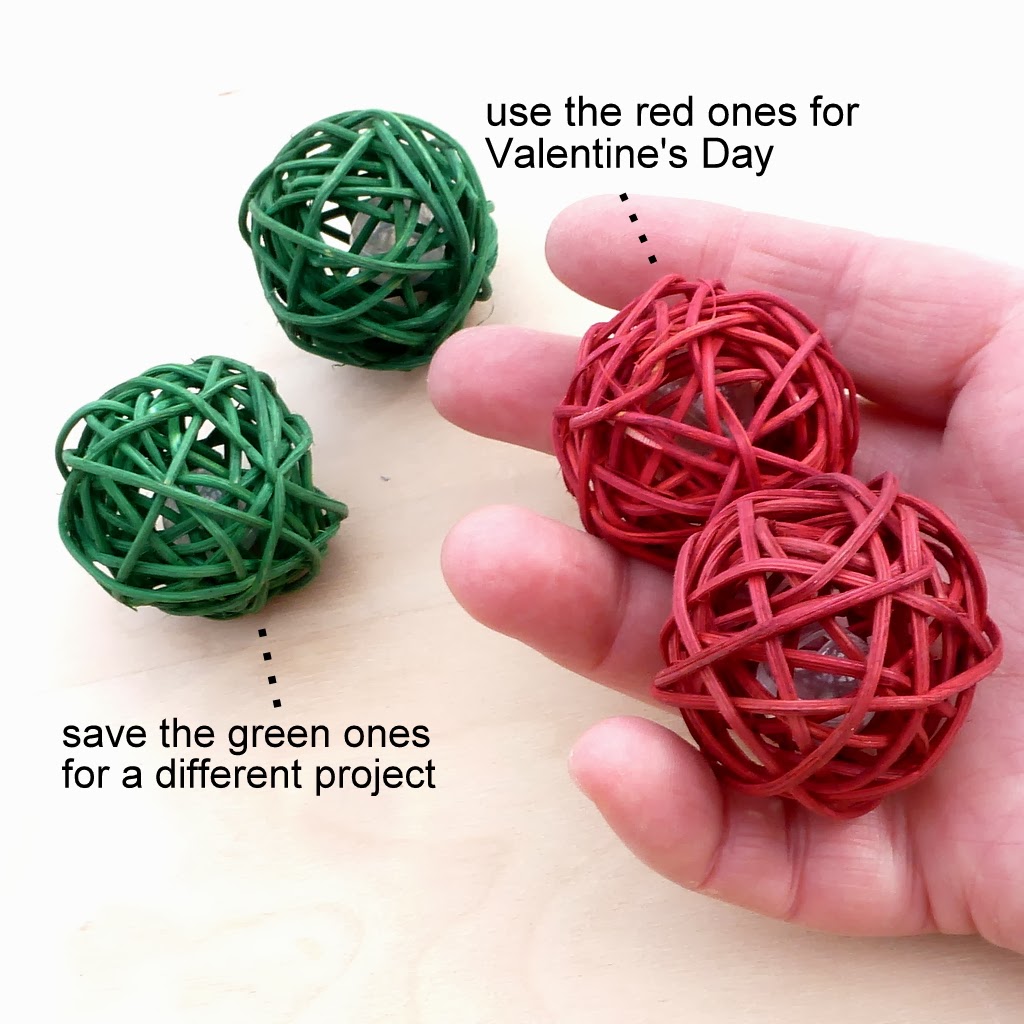
You know what's fun to do in January? Buy super cheap discounted Christmas stuff in red-and-green...fer example, I got these kitty balls for 97 cents...
...then set aside the greens for later, and make Valentine crafts with the reds!
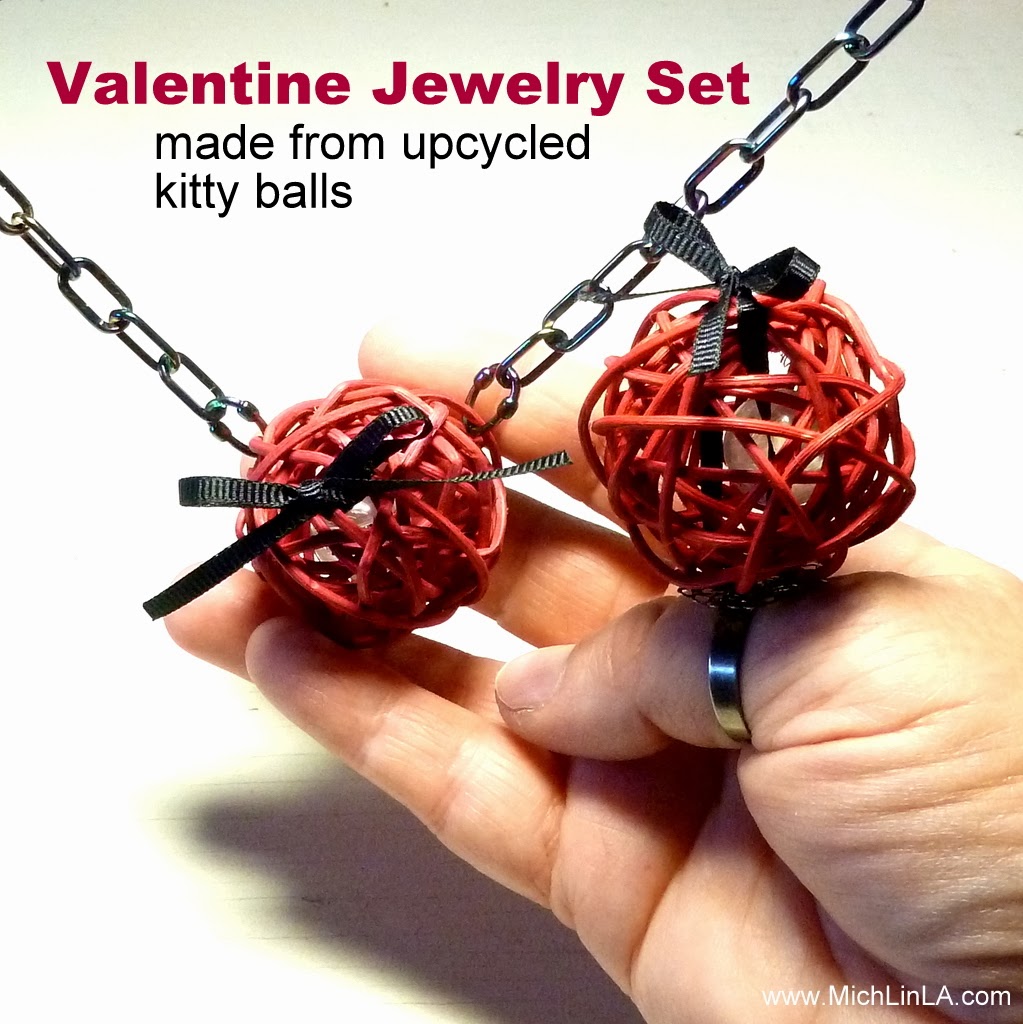
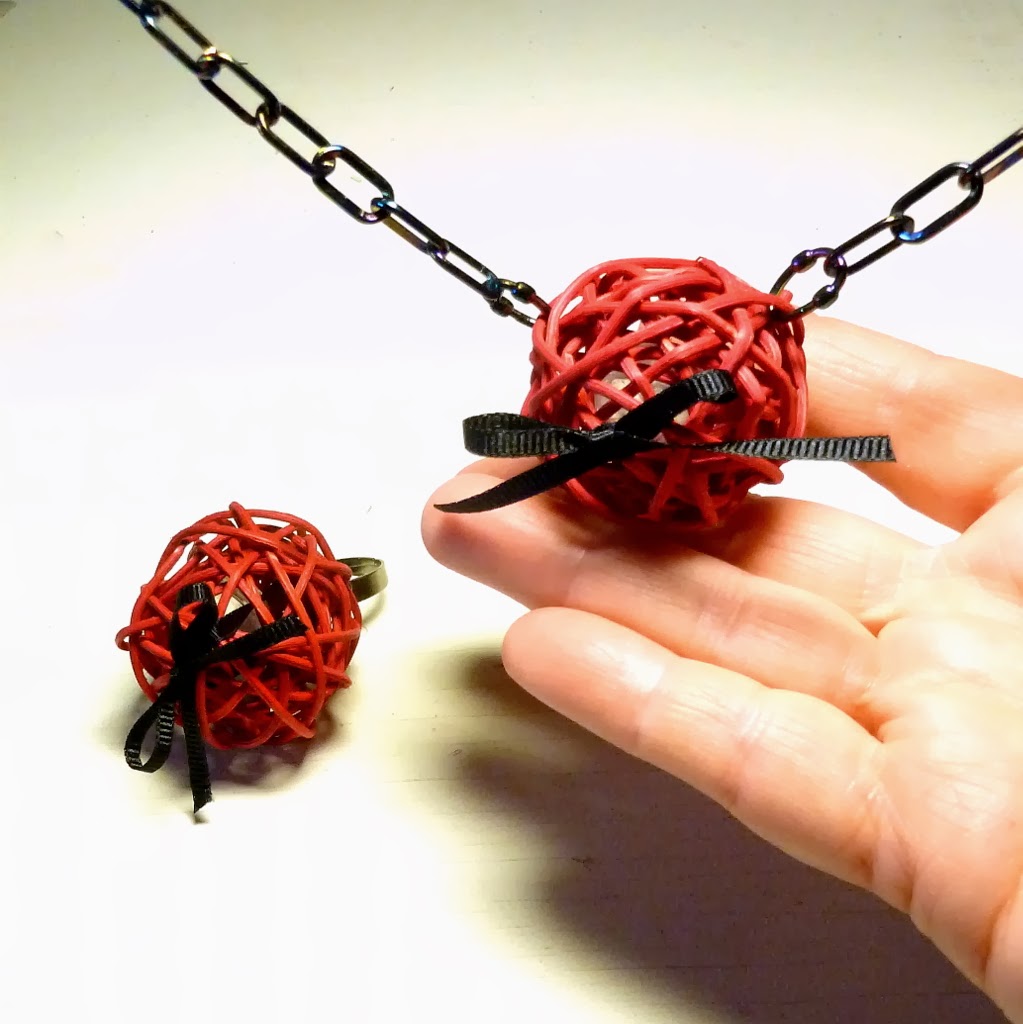
Do you like red and black for Valentine's Day? I do - seems somehow more hip than pink. (Not that there's anything wrong with pink.) I made these cuties in just a few minutes, with no tools needed!
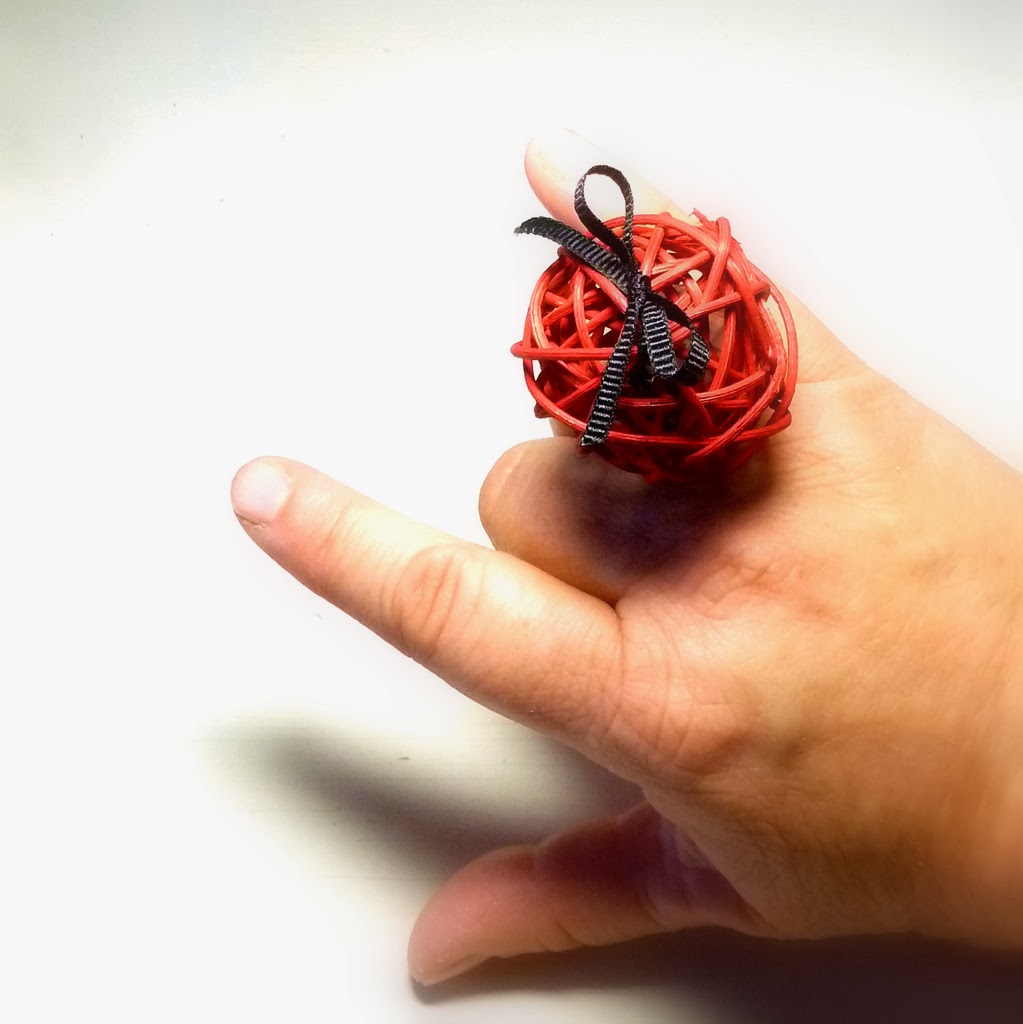
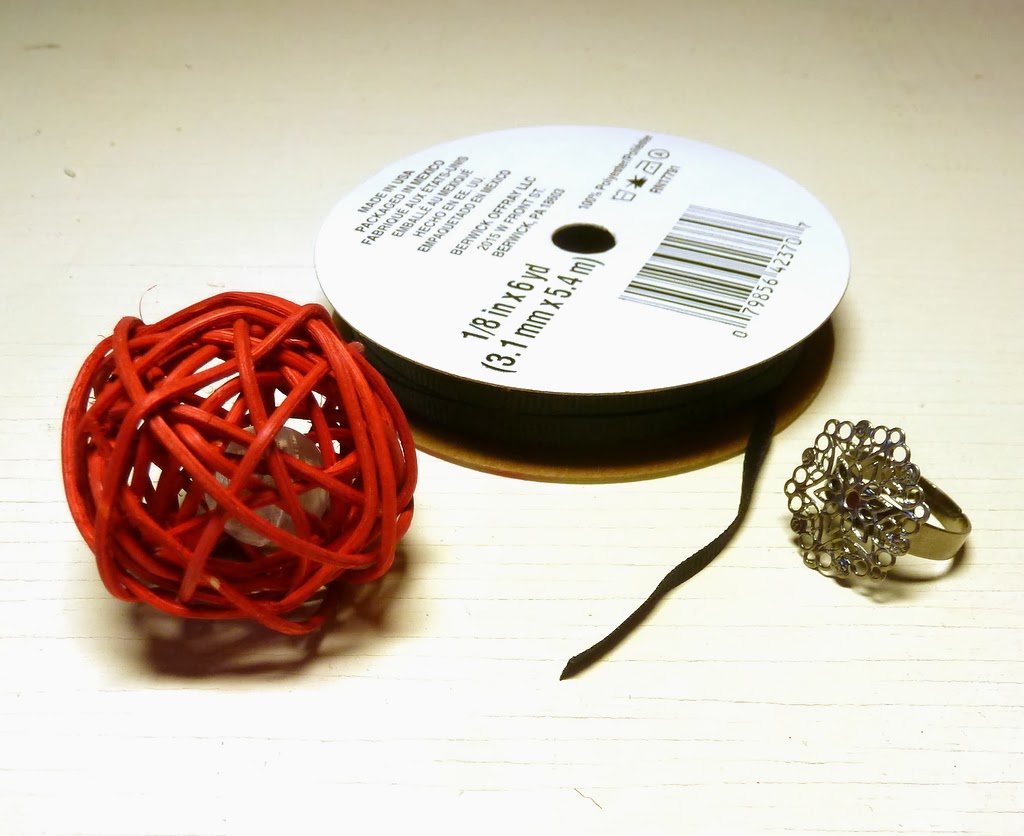
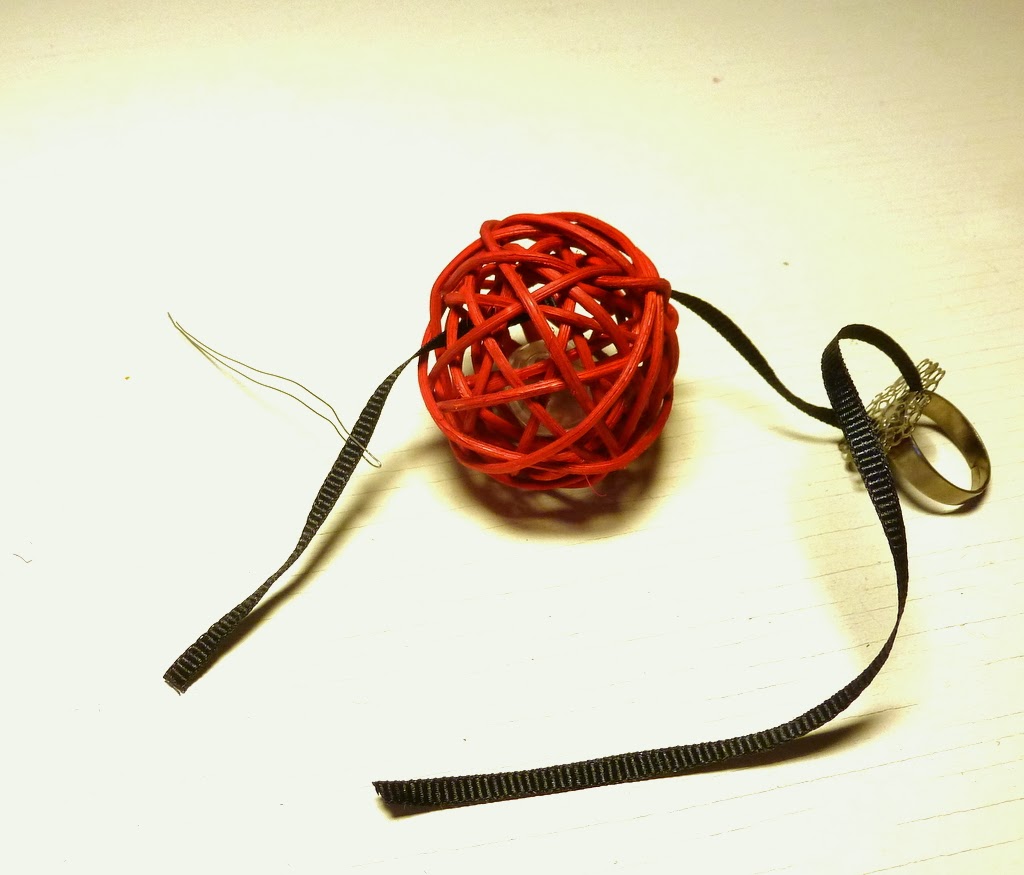
Ready to DIY? Let's start with the cocktail ring. You need a kitty ball, a ring blank and some skinny ribbon.
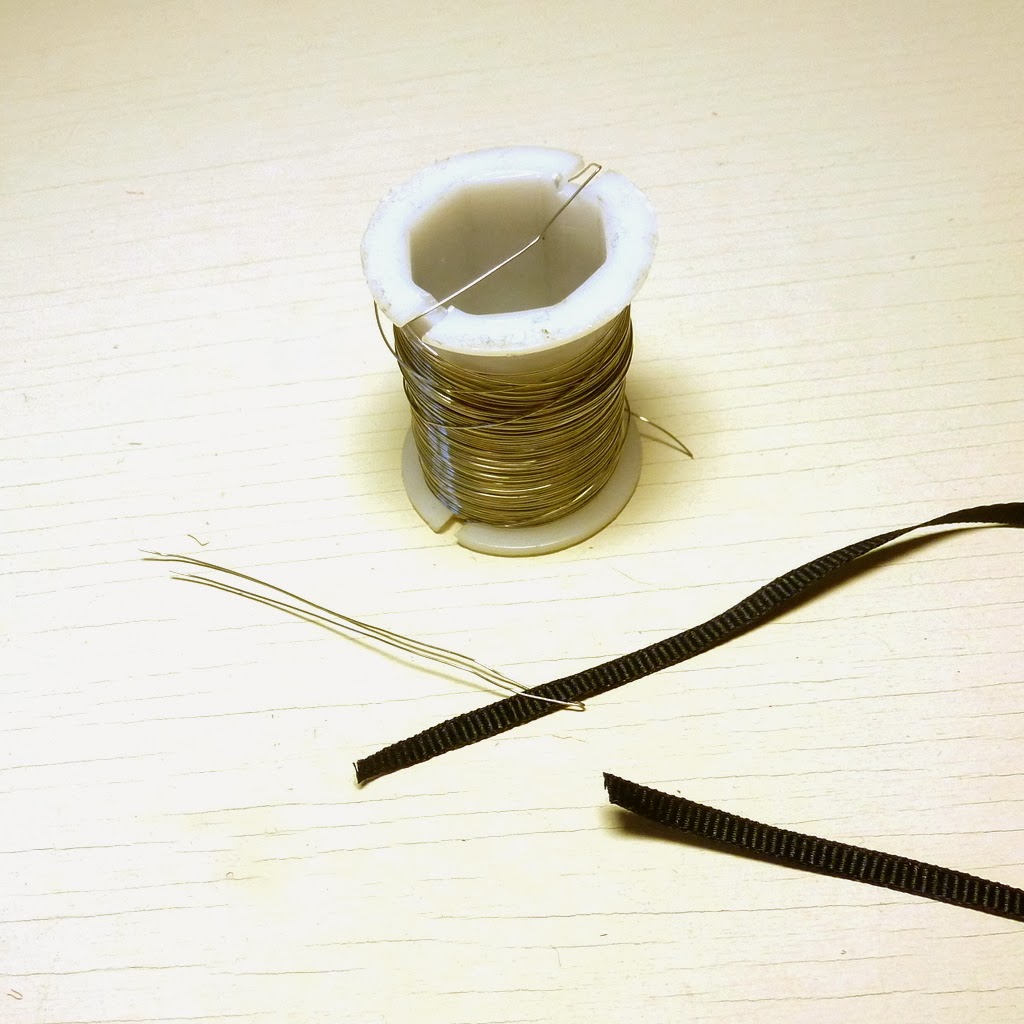
I used a little bit of craft wire as a needle, to help guide the ribbon where it needed to go.
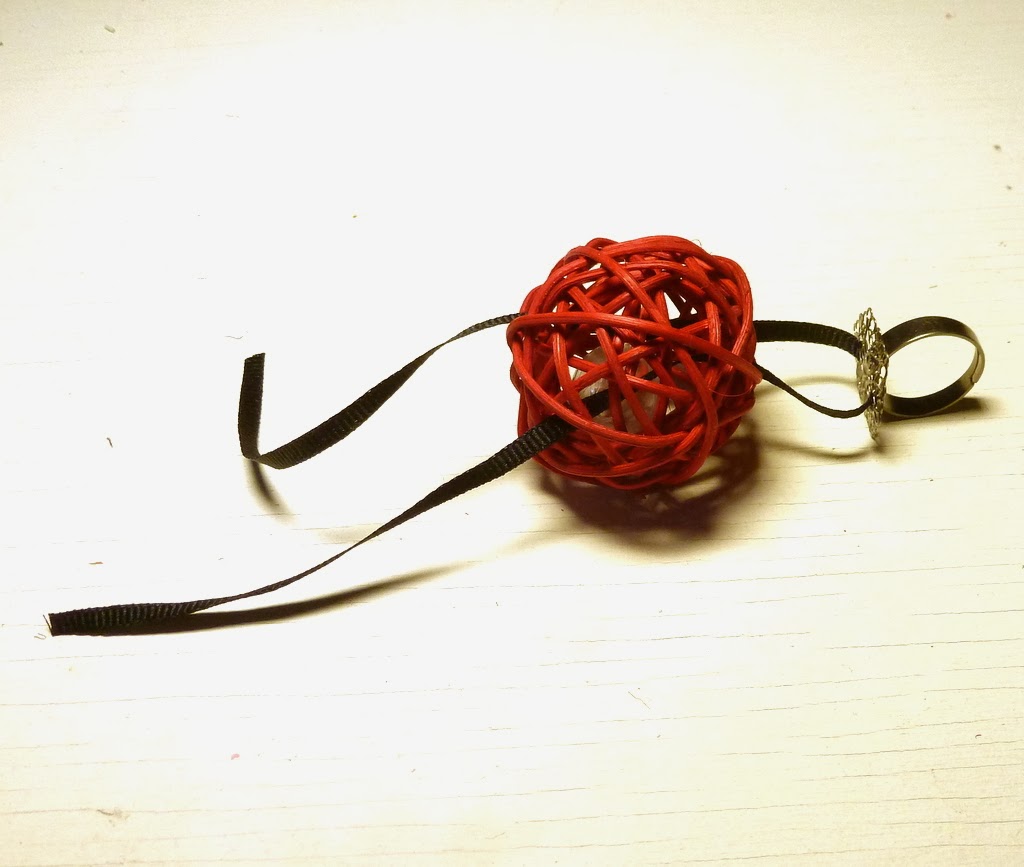
Thread the ribbon through two holes in the ring blank, then up through the kitty ball.
Tip: it may take a couple of tries before you feel you've found the right holes in the kitty ball - just experiment a bit until they seem about right. It doesn't need to be exactly symmetrical! I actually prefer the look with a slightly off-center ribbon.
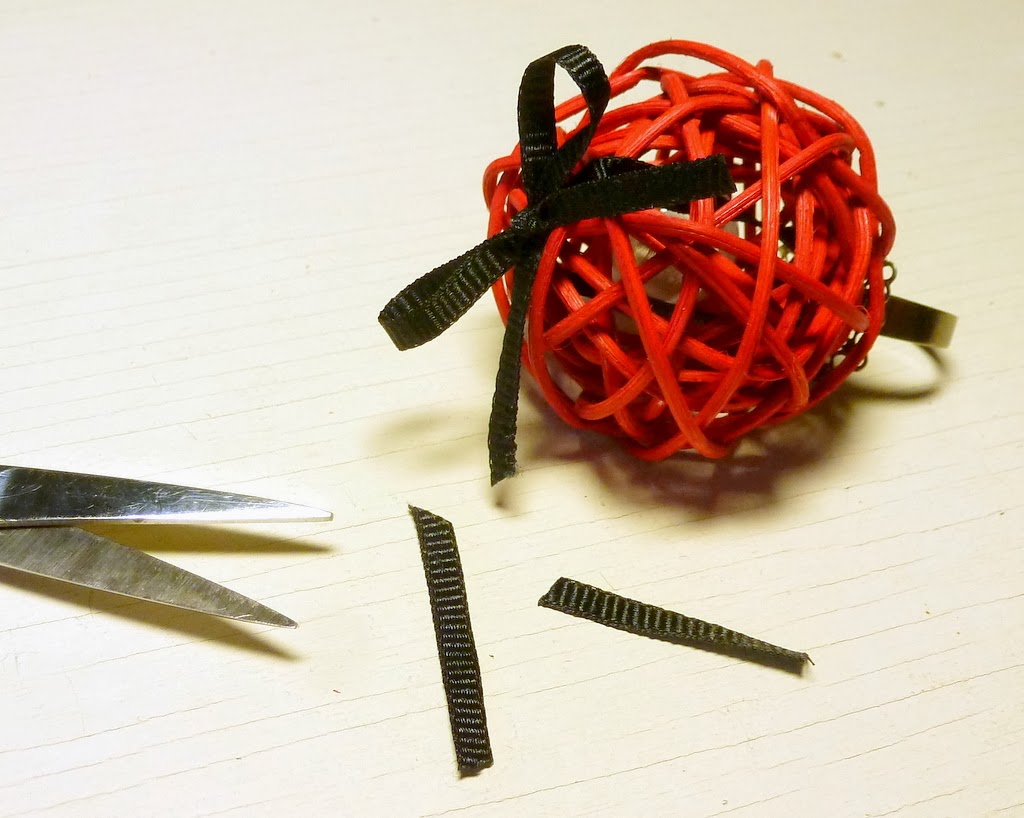
Tie a leetle bow! Trim the ends.
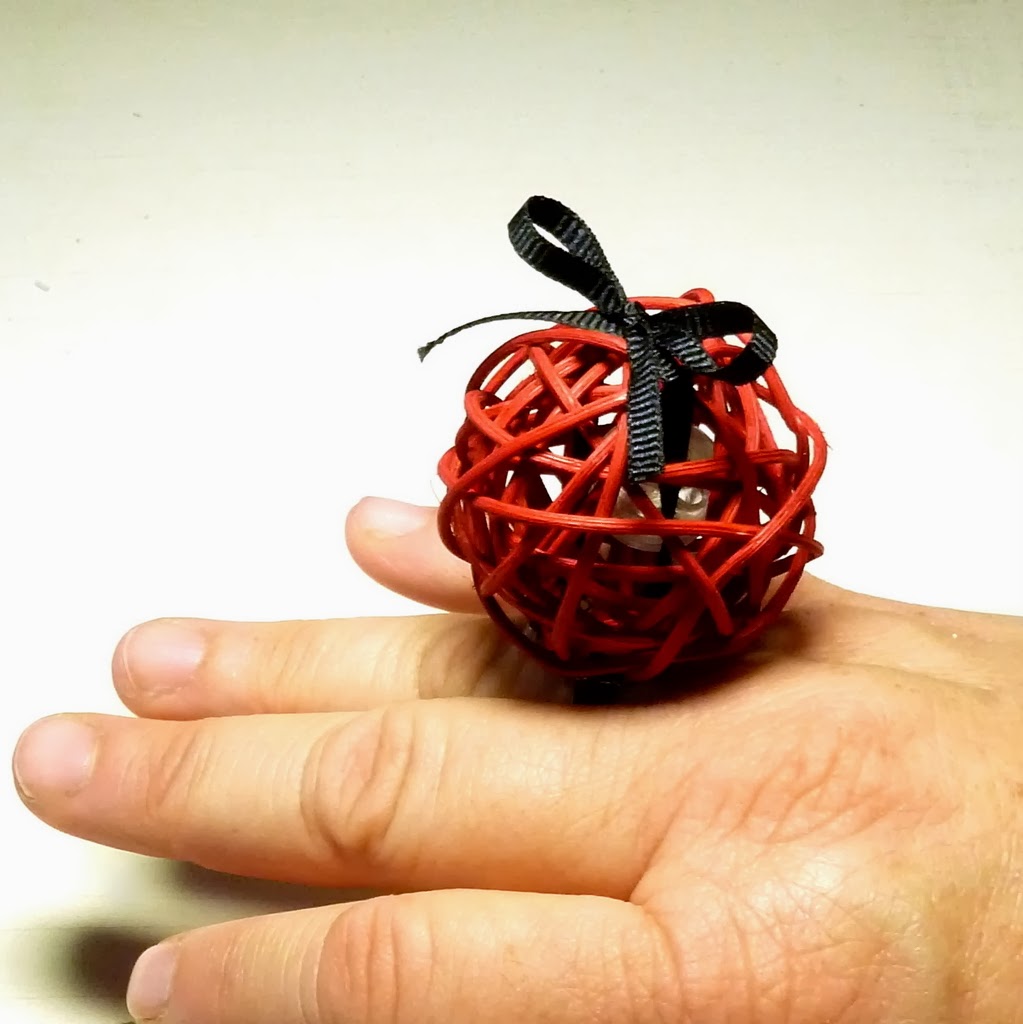
Wear your kitty ball proudly!
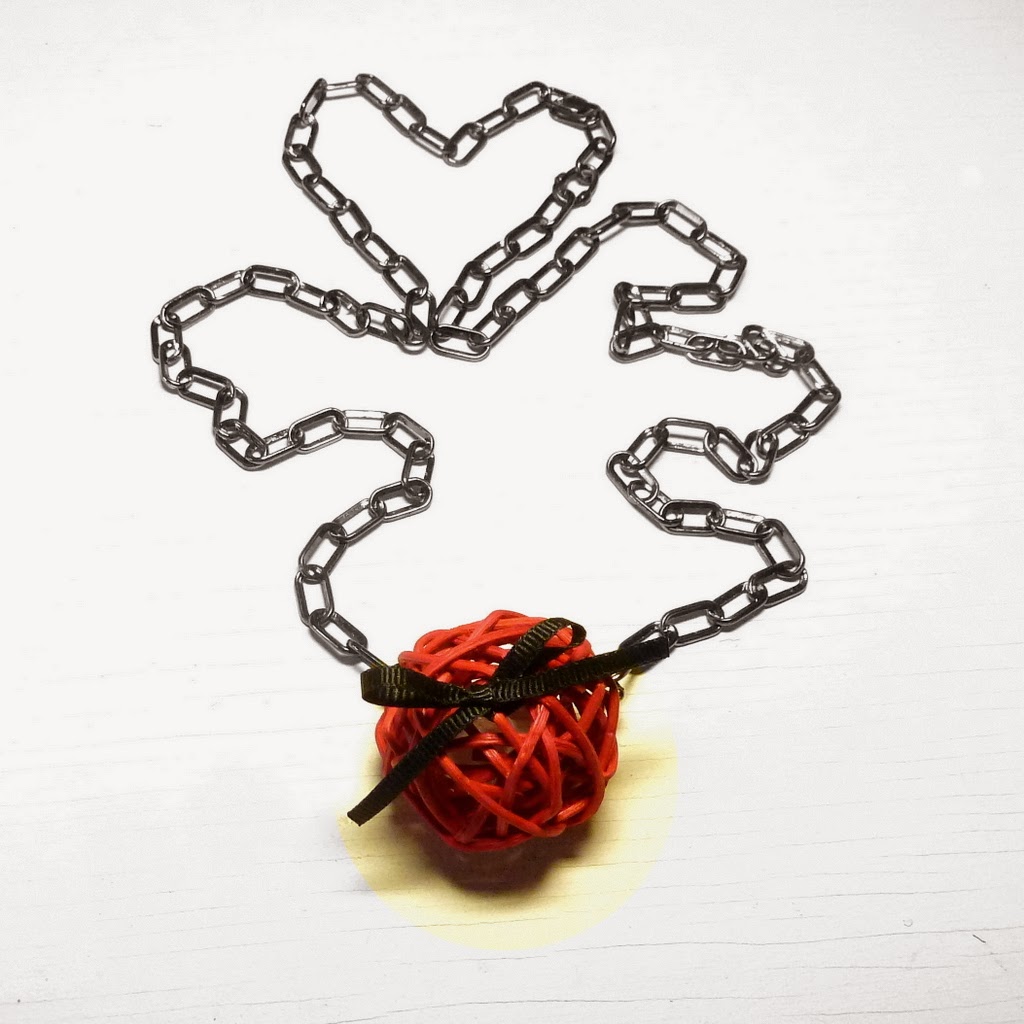
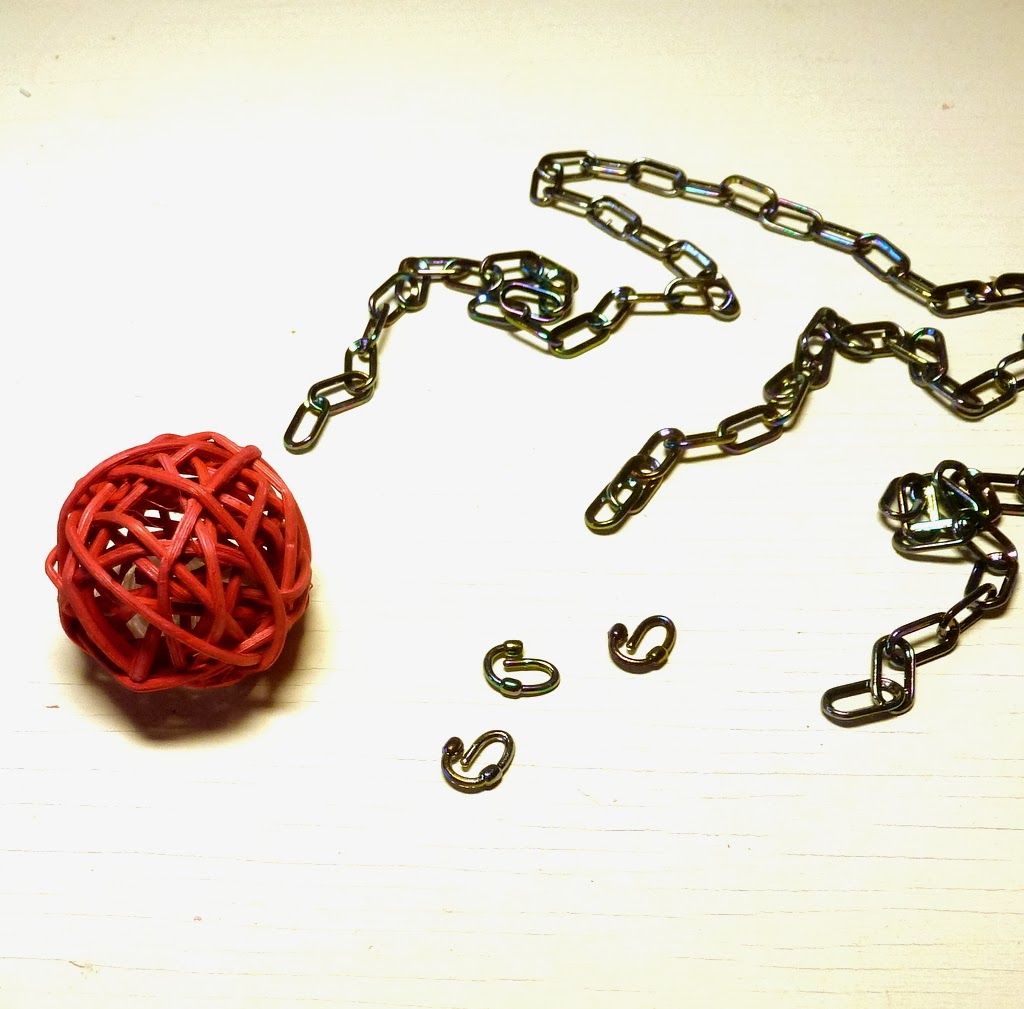
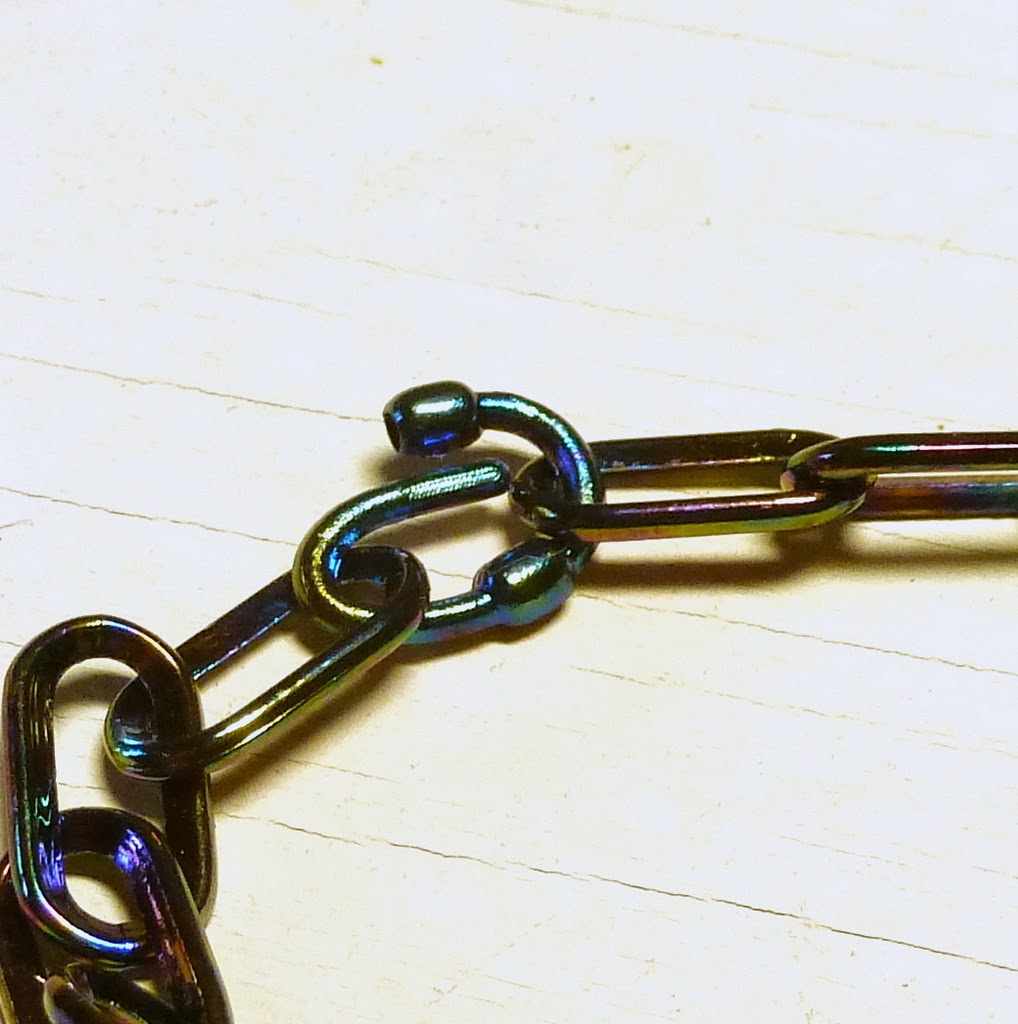
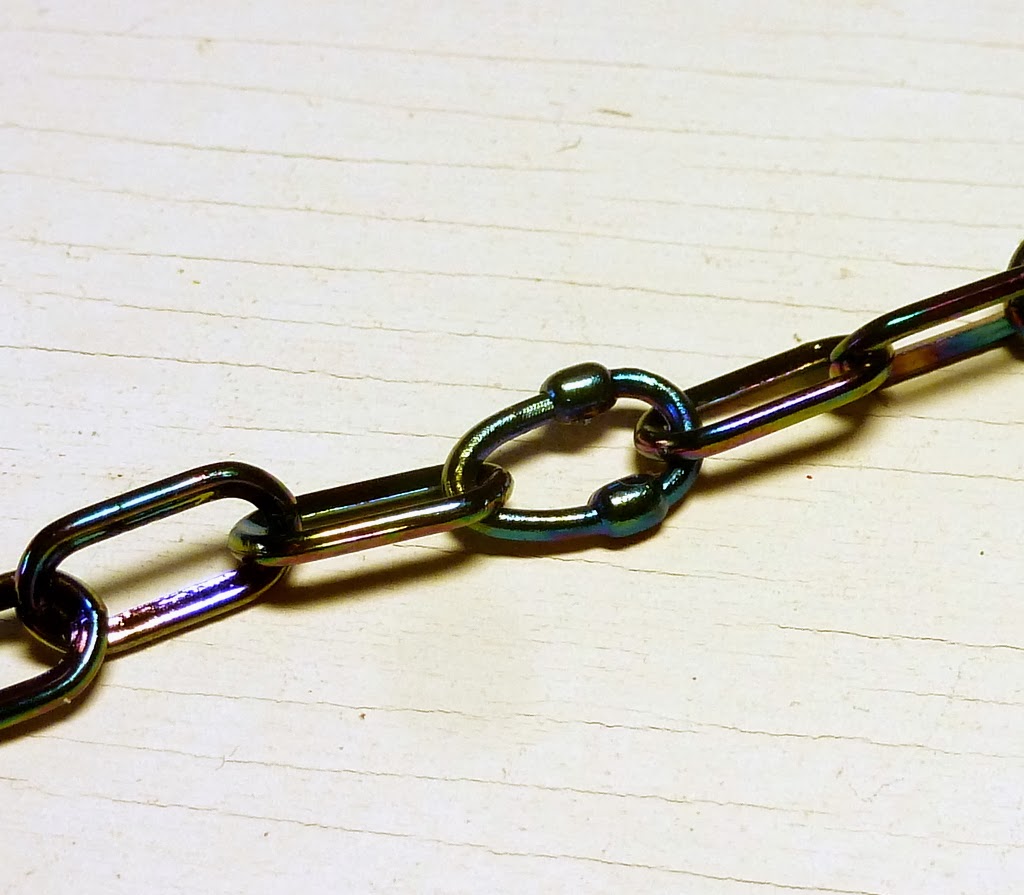
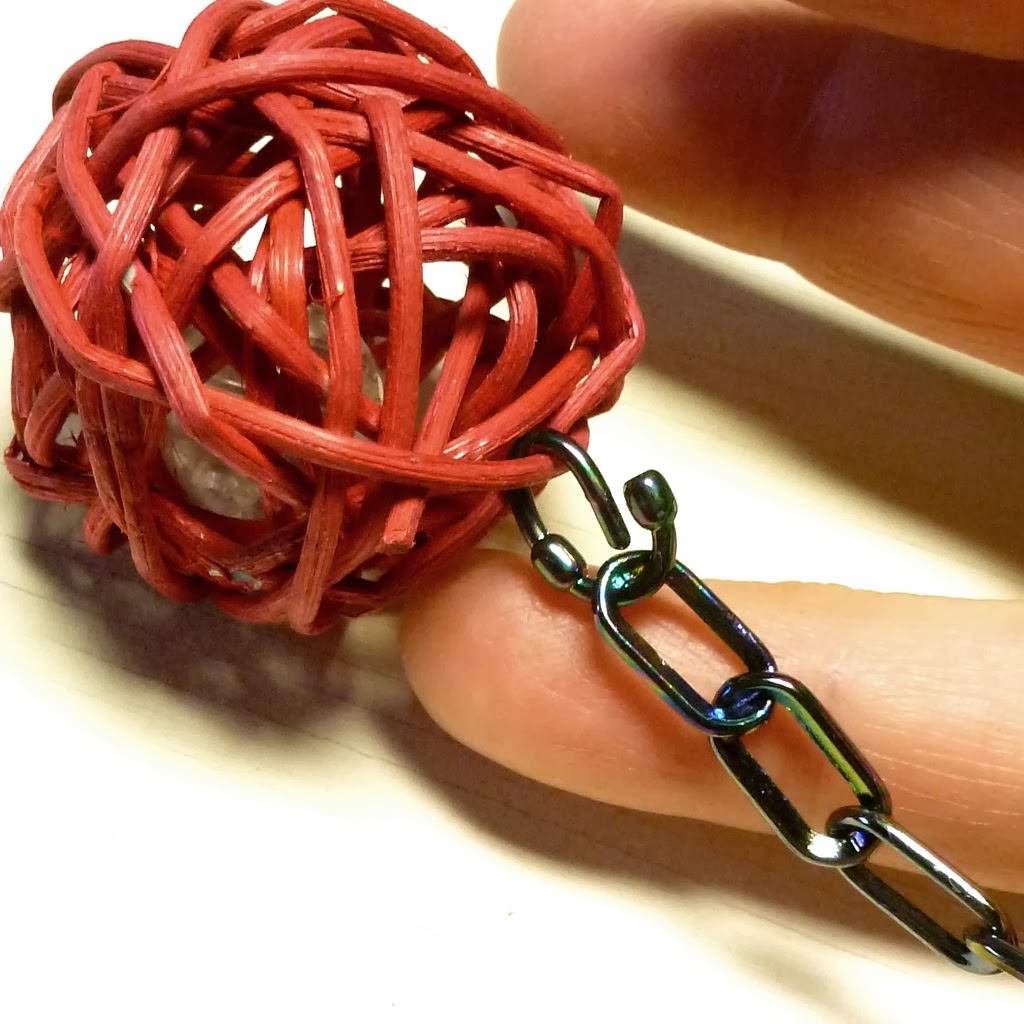
Now the necklace - another very easy one. I used some light plastic chain, which comes with its own linkers. (Of course you can use ordinary chain and jump rings instead.)
First I connected two lengths, because I wanted a longer chain.
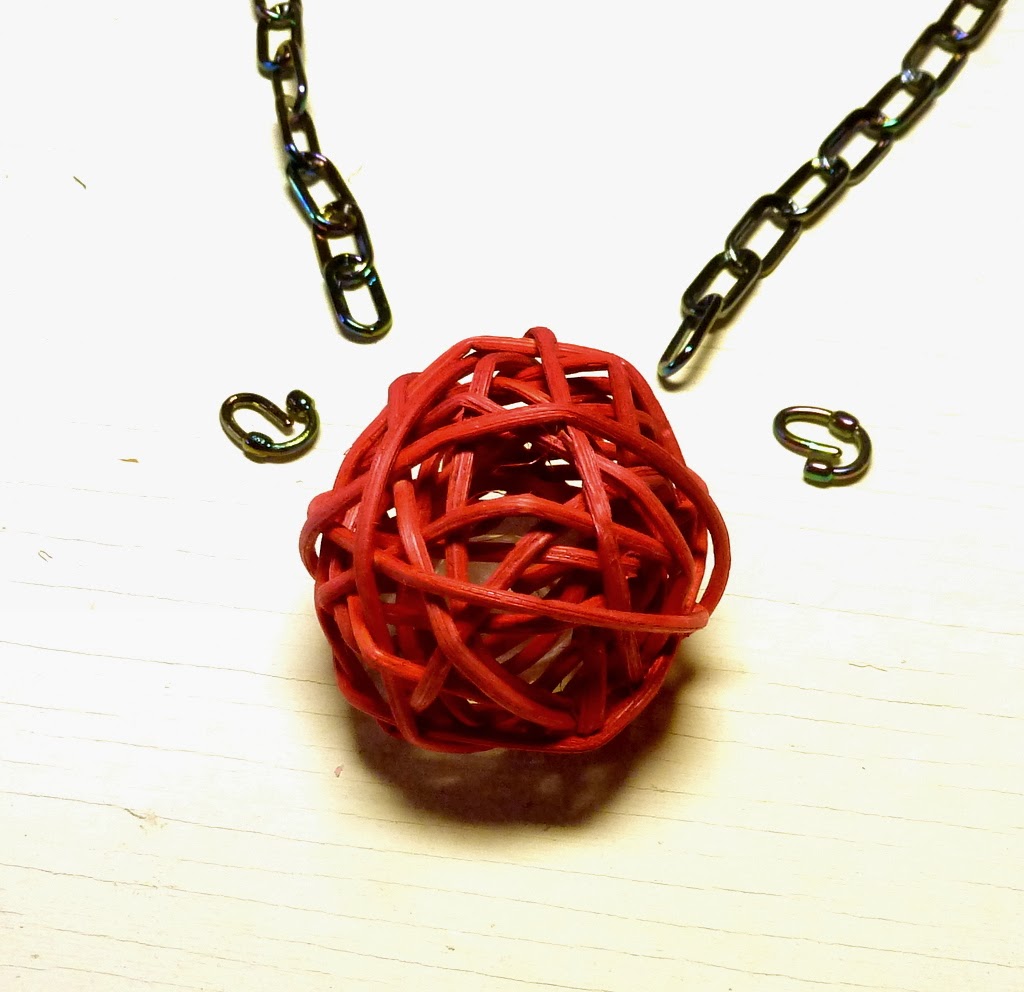
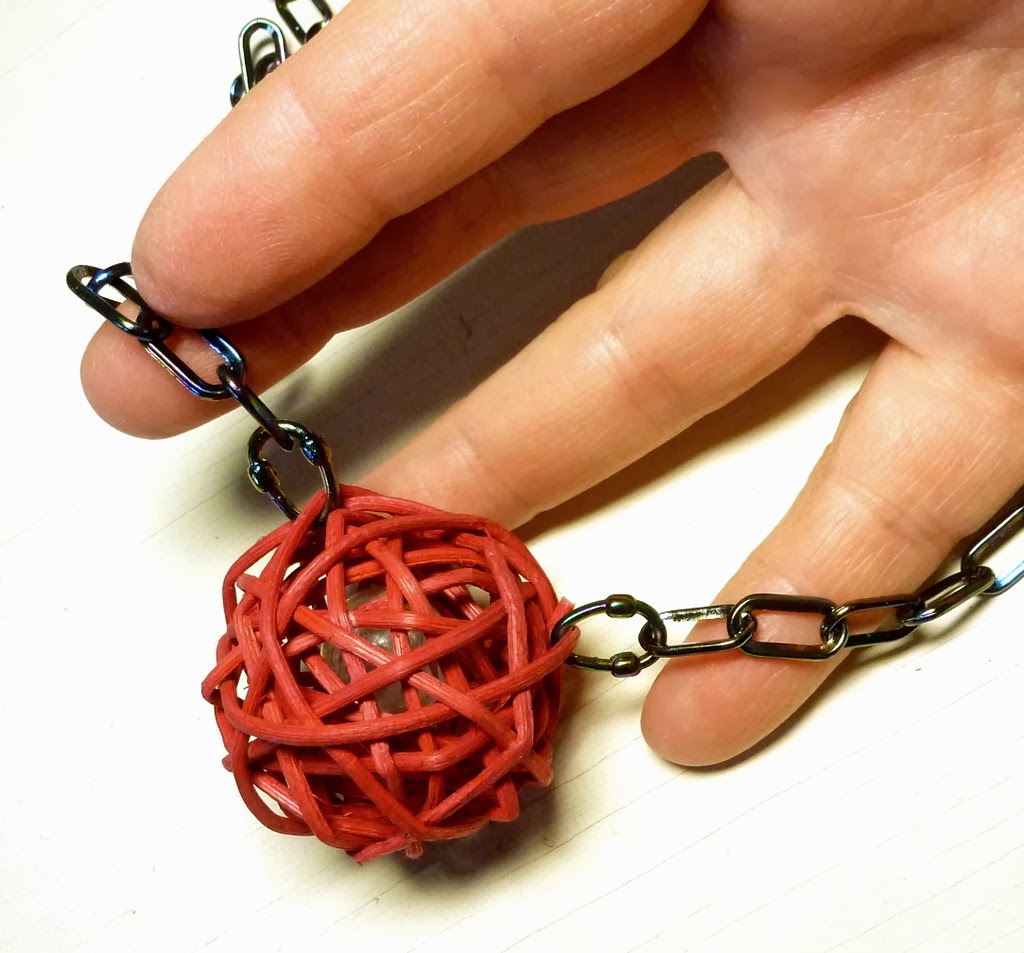
Then I used two more linkers to connect the chain to a couple of spots on the kitty ball.
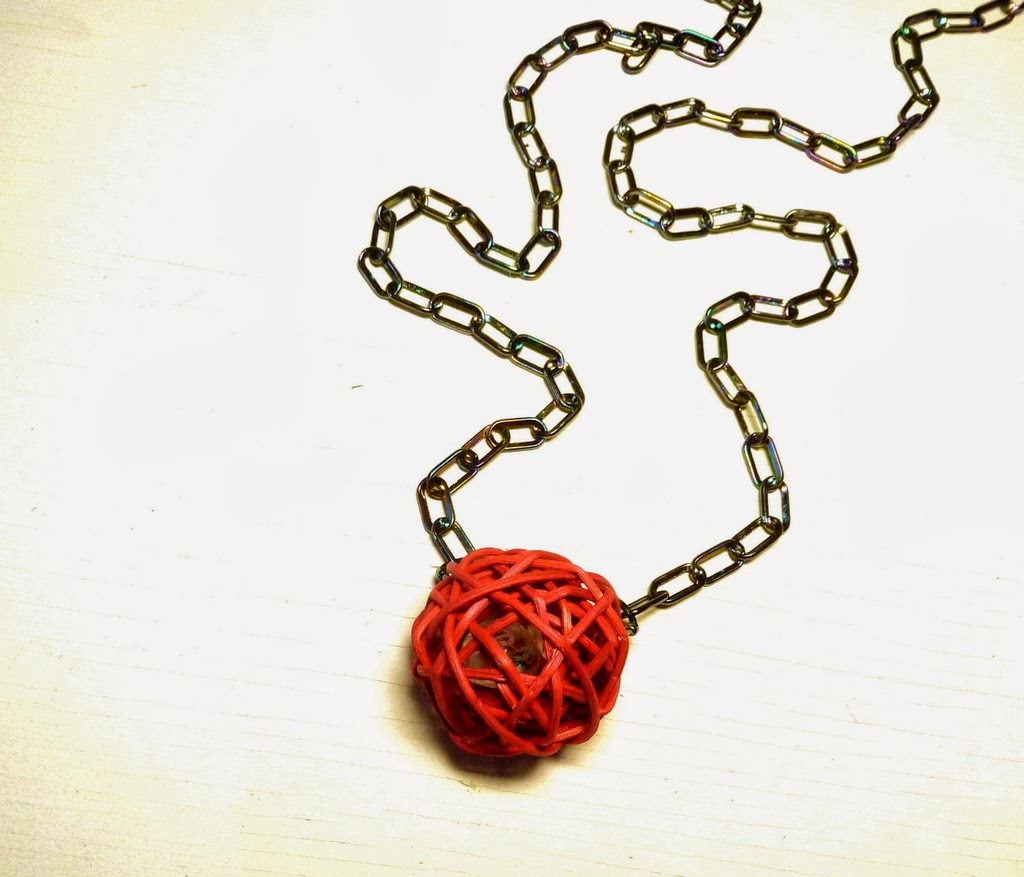
That's pretty cute right there, eh?
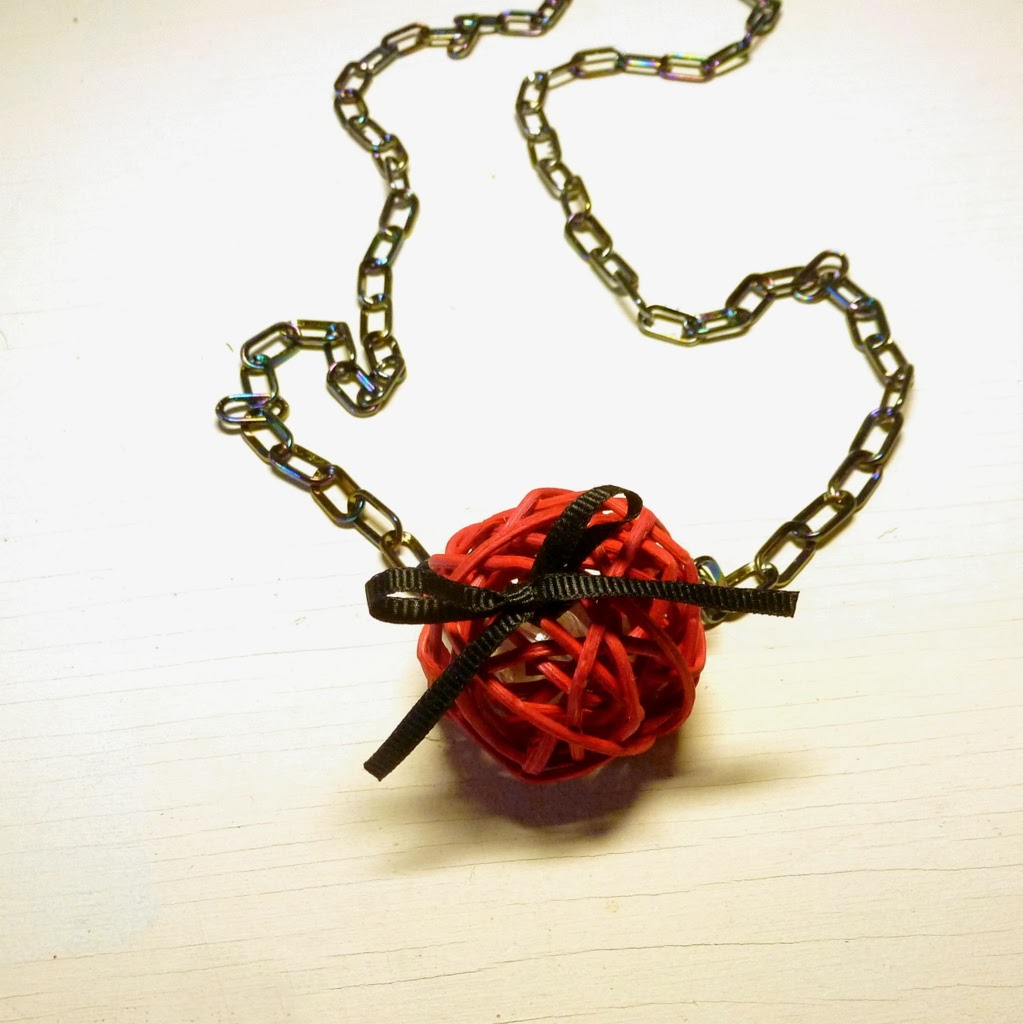
But if you like, tie a little bow as follows:
Gosh, I love these!
I'll post something with the green kitty balls sometime in the near future. Green for springtime. Is it almost here?
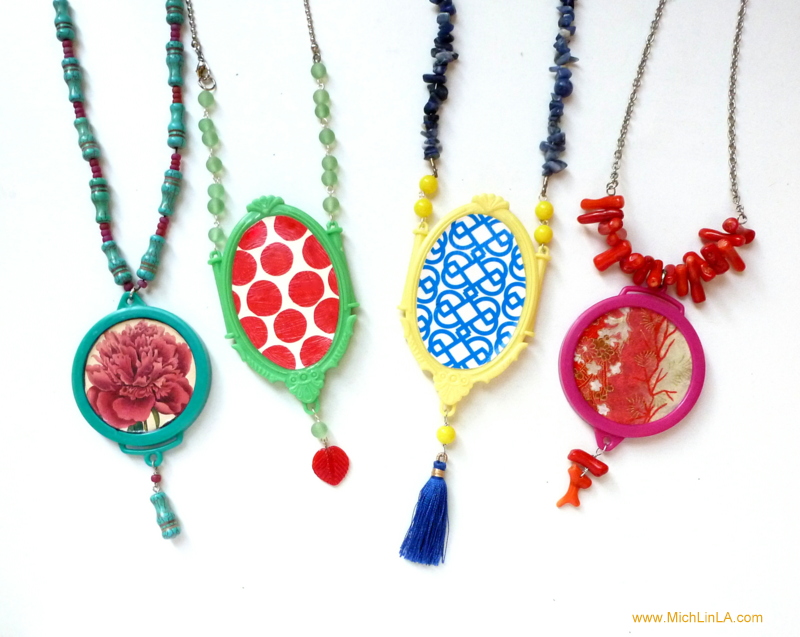
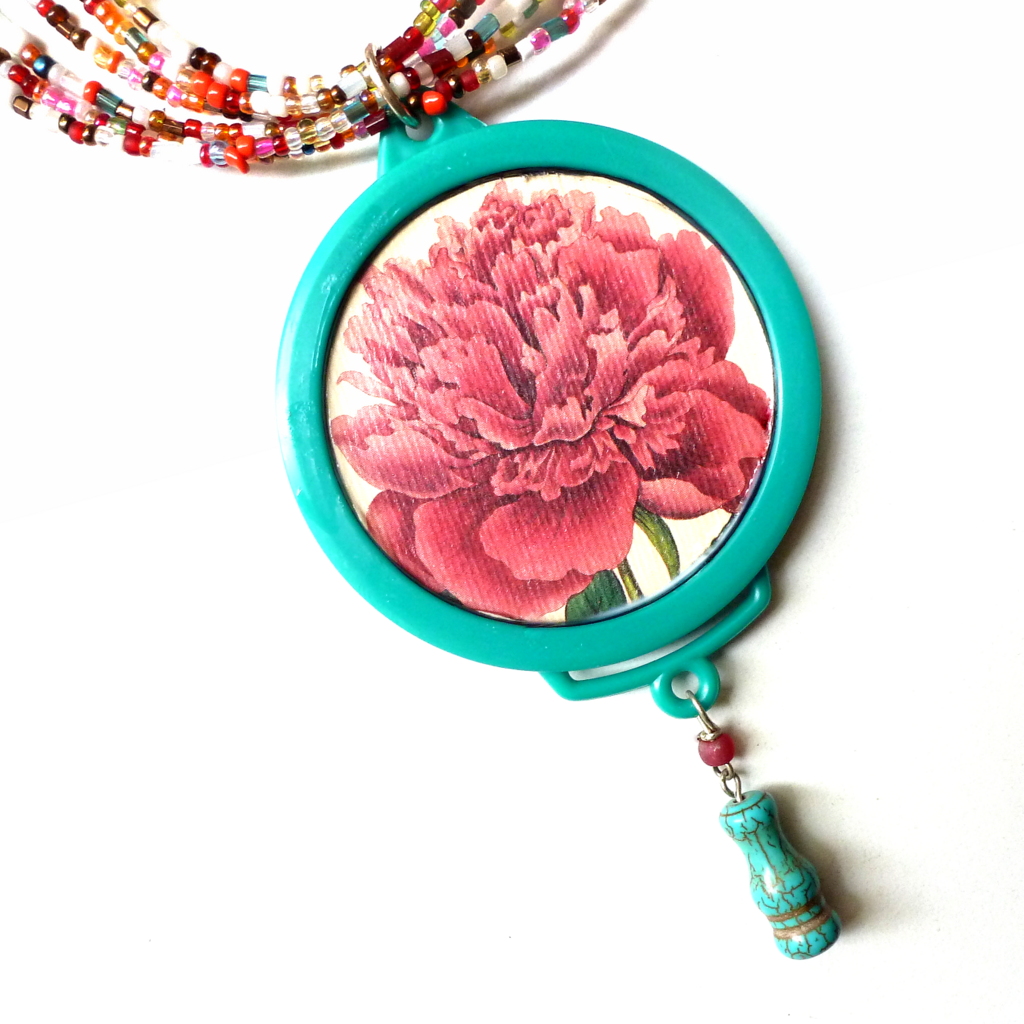
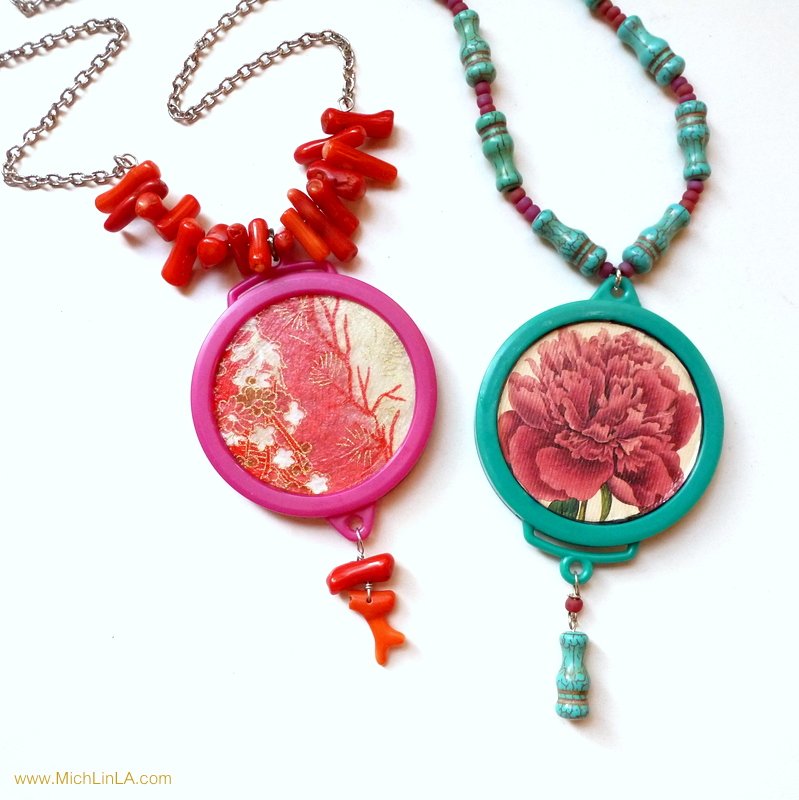
Polly wanna necklace?
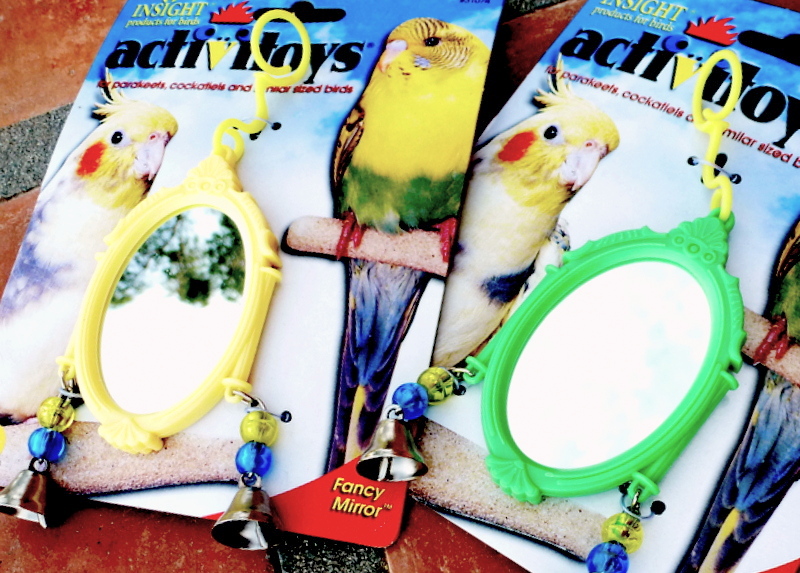
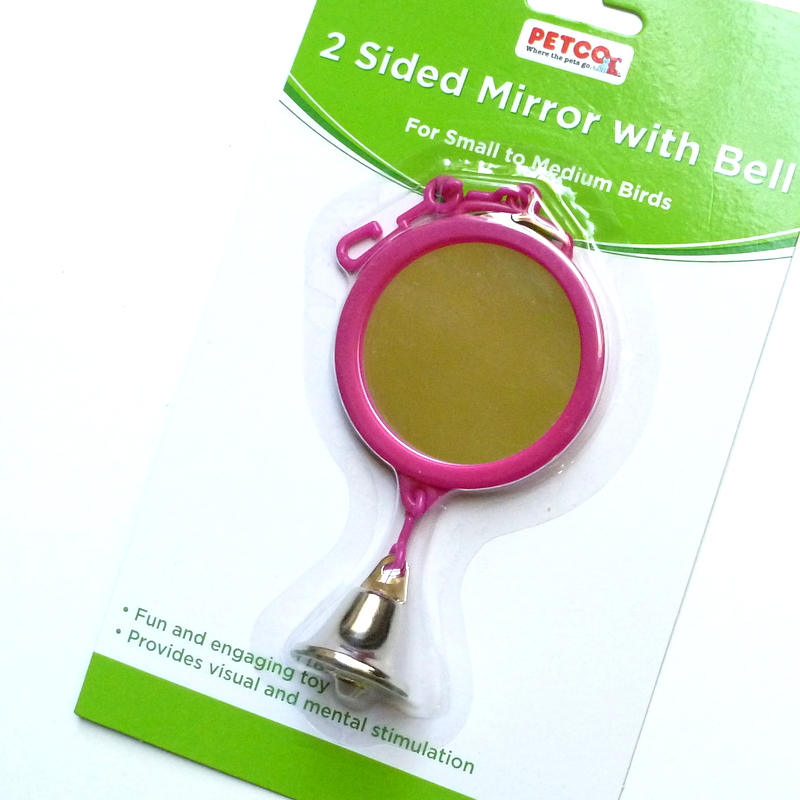
I made them from parakeet mirrors.
(crickets)
You know, parakeet mirrors! From the bird section of the pet store. They come simple or ornate, in lots of fun colors....
The perfect ready-made frame for a big, bold, Mod-podged pendant.
Want to DIY? Read on for the quick and simple tutorial.
So! After days of trying, I think you guys are wanting to know the answer to this week's Guess The Mystery Thing challenge. I will tell you right up front, nobody got it.
Nobody even came close.
If you're just joining us, I made these big decoupaged pendants, upcycled from something mysterious.
What are those bright little frames? Think you know? (I'm pretty sure you don't.) Read on to find out!
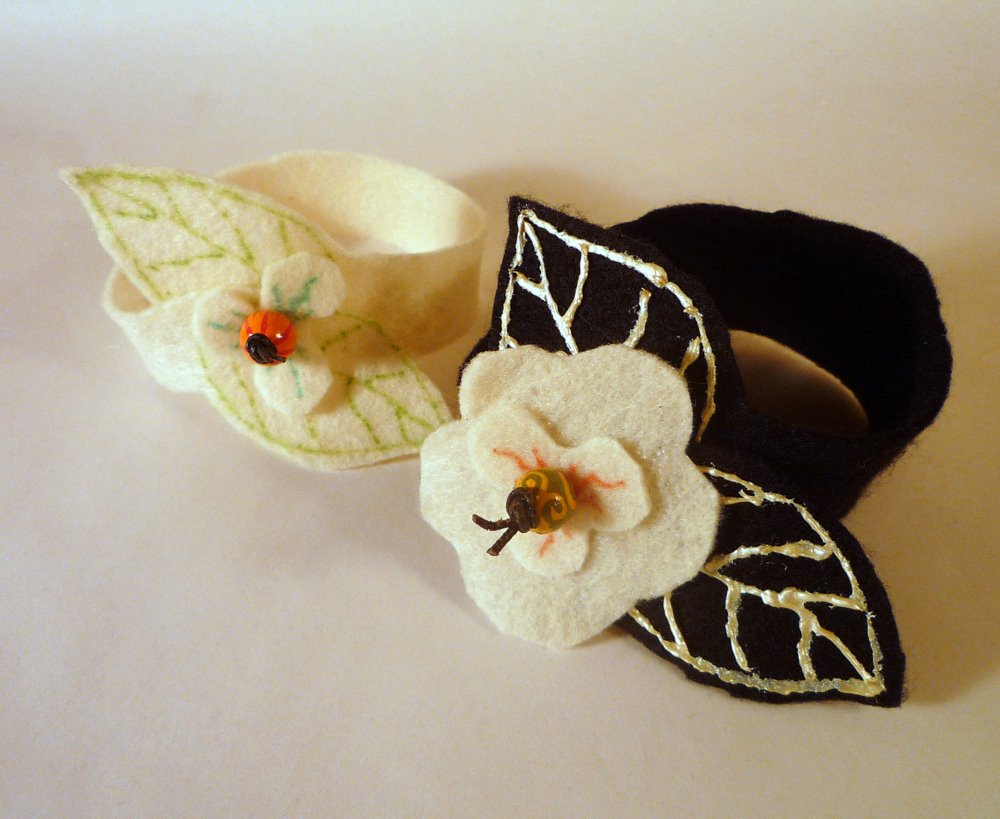
Last week, I showed you how to make these leafy cuff bracelets.

I thought I'd add a quick tutorial using the same simple method, to embellish something quite different...and suggest a small good deed you might like to consider.
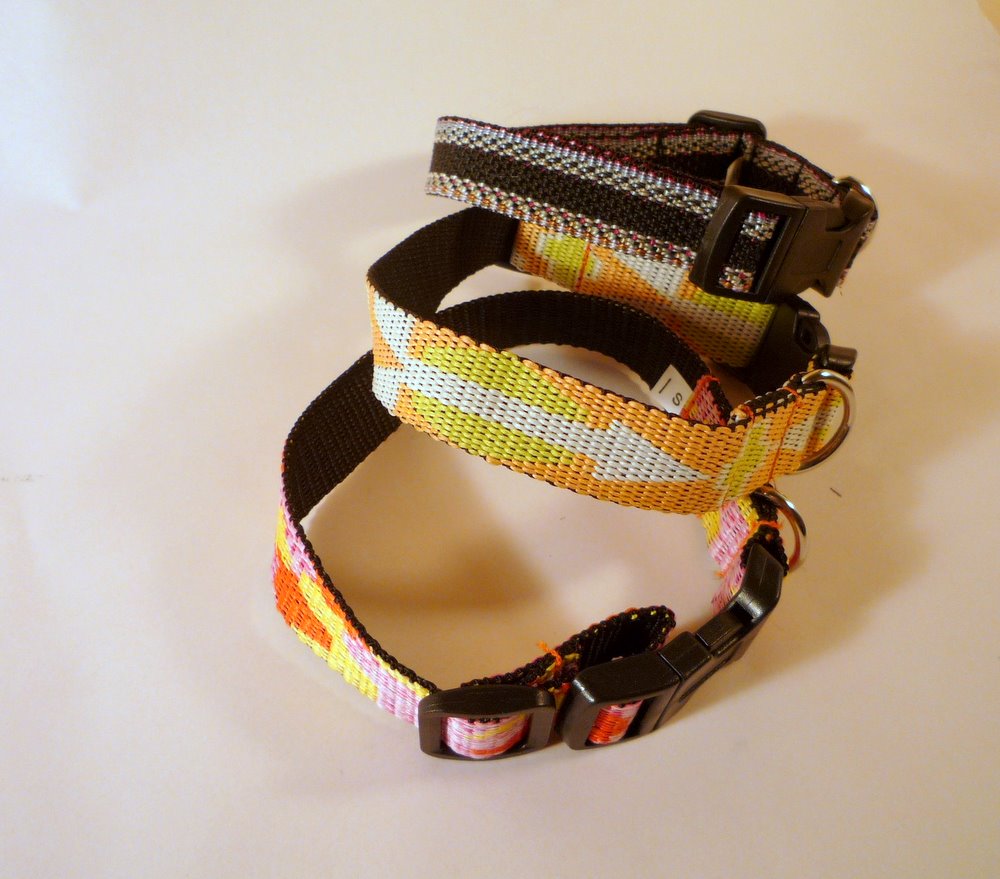
Every so often, at the dollar store, I come across a pile of good quality pet collars and leashes. Like these, a recent score -

Whenever I find them in stock I buy as many as I can, to donate to my favorite rescue shelter. They ALWAYS need them. Every donated collar means $5 or $6 the shelter doesn't have to spend buying a new one. And it only costs me a buck! What a great way to make an impact for very little money.
If you have (or know of) a sweet pup or kitty who would look smashing in some fine, custom embellished neckwear, find a plain collar and try this super easy project.
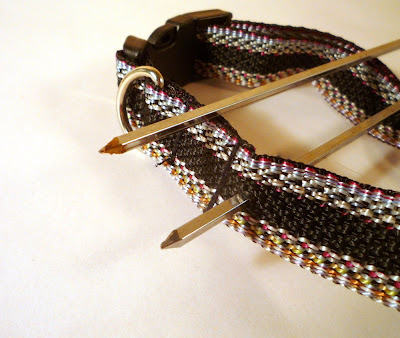
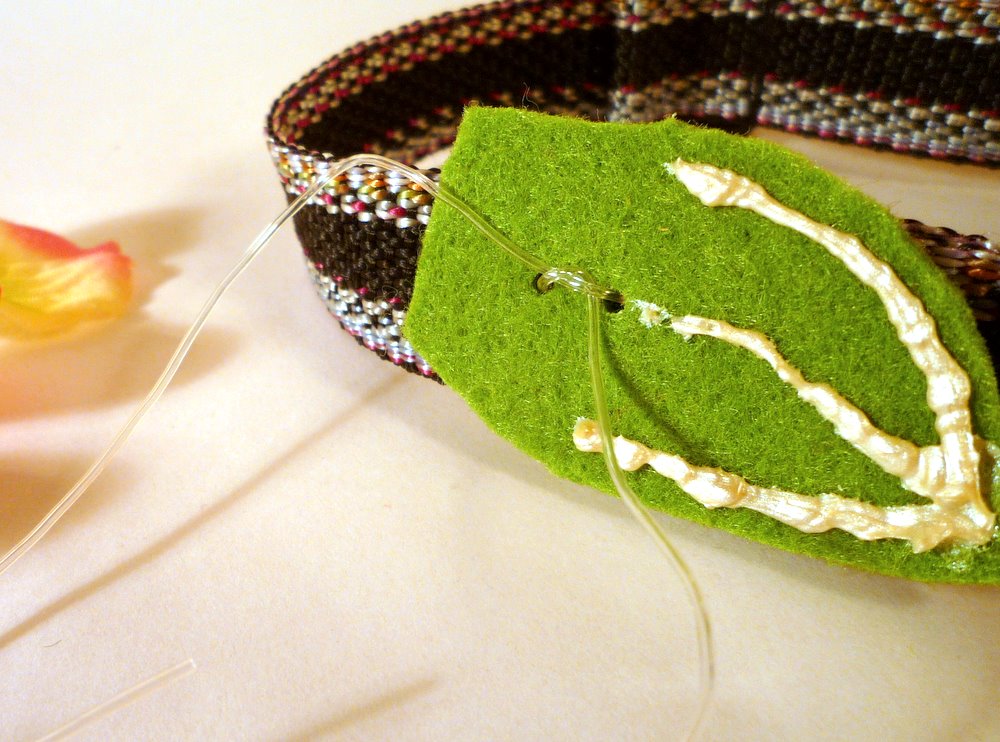
First you need to make two holes in the collar. Use something pointy, but not deadly sharp. I used a BBQ skewer. Gently work the point through the woven strapping, spreading the fibers until you have made a hole. You can usually do it without even breaking any threads.
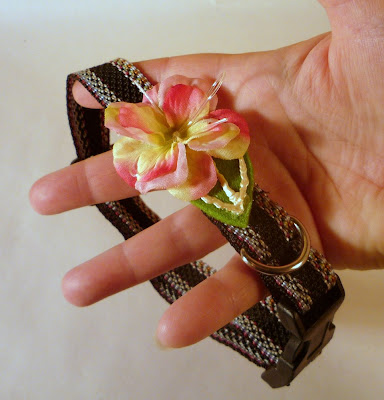
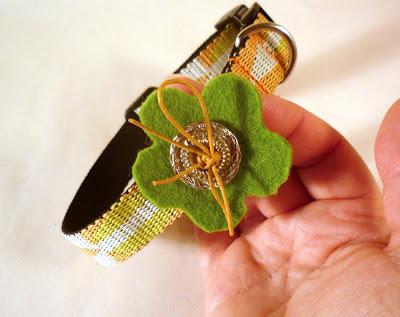
 String some cord or plastic lacing through the two holes. Then layer on your creative embellishments. Ideally, they'll be drool-resistant. I used silk flowers, puffy paint, felt and a button.
 Tie a secure knot in the middle - apply the finished collar to the critter of your choice - and wait for the compliments!
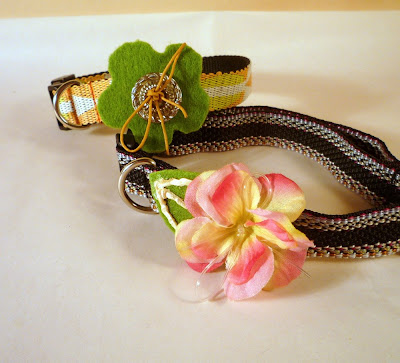
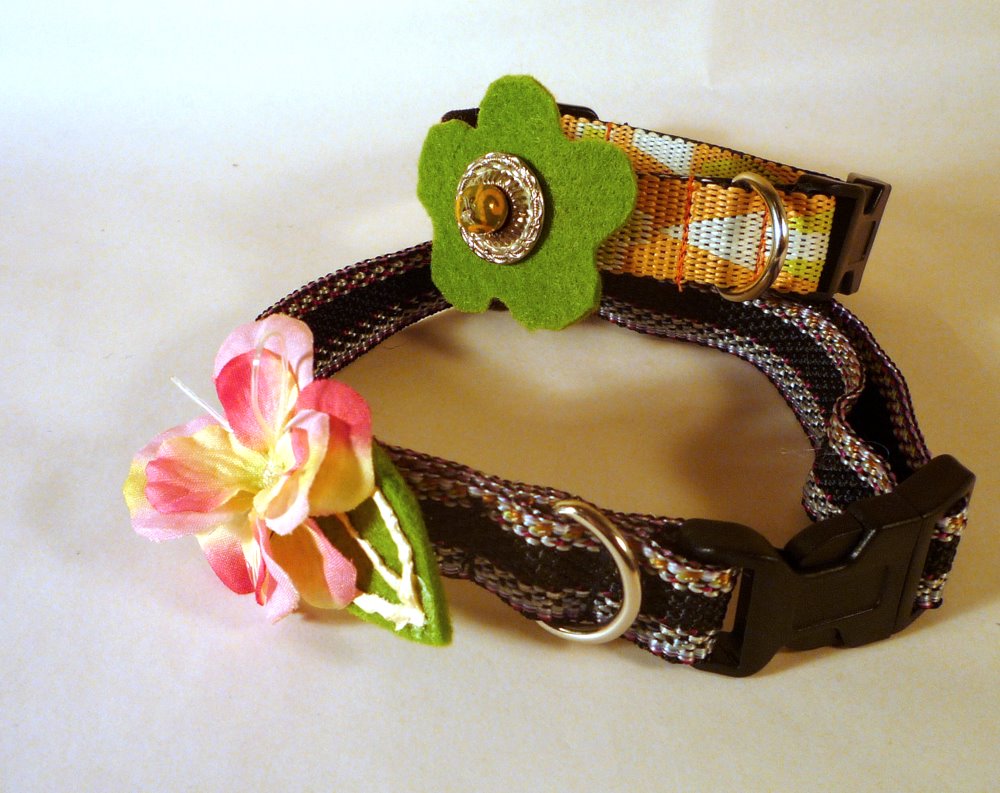
I know a miniature Aussie named Simon who would love this one. (He's a lover, you see, not a fighter.)
 And an Irish redhead of my acquaintance (her name is Ginger) would totally rock this orange and green one:
So next time you happen upon a collar for a dollar - why not buy two? One for your own critter, and one to donate to the shelter nearest you.


