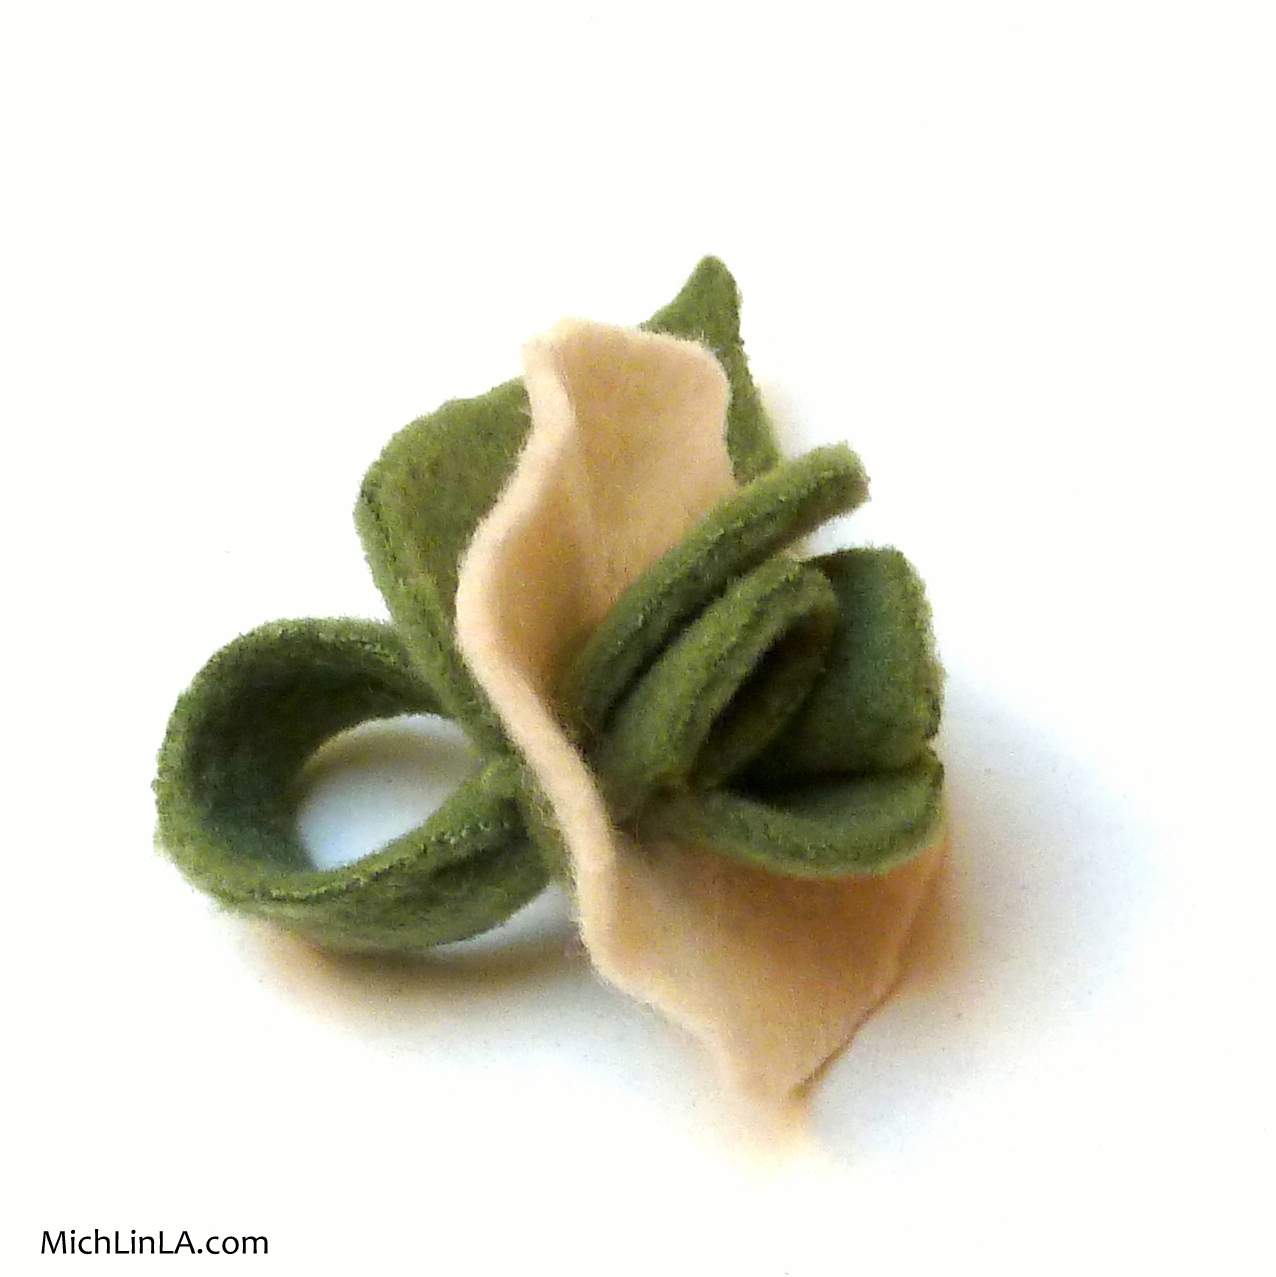
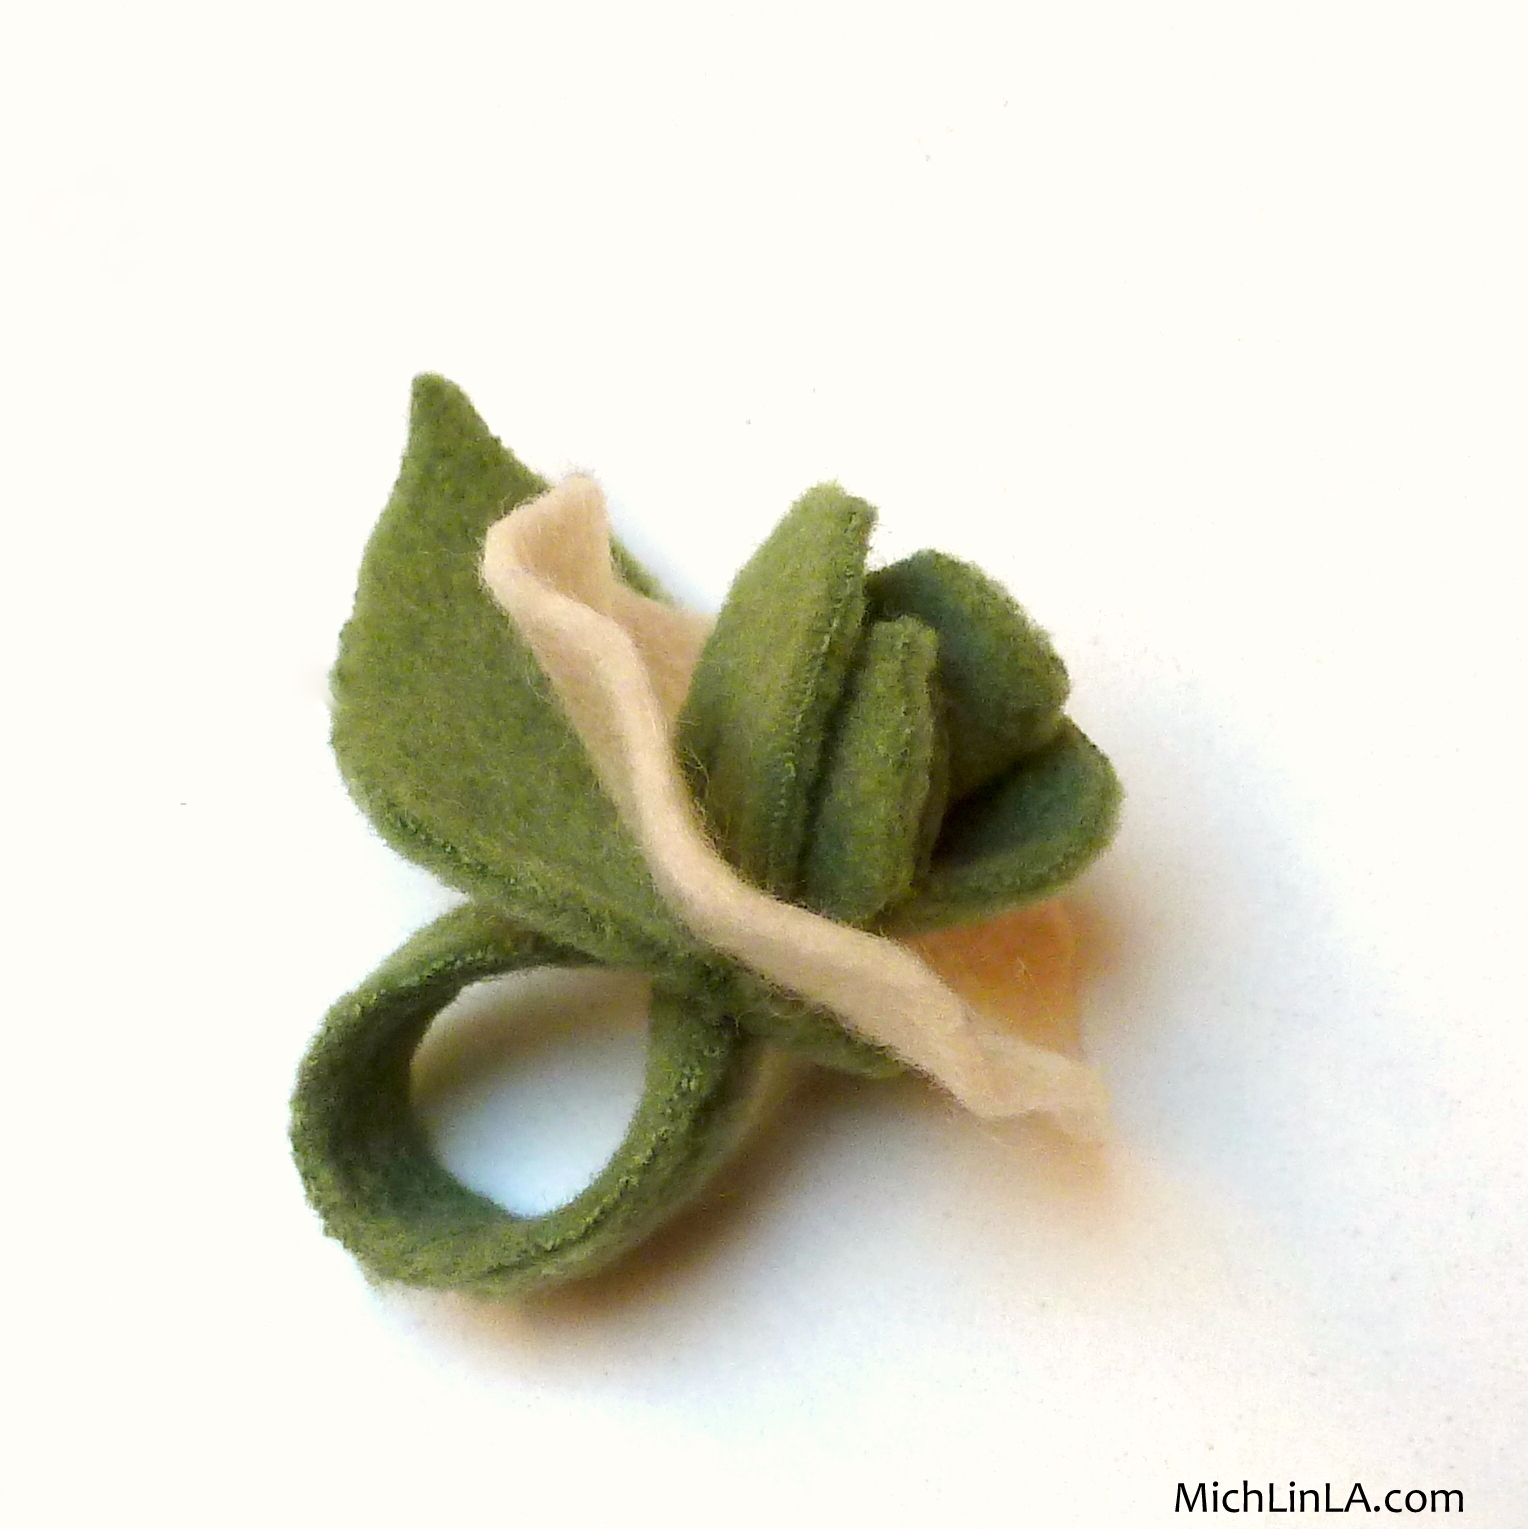
Today's craft: a DIY ring made from scraps of fleece and felt.
A five minute craft for any age and skill level. I like it plain...
And I like it patterned.
Aw heck, I just like it.
The How-To is particularly fun, and involves a dog biscuit. So now you have to try it, right? Ready? Here goes!
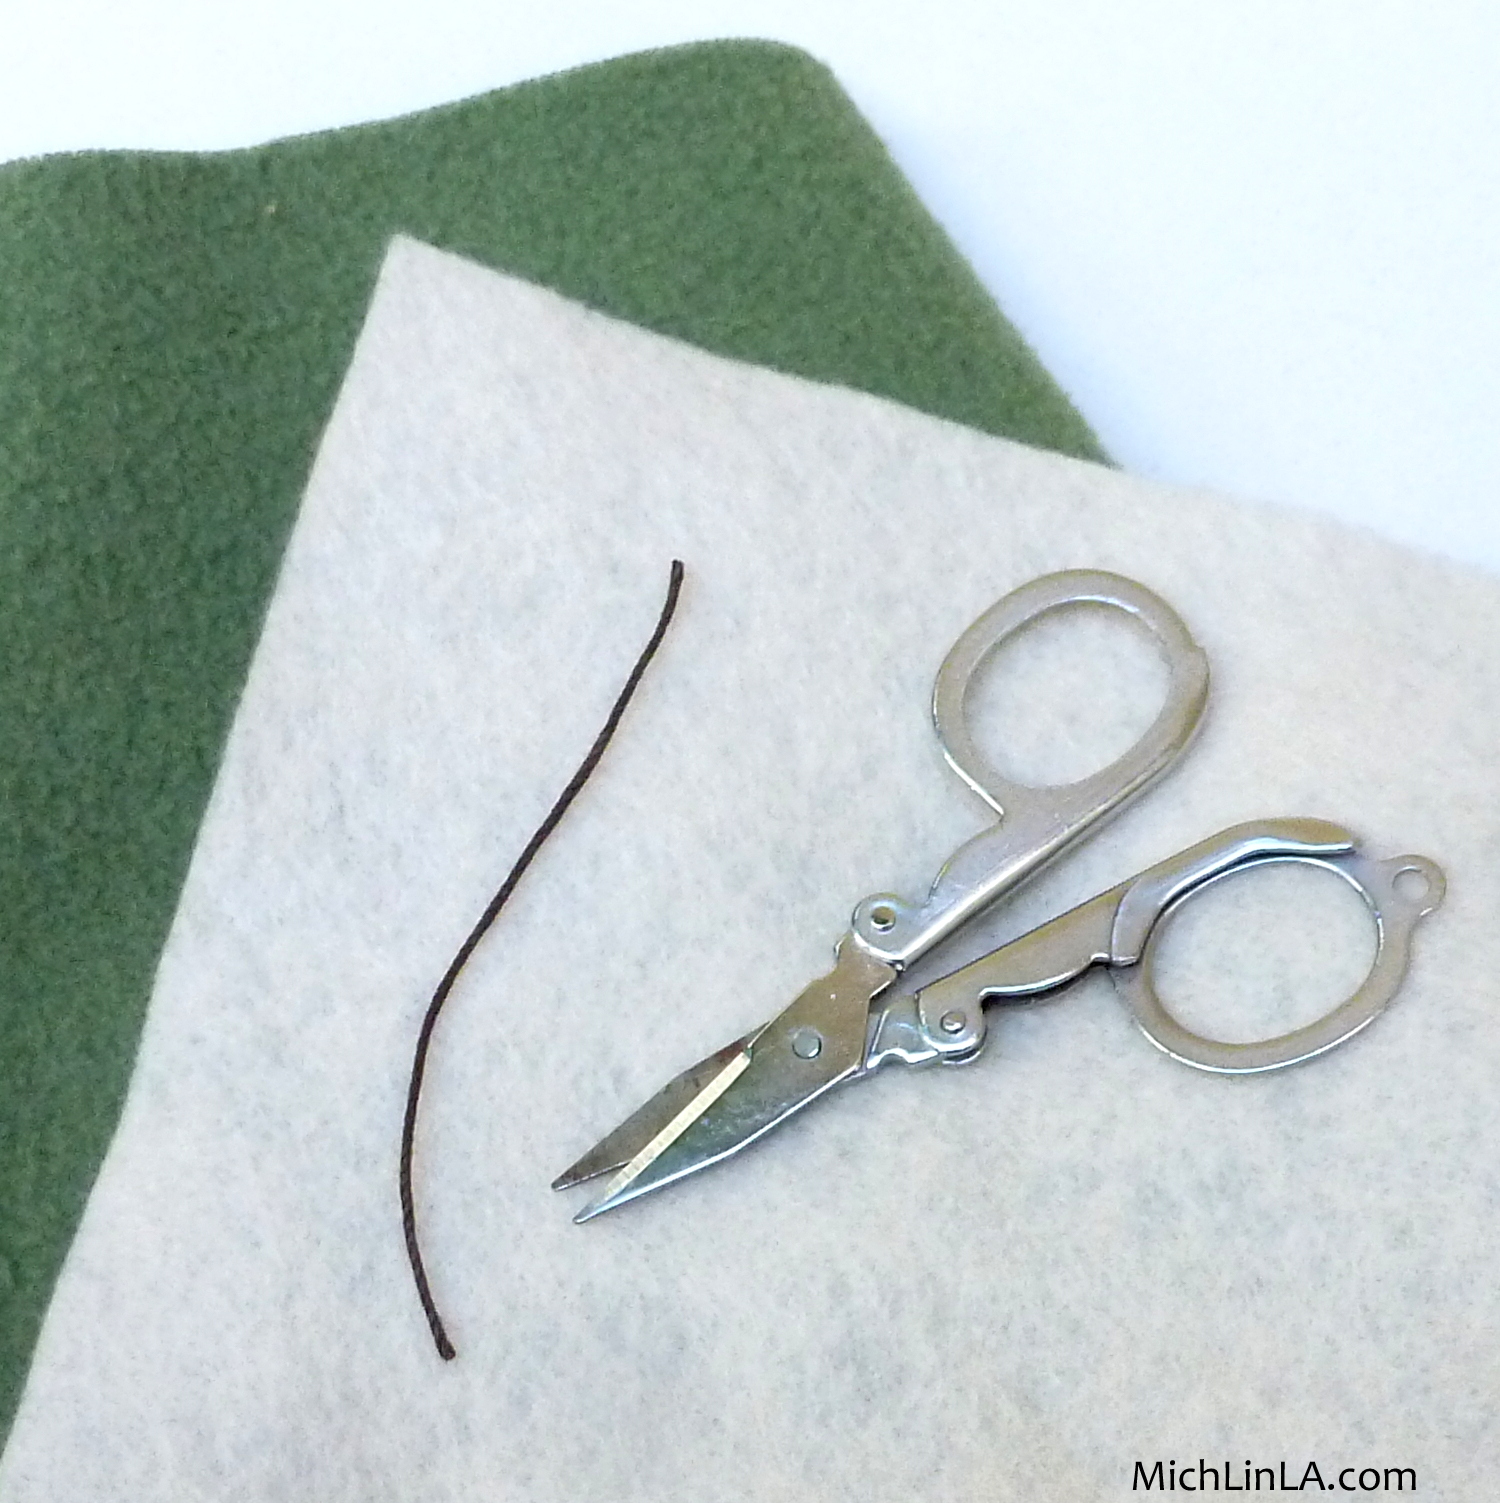
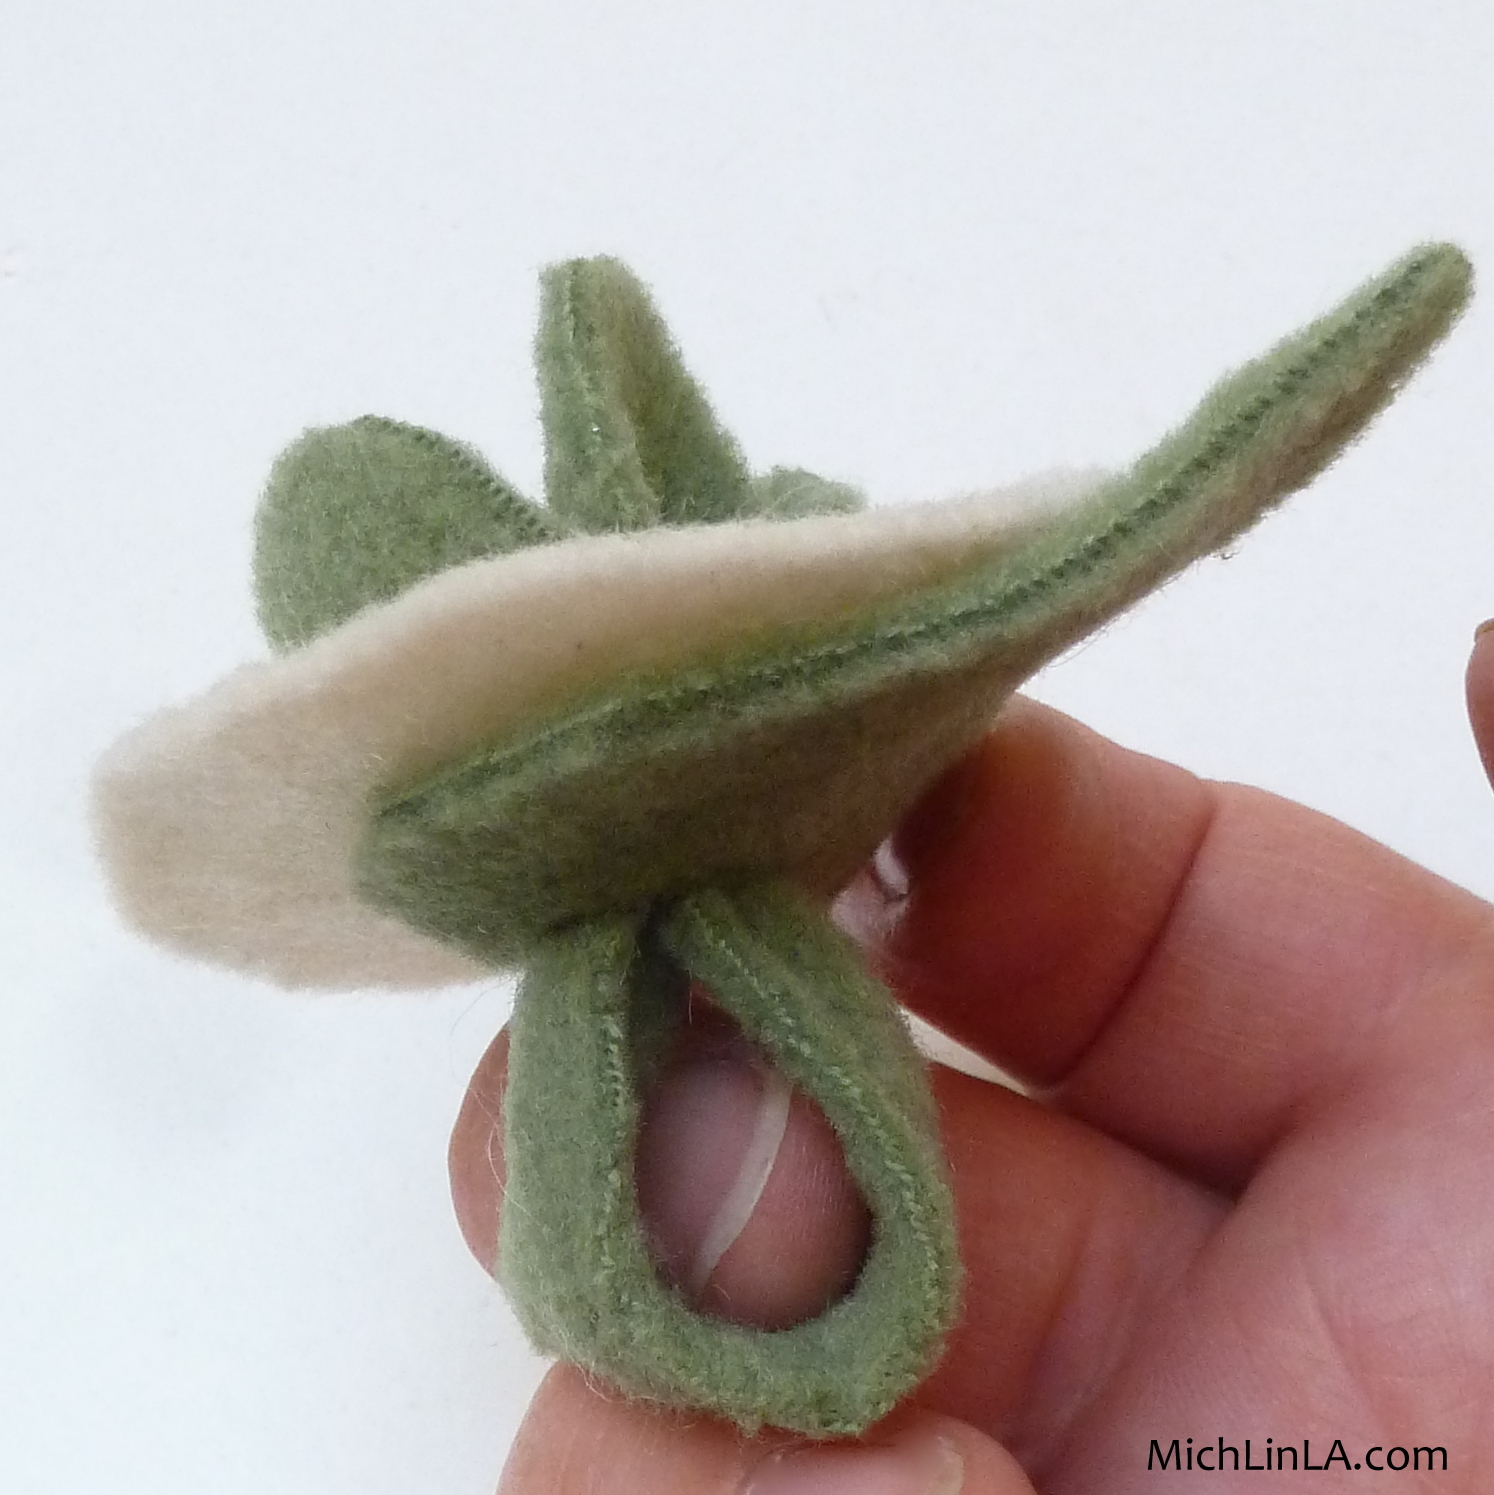
You will need some floppy scrap fleece (the green stuff) and some slightly-stiffer felt. You will also need scissors and a tiny piece of string.
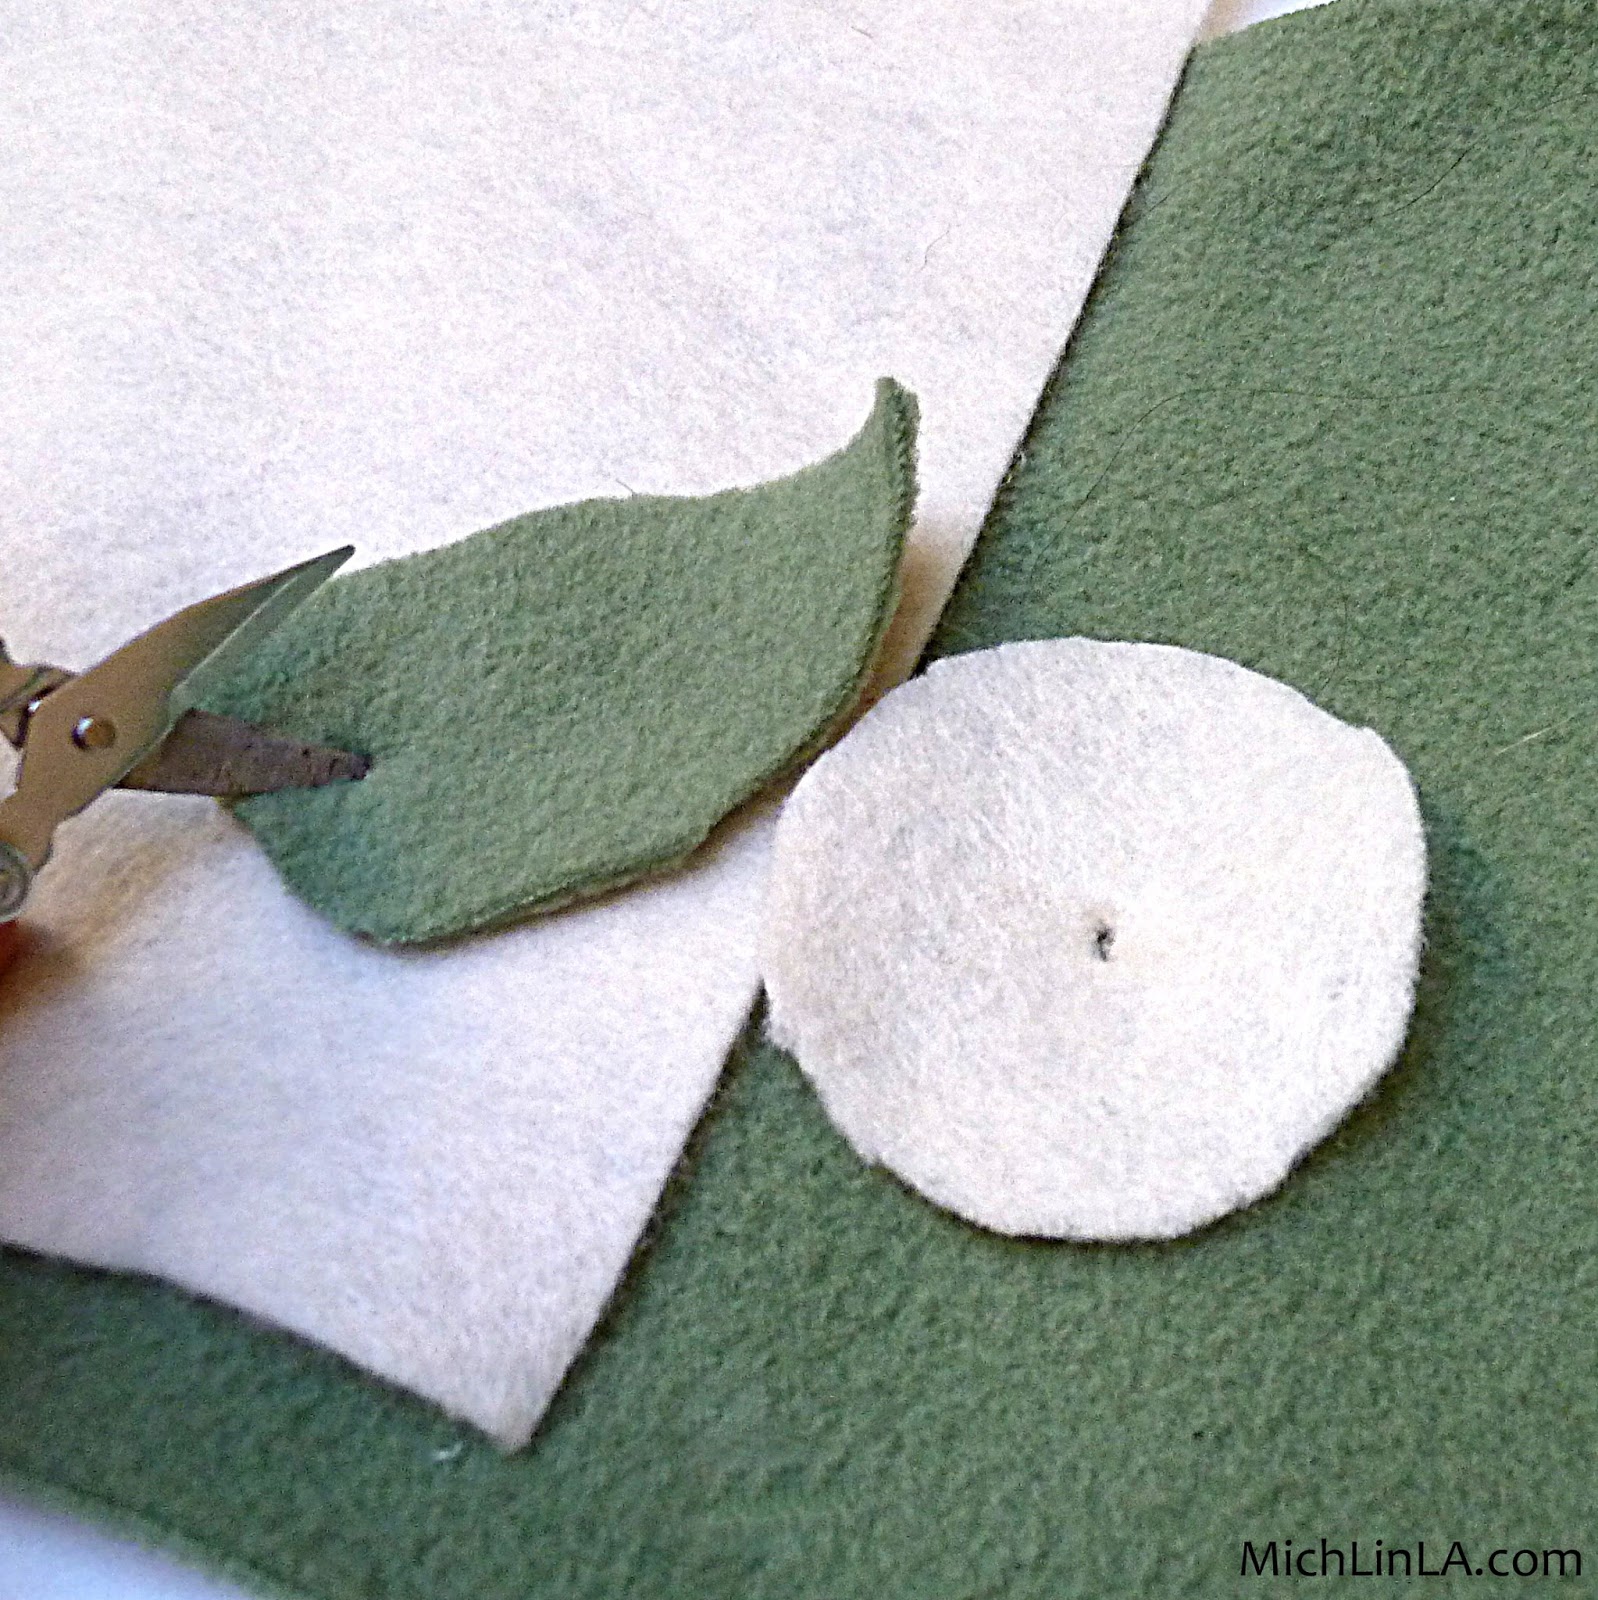
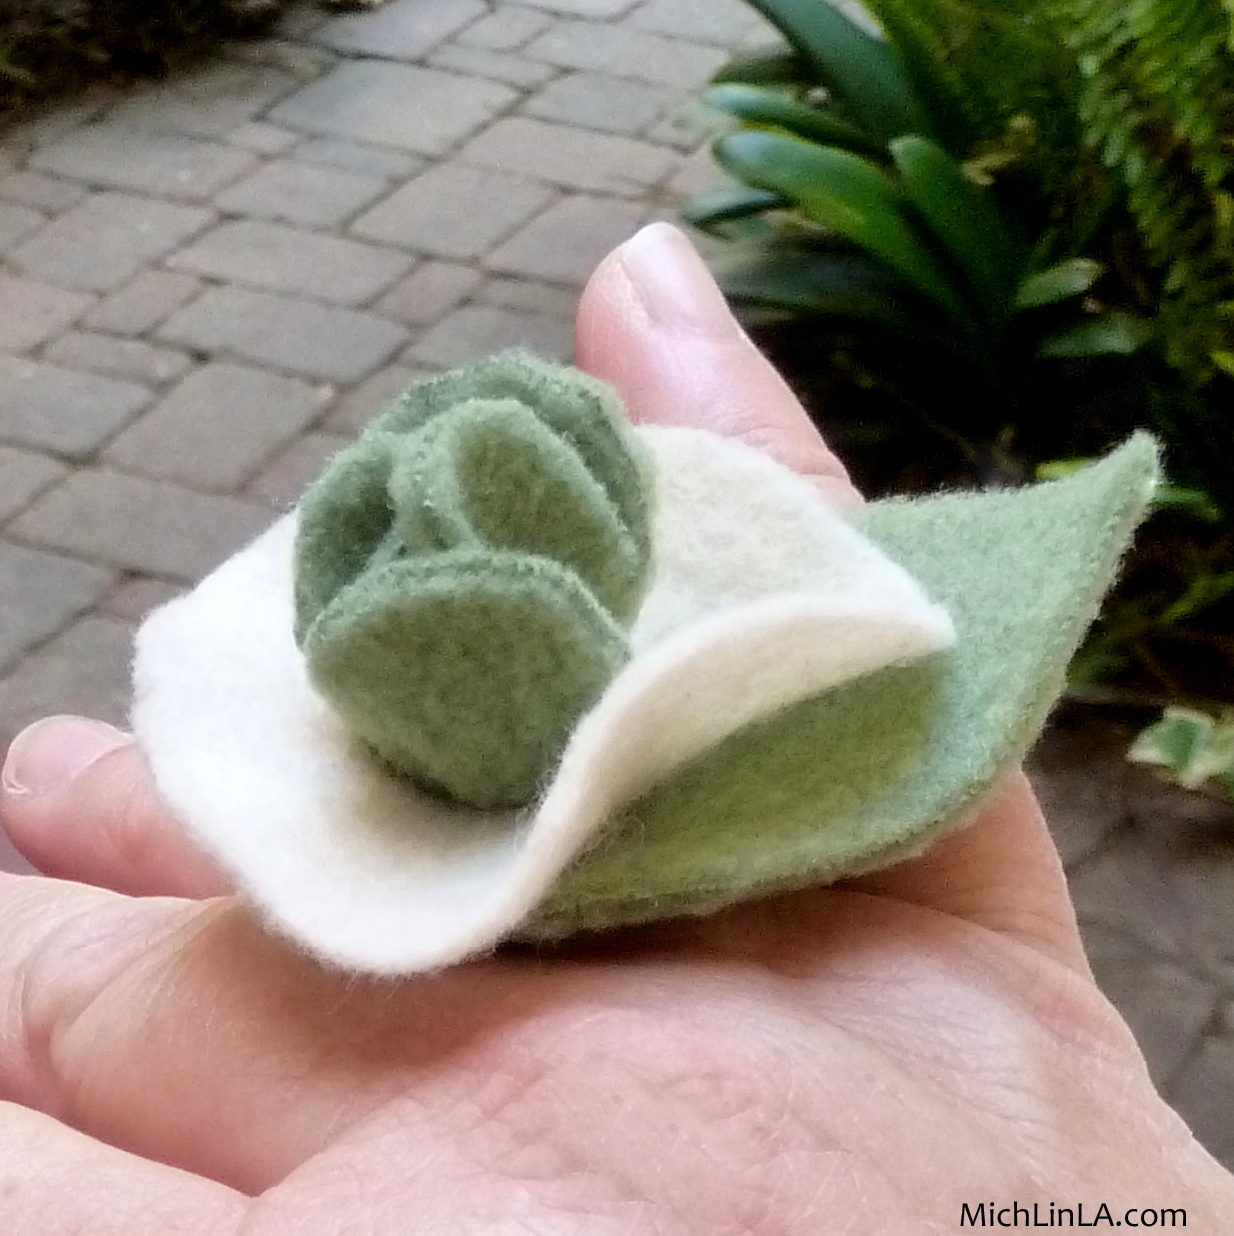
Cut a fleece leaf and a felt petal. (The petal can be a simple circle or a more flowery shape if you like.) Poke a hole in each as shown here:
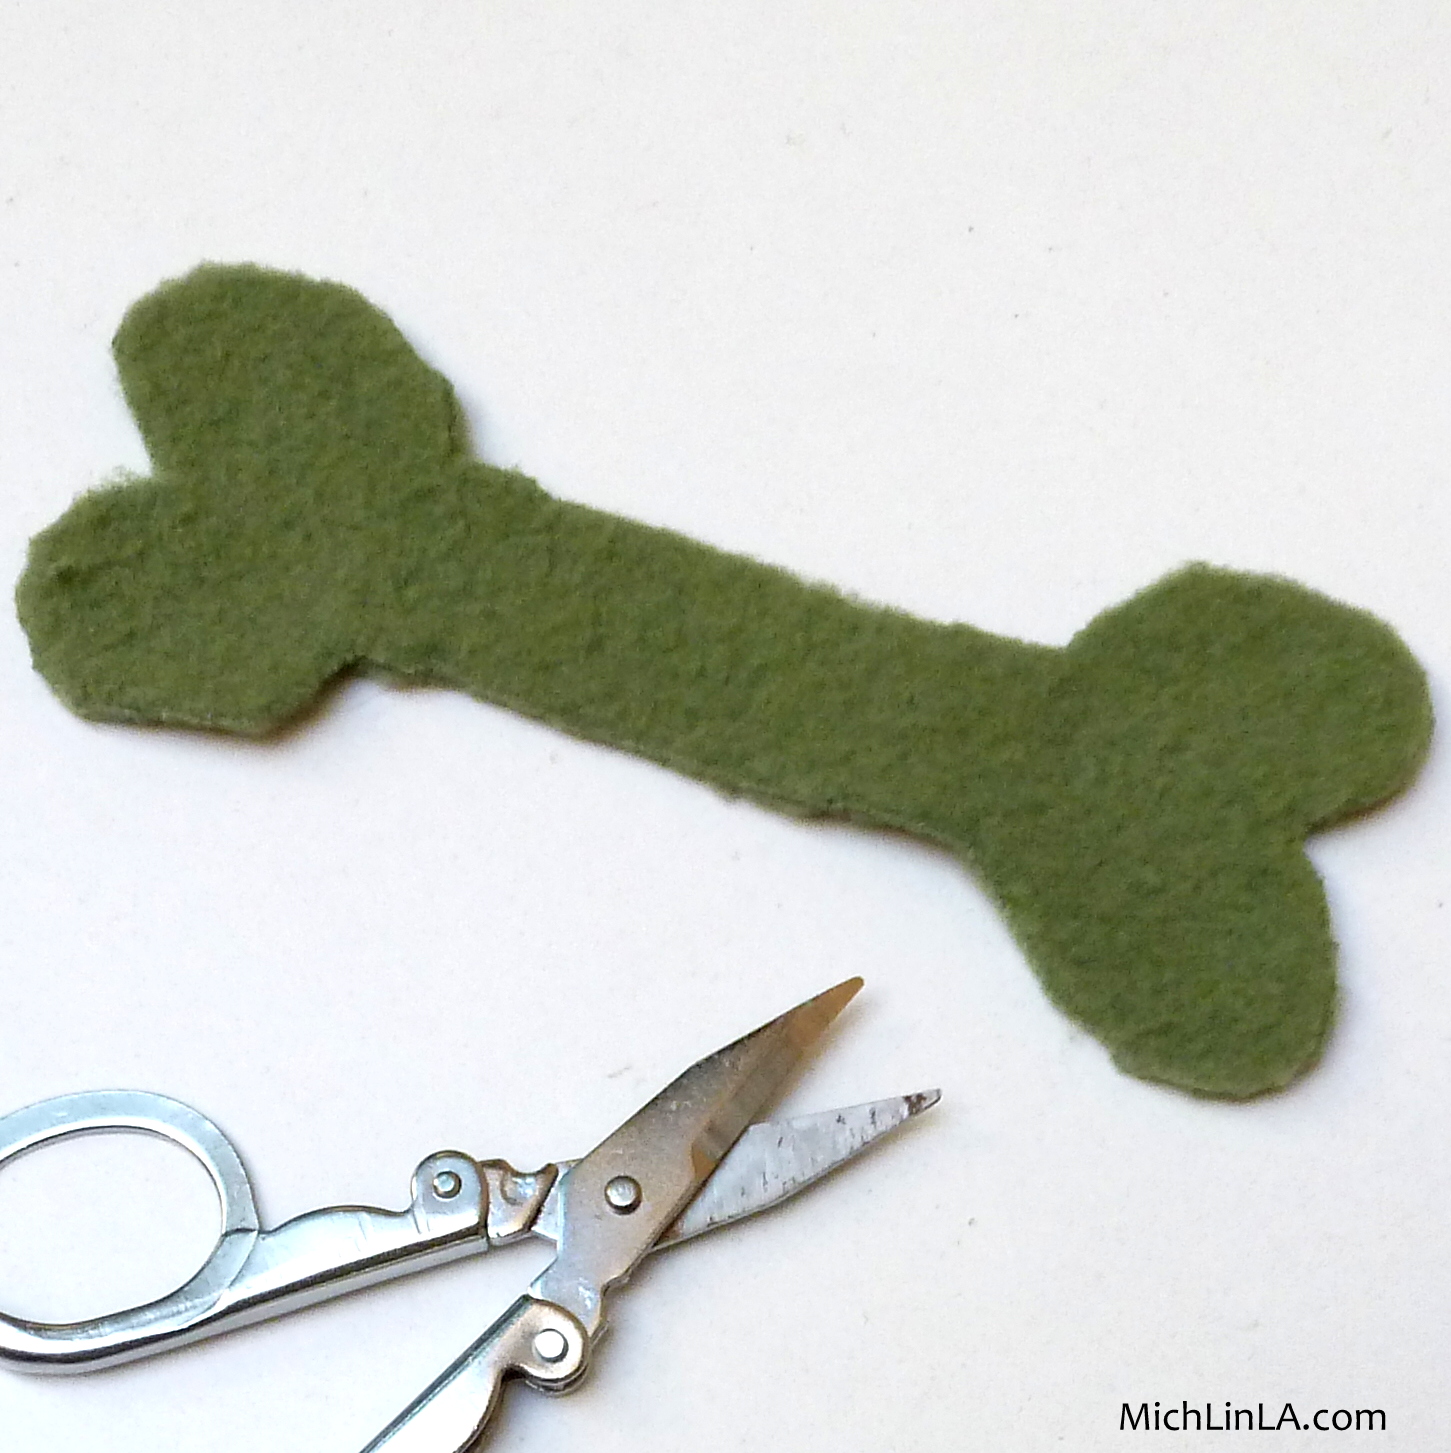
Now make a dog biscuit out of fleece, like so:
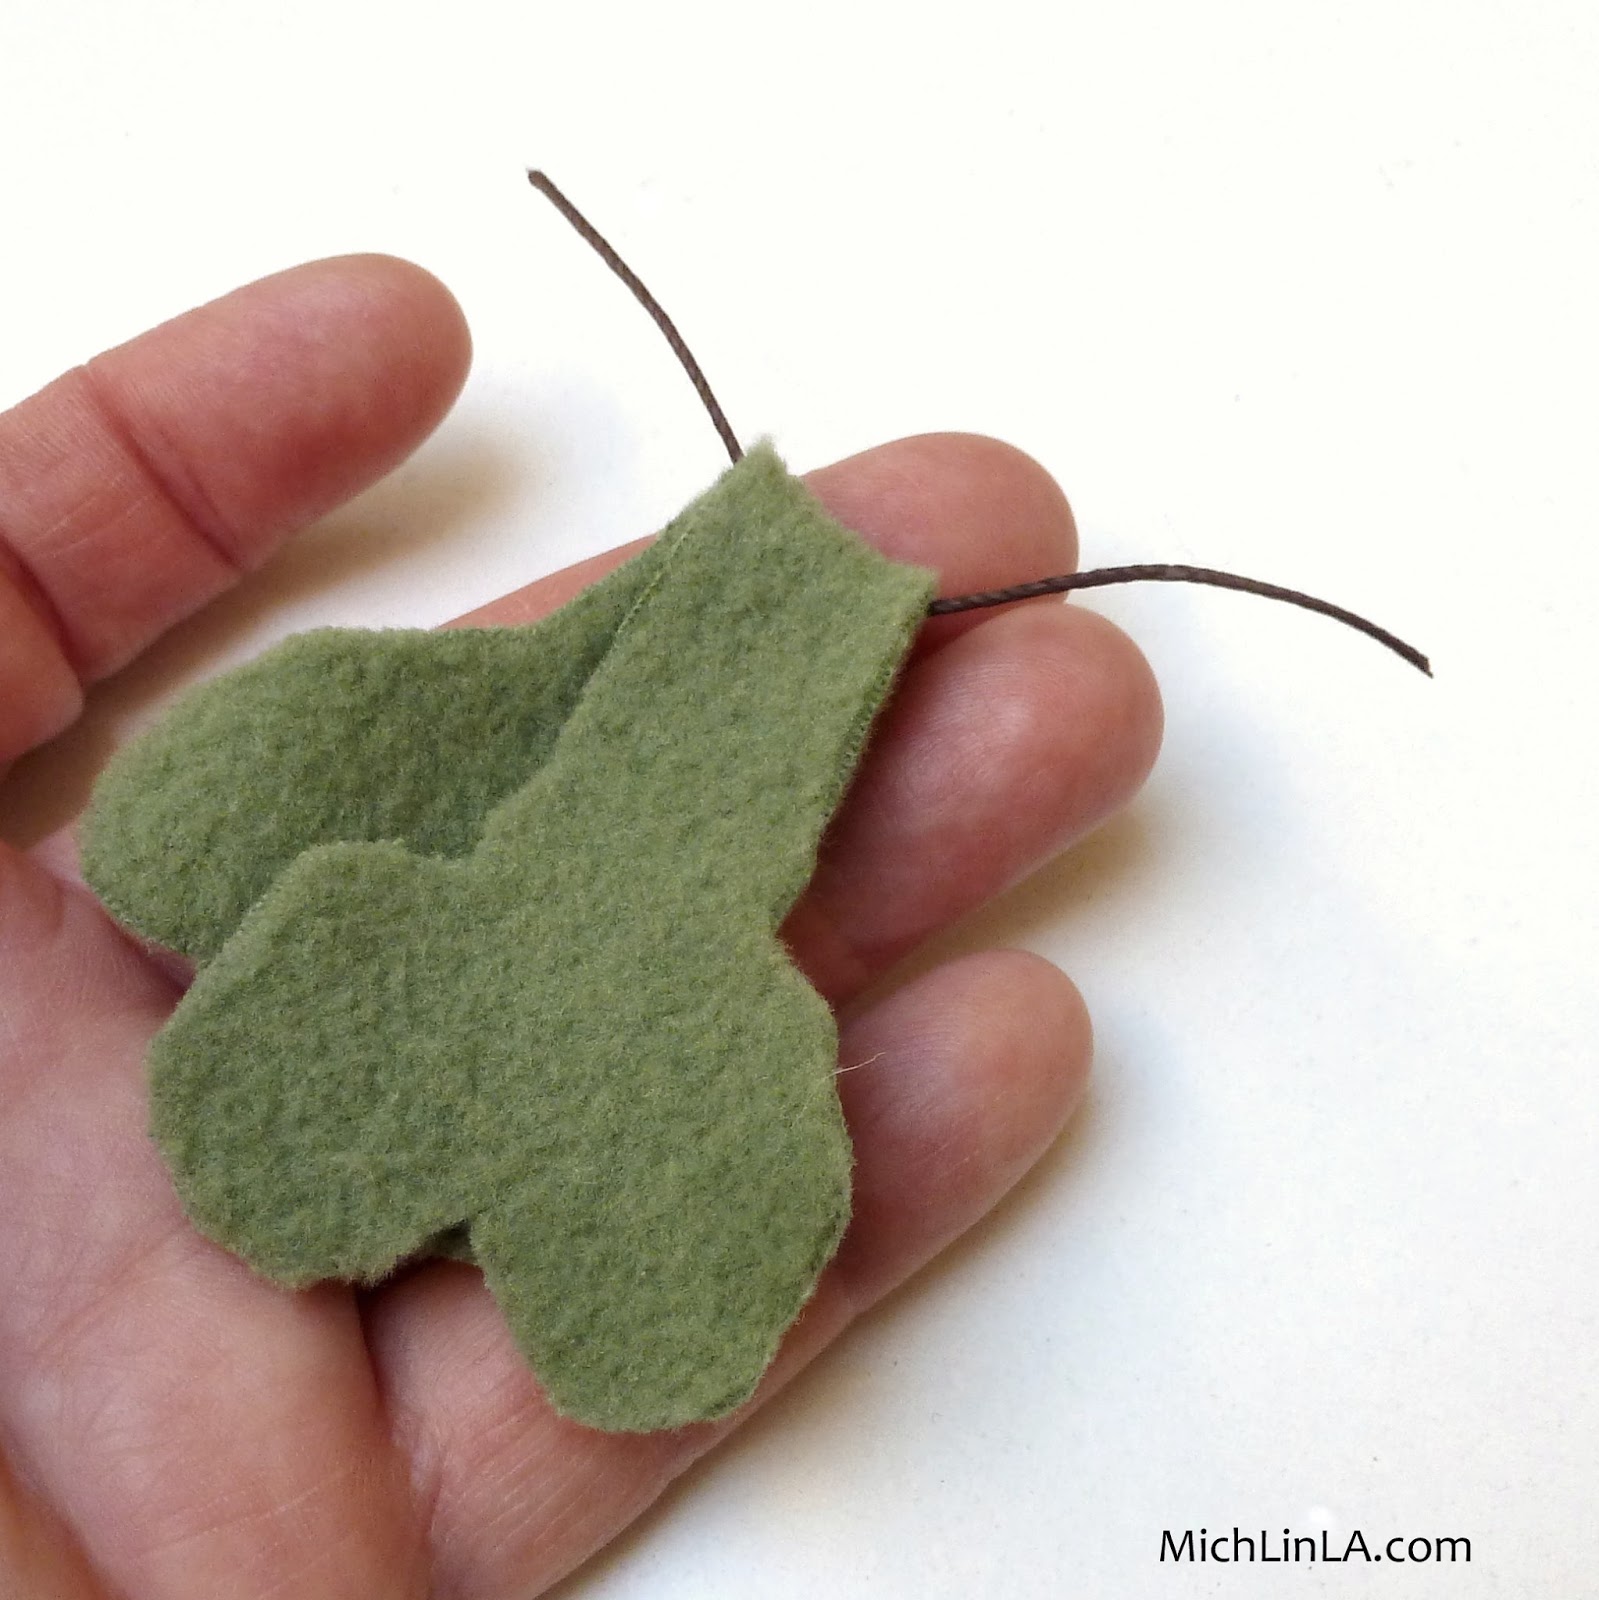
Fold the biscuit in half and insert the string at the fold.
Stack the leaf and petal, then use the string to pull the folded biscuit through the holes.
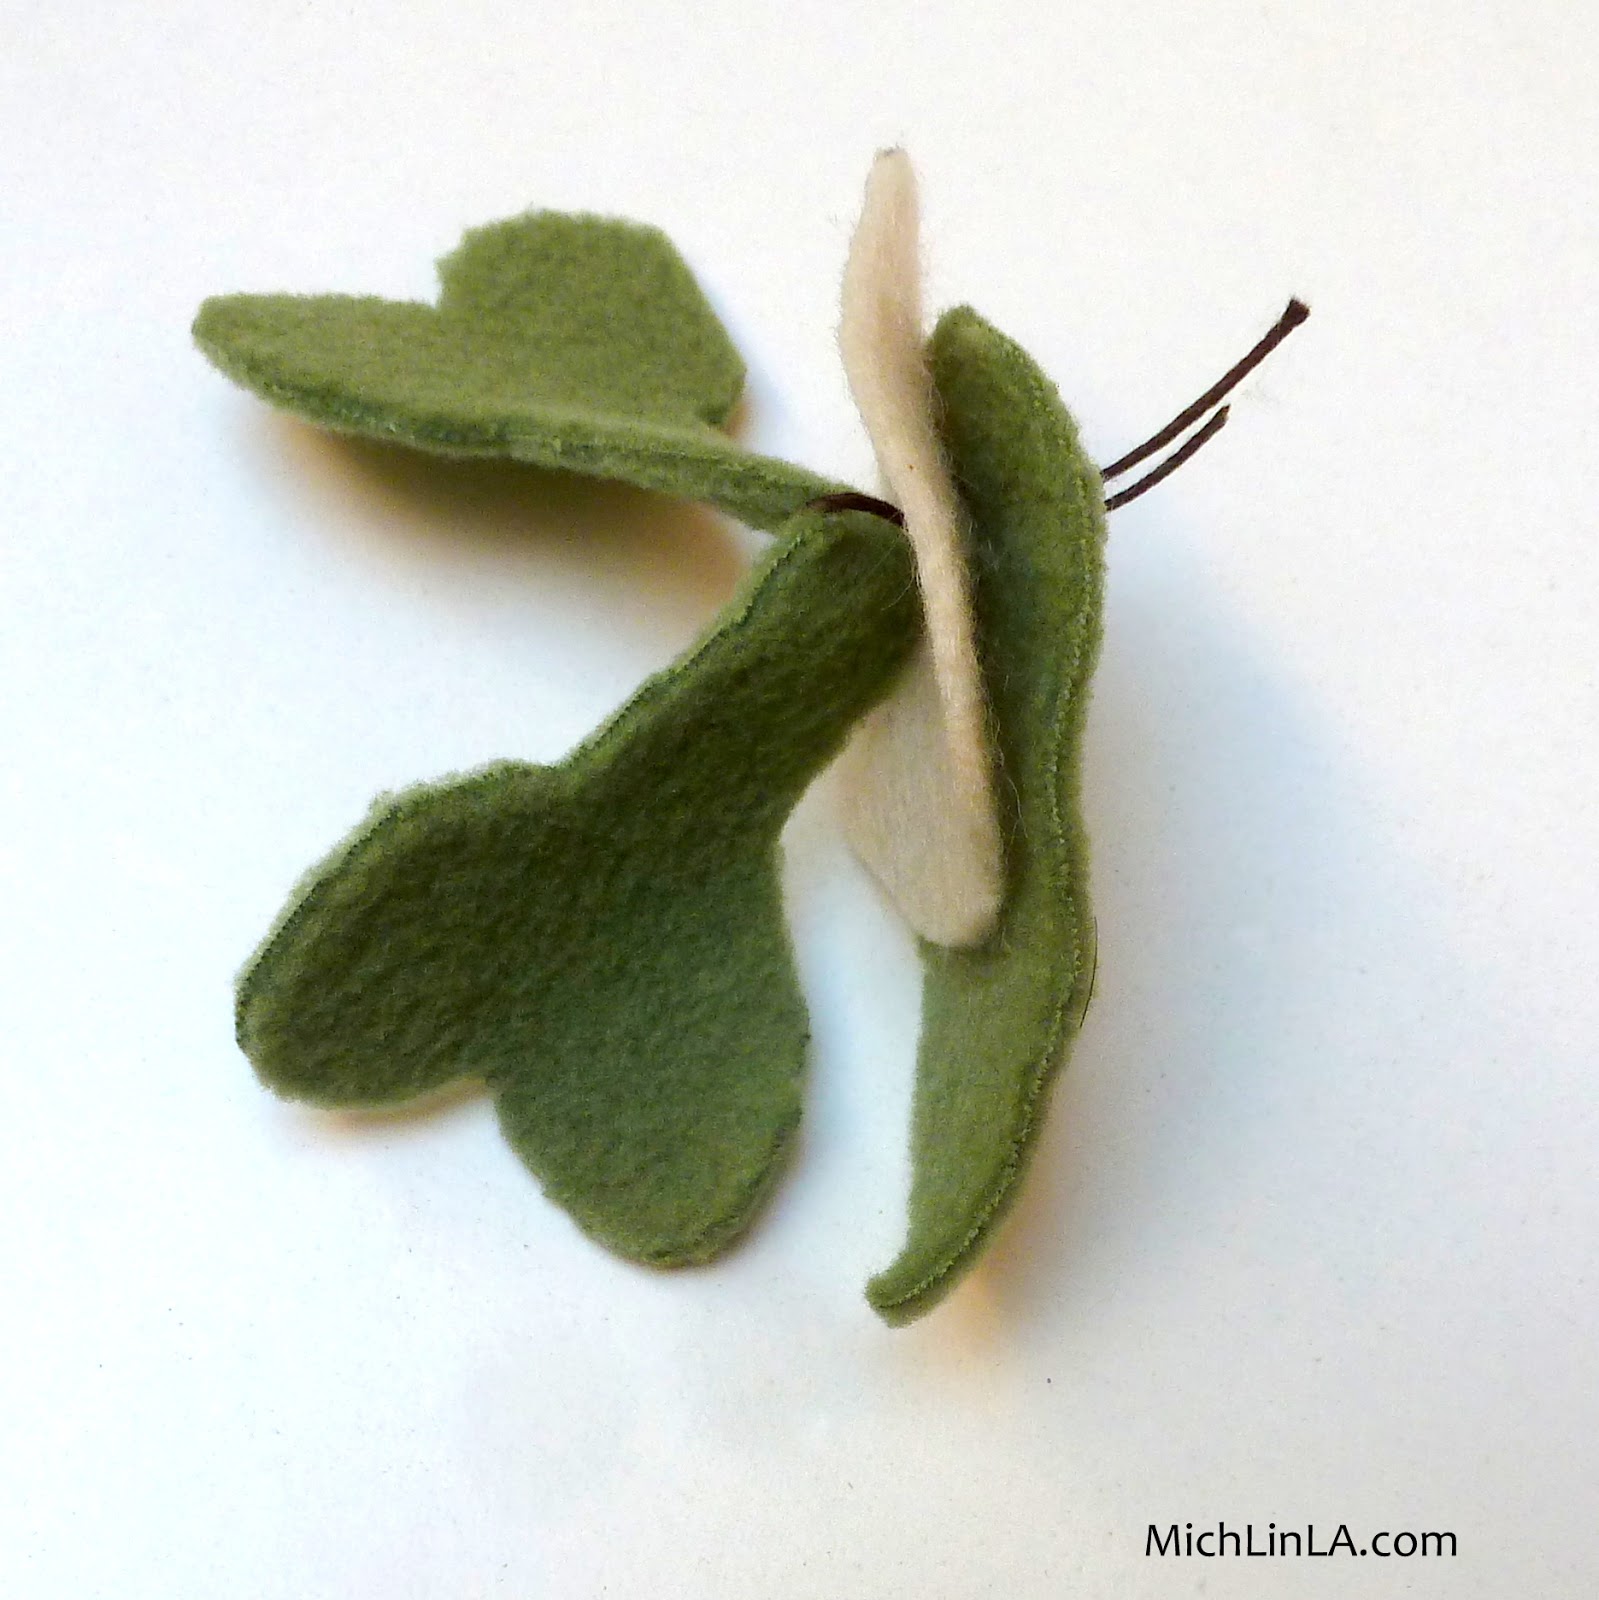
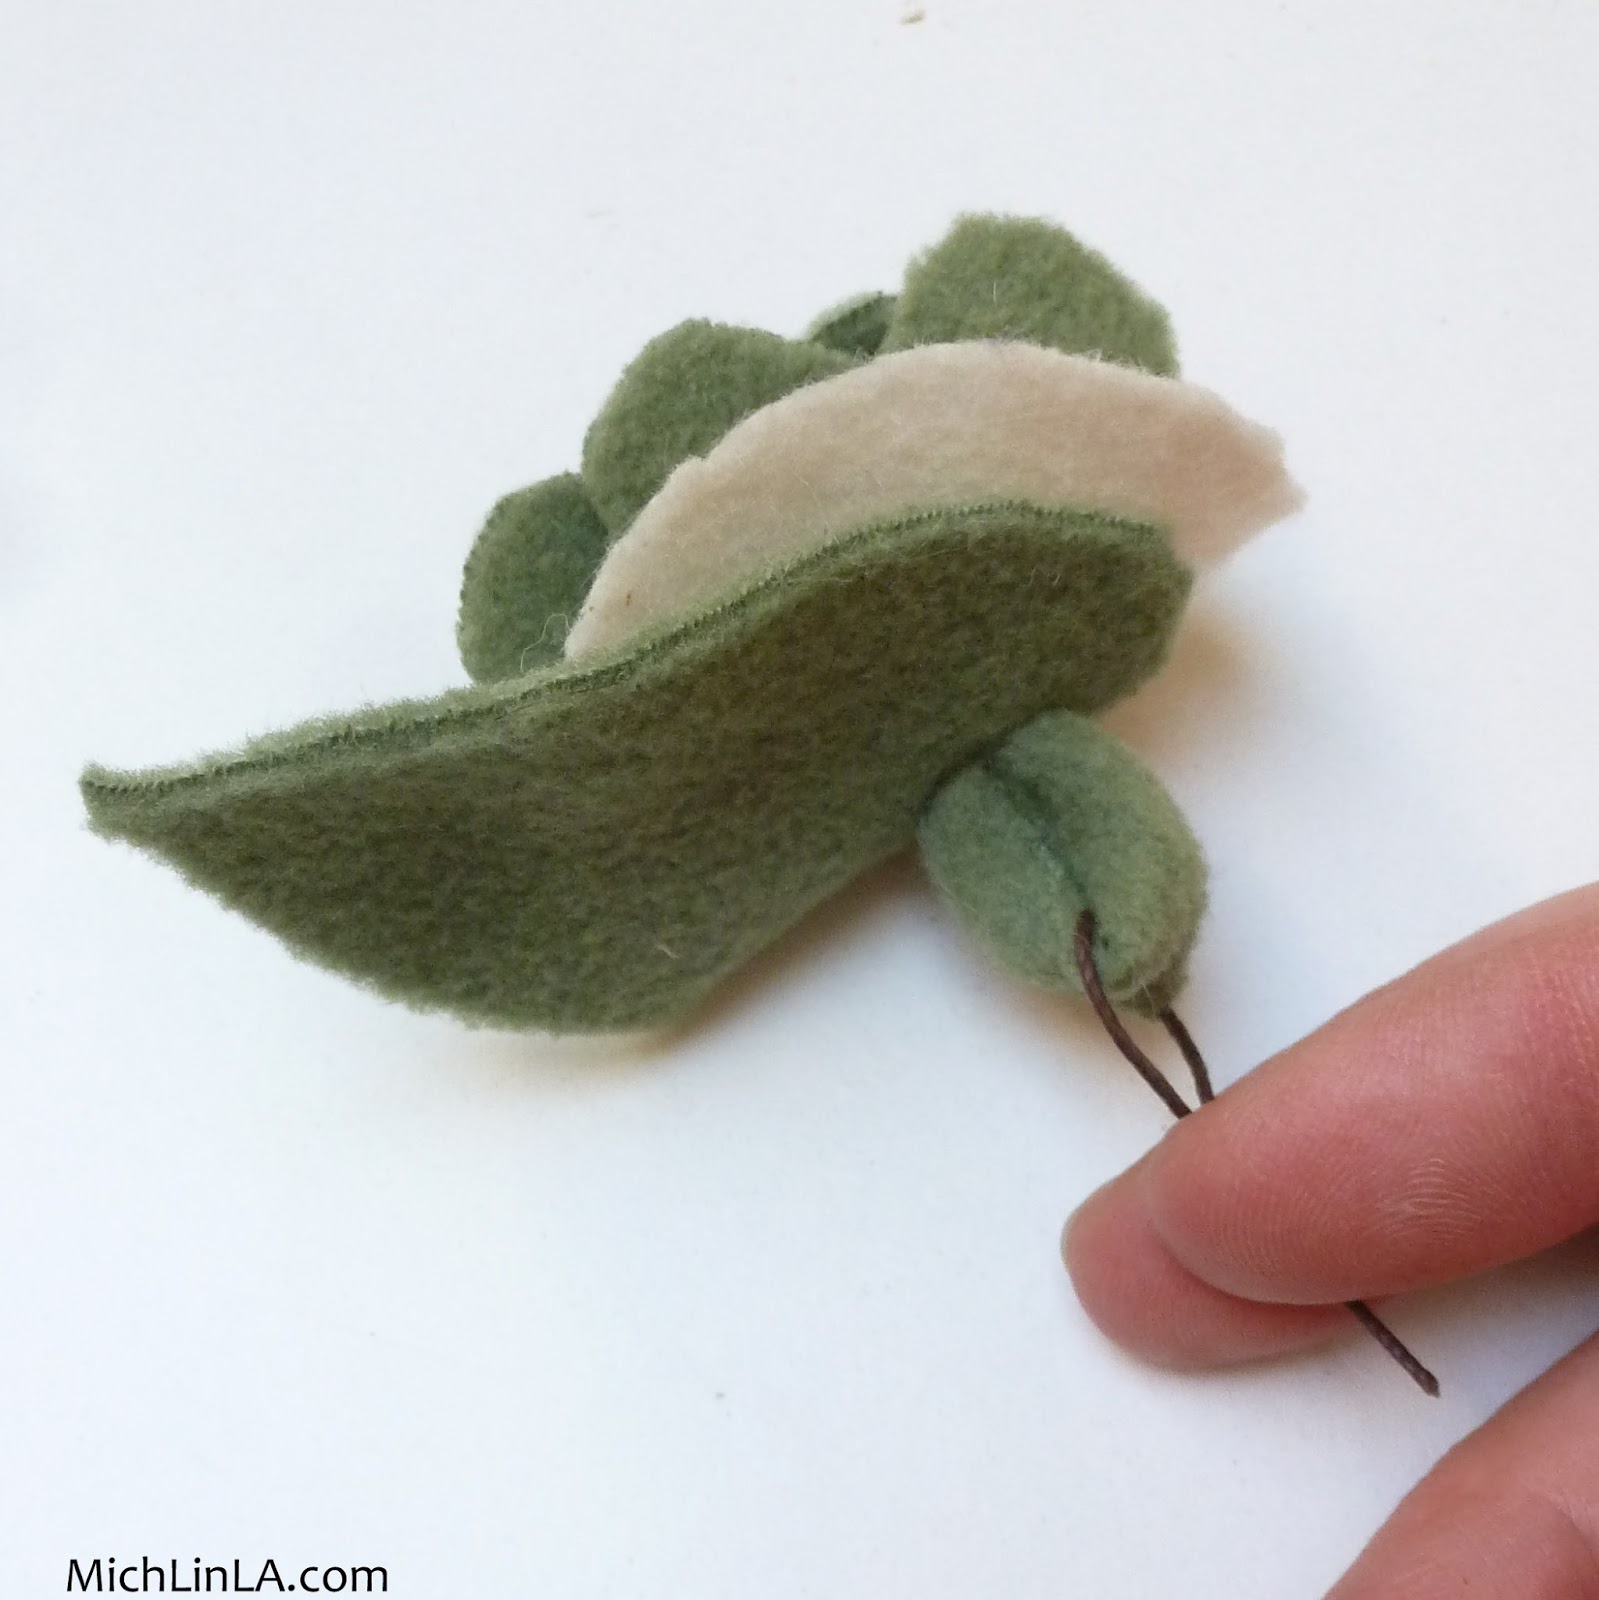
Pull until the biscuit ends are bunched in the center of the flower and you can't go any further.
Done and done.
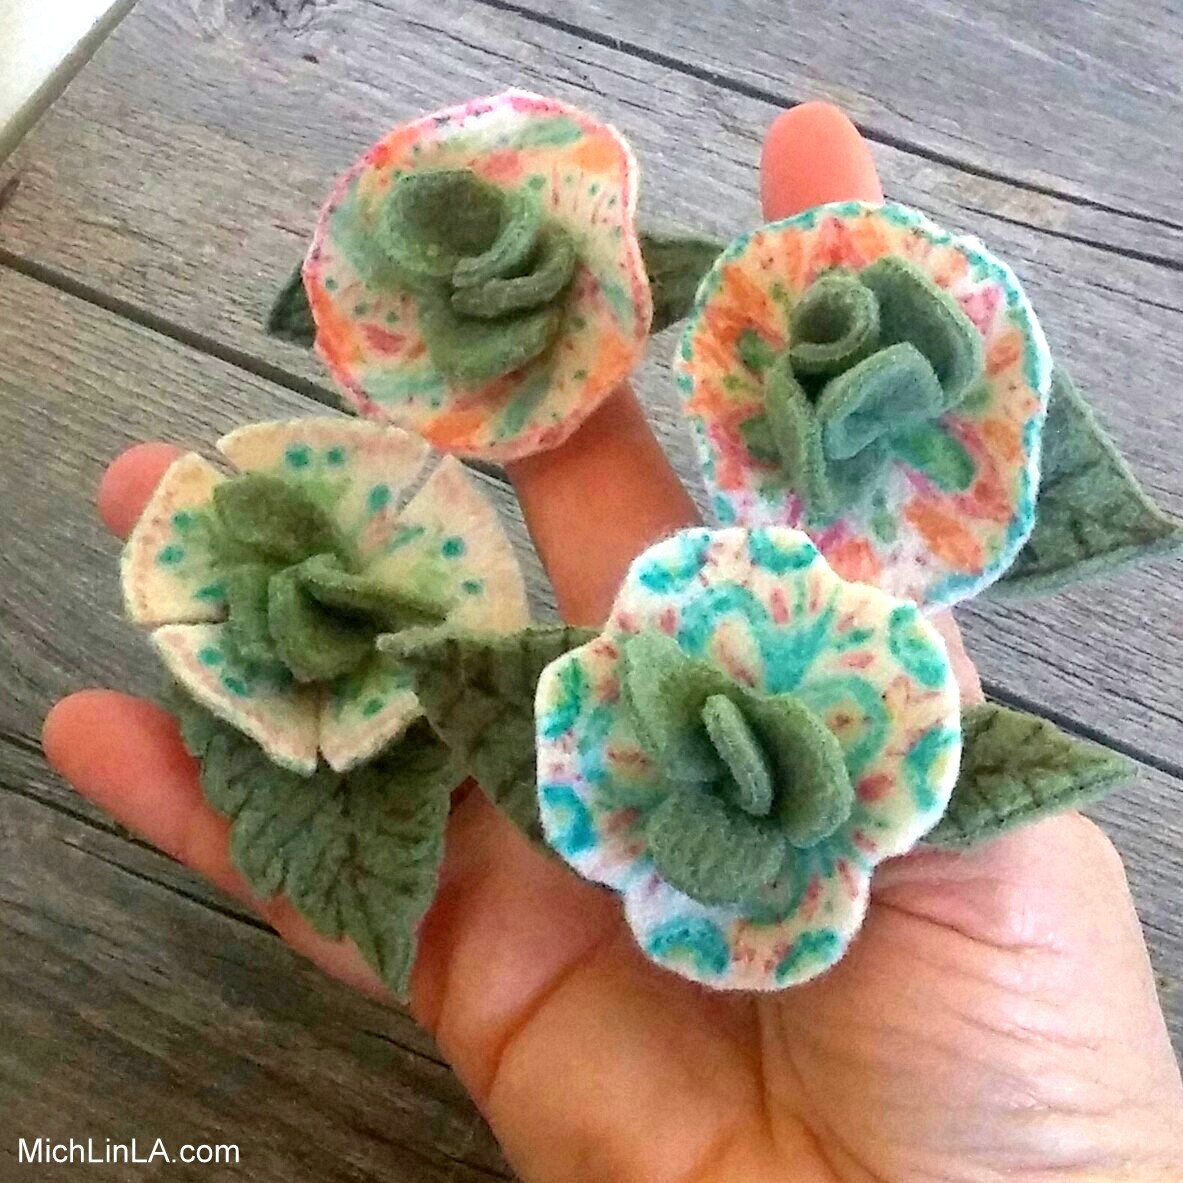
For the fancy version, I just Sharpied the heck out of both the felt petal and the fleece leaf (or leaves). Here you can see some potential different shapes for both elements:
And that, you guys, is my Scrappy Fleece Flower Ring. Sure hope you like it!
Oops, gotta go, someone has been waiting patiently while I wrote this post.
Thank you for coming by!
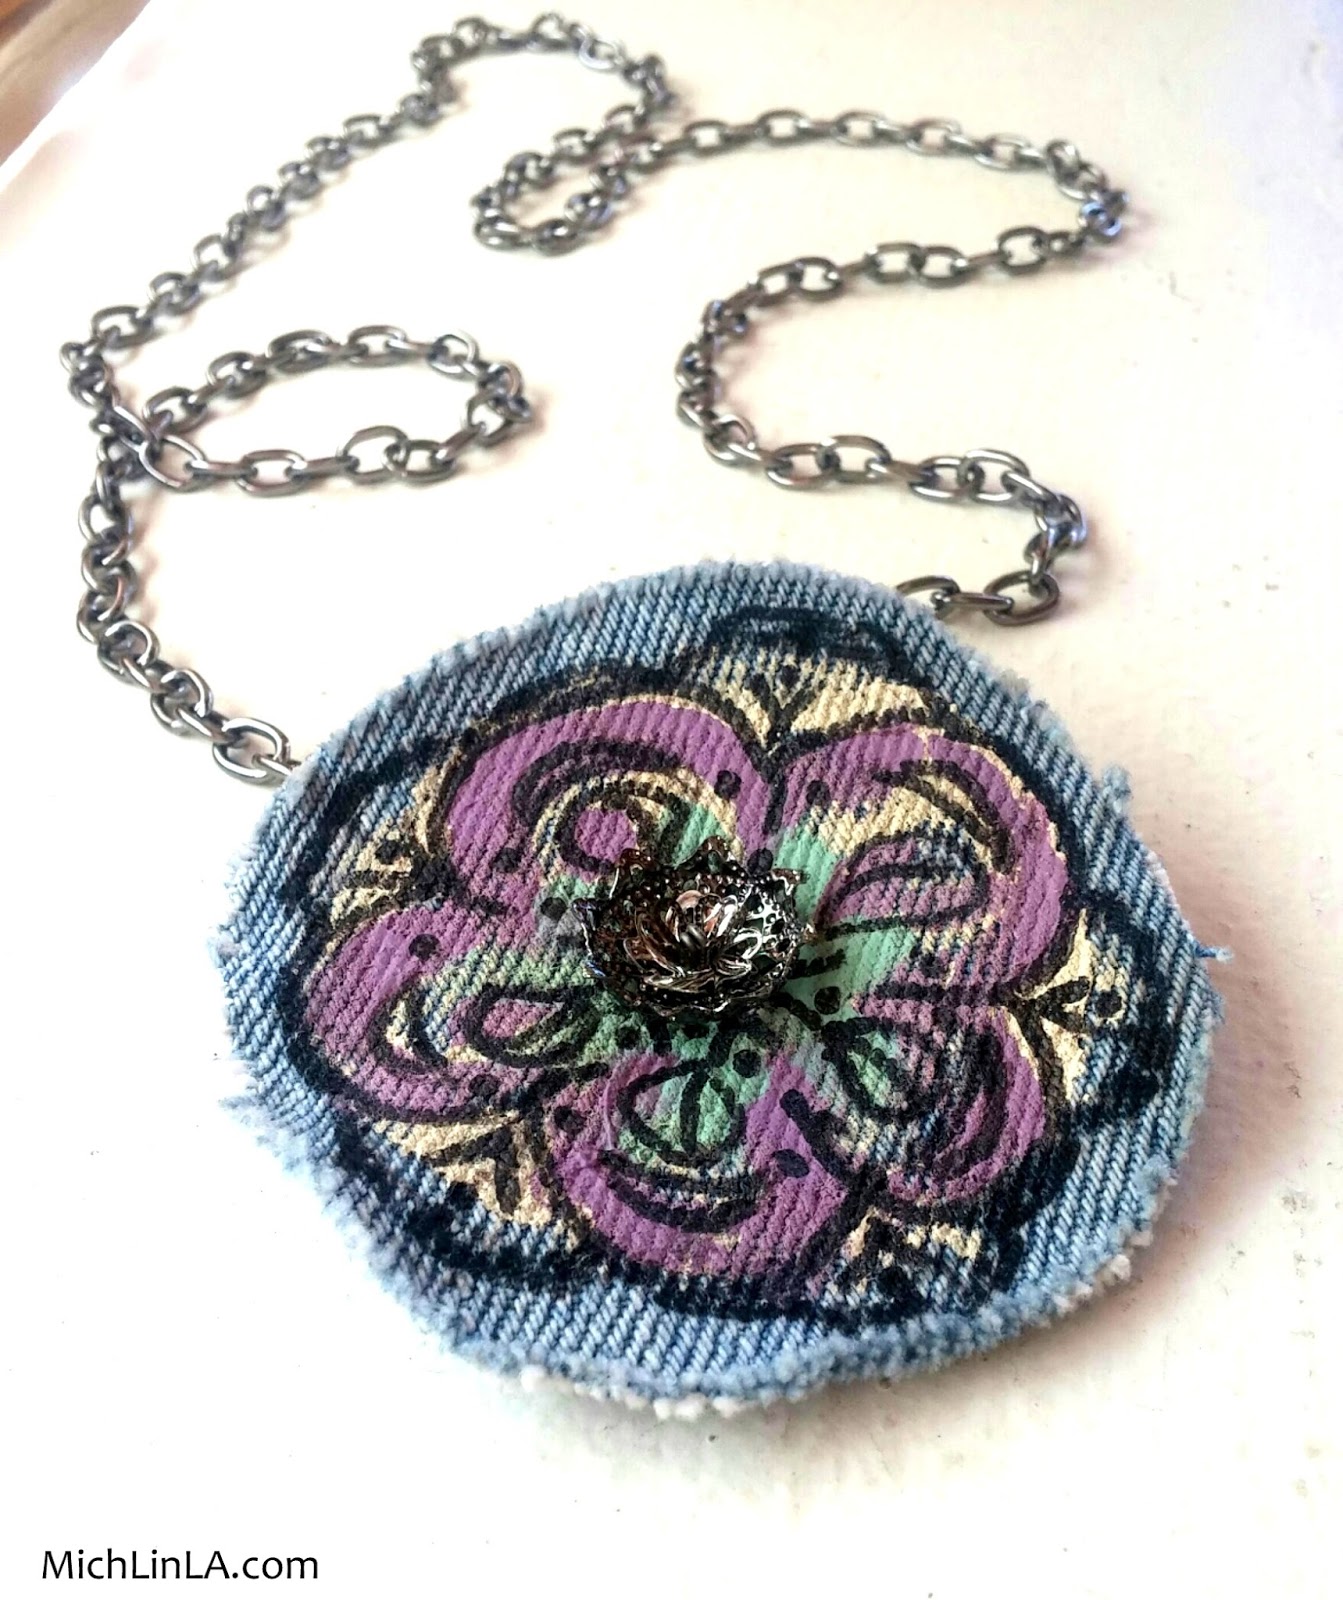
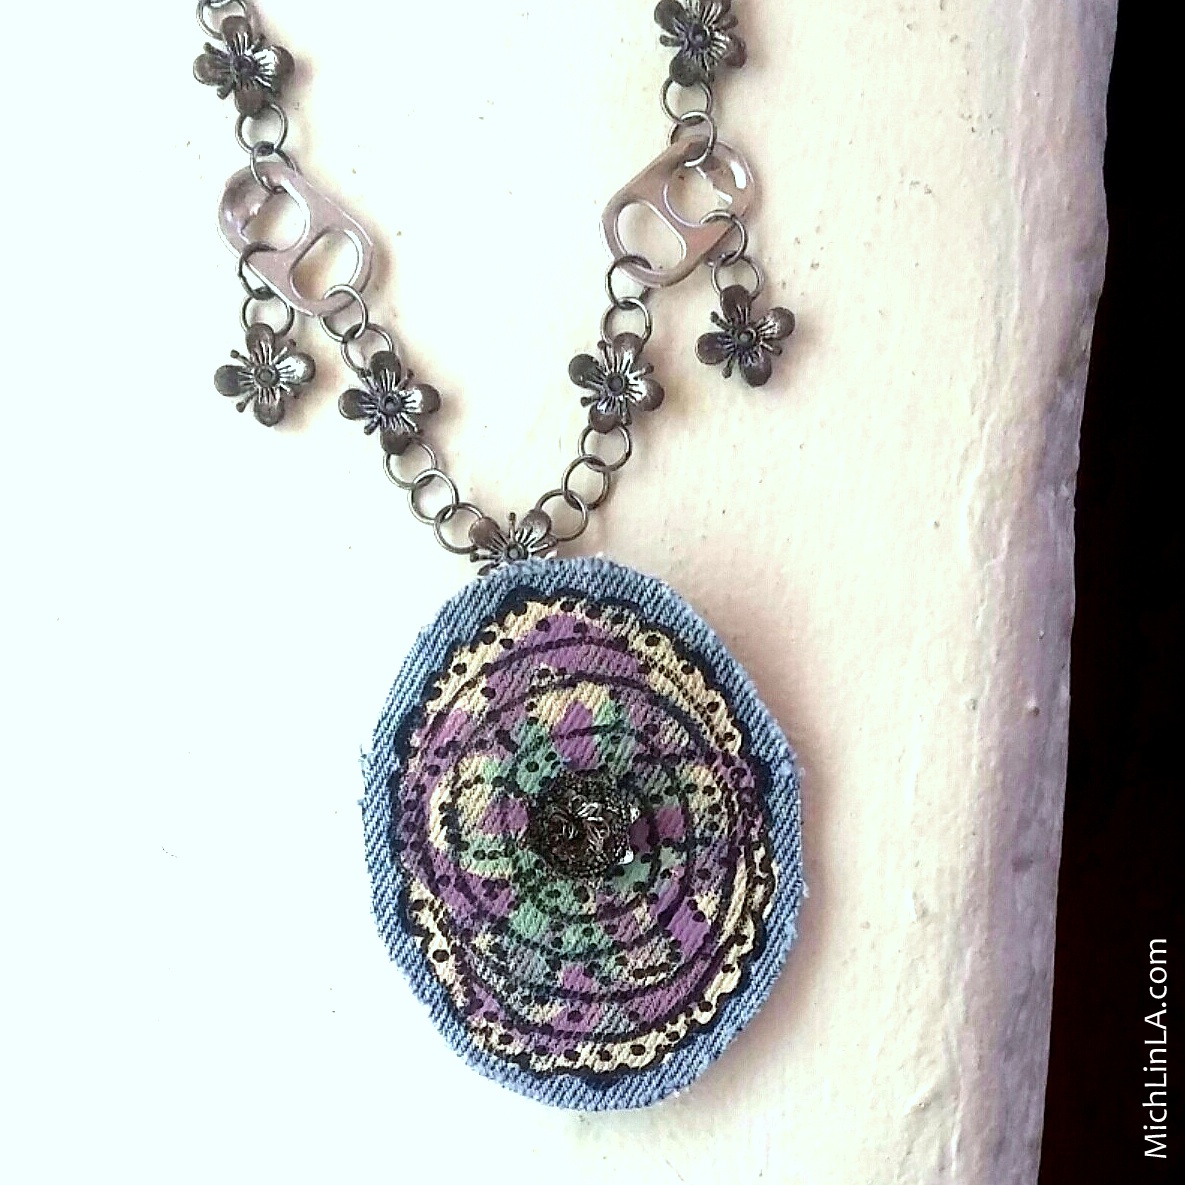
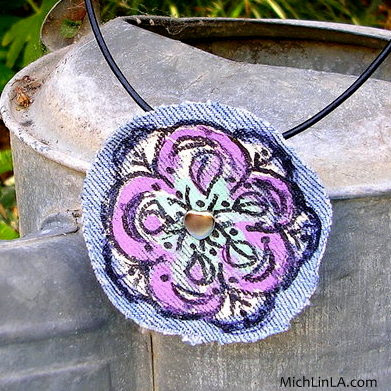
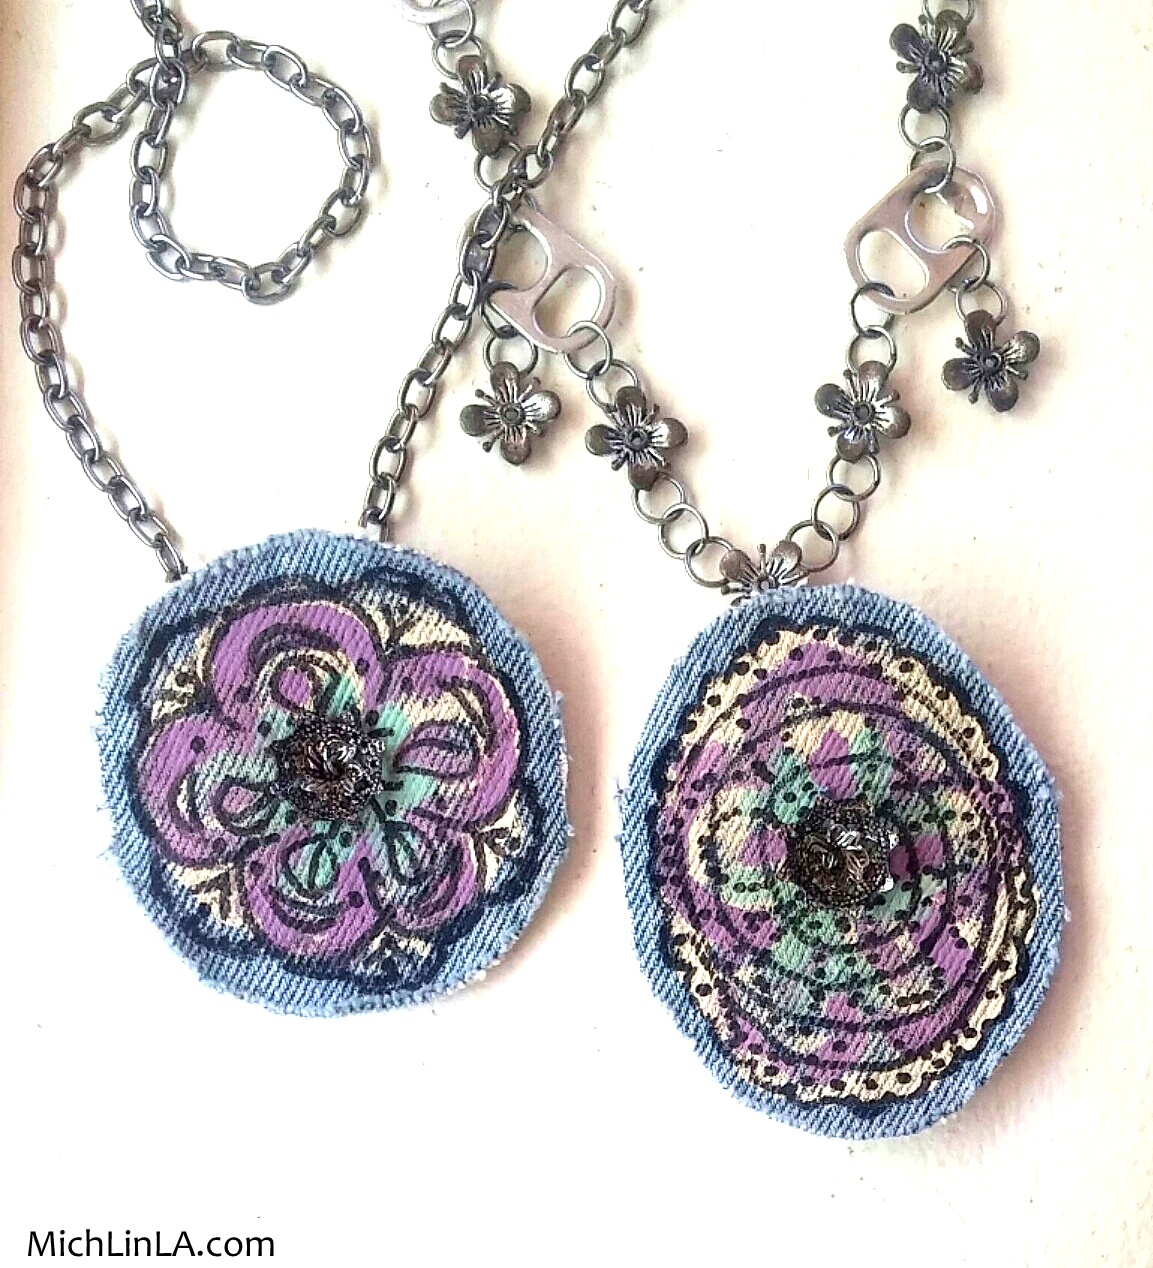
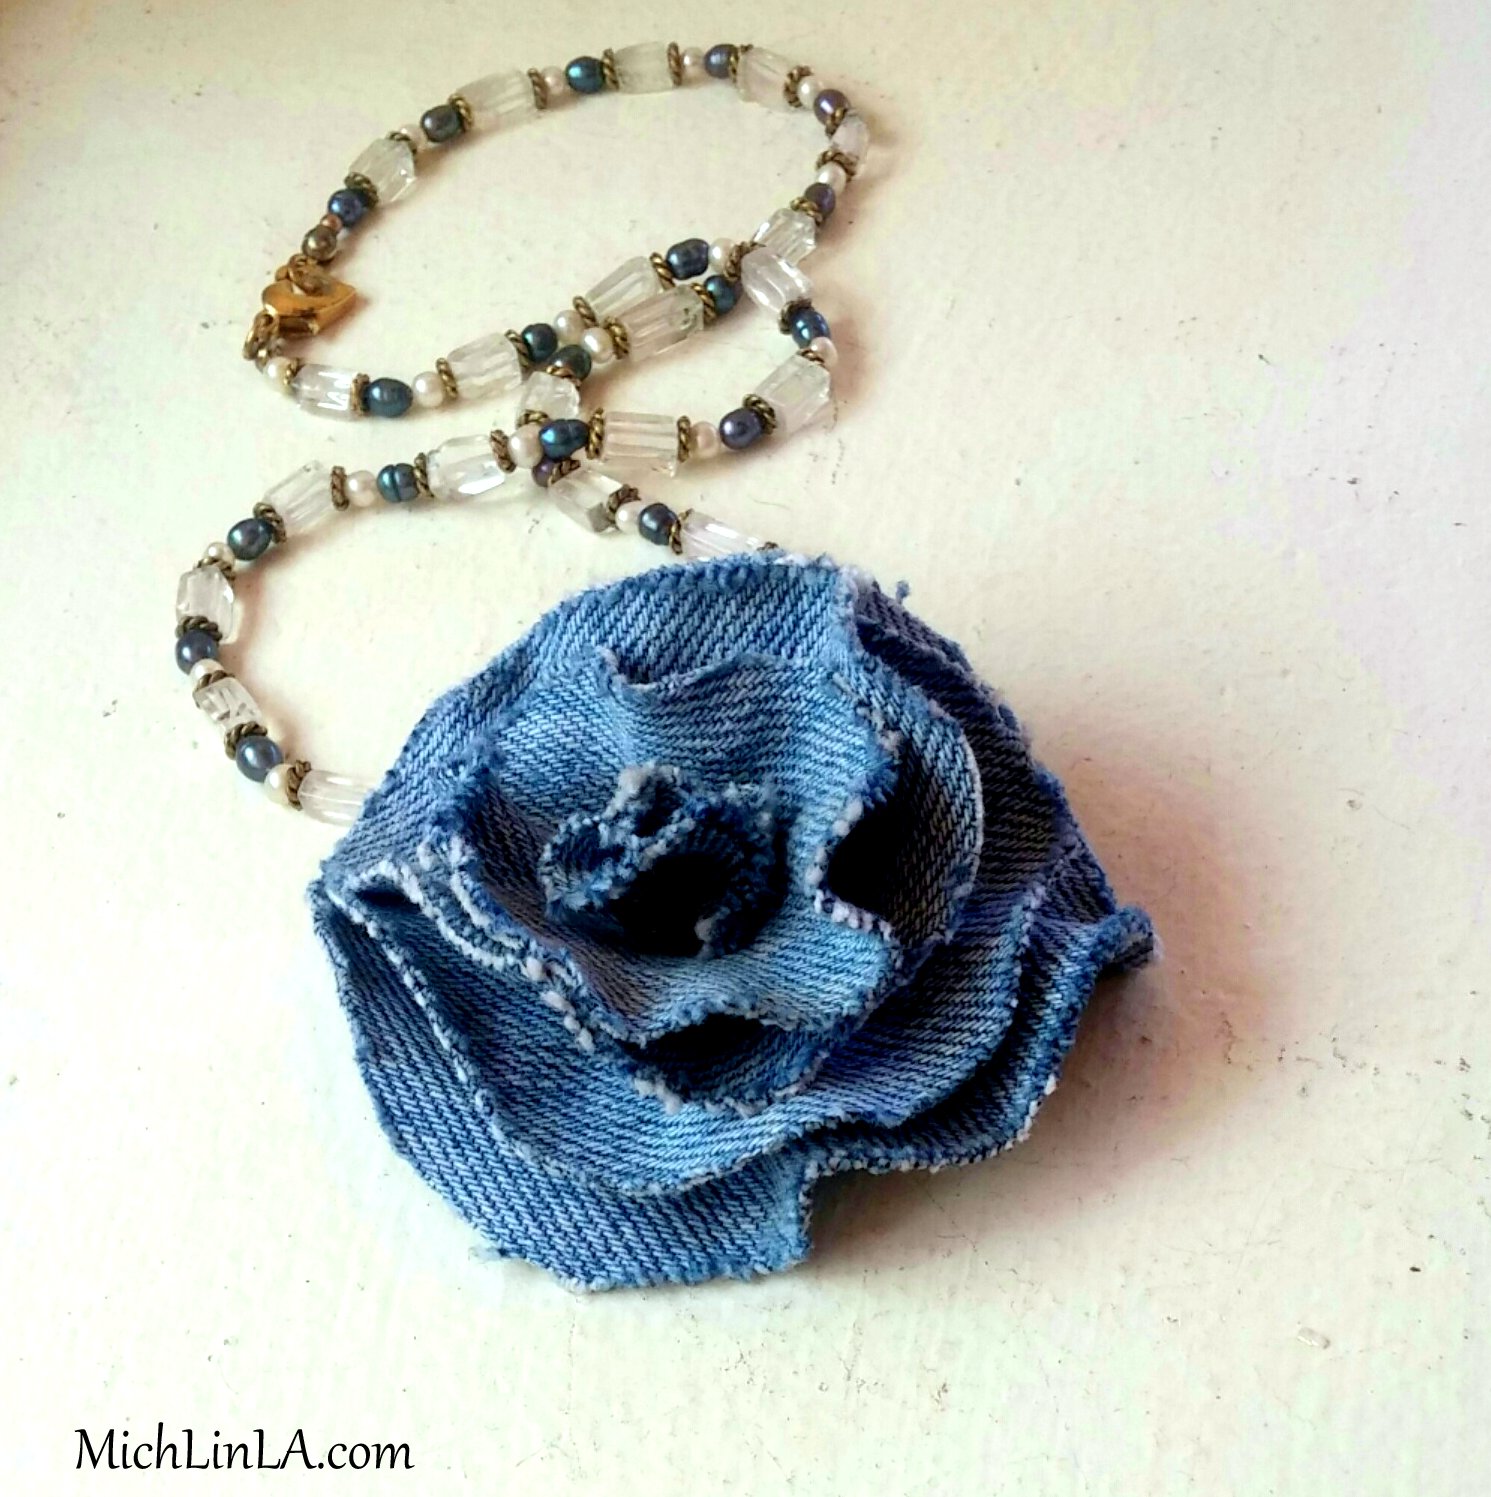
Hi again! While I'm on the subject of recycled denim jewelry (see last week's post with roses made from blue jeans), I thought I'd show you an updated version of a different style of blue jean pendant.
Today's necklace is madly simple to make, hand-painted, and eco-fabulous.
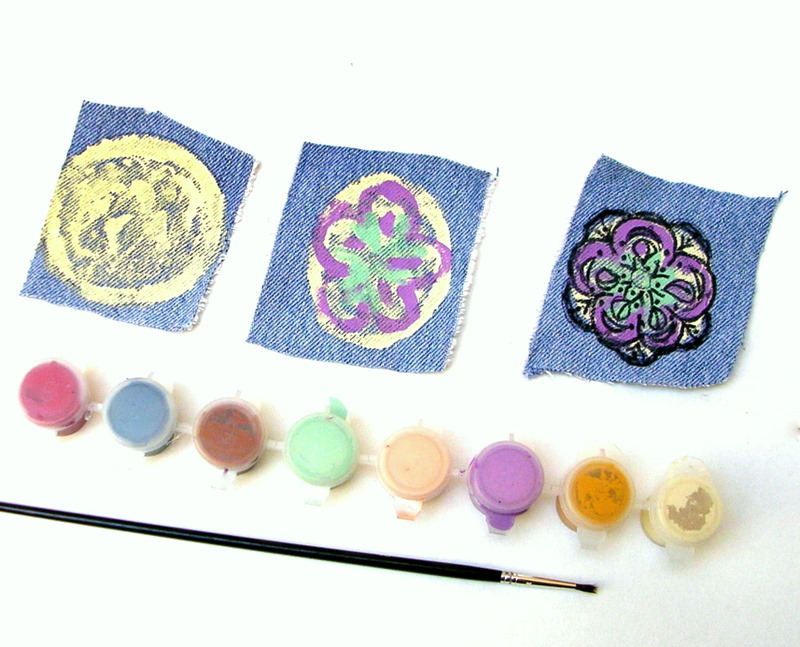
Just paint and then Sharpie on a scrap of denim. Like this...
And you end up with...cuteness!
There's a hidden bail in the back, made of felt. In my original version, I used little metal nailhead studs to connect the pendant to the bail.
A really fun, casual chic look. Here my sweet friend Kim models one so you can see it on.
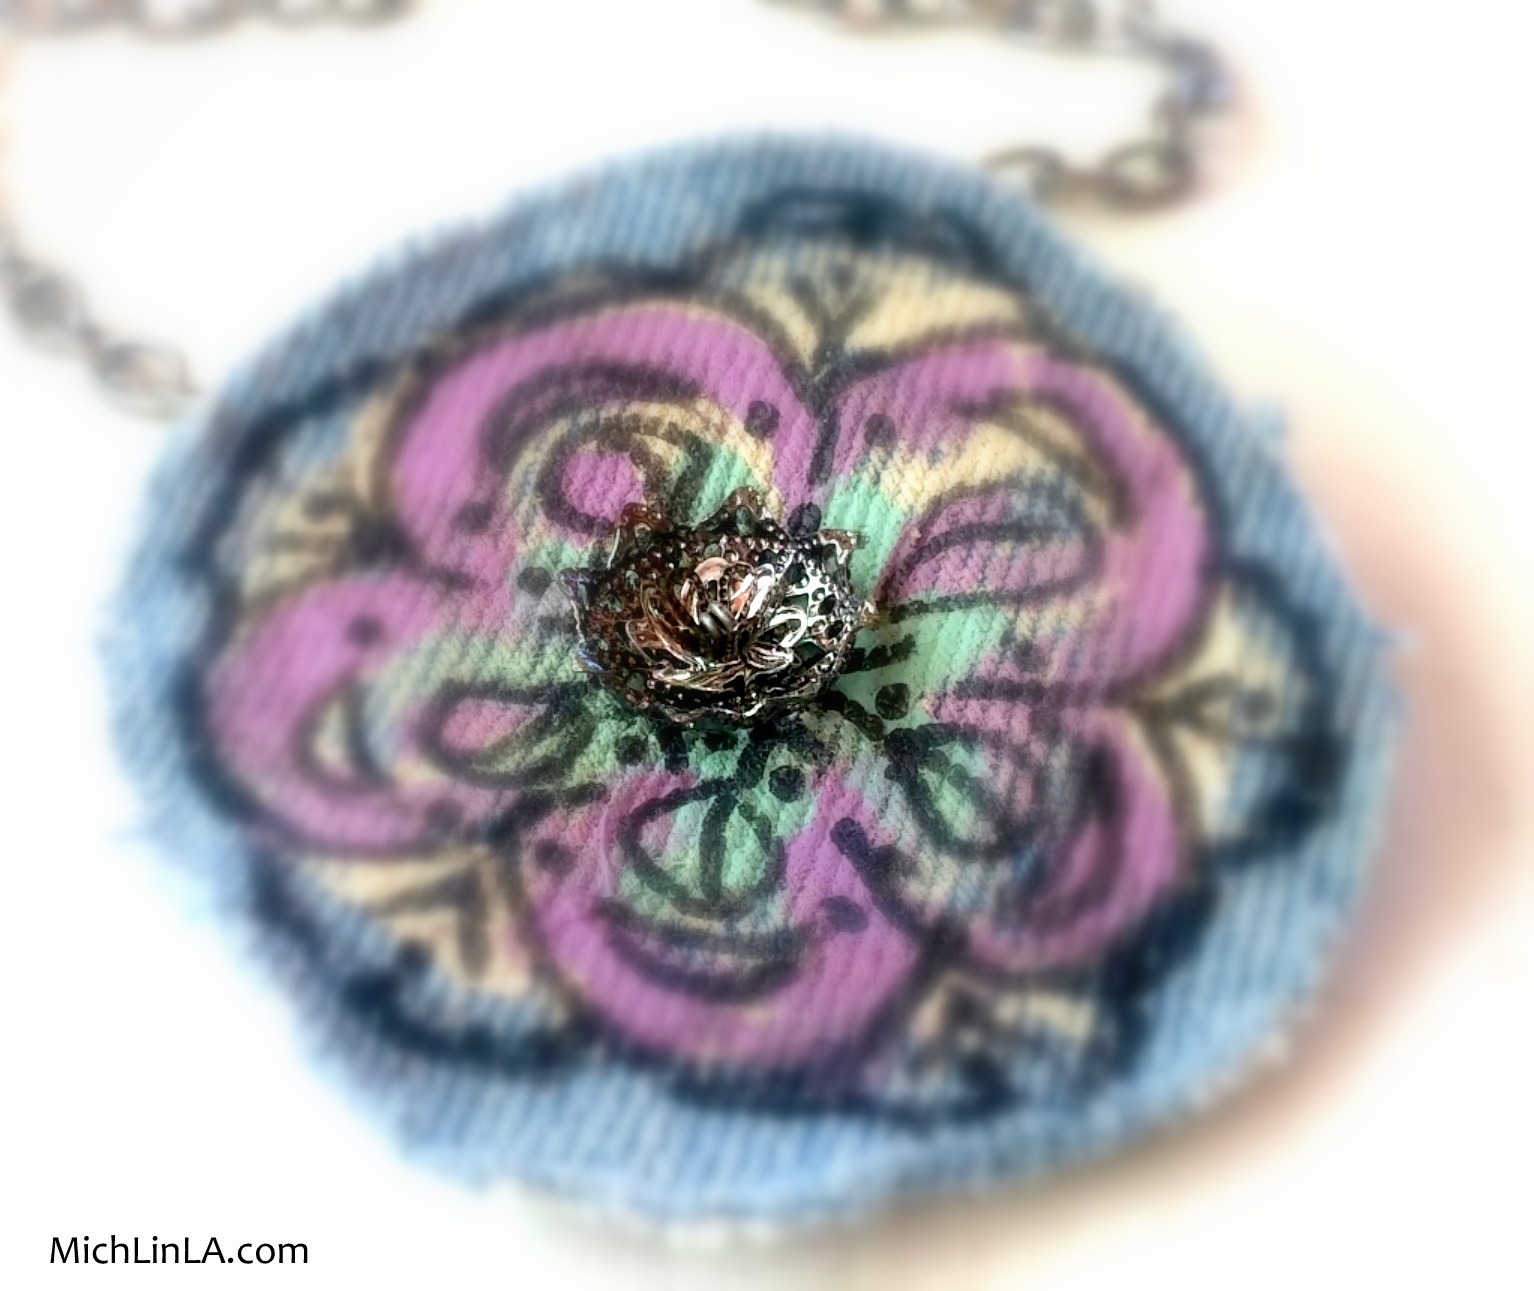
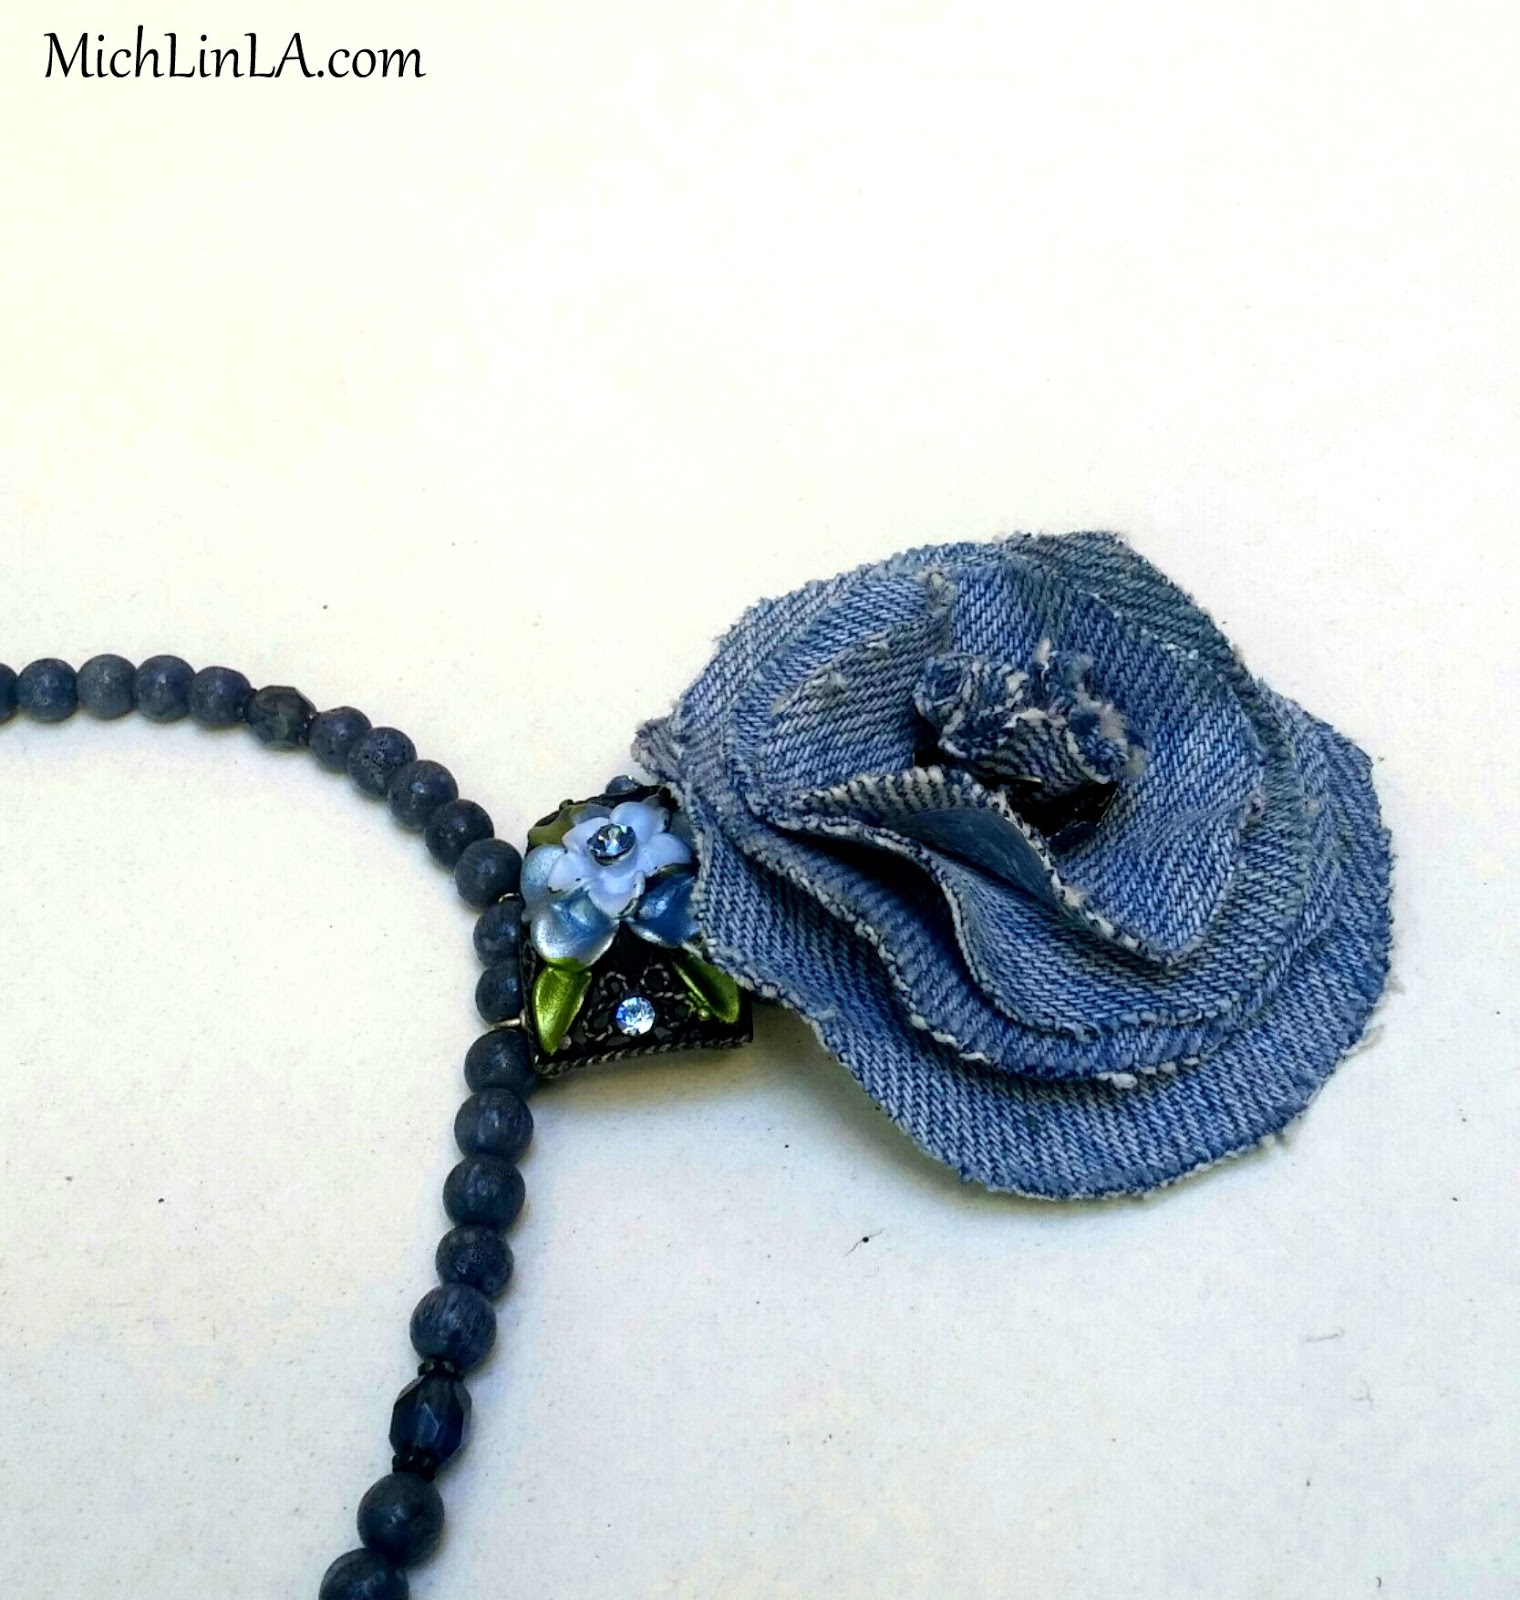
In this new version, I used the same method as in my denim roses, i.e., a headpin with a flat spacer, like this:
The updated method allows for a fancier, flowery center...
I punched up the look with metallic necklaces, to echo those mixed-metal centers.
Okie dokie! I hope you get inspired to grab your denim scraps and play.
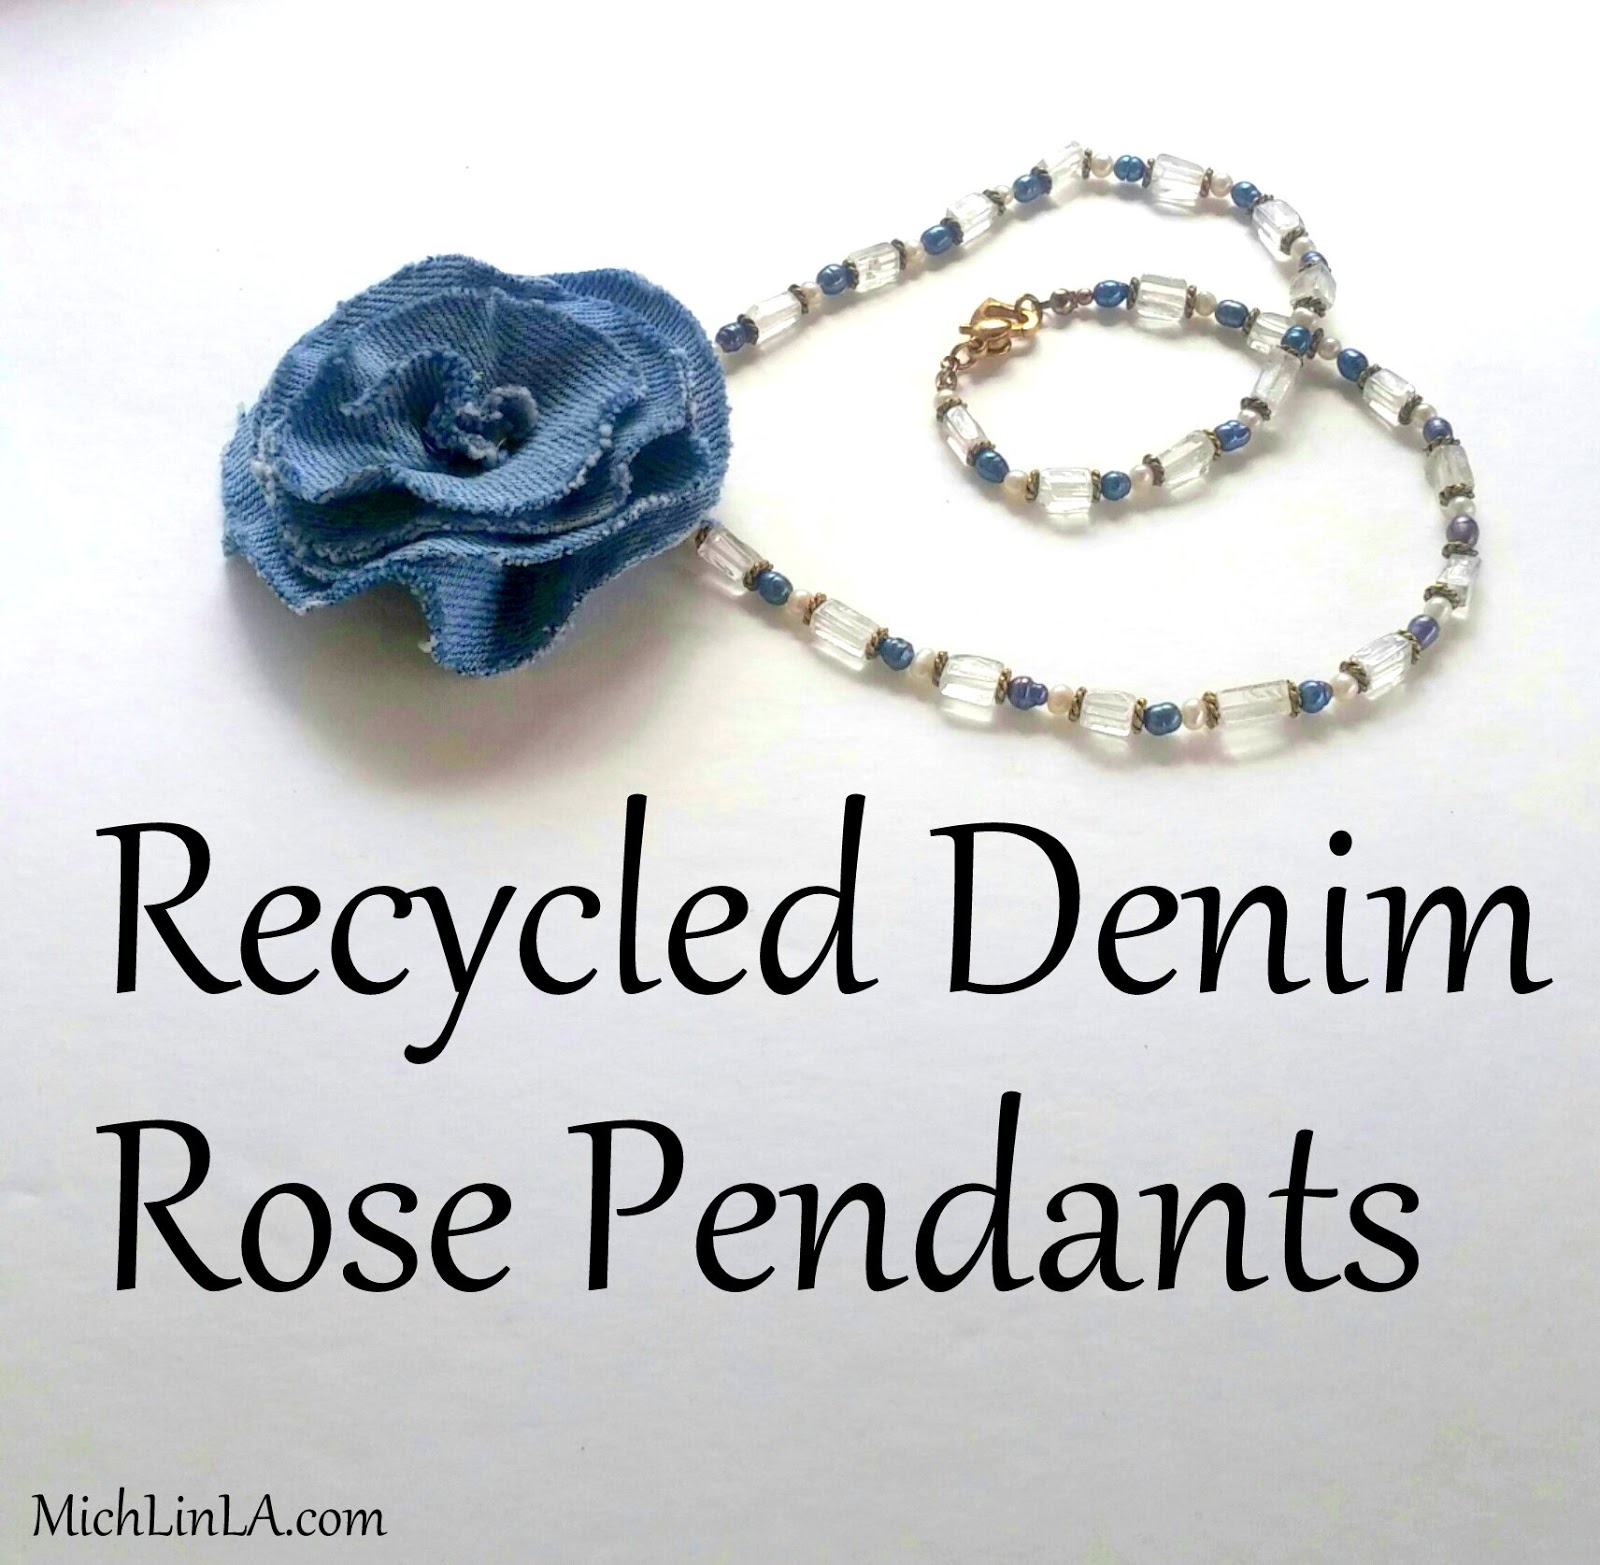
Hello, my friends! Today I have a fun and flowery upcycled jewelry idea to show you. Denim rose pendants!
The unique thing about these roses: a secret metal structure underneath, that keeps the petals from drooping. Just like an underwire bra!
Not that any of us know anything about underwire bras...no, no. No droopy petals here. We are all naturally perky. But I digress.
The DIY
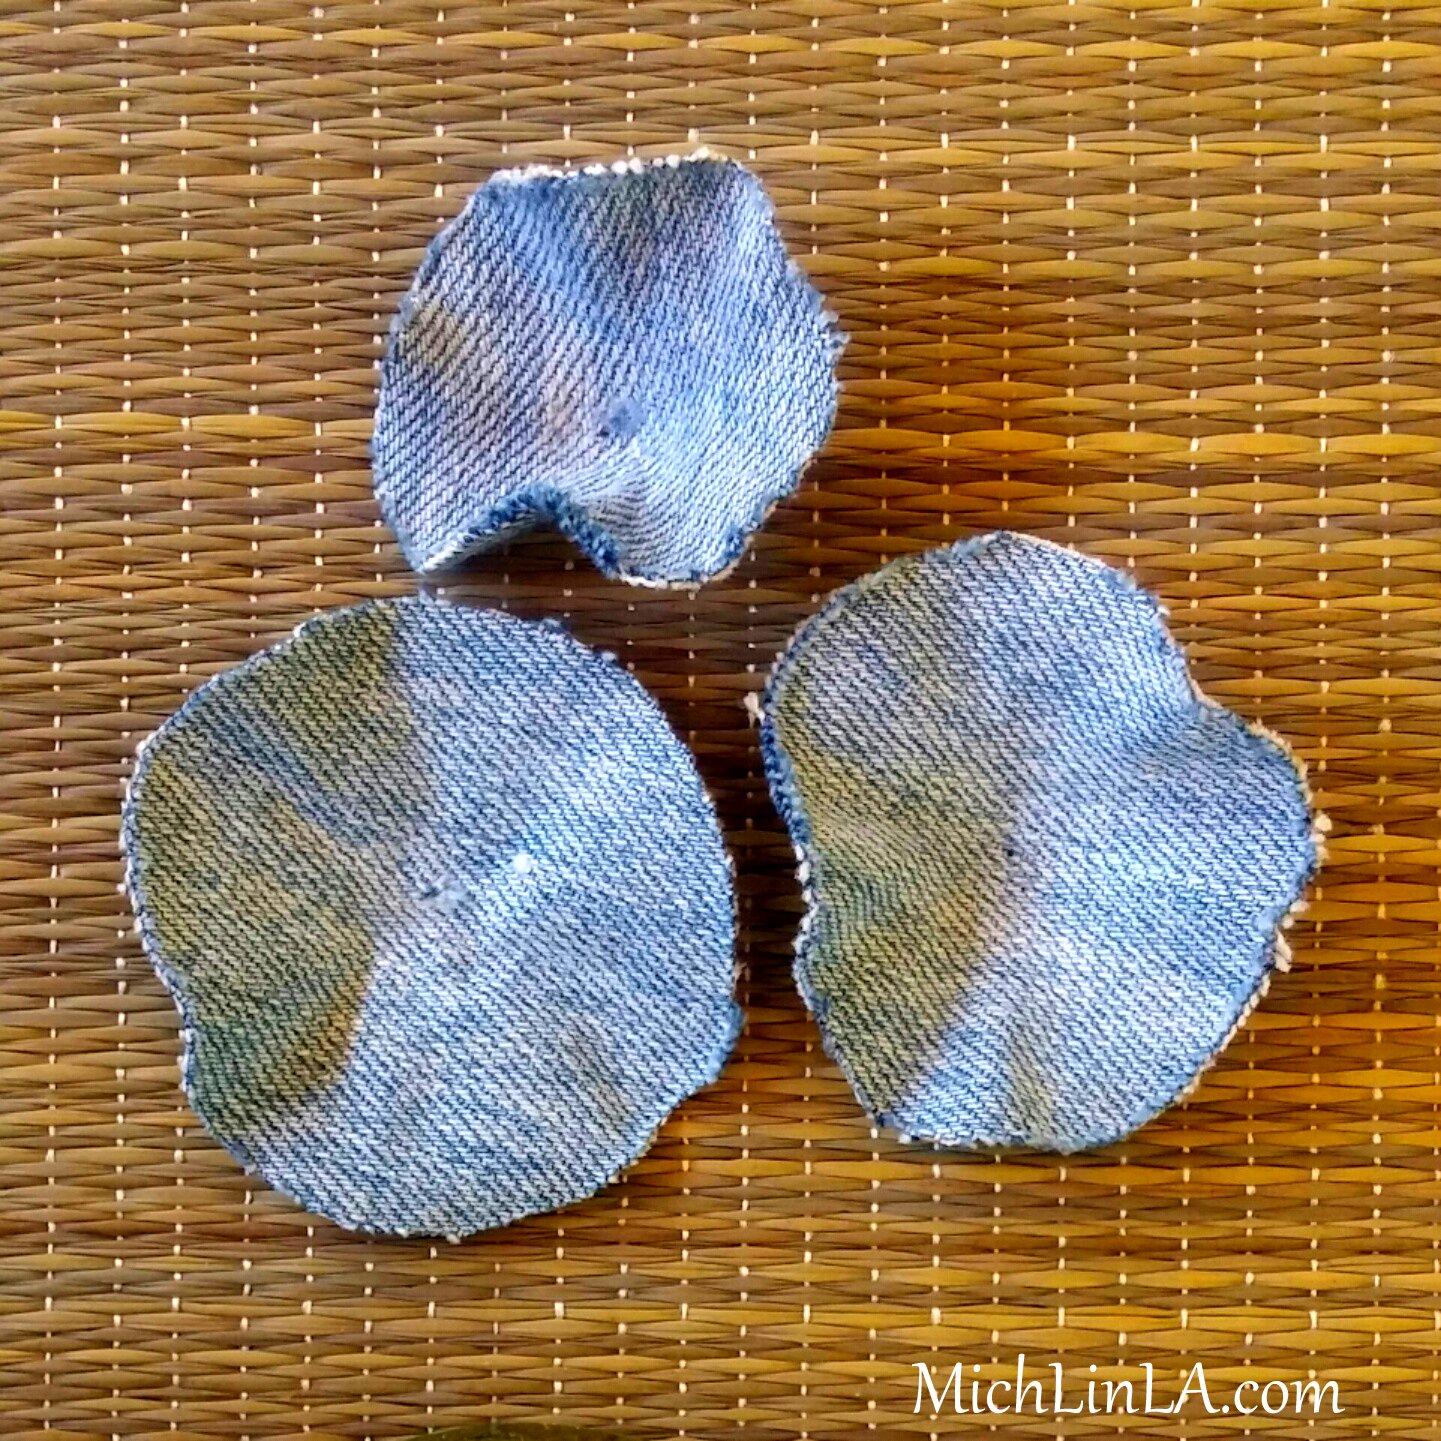
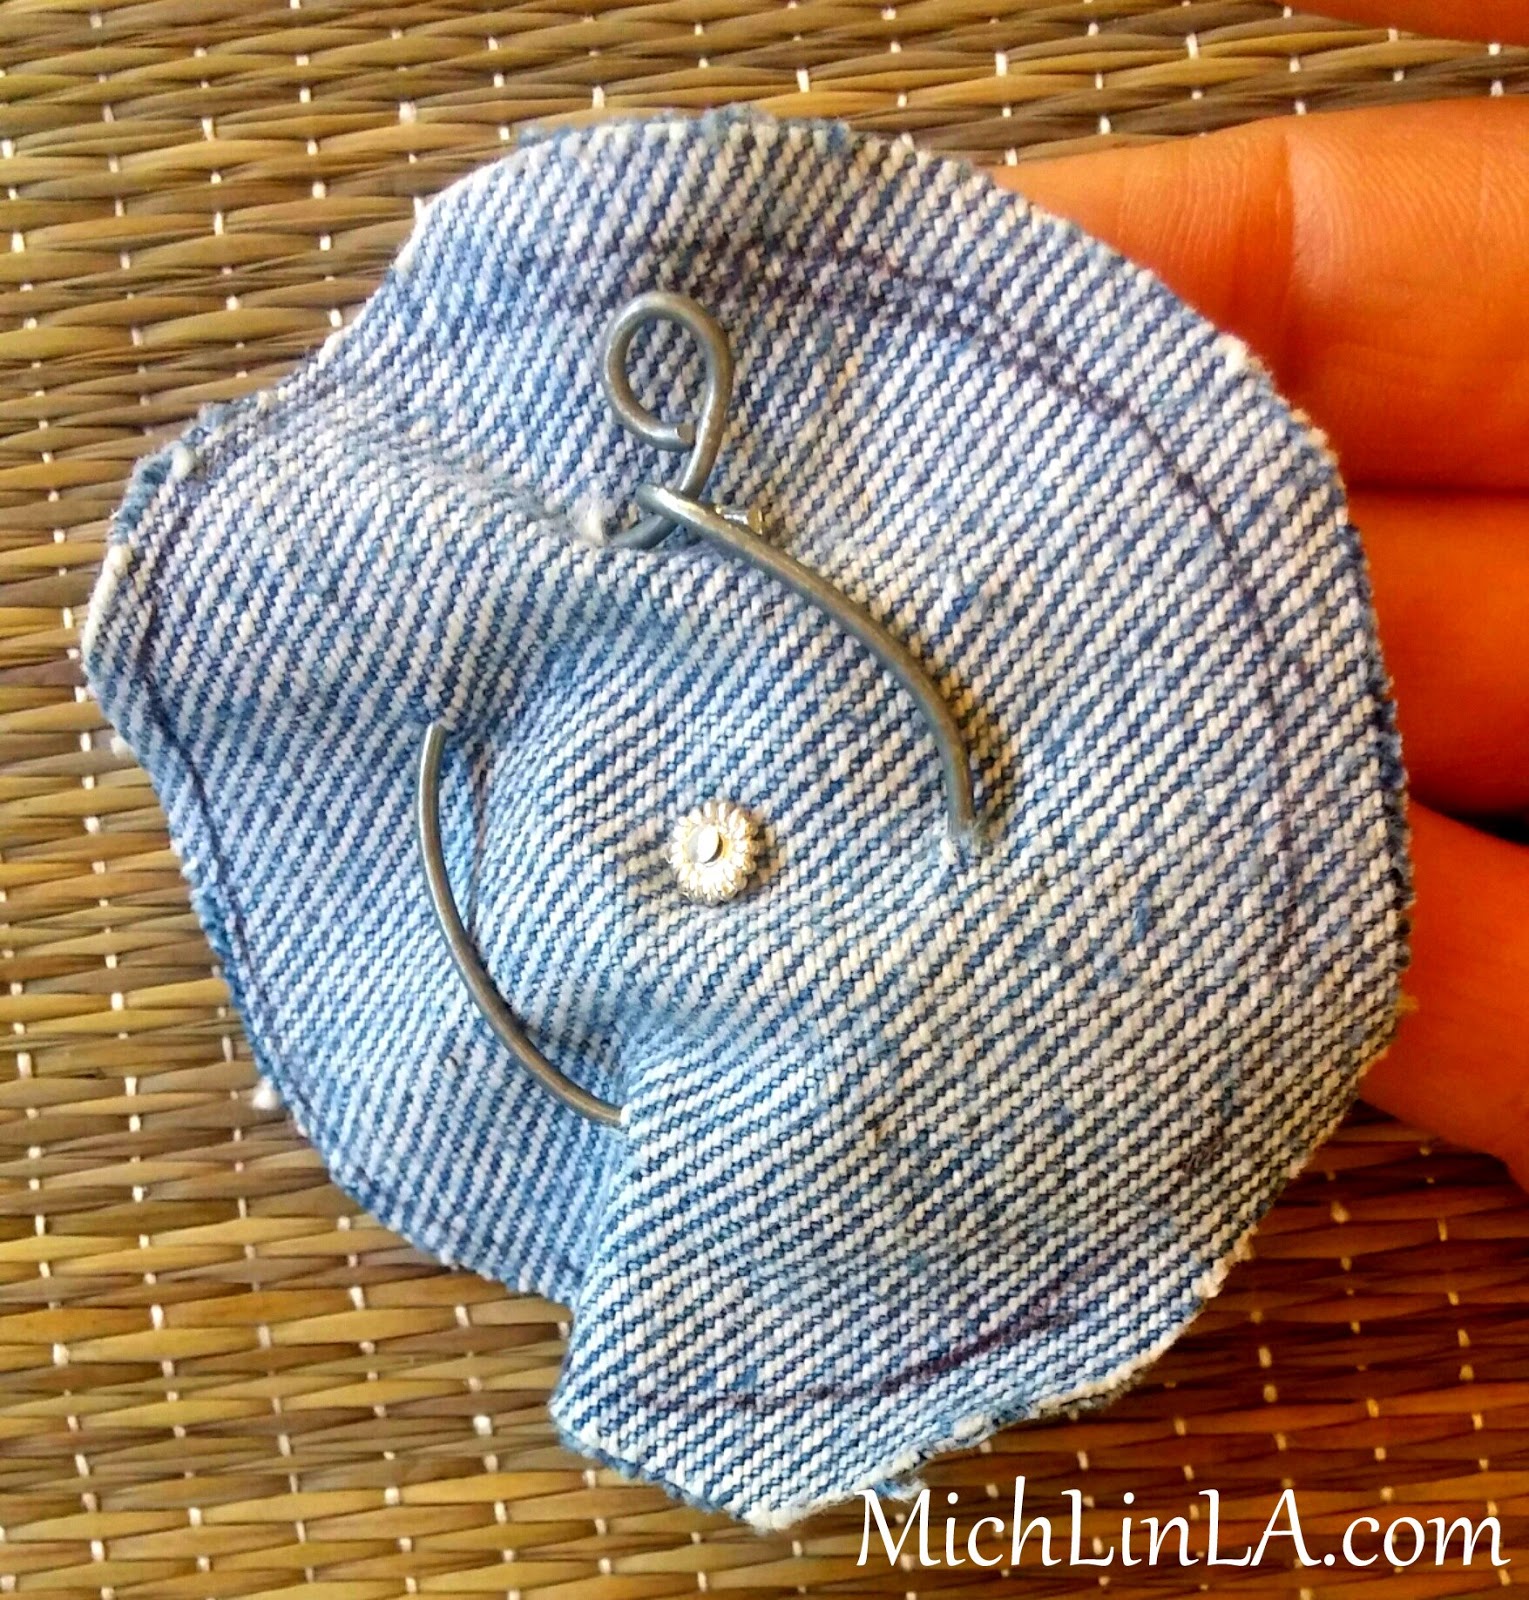
My rose has four graduated circles as the main petals. There are two hidden metal components to the structure. Ready to learn the secret? OK!
Support secret number one: the largest petal has an actual underwire.
To make it: referring to the photo above, poke four holes in your largest circle. Thread craft wire through the holes. Form a loop so the denim is slightly gathered. Pinch one end of the wire tight to secure. On the other wire end, make a small loop.
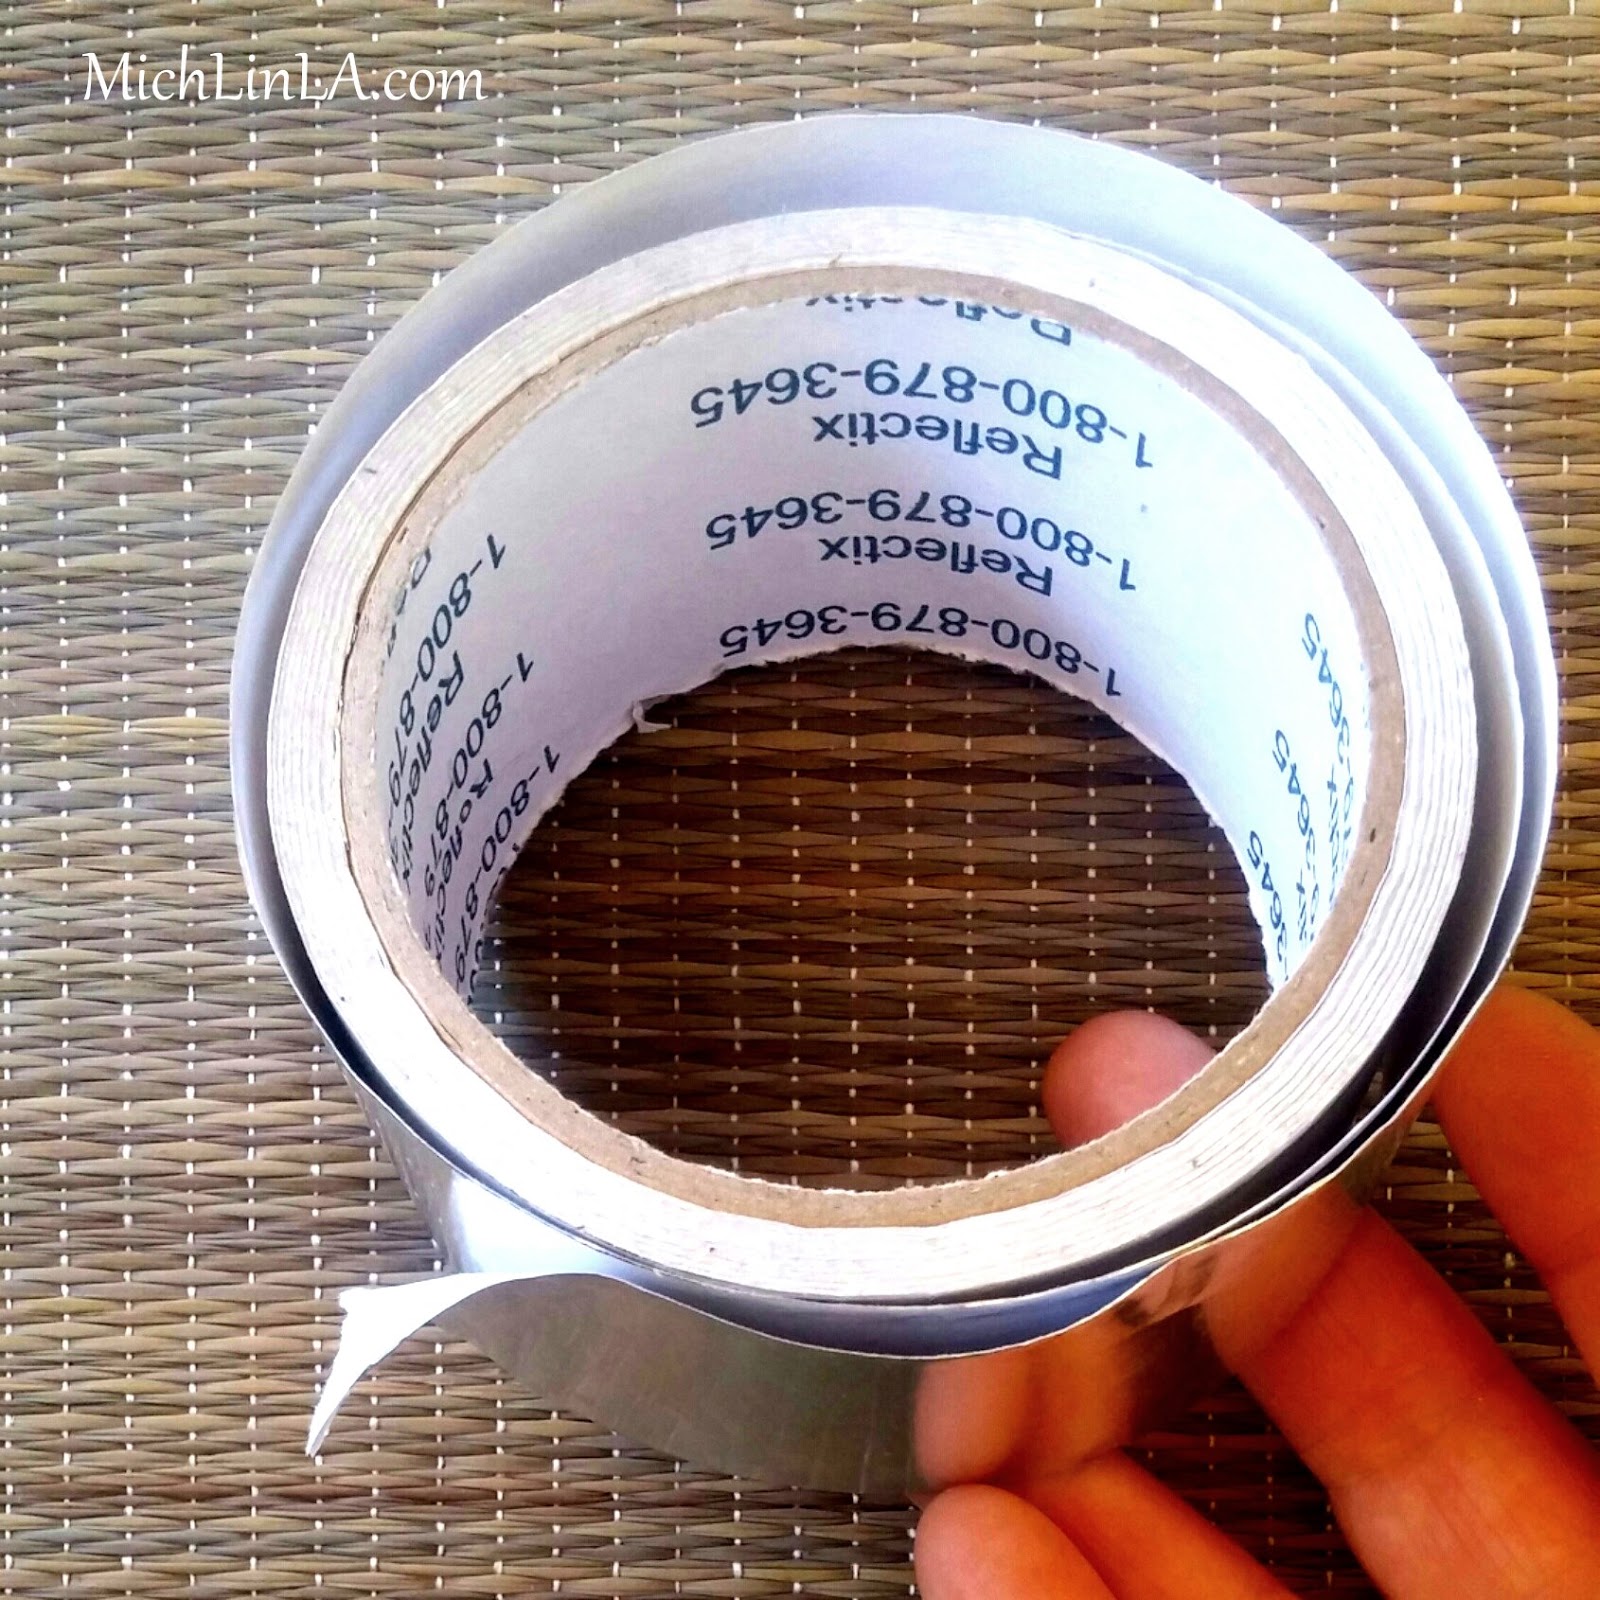
Support secret number two: stiffen the three smallest circles with my favorite stuff - aluminum duct tape.
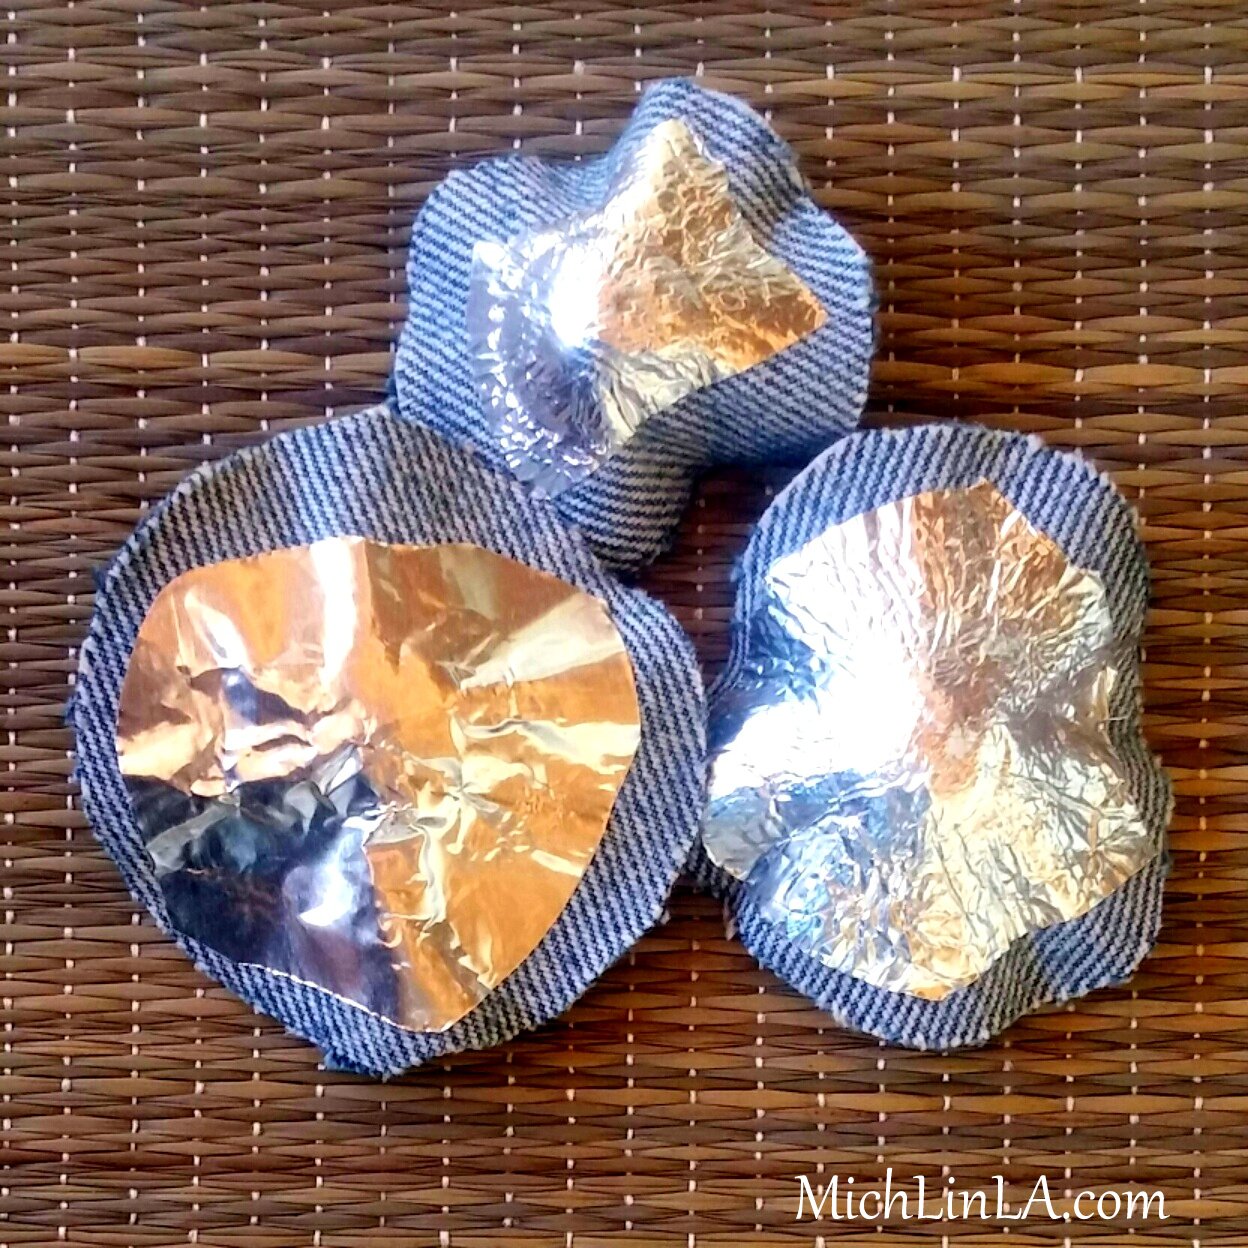
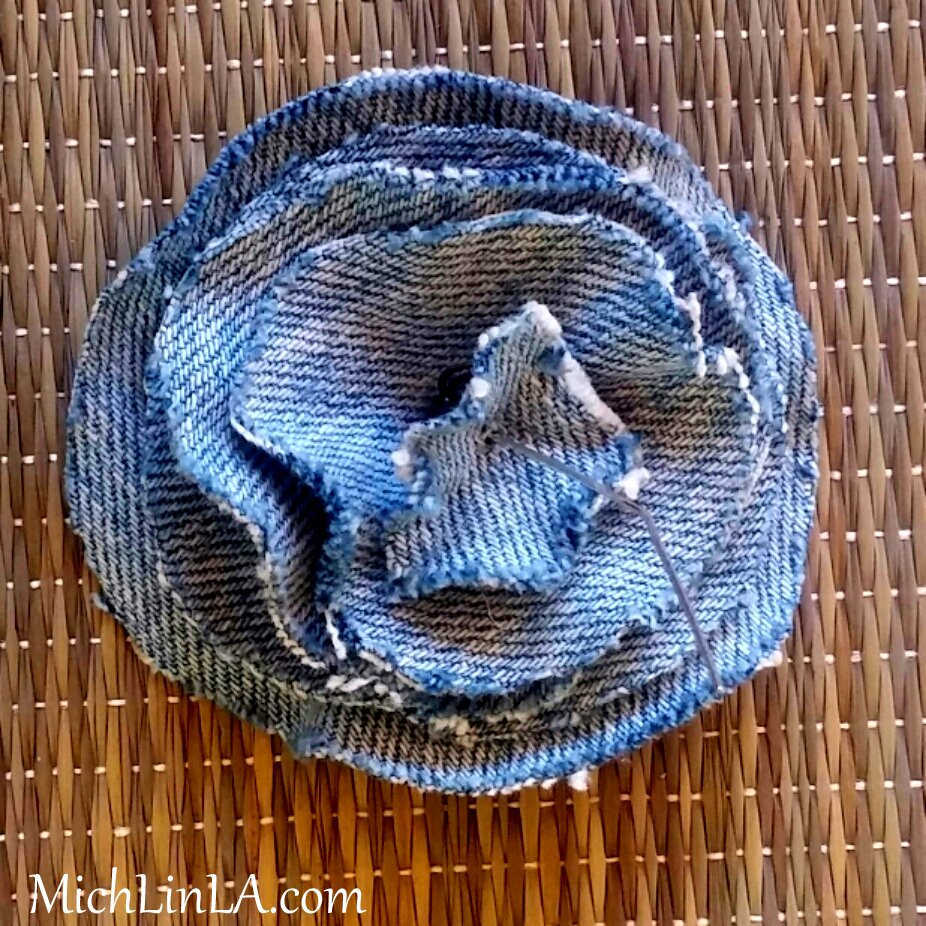
Add a piece of tape to the back of each denim petal, then pinch them up in the center.
Flip them over and they now have subtle ruffles! See?
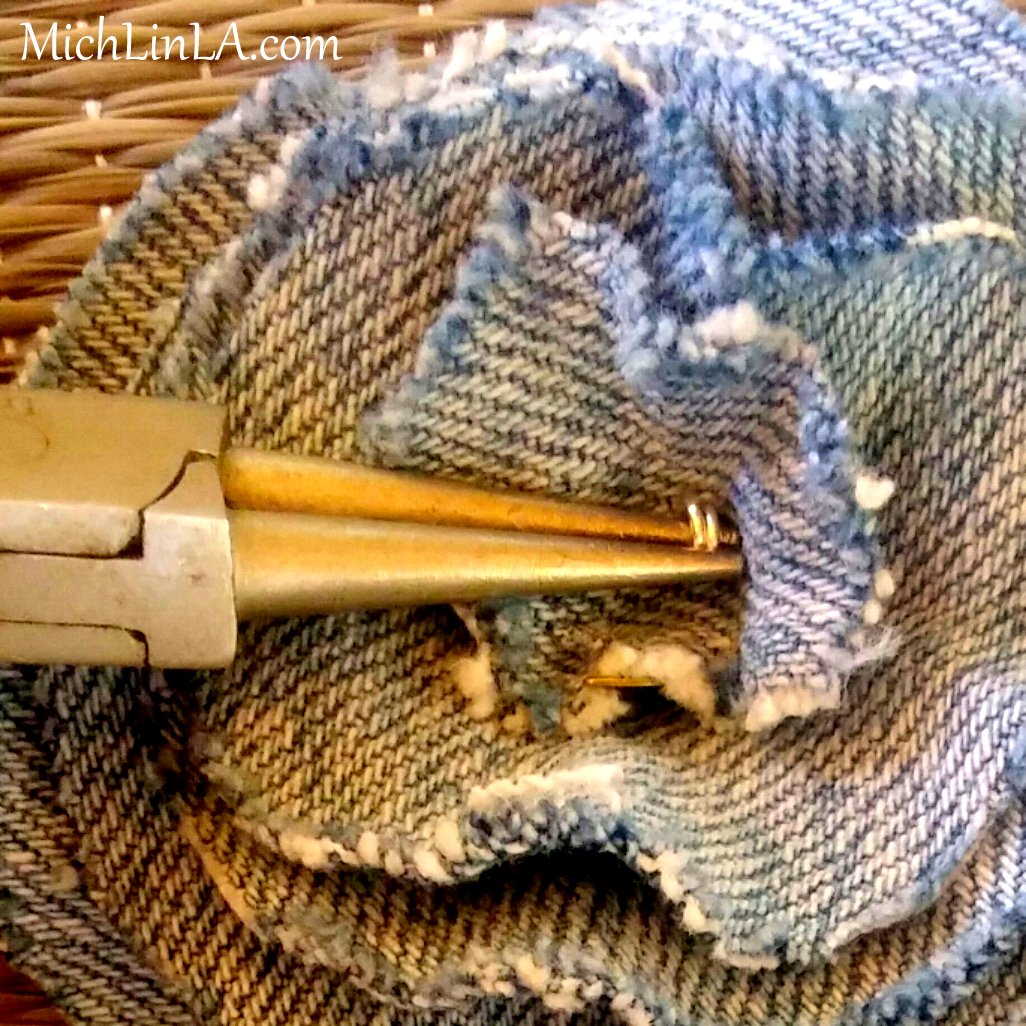
To assemble the rose, first put a small flat spacer on a headpin.
Poke a hole in each petal and stack them onto the headpin. Add a bead cap.
Add a scrap of denim, which will be the tiniest center petal.
Trim the headpin short. Use round-nose pliers to twirl the wire down into the center. Twist it as tight as it will go!
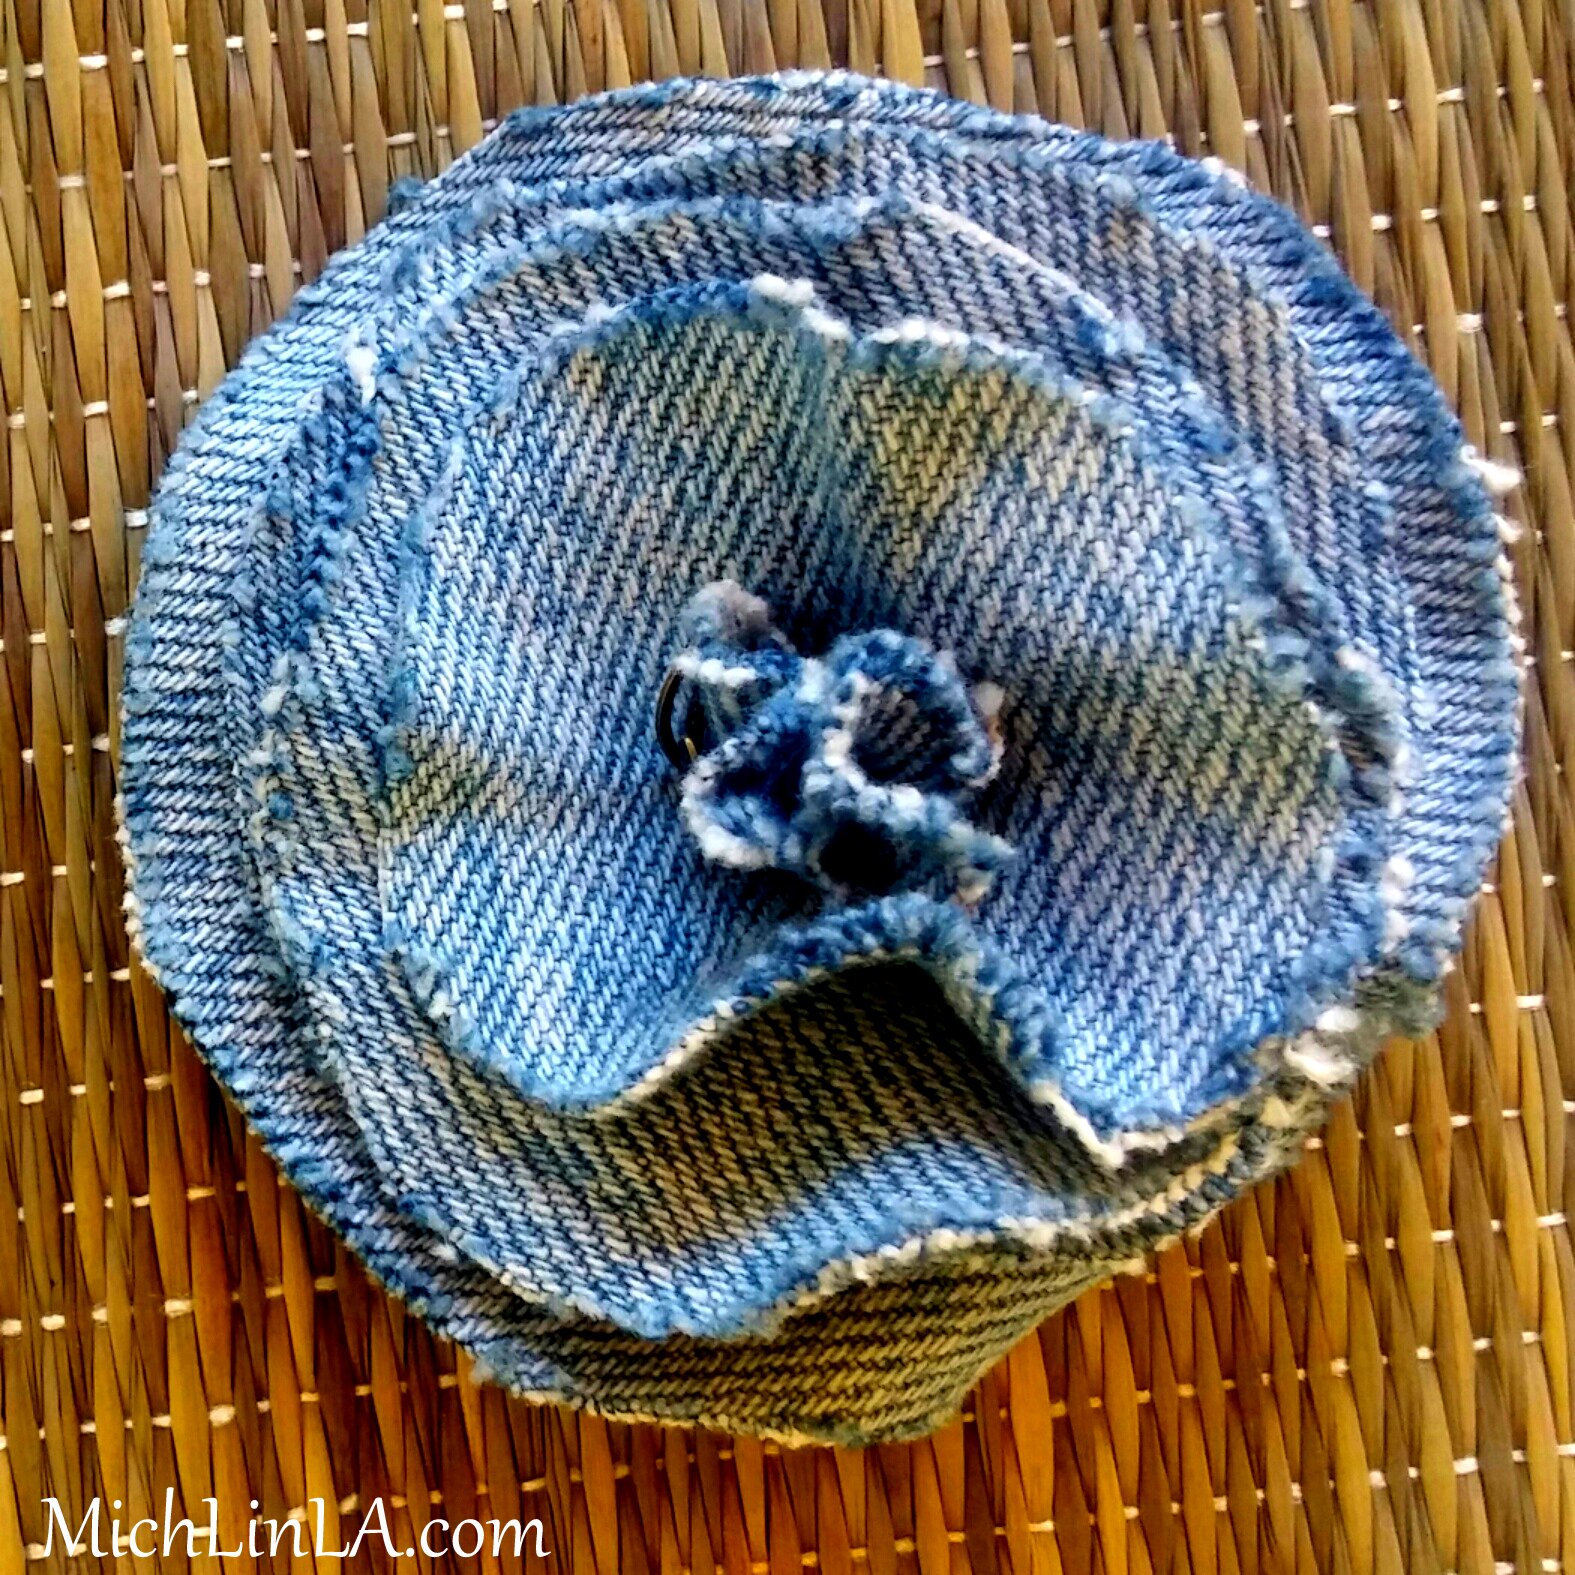
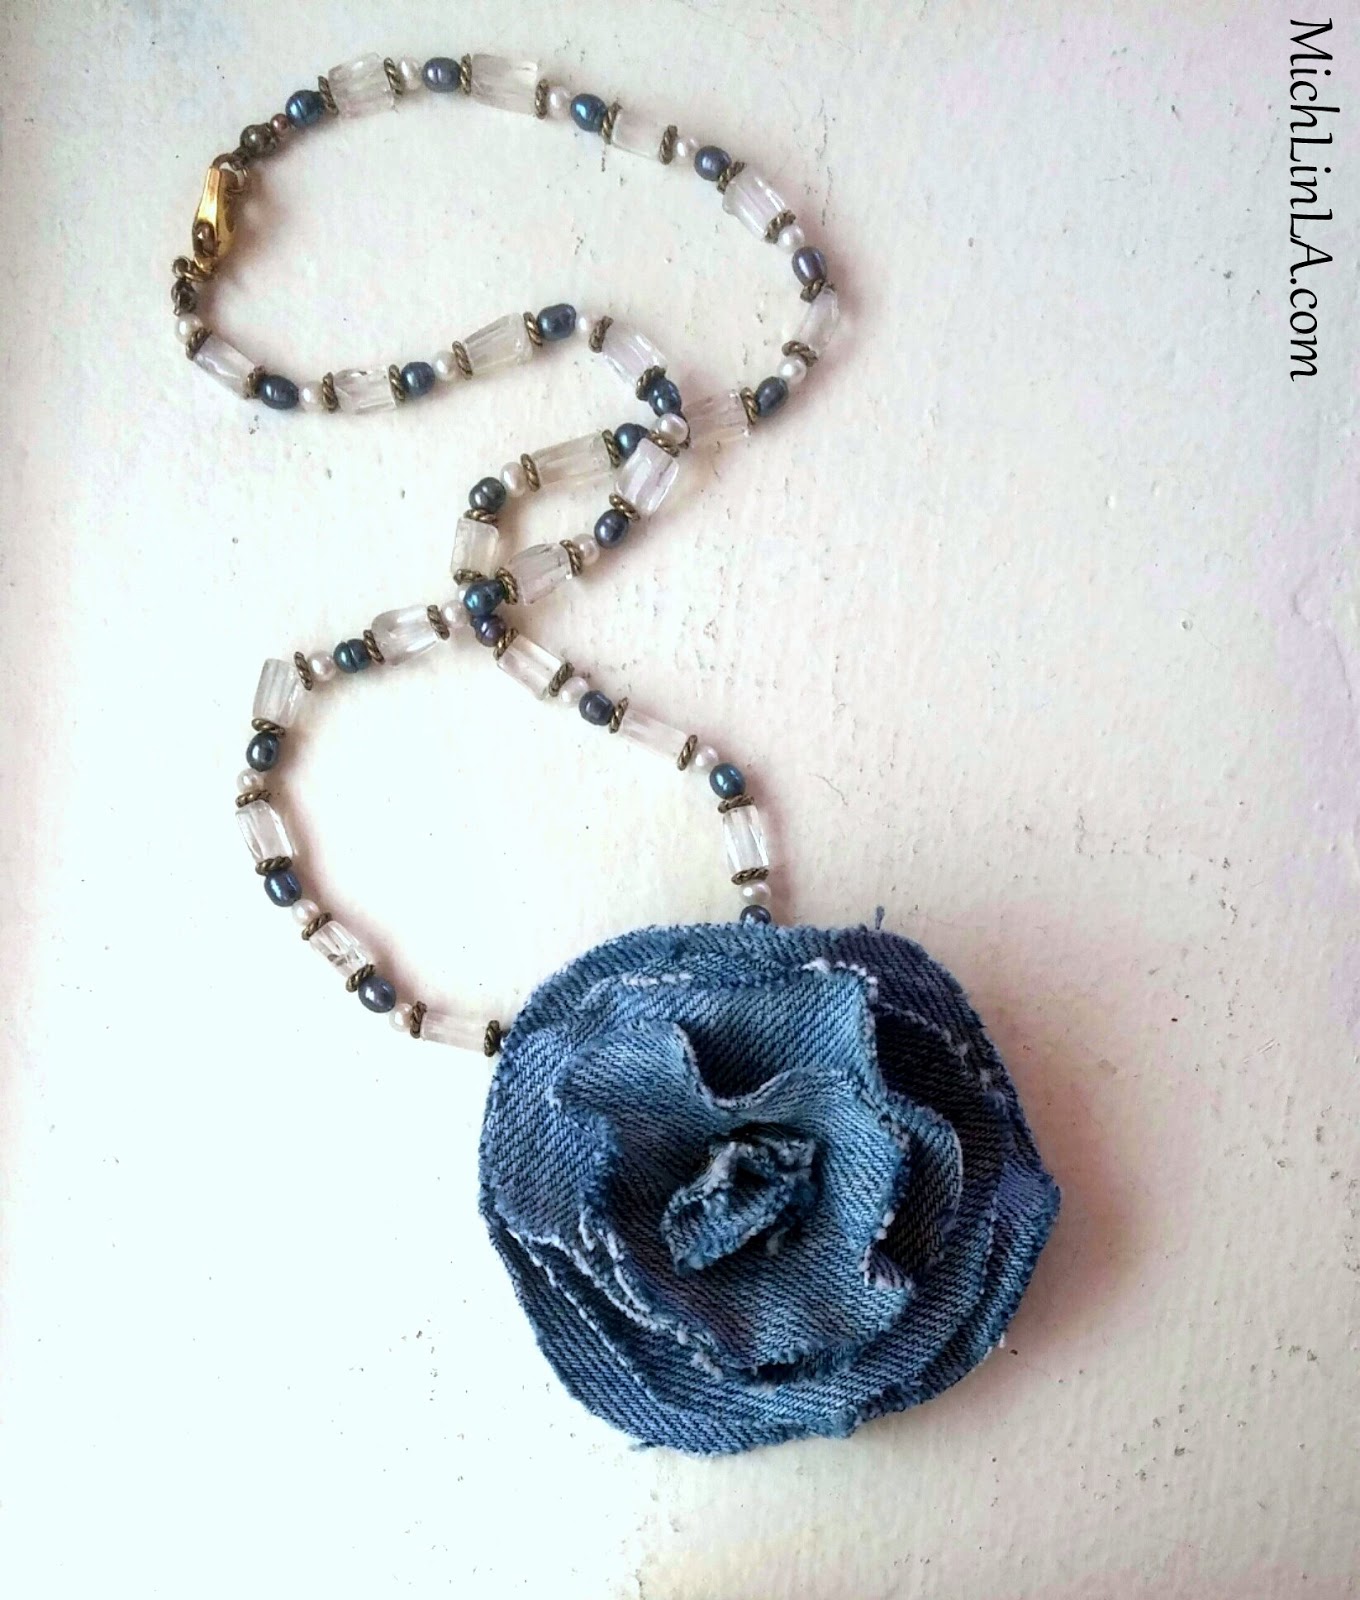
And huzzah, that is your finished underwired rose.
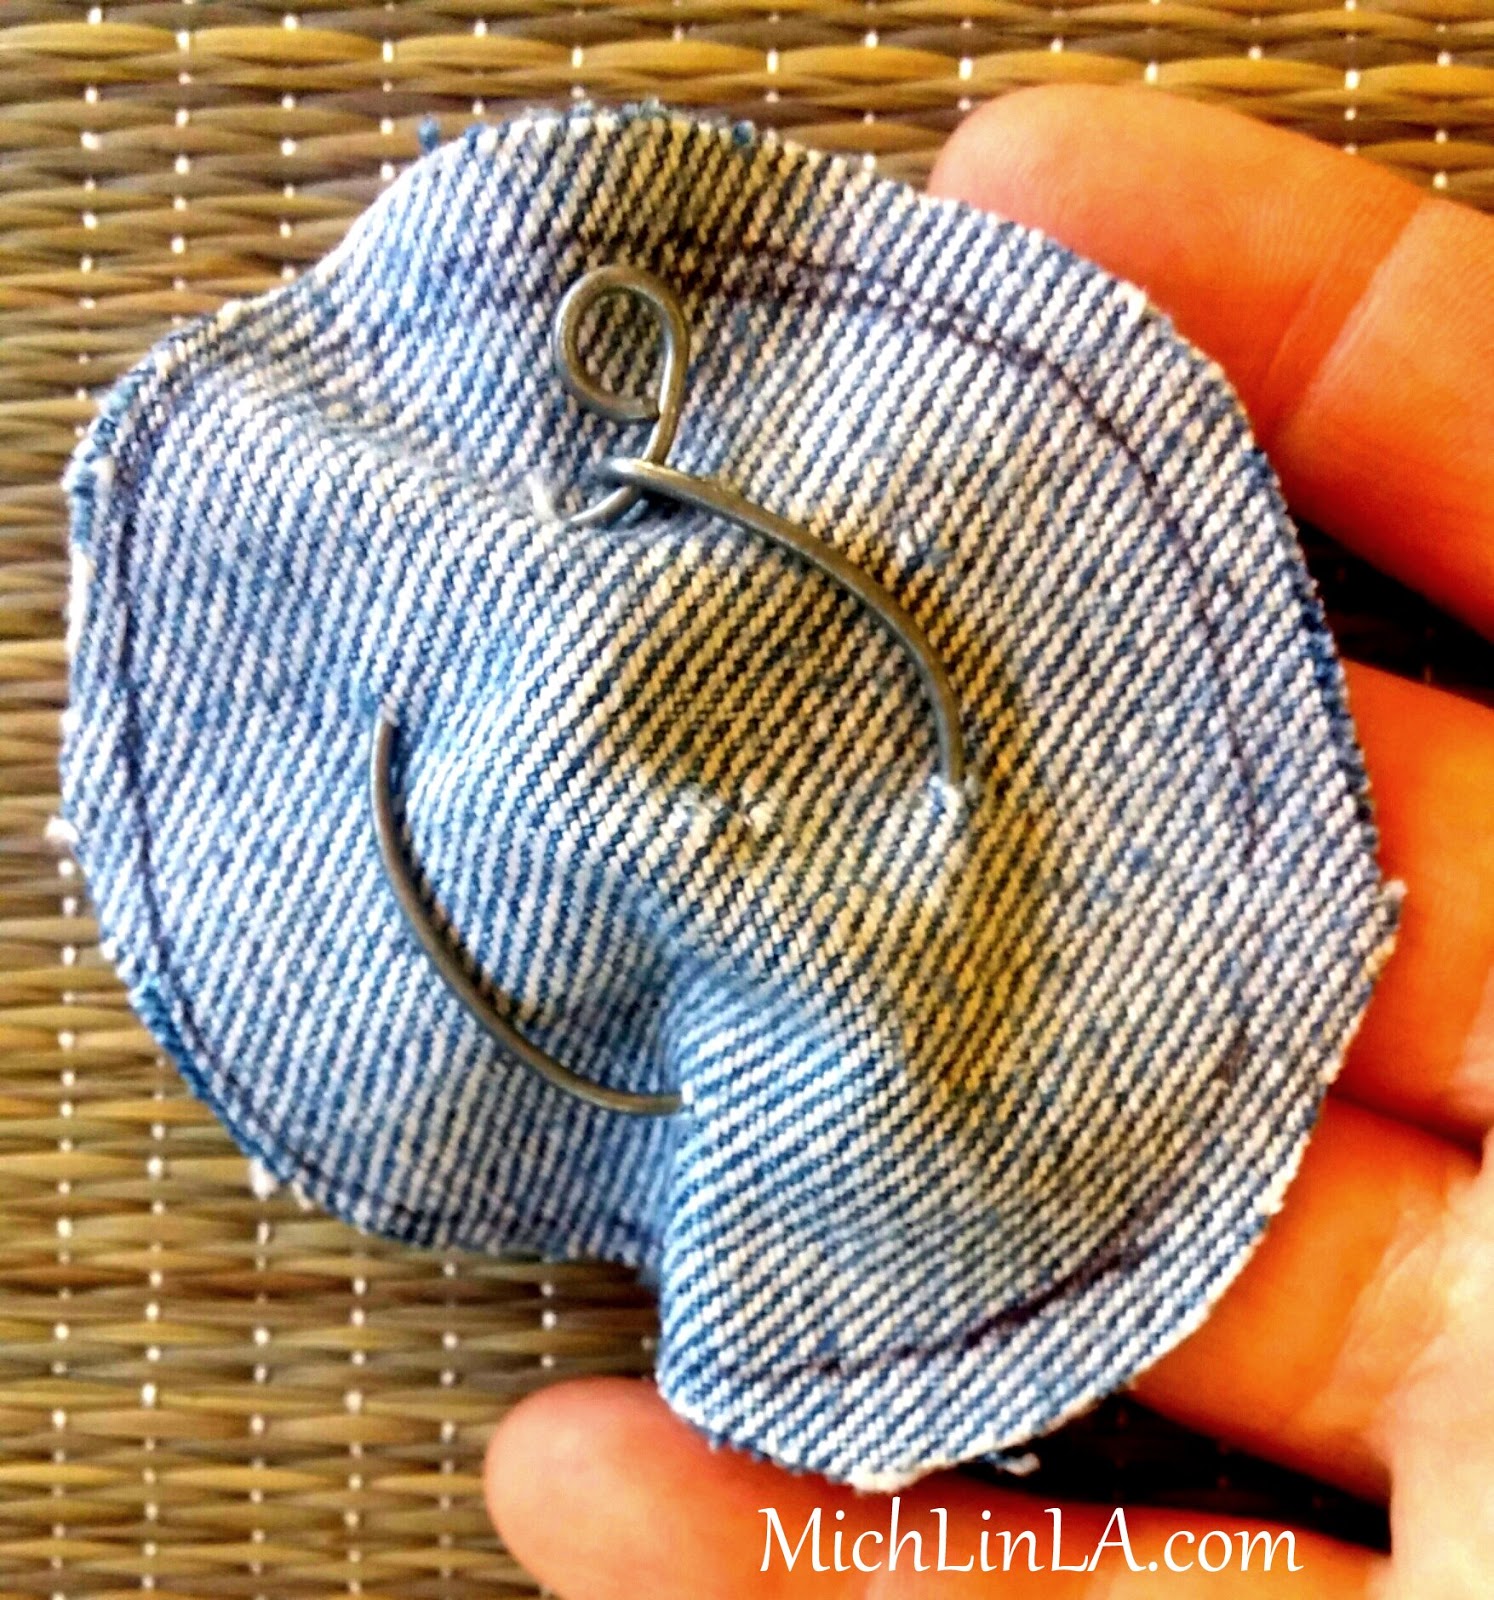
Here is the back.
Use that small wire loop as a built-in bail, to hang your pendant from a strung necklace.
My concept was to contrast the rustic denim pendants with elegant semiprecious stones. These are strung with natural quartz crystals, Czech crystals, lapis beads and freshwater pearls.
They look amazing dressed up or dressed down. Aw, go on, you know you want to make one...and wear it like the natural-born Blue Jean Queen that you are.
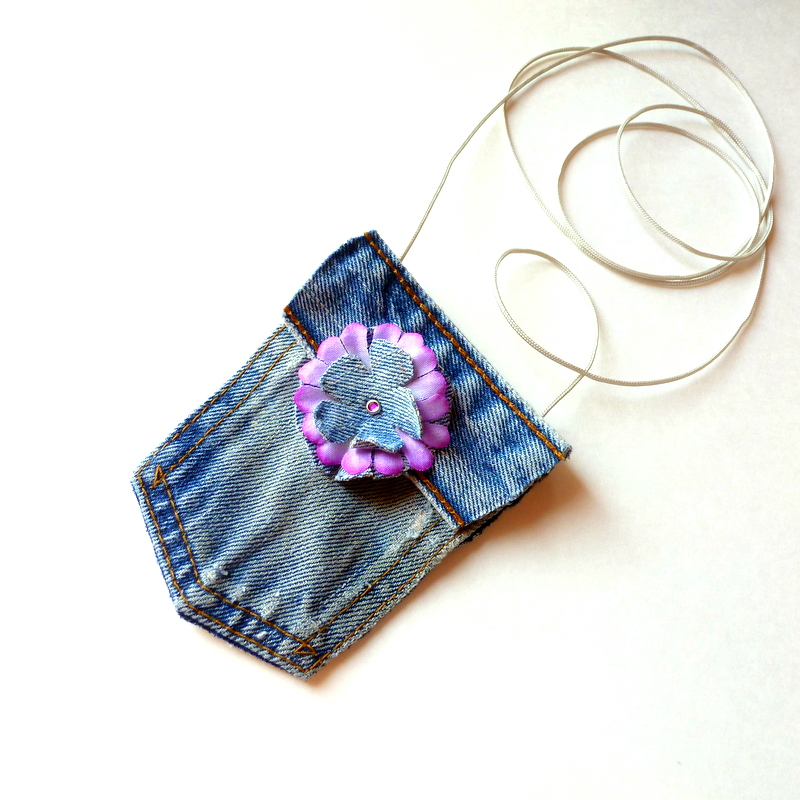
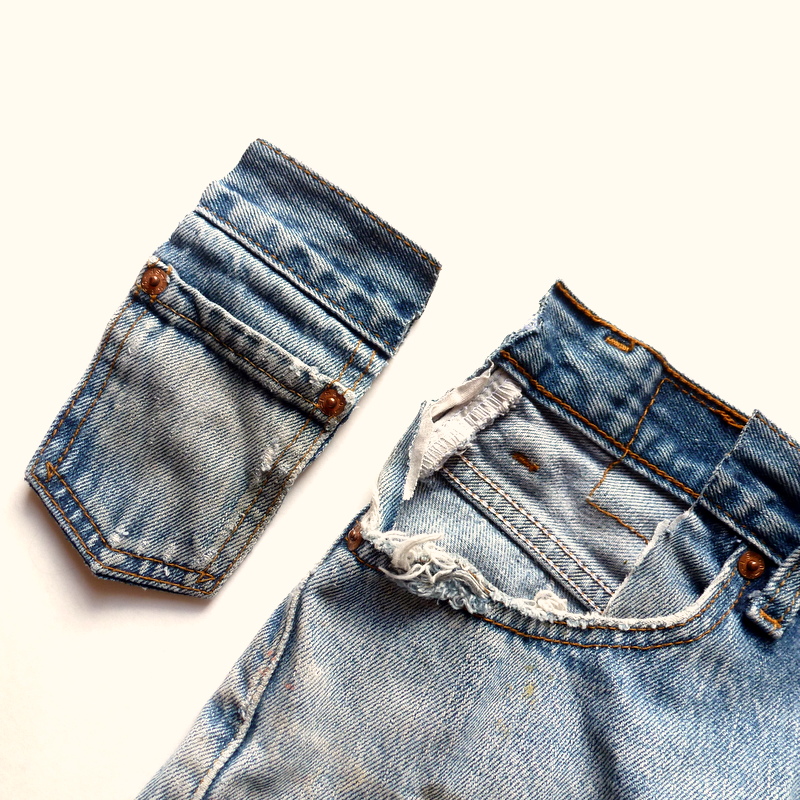
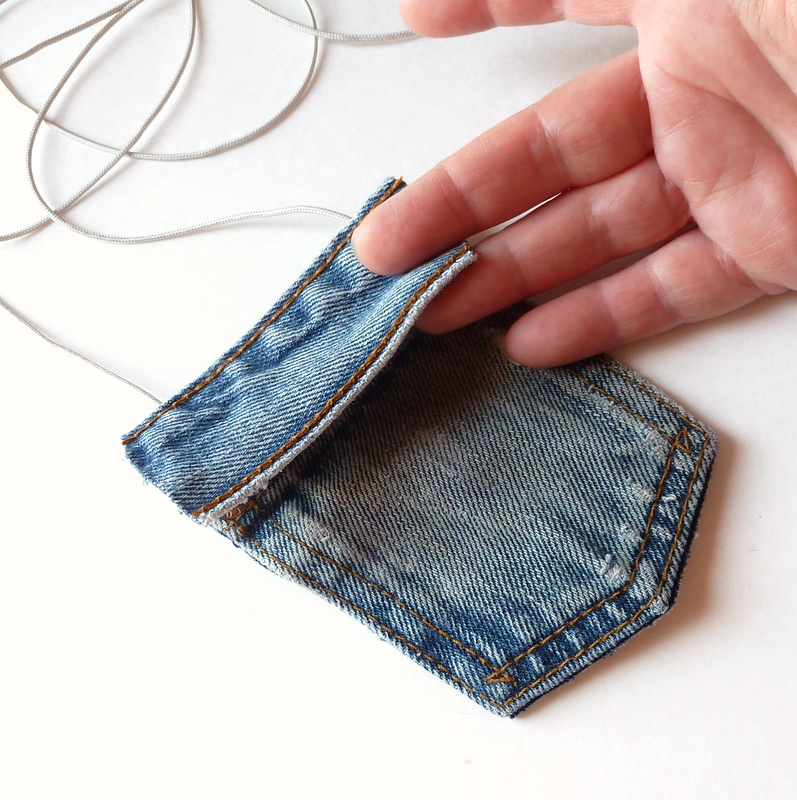
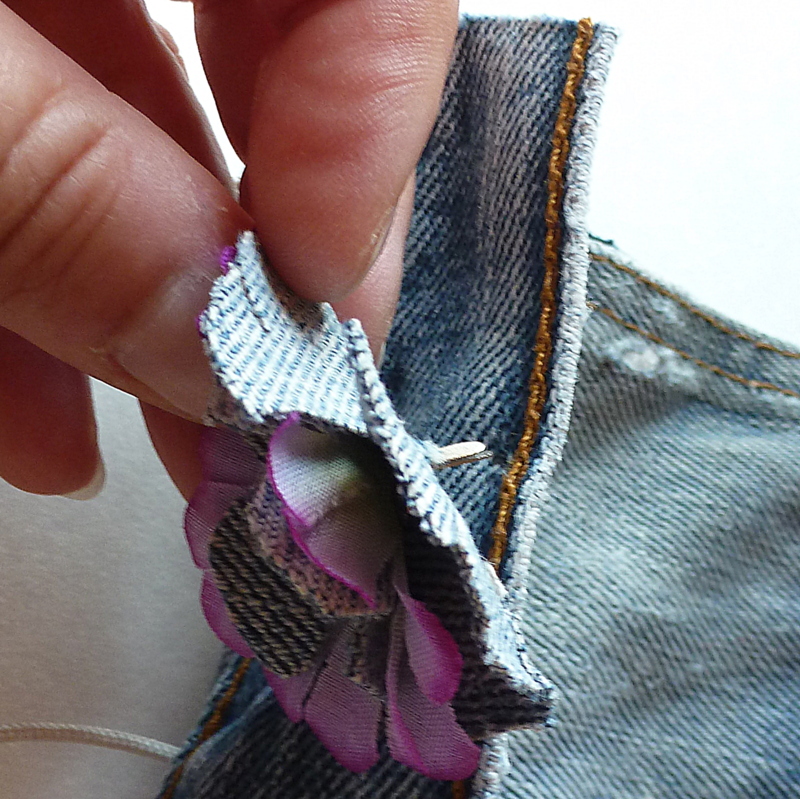
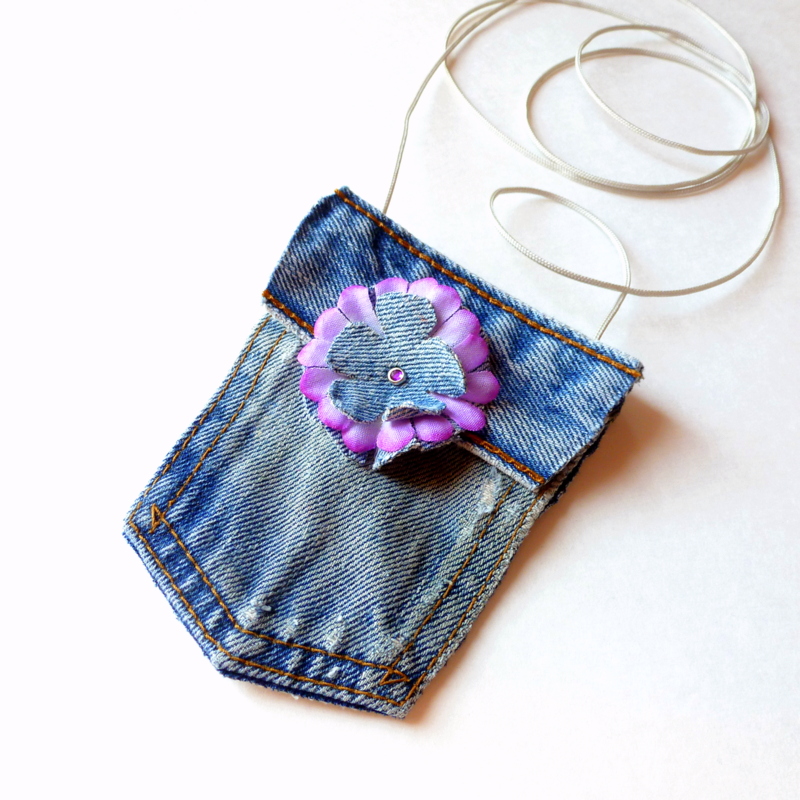
One more itty bitty blue jean upcycle idea for you. This tiny purse is made from the small coin pocket inside the front pocket of a pair of Levis.
Make it in five little minutes, without sewing a stitch! Set yer stopwatch - ready? Here goes!
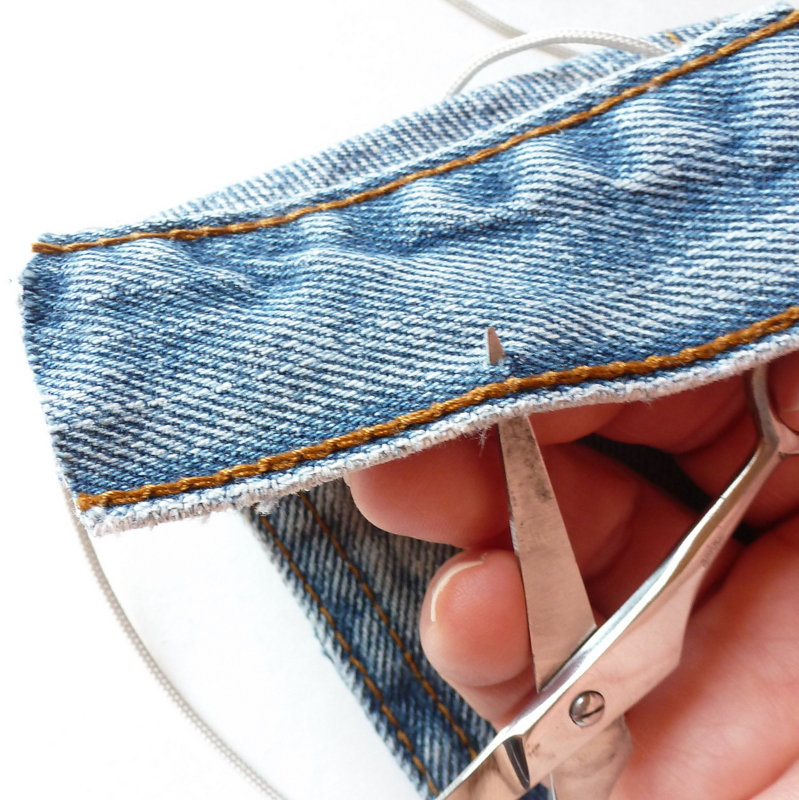
Cut the coin pocket away from the jeans, including a section of the waistband above the pocket.
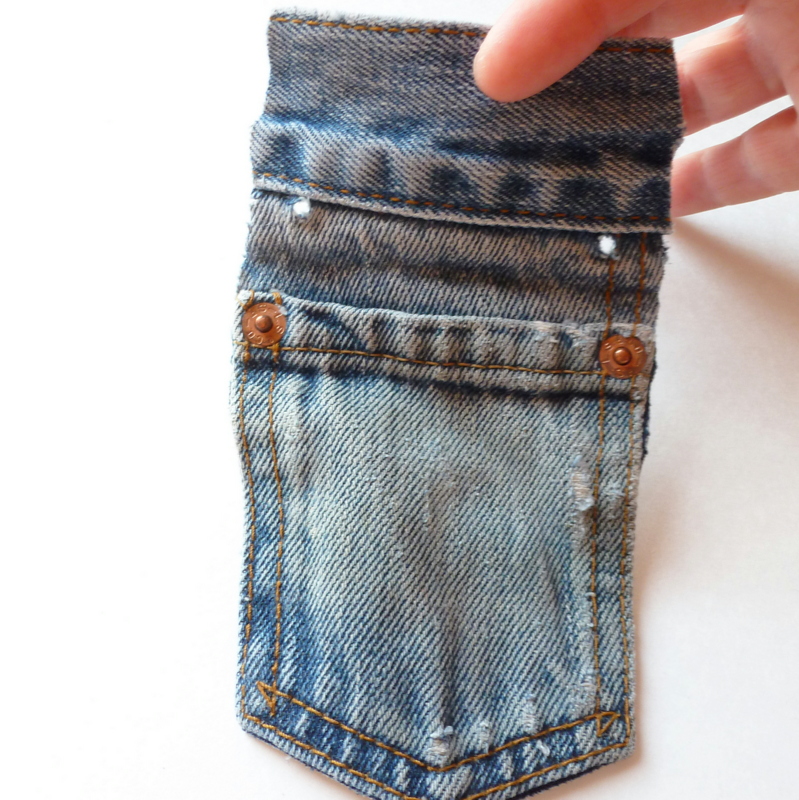
Poke two holes, just below the waistband section.
Thread some cord through the holes; tie knots in front.
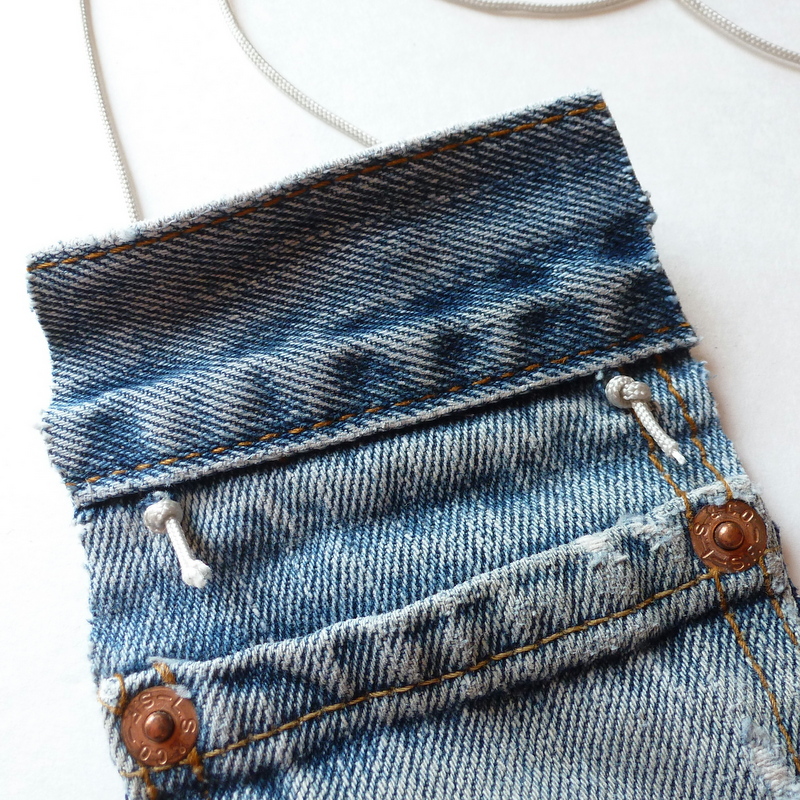
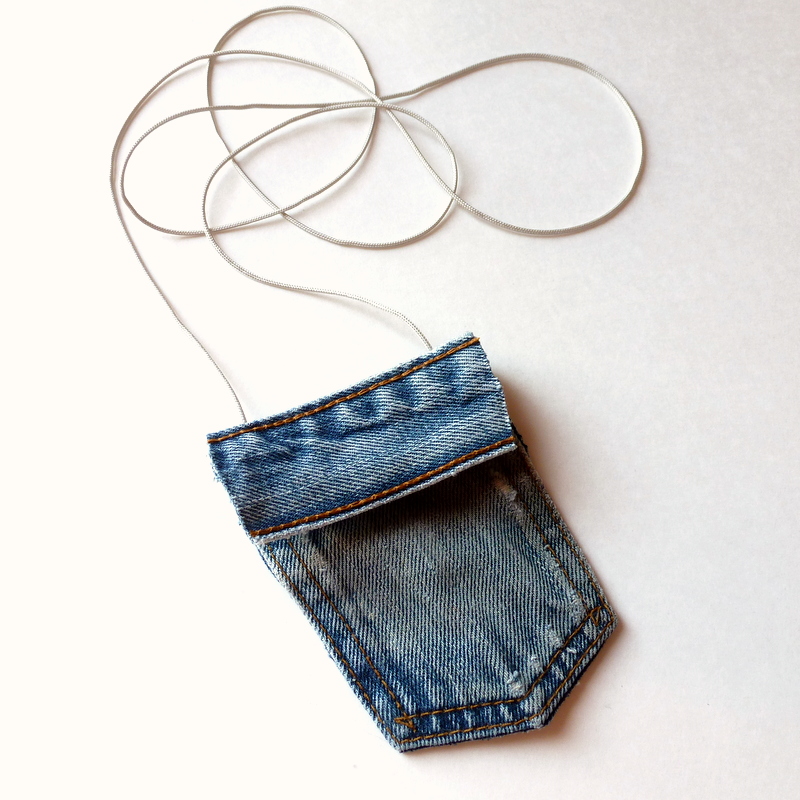
Now, when you fold the waistband down, it forms the front flap! How groovy is that?
Stop yer stopwatches, people - your five minute blue jean mini purse is done!
Wasn't that simple? And it is a perfect blank slate, just waiting to be embellished. Paint it, add buttons, pin on a brooch, glitter it up, whatever floats your boat.
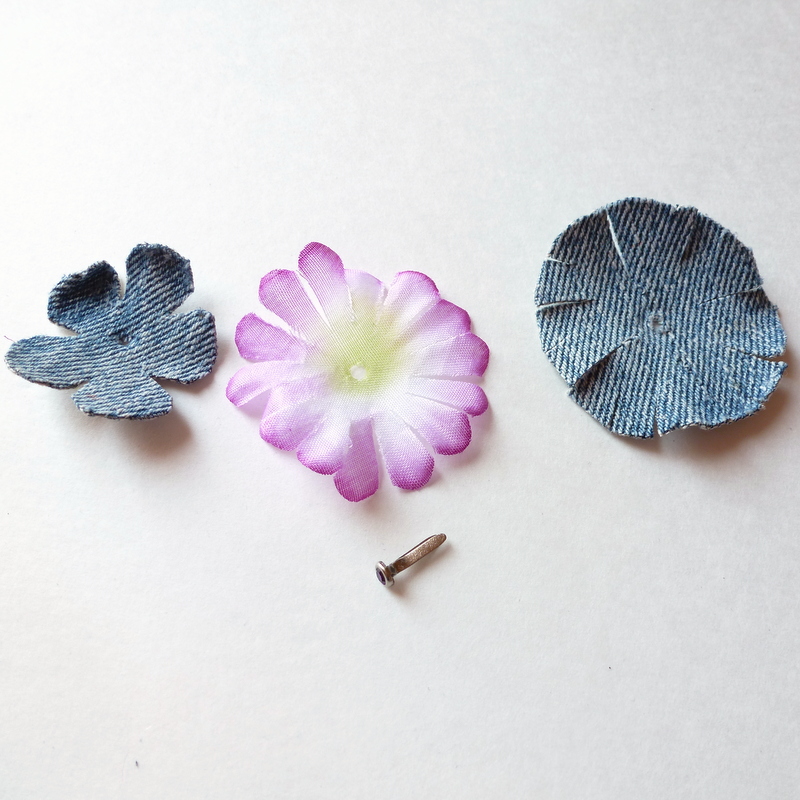
I used a scrapbooking brad to add a layered flower to mine (seen in a previous post as a blue jean cocktail ring). Here's how:
That was easy, too, eh?
That little coin pocket is now my favorite part of a worn out pair o' jeans!
Thanks for checking in, you guys - see you again soon.


