Today I made this delightful bloom:
From the lids of these plastic cups:
Want to DIY? The only ingredients you will need are one plastic cup, four cup lids and scissors. Here goes!
Trim three of the lids in graduated sizes, like so:
Flip the lids inside out. They rumple beautifully! When nested, they become the body of the flower.
For the flower center, cut a long rectangular slice from a plastic cup:
Then trim the rectangle to look like a weird, elongated fork, as in the picture below:
In the same way you would curl a ribbon, use scissors to curl each 'tine.'
Note: the longer the tines, the fuller the curls.
Final step: poke the curled fork-thingy down through the nested lids.
Stick it in a bud vase with some silk leaves, and whee! Isn't it nifty?!
Would you say it's a rose, or more of a peony?
I like the crystalline clear version, but check out this coppery variation...
To make that one, I just hit each petal with a little 'zzzzt' of metallic spray paint before assembling the fleur. I only spritzed enough for partial paint coverage, so some of the light shines through the petals.
That's the tute - hope you liked it. See ya!
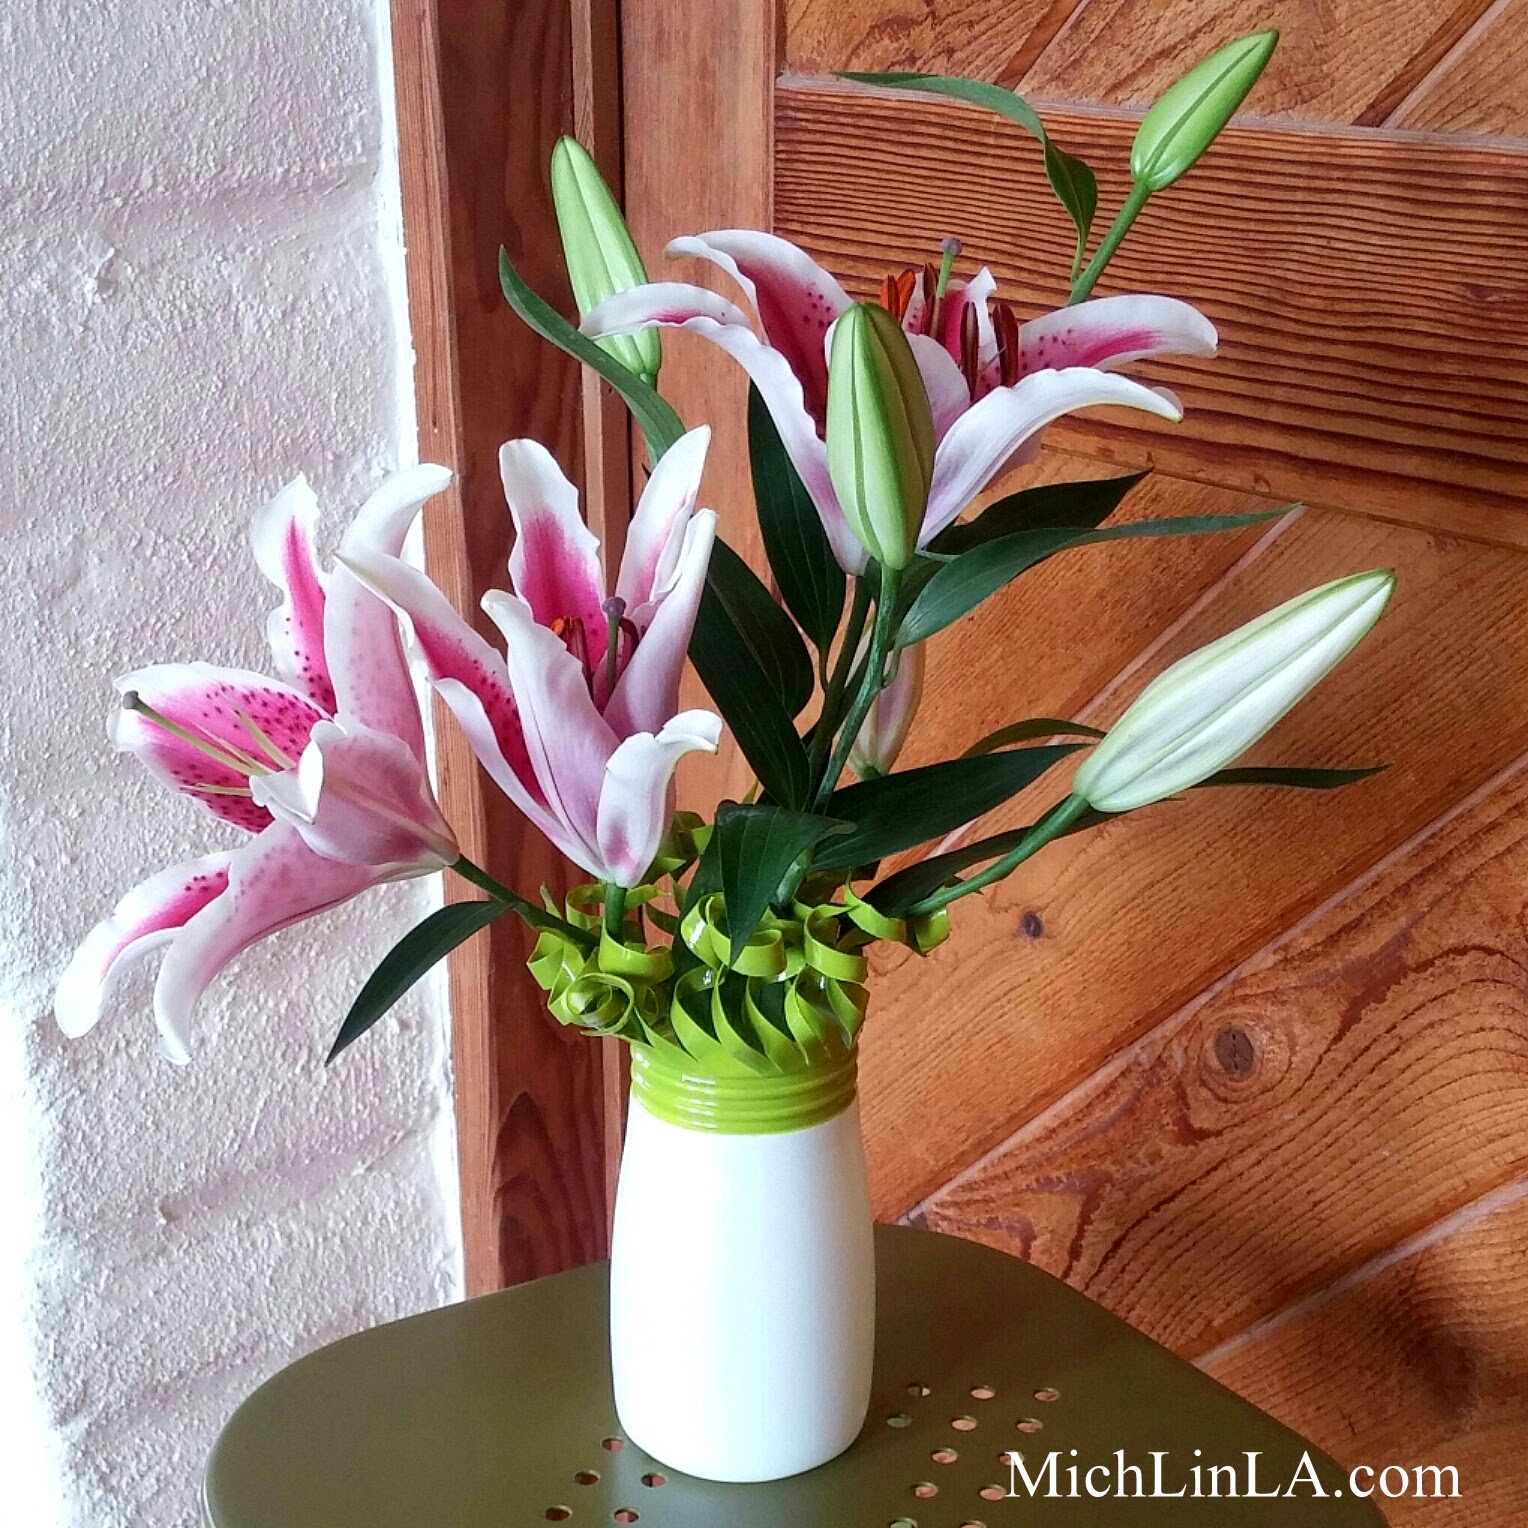
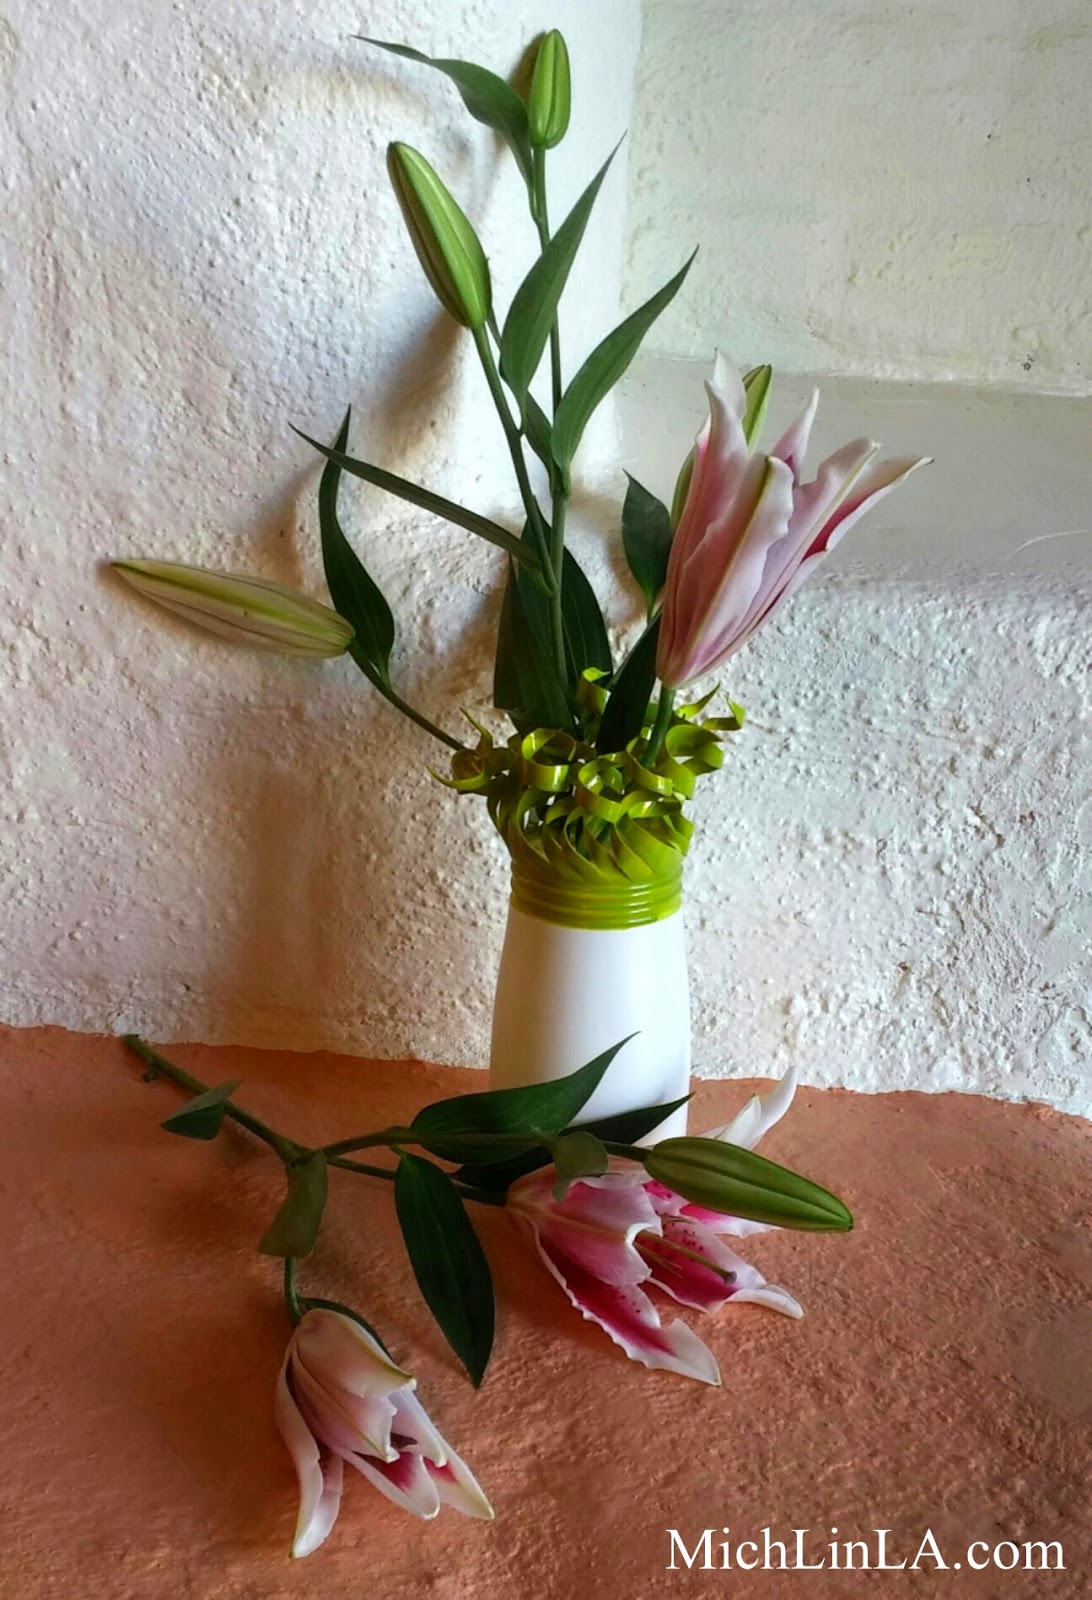
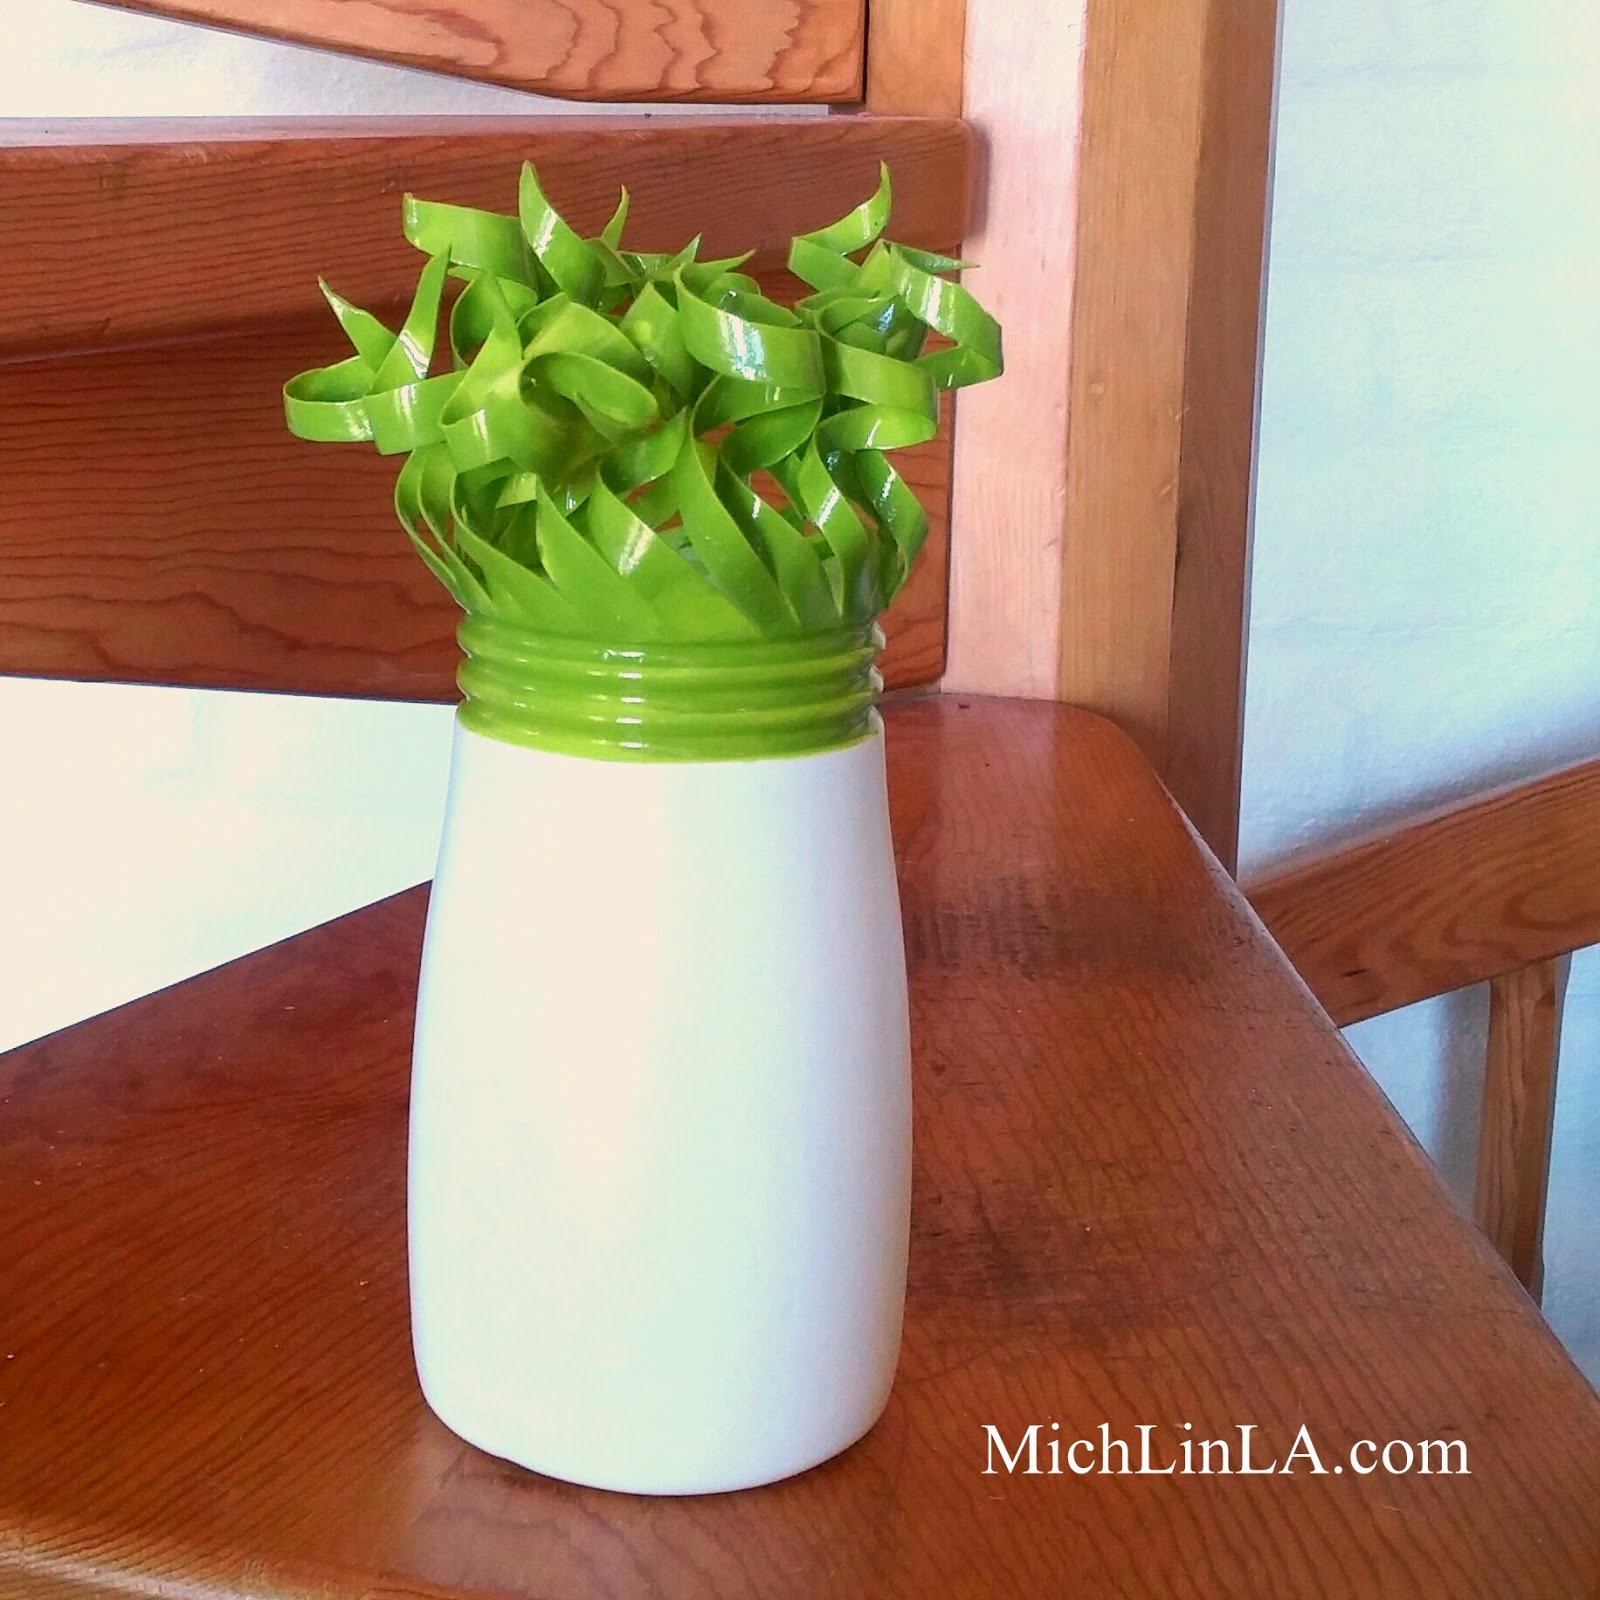
This is my new favorite project. A flower vase completely upcycled from trash, featuring a built-in collar of springy tendrils. Please to check it out!
The tendrils are not only decorative - they also serve as a kind of flower frog. They cluster together to help your flower stems stay where you put 'em. Here they are in closeup:
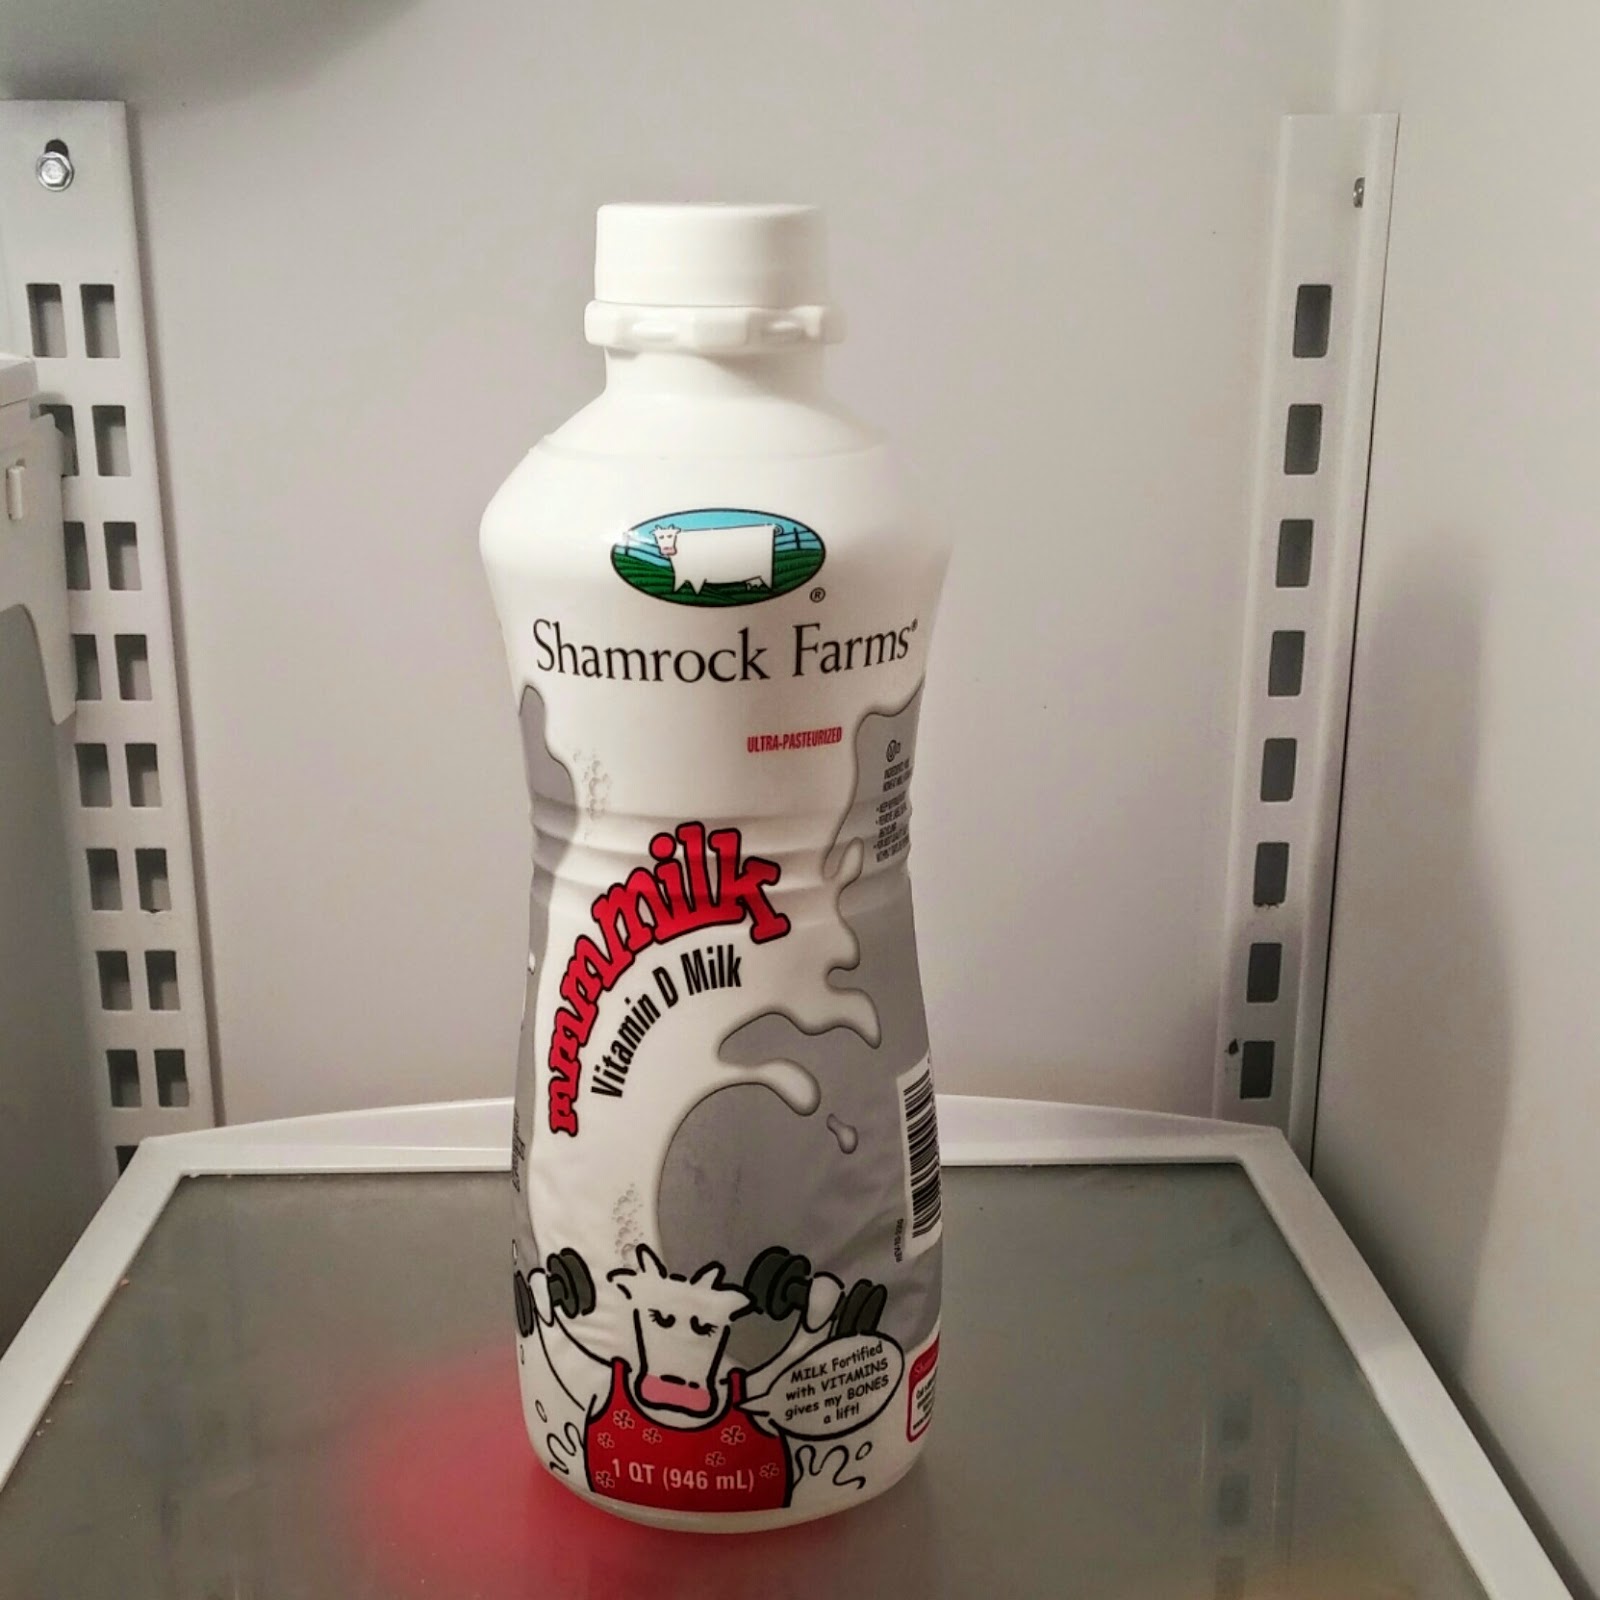
What's it made of, you ask? An empty plastic milk bottle. That's right, it went from this:
To this!
Here, my dears, is the very interesting DIY.
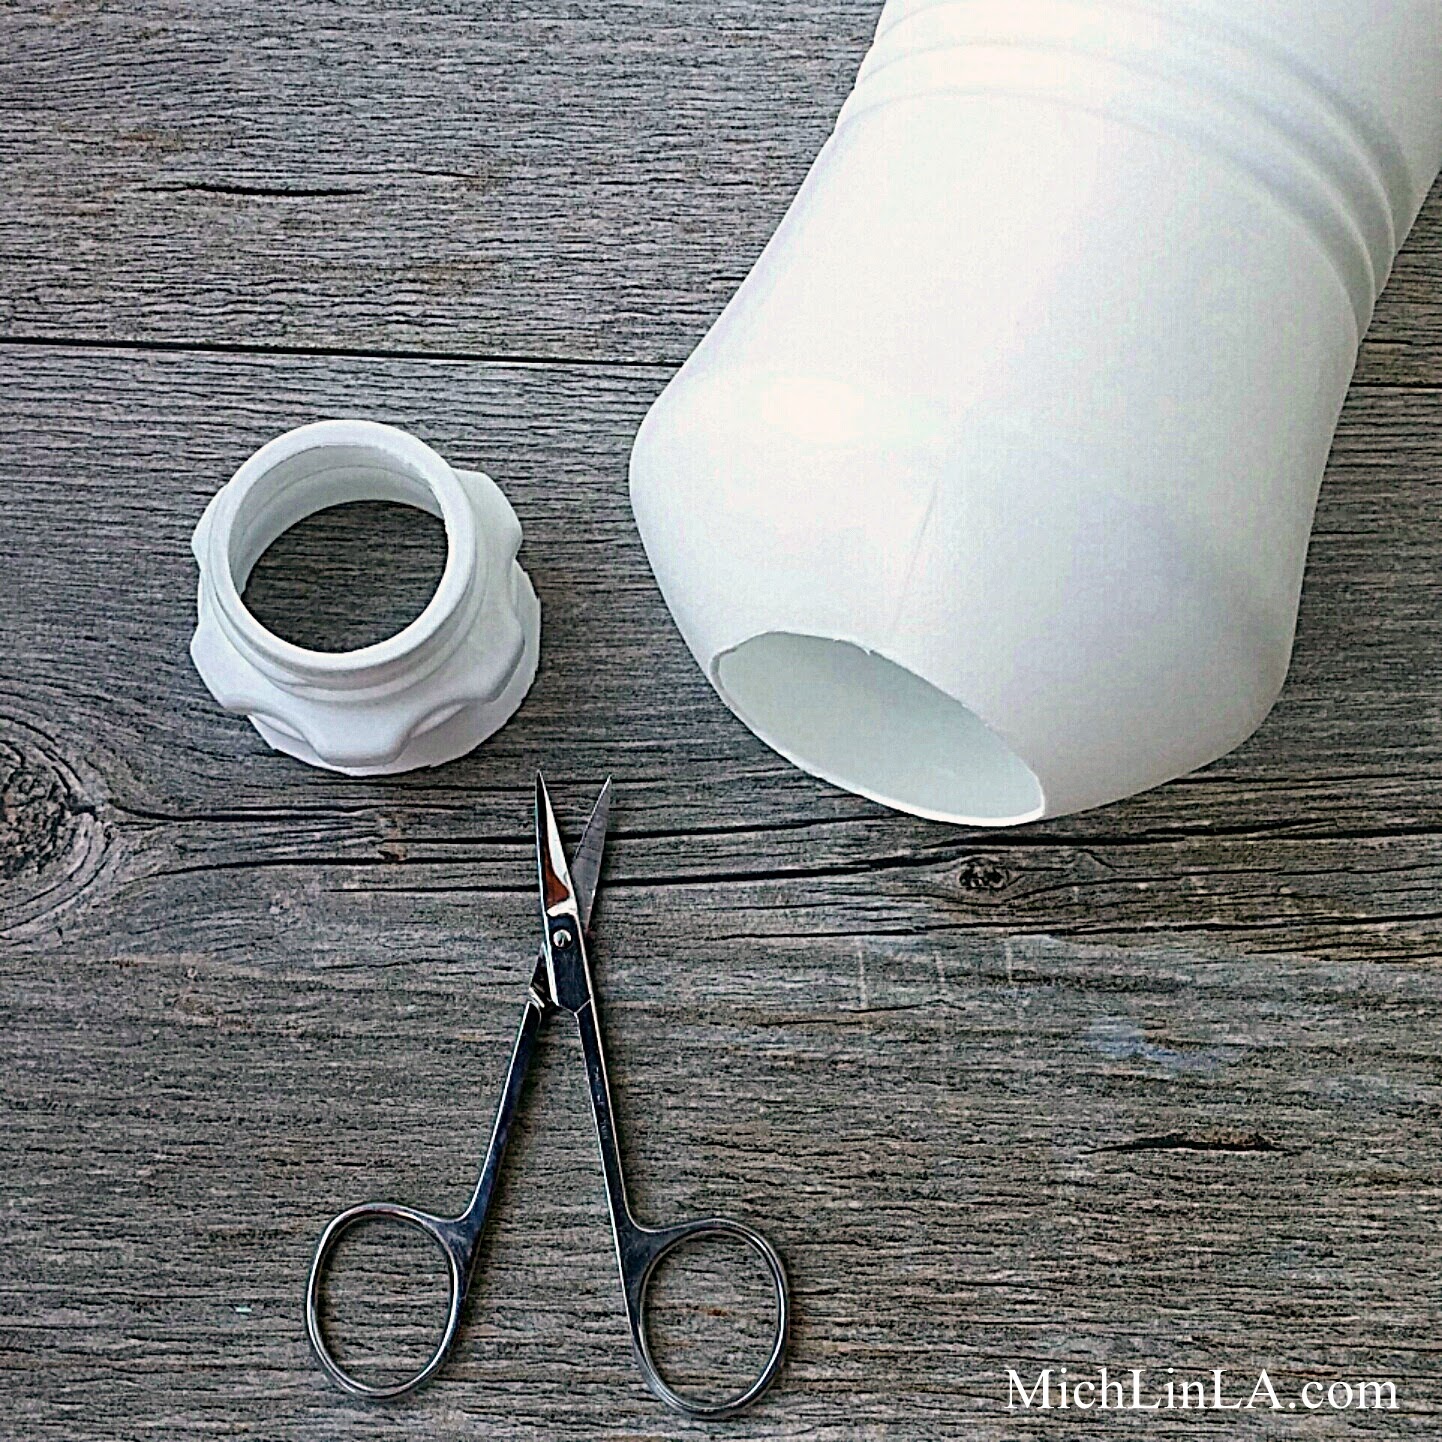
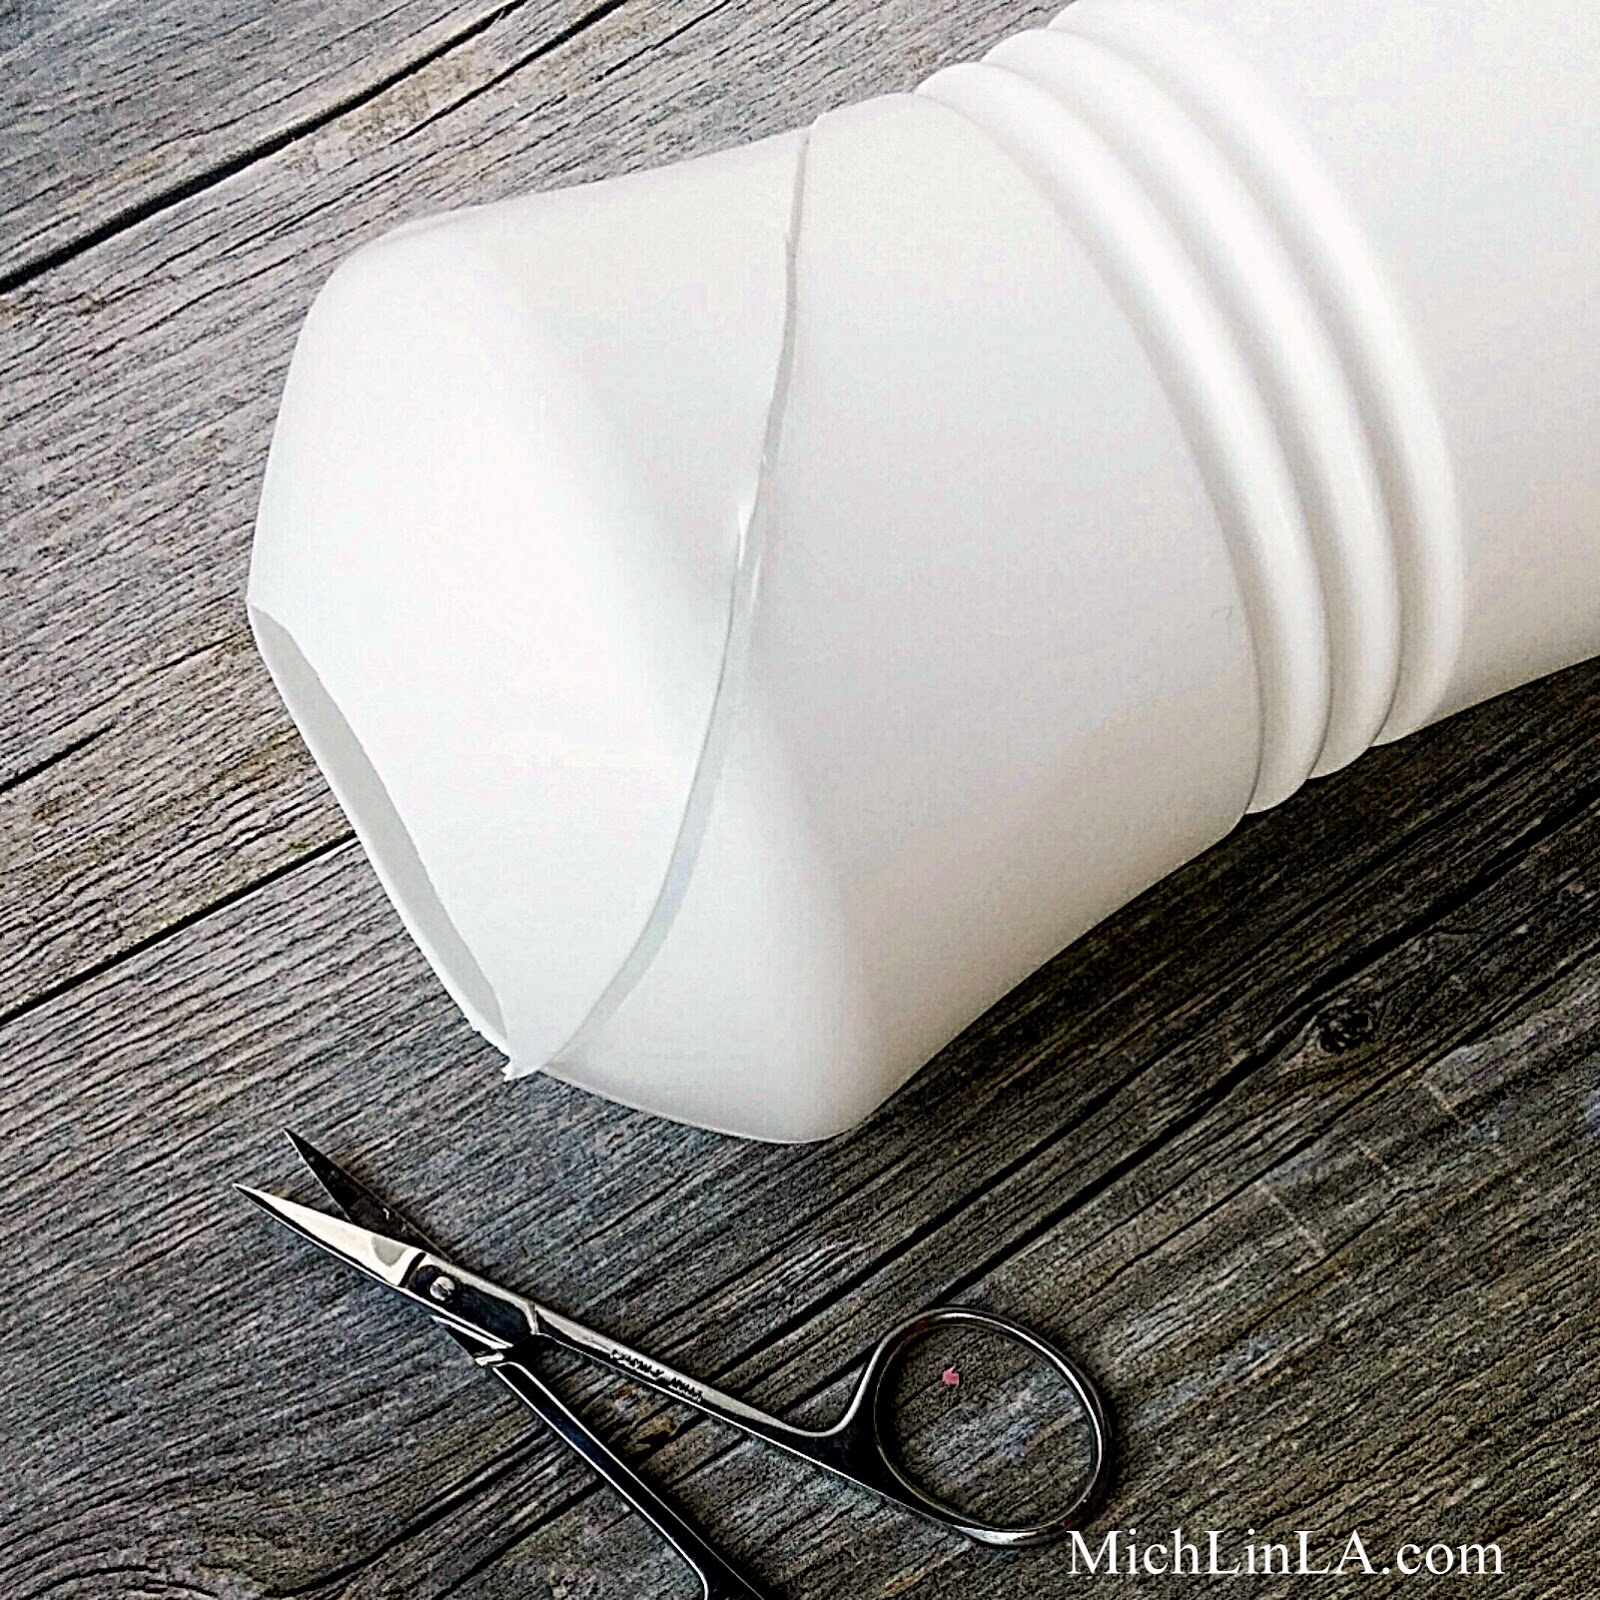
Find a bottle and cut away the neck. You can use most any opaque plastic bottle; doesn't have to be milk.
Make a diagonal cut, from the top opening to about 1/3 of the way down (or whichever spot makes sense for the silhouette of your bottle). Because of the bottle's round shape, the diagonal cut will actually be more of a spiral.
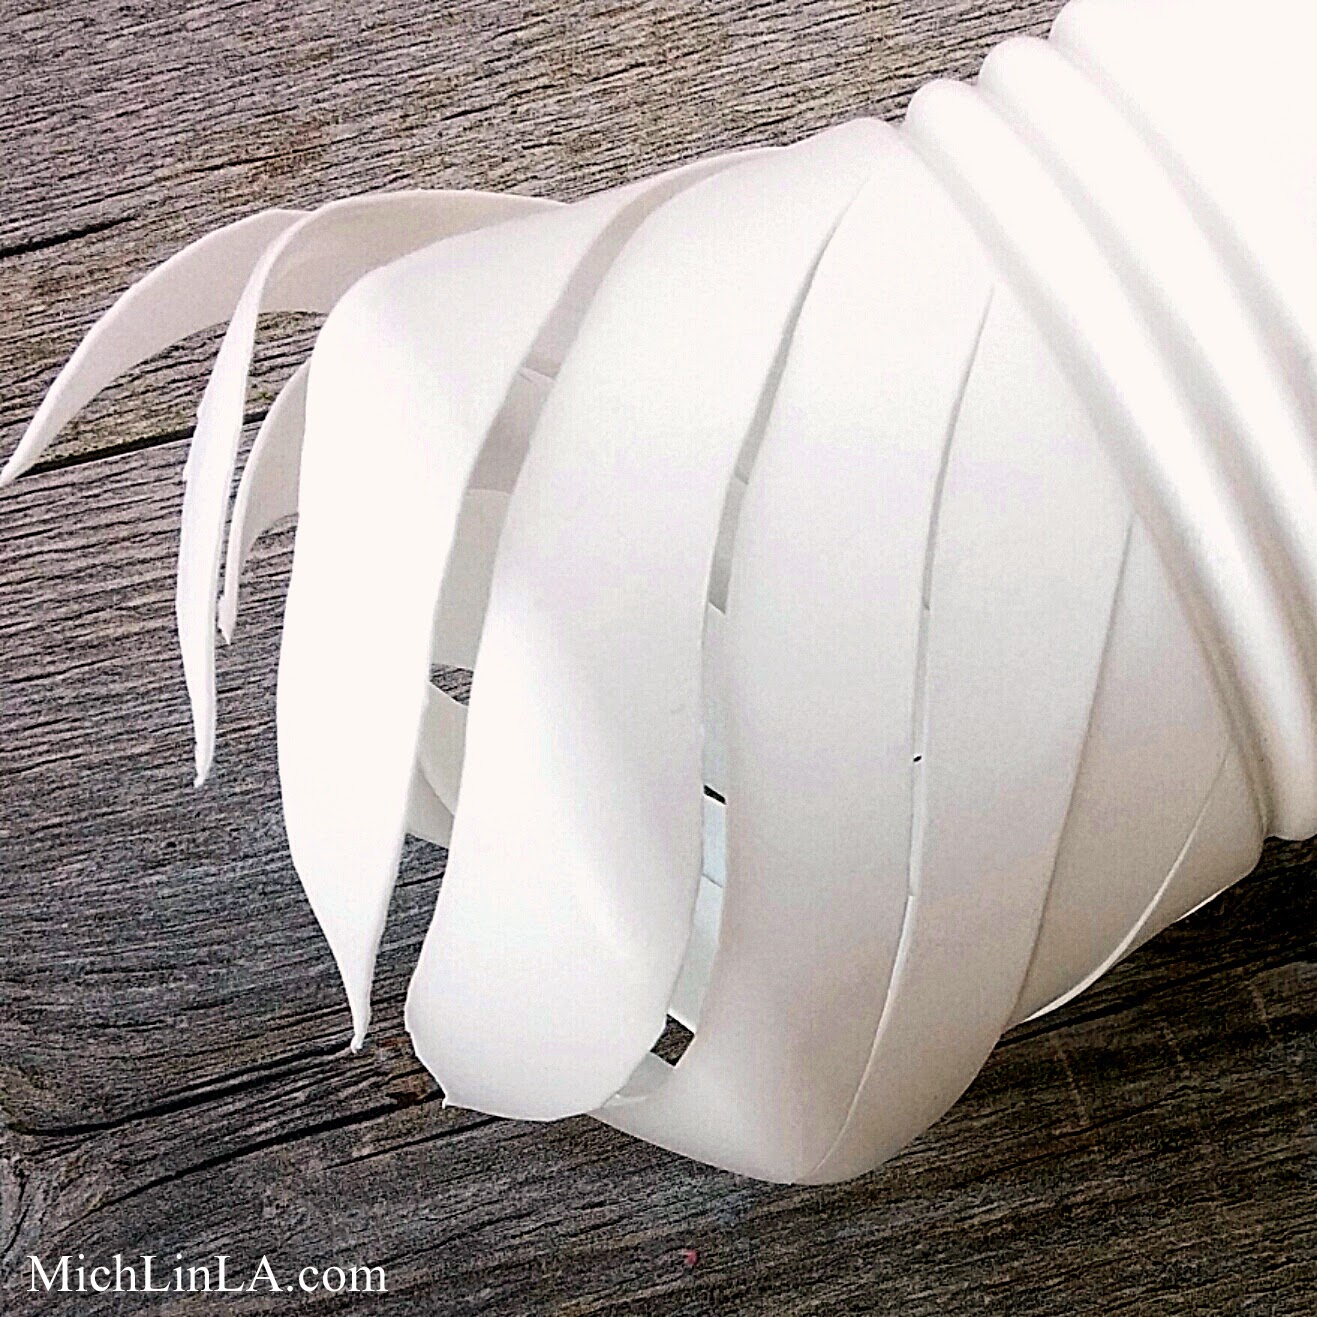
Parallel to the first cut, make a whole bunch more, going all the way around. The more cuts you make, the skinnier your tendrils will be.
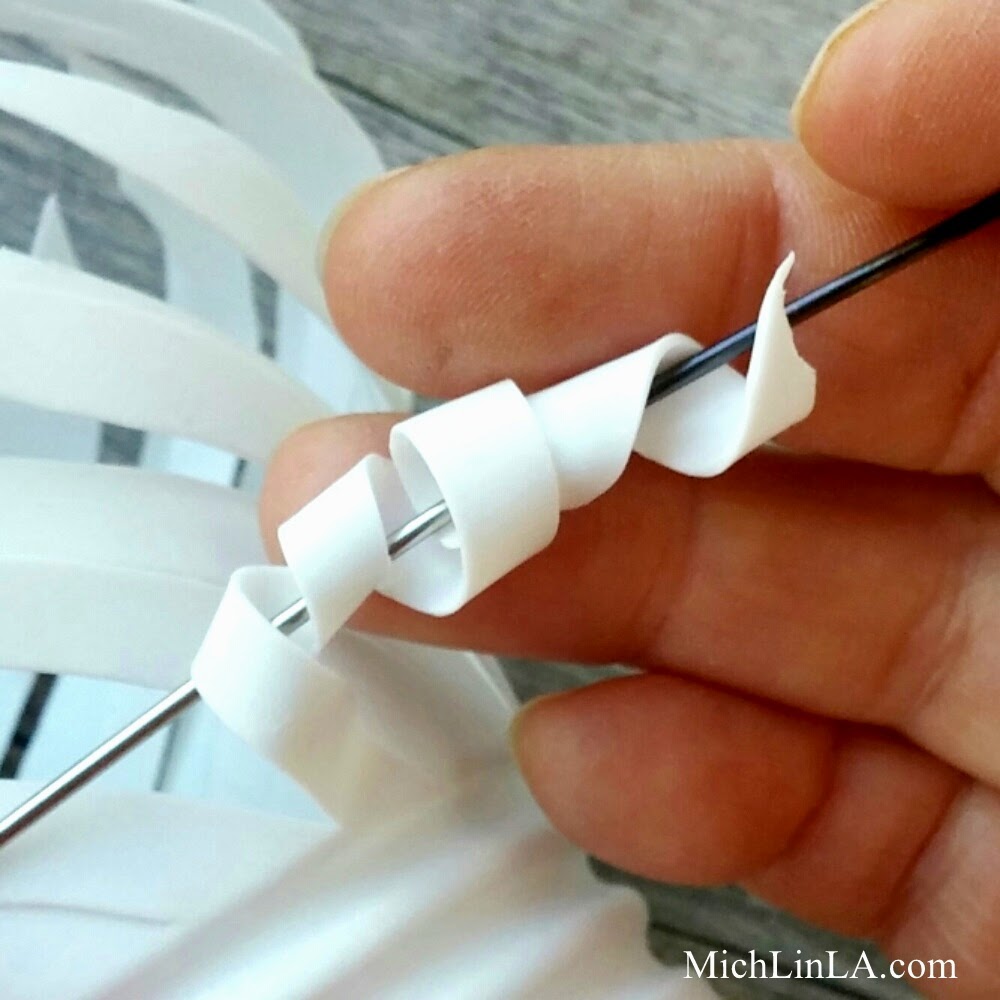
Grab one of the cut strips and wind it tightly around a skewer. Then release and - lookee there! The plastic will hold the curl!
Now, this doesn't seem to work on clear water bottles, at least not the ones I've tried, so stick with opaque plastics and you should be good. (Side note: this is the same method I used on one of my most popular posts, the uber statement jewel Ring On Fire.)
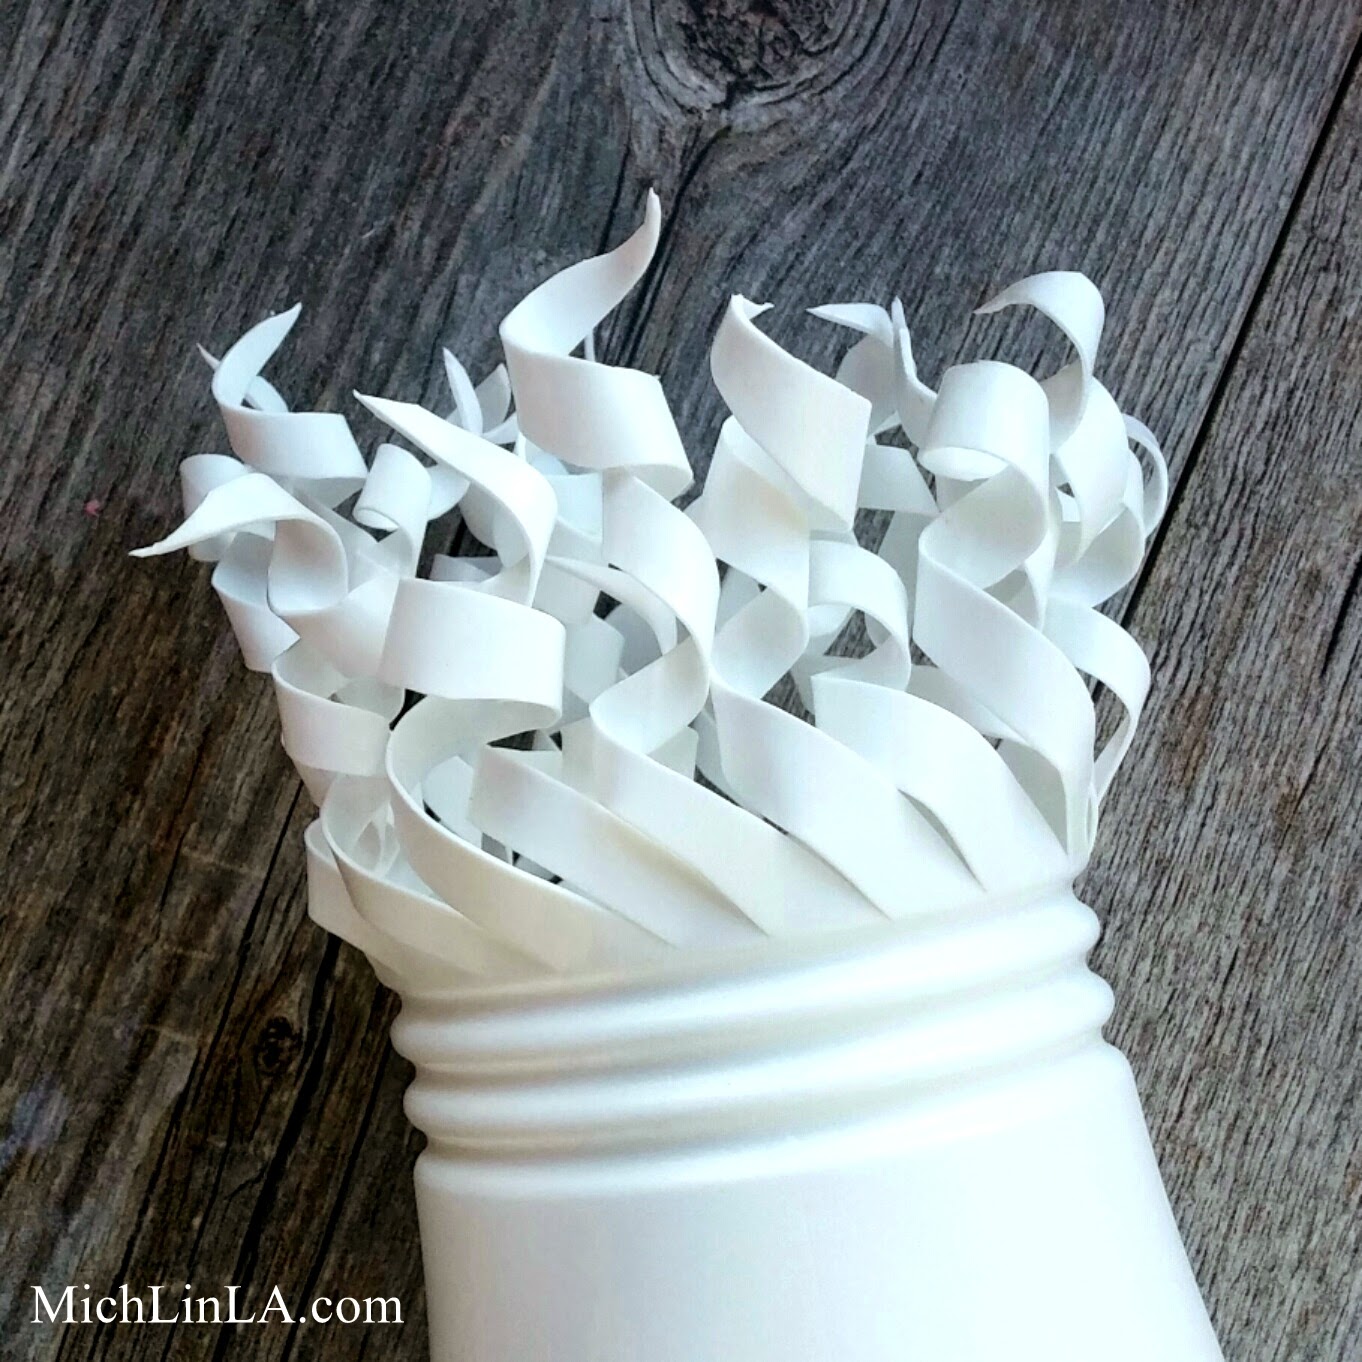
Okay, back to the vase. Keep going until all the strips are curled. This takes a little patience, because all those corkscrewy little things tend to get in each others' way. If you have to say a bad word, go right ahead.
The final result: wowsers!
At this point, your vase is essentially done. Use as-is, or decorate in whatever way might float your boat.
To make my color-blocked tendrils, I masked off the bottom section and simply spray painted the curlicues. It took a hot minute, and the effect just delighted the heck out of me.
Other ideas: gold tendrils above a matte black base? Polkadots or stripes on the white section? Hand paint the tendrils in multiple colors? I can imagine all kinds of fabulous versions.
So who thinks they might give this a whirl? And how would you paint yours?
Oh, wait! Before I go - let's not forget the rest of the bottle. Trying to be eco-conscious here, ya know. So what can be done with the neck and the lid?
Well! In case you missed it, I made something totally and utterly adorable with those - I think you'll be surprised. CLICK HERE to pop over and see.
Thanks for coming by, you guys.
Hello again! Let's play another round of my crafty guessing game, Guess The Mystery Thing. Challenging you, I am! Who can identify the original source from which I built this here cute little candlestick?
What is that mysterious white stuff? Think you know? No peeking until you have a guess. Then scroll on down to see the reveal.
Ready? Scroll away!
*
*
*
A little further...
*
*
*
I'm thinking a lot of people might get this one - but I have been wrong before.
*
*
*
Here goes! The answer is:
The top bits from a plastic milk bottle.
The How-To is so simple. I turned the lid upside down for the base. I cut off the neck at just the spot where it begins to flare out.
Then I glued them together and inserted my candle. Isn't it odd how traditionally candlestick-like it looks?
One of these days I'm going to show you what I did with the rest of the bottle. (Hint: it's really cool.)
So did you get it right? If not, what did you think it was? Do, DO tell!
Well, isn't that a learned post title? Yes, this Guess the Mystery Thing challenge is about a stamen - you know, those little antennae-looking jobbies in the center of a flower.
Wanna play? Take a look at my pretty homemade presentation box:
The Mystery Thing is the silver stamen. What are those antennae-looking jobbies? Ooh, so familiar looking...
We're going to do a scroll down reveal, so don't peek until you think you know what it is. Oh, and this is also a double Mystery Thing - can you identify the white petals? I love making these candle-burned flowers, but hate
cutting fabric circles, so I have a little shortcut. Bonus points if
you can guess both items!
Thinking cap plugged in? Wheels turning? Playing the Final Jeopardy tune in your head? Okay, if you're ready - let's scroll!
*
*
*
*
Scrolling...
*
*
*
*
*
The answer is...tada!
Earnuts! (For clueless dudes and non-pierced-eared people, they go on the backs of post earrings.)
I unrolled three of them slightly, like so:
Then I stacked 'em on a headpin to make my silvery flower stamen.
Isn't that fun? Find those stray earnuts at the bottom of your jewelry box and give it a try.
Now for the bonus question: how did I cheat the flower circles? Answer:
Rose petals from the dollar store wedding section. True, I have to trim them a bit to get different sizes, but it really cuts down on that fabric-circle-cutting labor.
Okay, scout's honor - did you guess either Mystery Thing? Do tell!
Check out this little starburst trivet.
Made from dollar store corncob holders!
Mine are small ones, but these can be made in any size - even huge! I love it with a teeny succulent set in the middle.
Tons of ways to use it. Maybe jolly up your summer barbecue table, with a starburst dish for candy, condiments or fixin's:
It would also be cute as a candle holder or a kinda kitschy, mini starburst mirror.
The DIY? Two steps, two minutes, no tools needed. Ready? Here we go.
Step One - cut a circle out of foam core board.
Step Two - poke the aforementioned dollar store corncob holders into the foam core circle.
Um...that's it, people! Your trivet-thing is done!
Just add stuff to the middle, set on a table and bask in the cute.
Note: I'm calling it a trivet, for lack of a better descriptive word, but it would not take heat well. So don't set any hot pans on top!
Hmm, I am also thinking about making a great big one to hang up, with either a mirror or a photo in the center. If I painted the corncob rays silver, I'd have metallic starburst wall decor.
What say ye, does anyone think they'd try it? What would you do with yours?
Today, a new entry in my DIY series featuring Stuff On Sticks. Check these out: little button-topped place cards!
They're repurposed from the type of zip tie with a big flat pad for writing labels. Cool, eh?
Where to find the zip ties? Most hardware stores and home improvement stores have them in various shapes and sizes. Or try an online search for "marker cable ties."
Stick them into small pots or tiny flower arrangements for party place cards. They also make great labels for a potluck or buffet.
Not to mention weddings - being so conveniently white and all.
Ready to DIY? Gather string, a button and pointy little scissors.
Poke the scissors into the ziphole and wiggle them around to widen the opening.
Thread the button onto the string, and pass both ends through the ziphole.
Tie a knot in back (make sure the knot is chunky enough not to slip back through the hole). Then trim the ends.
That's it, you're done!
Write on them with any color Sharpie. Who's on your guest list?
There are lots of variations to the basic idea. F'r instance, layer buttons for extra buttony goodness.
Add tiny faux flower petals for a garden party vibe.
Qué más? How about fancy crystal beads? Handmade shrinky dinks? Great big sequins with several layered colors? I'm sure you guys can come up with some other suggestions. Let us hear your brilliant ideas in the comments!
Hope you liked the special guest appearance by our newest family member, Matilda the Bagel Hound. She's a five year old rescue and we loff her!
Thanks for the visit, peeps! See you again soon for more upcycled crafts and silliness.
To see the rest of the Stuff On Sticks:
Part One
Part Two
Part Three
Part Four
Part Five
Part Six
Part Seven