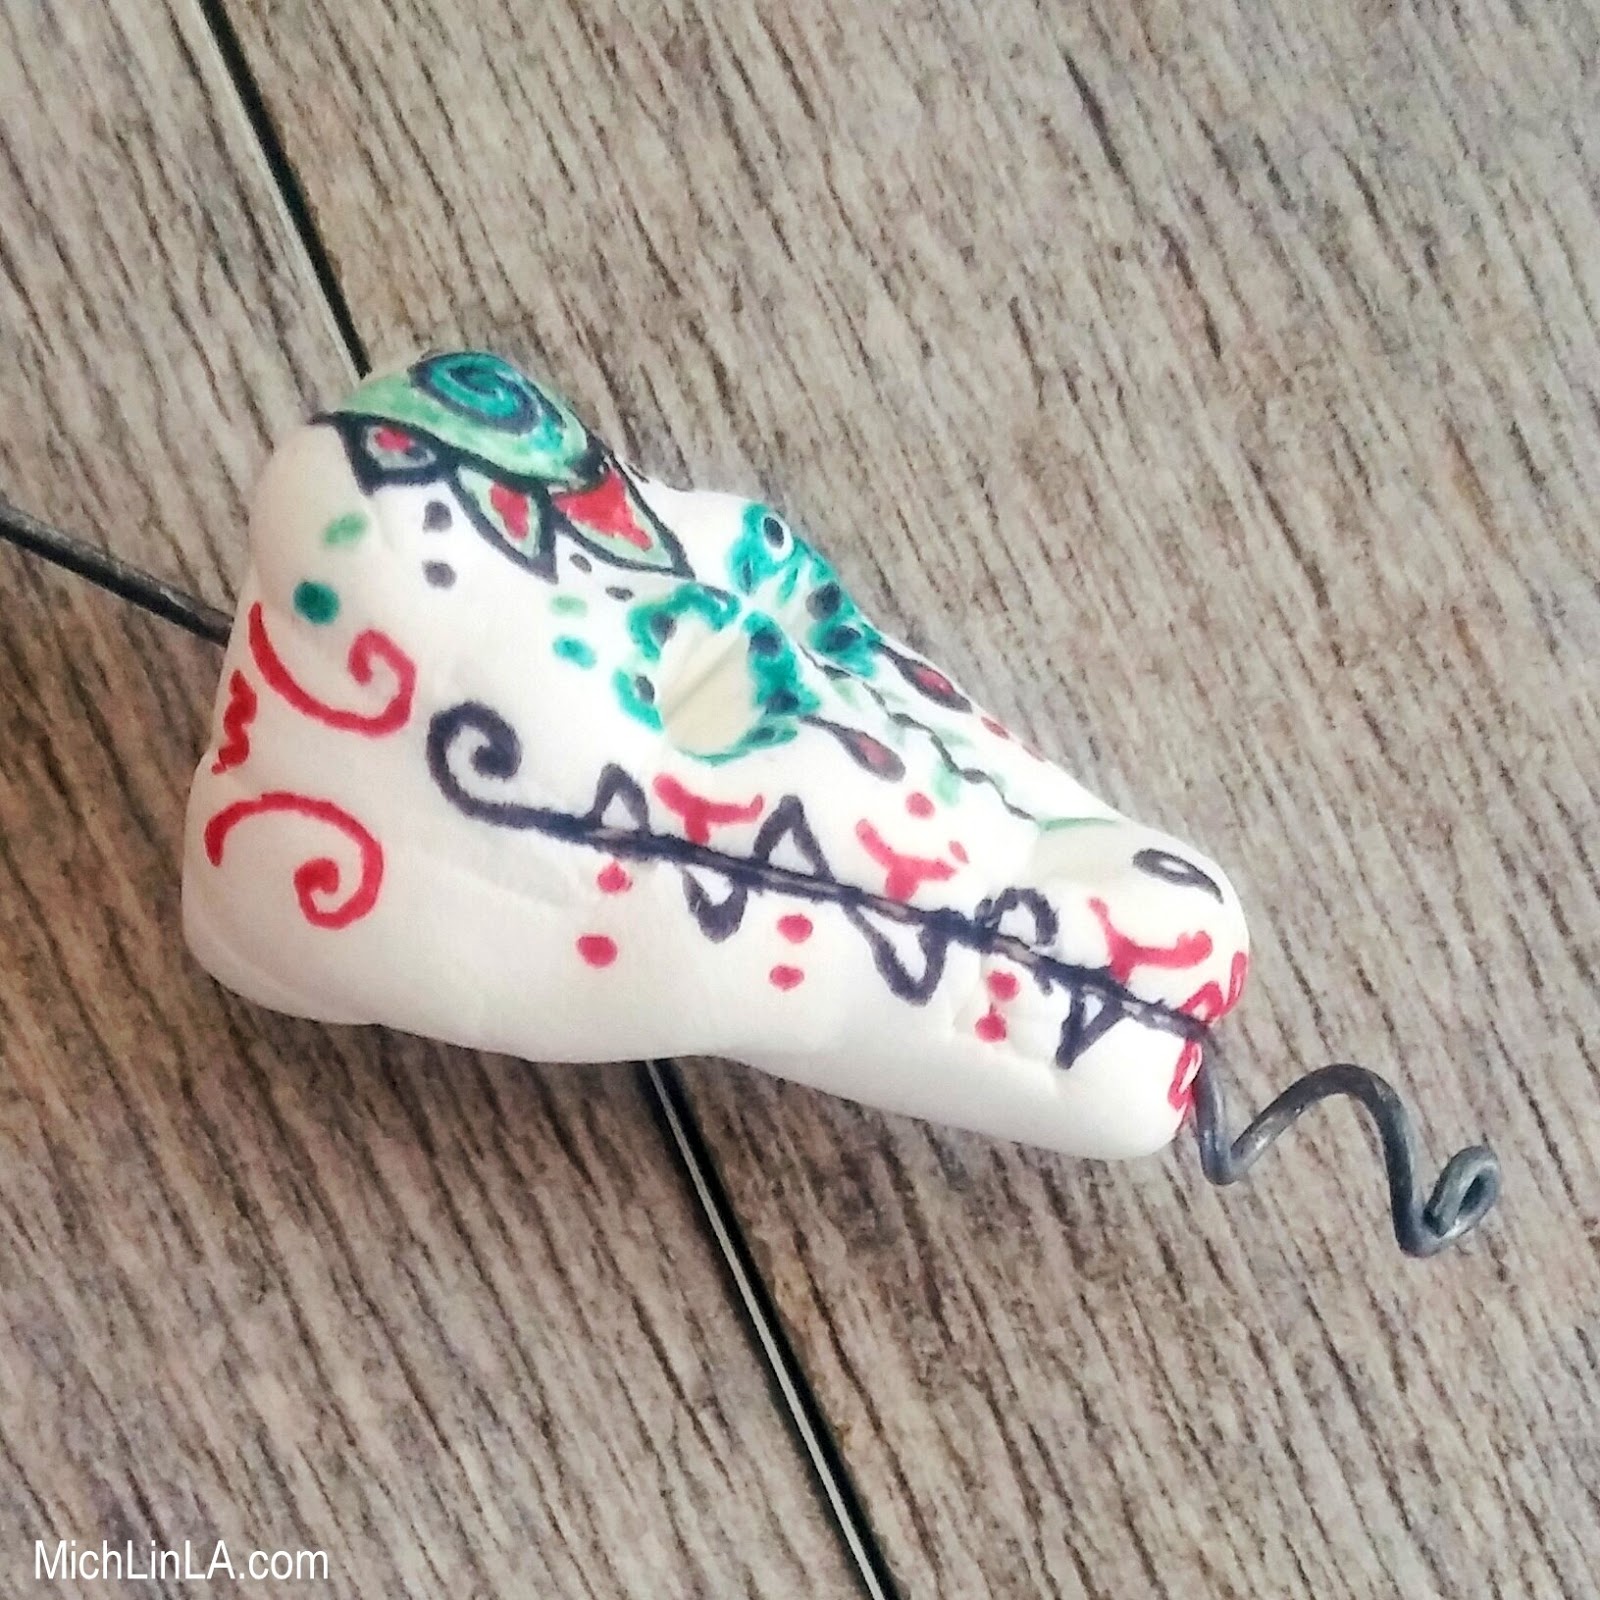
Hello again! I used some kids' air dry clay (mine was Crayola brand from the drugstore) to make a fun and weird little creature skull pendant. Take a look!
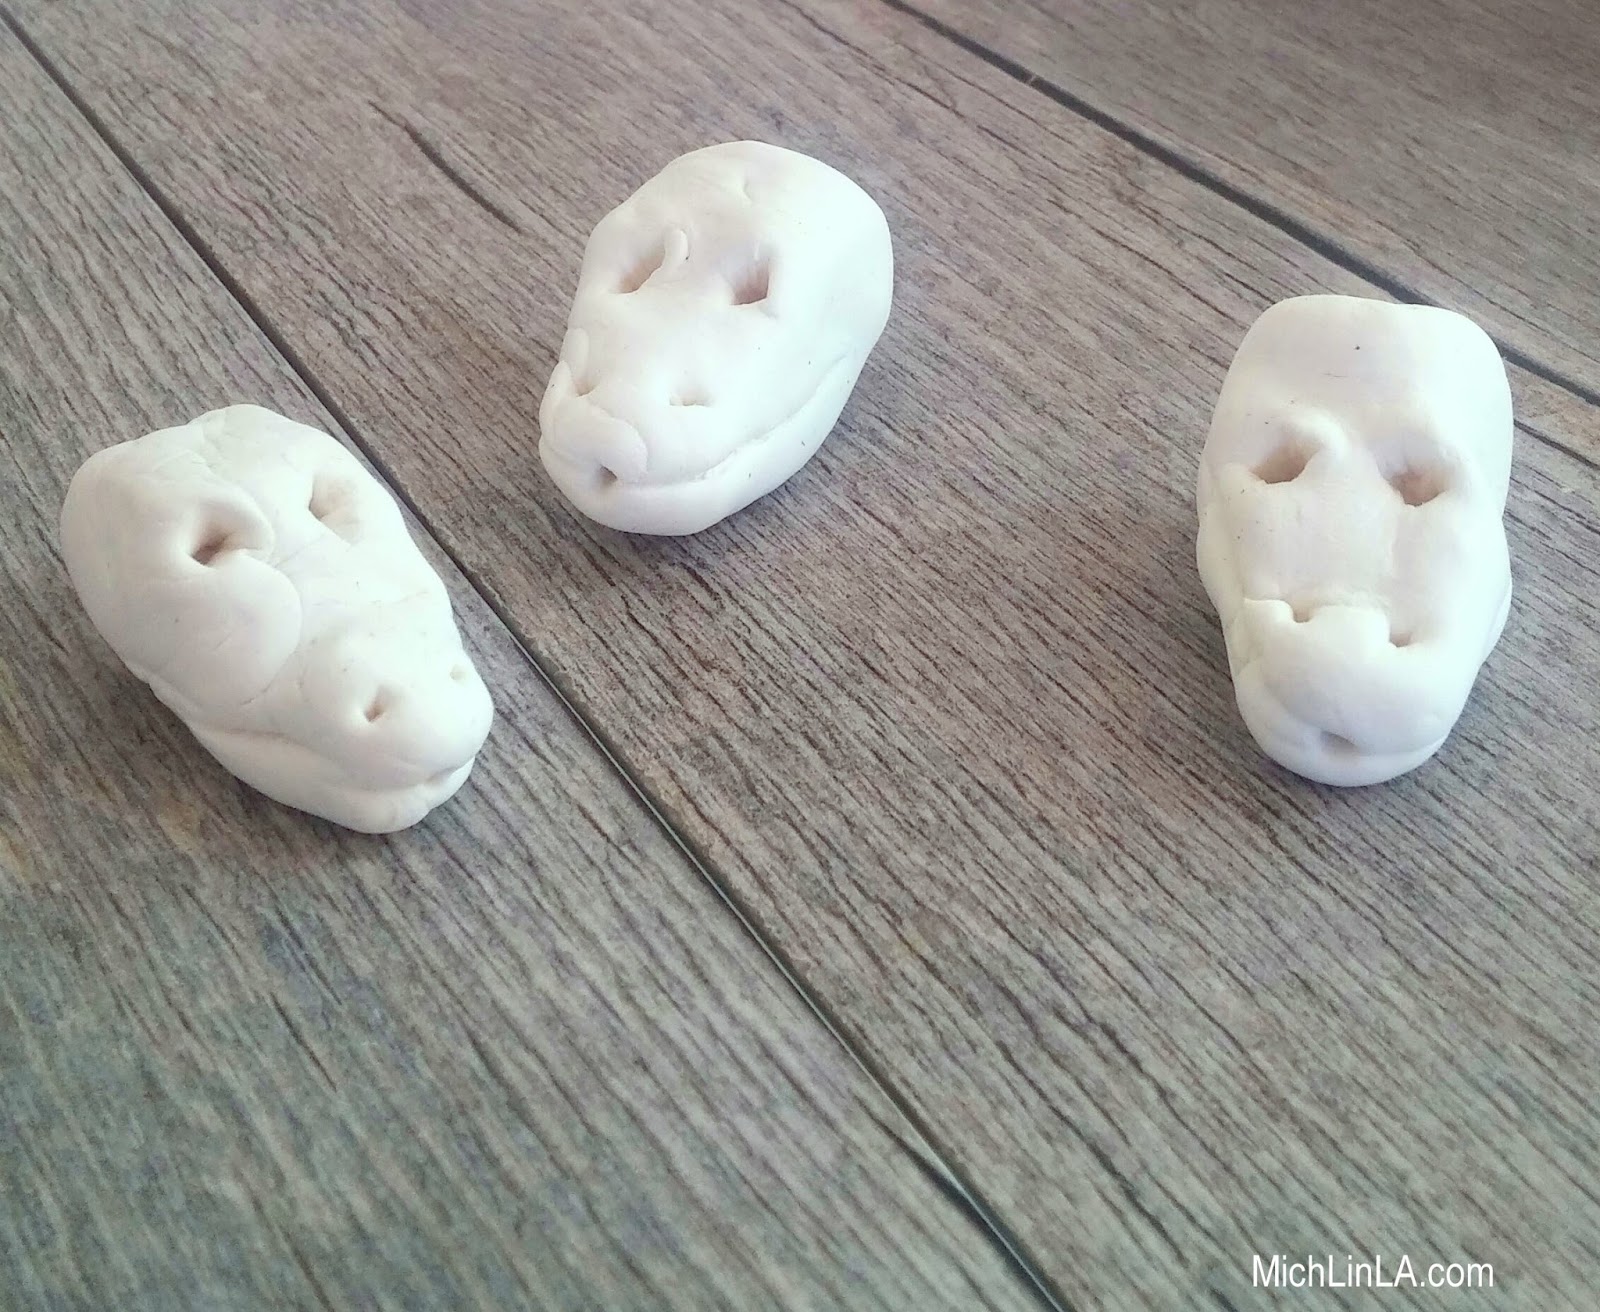
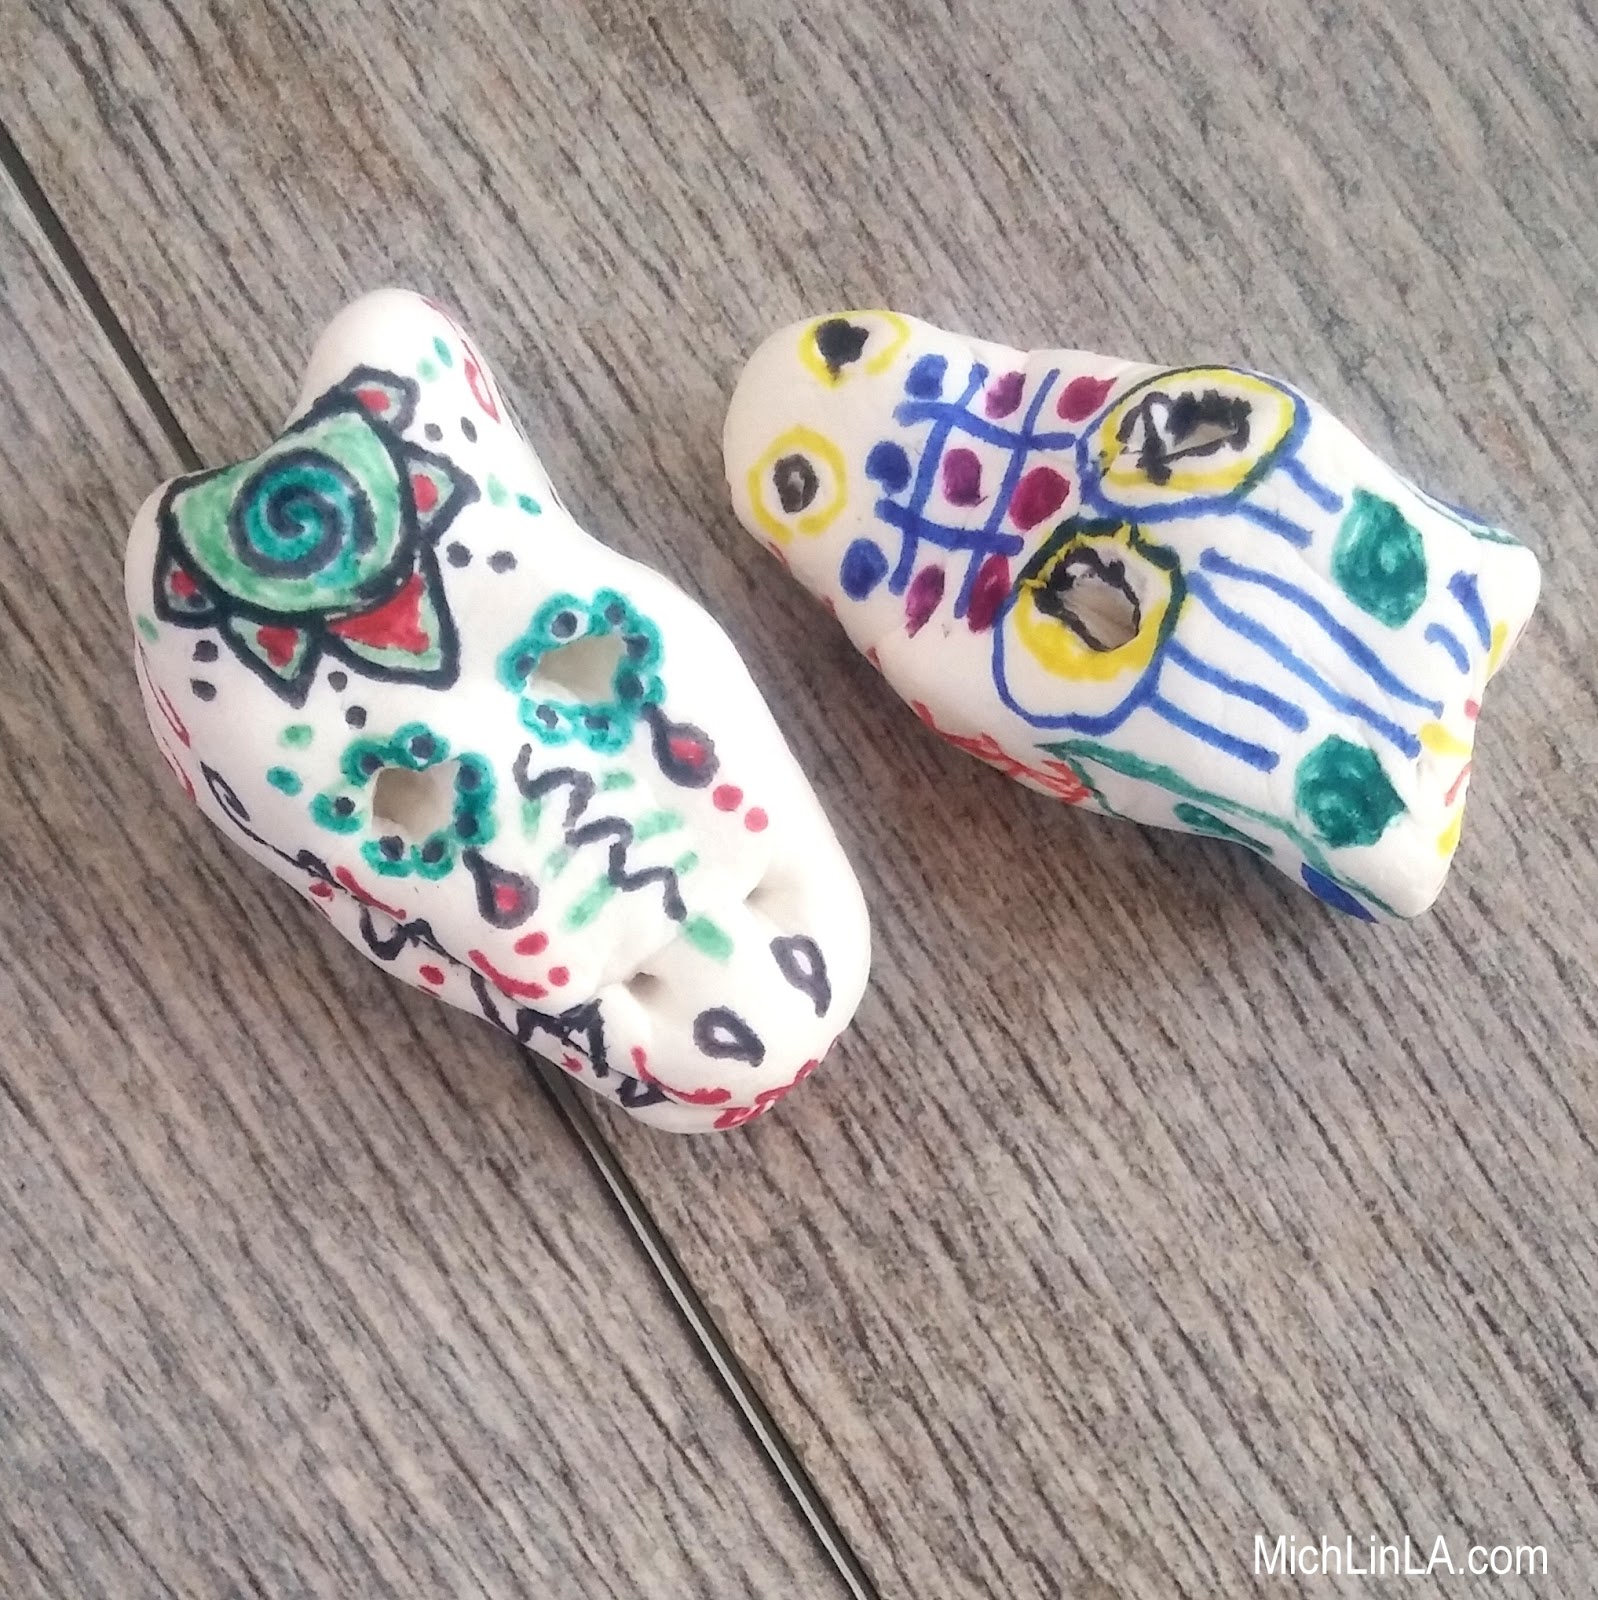
Want to try something like this? Well, here's what I did. First, using my nearly-non-existent sculpting skillz, I molded the plain white clay into these vaguely reptilian skull beads...
I'm still not sure if they are tiny dragons, baby gators, or lizards of an identified species. As you can see, pretty much anyone could whip these up. Bring in a kid to help if you aren't feeling skullish.
I left them to dry overnight, and then they were ready to decorate.
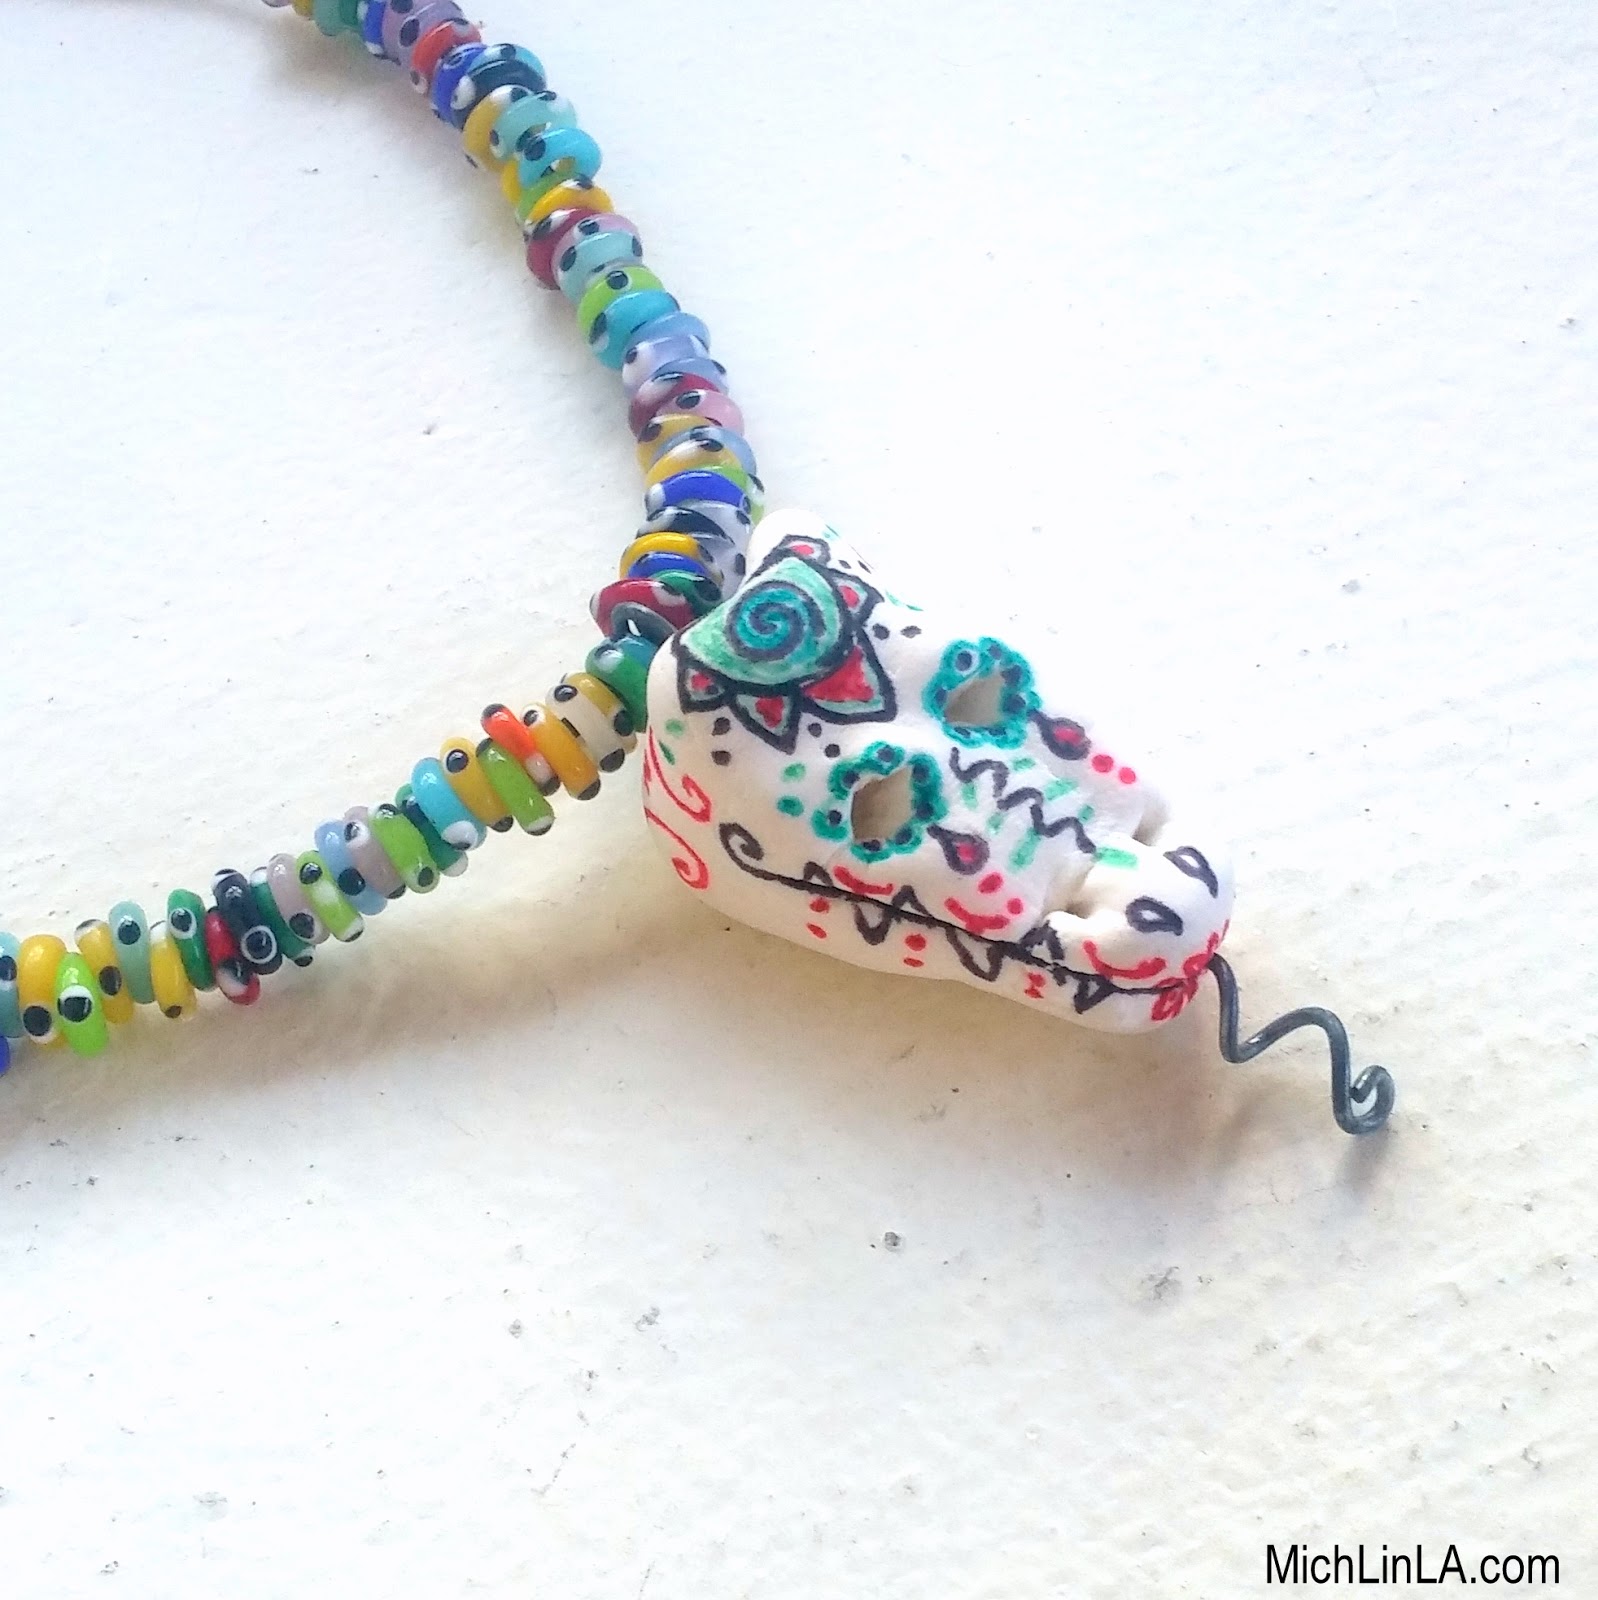
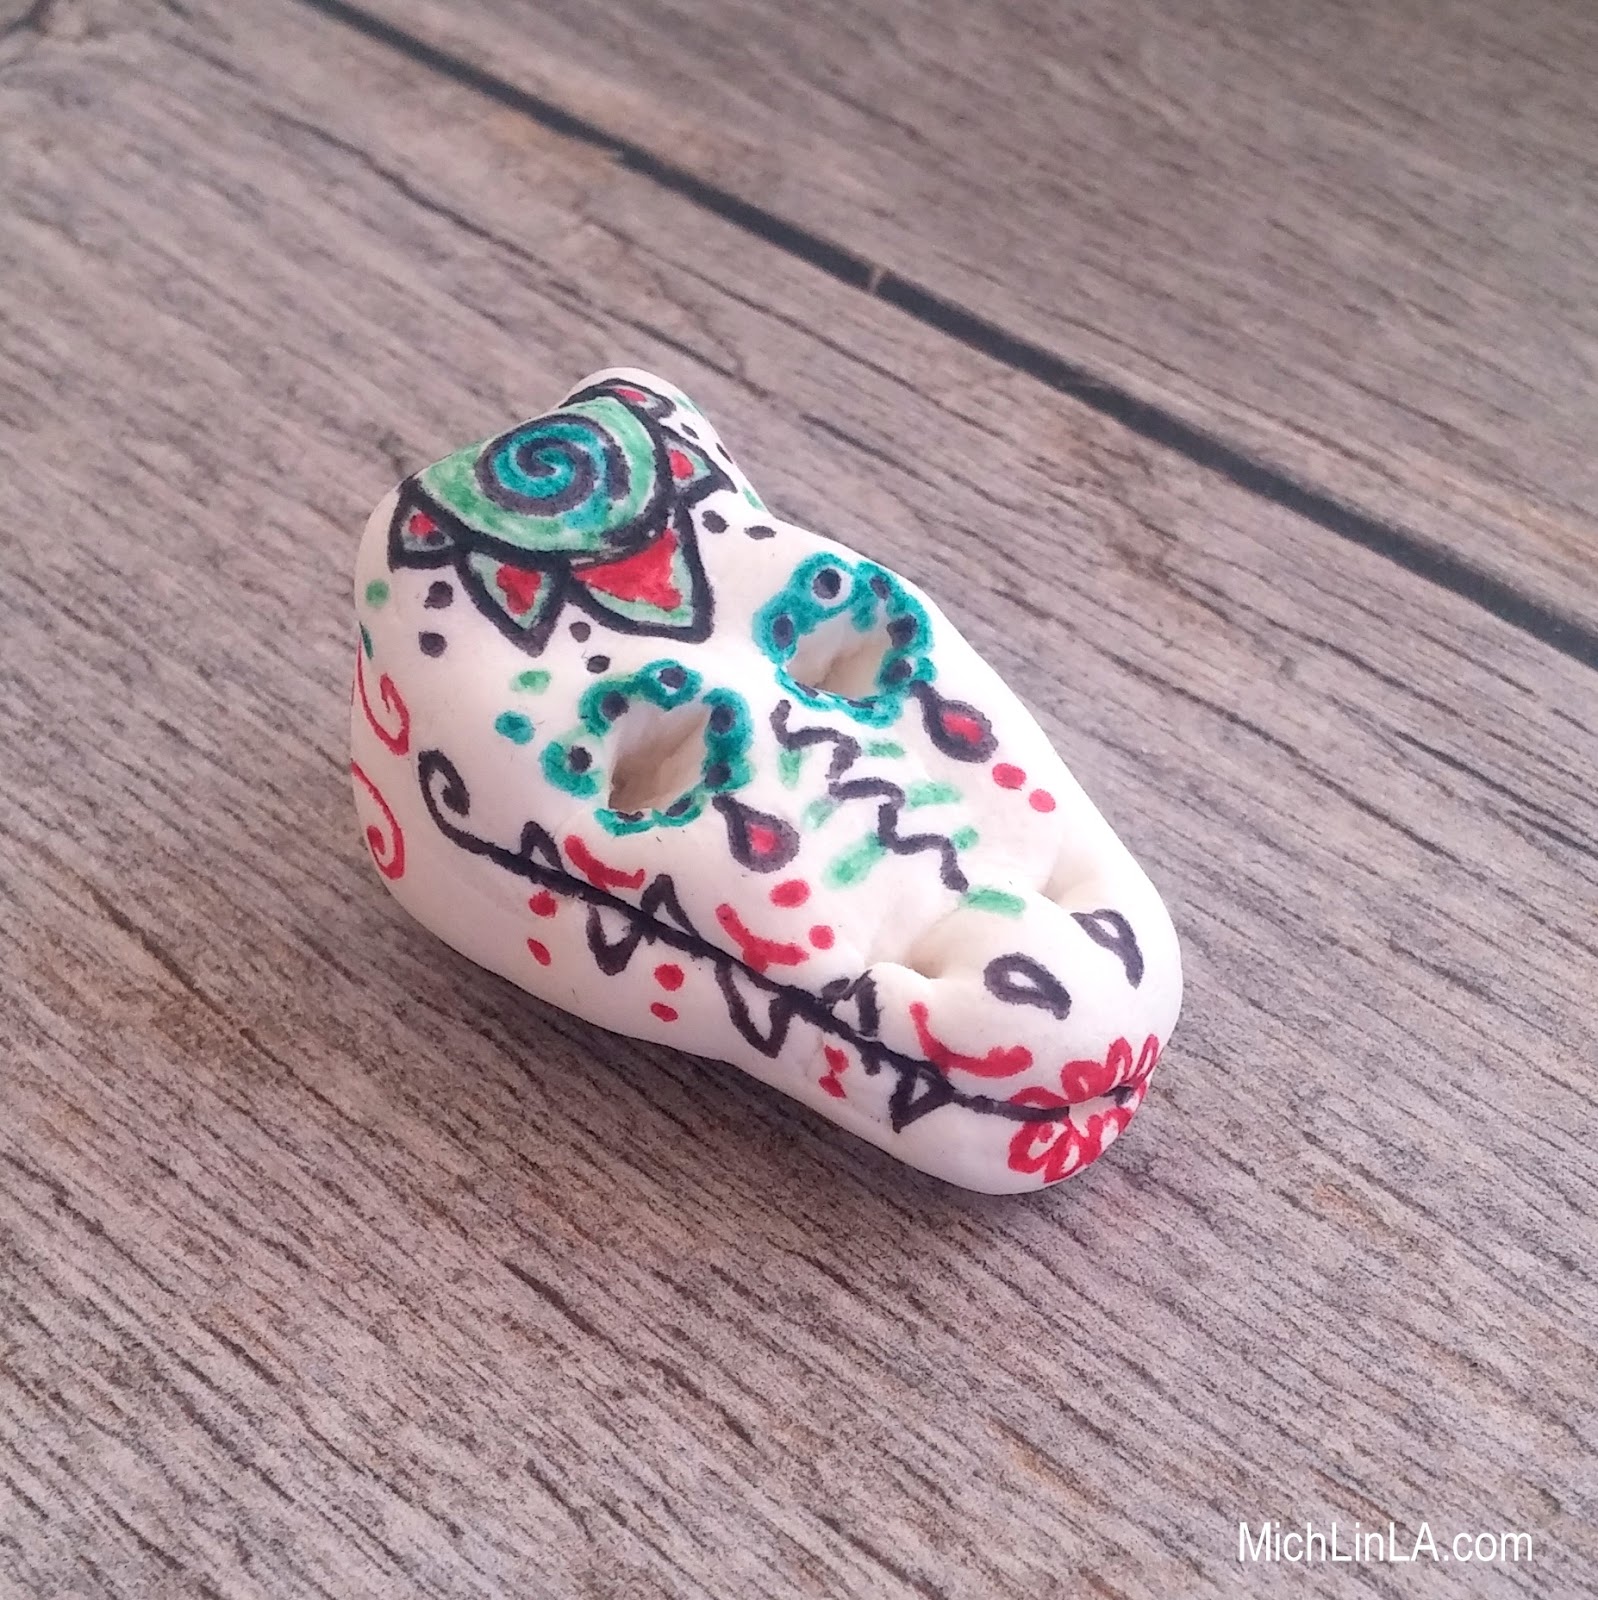
I sat down with my mom and some Sharpies, and we each did a skull. Mine:
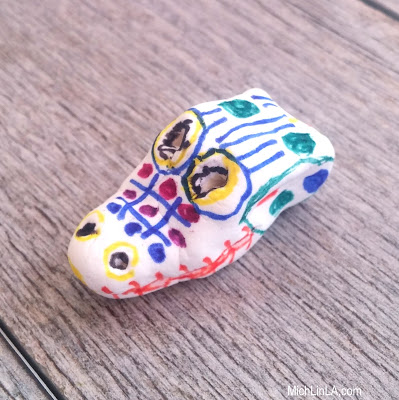
And Mom's:
I always LOVE what she does, without being able to do anything similar myself. I adore how our artistic styles are so different - it's like we come from different creative planets!
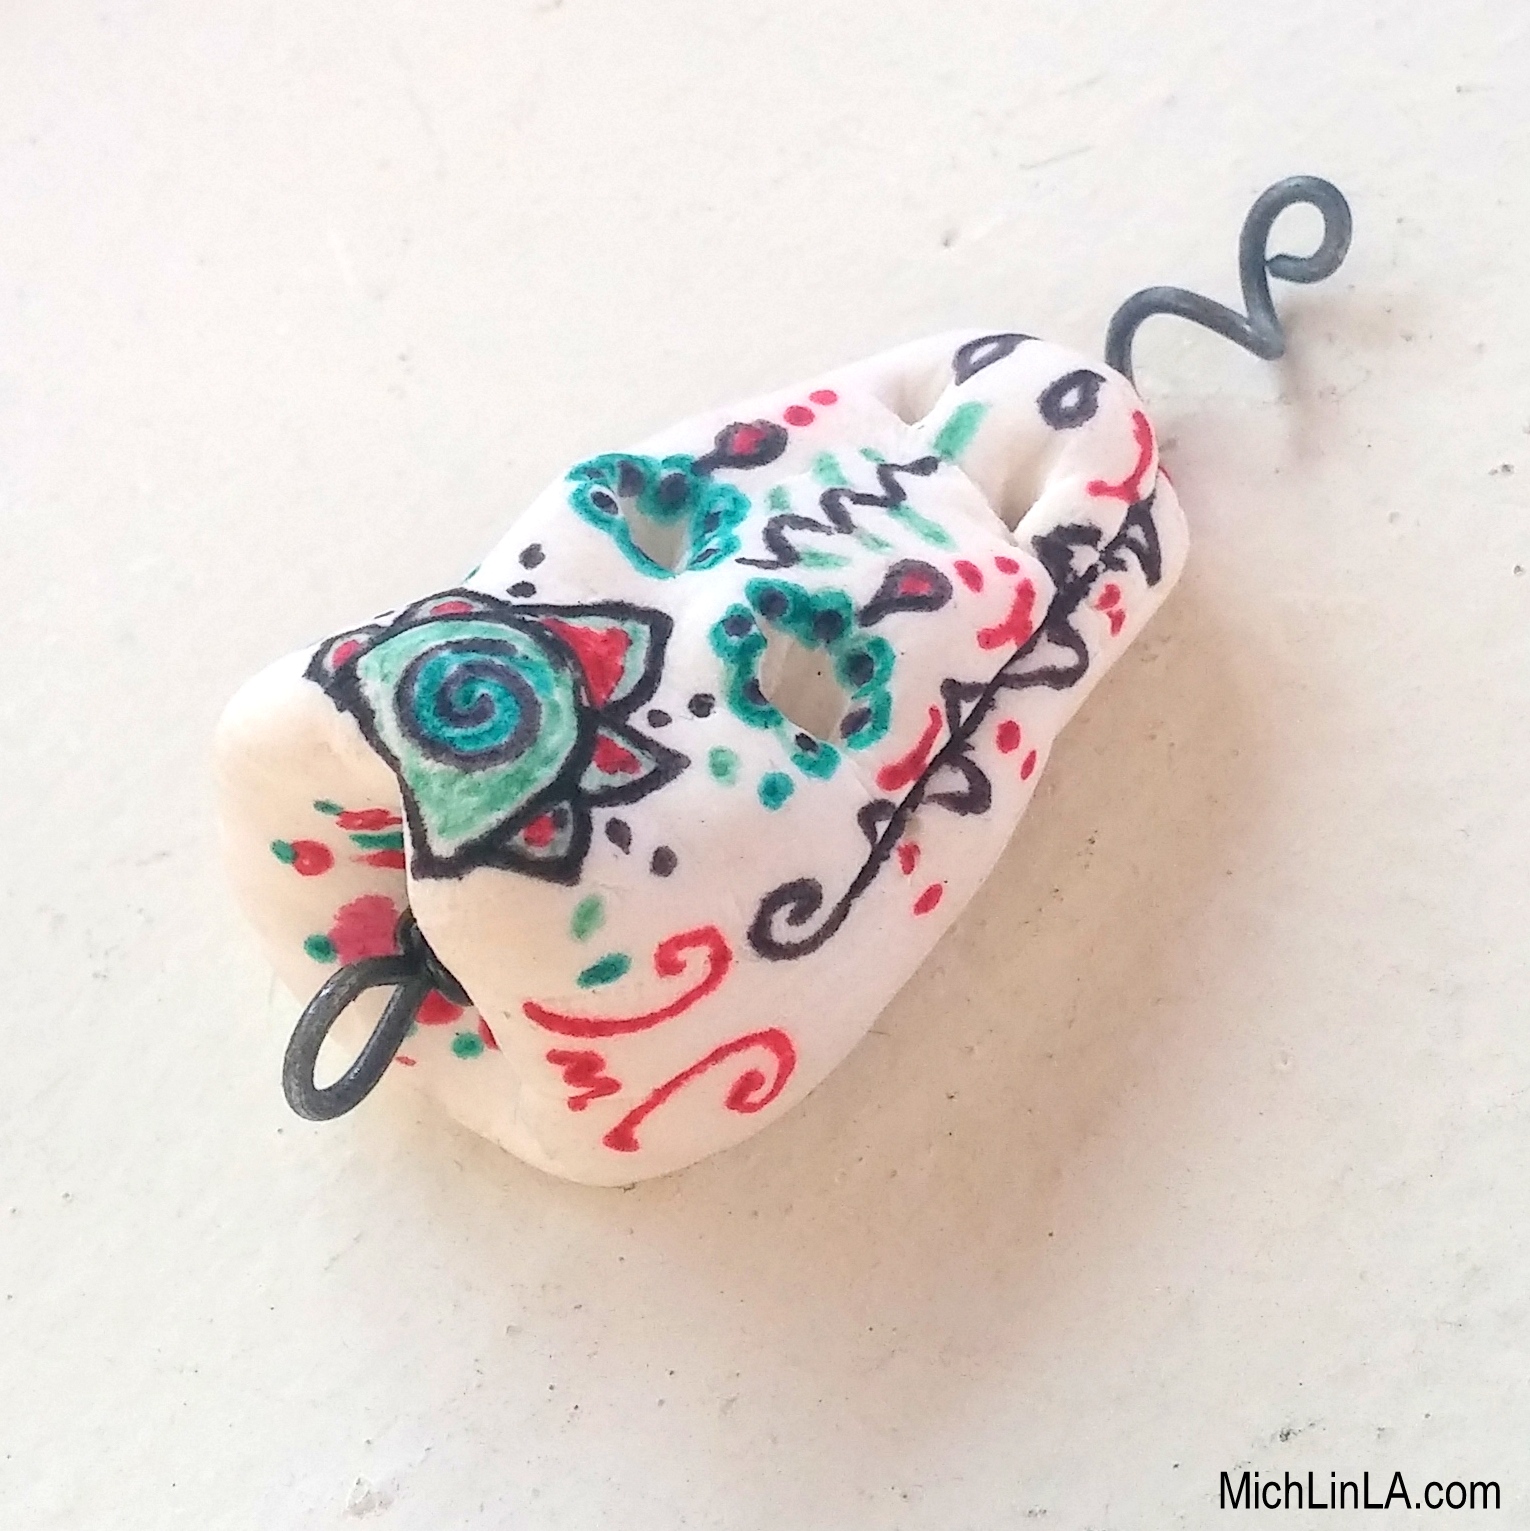
Next step: I made a curlicue on the end of some craft wire, and threaded it through the skull bead.
I finished up my pendant with a little bead tucked into that depression to protect the hole, and a loop for hanging.
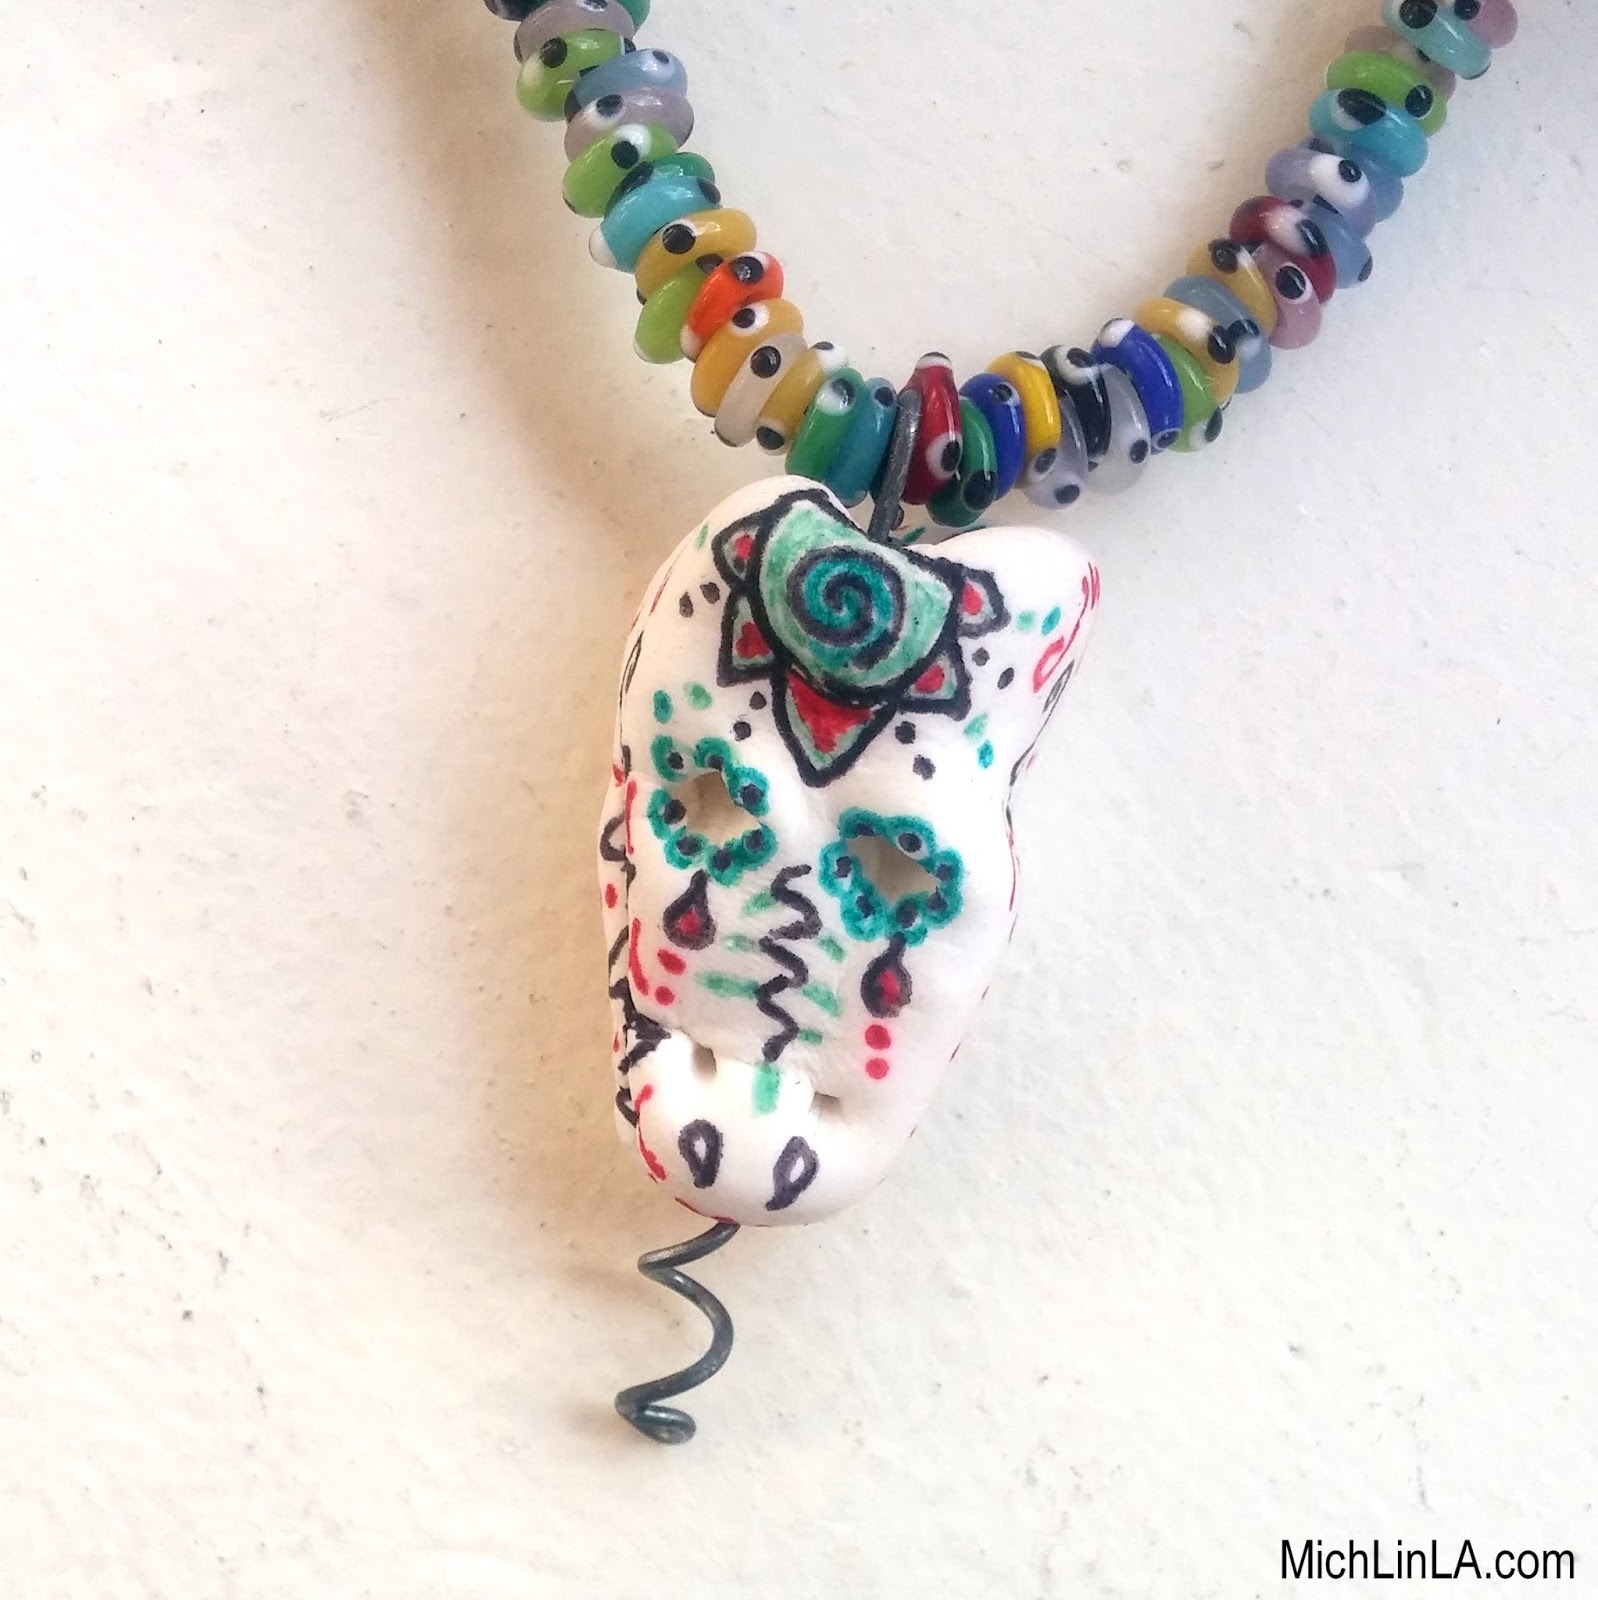
Then I added it to a bright glass bead necklace. Because the critter obviously wasn't colorful ENOUGH, right?
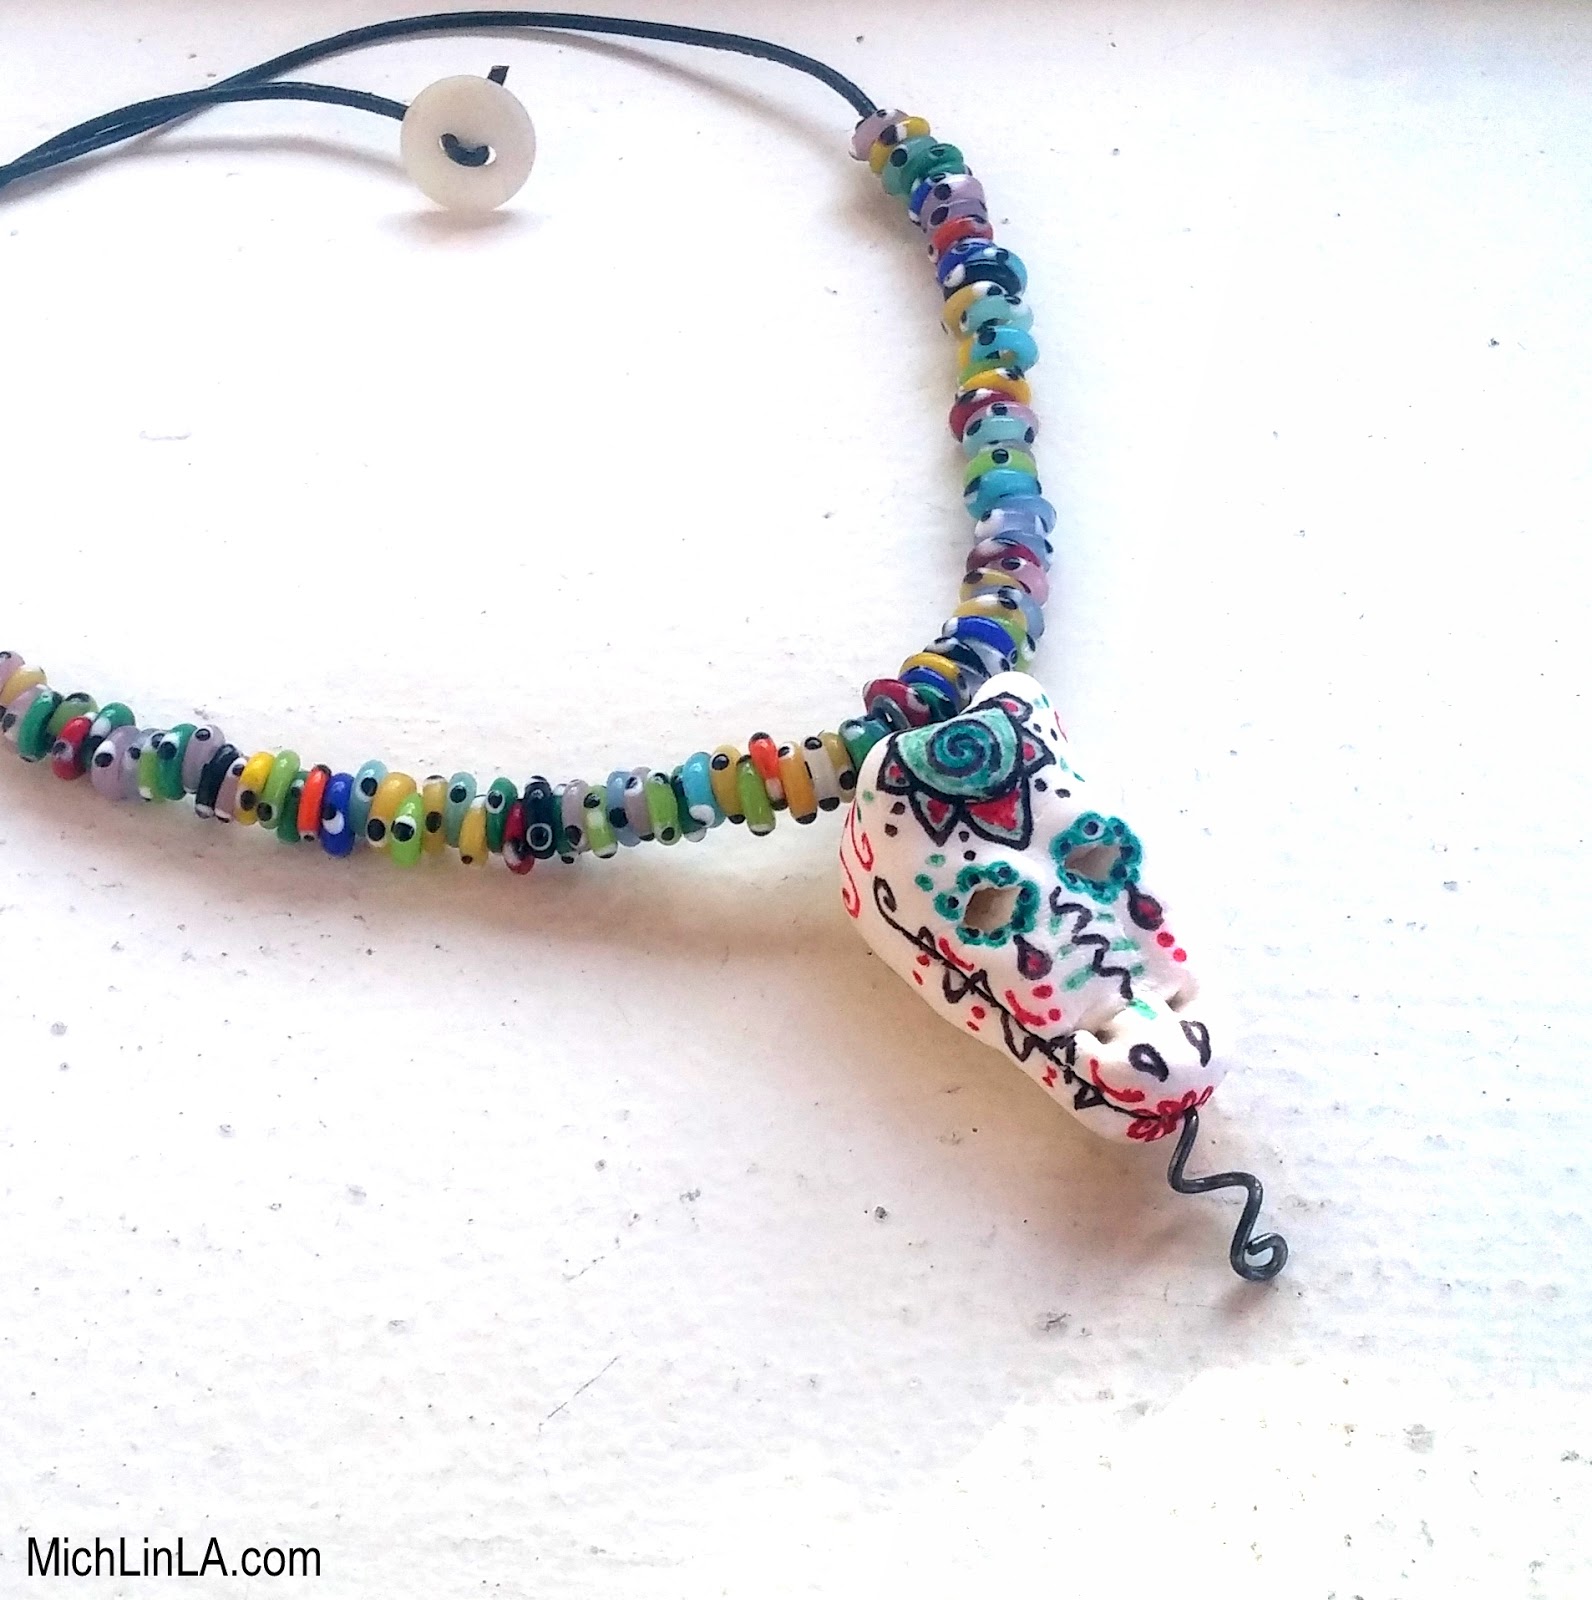
Here's a wider shot of the full necklace:
I've already gotten some compliments on it.
I hope this inspires somebody to grab a blob of air dry clay and make a big focal bead. It's fun and quick! Let it dry overnight, then Sharpie at will.
Later, gators!
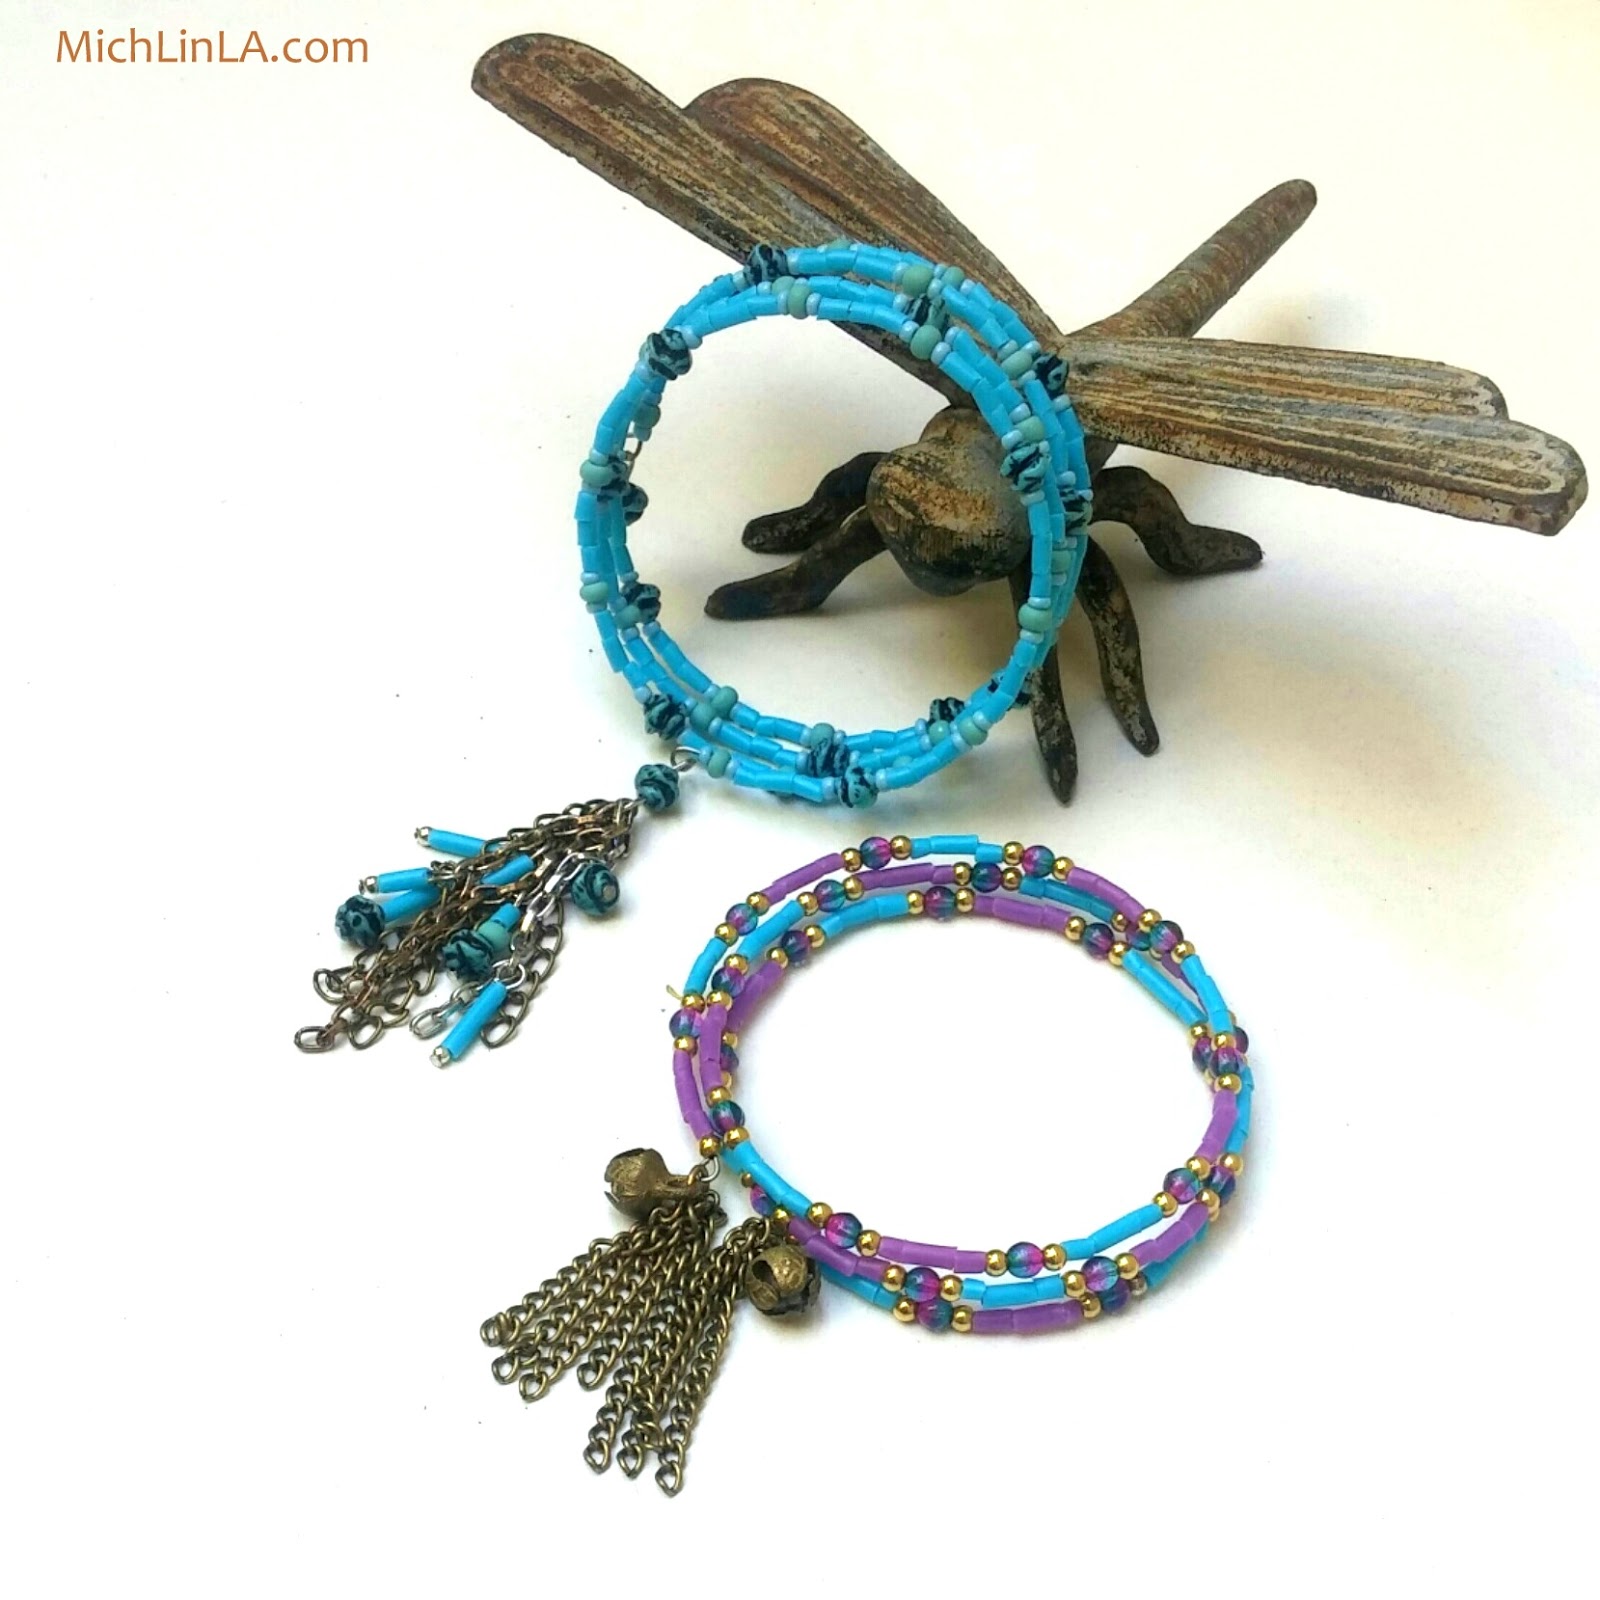
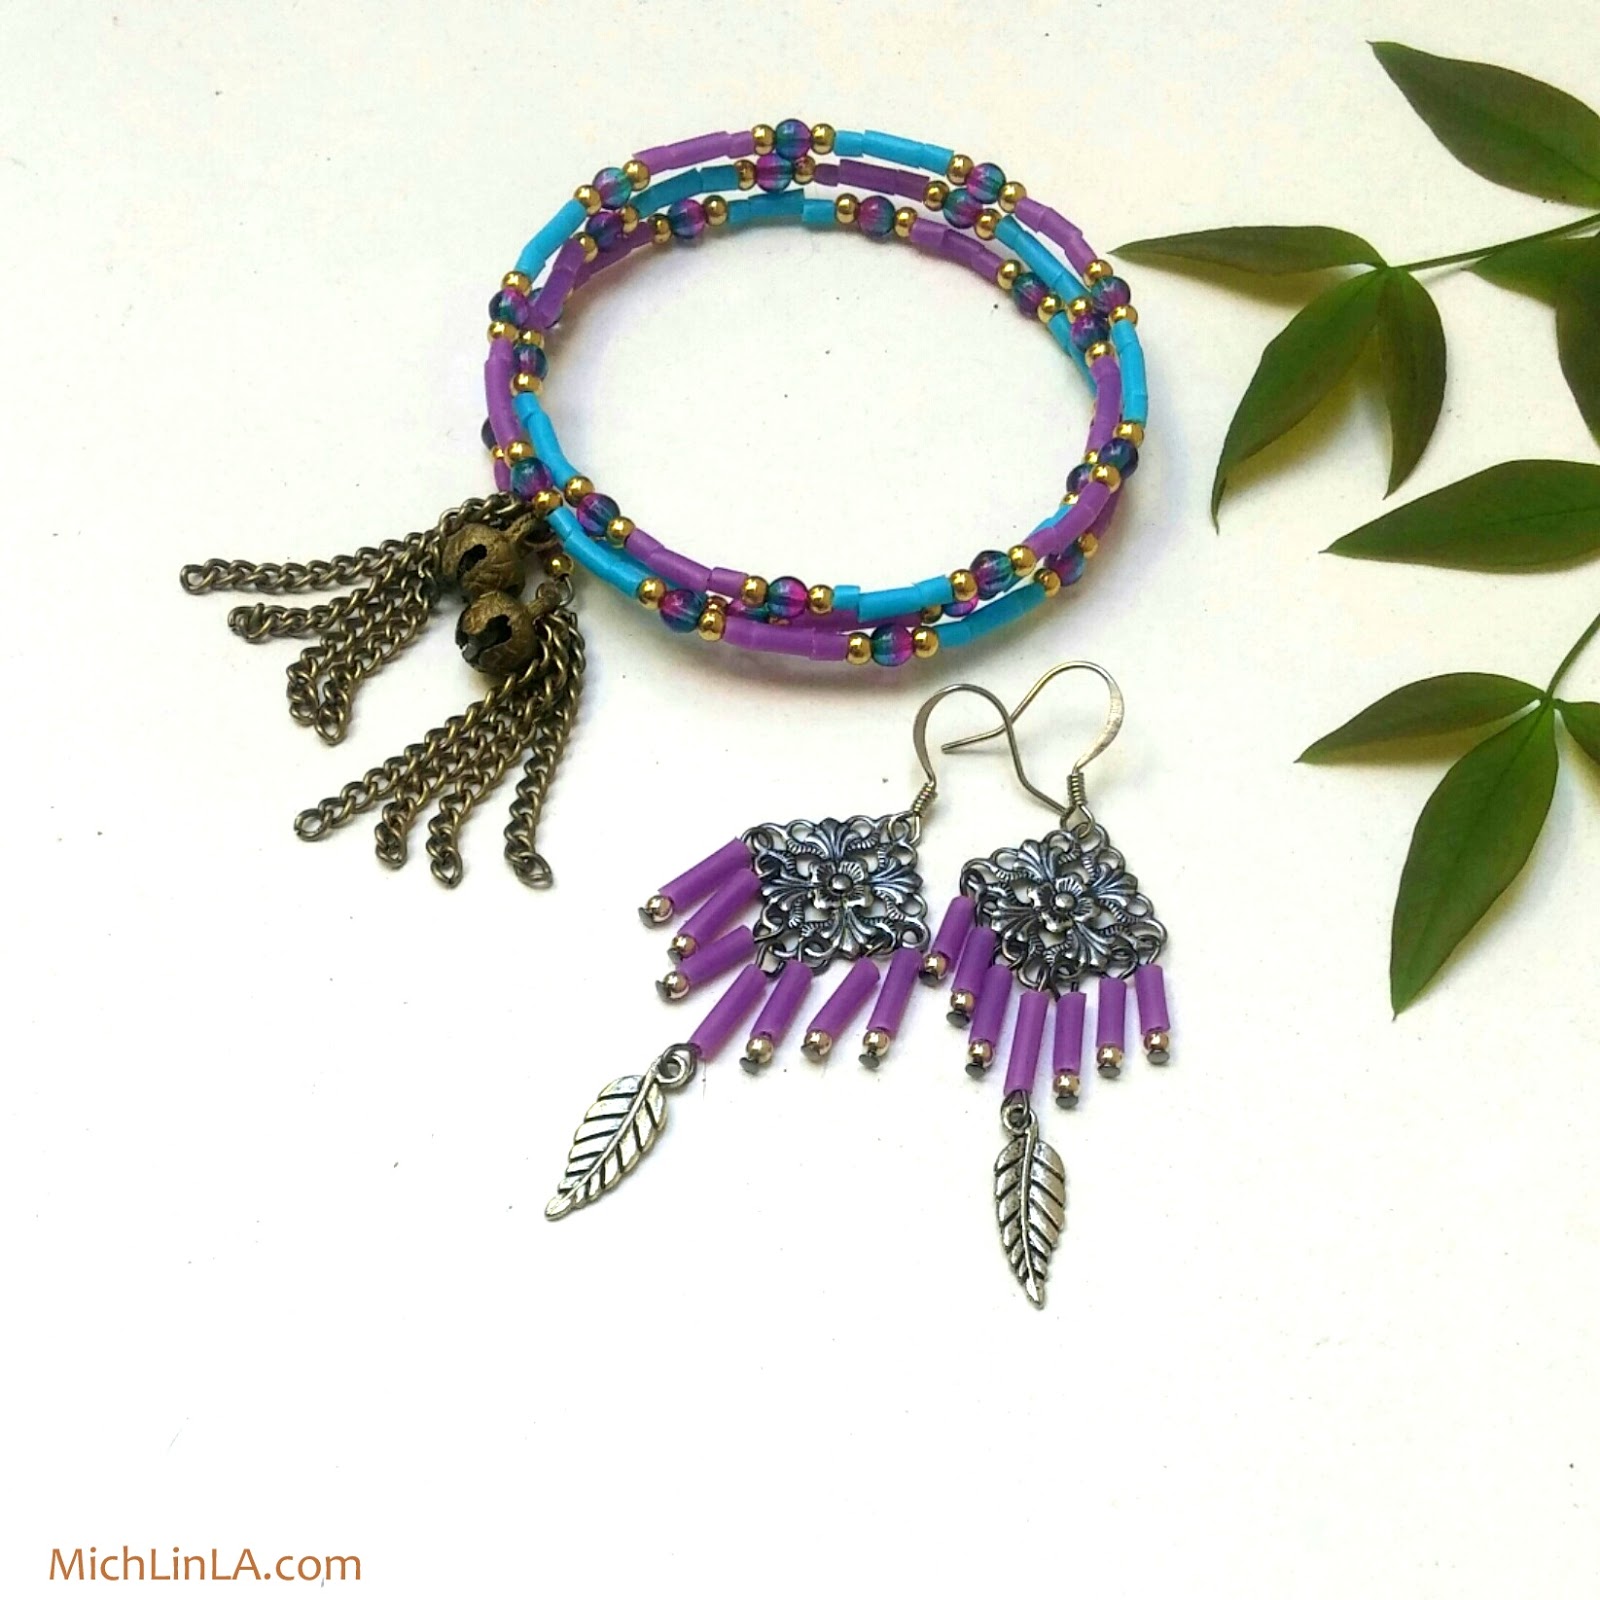
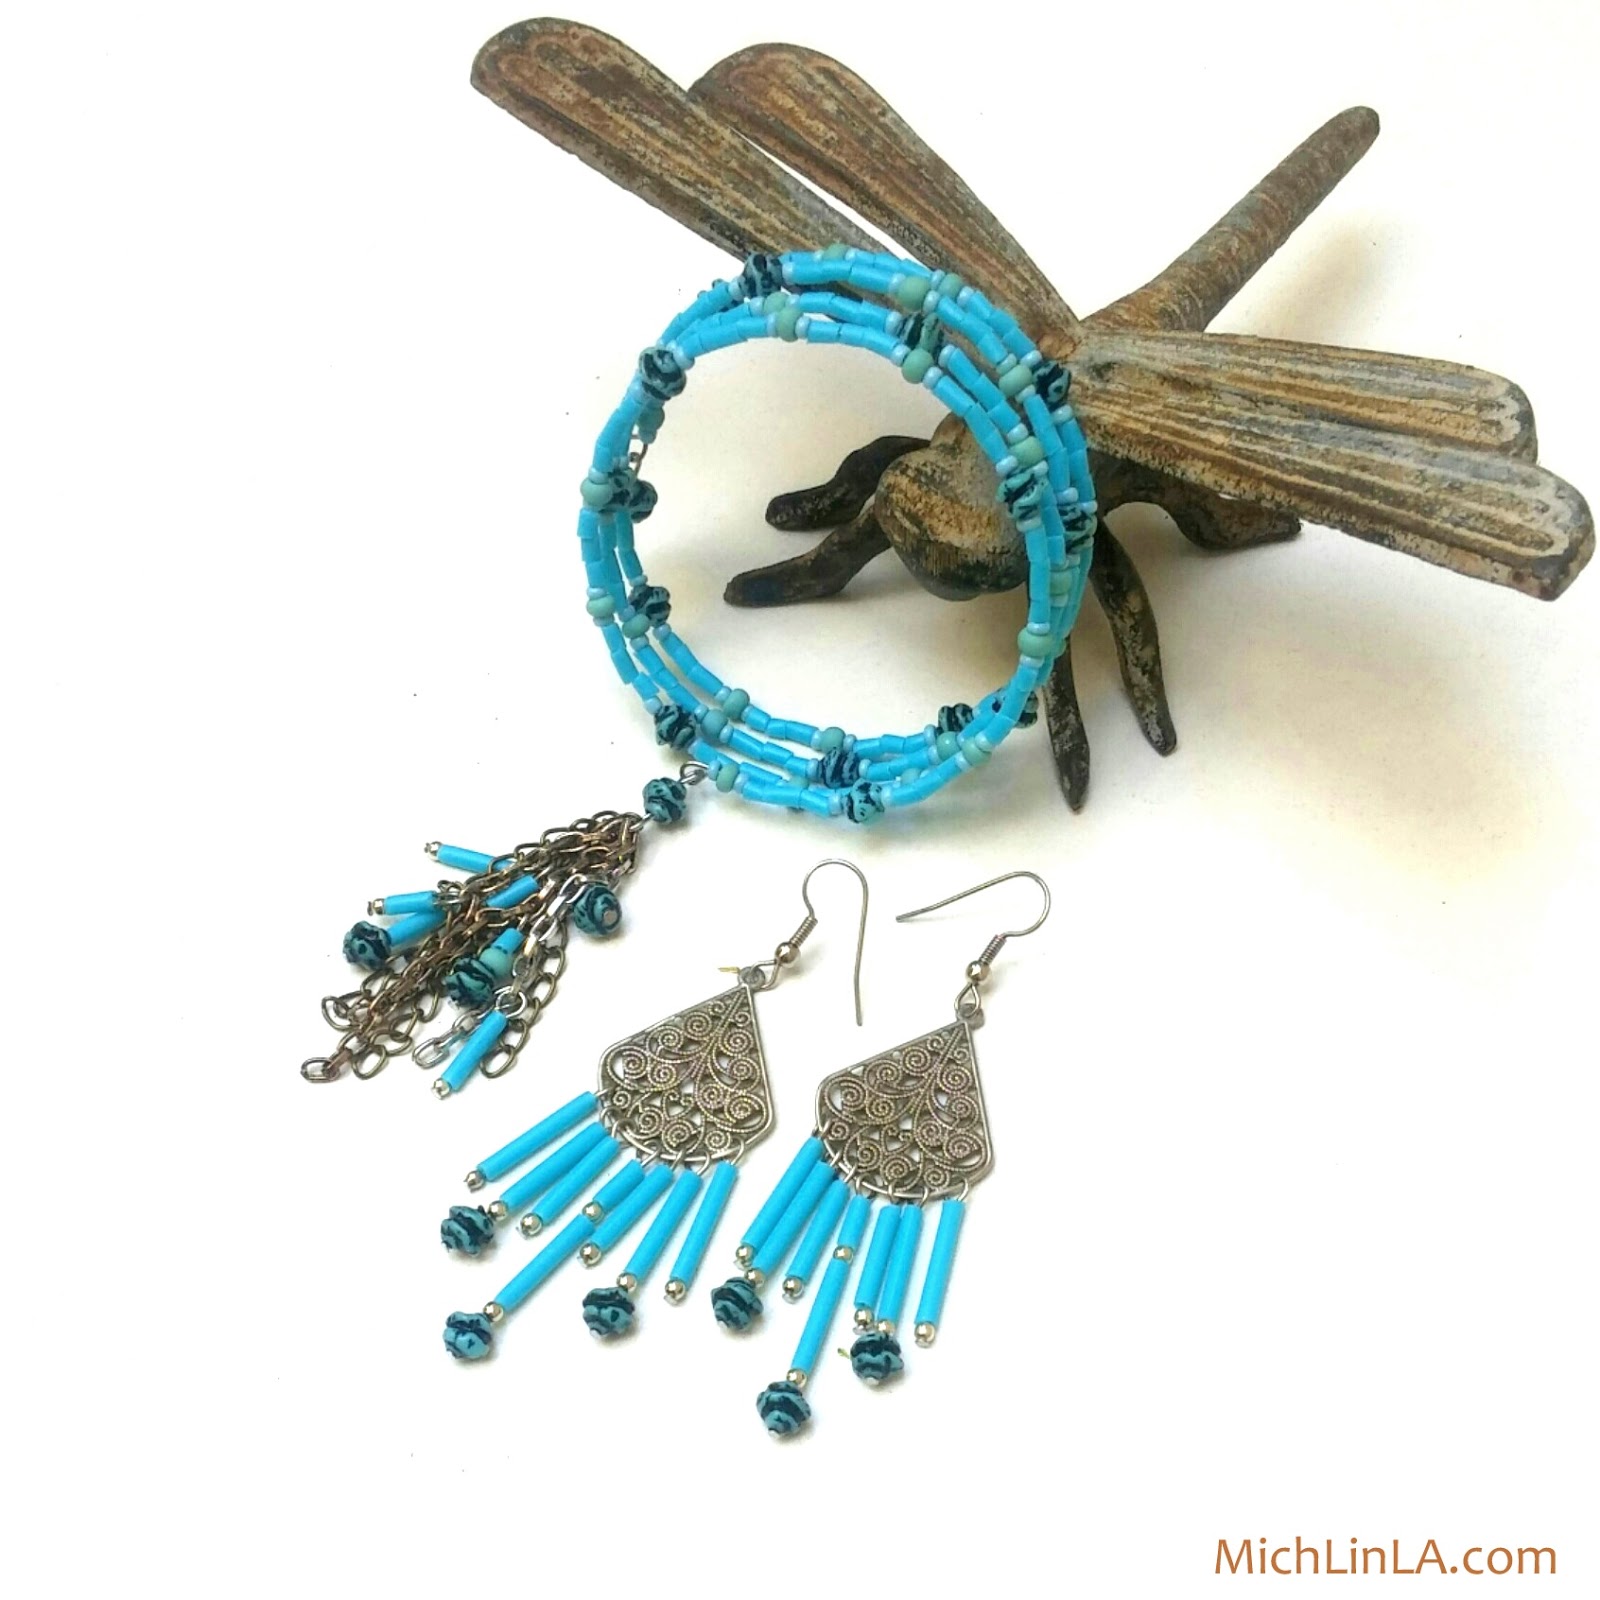
Okie dokie! Here's something fun and strange and cute. Check out these bright multistrand bracelets:
Pretty, yes? Would you have guessed they're made from upcycled Q-Tips? Yep, I went there.
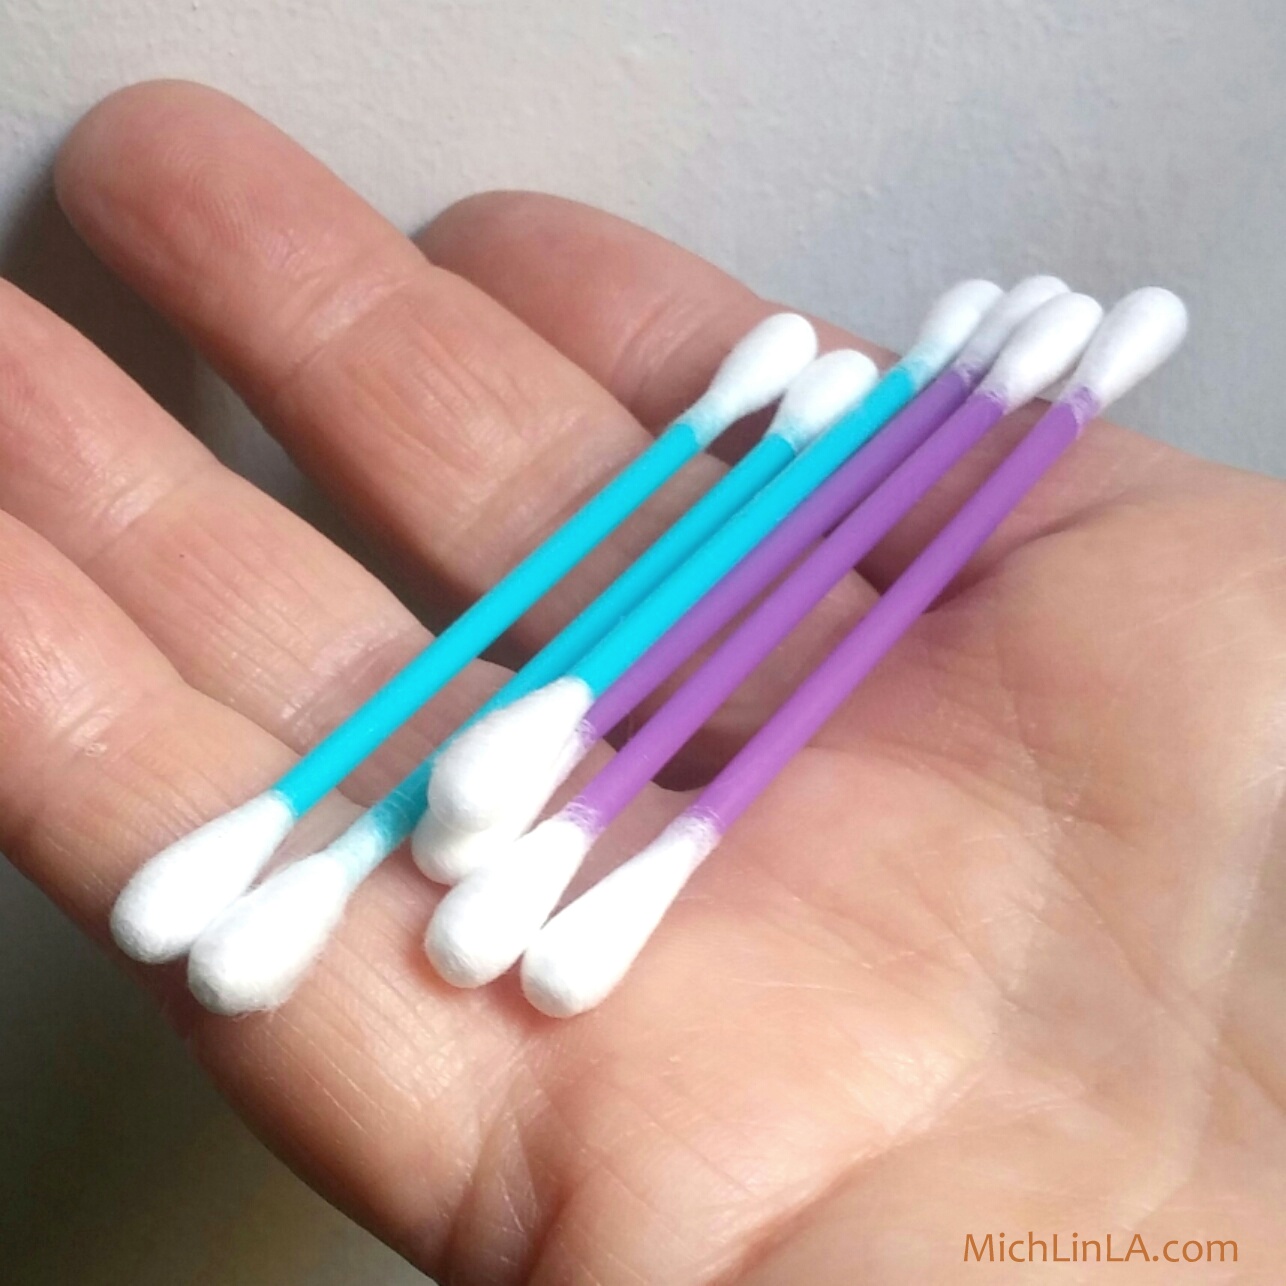
Now don't go all prissy on me - if this makes you squeamish, go ahead and use pristine, virgin Q-Tips if you need to. But I am happy to harvest the awesome plastic centers before tossing those used cotton swabs. They come in the prettiest colors and I just hate throwing them out.
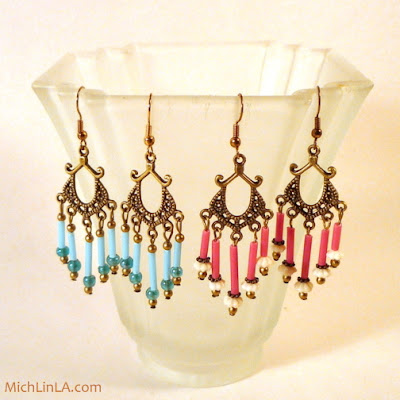
A long time ago I showed you how I made some Q-Tip chandelier earrings:
I did indeed make more earrings this time around, but the bracelets are even simpler.
That's 'cause they're memory wire, the easiest bracelet build there is. Here's all you do.
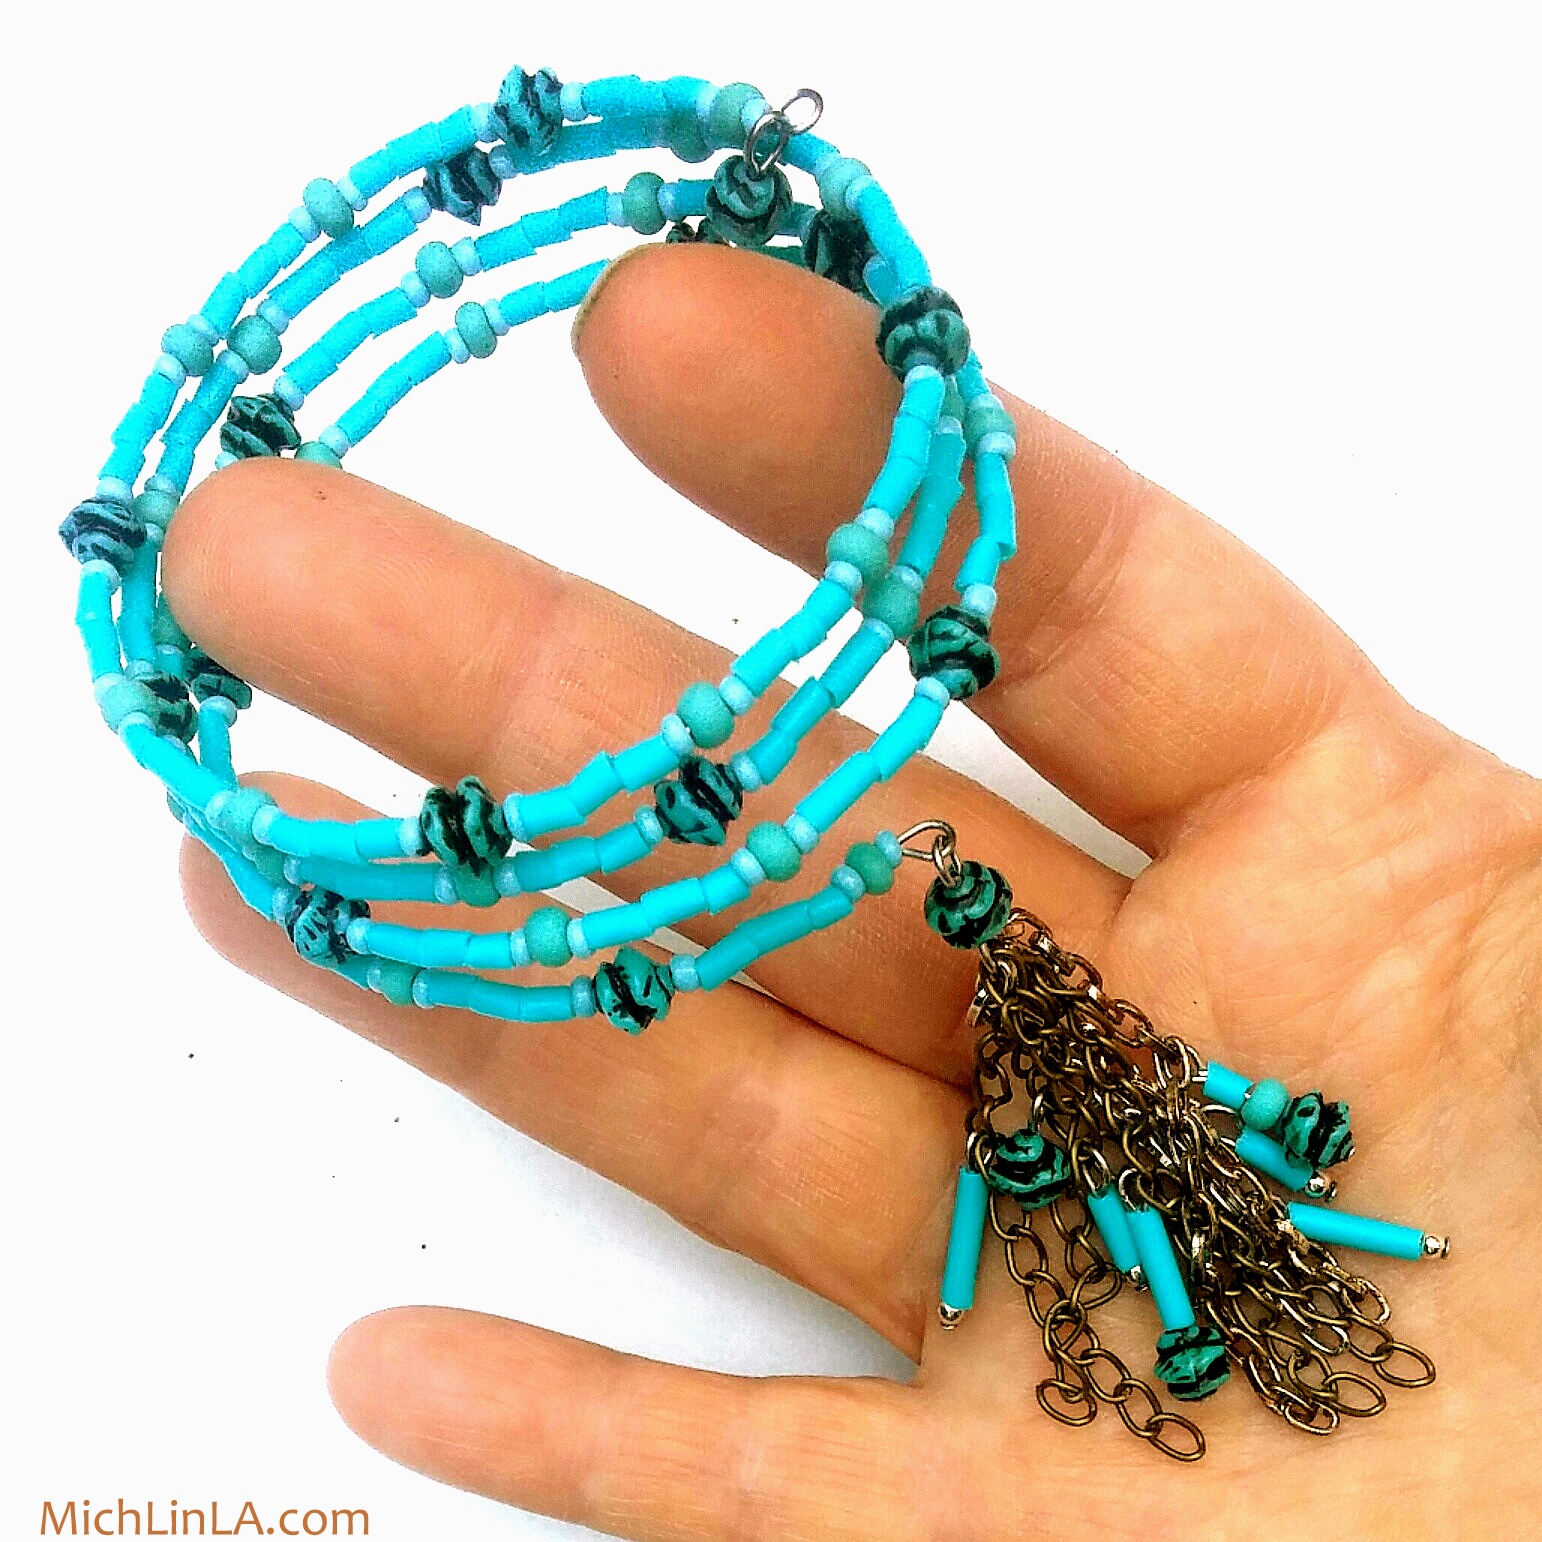
Snip up the bright plastic tubes of some cheap-o dollar store Q-Tips. Instant bugle beads, people!
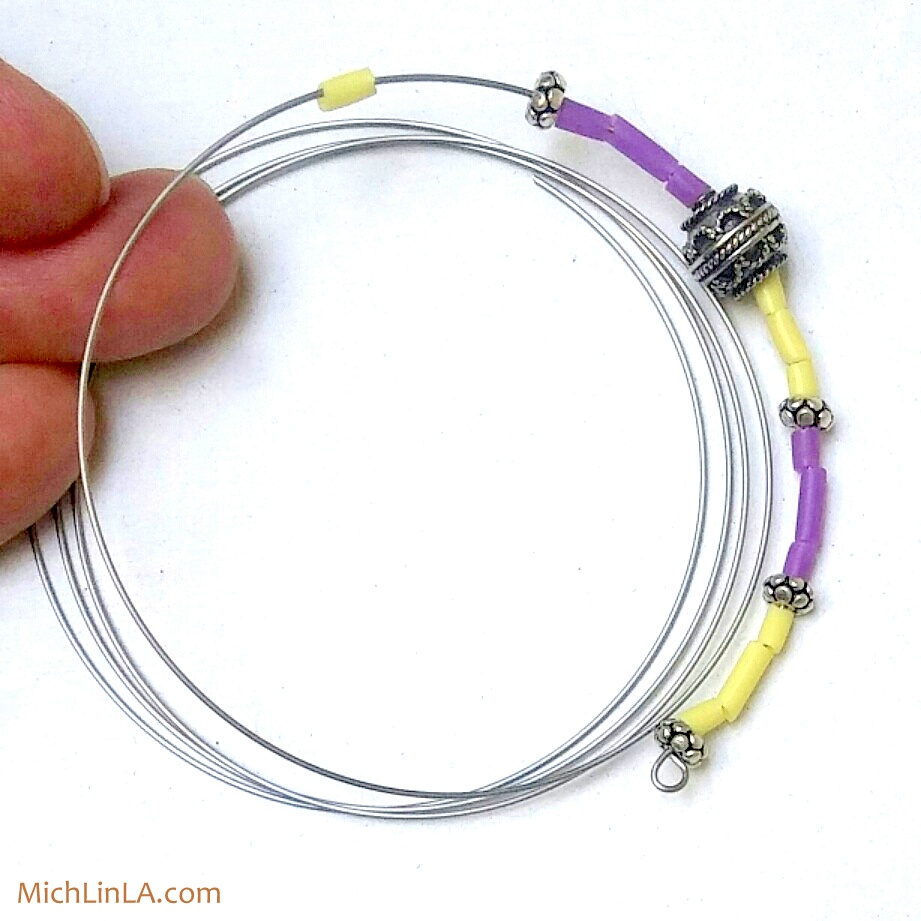
Cut a length of memory wire with several coils - as few or as many as you like. Mine are about four coils. Make a small loop on one end.
Play around with stringing patterns until you are happy with the look. Then just get started stringing your pattern onto the memory wire.
Keep going until you fill up the coils. Finish with another small loop. That's it - you have a bracelet!
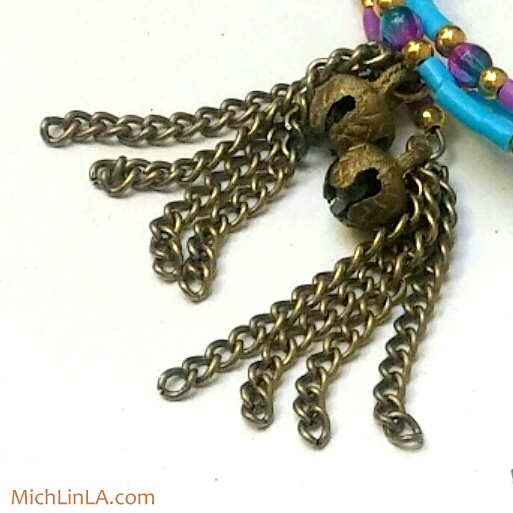
Optional: add bead dangles or tassels to the end loops.
Wouldn't this be fun as a group activity for older kids and teens? Also, memory wire bracelets make great gifts because they fit anyone.
Important Tip: be sure to use heavy wire cutters for the memory wire. It's very tough stuff and will damage delicate jewelry snippers.
Free beads plus upcycling plus kooky kolors plus simple to make - this is just my kinda project. Hope you guys enjoyed it!
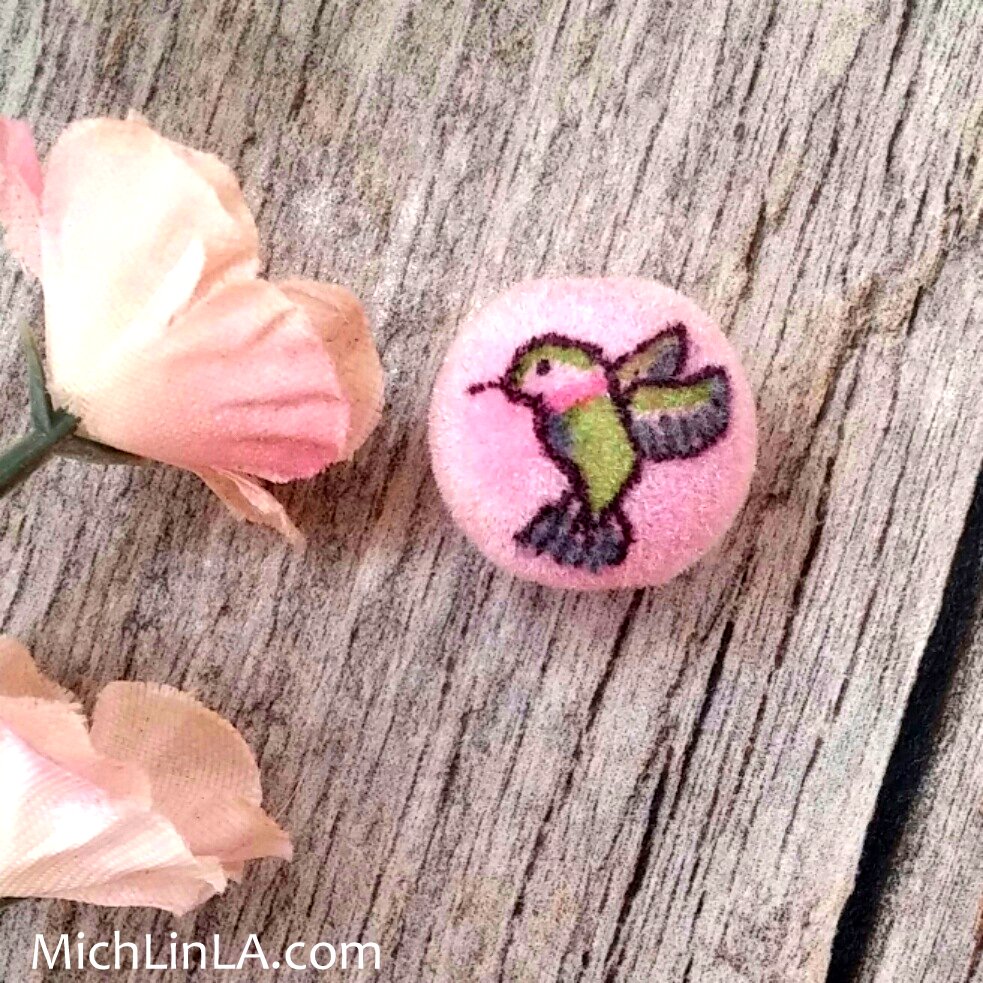
Ooh! Just look at this cute, oh-so-tiny, fluffy, fuzzy hummingbird bead. (It's only half an inch tall!)
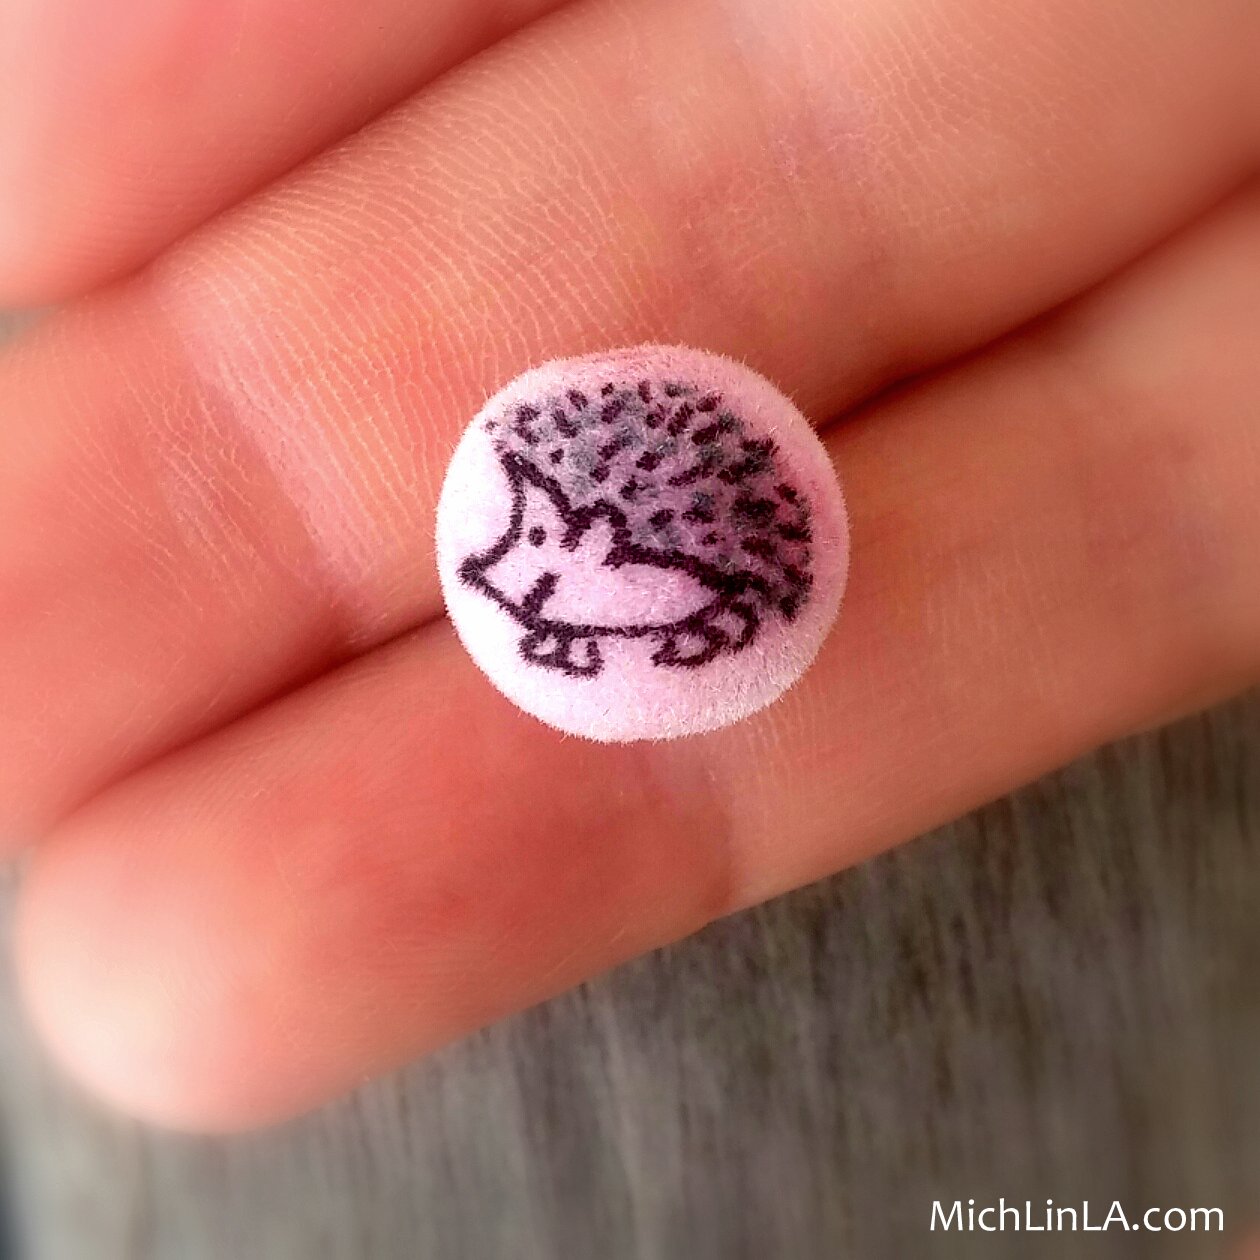
I also made a hedgie...
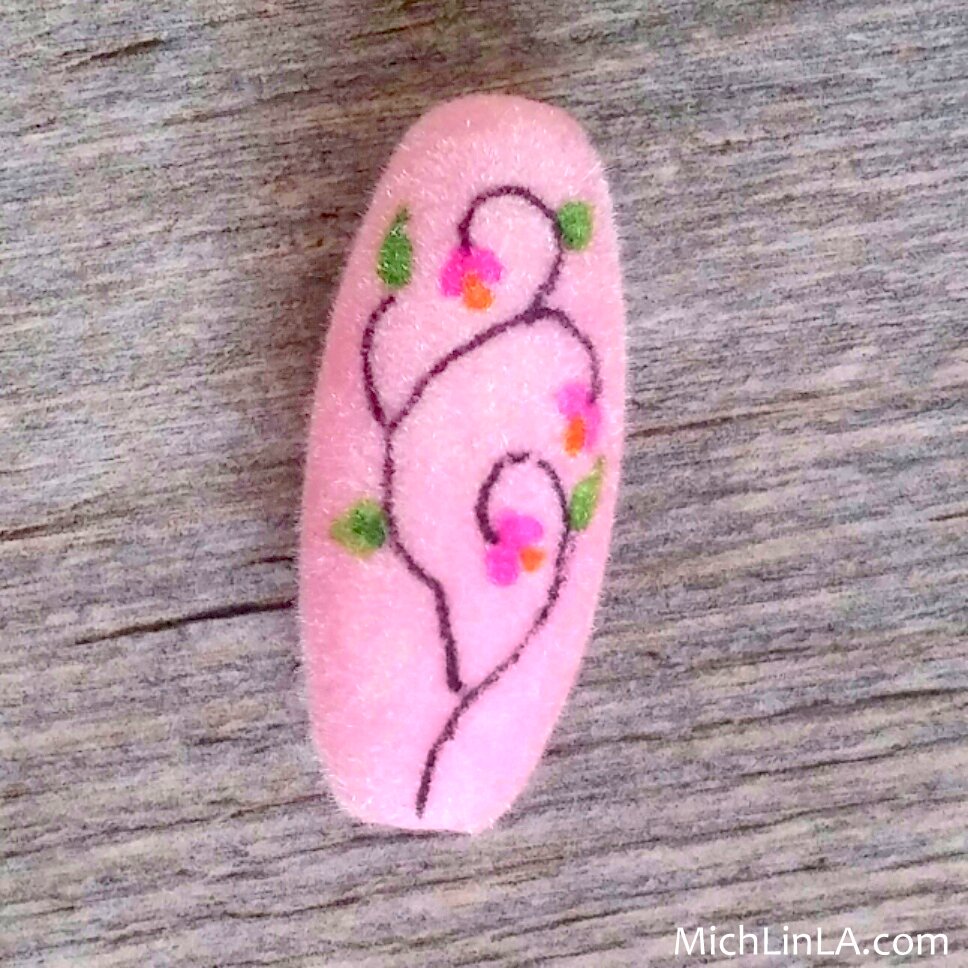
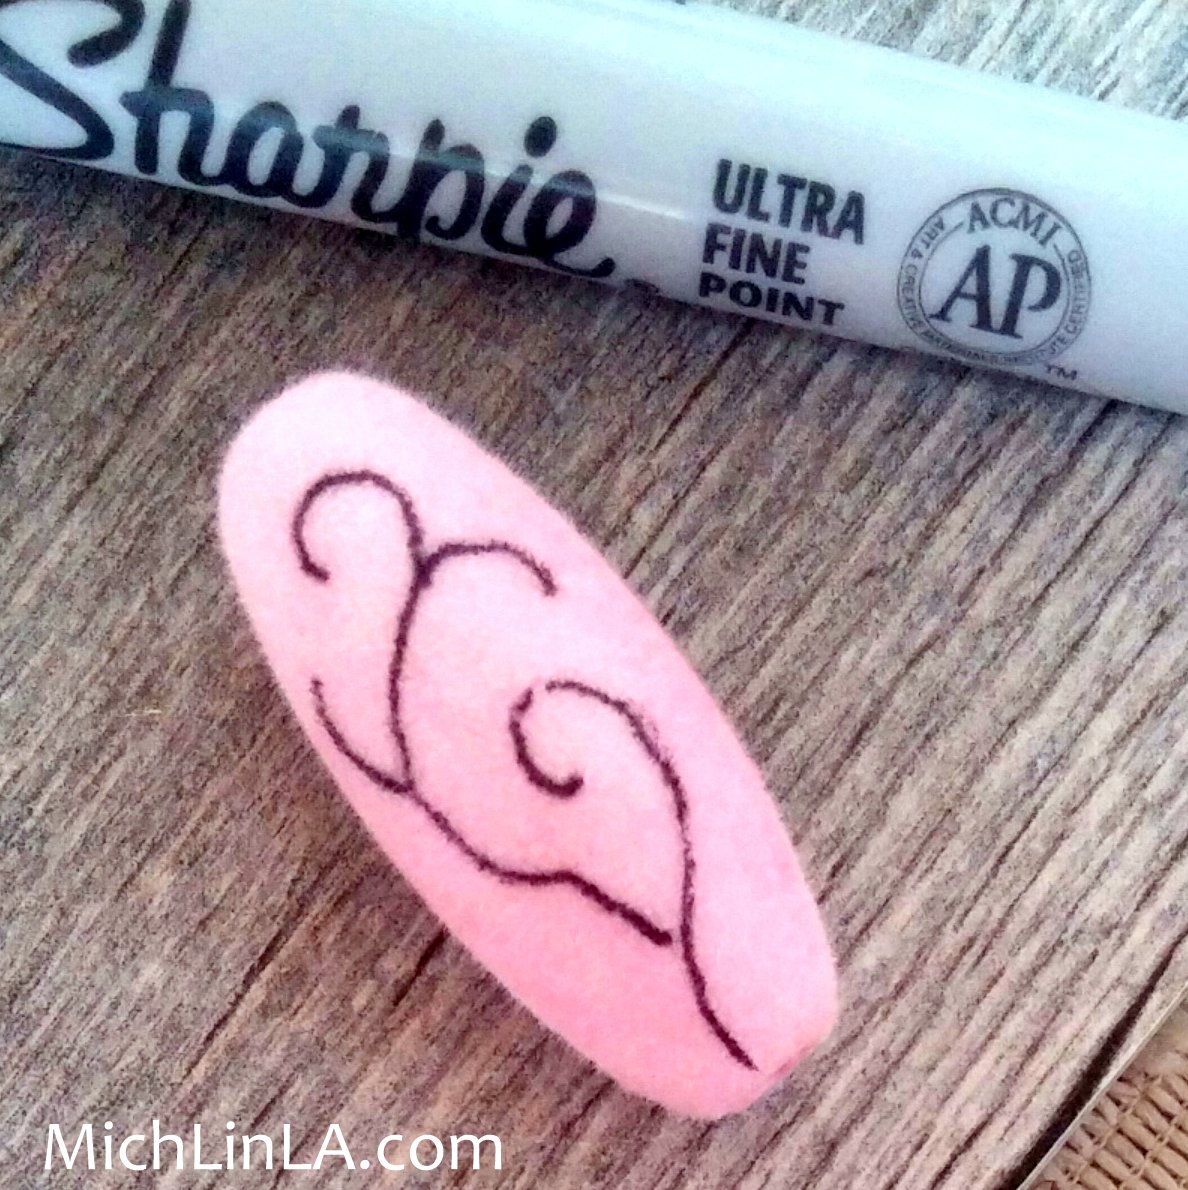
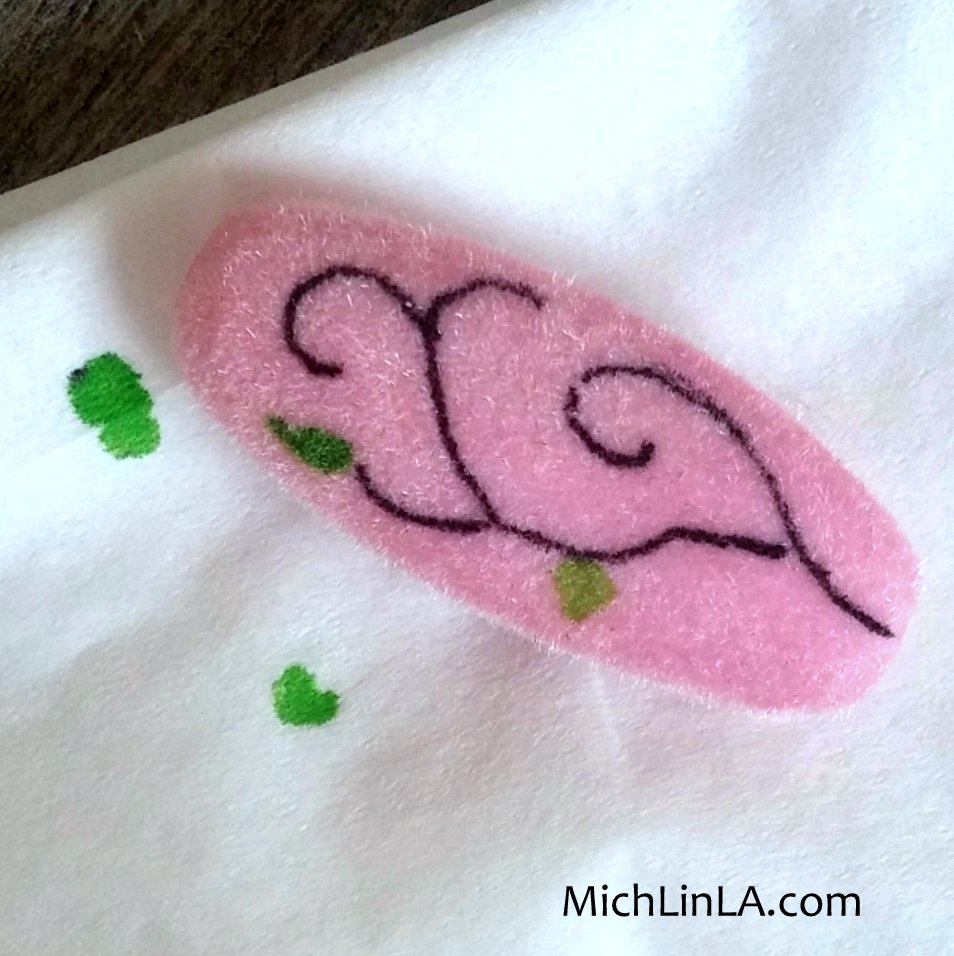
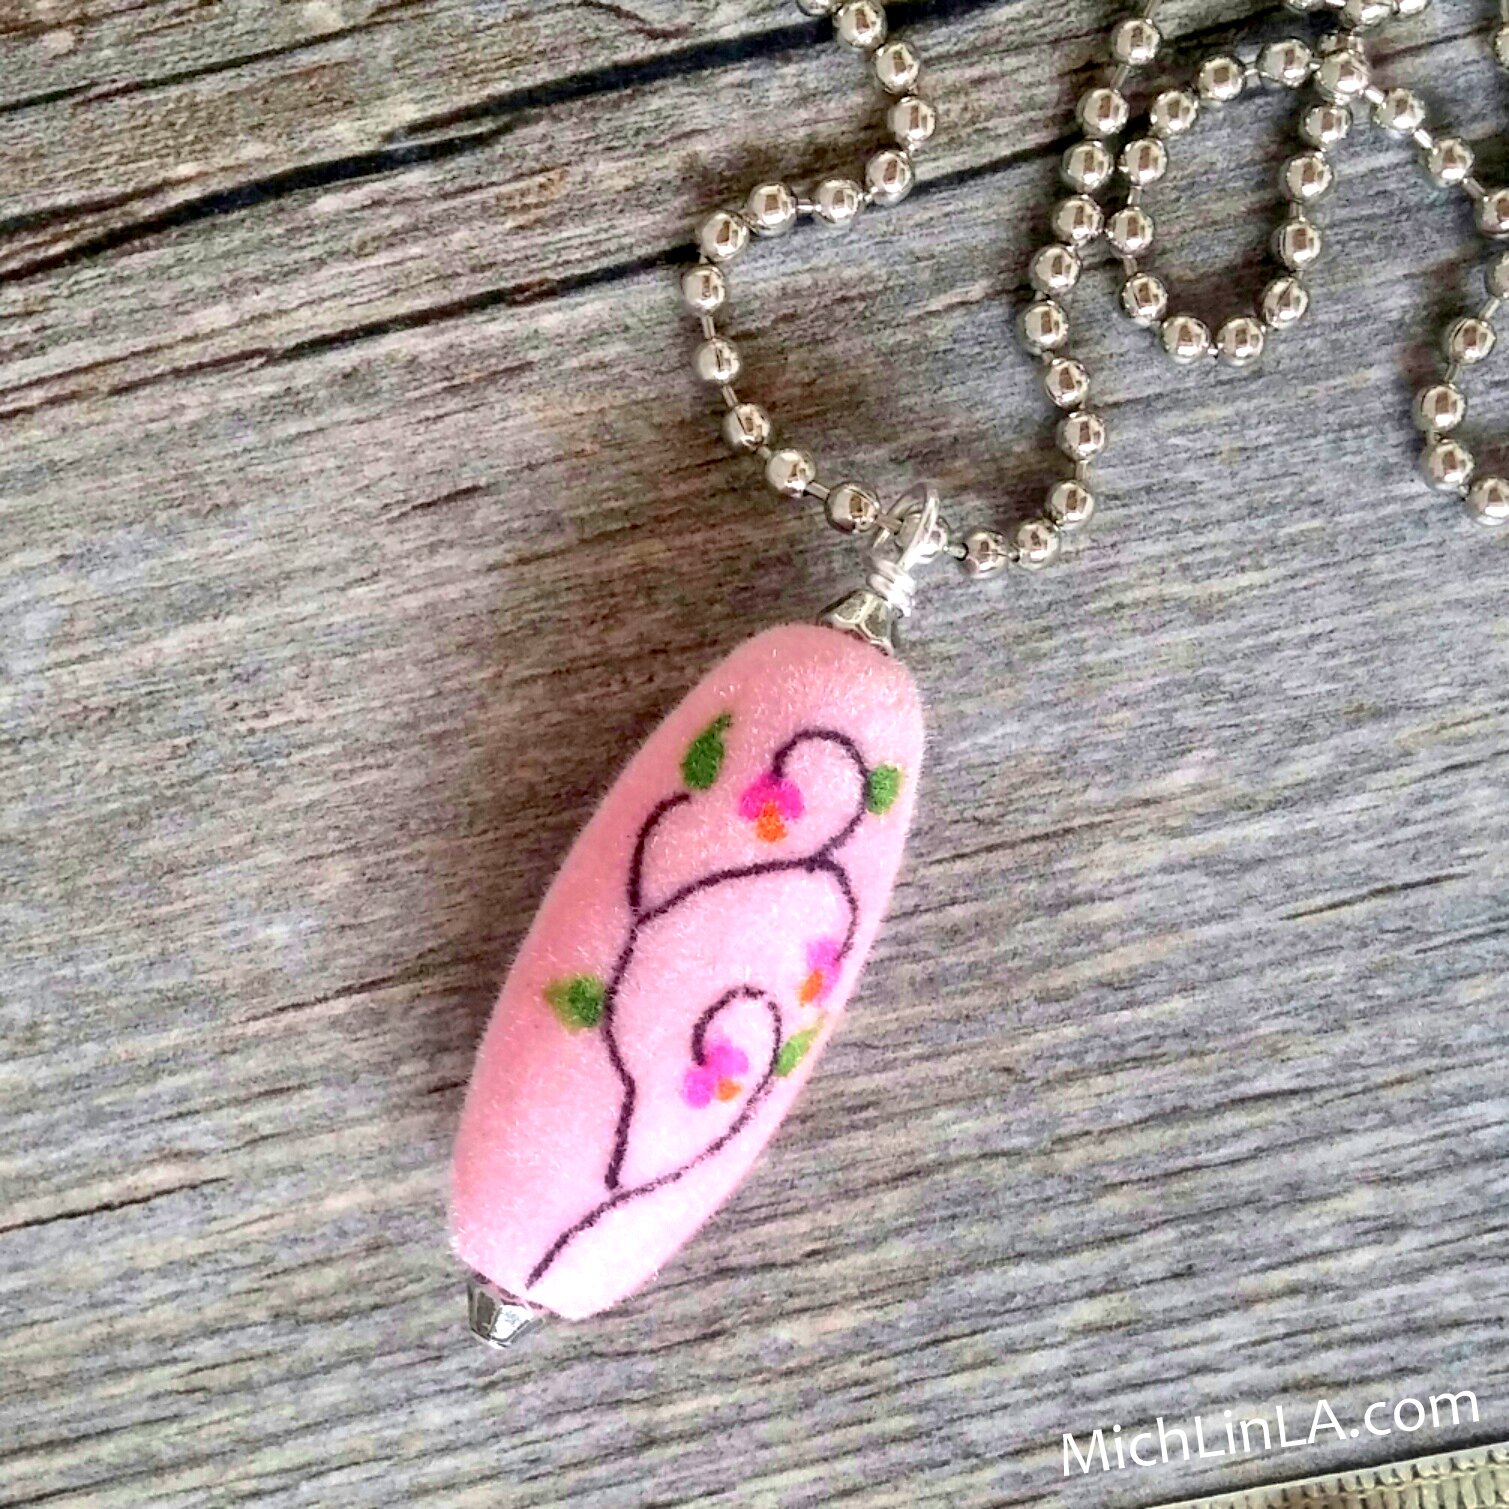
...and flowery vines...
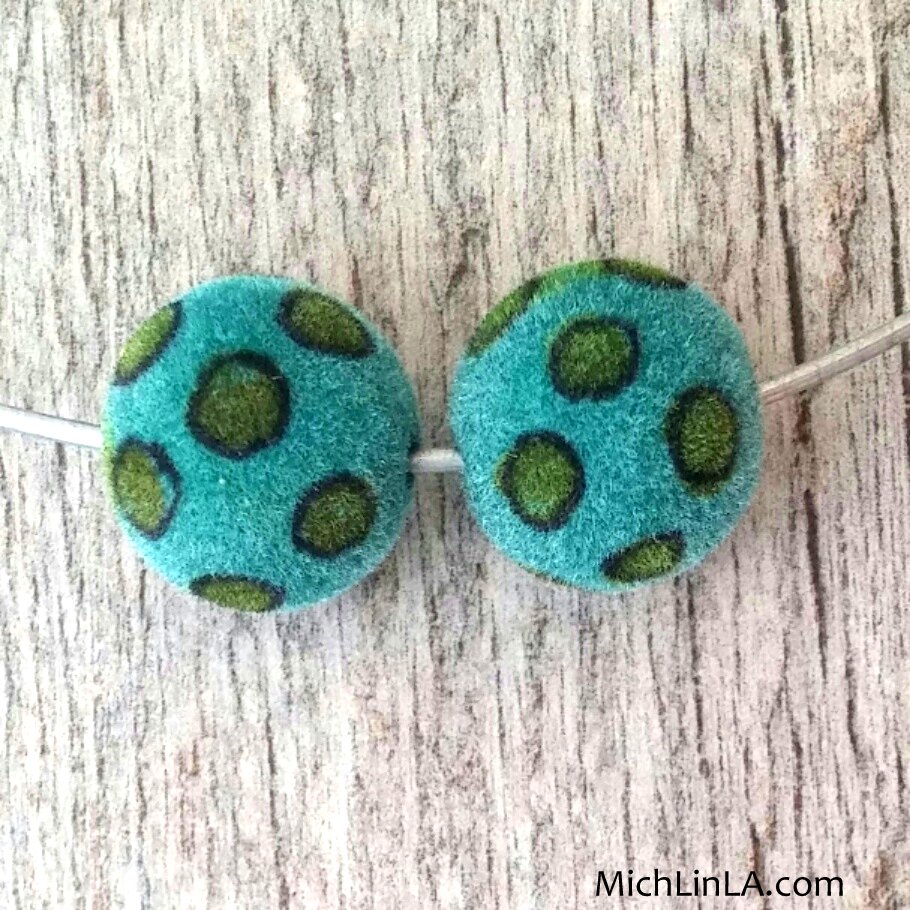
...very groovy polka dots...
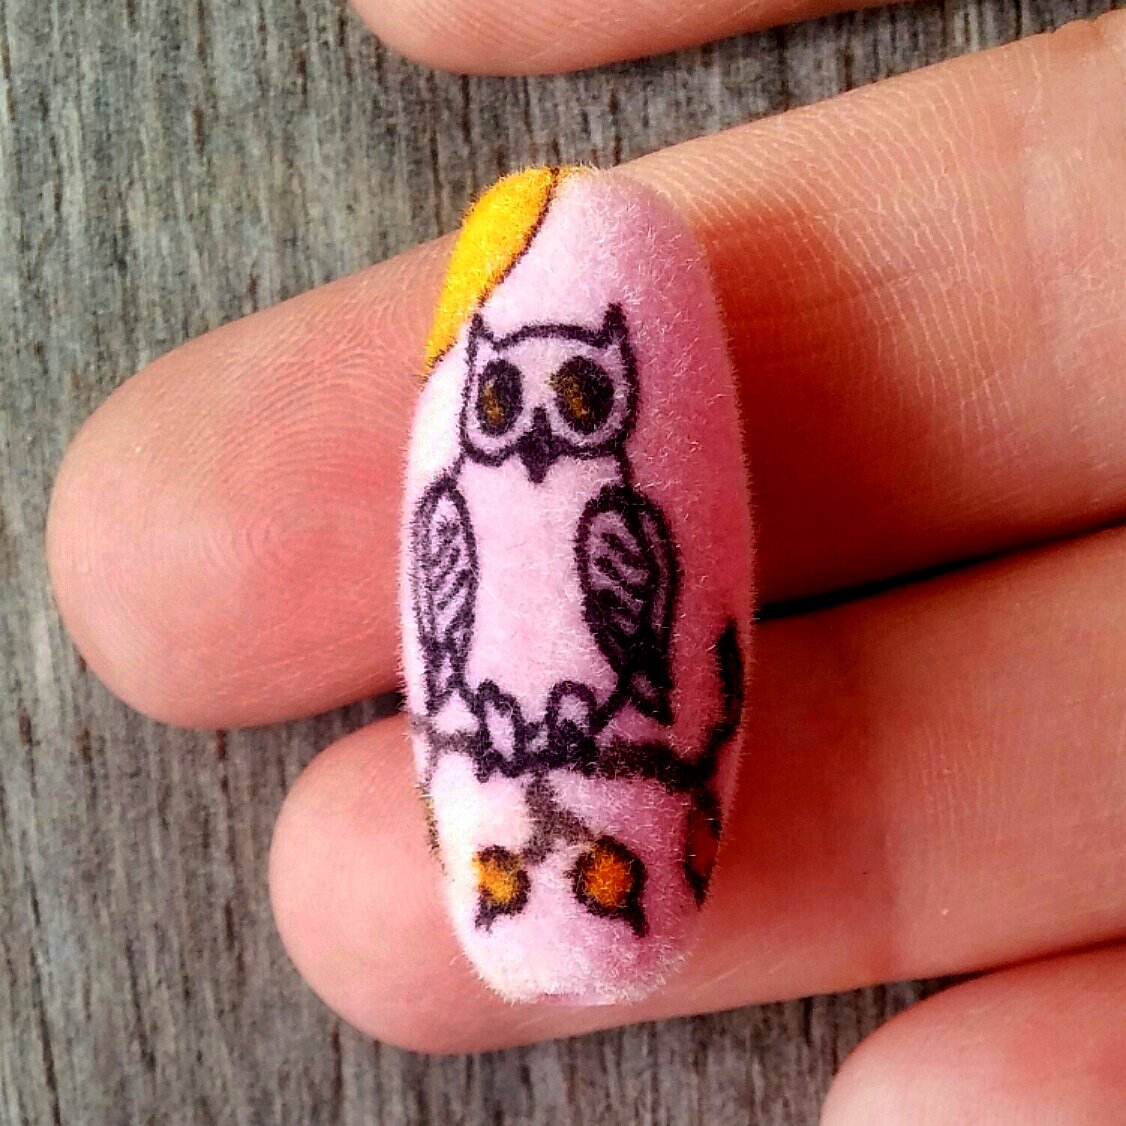
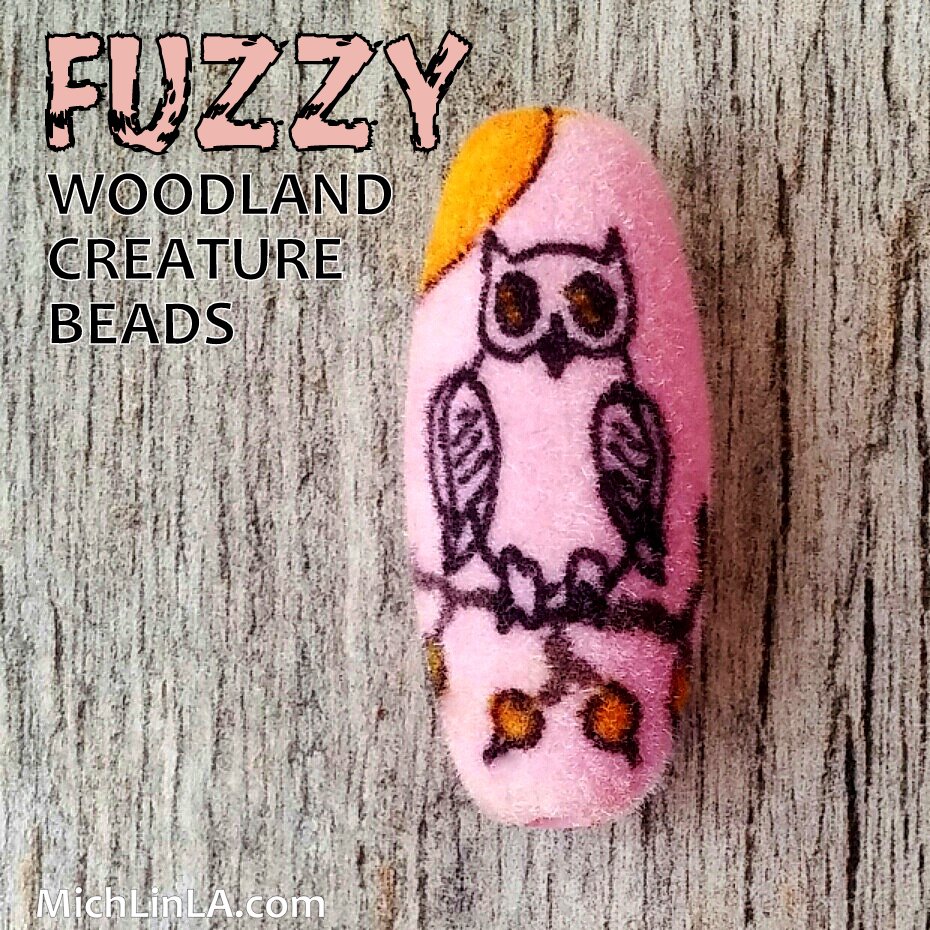
...and little Mr. Hootiepants, here.
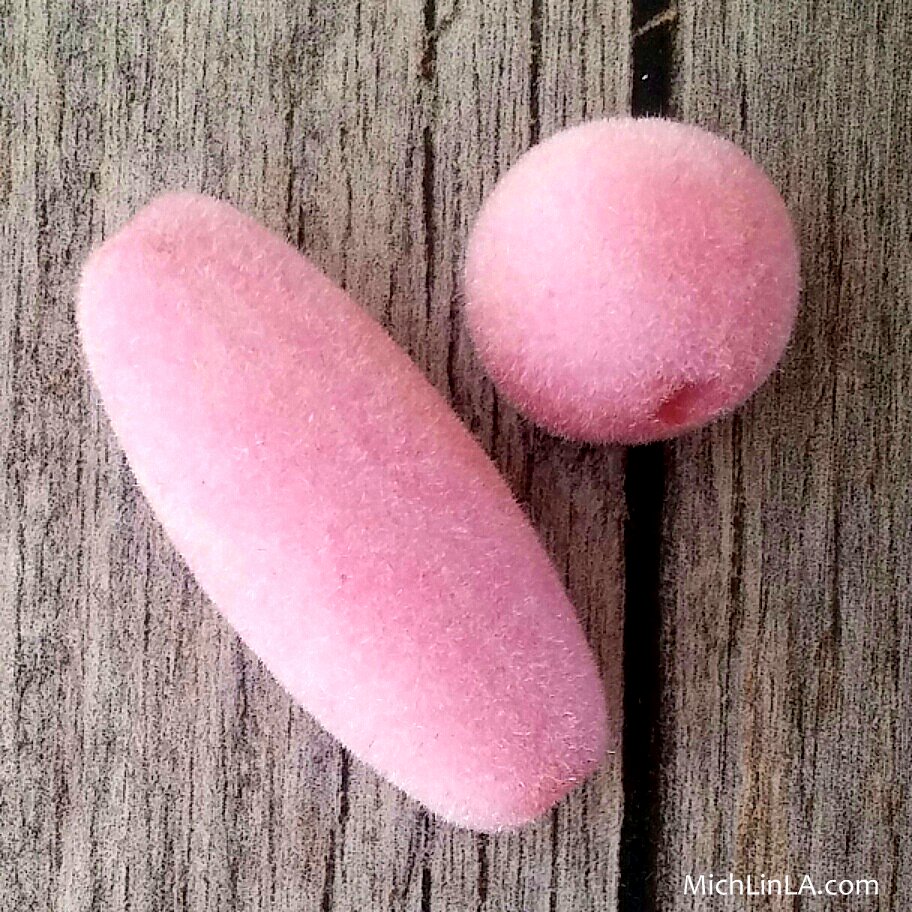
Aren't they fun? I used some fuzzy-coated beads I found online. Flocked beads - who knew?
I bought mine at Fire Mountain, but have seen them elsewhere, too.
THE DIY
The technique turned out to be really interesting. I drew on them with fine and ultra-fine Sharpies, but at first I found that the ink wanted to run and smear all over. Then I discovered a very important trick. Here's the HOW-TO!
Start with the ultra-fine point and do your black outlines.
Then add color - and immediately blot the color dry by rolling the bead on tissue or paper towels.
Do just one or two small bits of color at a time to avoid smears. Keep adding color until your drawing is done. Let it sit for 15 minutes before handling it much, in case there's a still a bit too much ink saturated in the fuzz. That's all there is to it!
My vine bead is an inch and a quarter high and soft as a bunny's butt.
The thing I like most about this technique: you can get some almost painterly effects by adding colors and blotting in between. Some bits even remind me of watercolor - you can see it pretty well in the hummingbird body!
Let me finish up this post with a couple of tips.
TIP 1. I am not very good at drawing things, but I did once manage to teach myself a freehand owl, and never forgot how. (To see, check out this old Halloween post.) For the hedgehog and hummy, I googled "how to draw a hedgehog" and "how to draw a hummingbird," and practiced on paper first.
These flocked beads are usually pretty cheap, so I didn't mind messing up a few times.
TIP 2. Do your best to avoid getting them wet. Interestingly, this is not as critical as you might think. I assumed they would be Gremlin beads, i.e., one should never never never get them wet! But to my surprise, they can withstand a bit of moisture without any drama at all. So just use common sense and come in from the rain.
What would you draw? Ideas, please, because I have a bunch of flocked beads and want to make more. I hope you enjoyed this fluffy post!


