Here's a five minute craft for summer! Something fun and creative from the brain of my husband. A psychedelic painted sun hat!
The story: for 4 years, he has been wearing the same mesh sun hat for working outside. Even though it went through the washing machine regularly, it was stained and unsightly and, well, take a look at what I mean...
Ew, right?
A few days ago I spotted him heading for the back yard, clutching three cans of spray paint and the hat. I grabbed my camera and followed.
Hijinks ensued.
Isn't it awesome? His colors: teal, purple and bright chartreuse.
I loved it so much, I made one for me. They only take a minute, you guys! I started with this dollar store straw hat:
I went with a slightly different color scheme - I kept the teal and chartreuse, but added touches of bronze and antique silver.
The paint dried in 10 minutes and the hats were ready to wear.
They look super cute hanging in your house, too.
Tips:
*Start with just a light spray, don't blast on heavy coverage. (That way the hat will still breathe.) If you want deeper color, add one or two more very light coats.
*Don't paint the underside - you don't want to wear spray paint against you hair or skin.
*These won't go in the washing machine, but cloth hats can still be spot cleaned on the inside. (Maybe even hand washed in the sink; I have had good luck with hand-washing spray-painted fabrics.)
Okie dokie, I hope you liked Jeff's quickie idea. Try it, have fun! Give a sad old hat a whole new attitude.
Hi, guys! A little post with a little baby onesie. I thought I'd show it off because I have a bit of a mental block. See, I am convinced I am utterly terrible at free-hand painting! But whenever I let go of that and just allow myself to daub, I often end up very happy - not only with the result, but proud of having made the effort.
If you might feel the same way about tackling a decorative painting project (or any project, really), maybe this will inspire you to go for it.
Here's my onesie:
Turned out pretty cute, eh? Aww, here it is on my nephew!
The DIY:
1. Get a blank onesie. At the dollar store, maybe?
2. Use a small brush and fabric paints to swoop colors of the sea all over the front. Use a light touch and a fairly dry brush, for thin paint layers without heavy brushstrokes visible. Let the ocean dry for 5 minutes.
3. Dab on some badly-drawn but really bright fishies. Wait one minute, then add a second layer of paint so they really stand out. Let the fish dry completely.
4. Add a tiny eye to each fish with a black Sharpie.
5. To set the paint: tumble the onesie in a hot dryer for half an hour.
Done! Woot!
So here's an awesome money saving tip. Did you know you don't need to buy fabric paints in a whole lot of colors? That would empty your budget pretty quickly.
Instead, convert your ordinary craft paints into fabric paint. Just invest in one small bottle of fabric paint medium.
(There are lots of brands out there, that's just an example.) A dollop of fabric medium, mixed into your own paint, and poof! Turns it into fabric paint.
Interesting side note: my mom and I painted onesies together, at the same kitchen table, using the exact same materials. The two turned out different as chalk and cheese. Here's mom's version.
I love hers, too! Isn't it amazing to how different brains work?
Okie doke! Thanks for checking in on my creative space - it is important to me to have one. Much love, see you around...
Mich
Ain't nothin' but a hound dog...
...with a flower on her collar!
I experienced a fashion emergency this week: a trip to Vegas was approaching, and because Matilda always gets so much attention when she walks through a casino, I decided to add a pretty accessory to enhance her star quality.
I made the cute collar flower from two waiting-to-be-repurposed items I had been saving for just such an occasion. (Both from the dollar store. I am very predictable that way.)
The DIY:
I cut two flower shapes from the fleece glove, and two simple pieces from the metallic silver placemat:
I layered the four shapes, and sewed them onto the collar.
If you look at the finished fleur, you can see I also placed a tiny circle of fleece in the center - useful for preventing the thread from tearing through the plastic lace.
Crisis averted! Princess Matilda is ready to make her appearance in Vegas.
Or as I sometimes like to call her, Princess Di.
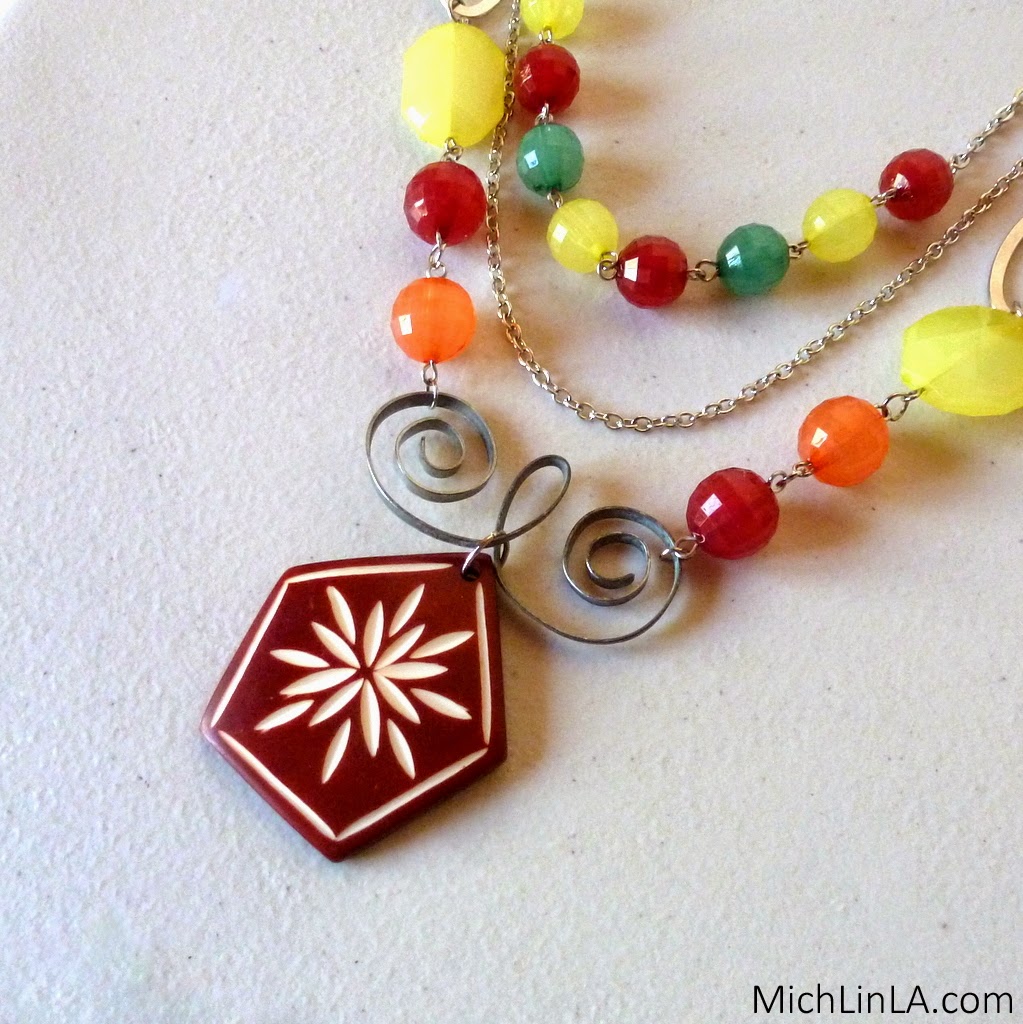
Ooh, today I made this! Out of all my jewelry conjured from freaky trash, it has jumped right up there to rank with my favorites.
See that beautiful big scroll between the necklace and the pendant? It's the underwire from a broken bra.
Next time, don't just toss that worn out foundation garment. Whether it be boulder holder or pebble perker, rescue those underwires and turn them it into something pretty.
Here's the DIY.
Remove the little plastic wire ends. (Just tug, they come right off.)
To snap off the skinny metal tips, bend them back and forth a few times.
Grab one end of the underwire in round nose pliers. Begin turning with all your might.
Keep going until you have a swirl. Repeat for the other side.
Start a fold in the center with your fingers, like so:
Then push hard on the sides until the swirls crisscross.
Finish up with this one last move:
You made a pendant hanger! Now use an extra-big jump ring. Put it through the hole in your pendant, then close it around the entire crisscross. See what I mean?
Did you evah? Would you evah?
I would and I did.
One more itty bitty blue jean upcycle idea for you. This tiny purse is made from the small coin pocket inside the front pocket of a pair of Levis.
Make it in five little minutes, without sewing a stitch! Set yer stopwatch - ready? Here goes!
Cut the coin pocket away from the jeans, including a section of the waistband above the pocket.
Poke two holes, just below the waistband section.
Thread some cord through the holes; tie knots in front.
Now, when you fold the waistband down, it forms the front flap! How groovy is that?
Stop yer stopwatches, people - your five minute blue jean mini purse is done!
Wasn't that simple? And it is a perfect blank slate, just waiting to be embellished. Paint it, add buttons, pin on a brooch, glitter it up, whatever floats your boat.
I used a scrapbooking brad to add a layered flower to mine (seen in a previous post as a blue jean cocktail ring). Here's how:
That was easy, too, eh?
That little coin pocket is now my favorite part of a worn out pair o' jeans!
Thanks for checking in, you guys - see you again soon.
You like to upcycle old worn out blue jeans, maybe? You would enjoy making a sweet little denim cocktail ring in five minutes or less, maybe?
Okay, then. Start with a swatch of denim and any cute scrapbooking brad.
Cut two simple flowers and a finger-sized strap. Poke holes in them with something pointy.
Push the scrapbooking brad through all the layers...
Fold the prongs flat.
You made a ring!!!!!
Add metal findings or faux flower petals to mix it up.
So many ways you could incorporate these into your crafting life. Fun for a sleepover project...make several as extremely hip teacher gifts...start now on stockpiling stocking stuffers - to name just three ideas! These definitely belong in my 'extreme cheapskating' category. From one leg of jeans and a single box of brads, you could create dozens of rings.
My. Kinda. Craft.